1

A Peek into The Guest Cottage

I’ve had a few requests to share pictures of the guest cottage interior.

To read about the restoration of the guest cottage, you can visit my Terra Tour section of this website or click here for the Guest Cottage overview.

The guest cottage sits on the secluded and quiet northwest corner of our property.

The guest cottage is approximately 576 square feet. Below is the living room done in neutral tones with soft blue accents.

The peonies are from The Enchanted Home.  Sofa, loveseat and side chair are all upholstered in Sumbrella fabric.

The coffee table was a $35 find at a 2nd hand store. All the accent pillows are from Pottery Barn.

The bedroom headboard is from an 1897 Victorian house I owned in Alameda, California.  The previous owner left it in one of the bedrooms and it has moved with me ever since.  Lampshades and pillowcases are from Pottery Barn.  The matelasse coverlet and sheets are from J.C. Penney.

The full bathroom has a stackable washer/dryer and plenty of storage. The mirror over the sink is from an old dresser and the wall lamps were added to the frame.

The kitchen is fully equipped with a gas stove, refrigerator, dishes, pots and pans and silverware.

The journey to the guest cottage is a bit magical as the walkway is through an arch of vines. Not only do our guests enjoy their privacy, but we do as well.

I hope you’ve enjoyed peeking into the guest cottage!


Hello November!

Dear November,

I will not forget you.  Even though the stores have moved onto Christmas I refuse to ignore your importance in the calendar year.

My blog post today will focus on this wonderful month.  To me, it’s the quiet time before the holiday rush ~~I’m a traditionalist about starting the Christmas holiday the DAY AFTER Thanksgiving. Please take time this month to enjoy the change of season and the calm this month offers.

My sister and her husband took this photo in New Hampshire~~such gorgeous colors!

I have been so swamped with opposing a local zoning issue, I have had little time to do much else. When stress levels rise, I tend to bake.  Being in the kitchen comforts me.

During our last trip to see our son in Virginia, I purchased several varieties of apples from Carter Mountain Orchard and stuffed them in my roller bag.

My first baking adventure was an apple pie.  Pinterest has featured so many innovative pie crusts that I thought I would attempt this. I used my go-to pie crust recipe which you can find here.

What I learned:  Layering the leaf cut-outs was fun, however, the top “crust” was too thick.  If I were to do this again, I would make sure my leaves were rolled very thin. However, it was still delicious and so pretty when I took it out of the oven.

With more apples in the refrigerator, I thought it might be fun to use my Pocket Pie mold from William Sonoma, which has been sitting unused for years. I made the crust recipe on the back of the box which includes quite a bit of butter.

The hinged plastic mold cuts (with some level of difficulty) both sides of the pocket pie pastry.

You can add whatever filling you want as the recipe suggests canned pie filling.  However, since I had fresh apples, I made my own.  Initially the apple pieces were too big and needed to be cut down.

Add a few tablespoons of filling, egg wash the edges, add the matching top and crimp.

In retrospect, these pies were a bit of a pain in the neck to make.  The dough is much easier to use while it is cold.  Once it warmed up, it stuck to the mold and the pockets were hard to handle. William Sonoma doesn’t offer this mold any longer, however they have other types. After making a couple of dozen I would have gotten better, but I quit after making 8.

Please enjoy this month.  We still have Thanksgiving to look forward to where we will share our gratitude with family and friends.


Halloween Memories

I know some people are not fond of Halloween, but I have such great childhood memories going trick or treating with my siblings in our small Connecticut town.  There was a cemetery across the street from our Dutch Colonial house. We would run by it really fast imagining all sorts of ghoulish things, squealing the whole way clutching our pillow cases full of candy.

Mom would paint faces on pumpkins and adorn them with straw hats.  There was always a cornstalk wrapped around the lantern post.  She would make our costumes and I am sure many of them would be considered politically incorrect today~~like me as a hobo and my sister as Aunt Jemima!

My parents made all holidays extra special~~even with very little, Mom managed to make each one magical.

Naturally, I wanted to do the same for my children.  Each year, we bring out the black crows, owls, skulls and chemistry bottles and decorate the dining room mantle.

In the living room, the deep mantle serves as the perfect place to put our family-made ceramic pumpkins.

The battery operated frosted glass witches are tucked into the centerpiece on the table.

The kitchen pastry rack is filled with holiday candy and pumpkins.

Several years ago, I purchased these fabric pumpkins at a charity event.

Halloween would not be complete with Mr. Bones.

Or the mummies…..

The same holiday pillows come out every year.

The querky pumpkin ladies are scattered throughout the house.

A Halloween ribboned wreath completes the front door.


Do you have a favorite memory or costume?

Wishing you a safe and Happy Halloween and a boo-tiful day!!


The Art of Gift Wrapping

Being on the receiving end of a visually gorgeous gift is exciting.  I have always appreciated someone taking the extra time to make the outside of the gift as thoughtful as the inside.

When we were restoring Bella Terra, I designed a gift wrapping space in our mud room ~~a place to hold all the paper, tissue, bags, and ribbons.

The deep drawer pulls out and there are wooden dowels for hanging the rolls.  There is also another pull out section that provides a flat work surface.

On either side, there are small individual drawers for tape, scissors, ribbons, glue gun, and miscellaneous items.

Unfortunately, I left the big drawer open recently and our rescue cat, Donovan, decided it was a fun place to hide and explore.  Here’s what he did to several rolls of wrapping paper. The good news is that it forced me to clean out the mess. In doing so, I happened to find a diamond earring in the bottom of the drawer that I had lost nearly 2 years ago!!

Timing is everything. It just so happened that one of my favorite bloggers, Tina from The Enchanted Home,  recently released her own line of wrapping paper.  Tina LOVES blue and white porcelain and I have previously blogged about the gorgeous artificial flowers I purchased from her online store.

What I love about this paper is that it is two-sided~~so with 4 rolls I actually have 8 different styles and colors. The perfect replacement for my many shredded rolls.

After selecting the paper, it’s important to choose the right ribbon.  If you have a Costco in your area, they have a wide selection, especially around the holidays~~large rolls for a reasonable price.

You can make a gift extra special by adding a trinket to the box.  Typically I search my stash of craft supplies, artificial or real flowers, old costume jewelry or buttons or even something from the yard.

By adding a small do-dad, you can make the gift more elegant, playful, casual or themed.

This clip-on artificial flower gives a big punch of color.

What I appreciate about Tina’s paper is that is a very good quality.  Some papers are so thin they tear when you fold the corners.  Here are examples using both sides of one roll of paper~~creating two totally different looks.

The simple blue grosgrain ribbon adds contrast to the green sheer one and the brooch bumps up the elegance. I chose the topiary garden charm from Pottery Barn since it matches the topiary theme on the paper.

The Enchanted Home has just released their holiday wrapping paper and you can see their selection here.

The holidays are coming…..will you do something extra special with your gift wrapping?


A Colorful Walk

It is so rare for many of us to experience solitude.  Even when I am not on the go, my brain seems to be racing . With all the hats we wear, having calm and quiet time is a luxury.

I went on a long walk this morning as I am by myself at our cabin in the mountains.  It is a typical fall day-chilly, crisp, clear blue skies, white puffy clouds and sunny.  I tried to quiet my mind and let my eyes capture and appreciate nature and it’s every changing story.  I only encountered a few other forms of life~~squirrels gathering food for the winter as well as a variety of birds-woodpeckers, nut hatches, and crows.

In the White Mountains of Arizona, we experience a different set of colors for autumn.  There is a predominance of Ponderosa pines and oaks. The oaks go from green to a golden yellow to a warm brown.

The aspens are gorgeous this time of year with their shimmering round coin-shaped leaves against their white trunks and blue sky.

There is a scattering of maples, which add their splashes of red and orange.

I was surprised to see some pansies in a flower bed, looking just as good as they would in the springtime.

The colorful blooms of rose bushes have not lost their beauty yet.

And of course, this is the time of year for marigolds and chrysanthemums….and lots of pine needles.

It was so peaceful to walk near the lake and see the sky’s reflection on the glistening water.

Soon all the leaves will fall as nature prepares for winter.

Wishing you a weekend with more moments of quiet and calm.

“Learning how to be still, to really be still and let life happen~~that stillness becomes a radiance.”  Morgan Freeman


Homemade Chicken Soup

Who doesn’t love chicken soup?  I always like to keep some on hand, especially when the weather changes and sniffles start appearing.

My daughter who is a junior in college wasn’t feeling well and I whipped up a batch for her.  I don’t really have a strict recipe, but it’s hard to ruin this soup, especially with my two special ingredients.

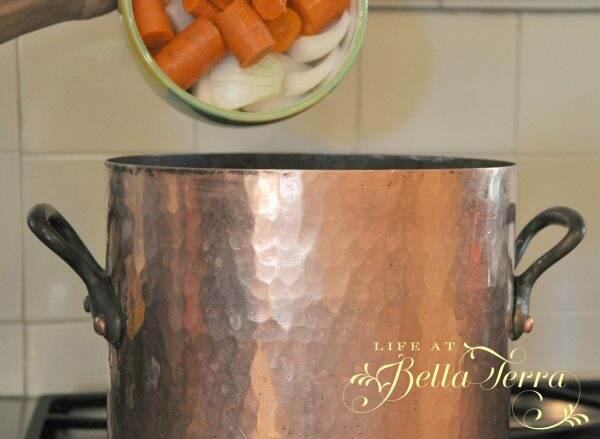
I like to start with my favorite stock pot.  This hammered copper pot from William Sonoma was a gift from a friend who needed an interim place to stay, using our guest room for a few weeks. It is 9.5″ tall and has 11.75 quart capacity. What a perfect gift as I use it frequently and always think of him when I do.

Chicken~~I use anything with bones.  For this recipe, I purchased 1.5 lbs. of drumsticks, 1.5 lbs of boned breast, and 1.5 lbs. of thighs.  You can take a whole chicken and cut it up….it’s the bones that give it the most flavor.

Next I add carrots and onions, cut up into chunks.  You can add as much as you like. I added 3-4 large carrots and 2 onions.

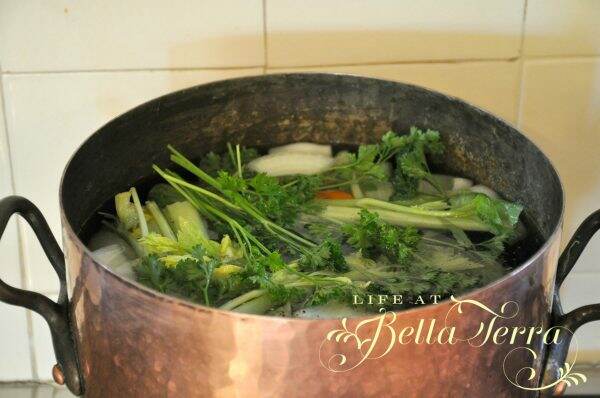
Next comes celery~~include the leafy tops.

A bunch of parsley…..

I fill the pot with tap water.

Here is what it looks like.

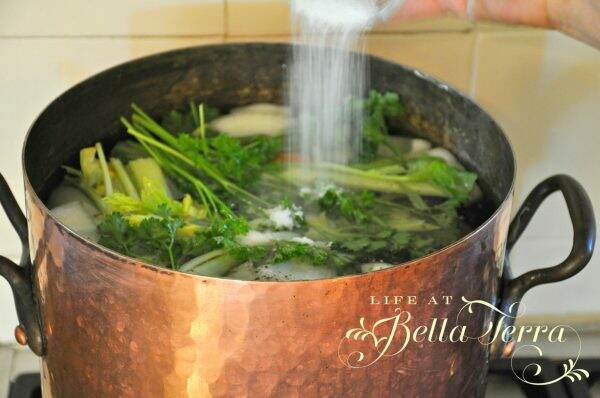
I finish with some salt….again, try not to over salt it as you can always add more later. However, if you do over salt it, I understand you can add a potato and that will absorb it…but I haven’t tried it to confirm.  Add pepper if you’d like.

Bring the stock to a boil and then simmer~~for a few hours.  If the water evaporates a lot then you can always add more.

Strain the soup in a colander.  Remove the chicken, de-bone it and remove the skin.  Cut the meat into bite size pieces (it will more than likely just fall off the bone).  Cut up the carrots. You can cut up the celery and onion, however, often times I just remove it because it is so soft.

Put aside in a bowl.  Skim the fat off the broth.  If you decide to refrigerate the broth, the skimming of the fat will be easier as it solidifies.

Add the chicken and the vegetables back into the broth.  Now here are my two secret ingredients.

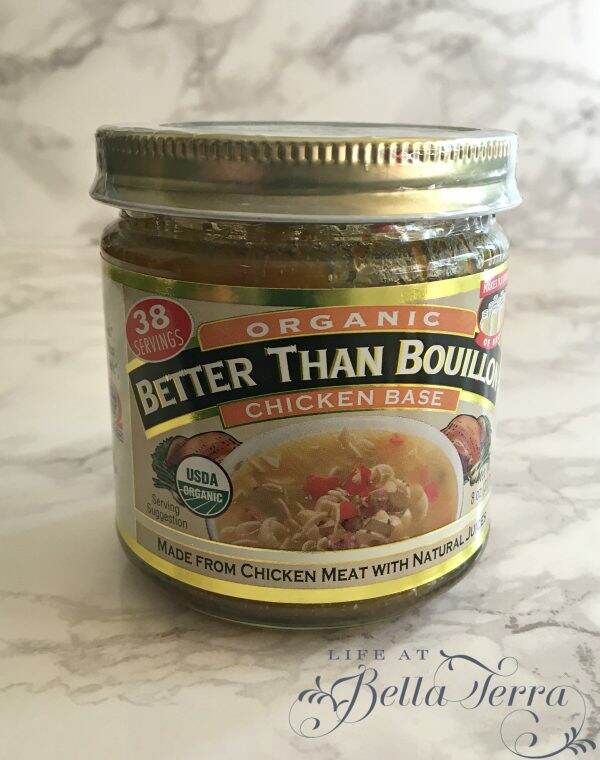
Better than Bouillion~~this organic chicken base can add more flavor to the broth, if it isn’t to your liking.  I believe it punches up the taste and is a great substitute for more salt. I add it a spoonful at a time, until the broth is at the desired flavor.

Reames Homestyle Egg Noodles~~these hardy noodles add some bulk to the soup. They taste like real homemade noodles and you can find them in the freezer section of your grocery store.  My friend, Sue Frome, turned me onto to these noodles and I always keep a few packages on hand. Add the noodles to the chicken soup and cook for approximately 20 minutes, or until desired tenderness.

I don’t know how many servings this makes since I freeze most of it in portions to use in the future.

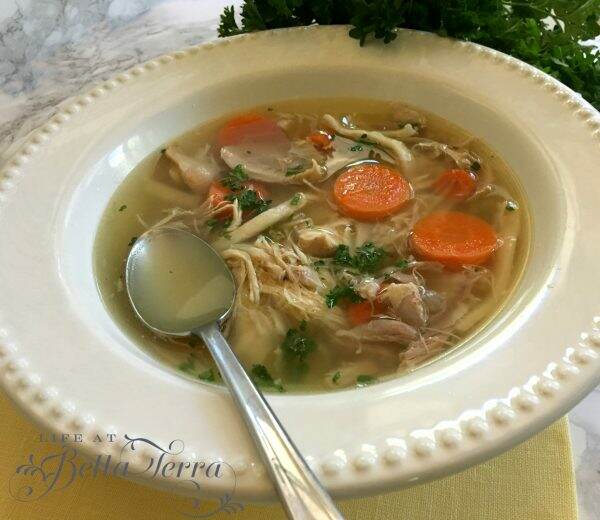
As the weather gets cooler, it is so nice to have a bowl of hot, homemade, chicken soup!

Enjoy!


[amd-zlrecipe-recipe:13]