1

Fall Decor Ideas

Autumn in Simsbury, Connecticut

Though I am not ready to give up on summer yet, I feel I could easily welcome cooler Fall temperatures. It doesn’t get Fall-like here in the Valley of the Sun until late October. We seem to be hotter now with all the new growth and development, which is unfortunate. I recall cooler weather in mid-September when I first moved here. Fall decor is on the store shelves and typically, by the time I am ready to decorate everything is gone.

Front Porch decor

So today I would like to share some inspiration as we dream about apples, sweaters and falling leaves. The front porch is always a fun place to decorate and the wreath is the first item that goes up. Since our front door is wider than a standard size, our larger wreath is an investment. As a result, I store them carefully year to year. I love the rich fall colors and surprisingly, they do work with my light blue front door.

Fall wreath using natural grasses

Or you can make a wreath using some natural materials from nature. To see my blog post on this, please click here.

Adding fall plants like wild grasses or coleus creates an autumn tapestry of textures and shades.

Pillows and Blankets

Wool blanket and orange pillow

Pillows and blankets are an easy way to bump up your fall theme. This is a welcoming spot by the front door to sit and just relax. You can find great pillows on Etsy or Amazon here. And I love this blanket from Amazon too.

Fall DIY
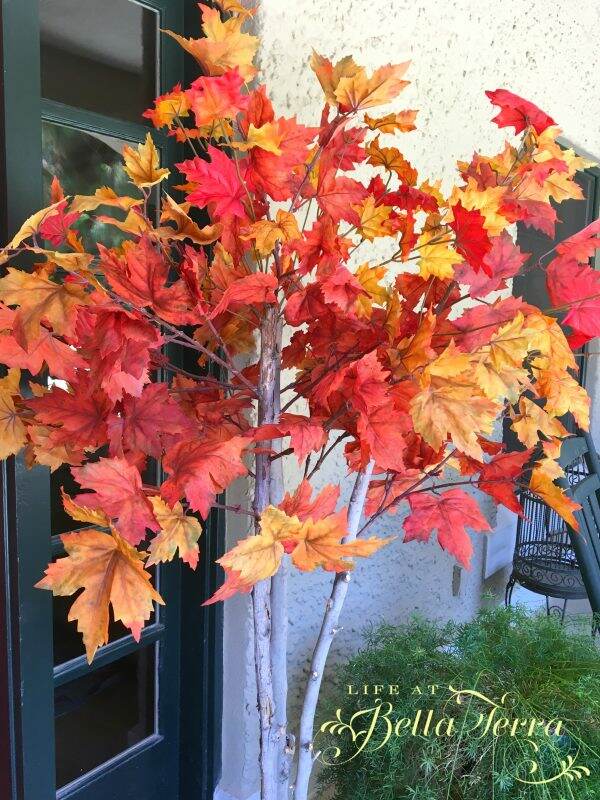
DIY fall trees

Making fall trees (see post here) is a simple DIY utilizing all the fall foliage that can be found at Michaels or Hobby Lobby. Keep some of your outdoor branches and with a drill and glue gun you are good to go!
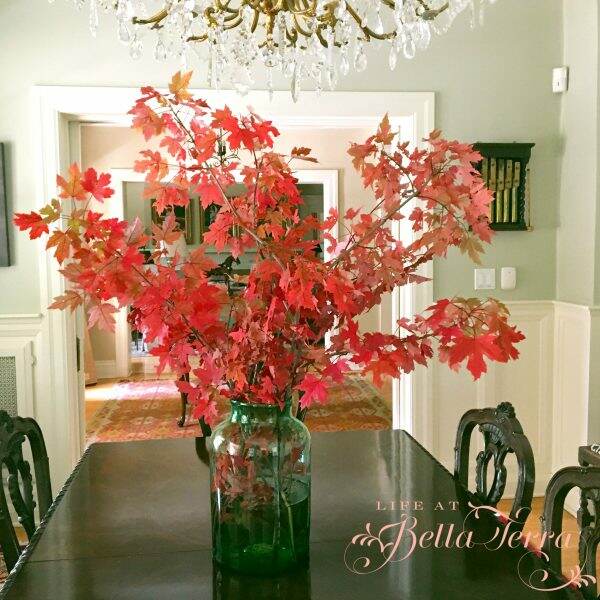
Freshly cut maple branches

Fresh cut branches with colorful autumn leaves in a large glass vessel can provide an instant change in season. Since we don’t really have these lovely deciduous trees here in Phoenix, I cut branches on our trip to the mountains each October.

Accessories

Spicy Apple candle by Rosy Rings

A few years ago, I discovered these amazing candles by Rosy Rings. They are works of art~beautiful to look at and smell great too. This autumn candle is Spicy Apple and you can see the slices of apple, cinnamon sticks, leaves and berries in the wax. You need one, right? See it here.

Painting by me

Adding a few pieces of seasonal art brings new color to any room. Here is a painting I did a few years back…my first pumpkin!

A California autumn by Lynn Winans (1897-1982)

Decorating Shelves

I love adding a bit of fall decor to each room, but one of my favorite spots is the antique Hepplewhite secretary from the late 1700s which sits in our living room. From my Johnson & Johnson plates to the pheasant soup tureen, everything about this vignette screams autumn.
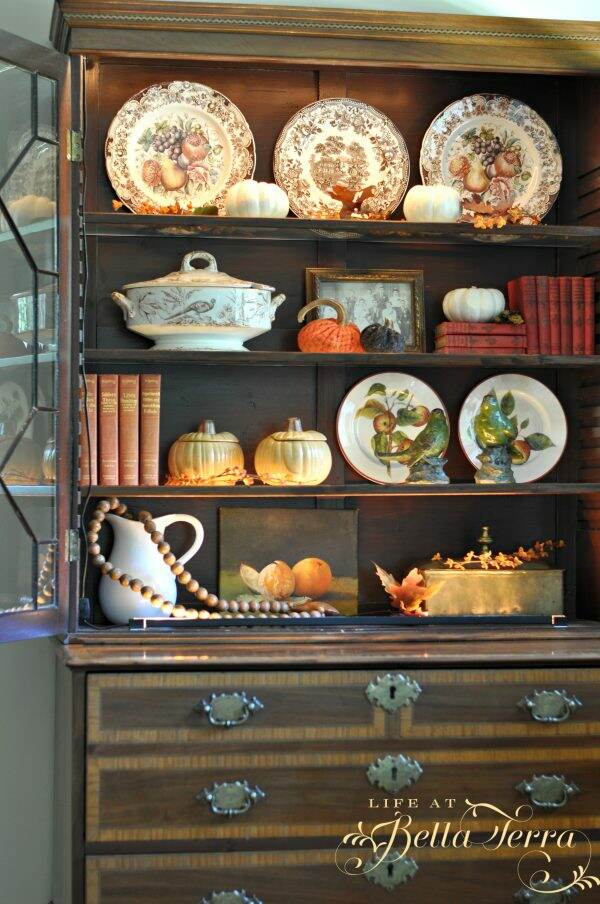
Last year I made fabric pumpkins, to replace the ones damaged by creepy bugs. This DIY is really easy and if you can get your hands on real pumpkin stems, then the possibilities are endless.

We have a huge pine tree in our front yard and for the first time it is dropping big, gorgeous pinecones. I cannot wait to figure out what I am going to do with this pretty gifts from nature.

Bleaching pinecones

Last year I did bleach pinecones and the results are a bit different but perfect for a more monochromatic theme. And you can use them into the Christmas holiday too. See that project here.

Well hopefully I have your fall decor juices going. I think my focus this year will be on making some of the mantels truly spectacular.

Do you have a favorite fall theme or color? Are you more traditional in the shades of oranges, reds and browns? Please share any fun projects that you are doing.

Happy Wednesday!

I always appreciate it when you share my pins on Pinterest. Thank you!


Refinishing Outdoor Furniture

Thanks for joining me today for our DIY Monthly Blog hop. This month our focus is something to do with seating. Over four years ago, I did a DIY project where I repainted our outdoor furniture. Fast forward to today, and the pieces look as new as ever! Here in the Arizona sun, our outdoor furniture takes a beating. It is rewarding to know that this technique is still producing gorgeous results. Let me share how easy it is to refinish outdoor furniture.

The Before

Lounge chair with oxidized frame

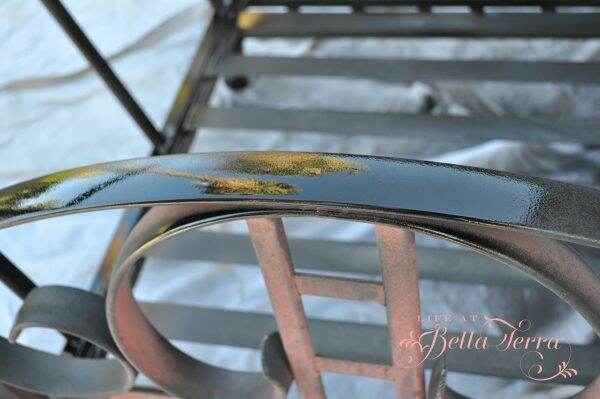
Here you can see the metal frame of the lounge chair in its oxidized condition. Instead of being a dark, rich brown, the finish almost looks purple.

Notice the variation of color

The pieces that need work are a lounge chair, a regular chair, a large ottoman and a round table. All these pieces are on our deck outside the master bedroom. The seating is rubber straps that do not require any work.

4 pieces that need refinishing

Supplies

I purchase 5 cans of Metallic Oil-Rubbed Bronze spray paint from Rust-oleum. There is something about the depth of this color that I love for outdoor furniture. You can find it here

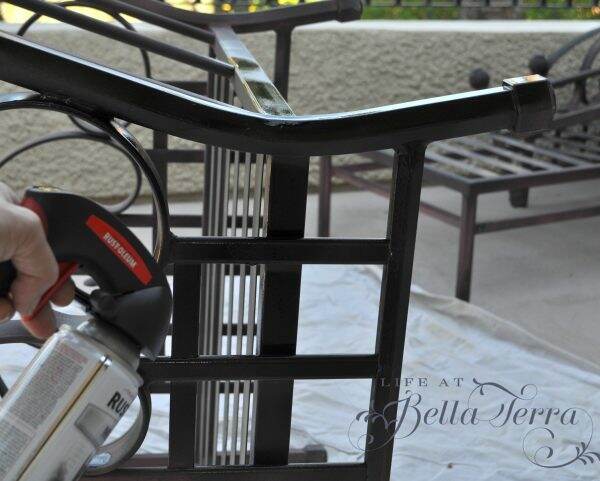
If you have ever done a lot of spray painting, you will know how challenging and tiring it is on your index finger. With this handy attachment, spraying is so much easier.

Best tool for spray painting

The Comfort Grip attaches to the top of the can and the handle helps to apply the paint evenly. It is so inexpensive and well worth it! You can find it here.

After wiping down the seating frames with a damp cloth, I am ready to paint. Using large drop cloths, I lay the furniture down and spray the bottom sections first. I tend to spray paint my feet (or socks) so be aware of where the paint is landing!

You can see in this photo the huge improvement from a new coat of paint.

Big difference!

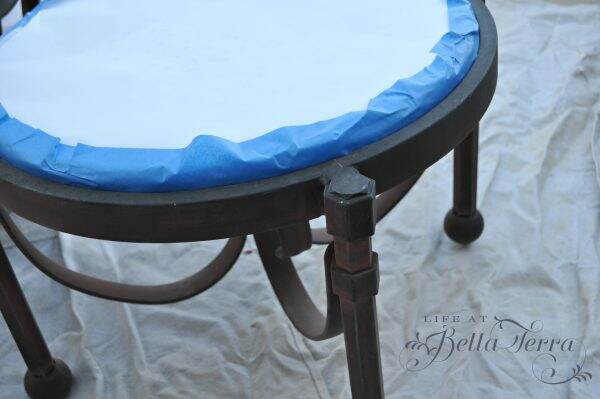
Since the stone top of the table is not removable, I carefully tape the edges with painter’s tape and make sure not to overspray the top.

Protecting the stone top

Allow to dry according to the manufacturer’s instructions. Also make sure you look around the furniture for missed painting spots.

The After

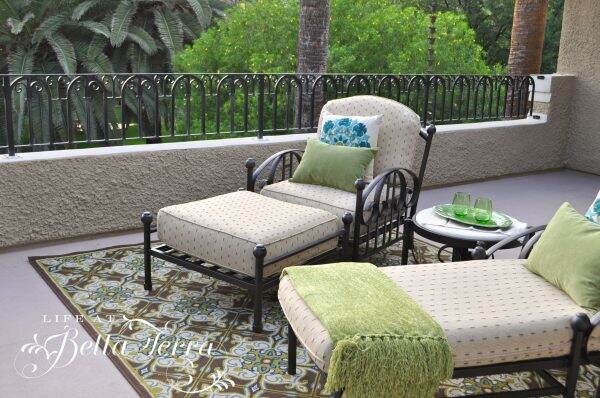
Here is the furniture 4 years ago. Doesn’t it look clean and new?

Furniture is finished!
Looks like new!

Now here is the same furniture today. We did move the pieces to a different location on the covered portion of the deck. But even after 4 years of being outdoors in the Arizona weather, all the seating pieces still look good!

Lounge chair today

The spray paint did hold up beautifully. Actually, the only thing that has changed is the pillows are a bit faded now from the sun.

Paint is still looking good!

Outdoor furniture can be pricey but with a bit of maintenance they can last you a long time.

Now onto the DIY Blog Hop

Thanks for joining me today. Now onto the other bloggers who will share their seating projects!

Andrea from Design Morsels shows how to cover your office chair here. I need to check this out as my office chair is looking a bit skanky.

Allison from Darling and Dapper Life creates a DIY Farmhouse Bench here.

Chas from Chas Crazy Creations gives us a great tutorial on How to Clean a Sofa.

Tarah from my Grandmas House DIY has two favorite rocking chairs that she has updated. You can see it here.

If you enjoy this post, please feel free to share on Pinterest.

This post shared with Between Naps on the Porch Metamorphosis Monday #649.


Ways to Enhance Your Entry

Like every first impression, the entrance to your home says alot about you. Is it welcoming? Warm? Impressive? Easy to find? Often we take the entries of our homes for granted, because we are in and out of them frequently. So it’s time to step back and ask yourself the question, how can I create an impressive entrance?

Front Entry Update

Getting ready for our pre-renovation party 1999

Sometimes your entry needs a major facelift. This photo is our house prior to the extensive restoration. It is the only picture I found of the front door that shows the bare light bulb on the front porch. And back then, there were security bars on all the windows and doors.

Front Entrance today

With new house paint, removal of the security door and bars, new front door paint color, new light fixtures we transform the scary front of our home into something much more welcoming. Adding plants and a bench do add to the notion that we actually want you to enter the house and stay awhile.

Bella Terra

To read a detailed version of the restoration of the front of our home, click here.

Willetta Restoration before

I must be attracted to home with security doors as the same appears at the 1922 home I restored in downtown Phoenix. Even with missing light fixtures and significant deterioration, this is still an impressive entry. Plus the front door does have wonderful opening sidelights for ventilation.

Willetta restoration during

After all the white aluminum siding was removed, we found the original clapboard in good condition. The columns need significant work as does the under roof of the terrace.

Front Door Color

Willetta Restoration After

Sometimes a simple can of paint can really change up the look of your front door. Previously painted white, the double front doors look fabulous in this color red. For a more in-depth review of the historic Willetta restoration, click here.

Numbers

Here is the before and after of a remodel I did on a small ranch house. In addition to changing the front door, the house siding and removing the brick planter, note the old house numbers.

Here is the after with lots of changes. But the personal touch I love on this house is the custom made gold plated number 32. Made by an artisan in Connecticut, this is a unique look in Phoenix.

In lieu of a screen door, the shuttered door allows in light and ventilation to a rather dark entrance.

A Front Walkway

Before

This is one of my first “for sale” remodels. There is a lot wrong with the entrance to this house. It needs a new door as the hollow core closet one makes no sense. The mixture of brick and stone confuse me. But because the house is so flat and linear, it desperately needs a welcoming walkway.

After

With a winding path of tumbled pavers, your eye goes directly to the front door (sorry for the quality of this old photo). The solar lights enhance the path at night.

Front Entry Decor

Each season I change up the decor on my front porch. A new wreath, pillows, a throw, new plants~anything to freshen it up for that time of year. To see more about this front porch re-do, click here.

Adding Pretty Elements

Before

It doesn’t take much to freshen up your front entry. Recently, I painted the exterior fixtures and mailbox to our guest cottage. A simple project like this produces big results. To learn more about painting both these items, click here.

Know Your Home’s Architecture

In a small gated community here in town, I found this sweet patio home. However, the entrance does not fit with the style of the house. Between the dated French provincial front doors and the alpine-like peaked roof, I felt like yodeling every time I entered. The light fixture is 1980s. Structurally it looks wonky.

The wooden spindles and beams are removed. Columns are added and receive a coat of stucco. New fascia board gives the roof some beef.

During

With a new front door with sidelights, an appropriate scaled light fixtures and new paint the front door becomes the focal point in this entrance.

After

Here are some pretty entry pictures I did find on the internet. I just love all the window panes around this door.

Better Homes and Gardens

In each photo, your eye is drawn to the front door…which is exactly what you want to achieve.

Houzz

I hope this inspires you to spruce up the entrances of your home! Happy Wednesday!

If you enjoy this post, please share on Pinterest.

This post shared with Between Naps on the Porch Metamorphosis Monday #648


Room by Room~The Master Bedroom

My bedroom table

Last month, I introduced a new series, Room by Room, where I can share a room in our home each month. In April, the Room by Room feature is the Living Room (see post here), and this month, I will focus on the master bedroom.

What I am enjoying about this Room by Room series, is that it gives me the opportunity to really scrutinize each room, what I like about it and what I don’t like (or may change). Since the master bedroom is only used after the end of a long day, I am eyeballing my comfortable bed and not necessarily assessing the elements of the room.

When we restored and remodeled the house in 1999, the only access to the master bedroom was by actually walking through a long and narrow closet. It was a great opportunity to completely revamp the master bedroom, bath and closet footprint to create an oasis just for us.

Quote door art piece in master bedroom foyer

The Privacy

Currently the entrance to the master suite is at the end of the upstairs hallway through separate French doors. A small foyer showcases a unique piece of art floating from a curved wall. Years ago I wrote about our “quote door” (see post here). This is one of my cherished pieces as it contains our family’s favorite quotes. Illuminated from behind, it is focal point as you enter our master bedroom.

Behind these French doors is access to my art studio, my husband’s office and our master suite.

Here is your first view past the entry doors into our bedroom. This antique sofa is a Round Top, Texas find several years ago. Re-upholstered in a houndstooth print, it is a new look to a very old sofa. To see the before and after, click here.

Double doors to the master bath

Overall, the bedroom measures 23 feet by 15 feet. There is a set of doors leading to the master bathroom and French doors with sidelights that open to the second story outdoor terrace.

Hidden television

Where is the television?

Above a chest of drawers is an oil painting of San Gimignano, a medieval village in Tuscany, Italy. Not only have we been there, but the art work rolls up to reveal a television beneath.

Art work rolls up and out of the way

To the left of the hidden television, is a charming kidney-shape make-up table and mirror from Horchow. It appears that Horchow no longer carries this, but there are several make up tables at Amazon here. The fabric skirt is custom made and I do have one for winter/fall and spring/summer.

I would love to tell you that I use this table all the time. I like the romantic notion of having a table for glamour, but it seems to be a place where I store my perfume and pretty jars. Because at the end of the day, I’m not a very glamorous person!

Another romantic notion in this room is the crystal decanters on the silver tray on the painted chest of drawers. I can recall on perhaps two fingers where we poured a nightcap from this area! But I do love the shapes of the bottles and the silver tags.

The View

Perhaps one of the best features of this room (besides the bed), is the view. All we can see through the French doors and windows are tree tops. No neighbors, no other homes, just the mature tree canopy of our property. During the cooler months, we leave the doors open and awaken to bird song. Just lovely.

The Bed

In retrospect I am so happy we did purchase a high quality mattress. When you spend 1/3 of your life in bed, a good, supportive bed is important. Ours is a Chattam & Wells and every night I so appreciate this bed.

Quality linens and fine pillows are the icing on the cake. Since I have an ongoing neck issue, making an investment into this pillow system from Pandora de Balthazar is worth every penny.

The actual bed is upholstered in a short sage green velvet. Purchased from European Traditions in Scottsdale, I believe this store has since closed. We add picture frame lights behind our pillows for nighttime reading.

Night Stands

Though I do not like matching bedroom furniture, I did purchase identical Louis XV commodes imported from France (years ago)….back when darker finish was popular. These European cherry night stands are stained walnut and are the perfect height for our rather tall bed.

The Artwork

In addition to the oil painting of San Gimignano, there is a set of vintage botanical prints over the sofa.

I am not sure this piece is even my style anymore, but I do consider it a piece of art. Hand painted many years ago by a local artist, this commode goes extremely well with the painting above it.

Lydia and her sparrow is one of my favorite paintings.

Flooring

Like the living room, the hardwood flooring is Canadian Beech. A richly colored silk Oriental rug measuring 10′ x 12′ anchors the sleeping area.

What I Love or Would Change

The master bedroom space is perfect. With a southern and western exposure, we do not need any curtains on the windows/doors. No one can see in from the outside. The room feels spacious and welcoming.

However, in writing this post, I would probably use more subdued colors. The duvet cover doesn’t really go with the rest of the room, but I like its soft colors. Some of the furniture seems dark to me, but perhaps not enough to replace it.

There are areas that we don’t use much~the vanity, the television and the sofa, but those pieces do fill the space. I’m not unhappy enough with it to change it. However, the master bath DOES need to be completely re-done and maybe that will inspire me to re-think the master bedroom.

I hope you enjoy this segment of Room by Room. Happy Tuesday, my sweet friends!

If you enjoy this post, please share on Pinterest.

This post shared with Between Naps on the Porch Metamorphosis Monday #643


Spring Front Porch Ideas

After putting up the new tulip wreath on the front door, the rest of the porch looks a bit tired after winter. If you missed yesterday’s post on how to make the front door tulip wreath, click here. Inspired by the pinks of this wreath, I am excited to come up with some new Spring front porch ideas.

Since I do not like to waste anything, many of the plants and colors from Valentine’s Day will continue on through the Spring. The pink geraniums and Latinia Rose cyclamen from Whitfill Nursery still look healthy and colorful. The stone rabbit will wear the pink polka dot ribbon for a few more months.

By the door, we have an iron bench and it is fun to place a blanket or pillow on it to soften the edges. The blue thrown has some of the same tones as the front door. Below, the Rose Bible by Reyford C. Reddell is one of my favorite rose reference books.

The two 5 foot cedar trees (artificial) flanking the front door are holding up well and require NO maintenance! I almost want to convert everything to faux plants because they are so easy! The quality is superb and can anyone really tell the difference?

Before you step up to the front door, the planting bed is looking exceptionally good this year. Only one plant didn’t survive the winter, but the rest are healthy and abundant with lavender, geraniums, scented geraniums and snapdragons.

If you have been following me for a while, you may recall the re-do of the rocking chairs on the porch. Repainting the chairs makes such a difference. Click here to see that post on sprucing up the front porch. It’s fun to see the before and after photos.

I was tempted to head to Target to buy some new spring pillows, but felt a bit lazy. Convinced I must have something here to use, I find these two sweet red/pink tulip pillows from my store. The colors are just perfect with the tulip theme. If you didn’t know I have a store, check out the Store tab at the top of the page.

The extremely heavy stone and concrete table is a yard sale find. Luckily we have two of them and they are weather-proof. And just big enough for a couple of cocktails and nibbles. Perfect for cashews are the fluted porcelain bowls by Epure, a recent treat in My Stylish French box subscription.

Scrounging the house and property for old items to put in new places is part of the fun. These two ducks have always been sitting by the front fountain….for years. Now they are integral pieces of the front porch spring decor!

So with minimal effort, I am able to transform the front porch from Valentine’s Day to Spring without any significant, additional cost. The wreath is less than $20 and the rest is just re-imagining my old stuff in new places.

Welcome Mat by Wayfair

This front door just makes me happy! I hope like my Spring-inspired changes.

It is typical of March to be warm one day and chilly and drizzly the next. Just when I pull out my first pair of shorts of the season, I am back wearing multiple layers. Crazy weather!

Have a wonderful Wednesday!

If you enjoy this post, please share on Pinterest.

This post shared with Farmhouse Friday Link Party #197, Between Naps on the Porch Metamorphosis Monday #635


How to Make a Tulip Wreath

If you recall, last year I added a new paint color to the front door. It is the perfect color for Spring and Summer. Surprisingly this shade of blue also works well for Autumn and Winter. Since tulips are currently blooming in the bulb garden, it seems appropriate to hang a tulip wreath on the front door. Join me today to make a tulip wreath. To see the front door color post for details, click here.

Michael’s is having a great sale on faux flowers and I scored 4 bunches of pink tulips for less than $20.00. See here. Initially the goal is to make an all pale pink wreath.

The challenge with our front door is that it is 48″ wide. Standard-sized wreaths tend to look a little dinky. So when I do create a wreath, abundance is the key. Naturally I did this DIY project out of order. It would make the most sense to start with your wreath frame and then determine the quantity of flowers you need. However, I didn’t want to buy another wreath frame and did some digging in the garage to find this 26″ grapevine one…..after I purchased the pale pink tulips.

My old glue gun

Supplies you need are simple: a wreath frame, flowers, glue gun and something to cut the flowers. For a nice selection of grapevine wreaths, click here.

Realizing that I may not have enough pink tulips to fill the wreath frame, I find some darker pink tulips that I had on hand from another project. With 4 bunches of light pink (14 stems each) and 2 bunches of dark pink (also 14 stems each), I have a total of 84 tulips. Before I start a project I want to make sure I do not run out of materials. Been there. Done that.

Using wire cutters makes this easier

Having wire cutters makes this job a lot easier to get through the plastic covering and the wire underneath. These are super affordable and you can order them through Amazon here.

Use glue when necessary

I start working on 1/4 of the wreath, knowing I can use 21 stems in that portion. This gives me a sense of what density of flowers will work. Most stems tuck easily and securely in between the grapevines.

Tucking in the flower stems

Don’t discard the leaves as they can be added to the wreath for fullness or just another pop of color. I hot glue the leaves randomly. Personally, I really don’t like using a glue gun because I tend to burn myself far too much. On this wreath, I use minimal gluing.

Adding leaves

As I am styling it, darker tulips are added for contrast. If you follow me on Instagram, I try to post a story daily and show these types of DIY projects in action.

As posted on IG

Continuing to add tulips around the entire wreath, I leave a space for a ribbon. Using the leftover bow from Valentine’s Day, I find that I don’t like it. The pink in the ribbon looks a little flat to me.

Bow or no bow?

Instead, I remove the bow and continue adding more tulips to fill in the gap. Much better!

So here is the finished tulip wreath! I think it looks so cheerful on the front door.

Since the wreath looks so nice, the rest of the porch looks a bit tired. Join me tomorrow to see how I spruced up the front porch to go with my new wreath!

Happy Tuesday! Spring has sprung and hopefully, everyone’s weather is improving. We are, of course, in the midst of our beautiful season so every day seems better than the one before.

If you enjoy this post, please share on Pinterest.