Though I am not ready to give up on summer yet, I feel I could easily welcome cooler Fall temperatures. It doesn’t get Fall-like here in the Valley of the Sun until late October. We seem to be hotter now with all the new growth and development, which is unfortunate. I recall cooler weather in mid-September when I first moved here. Fall decor is on the store shelves and typically, by the time I am ready to decorate everything is gone.
Front Porch decor
So today I would like to share some inspiration as we dream about apples, sweaters and falling leaves. The front porch is always a fun place to decorate and the wreath is the first item that goes up. Since our front door is wider than a standard size, our larger wreath is an investment. As a result, I store them carefully year to year. I love the rich fall colors and surprisingly, they do work with my light blue front door.
Fall wreath using natural grasses
Or you can make a wreath using some natural materials from nature. To see my blog post on this, please click here.
Adding fall plants like wild grasses or coleus creates an autumn tapestry of textures and shades.
Pillows and Blankets
Wool blanket and orange pillow
Pillows and blankets are an easy way to bump up your fall theme. This is a welcoming spot by the front door to sit and just relax. You can find great pillows on Etsy or Amazon here. And I love this blanket from Amazon too.
Fall DIY
DIY fall trees
Making fall trees (see post here) is a simple DIY utilizing all the fall foliage that can be found at Michaels or Hobby Lobby. Keep some of your outdoor branches and with a drill and glue gun you are good to go!
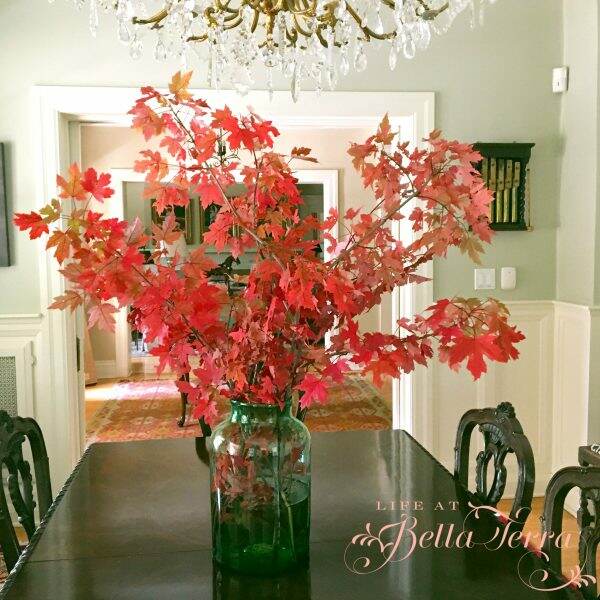
Freshly cut maple branches
Fresh cut branches with colorful autumn leaves in a large glass vessel can provide an instant change in season. Since we don’t really have these lovely deciduous trees here in Phoenix, I cut branches on our trip to the mountains each October.
Accessories
Spicy Apple candle by Rosy Rings
A few years ago, I discovered these amazing candles by Rosy Rings. They are works of art~beautiful to look at and smell great too. This autumn candle is Spicy Apple and you can see the slices of apple, cinnamon sticks, leaves and berries in the wax. You need one, right? See it here.
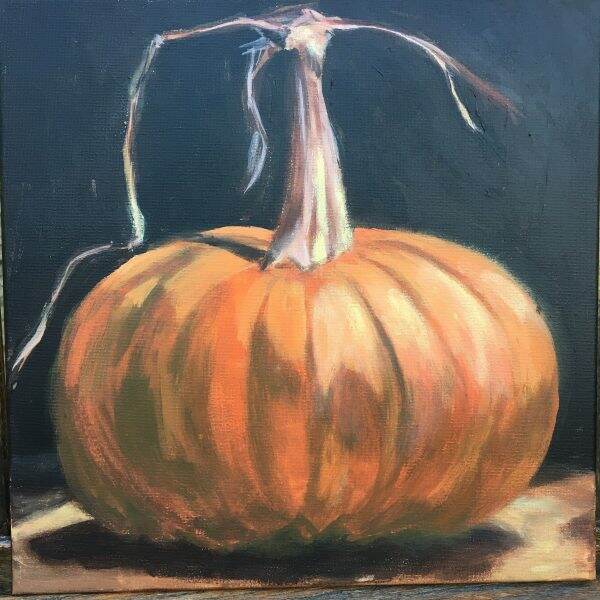
Painting by me
Adding a few pieces of seasonal art brings new color to any room. Here is a painting I did a few years back…my first pumpkin!
A California autumn by Lynn Winans (1897-1982)
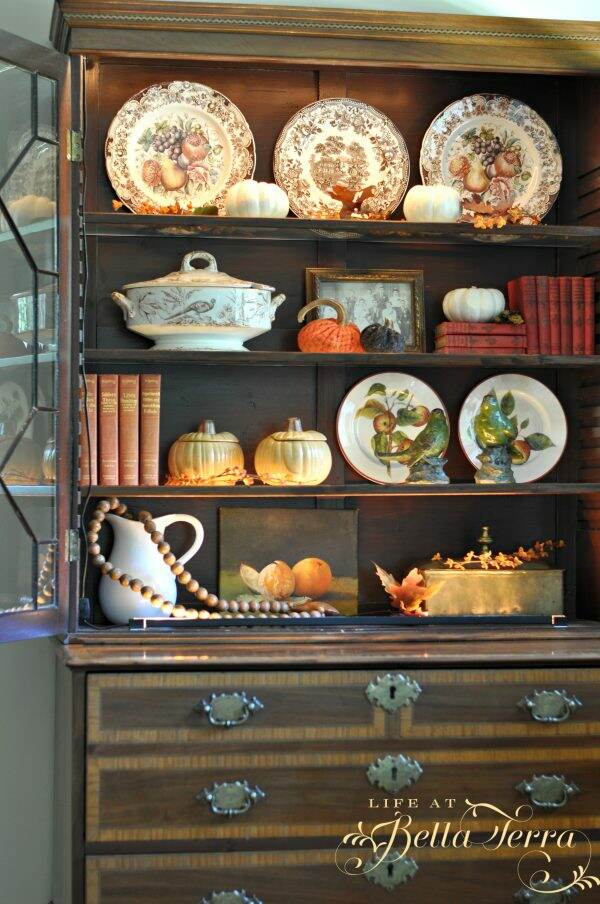
Decorating Shelves
I love adding a bit of fall decor to each room, but one of my favorite spots is the antique Hepplewhite secretary from the late 1700s which sits in our living room. From my Johnson & Johnson plates to the pheasant soup tureen, everything about this vignette screams autumn.
Last year I made fabric pumpkins, to replace the ones damaged by creepy bugs. This DIY is really easy and if you can get your hands on real pumpkin stems, then the possibilities are endless.
We have a huge pine tree in our front yard and for the first time it is dropping big, gorgeous pinecones. I cannot wait to figure out what I am going to do with this pretty gifts from nature.
Bleaching pinecones
Last year I did bleach pinecones and the results are a bit different but perfect for a more monochromatic theme. And you can use them into the Christmas holiday too. See that project here.
Well hopefully I have your fall decor juices going. I think my focus this year will be on making some of the mantels truly spectacular.
Do you have a favorite fall theme or color? Are you more traditional in the shades of oranges, reds and browns? Please share any fun projects that you are doing.
Happy Wednesday!
I always appreciate it when you share my pins on Pinterest. Thank you!
4 Ingredient Tomato Sauce
|
Roma Tomatoes
This tomato sauce recipe is so yummy~simple ingredients with fabulous results. You can make this using 3 pounds of tomatoes (as the recipe indicates), or more. Recently, I purchased 60 pounds of Roma tomatoes from McClendon’s Select, a local farm here in Phoenix. And I did experiment with ways to alter the recipe to make the project go a bit faster.
Please don’t think you need to know how to can or preserve to make this recipe. It certainly depends on the quantity of sauce you make, but you can certainly just refrigerate it if you are consuming it quickly, or freeze it.
My friend, Rick, who is a very good cook is responsible for this recipe. Like most recipes, I am always looking for a short-cut or a different way to tweak it to make it my own. Always start with good quality ingredients. Personally, I prefer to make sauce from my own tomatoes, but my crop this year wasn’t a good one. So it is time to find an alternative.
Where to Find Good Tomatoes
McClendon Select Grab and Go Produce Boxes
McClendon’s Select is family-run, certified organic farm located on 25 acres in Peoria, Arizona and an additional 68-acres in Goodyear, Arizona. How does one get 60 pounds of Roma tomatoes? Since this farm is always at our local farmers markets, you can order produce directly from them. All it took was an email asking the question. Since they do sell to restaurants, I am able to buy 20 lb. flats of tomatoes at $20.00 per flat. And as they do sell custom boxes of produce each week, I went to their drive through location and picked up the merchandise.
Here are the four ingredients: olive oil, garlic, Roma or plum tomatoes and salt. Making the sauce does involve cutting the tomatoes.
In Rick’s recipe, he suggests cutting the tomato in half, and then into a total of 16 pieces. Remove the core and seeds, saving the rest of the tomato. (Note: In order to eliminate this step, read the section on using a food mill).
Sauté the minced garlic in oil until fragrant (do not brown) and add the tomatoes and salt. Bring to a boil. Reduce heat and simmer vigorously, stirring frequently, until sauce has thickened slightly and tomato skins are starting to separate from the flesh, 15 to 20 minutes.
Other processing options
Using a food processor if you do not have a food mill
Rick’s recipe suggests using a food mill. Not everyone has a food mill and if you do not, here is an option. After cooking the tomatoes, put everything in a food processor. My Cuisinart pulvarizes the tomatoes, skins and all. The first time I made this recipe I did not own a food mill and I actually like the sauce with tiny bits of skin.
Using a Food Mill
Food Mill by Roots & Branches
My friend, Gwen shares her favorite food mill by Roots & Branches. This large funnel sauce maker really reduces the time on making 60 lbs. of sauce. All you need to do is cut the tomatoes into a size that will fit down the throat of the funnel. Turn the hand crank and the seeds, core and skin are removed. No need to cut the tomatoes into 16 pieces. See food mill here.
Cut tomatoes to fit in the food mill
What’s left is tomato pureé which you will reduce in half for a thicker sauce. In Rick’s recipe, he recommends using a food mill after cooking the tomatoes the first time. The food mill I own suggests using the food mill before cooking.
What is interesting is that regardless of when you use the food mill, the sauce is equally delicious. Note: Using such large quantities of tomatoes, I prefer not having to remove the core, skins and seeds and cutting the tomatoes into 16 pieces when the food mill does all that work for me. A real time saver.
Quantity
The recipe below, using 3 lbs. of tomatoes, produces approximately 2 cups of sauce. After using the food mill, you will get 4 cups of pureé. With a vigorous simmer, you will reduce it by half.
Preserving and Storing
Canning sauce
Again, depending on the quantity of tomatoes, you can either refrigerate, freeze in Ziploc bags or preserve your sauce in jars for long term storage.
To learn more about canning your sauce for year round use, see my post on Processing Tomatoes here.
Other Recipe Adjustments
Another change I did make to Rick’s recipe is allowing the sauce to sit overnight. I did not do that, nor did I skim the floating olive oil off the sauce. I went straight to preserving and using a water bath to can the 20 jars.
My recommendation would be to follow Rick’s recipe the first time and then make any adjustments based on the quantity of your tomatoes. Needless to say, I do love this recipe because it focuses on the simple, fresh ingredients and makes a fabulous tomato sauce.
All Parts of the Tomato Used
Tomato scraps for the chickens
The discarded parts of the tomato are put to good use. Happily, the chickens did receive a large tray of scraps, which they quickly consumed.
In the compost tumbler
The rest of the tomato scraps are sent to the compost tumbler where their water content will help the dry yard material convert to gorgeous soil.
Donovan loves the tomato boxes
Even the tomato boxes are put into good use…..a place for Donovan, our Maine coon cat, to play.
All in all, the entire cutting, cooking, reducing and canning 60 lbs. of tomatoes did consume a weekend. But in the middle of winter when I can open a jar of fresh tomato sauce, it will be all worth it.
Happy Tuesday! As I write this it is dark and gloomy and we are praying for more rain. Have a lovely day.
If you enjoy this post, please share on Pinterest.
Rick’s Tomato Sauce
This recipe uses 4 ingredients and makes the most delicious tomato sauce
6 TBSP olive oil (extra virgin)
1 TBSP minced garlic
3 lbs Ripe plum (Roma) tomatoes (stemmed, cored and cut into pieces (16 pieces))
2 tsp Kosher salt
Heat oil in a large pot over medium-high heat. Add garlic and cook 20 seconds until fragrant (do not brown). Stir in tomatoes and salt. Raise heat and bring to boil. Reduce heat and simmer vigorously, stirring frequently, until sauce has thickened slightly and tomato skins are starting to separate from flesh, 15 to 20 minutes.
Pass sauce through the medium disc of a food mill. Discard skin and seeds. Return the milled sauce to the pot. Bring to a vigorous simmer and reduce by half for a thick sauce.
Let sauce sit (overnight in refrigerator is best). Bring to room temperature and skim off any floating olive oil (the tomato oil is great for other uses).
Season with additional salt to taste. The sauce is ready to serve and can bee seasoned with oregano, red pepper flakes or basil.
Recipe can easily be multiplied given the amount of tomatoes available and the size of the pot.
Sauce freezes well and is suitable for wet bath canning.
Notes: if you don’t have a food mill, I just put the cooked tomatoes into a food processor.
In using a food mill, you can do it before cooking the tomatoes. Let the food mill remove the core, skin and seeds prior to cooking.
Depending on the quantity of sauce you make, I skip the part about letting it sit overnight in the refrigerator and go straight to preserving or canning the sauce.
Saturday Meanderings
|
A hot and humid Connecticut sunset
It is SO nice to be home and able to write a Saturday Meanderings again. Sorry for being absent the last few weeks, but it’s been a bit frenetic. So grab a cup of coffee and let’s catch up with all new and exciting things that are happening.
Trip Back East
As I have mentioned before, I am flying back and forth to Connecticut to settle up my aunt’s affairs. The good news is that upon arrival, the hydrangeas are starting to bloom. The bad news is the excessive high temperatures and equally high humidity are unbearable in my aunt’s home ~which is not air conditioned. Plus there is no internet. Groan.
Donating furniture and bulk trash
But with only a few minor injuries and very sore muscles from moving furniture, I did get a lot accomplished. When the long flight back to Phoenix landed late at night, I was just SO HAPPY TO BE HOME. My sweet husband picked me up at the airport and on the way home this happened….
While we are waiting on the exit ramp for the light to change, an out of control white pickup truck traveling at excessive speeds comes out of nowhere and lands perpendicular on the front of our car, A nasty 5 car pile up and fortunately no one is injured~which is almost hard to believe. Since this is an open investigation I can’t share much more, but 3 hours later, we are finally able to go home, stunned, shaken and glad to be alive.
Another Watermelon Recipe
Watermelon Frosé
If you missed the blog post last week about my favorite watermelon recipes you can find it here. We are consuming so much of this delicious fruit, which is a delightful on our hot days. Here is another recipe adapted from Ambitious Kitchen. I cut corners and make this Watermelon Frosé a bit easier and it is equally delicious.
Freeze 4 cups of watermelon (cut into 1″ cubes). I froze mine on a cookie sheet. In a blender (I use my Vitamix), add the watermelon cubes, 1 bottle of chilled Rose wine and a squirt of agave syrup (optional) and blend until slushy. You may need to stir it up a bit as you go. Serve with a fresh mint sprig. Yum.Yum.
Frozen Dog Treats
Frozen dog ice cream
You can buy frozen dog treats in the freezer section of your grocery store (like Frosty Paws). However, if I cannot recognize an ingredient or if there are more chemicals than actual food, I don’t buy the item for us (or our dogs).
A piece of Greenie for an added surprise
It is easy to make your own dog ice cream using plain yogurt and peanut (or another nut) butter. Mix the yogurt and peanut butter (use whatever quantities you like) until well blended. Place in small containers. As an added bonus I put in a cut up Greenie (or similar dog treat) in the middle. Place in freezer.
Cooper loving his frozen treat
I really need to purchase some paper cups in lieu of plastic ones. The dogs do chew up the cups and I do not want them to swallow any plastic. There appears to be a good selection here.
Did You Know?
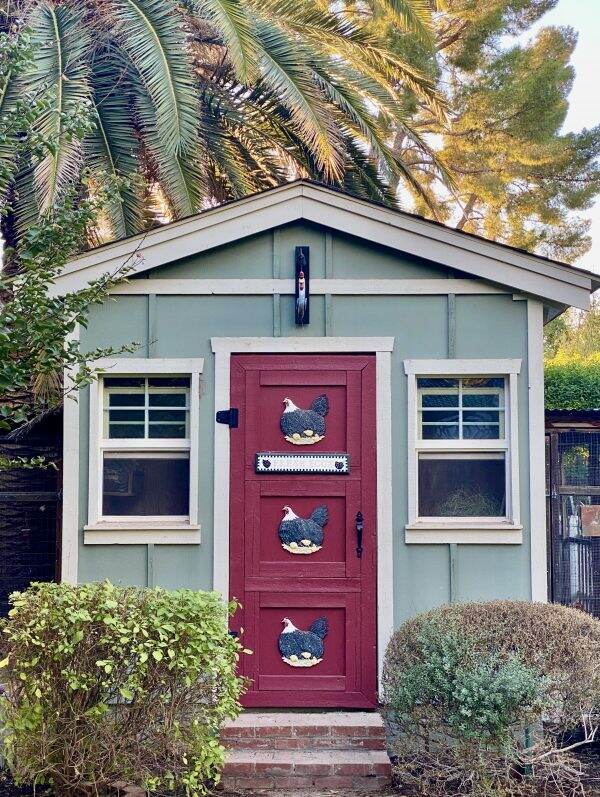
Our Hen house
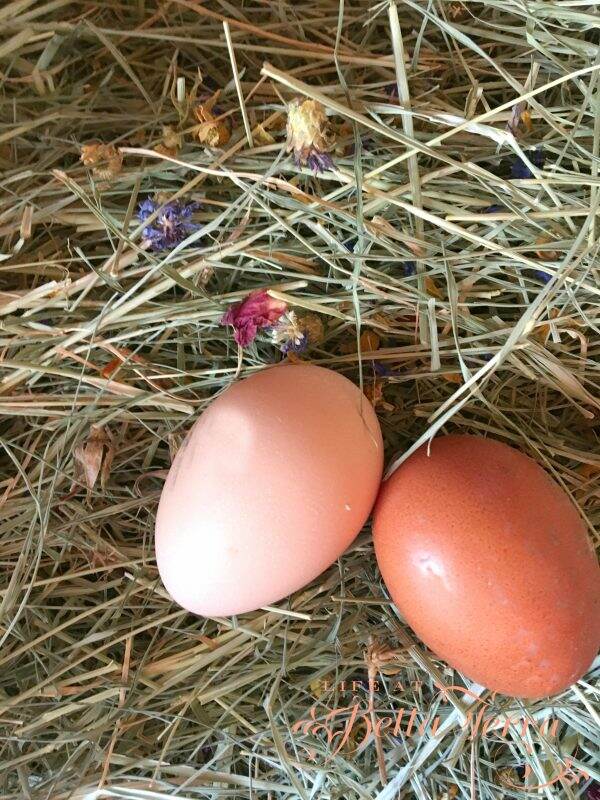
We have several chickens in our hen house, and those gals are still laying quite a few eggs even during the heat of the summer. When the hen lays the egg, it comes out with a wet coating that dries instantly. This coating is called the “bloom”.
Fresh eggs
The bloom is the first line of defense in keeping air and bacteria out of the porous egg shell. If an egg is washed, the natural barrier is removed, which accelerates decay of the egg.
Unfortunately, commercial egg growers wash their eggs before sending them to market. If you buy eggs at the farmers market or other places other than your local grocery store, you may want to ask if the eggs still have their bloom.
Since we do sell our eggs to friends, I recently had these cute tags made up that I place on the top of each carton. The tag explains that we do not wash our eggs here at Bella Terra, because the bloom keeps the egg fresher longer.
Bloom info
Prior to using the egg, if you wish, you can wash them. Though you don’t need to refrigerate unwashed eggs, we refrigerate our eggs regardless. If you have ever been to other country, you will notice that they do not refrigerate their eggs, but stack them up for sale. I’m guessing that’s because they leave the bloom on.
Hester & Cook have new vinyl floor mats that I am considering. My sweet friend, B.J. owns a few of these (purchased from another source) and she loves them.
Currently my small rugs by the doors by Dash and Albert are looking a bit sad, so maybe this would be a good alternative. Does anyone own a vinyl rug? Thoughts?
When it is 113 degrees, it is very difficult to think ahead to Fall. But we are starting to see more autumn posts and inspiration, as Back to School is right around the corner. Yvonne from Stone Gable just shared a lovely post full of fall decorating ideas. Her photos are stunning and you can see it here.
A few posts ago I stated my desire to have a care free summer. Well, that certainly hasn’t been the case. In addition to being absolutely swamped with absorbing an entire household from my aunt, I spend countless volunteer hours on our neighborhood association board. It’s been a bit stressful and I am praying for it all to settle down soon. My therapy is being in the kitchen and with 60 lbs. of Roma tomatoes and a sink filled with fresh basil, it’s apron time for me this weekend.
If you missed any of my posts this week, you can find them here:
Have a happy one, my friends. And stay safe out there.
If you enjoy this post, please feel free to share on Pinterest. And you can follow me too @lifeatbellaterra.
Room by Room~Front Hall
|
View from the upstairs landing to the front hall
Welcome to the Room by Room series where I feature one room of our historic home in detail. Whether you call it a foyer, entryway or front hall, this is the area where you enter our home after you step through the front door. We are so blessed that this space is a good size ~ 12 feet by 16 feet.
The Front Door
Outside of Front Door
I do believe this door is original to our home which is nearly 110 years old. This 6 raised panel solid wood door is a generous 4 feet wide and has the original brass hardware and ball tip final hinges. Just a quick note that the topiary cypress trees are faux and can be found here.
Front door inside view-Valentine’s Dinner 2020
On either side of the door are side lights with 6 mullioned sections, which allows the eastern or morning sun into the front hall.
The Staircase
The staircase with sisal runner
Once you cross the front door threshold, you are directly across from the staircase. The front entry acts as the center of a wheel with spokes leading to the several different areas of the house. The staircase leads to the second story and bedroom quarters. The mahogany handrail is worn smooth by many trips up and down the stairs over the past 10 decades. Memories are embedded in that railing and often, when my hand glides down it in the morning, I think of all the other people who have touched it during their lifetimes.
The Living Room
View to the living room
Once inside the front hall, and on your left, the wide opening to the living room gives you a glimpse of many original features, like the coffered ceiling. To read more about our living room, click here.
The Dining Room
View to the dining room
Off to the right, opposite the living room, is the entrance into the dining room. During the home’s restoration, we discovered original pocket doors hidden in the walls. What a find!
Pocket Doors discovered during restoration
The Powder Room
Adjacent to the staircase are two 5 panel doors~one leading to the small powder room; the other to the hall closet.
Doors to powder room and hall closet
Before the restoration, this powder room was hardly functional. I recall a toilet seat with a celestial horoscope design on it and a full size vanity. It was impossible to sit without bumping your knees against the sink. However, we did keep the original push button toilet which allows for a nice hearty flush.
Since this room is so small, a tiny Kallista sink and custom scaled-down vanity is designed for the space.
A peek into the powder room
Hall Closet
The other door is the hall coat closet (funny as we rarely wear coats here in Phoenix) that serves as a storage closet for many of my linens.
Hall closet is storage for tablecloths/napkins
To see more fun storage tips and information on this closet, like a pulley system for lampshades, click on my post about this odd-sized closet here.
Hidden Storage
Hidden storage
Another very unique feature in the front hall is the hidden space under the staircase. Not only is there a large area to store all my pillows and table leaves, but there is easy access to the powder room plumbing. On a rope and pulley system, the raised panel slides down below the floor.
To see more about this unusual yet clever space, click here.
Hall Table
Petticoat or Pier table
The burl wood hall table with the mirror below is something I always refer to as a petticoat table. According to the Clermont State Historical Site, the reason behind referring to this as a petticoat table a myth. According the story, these mirrors are called “petticoat mirrors” and are installed to allow ladies to check to make sure that their petticoats were not showing beneath their skirts. Often located in hallways, where a woman would be entering or leaving a house, it seems sensible.
Mirror inserted in table
However, this is called a pier table. The purpose of the mirrors is decorative. Reflecting light around a room on highly-polished surfaces, including mirrors, glass, crystal pendants on chandeliers, or fine wood surfaces, was a way of demonstrating wealth.
Regardless whether it is a petticoat or pier table, I have never seen another one like it and I have no idea how old it is.
Other Unique Features
Original brass vents
Our home did not have any central air conditioning, but we did utilize the existing heating vents to retrofit the house with a modern heating and cooling system. The beautiful heating grates had been painted over in dated shades of pastel blue and pink. In order to bring them back to their original beauty, we found a resource to brass plate them.
The hardwood floor is original Canadian beech and is so solid and sturdy.
Architectural details
There are some interesting architectural details only found in the front hall. Angular corbels and trim detail delineates the transition from the hall and staircase unique.
New light fixture
Much to our dismay, the previous owners took all the original light fixtures. Selecting the right scale and style is a bit challenging, but this one works. The crystals tie into the much more elegant chandelier in the adjacent dining room. I cannot recall the resource for this.
Cross Stitch Prayer
Hard to believe that I did this cross stitch over 43 years ago…yikes. It hangs in our front hall, where we strive to open our doors to joy and love.
Front Hall table; flowers from @thebouqs.com
In the center of the front hall is a carved antique small drop leaf table. Typically I like to have fresh flowers and candles on this table. Our house rule is that the first 3 rooms (living room, dining room and front hall) of the house remain clean at all times. The rest of the house is fair game!
Thank you for joining me today for another episode of Room by Room. Have a happy Wednesday! Today I am picking up 60 lbs. of Roma tomatoes~you know what I’ll be doing this weekend!
Dividing Irises
|
Bearded Iris
In our USDA planting zone (9b), the best time to divide iris rhizomes is this time of year. Established plants need to be divided every third or fourth year or whenever the clumps become crowded and flowering decreases. This is best done in August after flower stalks have died back. I can honestly say that dividing iris in the summer heat is not a fun thing to do.
Bearded Iris
As you know, once you buy a property it is fun to go through the seasons to see what will bloom in your yard. Since our property was a major restoration construction site for 3 years, large portions of the landscaping have been re-designed. However, many plants/trees that were planted by previous owners over the last 100+ years still remain.
An Overgrow Bed of Irises
The front bed is dense with iris
A section of our landscaping bed nearest the street is chock-a-block full of a smaller white iris. I have no idea who or when these irises were planted. Since we have been living here for 20 years, this iris bed is in dire need of attention. It is a cluttered mess.
Since the original rhizome (the “mother”) will produce several offshoot rhizomes you can only imagine how entangled this planting bed is currently. Dividing them gives them space to grow and flower.
My bulb garden
If you are new to my blog, two years ago I did create a separate bulb garden on the south side of our parcel. The hope is to divide these irises and place some of them in the newer bulb garden. To see my bulb garden project, click here.
It’s impossible to garden here without a hat, water bottle and since we’ve had so much rain, a mosquito repellent. I place a tarp down so I can sort and separate the rhizomes.
Using a pitchfork to gently lift the rhizomes and roots, I quickly realize that this will be a difficult project. As stated earlier, dividing irises should take place every 3-4 years. Since nothing has been done in the past 20 years, these rhizomes are firmly embedded, so much so, that I bend the tine of the pitchfork.
Parts of the Iris
You will quickly see the rhizome protruding from the bottom of the iris fan. The roots hang freely below. In the picture above you can see how long the rhizome has grown.
Digging up rhizomes
Condition of the Rhizome
After carefully releasing several iris, I am ready to prepare them for replanting. First I check the condition of the rhizome. If any parts are rotted or showing signs of extensive infestation, I will not replant. However, if just the end or tip has decay, you can cut off the bad areas.
Rotted parts of the rhizome
In order to determine the condition of the rhizome, I place them in a bucket of water to wash off the excess dirt. Here I can evaluate the condition, length and hardiness of the rhizome.
Washing rhizome
Many of the rhizomes are in big clumps and others are just long and linear. Separate these rhizomes from the mother with a sharp knife and discard of the mother, as it will no longer produce blooms. You can break apart the clumps and trim the rhizome to approximately 3-4 inches, using a sharp, clean knife or garden shears (found here).
Cut the rhizome to 3-4 inches in length
For the rhizomes you decide to keep, cut the leaf fans back so they’re about four to six inches long. This helps the plant focus on growing roots before winter.
Trim the fan to 4-6 inches
Replanting
To plant, dig a shallow hole and create a mound in the middle where the rhizome will sit. Place the rhizome on the mound with the roots in your hole. Cover the roots and then place a thin layer of soil over the rhizome. You want the rhizome itself to sit just below the surface, lightly covered in soil. Push any errant roots under the soil with your finger.
It’s easy to make the mistake of planting irises too deeply. The rhizomes of these plants should be partially exposed to the elements, or thinly covered with soil in hot climates. If they’re buried too deeply, they won’t do well.
Newly planted iris
Since the long overdue extraction of the rhizomes is rather difficult, I still have half a bed to go. But several are now clean and freshly planted in the ground. While digging up the rhizomes, I also discover many miscellaneous bulbs. I am not sure if they are freesias or paperwhite narcissus so it will be fun to see what comes up in the Spring.
My bulb garden in 2021
Irises in Phoenix bloom around Easter time. I plan to fertilize all my bulbs and rhizomes in January, February and March. Hopefully I will have an abundant crop of spring blooms to share with you. Check your area to see when it is the ideal time for you to plant and divide irises.
Happy Gardening! Make sure you keep reading to see what my other gardening friends are up to this month. It is such fun to see their gardens in other parts of the country!
I would love for you to follow me on Pinterest. Please share this pin if you enjoy my post!
Now Off to the Gardening Blog Hop
Well, since my cutting garden is a bit of a failure, I am excited to read Kim from Shiplap and Shells post about 9 Common Cut Flower Garden Challenges and Solutions. See it here.
Shiplap and Shells
Chas from Chas Crazy Creations is sharing When to Harvest Your Garden Vegetables here.
Chas Crazy Creations
Stacy from Bricks and Blooms is enjoying her flower garden and let’s us peek into Gardening Zone 6a Summer Flowers here.
Bricks ‘n Blooms
Ways to Look and Feel Younger
|
Gardening is therapeutic
Let’s face it. We all get older. But don’t you find it interesting that there are people in their 70s that have more energy and joie de vivre than some people in their 40s? What is the secret to living life to its fullest and looking good in the meantime. I certainly don’t have all the answers but here are some ways I try to look and feel younger. Making an effort to improve your health, attitude, appearance and spiritual connections will enhance your life.
Posture and Shrinking
Working on your posture is W.O.R.K. However, if you do not, you will eventually be stooped over, look shorter and older.
There are several reasons why a person may lose some height as they age: osteoporosis, flattening of the feet, dehydration (which can cause our spinal discs to compress), stooped posture due to loss of core muscle strength.
The good news is that you can improve your posture and slow down shrinkage by exercising and eating right. Calcium and Vitamin D are key to building strong and healthy bones – but vitamin C and vitamin K also play an important role in bone health. Strength exercises are a must, whether lifting weights, playing tennis, running or jogging, as they all contribute to bone health.
Bad habits. Photo from 123RF
Bad habits that contribute to shrinking include slouching, a lack of physical activity, smoking, drinking alcohol or caffeine excessively, extreme dieting, taking steroids and poor nutrition.
Two years ago I had my first bone scan and I was surprised to find out that I have some bone density loss. Actually, it made me mad because at that time I was working out 6 days per week. So I consulted with my chiropractor, started using bone building supplements and changed my workout routine. The latest bone density scan test results show a big improvement~much to the surprise of my doctor.
Please check with your doctor before taking any supplements. I take one Strontium every morning and 2 Bone Builder Forte at night.
Sitting is the New Smoking
Photo from Posturite.co.uk
Get up and move. I try to limit the time I spend at my computer writing this blog, and I am always trying to practice good sitting posture. When I walk, I squeeze my shoulders together and engage my gluts, while holding in my abdomen. This very hard task isn’t something I am yet to retain throughout my walk, but I keep trying!
I cannot say enough about Pilates as I take a one hour class twice a week. This gets me to move in ways I typically wouldn’t and it is part of my weekly exercise program. Pilates keeps your core very strong which also helps with your posture. And it’s a wonderful community of like-minded women, who are trying to age the best way we can.
Keep Hydrated
Pretty ways to help me drink more water
Dehydration negatively affects the body in several ways. It is the main cause of heat exhaustion. It also leads to a loss of strength and stamina. Chronic dehydration will lead to kidney problems. For some reason, I have not been drinking enough water. Please join me in trying to drink half your body weight in ounces every day. There is a quick way to tell if you are not drinking enough. Check your urine. It should be a light straw color. And being hydrated plumps out the wrinkles!
Care for your skin and hair
Petting dogs lowers your blood pressure
Dry skin and dull hair just makes you looks older. There are so many products available at all different price points. Invest in a good haircut. Keep yourself groomed. It only takes a few minutes to tidy yourself up if your are going out in public. You will feel better and as a result, look better too. To see my skin care rituals, click here. Haircut by Roscoe at Pucci Salon.
Are you Happy?
We all look much better if we are smiling. Are you happy? If not, what can you do to add happiness to your life. Though life can certainly throw you curve balls, happiness is a choice.
My friend, Chloe recently sent me this quote from Pavana Reddy. “Your soul is attracted to people the same way flowers are attracted to the sun. Surround yourself only with those who want to see you grow”.
Quite honestly, dump those people in your life that are energy vampires. Life is too short to be robbed of your spiritual essence. Be happy. Keep smiling. To see my post about the Importance of Smiling, click here.
Limit your Media time
Photo from TMS Center, Lehigh, PA
I no longer watch the news. It is the best thing I have done this year to promote positivity in my life. And I don’t care if I am not informed. So much of the news isn’t really news, but opinions and if something is monumental, I will hear about it. The benefits are enormous as I am no longer spending a few hours a day watching television and getting frustrated. Now, if I do watch television at the end of the day, it’s something happy before I head to bed.
Getting off of my smartphone is another goal of mine. There are some benefits with checking in a few times a day but if you find yourself spending hours watching other people’s lives, then it may be time to put the phone down and use that time for yourself. Studies show a correlation between social media and depression. For more information on this, click here.
Care for Others
Photo from Benchmark One
If you focus your efforts on helping others, it’s amazing how good you will feel. Pick up the phone and call a friend. Help a neighbor or an animal. Get involved in your community. So many people need a helping hand and doing so will take your mind off your own problems and give you a sense of well being.
There are so many things we can do to increase our happiness and health. One of my top blog posts of all time, 10 Tips on Aging Well is full of even more information. See it here.
I am constantly trying to be a better, kinder, and more interesting person. My goal is to be active and as healthy as I can be until the day I die. Please share any tips you have on staying young at heart. We need to keep motivating each other!
Happy Wednesday, sweet friends!
If you enjoy this post, please share on Pinterest.