1

It’s All in the Details

The Willetta project is moving along and I’ve got my fingers crossed that it will be completed by March 25.  Right now, we are putting all the pieces of the puzzle back-the kitchen cabinets, countertops, appliances, tiling, final window and door trim, and final paint.

The last 5% of any renovation/restoration is the most important.  Generally that’s when your work crew is looking to their next job and may be losing interest.  It’s the last chapter that requires the most attention to detail.  Picking the right faucet, cabinet hardware, the door knobs is what I call the house’s jewelry….it’s what people notice.  Even though most of the investment is behind the walls in the form of new electricity, plumbing, HVAC, it’s the details that win over a potential new owner.

The Willetta house had many original details that we have chosen to preserve.  However, much of it was covered in layers upon layers of paint or deterioration.

These solid brass door hinges with the ball pin are very expensive to replace, if you can find them at all.  My husband accepted the task of cleaning all of the hardware from the house.  In our relationship, I’m the more organic one-never wanting to use chemicals and exhausting natural ways to accomplish tasks.

I have an old crock pot I dug out of the basement and read that you can “cook” hardware overnight to loosen the gunked up paint. Note the dents and the rust….after using this for cleaning hardware do not prepare food in it…

I added some dish soap and turned it on high and left it on the counter in the kitchen overnight. Not the best idea because the smell the next morning in the kitchen wasn’t very pleasant-a dusty, stale, old smell.  Just what you’d expect from boiling decades of old paint from hardware.

The paint was loosened up quite a bit, however, my husband thinks that soaking the hardware in the chemicals work better.  He used Klean Strip Stripper for wood, metal and masonry and Brasso Metal Polish.

At least one has choices!

All the interior doors have skeleton keys and mortise locks–of course there are no keys to be found, but the octogonal hardware is so attractive and matches the plate behind the glass door knobs.

I can’t wait to show you the finished house at Willetta~~it is such a gem and worthy of all this tedious work.  Big hugs to Scott for cleaning up the “jewelry”!


Eating Healthy

Yesterday morning,  I noticed so many people photographing their breakfast and sharing it on Instagram.  So I was inspired to do the same.

I made a fresh egg cooked inside a slice of 7 sprouted grains bread, seasoned with fresh thyme, sea salt and pepper. I toasted the bread in olive oil first, then cut out the hole and plopped in the egg.

Since I had my cup of coffee earlier, I made hot matcha tea with hazelnut/cashew milk (see my post on making nut milk) and topped with cinnamon. A delicious and nutritious breakfast, utilizing simple ingredients.

The beginning of a new year is always a good reason to improve upon your health and diet. Though, generally, I consider myself to eat nutritious foods, I find myself skipping meals, eating on the run, all because I say I’m too busy.  As a result, I believe my metabolism is slower than it should be.  After years of creating and preparing meals and snacks for my family, I found myself hardly cooking since my oldest 2 went off to college.  My teenage daughter is starving at 3:00 p.m. after school and that’s when she has her big meal.  By 6:00 p.m. no one is hungry and at that point, why bother?

I was lacking imagination and preparing the same things over and over again and/or relying on take out foods when I was too pooped to cook. And of course, there was that glass (or two or three) of wine nearly every night…..

Adding a few LBs over the holidays didn’t help, so I was very excited to discover that a blogger I admire, Monique from Ambitious Kitchen (and others) put together a healthy eating/exercise plan called Healthy Glow.


It’s a 6-week program and for a mere $64 you can download all the recipes, shopping lists, eating guide, etc.  I thought, if nothing else, I may find some great new recipes.  And they have a 2-day preview of the plan that is free.

I personally like the shopping list ~~ so every Saturday we hit the grocery store and get all the items we need for the next week of recipes.  The serving size varies so you can increase or decrease the recipe (or make more and freeze it).  The Healthy Glow team make this a very easy plan to follow.  They also encourage you to dine out once a week and add a glass of wine too, if you’d like.

The coveted Nutella Stuffed Brown Butter Sea Salt Chocolate Chip Cookie recipe (that I made all the time for my son’s crew team) was created by Monique so I know she is able to eat healthy yet enjoy a variety of foods at the same time.

Even though the program says it’s designed for women, I’ve been preparing the foods for my husband too.  He has been adding other foods to satisfy his metabolic needs.  He has enjoyed the meals and especially looks forward to the diverse breakfast options (many made the night before and very appreciated on hectic mornings).

We have completed the first 6 weeks and have begun our 2nd round.  I felt like I was eating LOTS of food, but I didn’t gain a pound, actually I lost a few.  For the 2nd round, I am adding the nutritional information to the LOSE IT! app.  I didn’t realize that the nutritional information was in the packet (last time)  but it’s nice to know there is a good balance of protein, carbohydrates and fats.

I haven’t done any of their exercise recommendations because I already have a weekly routine.  But who knows?  It’s nice to have a fall back position if I become stuck in my current regime.

In summary, I’ve really enjoyed the recipes and eating in a different way.  Knowing what you will be having for each meal is so much easier than spending time staring at an open refrigerator door and wondering what to make for breakfast, lunch and dinner.

The egg in toast breakfast was inspired by a recipe in Week 2 of the Healthy Glow plan called Egg in a Frame.   It was absolutely yummy.  Calories: 307; Fat: 20.5 g; Carbohydrates: 22.8g; Sugar: 2.2g; Fiber: 2.8 g and Protein: 9.5 g.

Wishing you a healthy week!


DIY Girls’ Night Out

My friend and neighbor, Dawn, invited me to a spontaneous DIY Girls’ Night Out at Porter Barn Wood in Phoenix.  I have to chuckle because I don’t believe I’ve ever gone on a Girls’ Night Out.  I am so swamped that when I do have a moment, I tend to spend it here at Bella Terra.  But, Dawn is such a spectacular person with a large heart and the event, which included making a sign,  sounded quite fun.

Here is the adorable young family behind Porter Barn Wood.  Thomas is a woodworker, metalworker, and plays in a Bluegrass band. They provide reclaimed wood, slab lumber, antiques, and many other things as well as provide woodworking, milling, blacksmithing and just about anything you need.  Plus they have classes that include creating a barn wood wall to dinner and bluegrass concerts ( events calendar).

With the popularity of barn wood doors and the farm house style, this is the place to go.  They own this facility in downtown Phoenix and  the event was held here last Friday night.

When we arrive, The Coronado, a restaurant located on N. 7th Street, was serving wine and appetizers while we made our signs. This restaurant specializes in vegetarian and vegan dishes but with a Cordon Bleu spin.

In typical “barn” like fashion, the wine was served in mason jars….love that!  The roasted veggies, hummus and homemade tortilla chips were delicious (and healthy)!

Porter Barn Wood made the frames and the background wood was painted white.  We sat at picnic tables awaiting instruction.

After peeling off the back side of the stencil, we carefully centered it on our frames.

We then peeled off the front clear material, exposing the stencil to be painted.  We were able to choose the colors we wanted and applied the acrylic paint with foam brushes.

Dawn chose a gray paint for part of her stencil and then gold for the rest.

While our signs dried, dinner was served.  Instead of renting long tables with white table cloths, Thomas decided that morning (!) to plane down large reclaimed trees and created 3 16 foot lengths of wood to make the tables.  The smell of fresh cut wood and the beauty of the tree-tables made dinner extra special (and I believe these tables are for sale!).

Dinner was amazing.  Liam Murtagh, one of the owners of The Coronado, introduced each course and gave the history behind all the ingredients.  The first course was a beautifully presented Farm Salad utilizing ingredients from local farms (arugula from Blue Sky Organic Farms; radishes from Agave Farms, tangelos from FarmYard) with a black pepper agave vinaigrette.

The main course was Mashed Garlic Potatoes under a Tepary (heirloom) Bean Croquette with Rosemary Roasted Tomatoes and a Vegan Demi Glas.

Of course we had a different wine with each course while listening to a fabulous solo artist Hannah Risley,  a talented 18-year old singer and guitarist.

I am still dreaming about dessert.  Who knew that vegan/vegetarian food could be so delicious?  We had a Mesquite Flour Snickerdoodle with dark chocolate with Aqua Faba meringue (this was so delicious I wanted to lick my plate) with Candied Hibiscus.

During dinner we had the chance to sit near and chat with two wonderful young women~~~all in all, it was a spectacular way to spend a Friday night with a sweet friend.  Also, I was so impressed with Thomas and Liam, as young business owners who are so passionate about what they are doing.  They are such a great addition to our growing downtown area.

Plus I got to take home my very own sign!  Maybe this Girls’ Night Out thing is worth pursuing!!!!

Thank you, Dawn, for inviting me!


Save

Save

Save

Save

Save

Save

Save

Save

Save


Love is in the Air

I wanted to make something for my husband and the wonderful crew I have at the Willetta restoration.  One of my husband’s favorite desserts is homemade cherry pie.  I did think about making a whole one but we’ve been trying to eat healthy since the first of the year and I knew a huge pie would be a bad, albeit delicious temptation for both of us.

So I decided to keep the theme but on a smaller scale.  In a previous post, I shared my favorite pie crust recipe–which is super easy to make (especially in a Cuisinart).  After letting the pie crust dough chill, I rolled it out and found the largest heart-shaped cookie cutter I had.

I added canned (partially groaning here) cherry pie filling.  Normally I like fresh cherries but they are not in season so sometimes you need to improvise.

I wet the edges of the heart with water and added another heart-shaped dough piece.  A small fork served as the perfect tool for sealing the edges.

Next, I brushed the surface with an egg wash (just scrambled an egg) and then pricked the dough for air vents.

Baking was a bit of a challenge because I wasn’t sure how long~~but I set the oven to 375 degrees and started at 10 minutes.  I kept adding time in increments of 3 minutes so my total cook time, in a convection oven, was approximately 20 minutes.  Depending on the size of your cutter, my pie crust dough recipe made 9  4″x4″ hearts.  Lastly, I sprinkled the tops with sugar (used King Arthur’s Sparkling White Sugar).

I’m getting ready to run these down to the job site~~a small sweet surprise for my dedicated crew.  Happy Valentine’s Day!

If you have only one smile in you give it to the people you love.     Maya Angelou


Happy February!

To celebrate the beginning of February, I decided to purchase some roses before the prices increase 3x for Valentine’s Day.  It’s the Connecticut Yankee in me.  I also bought some red carnations.  I think carnations are considered inferior to other flower types, which is unfortunate.    A few years ago I used roses and carnations in a centerpiece I created for a charitable event.  After making 110 centerpieces, I thought I would never want to even look at another rose or carnation, but truly, I like the combination of both flowers with their red tones and textures.  Plus carnations are more affordable than roses and are good fillers.

In looking for a different container, I found an old white milking pail, with rust and all that we purchased for one of our barn sales.

I soaked some floral foam in water.

And then placed the wet foam inside a large Ziploc bag to keep any excess water away from the metal bottom of the pail.

I added the roses first, pushing them into the foam.

Carnations typically come with their petals tightly closed.  With some gentle manipulation, you can get a fuller carnation in a few seconds.

After using the 12 roses and the 12 carnations, the container still needed some filling.  I roamed the yard and clipped some greens to add to the empty spaces.

After the arrangement was completed, I thought I would hang it with a red ribbon on the red front door.  However, the red ribbon and red flowers just got lost against our red door.  Too much red. So I hung it on the side gate which leads to the rose garden.   It really pops against the dark green door!

With our chilly morning temperatures, I expect this will last for quite a while.  Of course, you could easily make this with high quality artificial roses and dry foam as well.  Here is another shot of the milk pail with my trusty companion, our pocket beagle, Sox.

May your February be filled with love and joy!

P.S. Thank you to Megan, my daughter, Elisabeth’s friend for lending her beautiful hands to this photo shoot!

Save


Reflections on the Glenn house remodel

My last remodeling project was probably the one that generated the greatest learning and the most heartache with unexpected challenges.  Before I buy a home, it has to “feel” right.  If you believe that the walls of a home speak to you, then you know what I mean.  I can sense if a home has been filled with love and laughter and I also sense when they don’t.

So when I purchased the Glenn house, I could tell it was well-loved, well-kept, but out-dated.  The house is situated on a small cul-de-sac with 6 other homes.

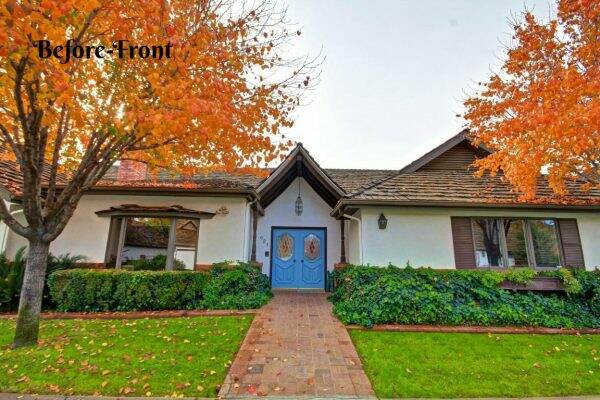
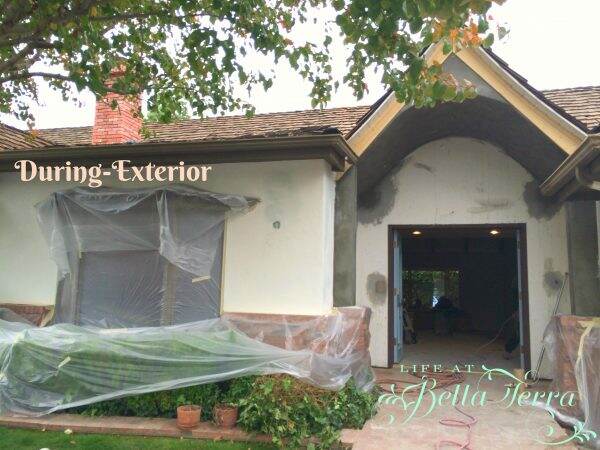
It had relatively nice curb appeal, except for the entrance.  I felt like yodeling every time I entered the front door.  Not sure why it was so Swiss Family Robinson looking, but it made the front doors look diminutive.  The pendant light is the wrong scale. And look at those skinny posts supporting the massive vaulted ceiling….quite odd.

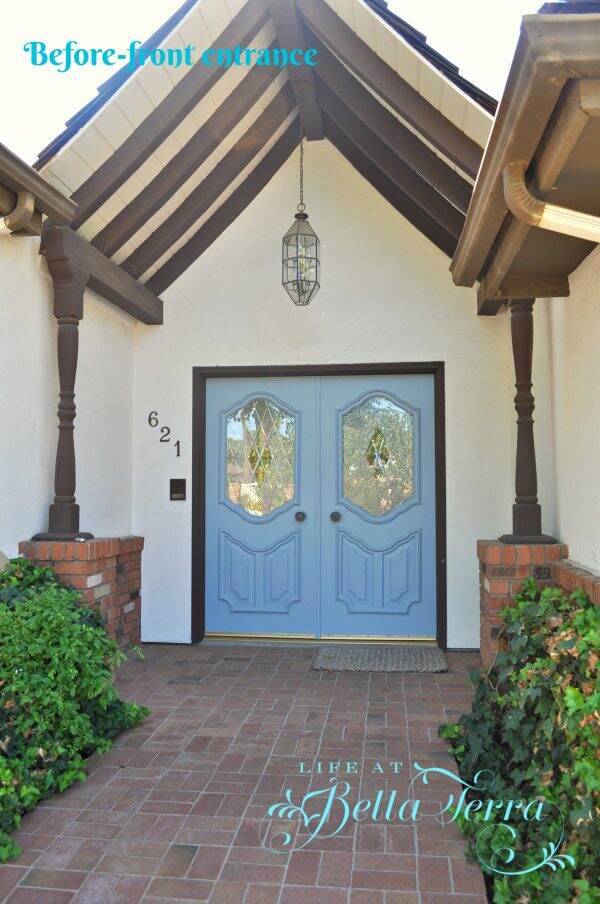
We removed the skinny posts and beams, and created an arched overhang and added more substantial columns.

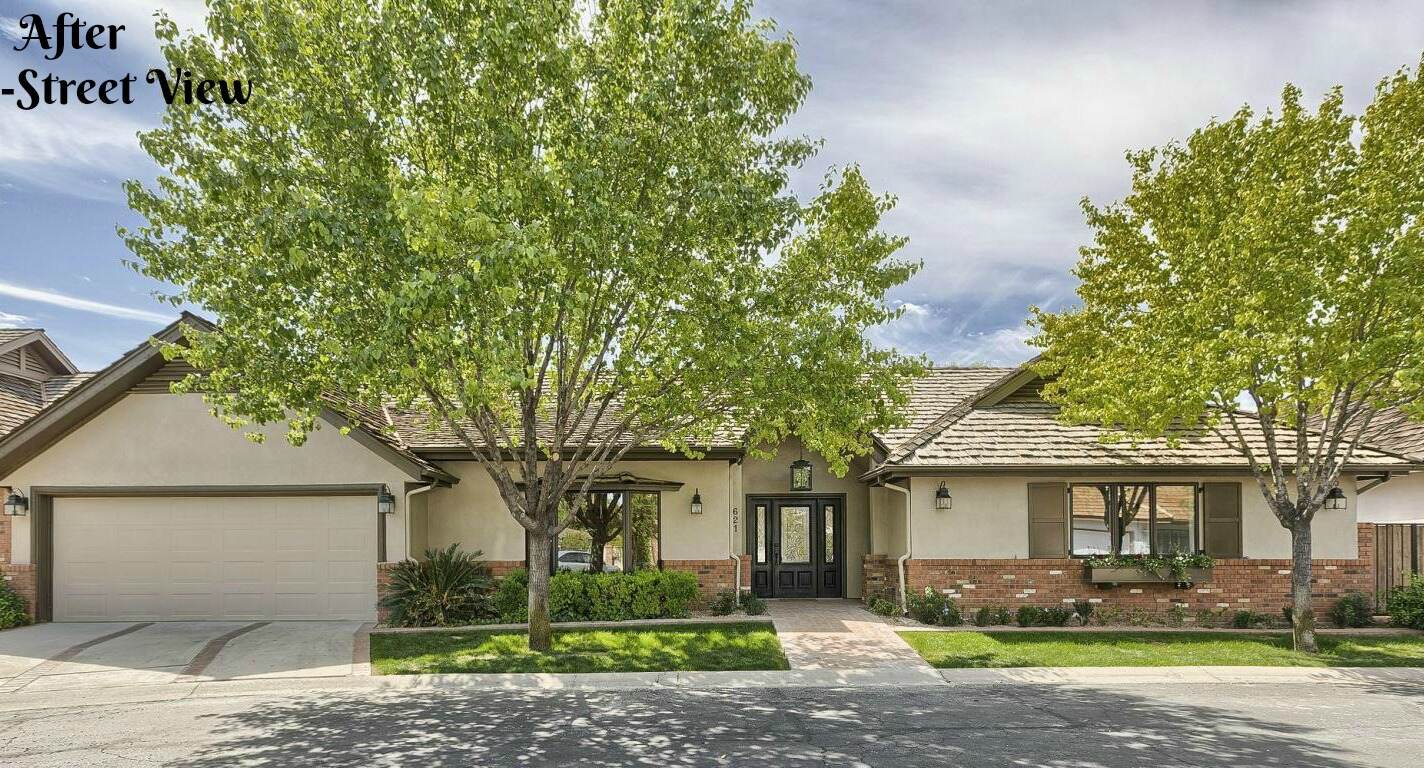
The after….new front doors painted black, new light fixtures, and richer paint colors.  I replaced the overgrown ivy with healthier foundation plantings.

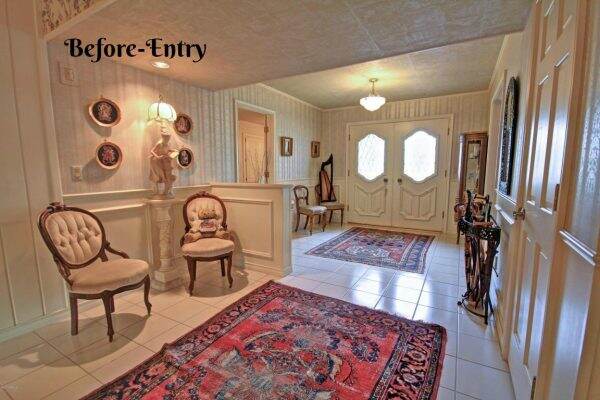
The entry had a low hanging soffit, a pony wall with dated wainscoting and my least favorite, tiled flooring throughout the entire house.

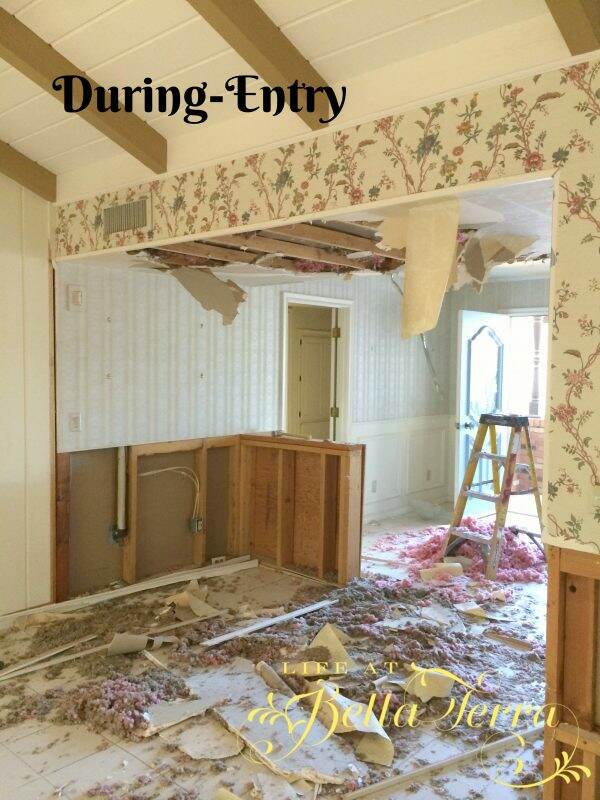
We eliminated the soffit because it interrupted the energy when you first walked into the house.  We also removed the short wall, the floor tile, and the wainscoting.

Here is the new entrance with a clean, elegant updated look with energy efficient LED can lights everywhere.

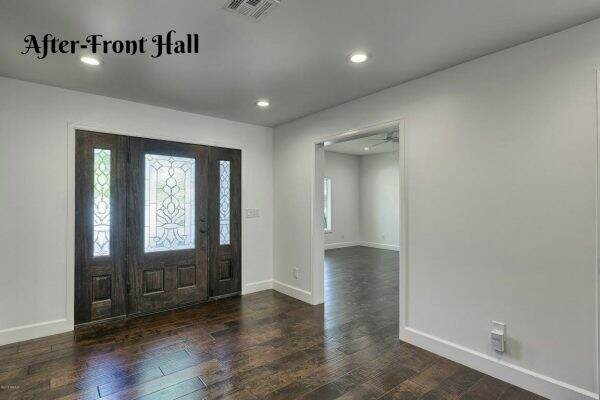
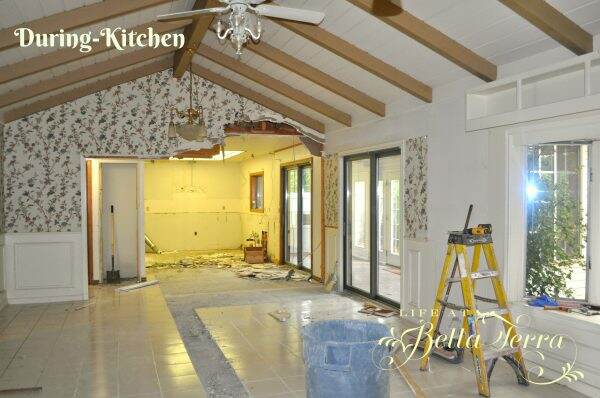
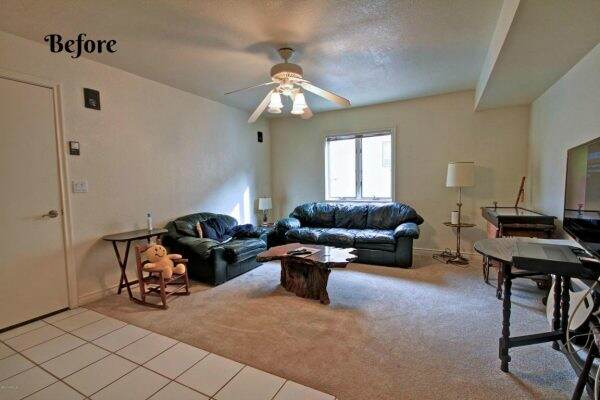
From the entry you walk into a wonderful great room.  At the end is the entrance to the kitchen.  Outside is a small patio area.

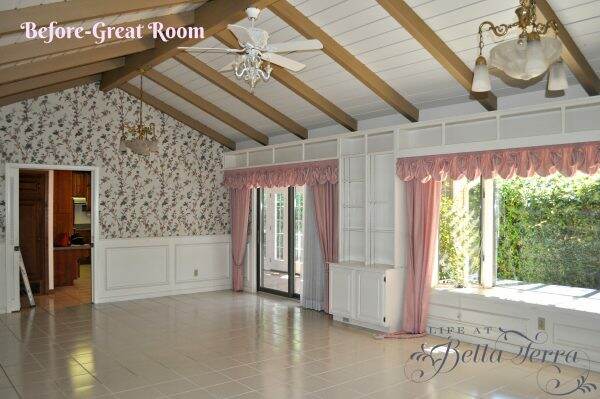
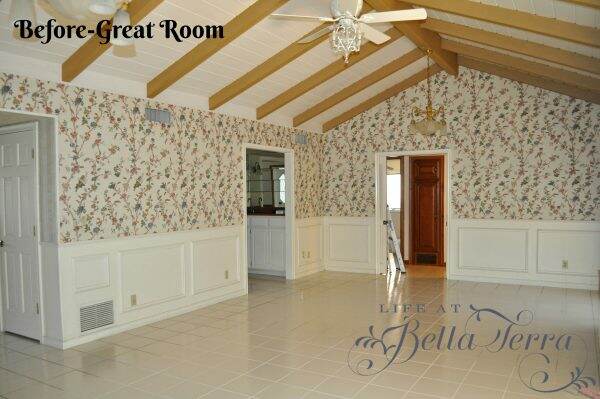
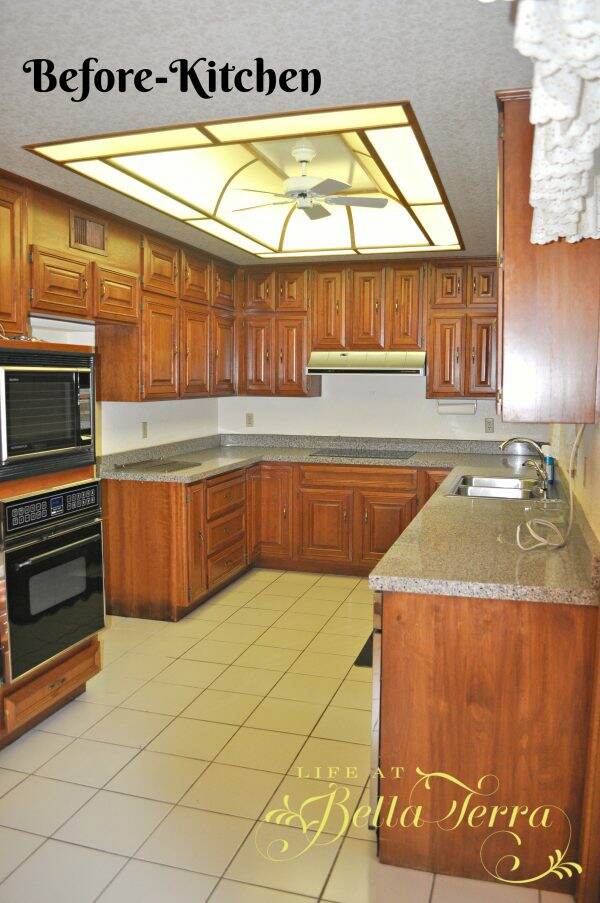
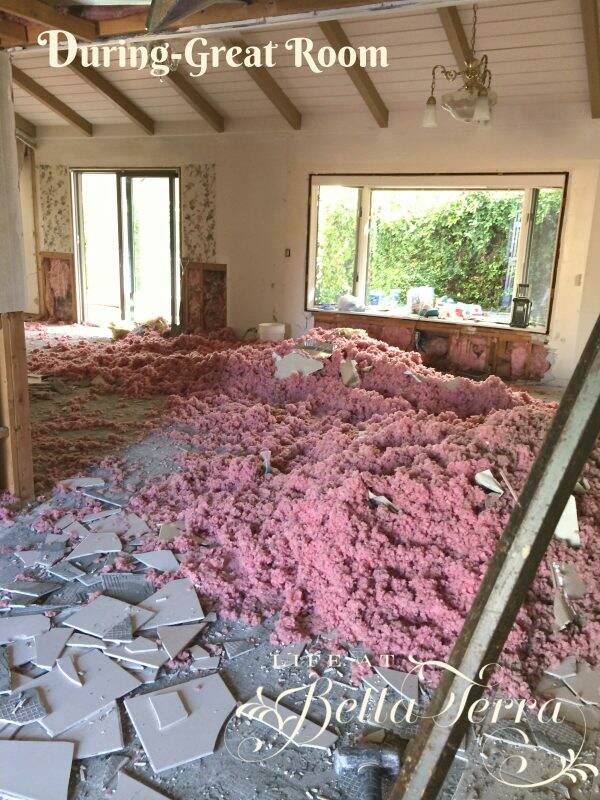
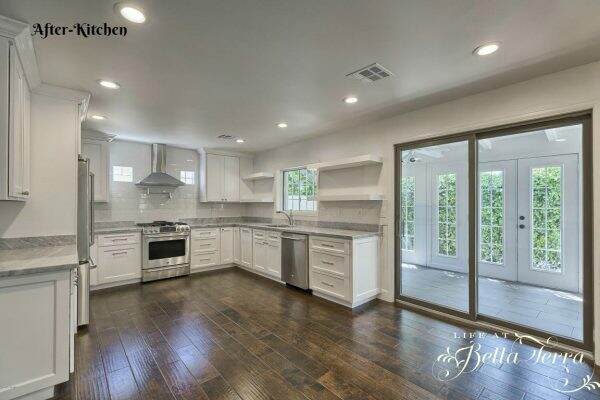
We removed all the built-ins and also took down the wall between the great room and kitchen.  My first intentions were to just remove wallpaper and repaint.  However, the house had a funny smell, which we attributed to its age.  However, in removing the kitchen walls we found a huge rodent infestation and the insulation was saturated with urine and feces.  We ended up removing all the walls, spraying everything with bleach and baking soda, redoing the electrical and plumbing and adding new, clean, fresh smelling drywall!!!!

Every single house I have remodeled has this creepy loose insulation in the attic that is filled with dust and dirt.  It’s a nasty job to remove it all and replace with new insulation, but I do it every time because I can’t stand this stuff.

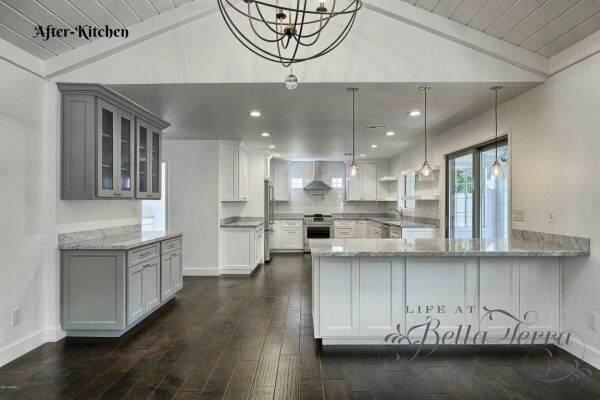
We painted the beams and removed one set of sliding doors and added Anderson casement windows.  The new dark hardwood flooring against the crisp white paint makes for a beautiful contrast.  The stunning new kitchen/great room creates a desirable, contemporary open floor plan.

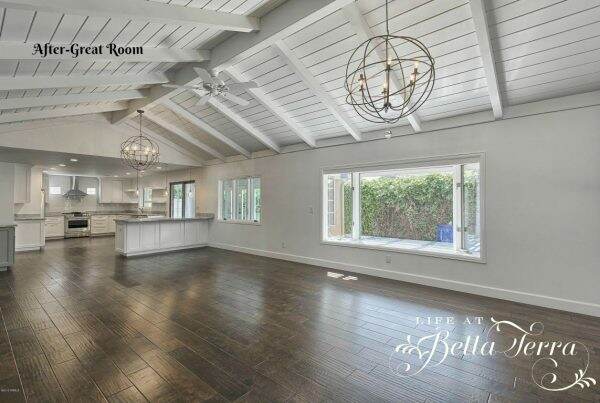
The large chandeliers are from Ballard Designs.  The pendant lights over the peninsula are from Restoration Hardware.

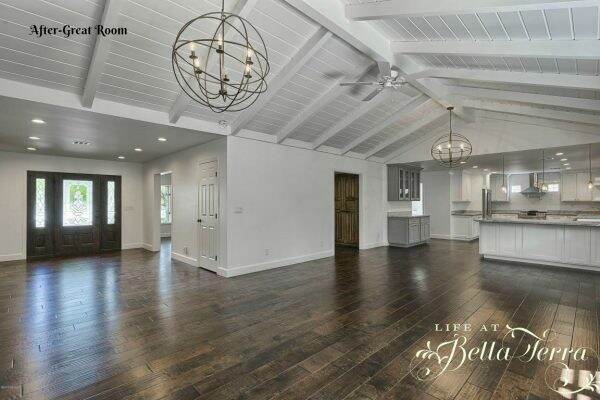
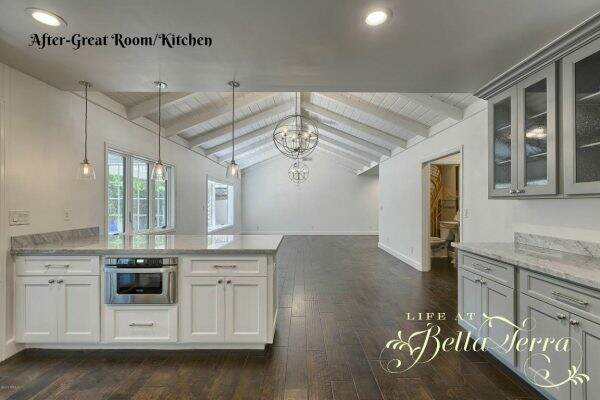
I don’t know how professional photographers do it, but they make the living spaces look so huge.  This room is actually quite reasonable in size vs. the picture. Kitchen cabinets were custom built. Countertops are white Carrera marble.

The powder room……such a small room, yet functional.

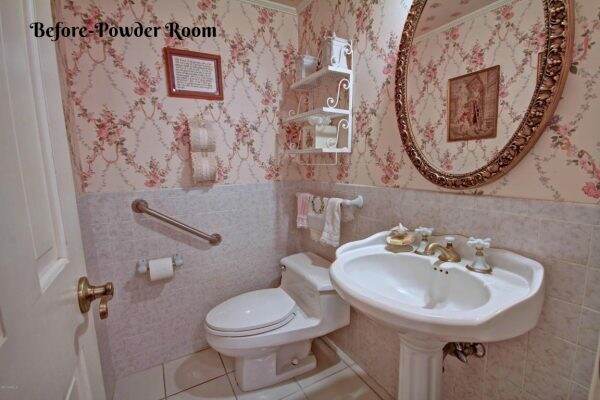
We removed the tile, replaced the fixtures and added this fabulous European wallpaper from Pixers to make the room feel bigger. I love adding a querky touch to each house I remodel.  Light fixture and mirror from Restoration Hardware.

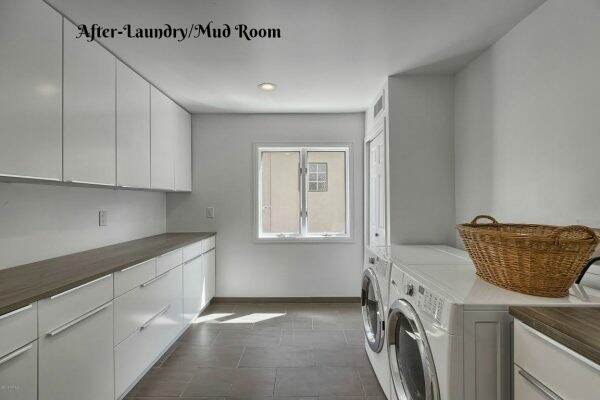
Next to the kitchen, was a den that we walled in and converted to a laundry/mud room.

The cabinets are from IKEA.  Personally, I love their drawer mechanisms and assembly was rather easy.

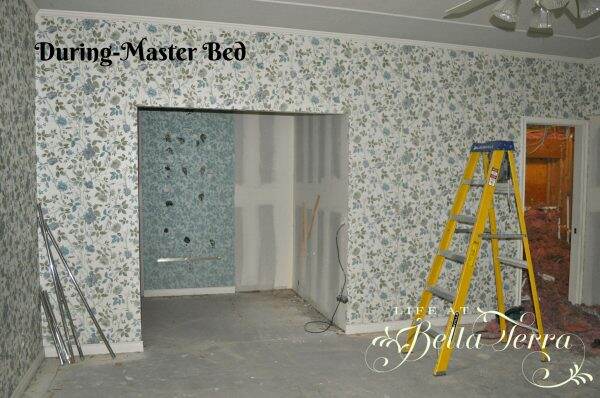
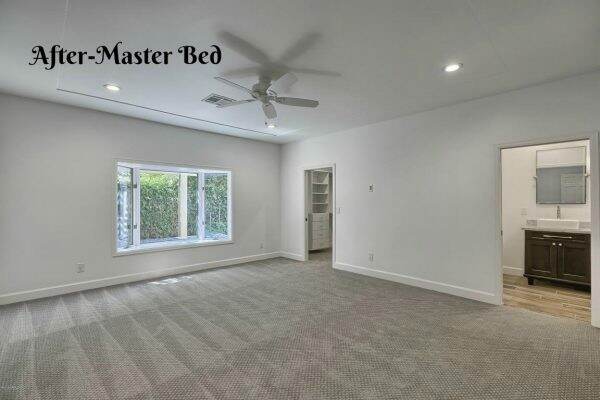
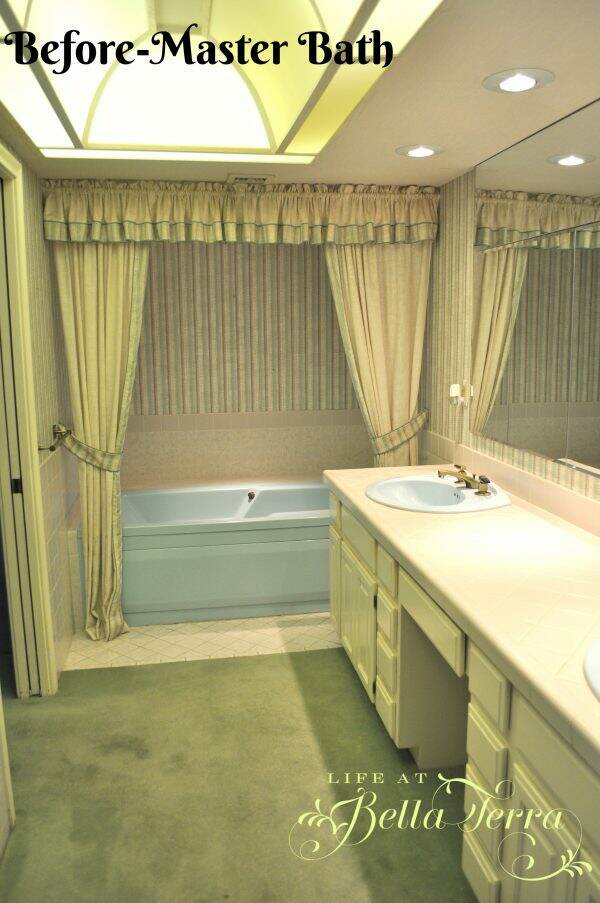
The master bedroom, like the great room, had lots and lots of built-ins and wallpaper.  We removed them and added a real, larger closet by taking some footage from the enormous master bathroom.

The master bathroom was well-equipped but required significant updating. It had what I call a “George Jetson” ceiling just like the kitchen. I am so happy those are no longer in style.

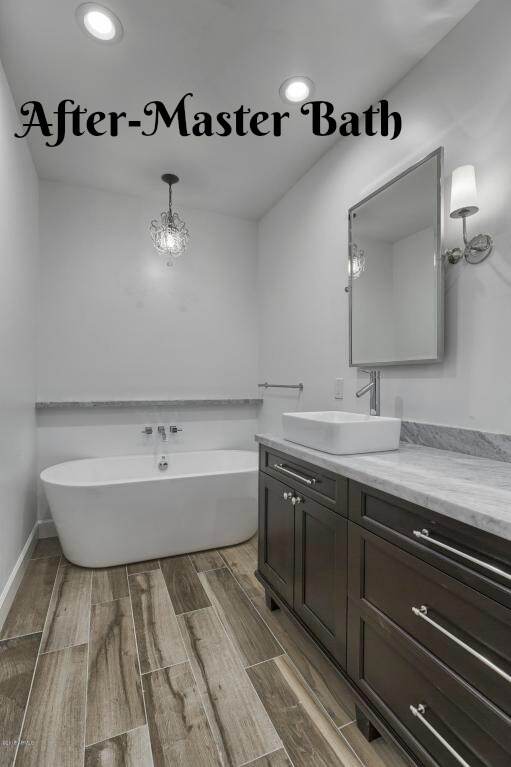
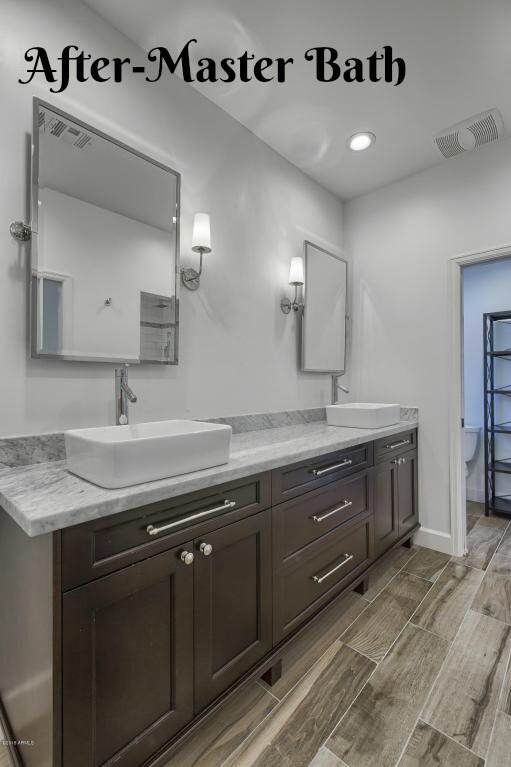
This is the first time I have used tile that looks like wood and I like the effect against the white walls and custom made vanity.  Countertops are Carrera marble.  Bathtub was ordered from Build.com.

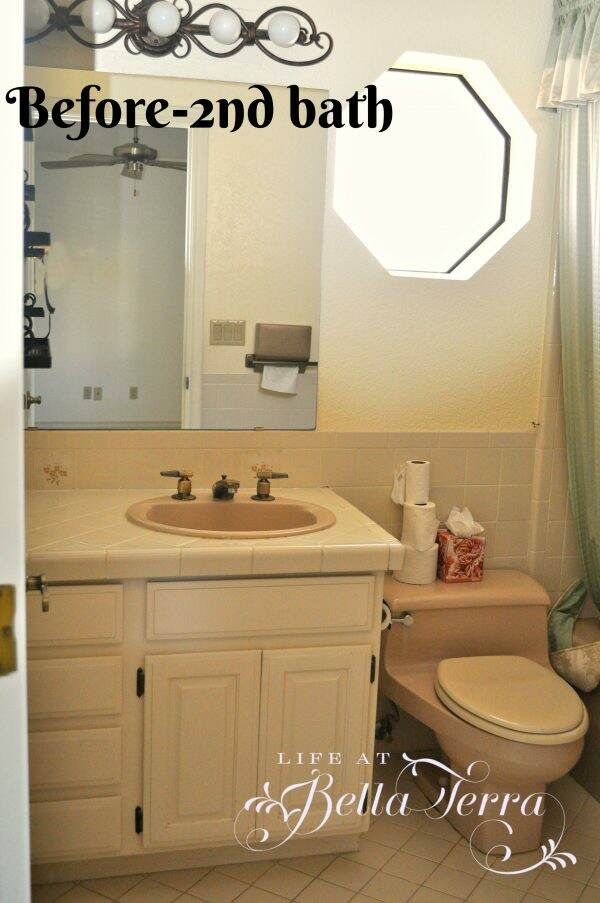
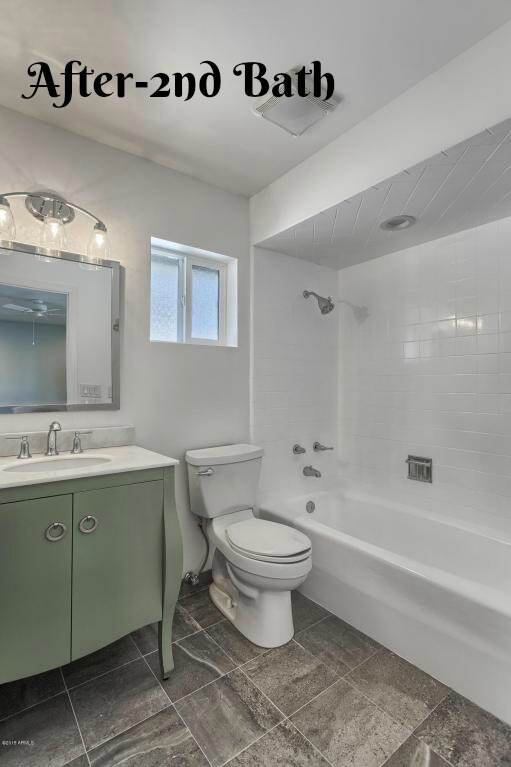
The second bedroom just needed cosmetic work, but the bathroom required a complete overhaul. The hexagon window really date this room which we removed and replaced with an operating one.

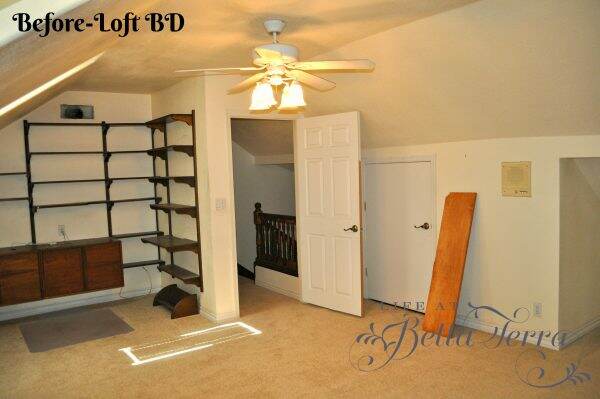
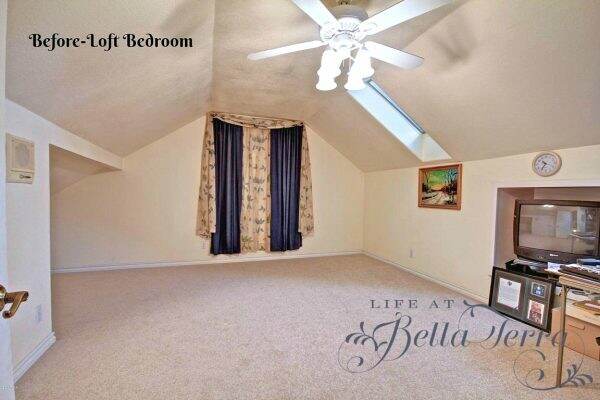
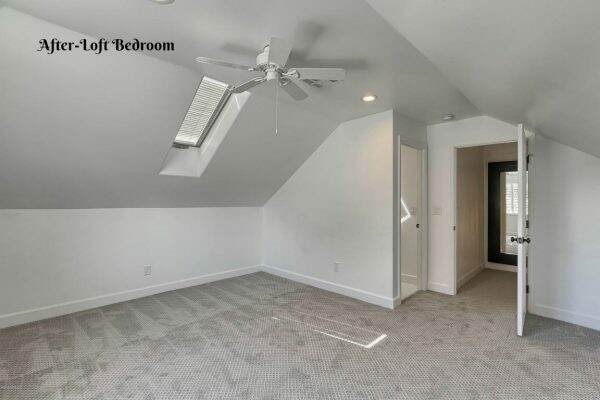
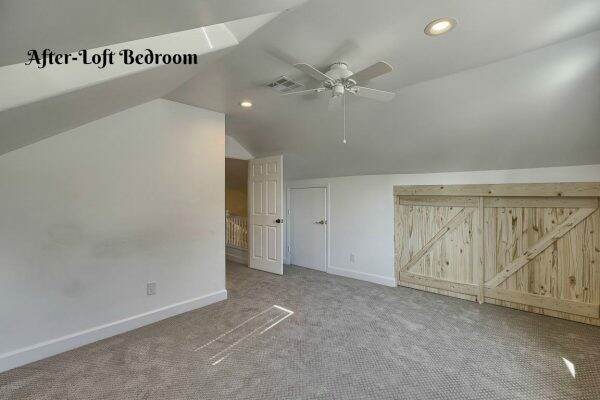
Most of the square footage of the house is on one level.  There is a loft bedroom/office, which is rather large.  We closed in the area with the shelving below and added a new, full bathroom.

Love the curtains.  There is no window behind them!!! However, we did add beautiful casement windows to capture the sky and rooftop views.

My sweet husband made the barn doors to cover the short closet/storage area, which is quite deep under the eaves.

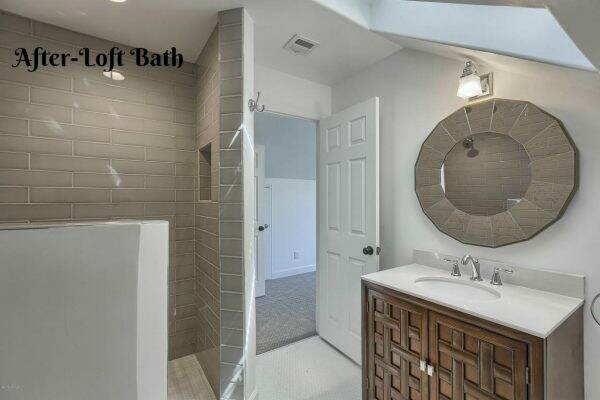
Here’s the new bathroom that we added to the upstairs loft bedroom. At completion, this was a 4 bedroom, 3.5 bath home, all newly redone and sold to happy homeowners.

Many thanks to my dear friend, and realtor, Shelley Caniglia, for finding these treasured homes for me to remodel and restore. There are many more pictures to share and if you would like to see the Glenn project in its completion, click here. 

The professional photographs of the finished home were done by Trevor Smith with Tour Factory.  The “during” photos were done by me long before I even considered doing a blog so I will need some latitude on the quality :). Hope you enjoyed the tour of the Glenn house.  Now back to work on the Willetta restoration!


Save

Save

Save

Save

Save

Save

Save

Save