1

Arranging Flowers

When I was in 11th grade I worked over the Christmas holidays at our local florist, Johnson Flowers and Gifts in Norwich, Connecticut.  In hindsight, I wish I had paid more attention to the ins and outs of flower arranging, but being 17, I’m sure I was more interested in boys vs. blossoms.

Over the last few years I have been asked to create centerpieces for various charitable events.  In 2012, I offered to make 120 centerpieces for my son’s high school fashion show.  I was promised a committee to help, but funny how those things don’t always work out.  To have a professional do it would have been cost prohibitive so I thought, how hard can this be?  I should know by now that when I hear that question in my head, warning signals should go off.

The centerpiece had to include a keepsake item (etched wine bucket) and be in the school colors (red and white). The good news was the event was a success, the centerpieces were perfect and it only took a few weeks for my back to stop aching.

Leading up to the event, I practiced making various flower arrangements of different sizes, flowers, and containers. Since it has been a while since I made a centerpiece that didn’t consist of putting cut flowers in a vase, I was inspired to do so this weekend.

I went to our local Safeway and purchased a dozen white roses, mini hydrangea, white carnations and green spider mums.

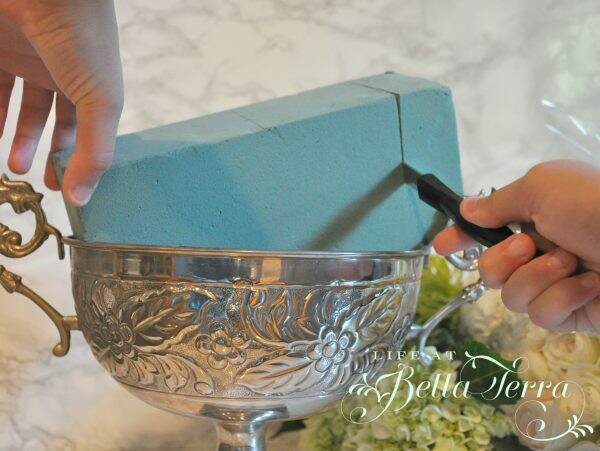
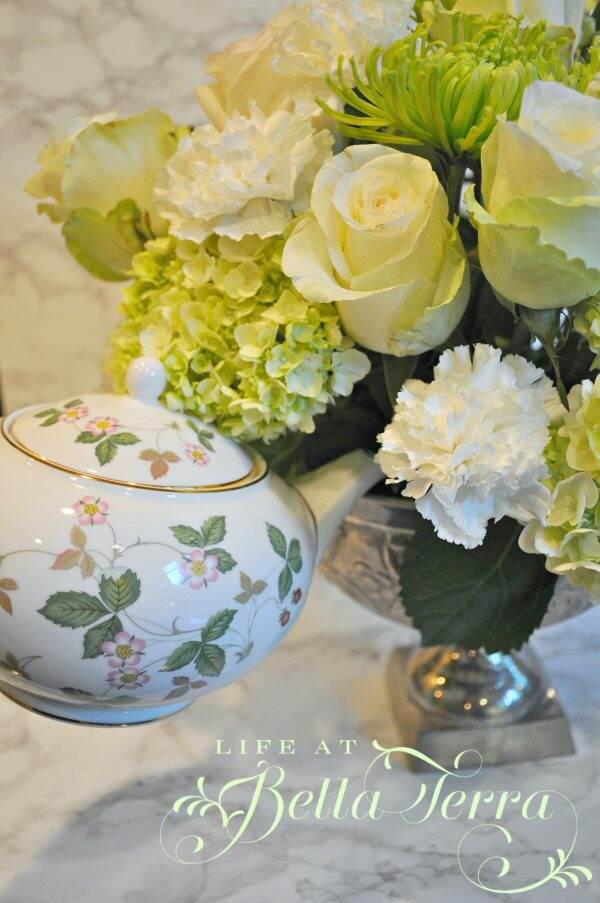
The container is actually one I had purchased online as a sample for the above mentioned event–it has an elegant look but was very affordable. The bowl is 9″ in diameter and 5″ high.

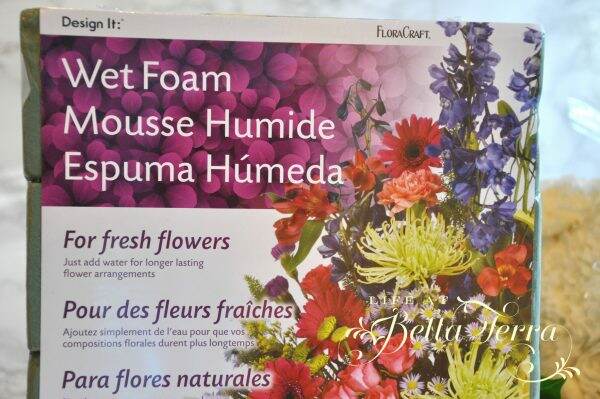
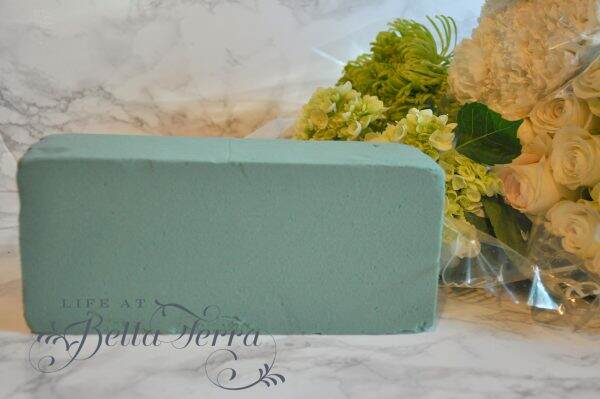
It’s important to use Wet Foam vs. dry foam (I made that mistake once~~dry foam works with artificial flowers).  I purchased a FloraCraft 4 brick pack at Michael’s for $6.99.  The foam is very easy to cut to fit the container you are using.

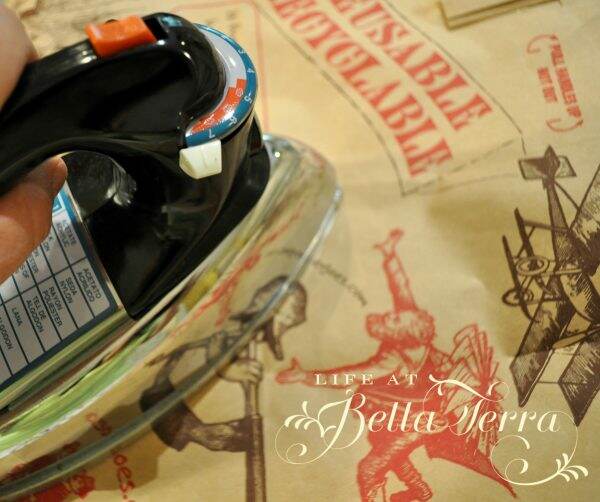
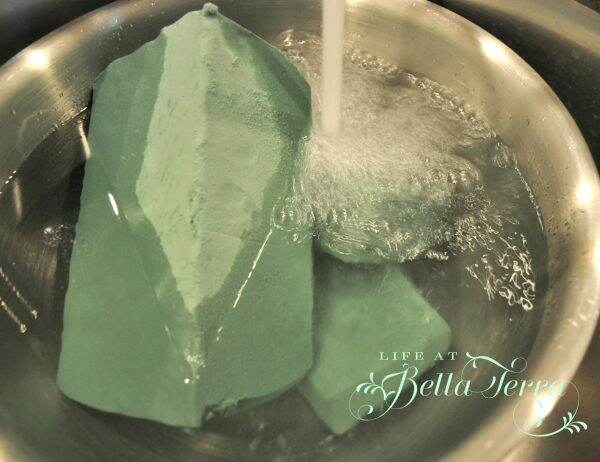
Soak the foam in a container with clean water for 1-2 minutes, until the water is fully absorbed into the brick.

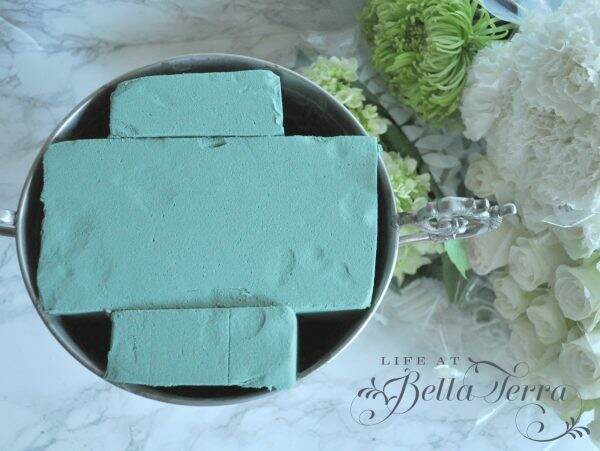
Since my foam is packed into my bowl, I did not need to secure it with waterproof anchor tape.

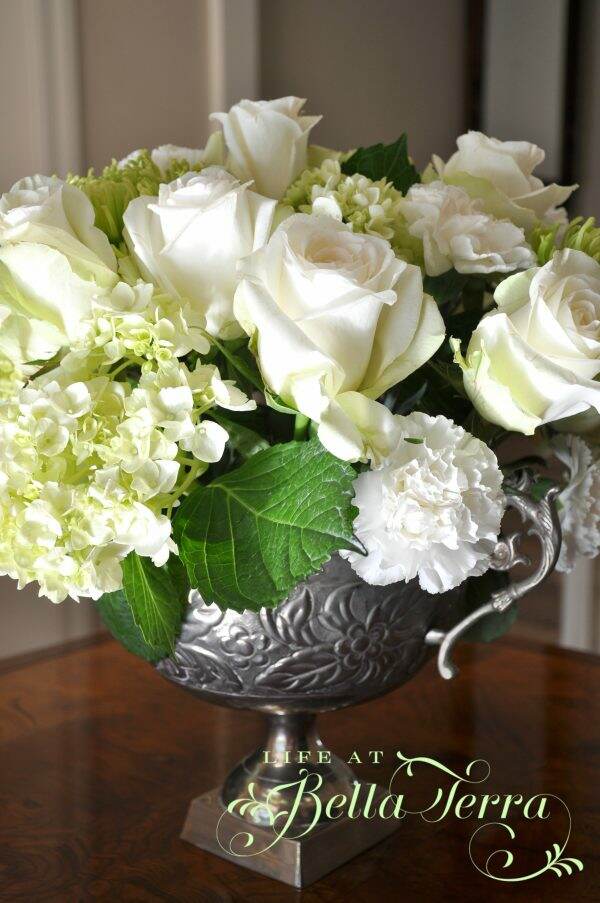
Determine what size and shape you want your arrangement.  Using floral shears or garden clippers, cut the stems at a 45 degree angle before inserting them into the foam.  This angle allows for easier insertion and insures maximum water uptake. I started with my roses and created a “dome” to outline the approximate size of the arrangement.

I then used the hydrangeas, spider mums, and carnations to fill in the gaps.  Remember to count your stems and spread them out accordingly.  Make sure stems do not come out on the other side of the foam.

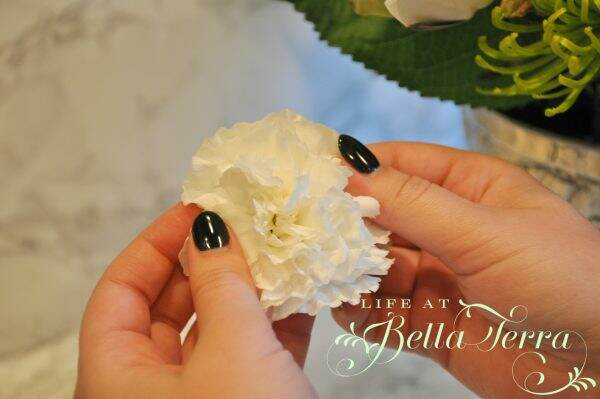
Carnations are such a great filler and can be spread apart to give them more volume .

The spider mums and the carnations were the most difficult to push into the foam. I broke a few in the process. Also, as much as I LOVE hydrangeas, I haven’t had good luck with them once they are cut.  They don’t seem to last as long as other flowers in an arrangement. But I keep trying!

When the arrangement is complete, add water to the bowl and check the water level every day.

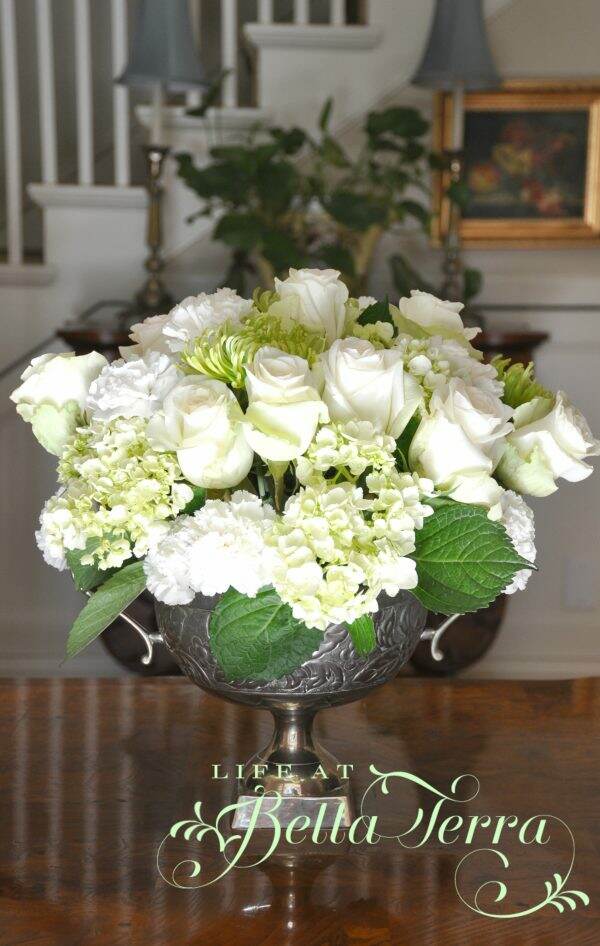
Here is the finished product which I placed on the table in the front entry!

Someday when I have lots of time, I would love to have an abundant flower garden where I could experiment with more dramatic arrangements.

Thank you to my two daughters for being hand models~~it’s a bit of a challenge to do the tasks and take photos!


Coffee/Beverage Center Re-do

The lifeblood of our household revolves around the kitchen, especially the coffee/tea counter. In the mornings, this portion of the kitchen is crowded, with each family member making their favorite beverage. For my daughter, it is tea in all its forms-loose leaf, tea bags, compressed blocks that require specific water temperatures and steeping times. For the rest of us, life begins around the Nespresso machine and the numerous flavors of coffee pods.

This is a rather hectic and cluttered part of the kitchen.  The good news is that everything you need to make coffee drinks and tea is here~~mugs, teacups, flavorings, toppings, timer, etc. But it’s rather messy nearly all the time.

Large glass containers hold tea bags and Nespresso pods, which take up too much space but I haven’t come up with a better alternative.

The counter is angled between the Dacor gas range on the left and the SubZero refrigerator and freezer on the right.  Though the picture doesn’t capture the color accurately, the granite countertop is a dark green with sage marbling and flecks of cranberry.  The hand made tile backsplash is from Waterworks.

I’ve been pondering how to make this area more efficient.  So I cleared everything off the counter and started from scratch. I’m not a big fan of having lots of appliances on the counters, but in this area, the three machines (Nespresso machine, electric teapot, and milk frother) are used multiple times every day.

I found this tiered tray at my favorite garden destination, Whitfill Nursery.  They converted a small adobe home on the property as a store and offer unique garden and home items.  Painted Fox also has a very nice selection of tiered trays online.  Initially I thought it may be too wide, but it seems to be able to handle our favorite coffee cups, flavorings, tea supplies and toppings.

I have a few favorite cups, which I refer to as my “happy” cups.  For some reason they make me smile (a great way to start the day) and all of them are from Anthropologie.

We will test drive this new coffee/tea station design and see how it works.  I am pleased I have one less cluttered counter!


What are you reading this summer?

I feel like I’m on a roll.  The last few books I’ve read have been winners! The summer’s less hectic schedule allows more time to read~~especially if we are stuck inside due to triple digit heat.  I have fond memories of having “reading hour” every afternoon when the children were little.  I would pick 3 books that we would read aloud as a family during those summer months. Reading has always been a priority for us.

Here are the books I have read and the ones I plan to read:

A Gentleman in Moscow….by Amor Towles.  My friend, Janie, recommended it and let me borrow her book.  I typically read on my Kindle so it took me a while to realize that on a real book I couldn’t look up the definition of a word by simply tapping on it! I loved this book so much that I instantly downloaded his first novel, Rules of Civility.

If you’ve read The Girl on the Train, this is the second book from Paula Hawkins, entitled Into the Water.  Of course I like anything to do with water, but there is a darker, deeper mystery to this one.

The Beach House by Mary Alice Monroe takes place in the Carolina Low country on the Isle of Palms.  Sweetly written, especially if you like loggerhead turtles.

This book was featured in Coastal Living’s summer reading list, The Book of  Summer by Michelle Gable. I was drawn to the cover…who doesn’t like hydrangeas and a blue bike?  The setting takes place in New England (love!).  It took me a while to get around some of the language (not a big obscenity fan) and some of her political comments, but plowed ahead and rather enjoyed it.

John Grisham‘s latest novel is Camino Island. He is a masterful best-selling author. I have enjoyed each one of his books and this one promises to be a page turner.  Love the mystery, intrigue and the beach setting.

The Little French Bistro is the first book I have read by Ms. Nina George and I absolutely LOVED it!  I found myself wanting French food and wine throughout. I liked this so much that I am in the process of reading her other book, The Little Paris Bookshop.

Barbara Hinske is a DEAR friend and neighbor.  She’s just remarkable~~a successful lawyer, wife, mother and now author. Her historical home here in Phoenix is stunning. I suspect the fictional estate in her series, Rosemont, is based on inspiration from her own beautiful home. She has 4 books in the Rosemont series, and I recommend you start with the first one and go from there, as each novel builds upon the last.  I just read her 4th book, Bringing Them Home. Reading Barbara’s books is comforting ~~like curling up on your favorite chair~~there’s mystery, love, deceit, a fabulous home, fine linens, silver. What’s not to like?

The Summer House by Hanna McKinnon is based on a multi-generational family summer home in Watch Hill, Rhode Island. We used to travel to New England every summer to visit my parents and Watch Hill is one of our favorite destinations.  So this book felt very familiar and takes you through the challenges and personalities of a large extended family vacationing together.

What happens when you start a book and just can’t seem to get in sync with the author?  I think I am finally at an age when I don’t feel I have to finish every book I’ve started. I give it 50 pages and if it’s not working for me, I move on.

When I love an author I read everything they write.  Here is a list of some of my favorites.

David Baldacci.  Since my son attends the University of Virginia, I have discovered this UVA alum author.  His detective/thriller settings tend to be in Virginia and reading his novels makes me feel closer to my Benjamin 🙂

Kate Morton writes about historical fiction and mystery.  Her last book, The Lake House was released in 2o15  and I am anxiously awaiting her next book.

Jon Krakauer.  I had nightmares after reading Under the Banner of Heaven...but he’s such a great author, especially if you like narrative non-fiction.

Last spring we had a fundraiser here at Bella Terra and Rhys Bowen was our guest speaker. Since then, I have read everything (historical spy mysteries) she has written.  To see more on that event, please click here.

Jennifer Weiner.  Her last adult book was released in 2015 and I am awaiting something new from her. Jennifer writes fiction, often replicating events or challenges in her own life~~witty, humorous and contemporary.

Diana Gabaldon and the Outlander books and Outlander television series, are an absolute favorite.  There are 8 books in the Outlander book series with a ninth one coming.  If you are looking for a reading commitment, this is it.

What are you reading this summer? Is there a book you absolutely LOVE and want to share?

Happy Reading!


A wonderful 4th of July!

We had a WONDERFUL day celebrating the 241st anniversary of the independence of America!  The Annual Bull Frog Loop parade (Bull Frog Loop is the name of our street) goes by our cabin.  It’s the perfect time to host a brunch for our neighbors and friends before the parade.

Here in the mountains, everyone decorates their cabins for the holiday so there is an abundance of flags and patriotic symbols.  This year we added more red/white/blue flag bunting to the deck railings.  I purchased this homemade wooden flag from a sweet dad and his two sons who were selling them on the side of the road.

For brunch, I made my egg casserole and fresh cherry coffee cake, (both recipes I have shared on previous posts).  We also made my new favorite go-to salad, Orange, Strawberry, Avocado with Citrus Poppyseed dressing (by one of my favorite bloggers, Monique at Ambitious Kitchen).  We rounded off the menu with fresh berries, Mimosas and a special cake for dessert.

I found these red/white/blue roses at Safeway~~I thought they would make a nice centerpiece on the table.   The girls laughed at me but I bought them anyway! The older I get, the more they laugh at me….go figure.

Our cabin is at approximately 8,000 feet altitude so it’s a bit of a challenge to bake here.  The girls and I decided at the last minute to make an American Flag Cake. I saw a post about the Top 30 July 4th desserts published by Country Living and this one looked interesting.  Baking at this altitude requires a bit of science and a lot of chemistry.

My daughter, Elisabeth, added the raspberries and blueberries on top of the delicious buttercream frosting. There were lots of oohs and ahhs when we cut into the cake.  Isn’t it amazing?  Surprisingly, with the high altitude adjustments, the cake was moist and all 8 layers worked out to really look like a flag!

We set up a self-serve buffet and then went outside and waited for the parade. This sweet homespun parade was started by Susan Palmer-Hunter. Years ago, Susan was so surprised that there was no July 4th parade here.  So, with determination she started one.  Susan and her husband host this parade every year. The much-anticipated parade has now grown and several hundred residents get to enjoy (and participate, if they like), in this very fun, patriotic event.   From decorated golf carts to bikes and floats, this parade represents the best of America. Here’s a glimpse:

Not only did this family participate in the parade, but they made cupcakes for all!

What a fun play on Red Cups!

And here is my good friend, Tracy, as Miss Bingo!

This parade, and all the red, white and blue, is such a reminder how lucky we are to live in this country!  Thank you, Susan for making this parade possible and gathering our community to celebrate Independence Day.

Also, we want to send our thoughts and prayers to those fire fighters who are working this holiday to manage the forest fires in Arizona.  We are so grateful for their service.  The fire danger is very high here and we pray for the monsoon season rains.

I hope you had a memorable holiday with your family and friends.  Happy July 4th!


A Different Twist on Lemonade

With the July 4th holiday right around the corner, an icy, tall glass of fresh lemonade seems to be the perfect beverage for hot summer days.

Simple, straightforward lemonade is always delicious, but here are two new ways to prepare lemonade, giving it a sophisticated flair.

It is very easy to memorize a simple lemonade recipe~~one part water, one part lemon juice and one part simple syrup.  Simple syrup is also very “simple” ~~two parts sugar to one part water.  If you want more tart and less sweet, I have also made simple syrup with one part sugar to one part water. I find it easiest to put the sugar in the water in a saucepan and dissolve it over a low temperature.  There are many ways to bring additional flavor to your lemonade by adding an herb to your simple syrup while it simmers.

Basil Lemonade

This recipe, Basil Lemonade is, without a doubt, the family favorite.  By adding a bunch of fresh basil to the simple syrup, it adds a different twist to the lemonade. The basil flavor and fragrance is infused with the simple syrup.  Actually, you could add various things to any simple syrup~~ginger, lavender, mint, thyme, rosemary, geranium, lemon grass~~adding a hint of flavor to your lemonade.

Simple syrup can be made ahead of time and refrigerated.  After the syrup cools, strain out the basil.  Mix the lemon juice, water and basil simple syrup together. Serve over ice and garnish with lemon and sprig of basil.

~~Basil Lemonade Recipe~~


Basil Lemonade

With the addition of fresh basil, this lemonade will impress your family and friends

  • 2 cups basil simple syrup
  • 2 cups cold water
  • 2 cups freshly squeezed lemon juice
  • Garnish with lemon peel strips and fresh basil leaves
  • 2 cups iced cubes

For the Basil Simple Syrup

  • 4 cups fresh basil sprigs
  • 4 cups water
  • 2 cups sugar
  1. Mix the basil simple syrup, water, and lemon juice. Add the iced cubes

  2. Pour into glasses with or without ice.

For Basil Simple Syrup

  1. Bring all ingredients to a boil in a medium saucepan, stirring until sugar is dissolved. Let stand at room temperature, covered, 1 hour, then transfer to an airtight container and chill until cold, about 1 hour. Strain syrup thourough a sieve into a bowl, pressing hard on and then discarding solids. Makes about 5 cups.


Strawberry Lemonade

My family’s 2nd place favorite, is Strawberry Lemonade.  Place fresh strawberries in a blender or food processor and puree.

Strain the puree (I used a fine mesh sieve) and discard the seeds.  Simply, mix the puree with the lemon juice, sugar and water and you have this beautiful, refreshing lemonade.

~~Strawberry Lemonade~~

Ingredients

2 quarts fresh strawberries or 2 packages frozen

6 large lemons

1 cup sugar

2 quarts cold water

Place the strawberries in a blender or food processor and puree.  Strain the puree and discard the seeds.

Slice the lemons in half and squeeze each into a large measuring cup.  Remove any seeds.  You should yield approximately 1.5 cups of juice.

In a large pitcher, combine the lemon juice, sugar and strawberry puree.  Stir in the cold water and serve over ice.  Makes approximately 12 cups.

Enjoy!!

P.S. I haven’t figured out how to put two printable recipes in one blog post….so my apologies for that!


Battling Candle Wax

Yes, it’s true that the temperatures in Phoenix have been well over 100.  On Tuesday, it was 117 degrees here at Bella Terra.  Fine week I picked to stay home, schedule as many appointments and meetings possible and do household chores.  However, I must admit I do like summer in Phoenix, as long as I can escape occasionally and the air conditioner is working.  There is less traffic and an easier pace around town.  A good time to buckle down and complete projects that have been unfinished or just left unattended.

Like this one.  It’s my own fault.  After hastily removing candles from a table, the warm wax spilled all over my tablecloth.  This is a special table cloth.  It was purchased during our first trip to Italy over 20 years ago and every time I use it, I am transported back to that piazza filled with flowers and peddlers selling their wares.

This table cloth is a combination of linen, cross-stitch and crochet. I use it often because it has sweet memories and feels a bit retro and homespun.

I have tried this wax removal strategy a few times to ensure it works (plus I happen to spill a lot of candle wax) before I decided to share it with you.

All you need is a dull knife, an  ironing board, a hot iron and some paper bags.

First scrape off and remove the excess wax.  I used a simple bread and butter knife in order to prevent cutting or tearing the fabric.

Having many Trader Joe bags, I cut these into sections to lay flat.  Make sure the unprinted side is closest to the fabric.

Sandwich the tablecloth between two sections of the paper bag on the ironing board, making sure you are over the wax area.

With a very hot iron, “press” the bag and “melt” the wax.  The paper bag will absorb the remaining wax and draw it away from the fabric.

You can see the wax melting and staining the paper bag.  Keep moving to cleaner sections of the bag over the wax, until all the wax is melted and absorbed.

Make sure you do not keep the iron in one place too long.  Even though the paper bag acts as a barrier between the iron and the tablecloth, the high heat could scorch the fabric.

After all the wax is removed, I washed the tablecloth in cold water, in a delicate cycle with a non-harsh detergent (Ivory Snow, for example) and then I always line dry my finer linens.  The sun acts as a whitener and there is nothing better than the fresh smell of items dried outside in a natural breeze! And this time of year, they dry in no time!

If you don’t have a clothesline, then you can easily lay the tablecloth on the grass to dry.

I also tried this method on an exterior stone slab.  Remember when I cleaned up and remodeled my upstairs terrace?  See the post here.  In adding the two lanterns on the fireplace hearth, I used real wax candles inside. What was I thinking? Yep, the heat melted them and the wax puddled on the slate hearth.

I used the paper bags to soak up what was still in liquid form; used a dull knife to scrape off the rest.  Then I dragged my iron outside and used the same technique as stated above.  Low and behold, it worked!!!

In my opinion, there is nothing better than candle light to create a certain ambiance.  Now, when I sloppily spill candle wax, I am confident I can remedy the situation. Another tablecloth saved!