1

What are You Reading?

In retrospect, I wish I was spending more time reading during our sheltering in place. But our weather is beautiful and so many projects just need accomplishing. But languishing in a soft and comfy chair, lost in a book taking you to other places, sounds like the right remedy for our stressful times.

It has been a while since I posted about the books I am reading. Last August was the last time I shared my summer reading. If you missed that post, click here.

Author Rhys Bowen doesn’t disappoint. I just love how she writes as it is effortless for my eyes to flow over her sentences. She has such a gift for creating passages you can see visually in your head. The Victory Garden takes place during the Great War in Devonshire, England. The main character, Emily, is determined to contribute to the war effort and you will experience joy, sorrow, friendship and superstition during her journey.

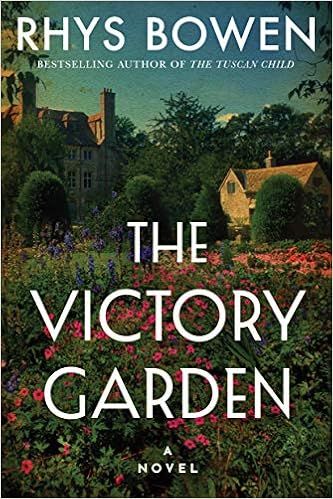
When I find an author I love, I consume each and every book they have written. As you may recall from one of my previous posts, I am a character in the latest release of Rhys Bowen’s Book, Above the Bay of Angels. Again, I highly recommend her books. In addition to stand alone stories, she has a few series that were equally delightful.

If you are looking for a mystery or thriller, I recently discovered Mark Edwards. He writes stories where scary things happen to ordinary people. The first book that I read is The Magpies. The beginning is full of optimism as a young couple moves into their first home together. But then strange things start to happen…

The Magpies

Here is another novel from Mark Edwards, Because She Loves Me. It is a gripping tale of jealously, obsession and murder.

Because She Loves Me by [Mark Edwards]

It is obvious I was on a binge of psychological thrillers. The Hunting Party by Lucy Foley is set in an idyllic and isolated estate in the Scottish Highlands. A group of friends from Oxford get together to celebrate the New Year and there’s a blizzard. And a death.

The Hunting Party: A Novel by [Lucy Foley]

If you like art galleries, small towns and a brutal murder, the The Last Day by Luanne Rice is for you.

Last Day by [Luanne Rice]

I first discovered Natalie Banks on Instagram. We exchanged a few messages and as a result, I purchased her book, The Water is Wide. The book is set in lovely North Carolina and is filled with love, loss and mystery. I’m still pondering the ending, but I am willing to read another novel by this author.

The Water is Wide: We believe the truth we want to. by [Natalie Banks]

My dear friend and author, Barbara Hinske, recommended her writing friend, Judith Keim. Since I love books in beautiful environments, I was excited to start Judith’s Chandler Hill Inn series Book 1, Going Home. The setting is Willamette Valley in Oregon. You can’t go wrong with vineyards, wine, love, luck and loss. By the way, please check out Barbara Hinske’s books. Here is a link to her website.

Going Home (Chandler Hill Inn Series Book 1) by [Judith Keim]

When we take long car drives, we listen to books on Audible. Unspeakable Things, by Jess Lourey is based on a true story from the author’s home town. This a heart-pounding novel of suspense about a small Minnesota community where nothing is as quiet—or as safe—as it seems.

Unspeakable Things

Another Audible book, which at times was difficult to listen to, is Dr. Laura’s The Proper Care & Feeding of Marriage. Dr. Laura is brutally frank and honest about the roles we play in our marriage. Both husband and wife have power in the relationship, and each needs to realize this in order to ensure personal satisfaction. It may not be for everyone and some of it was hard to hear. But like most things in life you can garner gems and make improvements.

The Proper Care and Feeding of Marriage

So what are you reading? Do you prefer hard copies, Kindle version or audible ones? And by the way, I am not sure it is obvious, but I try to provide links to access these books/products so you don’t have to go searching the internet. The link should be highlighted in the post’s copy. My husband said it is hard to see on his mobile version. If that is the case, please let me know and I’ll see if someone can resolve that.

In the meantime, Happy Wednesday and Happy Reading!

Heart Shaped tea bags are from Brin d’Aromes; her IG account is brindaromes. I ordered these at Valentine’s Day but I cannot locate her website.


The Restoration Chronicles~~Chapter 4

Building the Pool House

Welcome to Chapter 4 of The Restoration Chronicles! I love a good Before and After story and we have many of those here at Bella Terra. I hope you have read the previous chapters where construction of the kitchen/basement, back terrace, and master suite additions to our historic 1912 home have started.

Quite frankly, I have no recollection of making the decision that we needed a new building by the pool. But with two toddlers and a baby on the way, there is much during that time that I don’t remember.

However, there was an existing ramada hidden under all the foliage to the west of the pool. Initially we didn’t even know it was there. It was so rotted and overgrown that it had to be demolished.

Working with an experienced architect (Cathy Hayes of Hayes Studios), we designed the building with the same architectural elements as the main house~~green tile roof, window accents, and overhanging eaves. Again, we used Marvin Windows and Ludowici historical roof tile.

Since we already had a guest cottage, the City of Phoenix doesn’t allow you to have additional guest quarters. Therefore, the architect listed the rooms as Game Room, Exercise Room, and Hall with two covered patios. There is a total of 845 livable square feet and 345 square feet of covered patios.

Red lettering indicates current use

I don’t have any pictures of early construction, but here you can see the pool house prior to stucco and paint. Much of the new construction was occurring simultaneously and I am assuming I was off solving other problems vs. taking photos.

Family Life

In the middle of all of this, we welcomed our third child into the world, a baby girl, Elisabeth! Unfortunately, her clavicle broke during birth, but she’s healthy and has a sweet nature . We are all still living in the double wide trailer. Sigh.

For the most part the pool house has been for guest. But when the children were teens, we splurged and made it their space. It is heavily used when the children come home as it is still a gathering place with their friends.

Pool House Details

There is an outdoor shower, which I just love. There is something about showering outside in the privacy of all the foliage. Plus a great stop to rinse off after swimming in the pool.

Where the “Hall” is located, there is plumbing for a full kitchen if one is required in the future. I put primitive pine cabinets in place for storage and also to hide the plumbing. Hardwood flooring is throughout. The window over the sink overlooks the hen house and garden.

Here is a glimpse of the bedroom. There are two antique beds that can be pushed together for a king-size one if needed. We had the walls faux painted back in the day when that was in style. Not sure if I will re-paint, but I’ve held off doing a detailed post on the interior until I decide.

The bathroom is a good size and has access to the outdoor shower.

Here is the view out of the pool house’s front French doors.

The pool house is the perfect place for our out-of-town guests. It is completely private with a spacious living area to relax. During this quarantine, I may just spend a weekend out there to feel like I am getting away!

I hope you enjoyed the latest edition of our home restoration journey. If you haven’t read the previous chapters of The Restoration Chronicles, click here for Chapter 1; here for Chapter 2 and here for Chapter 3.

My goal this week is to finish some already started projects. I need to have sense of completion……on something!

What projects are you working on? I really miss painting and hope to get some art time in this week too. Have a wonderful Tuesday.


Propagating Roses

I have always wanted to learn how to propagate roses, especially the antique ones we have at Bella Terra. With a clean potting shed (see yesterday’s post here) and sheltering in place time on my hands, I thought I would try this.

Meet Quatre Saisons (Rose of the Four Seasons), R. damascene bifera). We have three of the original antique rose bushes that survived the property renovation. This is the oldest European rose to reliably flower more than once during the year. It is one of the most important historic roses, probably going back to the Romans or earlier. 

Quatre Saisons

This rose is not cultivated for the appearance of its shrubs as they are rather gawky and VERY prickly. Foliage is plentiful and leaves have a serrated edge. The blossoms are a bit unconventional and messy-looking but the scent is a mighty treat for the nose.

The reason I am so intrigued by having roses at Bella Terra is a reference made in a previous owner’s diary on April 1, 1922, when she wrote “saw first rose bloom”. When we were researching the house, we found these diaries at the Arizona Historical Museum. Apparently the roses are referenced many times as an important part of the landscaping. To know I am enjoying roses here just the same way someone did 100 years ago gives me great joy.

In Preparation

In preparation for the propagating process, I scrubbed and cleaned the clay pots I wanted to use. Since the success rate of propagating roses is about 50 50 to 75 percent (according the Dr. William C. Welch), cleaning the pots will help minimize any contamination. I then covered the hole at the bottom with a small rock.

Next I loaded up my clean pots and headed out to the compost pile. There are several sites on Google that recommend the type of medium to use for rose propagation. Our compost soil has always done wonders in the past and so I’m counting on it now.

If you missed my composting post, click here. With the pots filled with soil, it is now time to select roses.

How to Take the Cutting

Take a 12-inch segment of the stem, cutting at a 45-degree angle. The best cuttings usually come from the sides of the bush vs. the center. I made sure I used my sharpest and cleanest clippers, in order to avoid contamination or crushing the stem. I immediately put the cuttings in water while I continued cutting the others.

Cuttings taken from new growth vs. old, hardened wood are more likely to be successful. Spring or early summer is the best time to take these softwood cuttings. Select them in the early morning when the plant is most hydrated. Wish I wore gloves as these roses have such sharp thorns!

Remove Most of the Leaves

Remove all but the top two leaflets on the stem. Then, cut of the stem just above this top set of leaves. Removing the excess leaves helps to divert energy to root production. However, the stem still needs to continue with photosysthesis and feed itself until new roots are formed. Also remove any flowers. The flowers will consume energy, and you want to encourage the stem to refocus its energy on survival by sending out new roots. 

Prepare the Stem for Rooting

Using sharp pruners make a fresh cut on the bottom of the stem just below a stem node. I made the cut at a 45 degree angle. The stem node is where new growth typically forms. Then slice into the bottom stem about a quarter of an inch up, splitting the stem into open quarters.

Using a Rooting Hormone

Though this step is optional, a rooting hormone can help spur the plant into developing new roots. I purchased this rooting powder from my favorite nursery, Whitfill Nursery for $5.99.

Slightly moisten the split end of the rose cutting and then dip it into the powdered rooting hormone. Shake off any excess powder.

Plant the Cutting

Plant the cutting in a container filled with at least 6 inch of planting medium. Some recommend a mixture of coarse sand and vermiculite or a potting mix designed for roses. Keeping my fingers crossed that my homemade compost is sufficient.

Poke a hole in the potting medium (I used a screwdriver) and then insert the stem. Be careful not to rub off the rooting powder. Gently firm the soil around the stem and water well.

How cute is this pot~~a school Mother’s Day project made in 2004 by my son Benjamin!

Selecting the Location

Roses prefer a sunny location, but for rooting purposes it is best that they are shielded from the hot afternoon sun. It is important to keep the soil moist so the cutting does not dry out. Some people put a plastic bag over to create a humid environment.

I have placed the 5 pots on the window sill directly across from my computer, so I can check on them every day. The northern exposure will provide bright light but no direct sun.

Of course, I discovered the following advice AFTER I cut the stems. However, I did remove the flowers and buds, so hopefully I will have success. Here is what I read: “Moreover, avoid taking cuttings when your plant is heavily blooming. The plant is putting most of its energy into flower production rather than root development, so a cutting won’t readily root. If you must propagate when the plant is blooming, make sure to remove the flowers and buds from the cutting.”

I am planning to let them grow over the summer in these pots and then plant them in the fall? Or transplant them into bigger pots with a January 2021 planting? Still trying to figure that part out. If there are any rosarians out there, I welcome your help!

Here are some other photos that I’ve taken over time of these delightful roses. I wish you could scratch and sniff.

Lastly, it was difficult to decapitate the flowers off of the stems for this propagation. But not to fret! I am utilizing all the blossoms in a potpourri I am making for the hen house.

Have you ever propagated roses? What is your favorite species? Wish me luck and hopefully I will have 5 more Quatre Saisons soon!

Wishing you a delightful Wednesday! Today I am still washing windows (ugh!) and making face masks as my roll of elastic finally arrived!

References: The Rose Bible by Rayford Clayton Reddell


Cleaning out the Potting Shed

What started out as cleaning the windows to the well tower, turned into a full day of cleaning out the potting shed. The potting shed occupies the first level of the well tower. If you are new to the blog, the well tower is just that, it houses the well, which we re-activated when we restored this property. To see a previous post about the well tower, click here.

In order to get to the windows, however, I came across this mess. Most of it was my fault, as I recently have been searching for paint to do touch up for both the interior and exterior.

I am still trying to understand how things get so messy. But with many people using this space, it becomes a great dumping spot. The good news is I tackled it yesterday and decided to share it with you today.

When we restored the well tower, this was an empty space. An old tub and sink were “leftover” renovation items and we decided to repurpose them here.

This fabulous porcelain cast iron sink is BIG. One side is very deep and the other shallow. It’s a bit banged up but perfect for washing my garden tools and pots.

Leftover tile from Waterworks was used for the countertop and backsplash. The casement windows provide ventilation and a lush, green view right into the hollyhocks.

Washing the exterior window was a bit of a chore as I had to negotiate my way through the hollyhock jungle!

The bathtub is on a raised platform and is used as a dog bathtub. It’s impossible to get Cooper in there, but it is perfect for the smaller dogs.

The curtain panels cover 3 separate storage areas. I’m not wild about how they look but they are a Waverly old rose fabric and serve a purpose. Maybe they need a shorter hem?

One section is where we put all the paint cans. We have a local hazardous waste area where you can take old paint cans annually. This year I am committed to sorting through all these cans, labeling the good paint and tossing the old.

The other sections have numerous pots and gardening items. An old chippy wire basket keeps miscellaneous pots and supplies on the counter. Garden boxes hold seeds that I will need to sort through to see which ones are still viable.

I found these cute French hooks and put them up to hold my gardening bags. This way I can fill them with my tools and head out to the garden.

After removing two huge black garbage bags of trash, the potting shed is clean. I still have the other side to organize as I approach the final window on the first level.

Here is a larger view of the space. The well tower has 2 sets of spiral staircases that lead to the top. I don’t look forward to scrubbing that.

Entry into the well tower is through these gorgeous Dutch doors on the north and south side.

I am hoping to clean the rest of the room today, however, my back is aching.

Are you tackling any big projects during this lockdown? Some days I feel like it and other days, not so much. I don’t know about you but I am really ready for this virus thing to be OVER.

Have a wonderful and productive Tuesday!


My Easter Table

I know many of us are having smaller Easter dinner celebrations this year. However, albeit cozy, it is important to make it special for several reasons. Easter is a time of rebirth, joy and celebration. Even though we may be apart from our friends and family, we are healthy and safe.

Typically we have our sit-down dinners in the dining room, but since I have a “new” (from a yard sale) table in the family room with 4 “new” (from a yard sale) chairs, this location felt right for 4 people.

I chose the Royal Worcester Yellow Urn/Roses/Greek Key china because of the cheerful colors. An old business friend bought me 4 dishes many years ago. Slowly, over time, I have added to my collection but it is a rather difficult to find other pieces to this pattern.

Check out my adorable DIY bird nests! I am still tickled over how they turned out. If you missed my last blog post, click here. They fit perfectly inside my creamed soup bowl and add the Spring touch the table needed.

Yellow linen napkins are from Sferra. The sweet lamb napkin holders are gifts from my friend, Gwen. I am putting the napkins off to the side in a non-traditional location but this seems to work best with the round table configuration.

It’s hard to have Easter without bunnies! Daffodils were from our local Safeway store. I have no idea where the bunnies came from…maybe I just started with two? Ha!

My latest glassware purchase include these drop dead gorgeous Rogaska Gallia crystal glasses. They stand 9 3/8″ tall and the crystal cuts are stunning. Thanks to my friend, Louise, I was introduced to them at her dinner party last fall. I fell in love with the weight of the glass and was fortunate to find these on eBay.

Though I haven’t finalized the menu, I am hoping we have all the ingredients here so no one has to make a trip to the grocery store. We are wearing our masks out in public. I am encouraged by the latest projections as it appears that sheltering in is helping.

Wallace Silversmiths Bee Flatware from Horchow

Today I am making the annual family Lamb Cake. I am hoping all my siblings and my son are doing the same so we can have our Lamb Cake competition. My mother would bake one every year and it is one of many fond memories I have of her. Here’s a glimpse of last year’s cake. To learn more about the tradition of this cake, click here.

Happy Saturday and wishing you a blessed Easter with your family. May you continue to have good physical, mental and spiritual health!

The post shared with Between Naps on the Porch Tablescape Thursday #653


Making Easter Nests

In setting the table for Easter Sunday dinner, I needed something to make it feel more spring-like. I love birds’ nests and have a few, but didn’t think it was very sanitary to actually place them at the dinner table.

The Royal Worcester dishes I am using for the place settings have a lovely small 4″ creamed soup bowl with plate that I want to place on the dinner platter. Now the challenge is making a nest that will sit inside the bowl. I’ve got this!

Getting Started

After some pondering, and not wanting to go to the hobby store, I searched the house for materials. Leftover bottles of Mod Podge and shredded paper from the shredder sparked me into action.

In order to form the depression in the middle of the nest, I made a ball out of aluminum foil and covered it with plastic wrap. I have not used Mod Podge in years and I couldn’t recall if it would adhere to foil, hence the protective plastic wrap.

Knowing this would be a bit messy, I put down a piece of parchment paper, gathered my supplies of latex gloves, shredded paper, 4-5″ styrofoam bowls, plastic wrap and glue. If you don’t have Mod Podge I would imagine any glue diluted with a bit of water would work.

The Process

Line one bowl with plastic wrap. In another bowl, mix the shredded paper and Mod Podge. Use enough so the paper follows your hand around the bowl. If you use more, the drying time will increase.

Pat the glue/paper mixture around your center ball until you get the size nest you want. Do not cover the ball.

Let dry. I put mine in the sun since it was late afternoon. I removed my ball to make sure my depression was deep enough and clearly defined.

After approximately 1 hour, the nest is consolidated enough but not completely dry. I re-shaped the nests to have more of a rounded base vs. the shape of the plastic bowl.

Like most projects, the more you practice the better you get. The first nest I made, had more glue than the others. However, it did require a bit more drying time. The Mod Podge is very sticky and the shredded paper stayed together.

The Finishing Touches

While the nests are drying, choose your paint colors. Using old cans of spray paint, I selected 3 colors that would resemble a real nest.

Matching spray paint colors to a real bird’s nest

For protection, lay down a drop cloth or plastic, and spray your nests to the color of your choice. Think of all the possibilities! I even used a bit of gold on top.

I let the nests dry overnight. They are nice and sturdy.

The next morning, I added bits of different color moss for additional texture. You can add twigs, feathers or really any yard debris for a more natural look.

Using a glue gun, drip the glue over the nest. Push the moss onto the glue. I placed darker moss on the inside and a lighter one on the top.

Trim any excess if necessary.

Fill the nests with faux eggs or candied eggs ones for color. The nests fit perfectly into the soup bowls.

This project was completely unexpected! It was fun for me to search the house for supplies to make it. Now I am thinking of all the things I can make out of glue and shredded paper. My own version of paper mâché!

This project took approximately 2 hours. If I used less glue, they would have dried faster. You may need to let them completely set overnight. Today, I will leave them in the sun to get rid of the spray paint smell. I like the fact that I can use these year to year too!

I can’t wait to show you how adorable these look on my Easter table ~~that will be Saturday’s blog post!

Happy Wednesday! What are you up to day?