Ten years ago I went to the Brimfield Antique Show in Massachusetts with my dear friend, Susan. I received a phone call from my husband, stating the girls had found a kitten in the yard. Since we already had 4 dogs and numerous other pets, he promised the new kitten would find another home.
When I arrived back in Phoenix a few days later, the kitten had a name, a brand new collar and a litter box. Meet Tippy, our first cat. I had mixed feelings about having a cat. Growing up, we had dogs but my mother did not like cats. I’m not sure why, but we never owned one. So I didn’t know the first thing about these feline creatures.
The girls’ responsibilities were clearly laid out~if you want this kitten you must care for it, including cleaning the litter box (not one of my favorite smells). I remained detached from this animal, as I was homeroom mom for one child, crew team mom for another and life was busy and full.
But over the years, something happened. My indifference to cats grew into a love and longing I didn’t expect. Shortly after finding Tippy, the girls “found” another cat (which we think someone dropped over our wall). We lost two dogs and gained another and we have been a family of two dogs and two cats for quite sometime.
As the girls became older and their school and social lives grew, Tippy became my cat. At the end of each busy day, when I finally had a chance to sit down and put my feet up, Tippy would crawl into my lap and settle in. Like having a favorite blanket, she was my piece of comfort that closed out each day. Stroking her soft fur was relaxing and her purring confirmed that she enjoyed it too.
Over the last several weeks, Tippy wasn’t feeling well. What started as an intestinal obstruction morphed into lethargy and weight loss. Tippy loved my homemade cat food but soon stopped eating. The last few weeks, each and every time I sat down and had a lap, she was in it.
Ten years ago loving a cat was something I couldn’t comprehend. And now my heart is breaking because this sweet cat was clearly in the last chapters of her life.
Yesterday, we made the very hard decision to euthanize Tippy. I cannot remember the last time I had a good cry, but my tears for her are of loss, love, and thankfulness. Tippy opened my eyes to the unconditional love cats give us. I am so grateful my two little girls found her, all those years ago. That sweet little gray and white face showed me a love I never knew existed.
Clever Ways to Use a Bargain Lantern
|
You recall the recent post I did about the fun finds at Home Depot? If not, you really need to (click here). Keep reading to see the new bargain lantern I found and all the clever ways to use it.
After my last Home Depot post, my friend, Anne went to our local Home Depot (on Cave Creek Road) and sent me a picture of the seasonal section with all the lanterns. Unlike the Showlow, AZ store, their inventory was abundant.
Seasonal section at Home Depot on Cave Creek Rd, Phoenix
I went the next day and searched the store for lanterns, asked 2 employees and no one knew what I was talking about. The Home Depot in Showlow, Arizona has their seasonal aisle right when you walk in, yet at this store, I literally searched 15 minutes for it.
Finally, behind one of those enormous moving ladders and a bunch of boxes, I found the seasonal section. Lucky me, it was so obscured that no one else saw it, so I scored yet another batch of my 22″ lanterns from Hampton Bay. According to the Home Depot website, these are out of stock, but apparently some of the stores still have inventory.
But lo and behold, look what else I found!! These Hampton Bay 10″ Metal and Glass Lanterns. The online price is $19.98 (yesterday the price was $24.98 online), but in-store the price is $9.90 each! I imagine this is on seasonal clearance too. Click here to see the online link.
Quickly, I grabbed the last 4 of them because I am thinking of all the ways I can use this lantern.
Different Ways to Use this Lantern
Naturally, this makes a plain, good old lantern. I like the glass hurricane feature which helps keep a candle lit outside in a breeze. You can also put a battery operated candle which compliments its fine lines and simplicity.
Hostess Gift
But think of it as a hostess gift. Tired of bringing a bottle of wine to someone’s house? How fun would it be to bring this, filled with flowers?
Lantern filled with flowers
I never want to give a hostess gift that someone doesn’t want or can’t use. And I never re-gift something that I wouldn’t enjoy. Typically I will bring something perishable~~a food item, wine, flowers, a candle. What I love about this Hampton Bay lantern, is that not only can it act like a vase, but it can be used later as an indoor or outdoor lantern.
We currently have an abundance of eggs as our younger chickens are finally laying. Instead of typical egg carton, here is a fun idea (and bring the empty egg carton along too), as fresh eggs are always welcomed.
Or inserting a candle and then filling it with someone’s favorite candy? Or bath salts? Or tea bags? The ideas are endless.
Seasonal ideas
If you love these lanterns too much to give them away as gifts, imagine the numerous ways to decorate them for each season.
Adding some sand and seashells makes an easy summer themed lantern.
Simple cut branches or greenery makes for a fresh centerpiece.
For the autumn, fill the glass with acorns, pinecones, leaves, candy corn or fall flowers.
I haven’t pulled out any of the fall items and this isn’t my best work, but you get the drift.
For Christmas/winter, fill the lantern with ornaments, snow, crystals, greens, cranberries and the list goes on and on.
I believe these lanterns are so versatile that you can use them indoor, outdoor, year round, as gifts and only for $9.90 each. It is so exciting to me to find a great bargain!
Thinking about the holidays is tough when it’s still so hot out, but this purchase is one of the many ways I am filling up my gift closet.
Happy Wednesday ~ I am spending this morning trying to clean up the down feathers in our family room. Cooper has a bit of anxiety when we are out of town, and he acted out by tearing up the sofa cushion. It looks a bit like snow in here. It’s always something, right?
And lastly, thank you SO much for your supportive and wonderful comments yesterday. I cannot tell you how much your grace puts air under my wings. You are the BEST!
Thank you for visiting my blog on Tuesday, Wednesday and Saturday! I am so grateful to my faithful readers and all the new people who are joining us every week. Your comments and questions make my day. Since many of you are new, I thought it might be fun to share some oldies but goodies. Let’s call it Life at Bella Terra’s greatest hits!
Here at our home, we have the good fortunate of space where we enjoy everything from gardening to outdoor entertaining. Here are a few areas of interest.
Gardening and Chickens
My blog post Gardening 101 stemmed from the question, “does gardening take a great deal of time”? After the initial garden plan, the actual work to plant, harvest and maintain a garden is minimal and seasonal. And the benefits are enormous! To see this detailed post, click here.
Composting 101
Another popular post is about Composting 101, which is an ideal project to start during COVID. Being home and creating more waste, composting is the answer to having great soil for your garden. If you could recycle 30% of your trash to make rich fertilizer, why not? See that post, here.
Before and Afters
Our home BEFORE
Don’t you love to look at other people’s homes? I certainly do! And it is a bonus if there are good Before and After pictures. I actually have a file where I keep renovation photos of other projects as inspiration.
After
Our historic home is always going through a constant renovation. However, the initial restoration was the most significant. In an attempt to capture that journey, I am writing The Restoration Chronicles. So far there are 5 chapters and if you haven’t read our story, click here for Chapter 1.
Entertaining
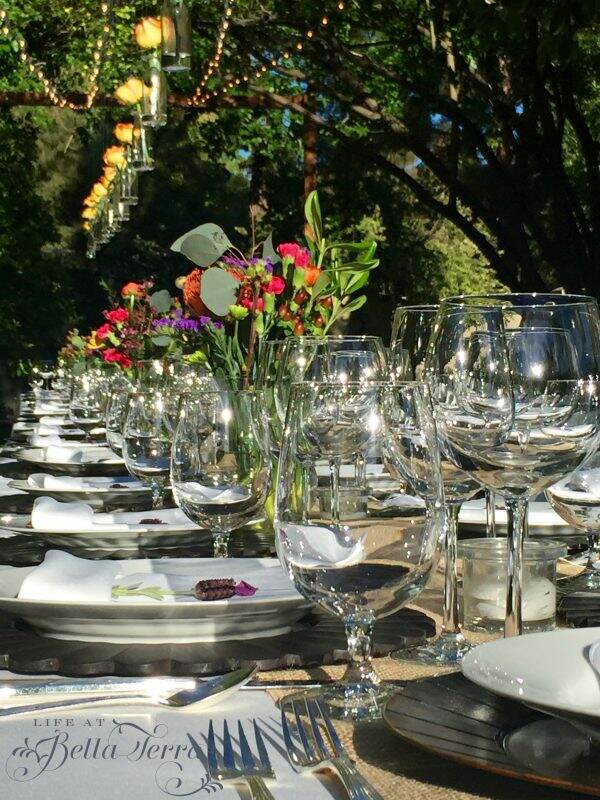
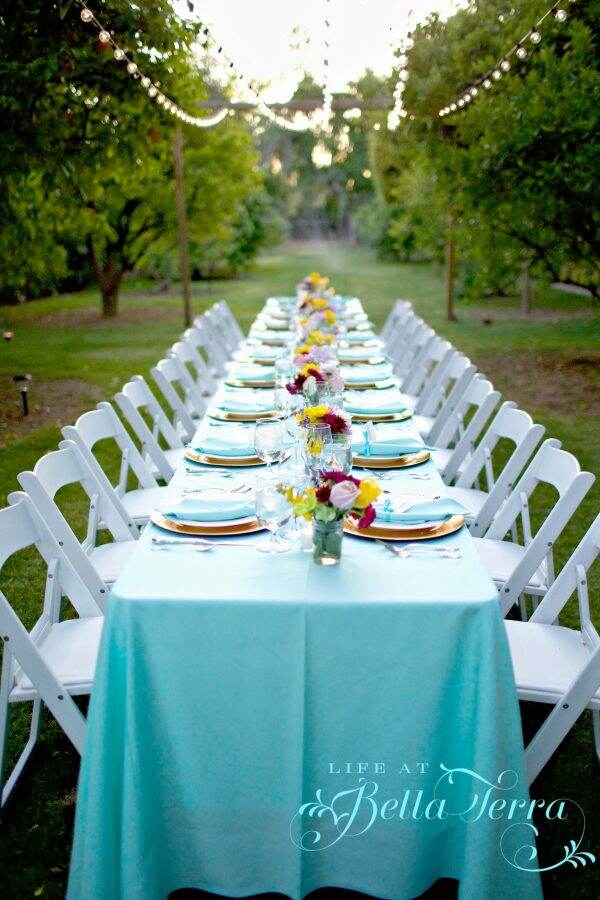
COVID has definitely put a monkey wrench into our socializing and entertaining. We feel blessed to be the stewards of this unique historical property and share it often to host everything from charitable events to proms. The orchard is one of the areas of the property we use for large sit-down meals. For more details about one of our dinners in the orchard, click here.
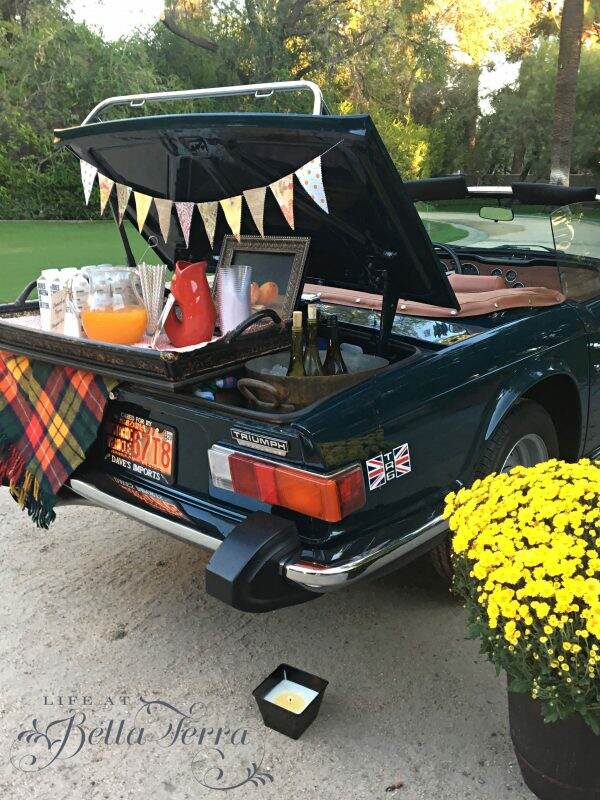
I long for the day when we can open up our home and our arms and welcome guests again. If you are dreaming of when we can all reconnect, here is an autumn entertaining post.
Cooking, Baking and Making
The summers do put a cramp in my cooking, as it is almost painful to turn on the oven in the triple-digit heat. However, the minute there is a touch of autumn in the air, I am back to baking. This past year, I learned how to bake sourdough bread from scratch, using starter that I carried home on a plane from Washington, D.C.
My sourdough starters~Hope and Bubbles
If you need a new project while we are all stuck at home, baking bread using a natural yeast, is so rewarding. I just recently shared more sourdough starter with someone who reached out to me and now I have a new friend. Bake bread. Make friends. Check out my post, Sourdough Starter Basics here.
Of course, there are all sorts of recipes in the files of Bella Terra. But here are a few favorites. Key Lime Pie post
Farfalle pasta with Lemon Chicken and Herb Salad
Together we made Preserved Lemons (see recipe here) and then we used them in some fabulous recipes, like the one above. This delicious chicken pasta salad is ideal for the summer~as it can be eaten warm or cold. Check out the recipe here.
DIY and Home Improvement
I am not much of a crafter, but I do like to tackle projects myself, sometimes moaning along the way.
The most recent is a hand stenciled tile bathroom floor in our pool house. If you missed that post you can see it here.
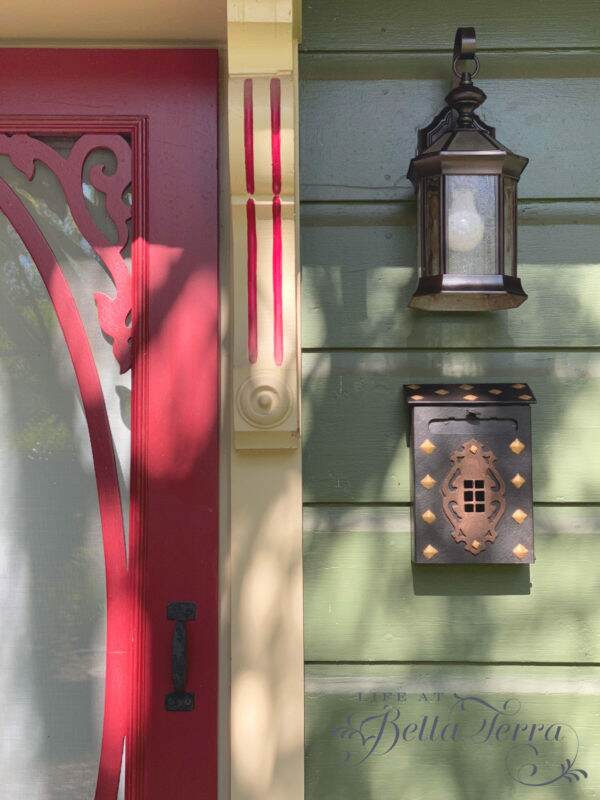
To see the post on the Mailbox/Exterior Light on Guest Cottage, click here
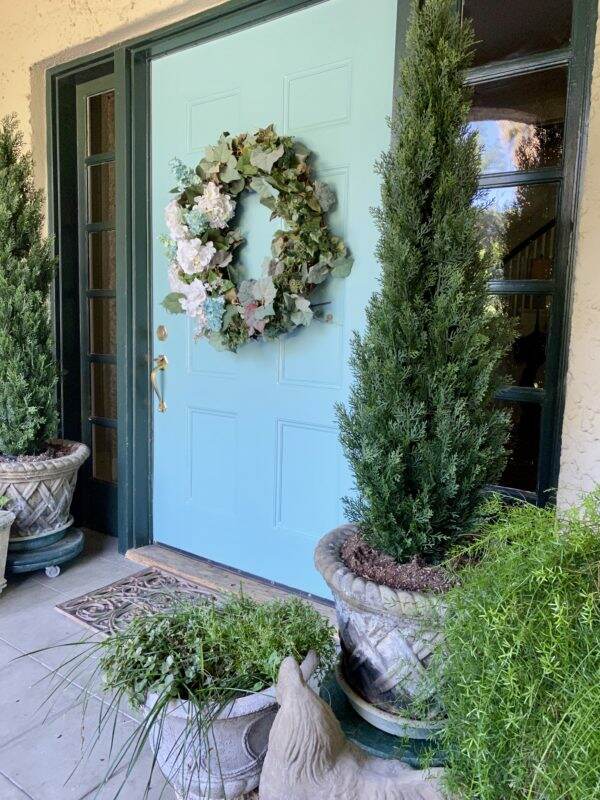
We have accomplished quite a few projects this year, and several with your helpful comments. From the great advice on the vintage mailbox above, to helping select a front door color, your feedback is gold! See that post, here.
Organizing
Staying organized is such a challenge, but I am inspired to be better at it when I see others accomplishing these tasks. This year, getting the master closet organized was a big win. To see the embarrassing before pictures and the fabulous after shots, click here.
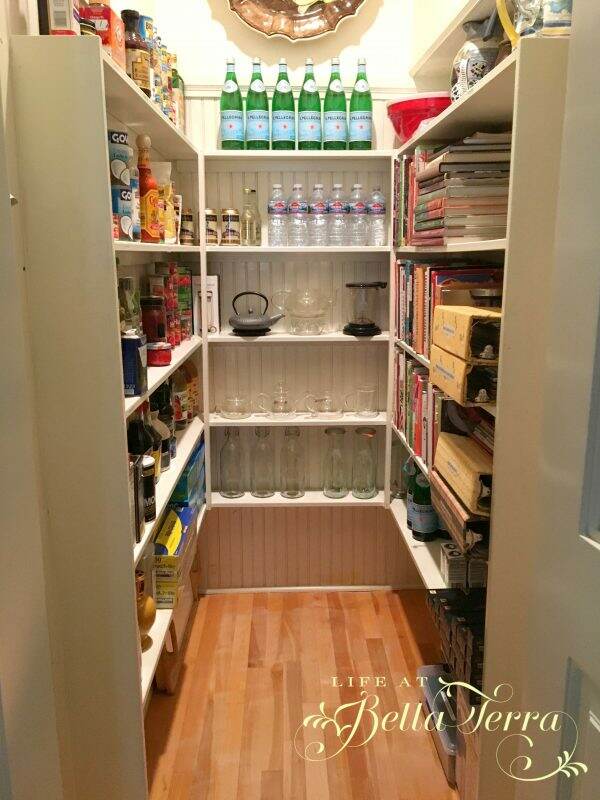
Keeping heavily used spaces like the pantry is always a challenge. But it looks so nice when it is neat and tidy. See the improvements here.
Pets
Cooper~loves to sit
For those of you who have pets, you know how important they are to family life. Our two dogs, two cats and numerous chickens are all part of our daily existence here. The Best Kind of Friend is a blog post about the bond we have with our pets, how they shadow us daily and love us unconditionally. Read it here.
Tippy and Donovan
Sox
Thank you for all your kind words during Sox’s recent back injury and Tippy’s current failing health. We share in the joy of their presence and the grief of their loss.
Just Getting Through Life
You have provided loving ears to some of my life’s challenges as we enter new phases of maturity. It was only a year ago, when I was struggling with empty nesting (see post here). But with the pandemic, nearly everyone is home again! Now, next week I will do a repeat performance as we move our daughter out of the house to start her sophomore year in college. Ah, the ups and downs!
We have talked about Kindness (see post here) and how important it is to Smile (see post here) and how to age well (see post here). Even though we cannot get together physically, we have such a supportive community right here on this blog. The goal with each and every blog post is to provide you with something interesting and important. And I’ve learned so much from all of you along the way.
Sharing my painting journey
Again, I cannot express how delighted I am that you have been with me from the beginning and I extend a warm welcome to new readers. In a world that seems to be filled with division and anger, it is my hope that Life at Bella Terra will be a bright spot in your day.
Happy Tuesday, my friends! If you ever want to see more content on any topic~gardening, recipes, home improvement, decorating, seasonal, whatever it is, please let me know! Thank you.
Back in early June, after harvesting the San Marzano tomatoes from my garden (thank you, Whitfill Nursery), I made fresh tomato sauce. However, I did not process it with the hot bath canning method, but froze the fresh sauce in individual zip-loc bags. Recently, when my friend, Rick said his tomato source has 50 lbs. of tomatoes available, I willingly said yes, not knowing what I was getting myself into.
50 lbs. of Roma tomatoes
The thought never crossed my mind what 50 lbs. of tomatoes looks like, but it is a lot. But there in nothing better than having a fresh batch of sauce from summer tomatoes in the middle of winter. Because of the volume of tomatoes, I will need to process them using the hot bath method.
Safety First
The last time I used the hot bath method in making tomato sauce a few years ago, I badly burned my hand (all my own fault). So I am a little wary making it this time.
But, like with most things, your memory dulls and my desire to have fresh tomato sauce overrode my fear of burning myself again. If you have never processed food for long term storage, it is a good thing to know. Especially after the events of this year. When the food supply is challenged, having a pantry filled with your homemade goodies is a comforting thought. And now is the time to do it with the summer’s bounty available.
There are several recipes available for making tomato sauce, but I love using the simple one from my friend, Rick. With only 4 ingredients~tomatoes, garlic, olive oil and salt, you have a great tasting sauce.
Enlist Helpers
Before you start a project like this, you may want to consider inviting your friends over to help. This is not a one-person project, nor do I suggest you do this with your spouse. There is a reason the women from the farm would gather and do this as a collective group. It is repetitive, time-consuming work but made faster with great conversation and friendship.
Get the Right equipment
Get the proper size jar
It is important to have the right tools on hand too. Since you are working with sterilized jars and tops, boiling water and hot sauce, you need equipment to help. You can purchase jars from Walmart or through Amazon. Determine what size jar you will need (all depends on how many servings you want per jar). For 16 oz. jars, click here; 8 oz. jars, click here; and for complete canning kits, click here.
Processing tomatoes the wrong way can have serious side effects. There is much debate about safely canning tomatoes and you want to make sure you take all precautions in doing so. Sterilization of jars, hot bathing them for the proper amount of time, adding acidity for an extra level of protection are few things to know before getting started. Make sure you have a large stockpot. If not, here is a link to one.
Large pot needed
Making the Sauce
For a quick summary on making the sauce, you stem, core and cut the tomato into 16 pieces. I add an extra step here, where I wipe away most of the seeds out of the tomato before I cut it into pieces. In the meantime, slightly cook the garlic in olive oil and then add the tomatoes and salt.
Cook the tomatoes for 15-20 minutes, until the skins separate from the tomatoes.
Here is where I deviate from the recipe. Instead of using a food mill, I put the tomatoes into a Cuisinart and reduce them to sauce. I skip the step about refrigerating it overnight (I don’t have the space for this much sauce), but pour the sauce into sterilized jars.
I like this device which sits on the jar, because the mouth is wide and the sauce funnels right in; and it has a measuring device on the side so you don’t overfill. I leave a 1/2 inch space at the top.
Safety guidelines recommend adding an additional acid to the top of the tomato sauce before you process it. Your choices are citric acid or bottled lemon juice. For citric acid powder, click here.
Getting Ready to Hot Bath
Next, wiping down the rim of the jar will ensure your lid seals properly.
Now the jar is ready to go into the hot bath. Again, proceed with caution as you are putting something heavy into boiling water.
I submerge the jars and simmer for 40 minutes.
You know when you have sealed the jars correctly, as the center button in the lid will pop down as the jar cools. It is rather satisfying to hear pop, pop, pop as all the lids complete the seal.
Whether you decide to can tomatoes or not, below is Rick’s recipe using 3 lbs. of tomatoes and it is worth making.
It is also possible to process certain foods with the oven method (jams, especially). To see that process, clickhere to see how I made fig preserves.
Since we really don’t know what the supply chain will be over the holidays, tomato sauce or other homemade preserved foods will be a wonderful gift. So if you have access to an abundance of fruits or vegetables, think about canning them for yourself or your friends.
I hope you have some fun plans this weekend. Happily I am up at the cabin again appreciating the cooler mountain temps. The plan is to do some painting (on canvas), and get some biking or walking in. Enjoy!
Rick’s Tomato Sauce
This recipe uses 4 ingredients and makes the most delicious tomato sauce
6 TBSP olive oil (extra virgin)
1 TBSP minced garlic
3 lbs Ripe plum (Roma) tomatoes (stemmed, cored and cut into pieces (16 pieces))
2 tsp Kosher salt
Heat oil in a large pot over medium-high heat. Add garlic and cook 20 seconds until fragrant (do not brown). Stir in tomatoes and salt. Raise heat and bring to boil. Reduce heat and simmer vigorously, stirring frequently, until sauce has thickened slightly and tomato skins are starting to separate from flesh, 15 to 20 minutes.
Pass sauce through the medium disc of a food mill. Discard skin and seeds. Return the milled sauce to the pot. Bring to a vigorous simmer and reduce by half for a thick sauce.
Let sauce sit (overnight in refrigerator is best). Bring to room temperature and skim off any floating olive oil (the tomato oil is great for other uses).
Season with additional salt to taste. The sauce is ready to serve and can bee seasoned with oregano, red pepper flakes or basil.
Recipe can easily be multiplied given the amount of tomatoes available and the size of the pot.
Sauce freezes well and is suitable for wet bath canning.
I wanted to entitle this “Clean out Your Fridge” dinner, but my husband didn’t think that was very appealing. However, it’s not too far off. This simple summer dish can be a side serving, or a full meal, depending on what ingredients you decide to include.
A version of this recipe was recently posted from Veronica on Instagram @baconliciousmademedoit, so I cannot take complete credit for its development.
It is as easy as this. Start with something from the following list.
A Grain (or Seed)
You can use rice (brown, wild, white), quinoa (which is really a seed), farro, barley or buckwheat. I chose farro because I like the texture and nutty flavor and it’s a great source of fiber. In following the directions on the back of the package, 1 cup of rinsed farro and 2 quarts of boiling water=4 servings.
Vegetables
Summer squash and zucchini are abundant in my refrigerator, so I sautéed them in olive oil and then seasoned them with salt, pepper and lemon juice. Diced into bitesize pieces, they are a nice addition to the meal.
You can add cooked or uncooked vegetables~cucumbers, tomatoes, really any vegetable that you have or love. They add texture and flavor. For this recipe, I used 1 1/2 summer squash and 1 1/2 zucchini.
Beans
We have SO many cans of black beans that were purchased from Costco at the beginning of COVID when we were all in our hunkering down mode. But you can use chickpeas instead.
Nuts
Unless you have a nut allergy, feel free to add walnuts or a nut of your choice. We always have a bag of pistachios in the freezer.
Fruit~ Fresh or Dried or both
Honeycrisp apples are a staple in our home and we add them to everything~from tunafish salad to thin slices on toast and almond butter. So it is a natural choice to chop up some fresh apples into this dish. For a different texture, I also added dried cranberries (cherries would be great too).
A Protein~Optional
I added shredded grilled chicken (2 boneless breasts) to this recipe. You don’t have to as it is great without it, but for a main course, the protein seemed like a good idea.
Fresh Herbs
Basil is growing quite well in the garden despite this intense heat so that is the only herb I added. But maybe even a little fresh mint might be interesting?
This chilled dish/salad is so hearty and delicious. It was even better the next day! So nice to make a big bowl of it and then everyone helped themselves as the day went on.
And it is nice not to have to stick to a recipe and jazz it up according to your own tastes and whatever is in your refrigerator.
When it’s over 100 degrees here it is so hard to turn on the oven. It’s even more difficult to want to go outside and grill. But having a healthy, filling dish ready to go in the refrigerator is perfect for the summer. For another favorite summer salad recipe, click here.
This with a huge slice of watermelon makes for a delicious weekday meal.
Enjoy!
This post shared with Finding Silver Pennies link party #371
Back in July, I shared with you a project I have been wanting to try ~ stenciling a tile floor. Well, I finally started and I have got to tell you, this project is kicking my butt. I just re-read my first post about this (click here to read), and my enthusiasm is high.
Well, I am now day 4 into the project and it is like climbing a mountain. Sort of reminds me of that volcano hike I took last year in St. Kitts. What the heck was I thinking???
Prepping the Floor
How does grout get so gross?
I started this project on July 12th. That day, I started prepping the floor by washing it with TSP (trisodium phosphate). This heavy duty cleaner is recommended before painting. So one washing coat and then another with clear water to remove any residual TSP. Be careful using this product as the warning labels are pretty scary.
I apply the primer with a paint brush for the grout lines and a roller for the tiles. Letting the first coat dry, I then apply a second coat. I let the floor set for a few days. The floor is looking better already because the dirty grout is now a pristine white.
Here is the floor with the crisp, white primer on it.
After the floor is primed and dried according to the manufacturer’s instructions, two coats of Behr Decorative Chalk paint in white is applied as the base coat.
Selecting the Paint and Colors
I selected chalk paint because it gives an aged appearance and adheres well to any surface. But it does require a finish coat to protect it against staining and scratching.
There are now several chalk paints on the market today. After reading the article comparing Annie Sloan, Rustoleum and Behr chalk paint by Three Coats of Charm, I was inspired to try something other than my go-to, Annie Sloan.
During a recent trip to Home Depot, whose limited inventory of Rustoleum included black only, I picked 2 blues from the Behr paint line. What is nice about Behr is that they can mix whatever color you want, which is mixed in with the white base paint. My two blues are: Inked and Arrowhead Lake.
Naturally I am excited to start painting the stencil. I experimented with different colors of blue on some drawing paper beforehand. This step is time consuming, but well worth it.
Stencil with 2 colors
After an overwhelming consensus that this stencil needs 3 colors, not two, I mixed up an additional lighter shade of blue by adding Inked to the white paint.
The Painting Process
Walmart brush on the left
As a side note, if you decide to do this, get good stencil brushes. Mine are from Royal Designs. I also bought a set from Walmart but the bristles keep falling out. This is tedious work so it’s important to use the best tools.
Here is the color combination I selected~ three shades of blue.
By the time I was comfortable painting the stencil, it took approximately 15 minutes to finish a stencil. I counted 77 tiles, some full size, others were partial tiles on the perimeter. Figure in additional time to accurately line up the tile and tape it down.
About every 10th tile painted, the stencil and brushes require washing.
Today marks 4 days I have been working on this. I was hoping that today’s post would reveal the completely painted bathroom floor. However, there is still a bit more to do~the partial tiles under the vanity and those around the toilet.
Each cutout requires hand dabbing and I use different size brushes for the size of the cutout. Some painting tips: The paint is in 3 individual bowls which I cover in Saran Wrap to prevent it drying out. It is also helpful to keep paper towels nearby to dab the excess paint off the brush before applying it to the stencil.
I apologize for the photos~I had the overhead lights on and it just makes the photos dingy.
My goal is to complete 10 tiles a day. It doesn’t sound like much but what I didn’t take into consideration is that all this work is done either on your knees or on your butt. Hovering over the tile, while on my knees, is a great isometric exercise, but very tiring. I tried spreading the pain by using different body positions. Plus the getting up and getting down added to an unexpected fatigue.
I recommend investing in good knee pads, not these! The plastic material increased sweating which made keeping the knee pads in place difficult.
Expect the unexpected
And then of course, are the unexpected disasters. Once I had completed this tile, I inadvertently kicked over my cup of coffee. It smeared the wet paint and this tile was ruined. I was able to fix it by priming it again with 2 coats of white chalk paint, and letting it dry for an entire day. A minor setback, but discouraging nonetheless.
So as of today, most of the floor is painted. This is the entry view from the hall. I still need to get the partial tiles done under the vanity and around the toilet.
Unfortunately, I need to take a break from this today to can the 50 lbs. of tomatoes I have, as those cannot wait. Once I complete the last few tiles, then I will paint the floor with 2 coats of a polyurethane.
I love how it looks, but in all honesty, this was a HUGE project to undertake. In retrospect, here are my thoughts. It would be much easier with a less intricate tile. Using one paint color the application could go faster and easier with a paint roller. Obviously having a smaller floor to finish would significantly cut the labor time.
But as I stand back and look at it, this is now a work of art. Once I finish I will sign a corner. And, at the end of the day it looks so much better than the previous floor!
Happy Tuesday to everyone! August is an interesting time of year here. Typically we get our monsoon rains but there hasn’t been a drop yet. The yard, regardless of our watering system, looks tired. Everyone is done with the heat and looking onward to a cooler fall.
Also, I am sending prayers for those along the eastern seaboard in hopes the hurricane doesn’t adversely affect you.
If you enjoyed this post, please feel free to share it on Pinterest.