1

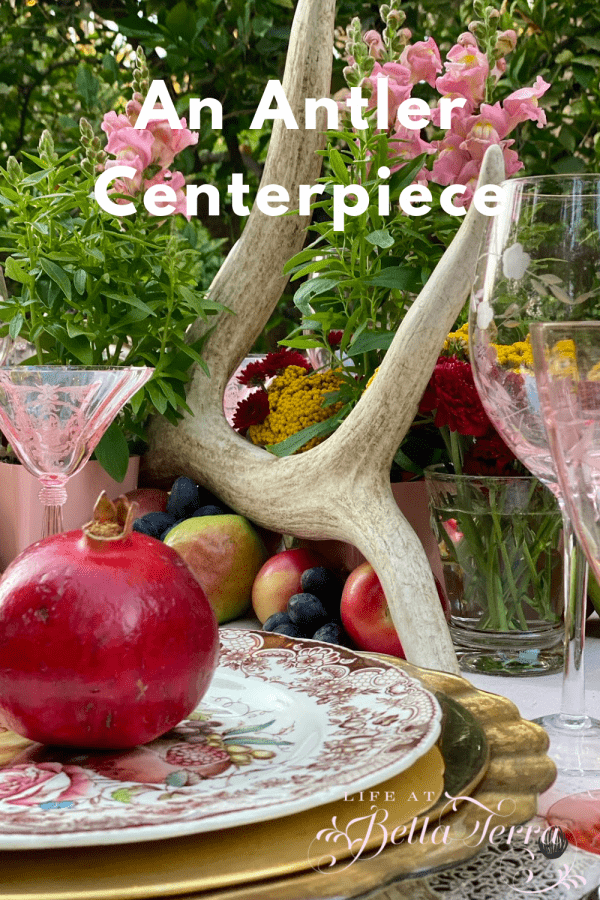
Creating an Antler Centerpiece

Having 4 talented bloggers come to Phoenix and stay at my home last week was such a treat. There is SO much to tell you, but one of the highlights is the Friday night dinner. They all brought favorite recipes and made dinner for 8. Since we are being COVID respectful, dinner in the orchard seems to be the perfect location for us to gather. I can honestly say it is very fun to have these extraordinary, creative women scouring the house for items to set the table. The set of antlers we recently got from a friend (see post here), was the perfect stimulus for the rest of the table design.

Andrea, Chas, me, Barbara and Chloe

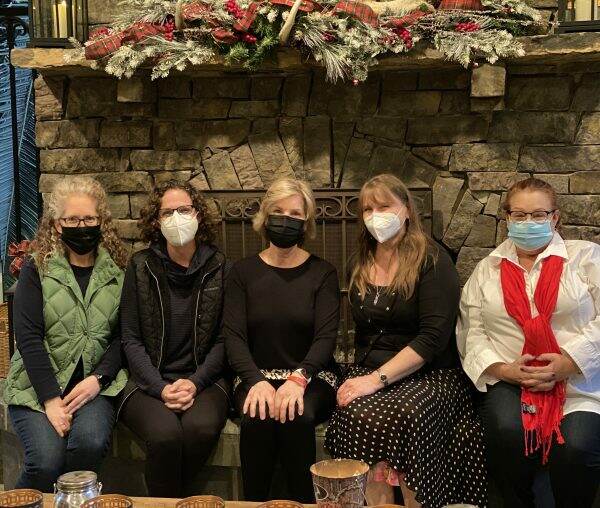
But first let me tell you a little bit about each of my guests. In October 2019, I attended an Inspiration Workshop in Texas at KariAnne’s home (Thistlewood Farms). After the workshop, one of the attendees started a weekly conference call where 5 of us would remain connected and share our blogging knowledge (or inexperience in my case).

Inspiration Workshop October 2019

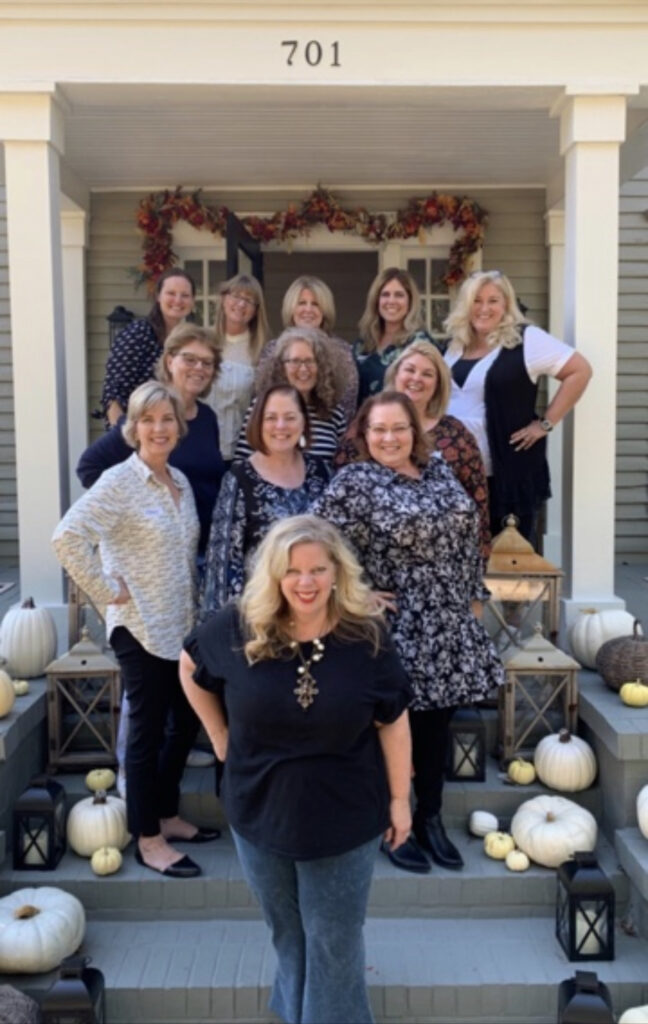
Over time, a few new bloggers joined the weekly call. When COVID hit, we had our network already up and running. Each week I found myself enjoying our virtual connection in a world promoting lockdowns and isolation.

Long story short, we decided to meet in person here at Bella Terra. I am excited and delighted to host this group. Unfortunately, two members could not attend due to family obligations. Kristin from White Arrows Home wrote a lovely post about why she needed to miss our gathering. You can read it here.

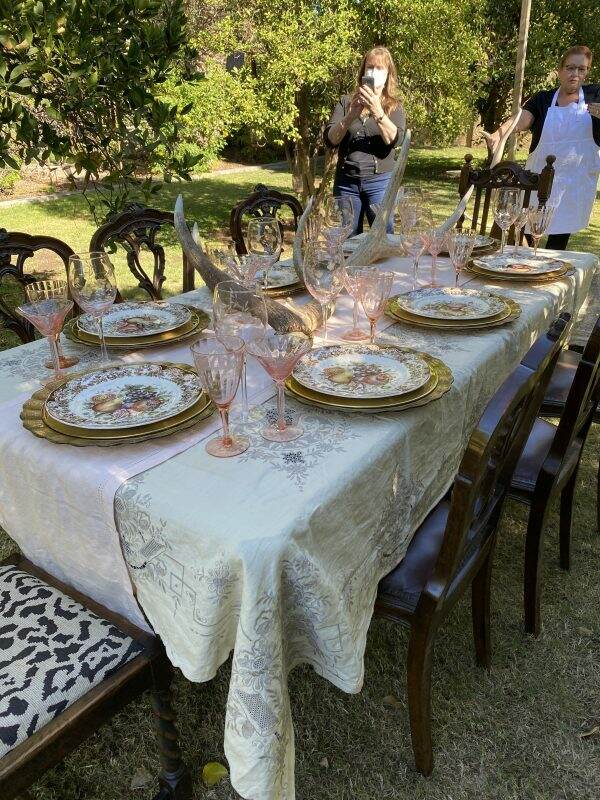
Setting the Table: The Linens

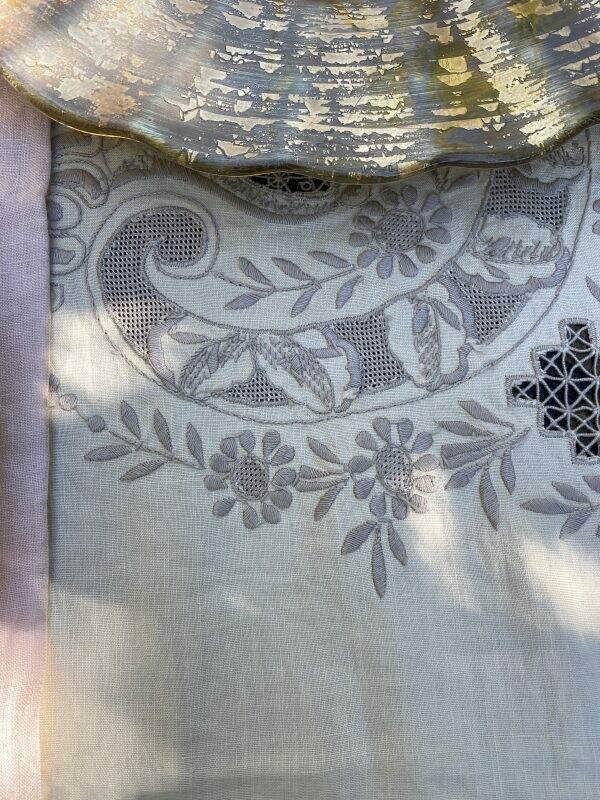
Since Barbara from Mantel and Table and Chloe from Celebrate and Decorate are Tablescape masters, they quickly select the tablecloth (a vintage find embroidered neutral) and a pink linen runner (from Williams Sonoma).
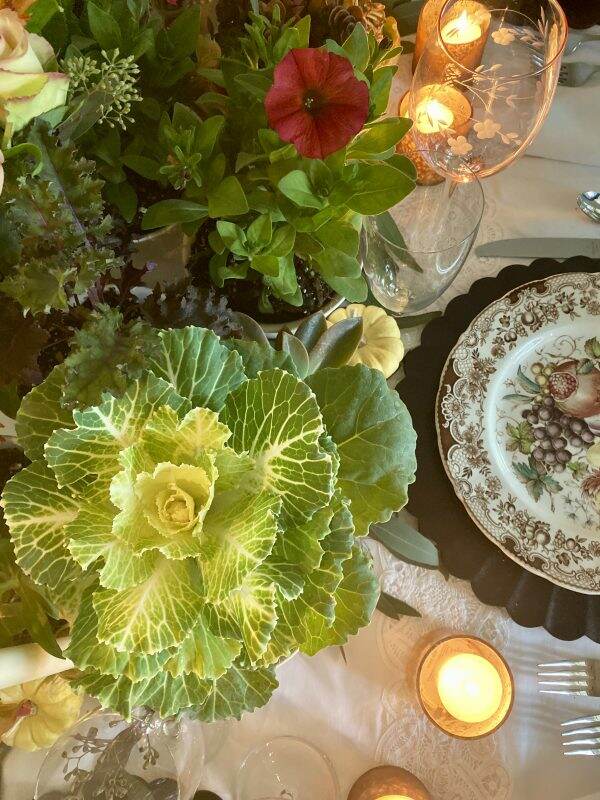
The Dishes

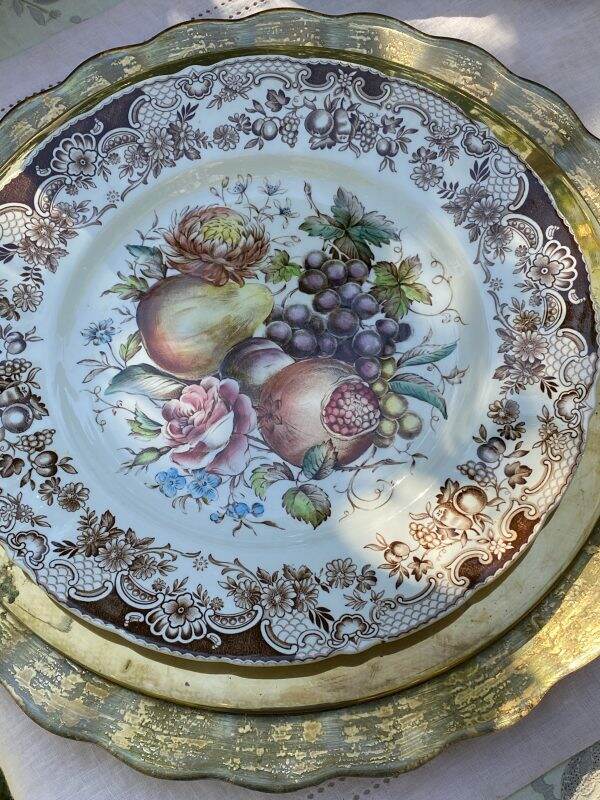
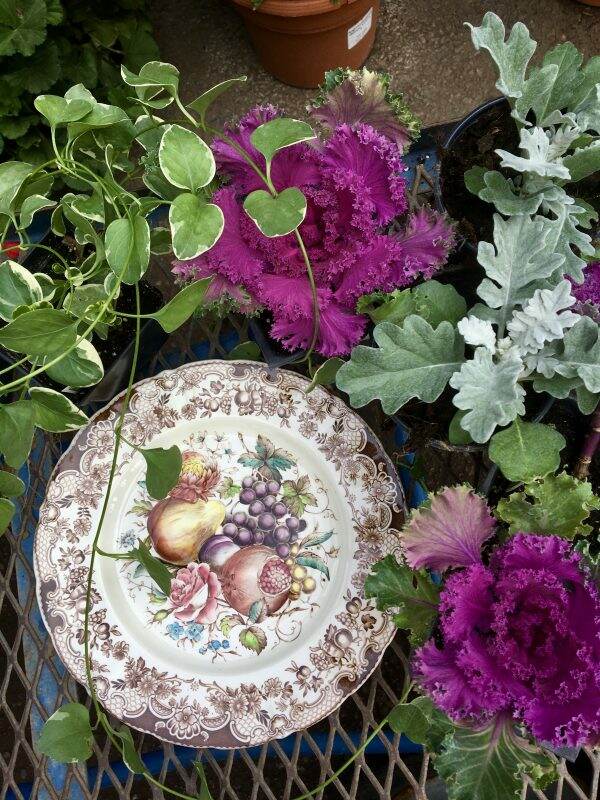
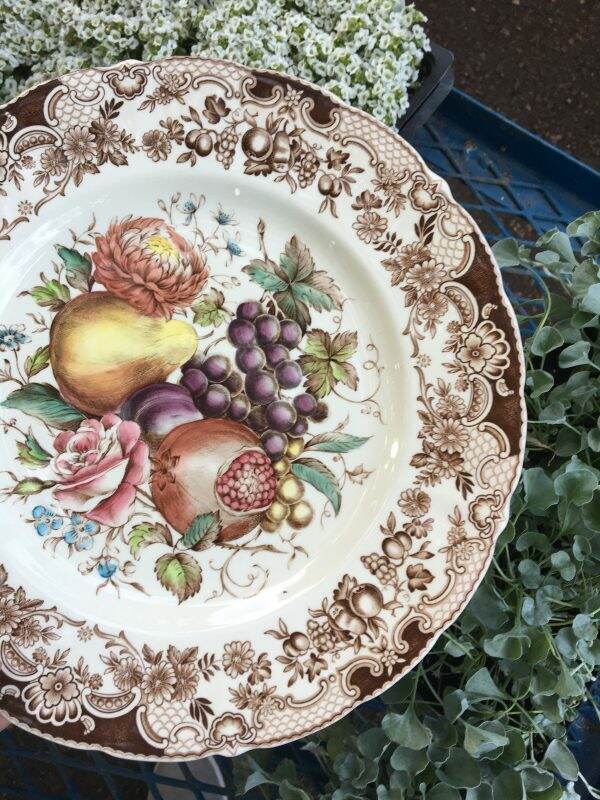
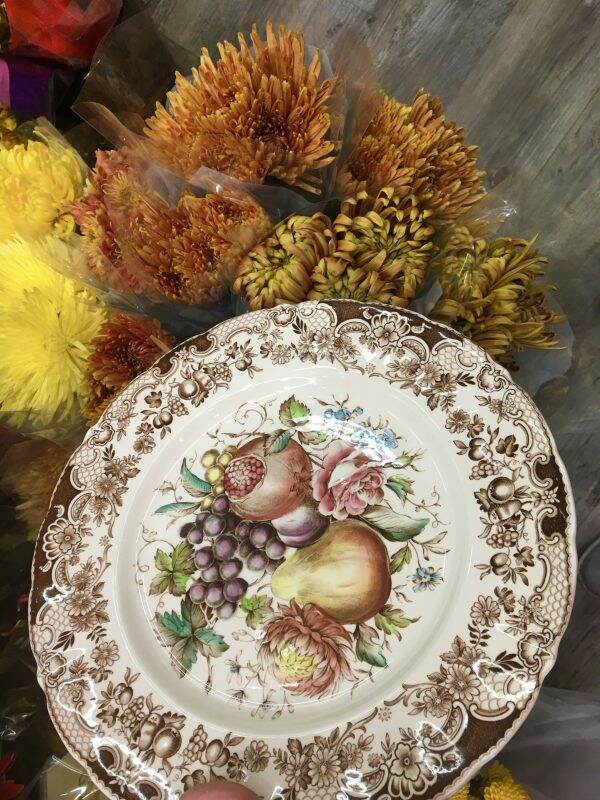
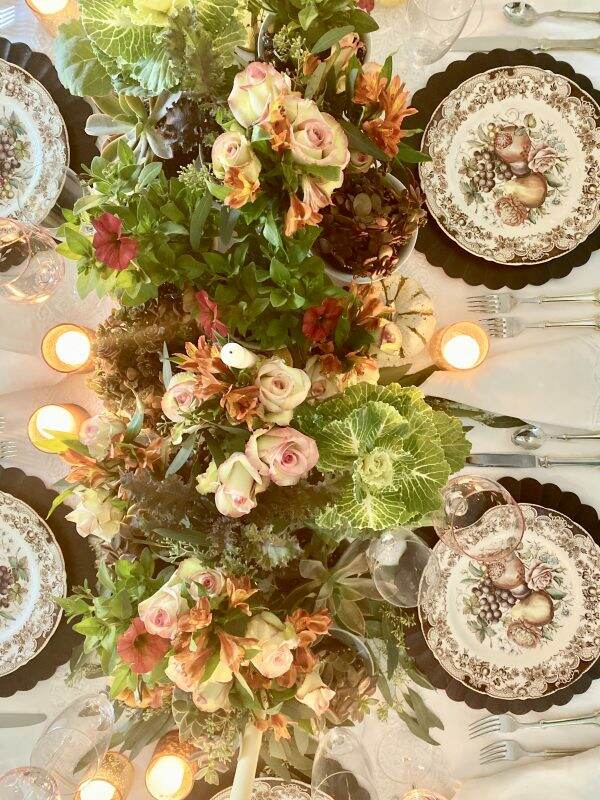
The charger is a ruffled, gold glass one from Leslie Roy, with an additional brass one on top. The plate is my favorite one for fall, Johnson Brothers Windsor Ware. Personally, I have never considered using double chargers, but the layering creates a fabulous and elegant look.
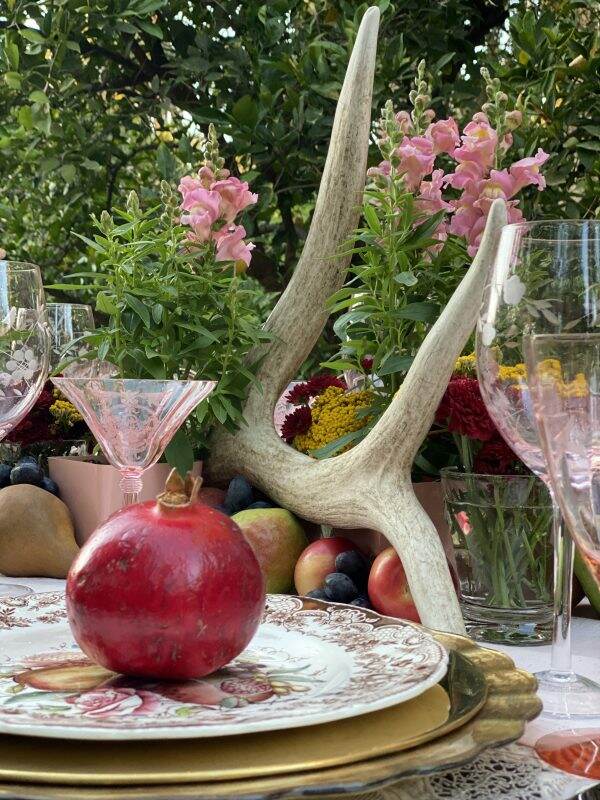
The Antlers

Andrea and Chloe

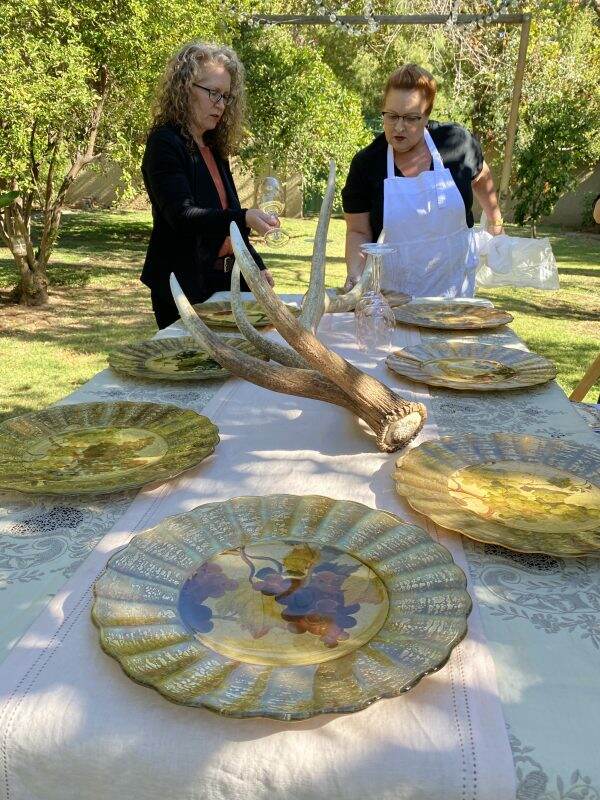
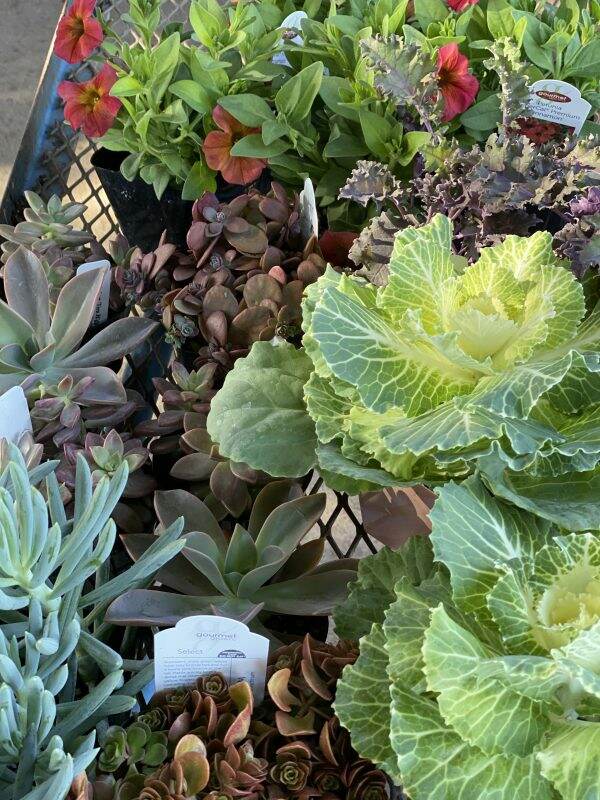
Take charge Chloe grabs the antlers off the front porch and off she goes to the orchard. Barbara states we need flowers and fruit and off we go to Whitfill Nursery and Safeway. Andrea from Design Morsels and Chas from Chas Crazy Creations help with all the rest~getting the glasses, silverware, chairs, etc. Activity is buzzing in the orchard!
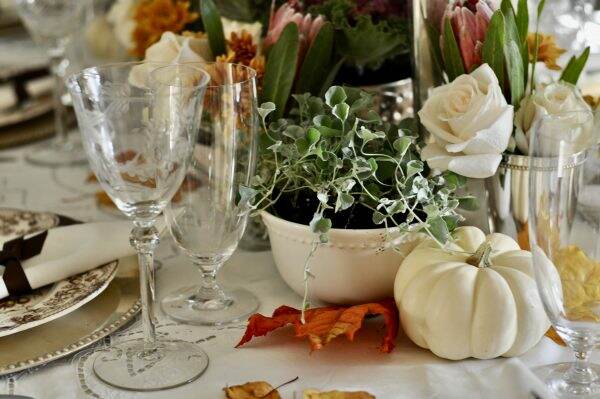
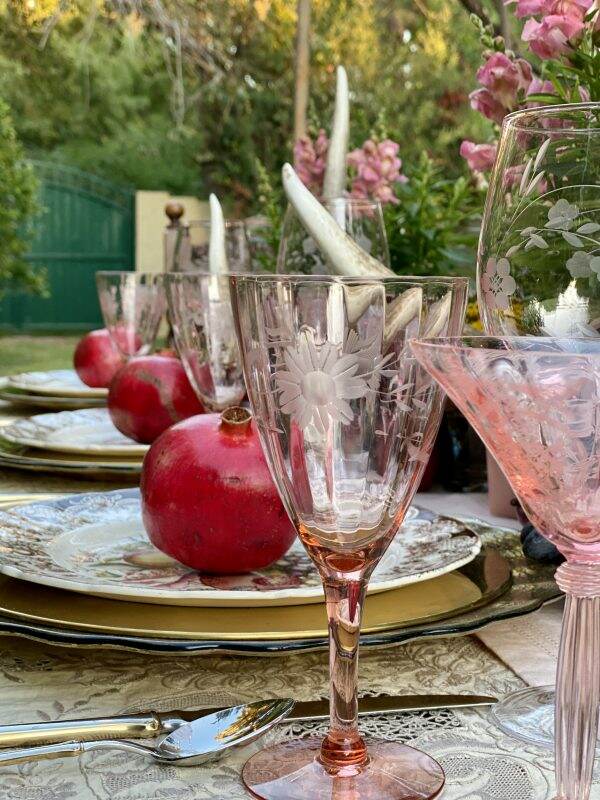
The Stemware

Barbara and Chloe

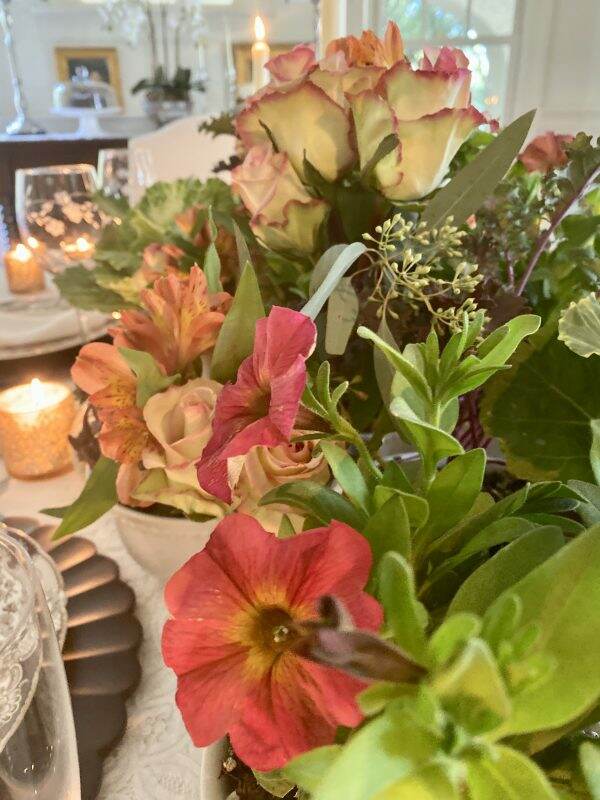
After selecting the right colors, sizes and shapes of flowers and fruits, Barbara goes to work on adding the final elements to the table.
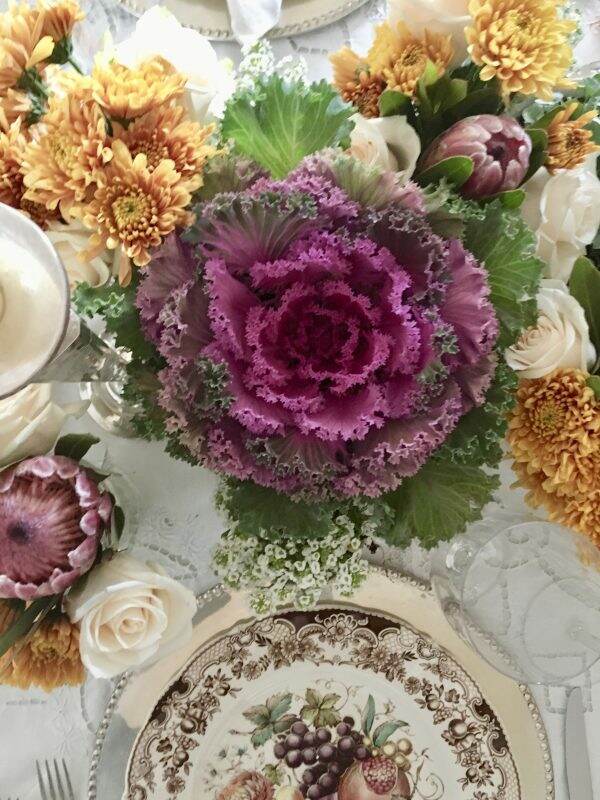
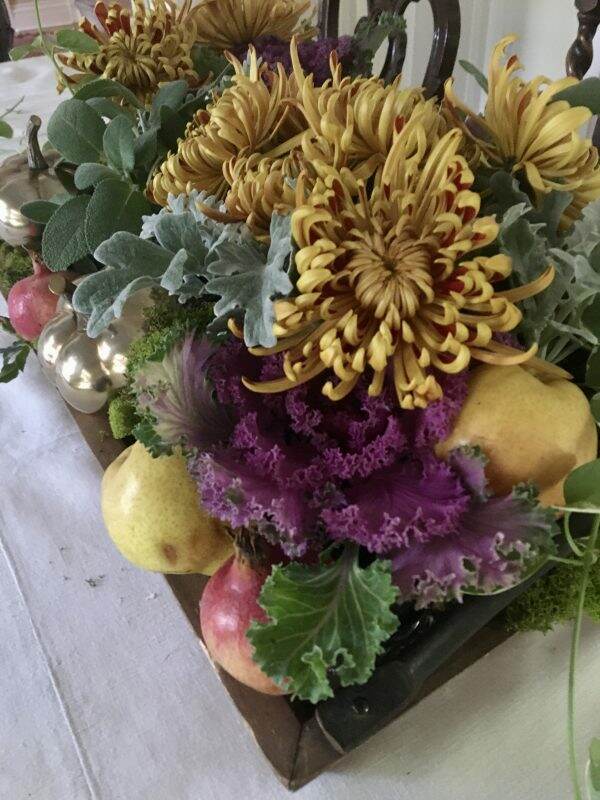
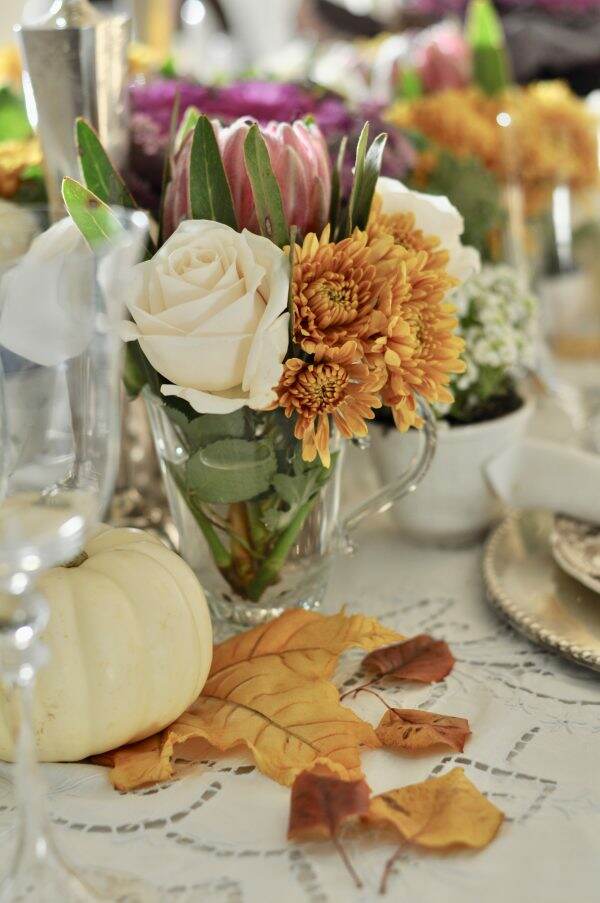
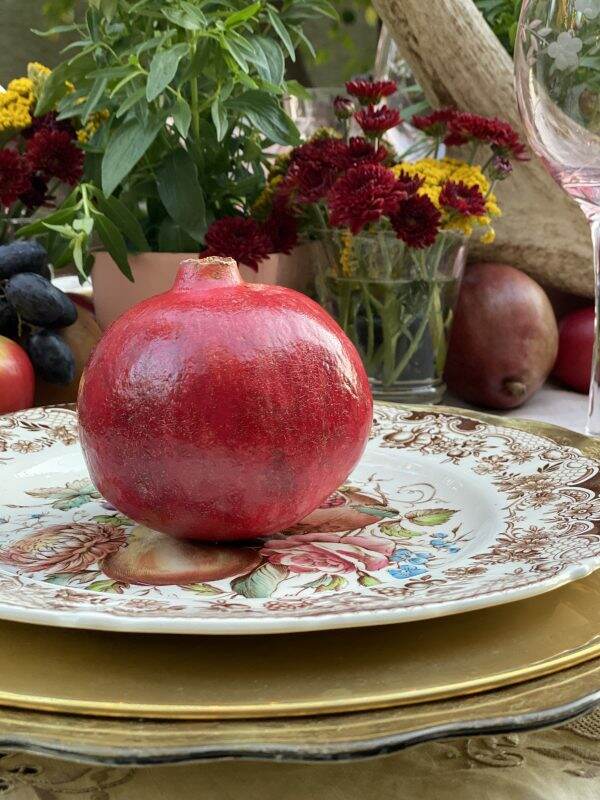
Flowers and Fruit

Cut flowers from Safeway; snapdragons from Whitfill

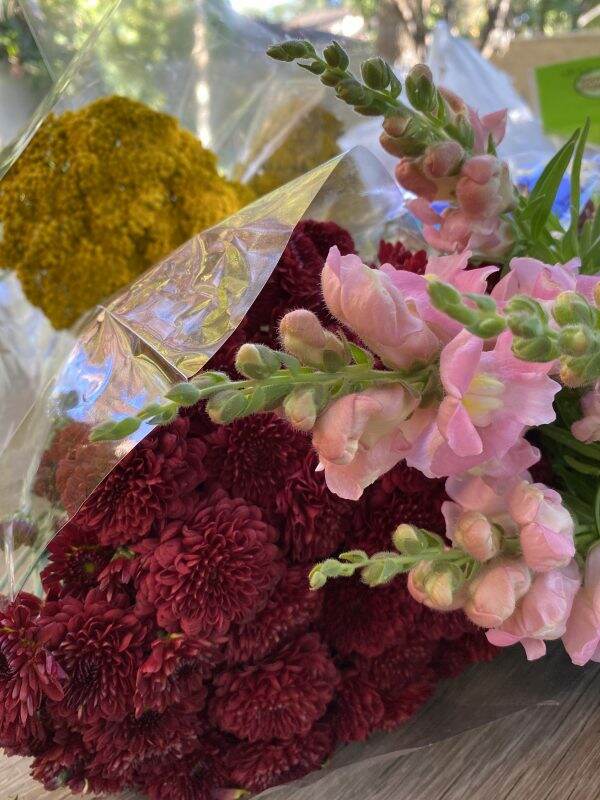
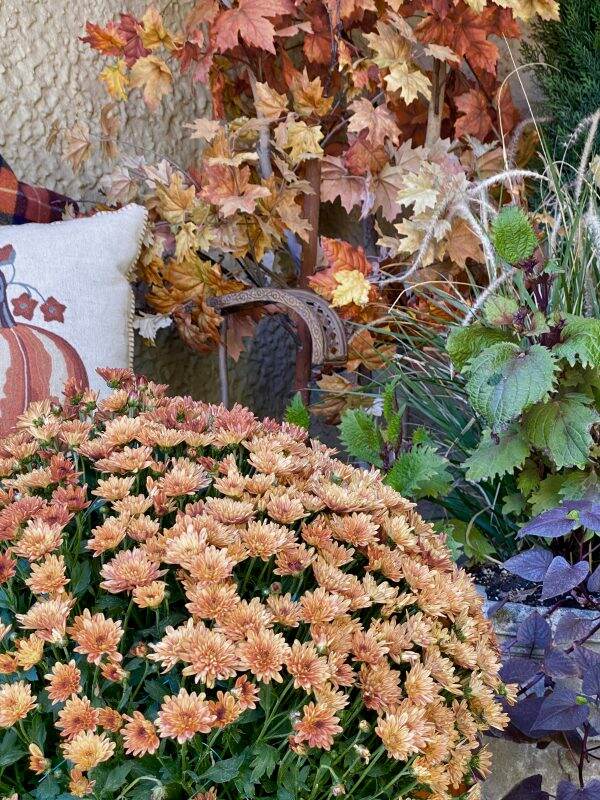
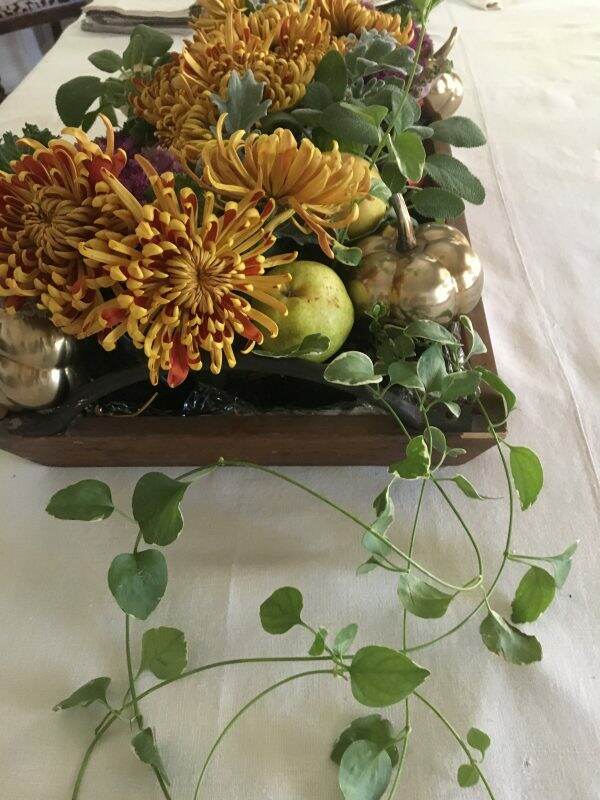
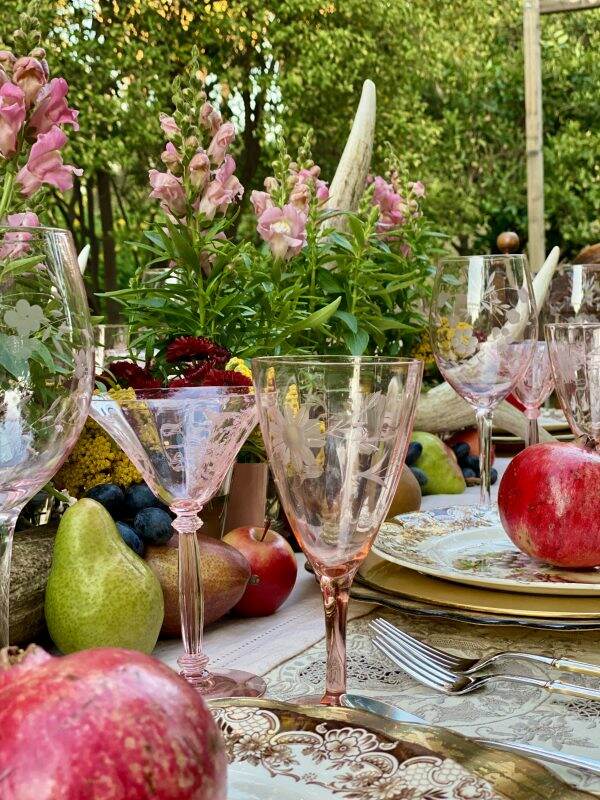
Pink stemware picks up the rose color on the plate. The pink glasses are vintage and part of my collection. Larger pink wine glasses are from Pier One Imports. Chrysanthemums, golden flowers and fruit bring the colors of the plate design to the table.

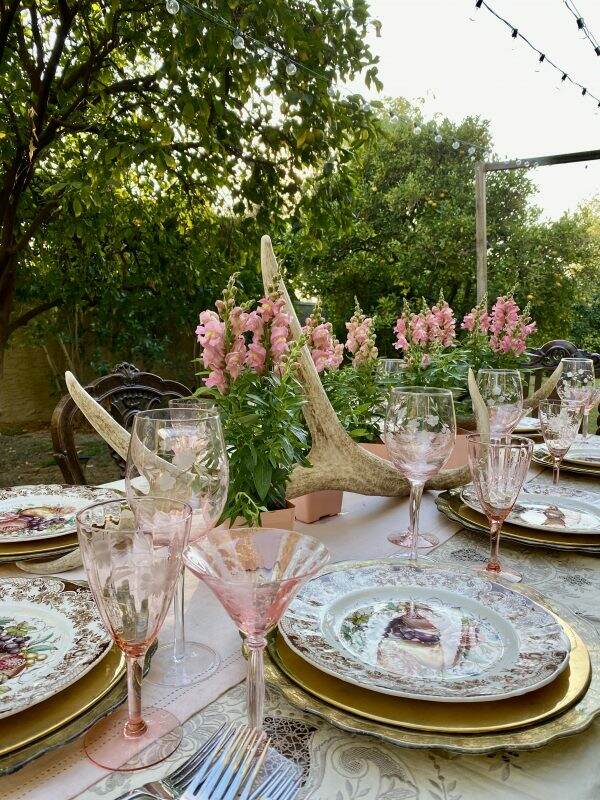
Pomegranates, pears, crab apples and grapes are tucked in among the flowers and antlers.

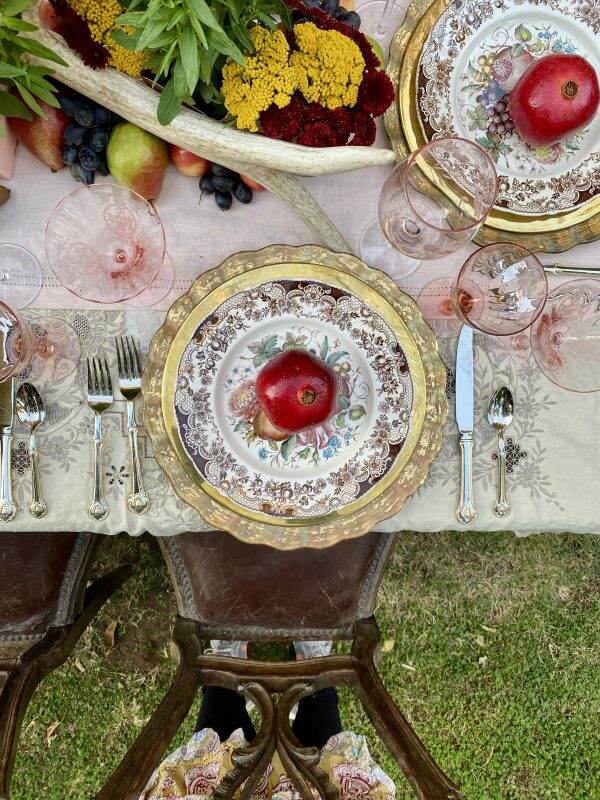
Using my Wallace Napoleon Bee pattern flatware, the gold accent goes well with the chargers. You can find this stemware on Amazon here.

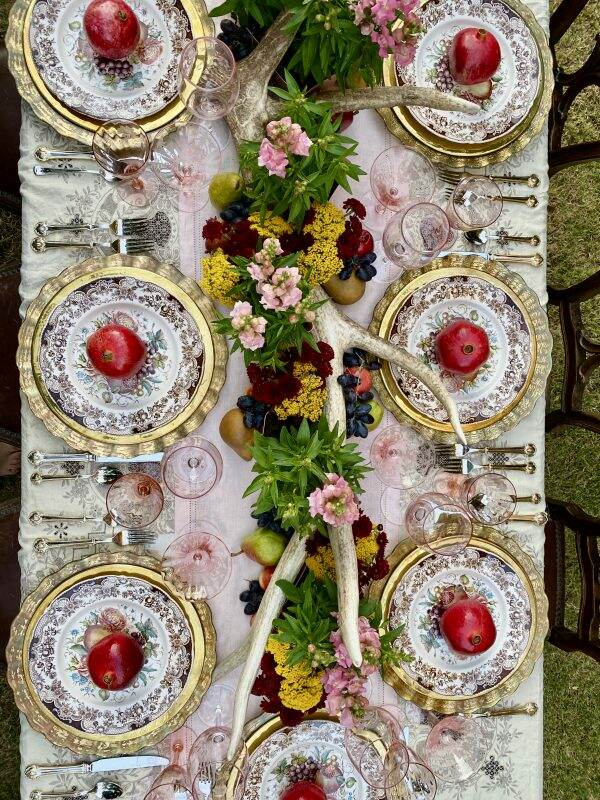
As a side note, the antlers are sheds, meaning an animal was not killed for them. Elk grow antlers every year and shed their old ones. We will be using these antlers at our mountain cabin, once they are properly mounted.

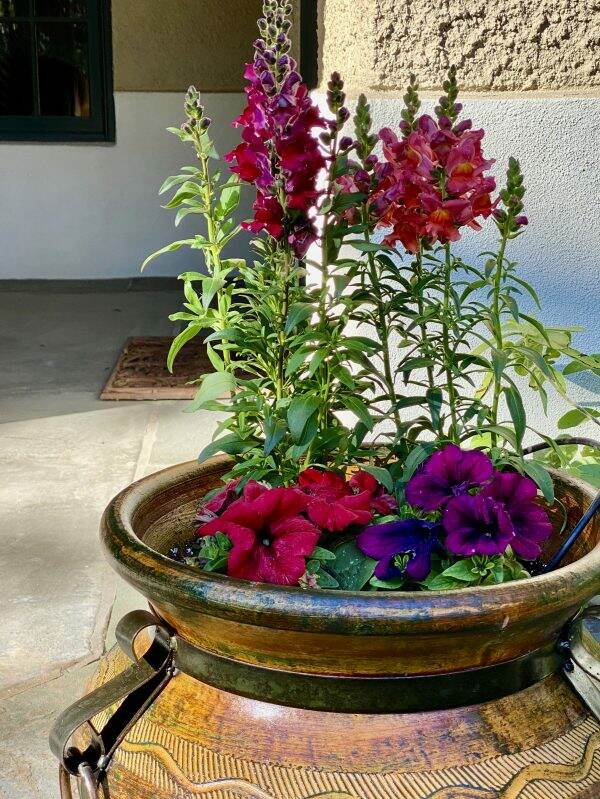
Even the pink plastic containers holding the snapdragons blend in with the centerpiece. Squares of plastic are placed beneath the pots to prevent the tablecloth from getting soiled.

The Evening

As evening approaches, the lanterns which were a bargain purchase from Home Depot, are used to line the walkway to the table. You can see that blog post here.

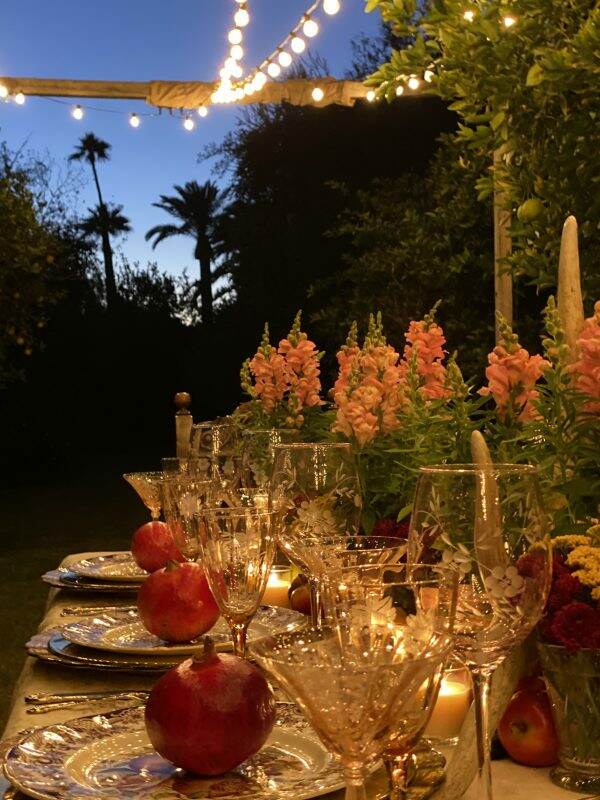
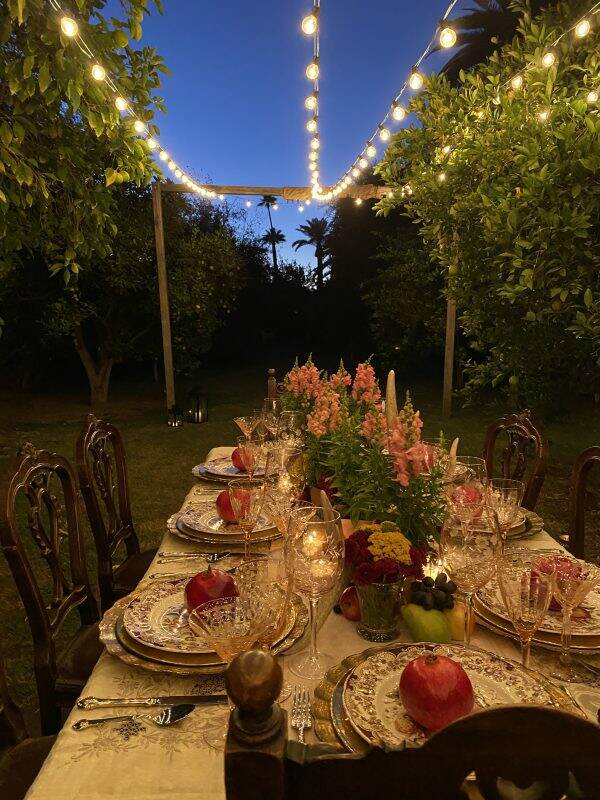
What a magical evening! The dinner everyone prepares is so delicious and worthy of another blog post.

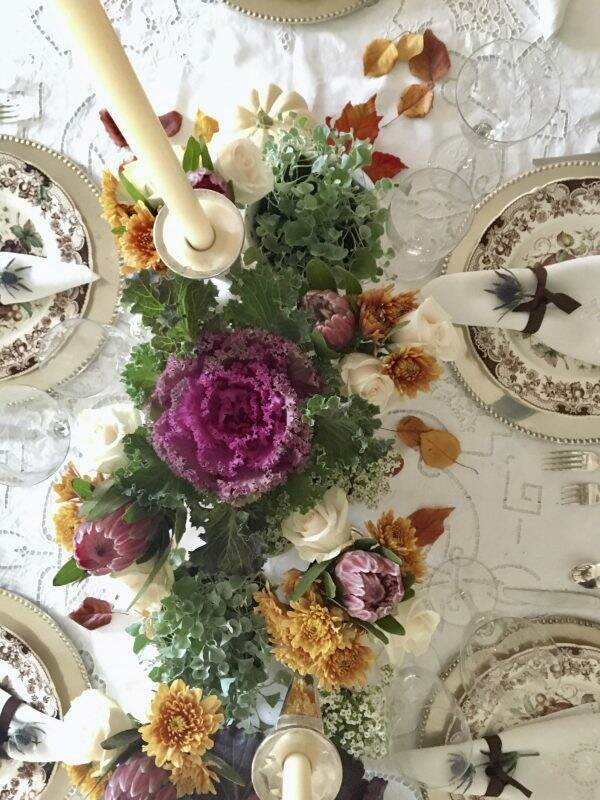
Here’s what I learned: When you live with all your belongings, it is difficult to step outside the box and create something new and different. I would never have thought to use the antlers, nor would I have paired it with pink. But look how lovely this table is~a mixture of rustic and elegance! Wish these friends lived closer as I would invite them over all the time to help me do things like this.

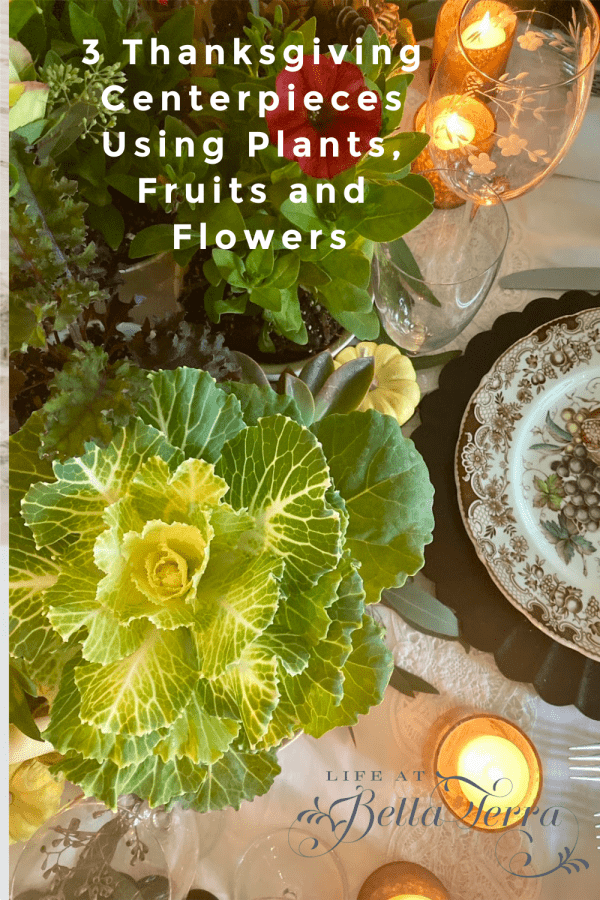
Happy Wednesday! For other centerpiece ideas using plants, flower and fruits, check out a previous post here.

If you enjoy this post, please do share it on Pinterest.

This post shared with Charming Homes & Gardens Week 34

Between Naps on the Porch Tablescapes Thursday #634


Property Maintenance

There is nothing better than having house guests to motivate you to spiff up your property. This has been a year of projects, mostly because of being confined to home more than usual. But this year it is necessary to get some of the bigger property maintenance projects done. Last week, I was blessed to have 4 friends come and stay. Since they haven’t been here before, I naturally wanted to make sure our property was in the best condition possible. A great time to finally schedule some overdue maintenance work.

The Well Tower

The well tower siding is redwood clapboard. Every five years it needs to be sanded and re-stained due to the exposure to our brutal summer sun. Peeling, blistering and fading make the structure look tired.

Being a size and shape that is difficult to navigate, I hire my favorite painter, John Cruz to help. John and I have been working together for years. He is my go-to painter for all my home remodels. The quality of his work is excellent and I believe his pricing to be fair. Plus he is fun to be around!

Well tower-After

With the well tower power washed and the sides sanded, it is now ready for stain. The dark green trim is also re-coated, making the final project crisp and ready for another 5 years. To see more information on the history of the well tower and its restoration, click here.

The Barn

Peeling and cracking paint on the barn-before

I haven’t shared much about the barn. Originally home to two horses (long before we owned Bella Terra), the barn is now where furniture is stored. Once the headquarters of 2 Connecticut Yankees, the barn was a fun vintage shop started by me and my friend, Susan. Filled with antiques and old treasures, Susan and I would have a barn sale 2-3 times per year. To see more about 2 Connecticut Yankees, click here.

Fresh paint-After

But life and family responsibilities became bigger priorities and the barn sales stopped. A few of our pieces and treasures are still inside. Some of those pieces can be found in my Store (there’s a tab on the top of my website).

Before
After

Using Ralph Lauren Barn Red, this structure definitely needed a new paint job. Though Ralph Lauren got out of the paint business in 2017, Sherwin Williams replicates this color. John scraped off the blistering paint, protected the hinges, primed where necessary and coated the entire barn with a fresh red layer.

The posts were primed in gray paint and then new white paint is applied.

Back side of the barn

All the hinges are re-painted with a fresh coat of black. Everything is now looking so much better.

The Hen House

Before
Hen house doors Before

Though the paint, for the most part, still looks good on the body of the hen house, the entry doors need significant help.

After

Using the same red paint as the barn, John, makes them pop again with his magical brushes.

Miscellaneous Touch Ups

In the interior, all the walls are plaster. Chipped corners happen every year with normal wear and tear. Typically, every October, I will go around the house and touch up the obvious dings in paint. It makes me feel like I am getting the house ready for the holidays. By putting both wall and trim color paint in mason jars, I am always ready to do a quick touch up here and there.

Sprucing up the Planters

Beautiful flowers are now available for planting so we are taking advantage of the abundant assortment to bring color to the yard. Some of our planters have been deteriorating and crumbling and are in need of replacement.

New geraniums and snapdragons are added to the front planter. Fresh containers of chrysanthemums enhance the fall entry. Whitfill Nursery has a great assortment of flowers and planters, if you are in the market.

Though it takes a bit of effort to get all this done, there is something very rewarding when your property looks clean and sharp. Plus after your houseguests leave, the work is done and you can sit back and enjoy the fruits of your labor!

Happy Tuesday! I cannot wait to share the visit with my four blogging friends tomorrow!

If you enjoyed this post, please feel free to share on Pinterest.

This post shared with Between Naps on the Porch Metamorphosis Monday #616


A DIY Chicken Feeder Picnic Table

Since Mary is busy getting ready for houseguests, I am filling in today! So here is a DIY project I made this week. Inspired by photos seen on Pinterest and Etsy, this chicken feeder picnic table is aptly named a chicknic table!

Not everyone likes projects.  However, a friend sent me a picture of one of these several months ago and I decide I want to make my own. I buy some scrap wood from Home Depot and use a pallet from the delivery of a new dishwasher.  It all crystallizes today.  Here’s the finished project.  I will walk through the construction as cryptically as I possibly can.

The first step is to cut the base of the table.  I cut a piece of 24” X 24” plywood into 3 — 8” X 24” pieces.  

Next I cut the pieces for the edges of the table.  I pre-drill, glue and screw them in place.  The plywood is 3/4” so the drilling and screwing are done carefully.

The legs of the table come next.  Four pieces, the same length, cut at 45° on both ends.  They attach to the underside of the table with screws coming in through the underside edge of the table. Again, you should pre-drill the holes to minimize splitting.

Finally, I put on the braces and seats.  The side braces are long enough to glue and screw the seats in place. I install the center brace after attaching the side braces. I have no plans so this is done on the fly.  Measure twice and cut once.

My tools include two drills (one, an old school Craftsman which plug in (my battery powered DeWalt died on me 😐) and my Makita (very reliable for driving screws).  See link here. I also use a Milwaukee circular saw (link here), some screws, liquid nails glue, the wood and a square and measuring tape.  A miter saw will work well for the project too. Here is my favorite mitre saw (here).

Cooper approves

Here’s the finished project with my quality control executive doing an inspection.  This project took a couple of hours of work.  I seal it with some spar varnish and may put drain holes in the table top (although it will be under cover).

 The chickens (and our duck) got their first look at it today.  It takes them awhile to find it but seem to appreciate the spinach and scratch.  Maybe I’ll build a couple more.  🐔🐔🐔🐔🦆

To see another project of mine, click here. Thanks for joining me today! Mary will be back again soon.

If you enjoyed this post, please share on Pinterest.


3 Thanksgiving Centerpieces using Plants and Fruits

Each Thanksgiving I try and do a unique centerpiece that reflects the harvest and a season of gratitude. I love using fresh potted plants because I can plant them in the yard or planters after the holiday dinner is over. It seems counterintuitive to be planting in late November or early December, but it is our growing time here in Phoenix.

The autumn harvest is filled with many wonderful fruits~apples, pears, pomegranates, plums, persimmon, dark grapes and figs. Utilizing these in a centerpiece adds texture, color and shape. Plus you get to consume them after the meal is finished.

Centerpiece #1

Each year, after I select the dinner plate I will use for my place setting, I take it with me to choose centerpiece items. My first stop is usually my favorite gardening spot, Whitfill Nursery. Here, my Johnson Brothers Windsor Ware works perfectly with the ornamental purple cabbage, alyssum, and the ivy. This tends to be my Thanksgiving plate of choice because of its colors.

The next stop is to the closest florist, which is at our grocery store, Safeway. Here is where I purchase pomegranates, pears, apples and cut flowers to compliment the dinner plate. I try to keep cut flowers to a minimum because they only last a few days, whereas all the other items I can simply re-use.

After selecting the items that you want to use, then consider what vessel or base you will stage them. If you are like me, I always set my table a few days before Thanksgiving. Using potted plants, you will need to water them so make sure that they have a place to collect water. Or you can make your base or vessel waterproof. You don’t need to have excess water leaking out from underneath your centerpiece.

In this particular centerpiece, I am using a wooden tray, that I lined with foil and plastic. Using fresh fruit, moss, brass pumpkins, fresh herbs (sage) and potted plants, it is a low, but abundant centerpiece. The ivy can be woven down the table or around candlesticks.

Centerpiece #2

With a larger table or one with more place settings, here is another way to use a mixture of potted plants, flowers and pumpkins. Using multiple vessels for the plants and flowers, creates a sense of interest, as well as different heights.

Putting plants in simple bowls, like the white one above from Pottery Barn (Emma), blends in nicely with the white roses and white pumpkins. Proteas, mums and autumn leaves enhance the colors on the dinner plate.

Often we tend to think that flowers need to go into a vase. But by using glass coffee and silver mint julep cups, you have flexibility to tuck the flowers and plants in where you want.

Centerpiece #3

Lastly, this centerpiece uses succulents, copper colored petunias, ornamental cabbages, and red kale.

Adding alstroemeria, peachy colored roses and seeded eucalyptus, completes the fall look. Look at all the lovely shades and textures.

Again I am using a variety of bowls and small glasses to hold the plants and flowers.

Both white and orange pumpkins are tucked around the centerpiece. A combination of tapers and votives add a magical ambiance.

The benefits of using plants and fruits is their extended use once the holiday meal is over. All the plants go back out into my yard and the fruit gets eaten or used in recipes. Of course, we enjoy the fresh cut flowers and then dry the blossom into potpourri we spread in our hen house.

Get a little creative in the colors, textures and vessels in your centerpiece. I hope this post has offered you some inspiration for your holiday~however it may look this year.

And Now More Thanksgiving Inspiration

Kippi from Kippi at Home shows 3 Simple Thanksgiving Table Settings.

Stacy Ling from Bricks and Blooms creates an easy Thanksgiving centerpiece.

Chas from Chas Crazy Creations makes this fun Easy Pilgrim Hat Centerpiece.

How do you make a simple Thanksgiving centerpiece? How can I decorate my Thanksgiving dinner table? I'm sharing an easy pilgrim hat centerpiece and it only cost me $3.

Cherryl from Farmgirl Reformed shows how to Create a Simple Thanksgiving Tablescape.

Rebecca from Zucchini Sisters has a 10 Minute Thanksgiving Decor Basket.

Olivia from Olivia O’Hern makes this sweet Felt Inspired Fall Garland.

Niky from The House on Silverado shows Three Simple Place Settings

Jemma from At Home With Jemma shows this adorable Vintage Truck Thanksgiving Centerpiece.

Please visit Agnes from Just That Perfect Piece and see her super easy last minute Napkin Rings.

I hope all these wonderful Thanksgiving ideas is getting you excited about the holiday. If you enjoyed this post, please share it on Pinterest.


When a DIY Craft Project Fails

Full disclosure, I am not a crafty do-it-yourself-er. And I am reminded of that when I take on a new cute project and completely screw it up. But like most things in life lately, we need to make the most of it. Here is my story on when a DIY craft project fails.

The Inspiration

Over a year ago, I saw this adorable craft idea on someone else’s blog. Since I have never tackled a project like this, I clicked on all her links and purchased the items needed for this craft. And they have literally sat unopened for the last year. So I decide this is the week to try making it.

How to Stencil a Thanksgiving Napkin
How to Stencil a Thanksgiving Napkin in 5 minutes

Here is how Karen at Sanctuary Home Decor (who just seems to be perfect in EVERY way) made this craft. It is a dinner napkin stenciled with the word “thankful”. She used this for her Thanksgiving table last year. Pretty, isn’t it? And she claims she did it in 5 minutes!

Follow the Instructions

I carefully follow her instructions by first ironing my napkins. Since I didn’t want to completely copy Karen, I choose the word “Blessings” to stencil on the napkin. I proceed to cut out the letters and decorative vine. See below for sourcing information.

In making sure I place the letters neatly, I determine the center letter so I can line it up properly on the napkin.

Up to this point, I’m fat, dumb and happy about this project. And then here is where it starts to unravel. There are only two “S” stencils available and the word “Blessings” has 3 “S” letters.

Applying the Letters

Next Comes Paint

These mesh stencils have self-adhesive backs, however, in order to protect the rest of the napkin from paint, I use blue painters tape on the edges. Working with the plastic wedge recommended with the paint gel, I apply the paint to the stencil.

Of course, mid-way, I needed to move the S from the end of the word to fill in for the missing middle S.

The Disappointing Result

When I peeled off the stencils, the paint has leaked between the S stencils and left a mark. I try covering it up with White-Out…..what a mistake!

So, with 11 napkins to go, I try this again on a new napkin. Changing the word to “Blessed” solves the lettering problem.

Carefully applying the paint, I am convinced this one will be perfect. However, this napkin also has paint blotches. Seriously?!!

Third time is a charm, right? Not for me.

After the fourth failure, I just gave up. At this point, I have ruined 4 napkins and most of the afternoon. Karen said this is an easy 5 minute DIY. What is wrong with me?

The next day, still disturbed over the fact that I am a complete failure on stenciling napkins, I am determined to find a solution.

Making the Mistake Obvious

Fortunately, I purchased 2 additional paint colors for this project. Using red paint, I cover all the black blotches and make them into hearts.

Where hearts didn’t work, I applied some white paint. They certainly are not perfect, but at a quick glance, you almost don’t notice all the boo-boos.

I will use these 4 napkins to wrap baked bread over the holidays, so not all is lost. Who knows? Maybe I will try again as I still have 8 white napkins.

The moral of the story~not all DIY projects are perfectly easy. If I share one in the future, please know that I will warn you about the challenges. In our social media world, perfection is often portrayed. However, in this case it was certainly not my reality!

It is good, affirmative exercise to write the word “Blessed” many times. Because I am blessed to have you reading this (and hopefully laughing about it!).

If you want to attempt this DIY project, here is the link to Karen’s post. Also,

you will need the following supplies:

Napkins of your choice (I used these from World Market), quantity of your choice. I ordered 12.

Good luck! If you do this, please let me know the results.

If you enjoyed this post, please feel free to share it on Pinterest.


DIY Holiday Gift~A Soothing Bath Soak

Yesterday, I shared the steps for making Muscle Relaxing Bath Salts. If you missed that post, you can see it here. Today, I am making another luxurious product, perfect for reducing stress. This has been a crazy year and the holidays, in and of themselves, tend to be frenetic. My focus this year is providing gifts that will help calm, soothe, and pamper my family and friends. So today is the second DIY Holiday Gift idea.

Simple, Clean Ingredients

Again, I sourced Pinterest for this recipe from Sweet Nature’s Beauty. This Chamomile, Lavender and Oatmeal Bath Soak blends dried flowers, oatmeal, Epsom salts and relaxing essential oils. I wish I had dried more of the chamomile flowers in my garden, but instead I am able to purchase these ingredients easily online. To see my garden chamomile, click here.

Chamomile is known for its reducing anxiety and promoting sleep. However, this sweet, floral herb has many other benefits from helping skin irritations to treating cold symptoms. Click here to see the 8 benefits of Chamomile tea by Medical News Today.

Though oatmeal is great for breakfast it is also a wonderful addition to your bath. It is moisturizing, soothing and inflammation-relieving for the skin. For this bath soak, put the oatmeal in a blender to get a finer texture.

Unlike yesterday’s recipe, this one calls for fine Epsom salts, another great source of magnesium.

Essential Oils

Lavender flower buds have been used in many cultures for many years. It is suggested that lavender helps purify the body and mind. Since ancient times, lavender has been used to treat many different ailments, including mental health issues.

In this recipe, I use Chamomile and Lavender essential oils, making it smell SO good.

Mix all the ingredients together. Make sure you remove any dried stems that may still be attached to the chamomile flowers. No one wants dried little sticks poking you while in the bathtub.

Presentation is Everything

Originally, I thought I would put the bath soak mixture into small muslin bags. However, for longer term storage, perhaps a glass container is better?

And since you will need to scoop the mixture out to put into your bath (2-4 big scoops), adding a spoon or scoop is a nice addition. Many different sizes, styles and price points can be found here. The bamboo spoon above is found at World Market.

Again, I did make labels for this bath soak with the ingredient list on the back. Using Avery Business Card #5377, it is very easy to create your own design and print both sides with a template.

As I mentioned yesterday, it would be such fun to put a spa basket together with the Muscle Relaxing Bath Salts and the Chamomile, Lavender and Oatmeal bath soak. In addition you could add the easy-to-make lavender pillow (see blog post here), a dry scrub brush, soaps and a candle for a lovely gift for friends or family. Who doesn’t need some love and attention, especially after this year?

I’ve never made products like this before. Not only is it enlightening and informative, but the results are gifts you would be proud to give. Packaging it up pretty for the holidays will make the recipient of this gift feel extra special.

The Ingredients

1 cup Fine Epsom Salts

1 cup Oatmeal, blended (I did not use instant)

4 TBSP Chamomile Flowers

3 TBSP Lavender Flower Buds

12 drops of Chamomile Essential Oil

12 Drops Lavender Essential Oil

Glass Jars or

Muslin Bags

The Directions

Blend the oatmeal in a blender or Cuisinart. In a bowl, combine Epsom Salts, oatmeal, dried chamomile flowers and dried lavender buds. If your chamomile flowers have stems, remove them. Stir in the essential oils.

Store in either an airtight glass jar or if using in the near future, use a muslin bag.

Happy Wednesday! Have a blessed day.

This post shared with Karins Kottage Wednesday Linky Party #202

Creative Crafts Linky Party #16