1

My First Key Lime Pie

I have never made a key lime pie….ever.  I did try my hand at Lemon Meringue once and it was a total disaster.  We were at Ranch Market this the weekend. They had key limes for $0.99 a lb. and I couldn’t resist buying a big bag of them.

There are quite a few different recipes for key lime pie~~with and without eggs.  The recipe I chose was from Allrecipe because it was customer rated with 5 stars. There are so few ingredients required for this pie.

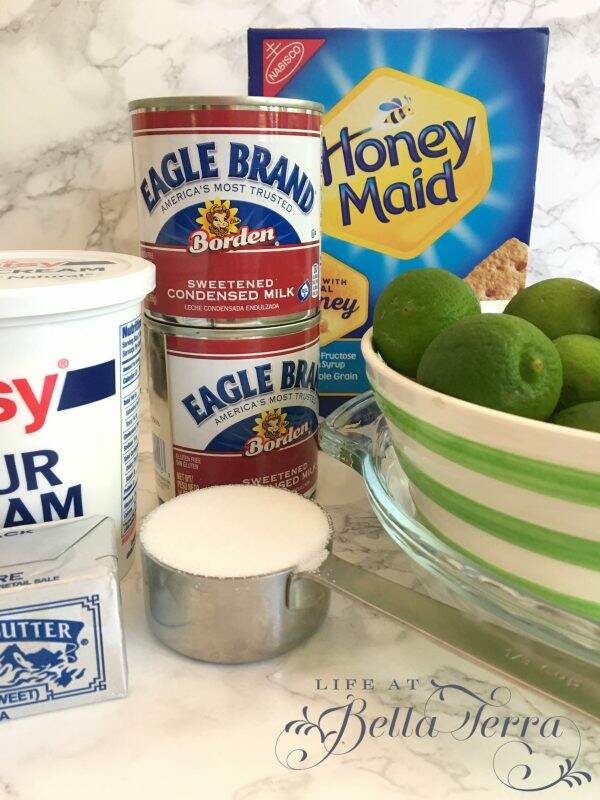
You can use either a store-bought graham cracker crust or it’s very easy to make your own from scratch.

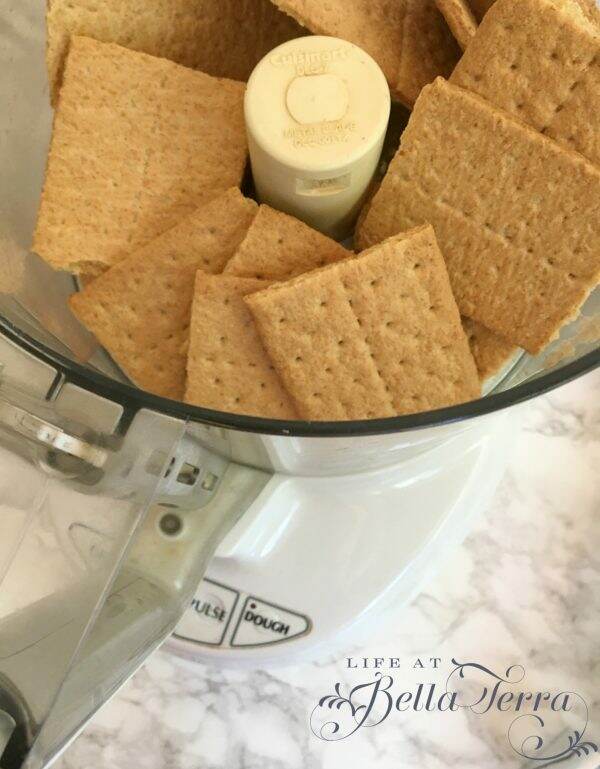
Here’s how to make the crust. To get 1 1/2 cups of finely ground graham crackers, I used approximately 1.5 packages of graham crackers.  Using the Cuisinart, it took a few seconds to pulverize the crackers into crumbs. You can also put the crackers into a Ziplock bag and use a rolling pin to crush them.

Has anyone else noticed how small graham crackers have become?  I actually googled it and there have been numerous complaints on the reduction in size and diminished taste.  Graham crackers were a favorite childhood treat, but now they seem so skimpy. I digress…

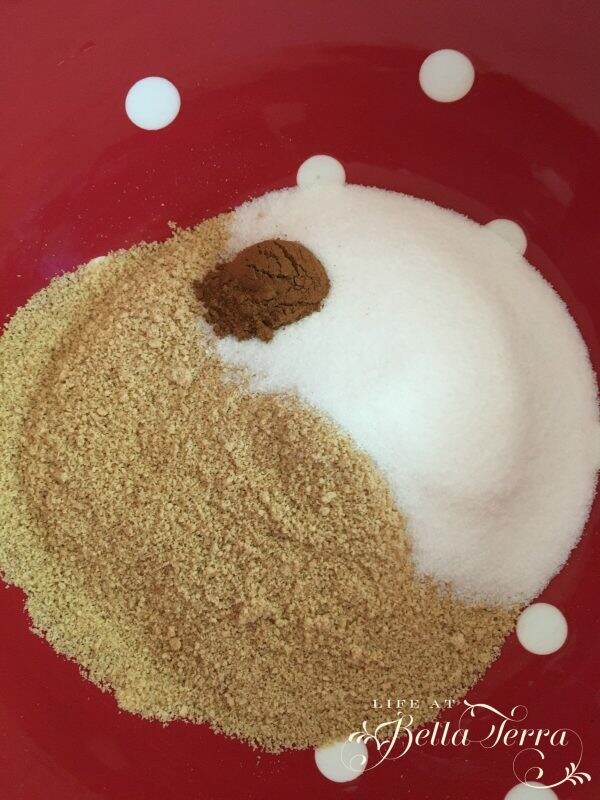
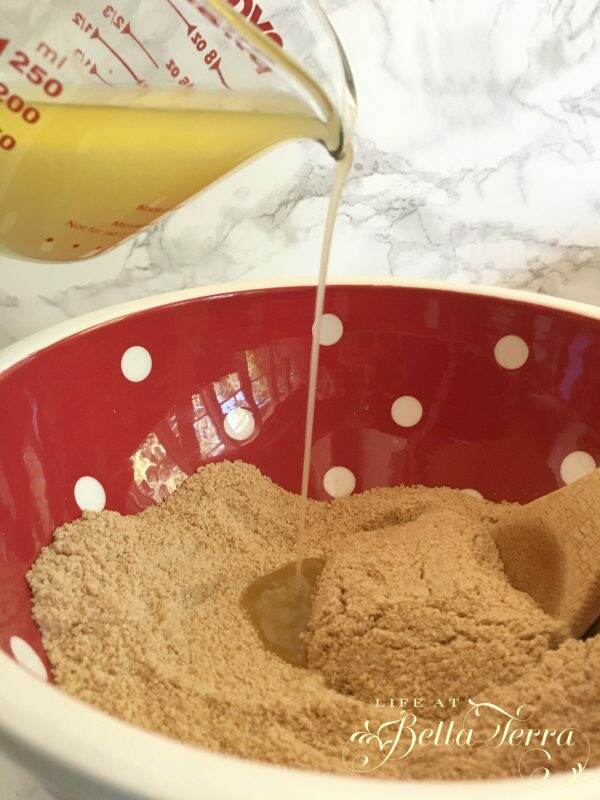
Back to the pie. Add sugar and melted butter.  Cinnamon is optional but I included it in this recipe. Mix well.

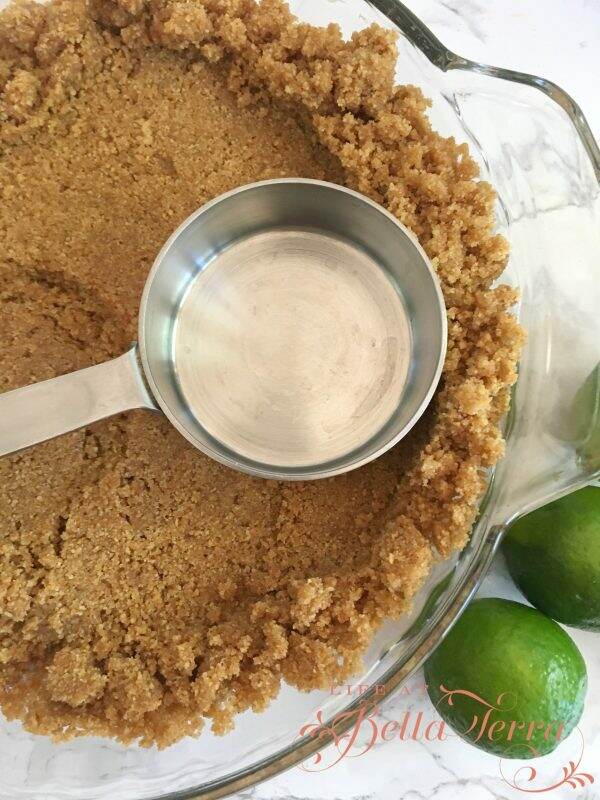
Press the mixture into a 9 inch pie plate~~I used a measuring cup to tap the crumbs down.

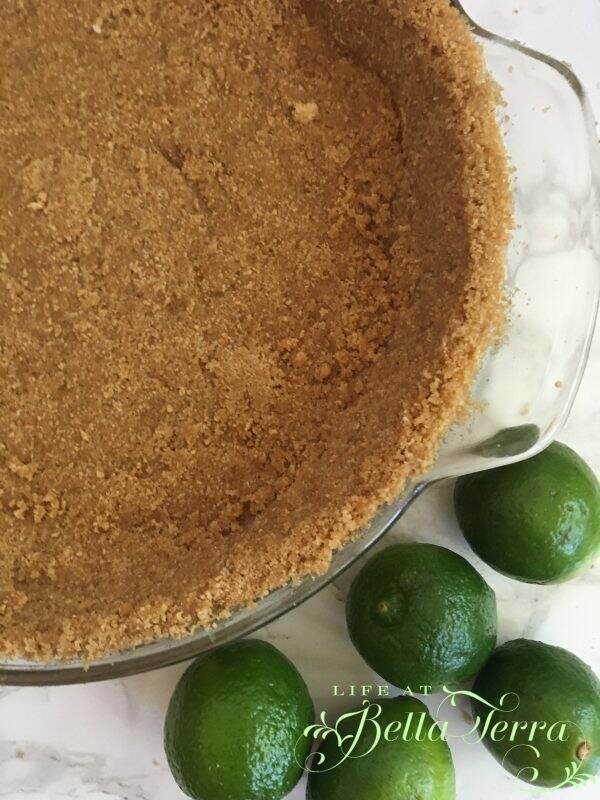
Bake it at 375 degrees for 7 minutes.  Cool before adding the filling.

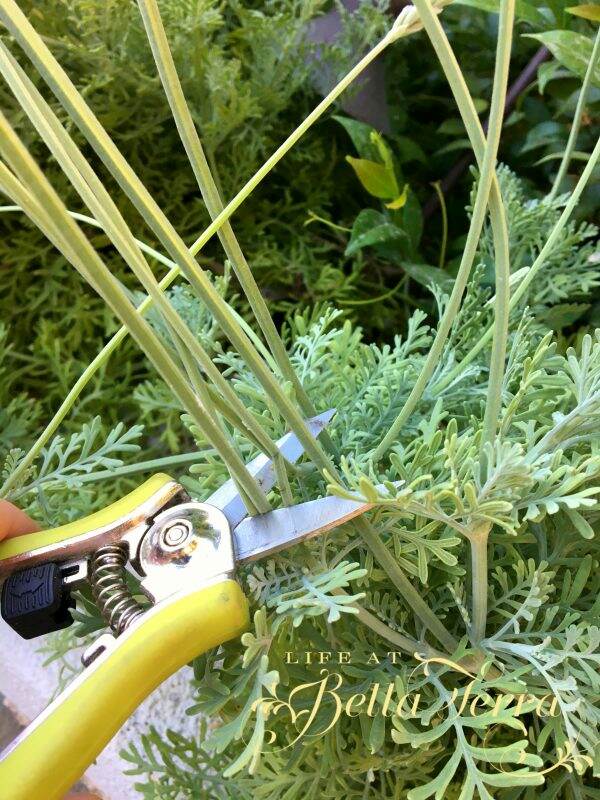
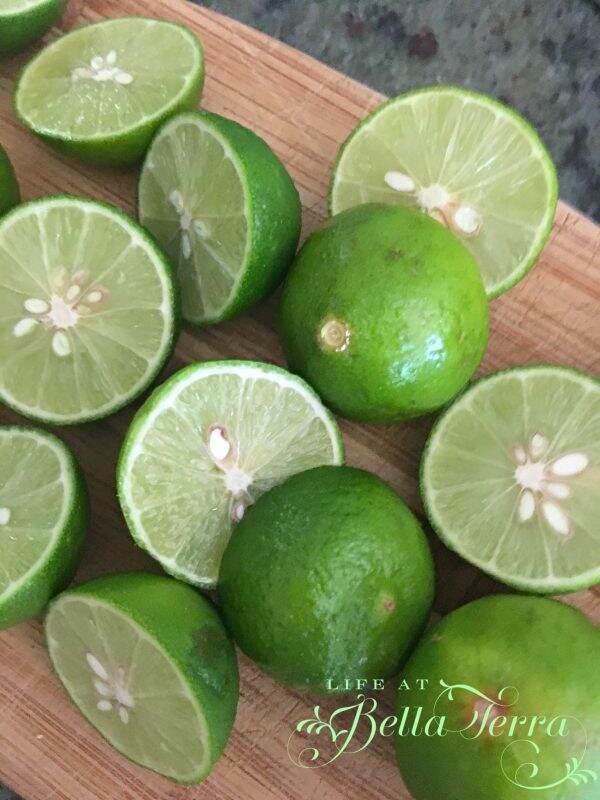
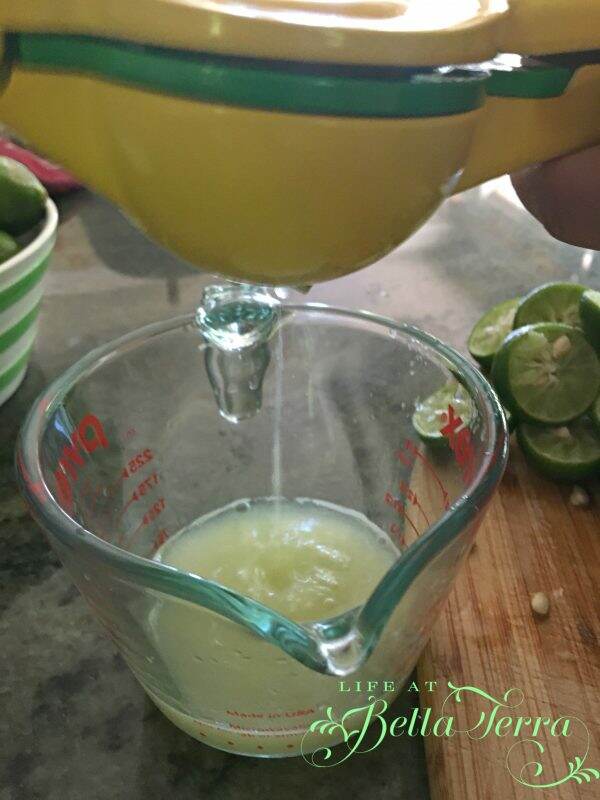
To make the key lime filling, squeeze this little tiny fellas until you get 3/4 cup of key lime juice. It took approximately 19 limes (14 or so limes = 1 lb.) and fortunately my strong son did all the squeezing.

This is the BEST hand-held juicer from Zulay that works for both lemons and limes.

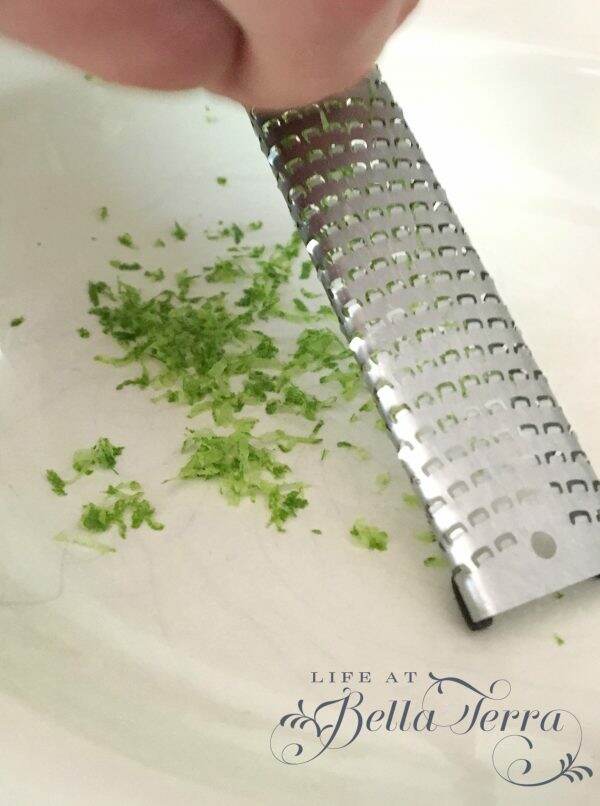
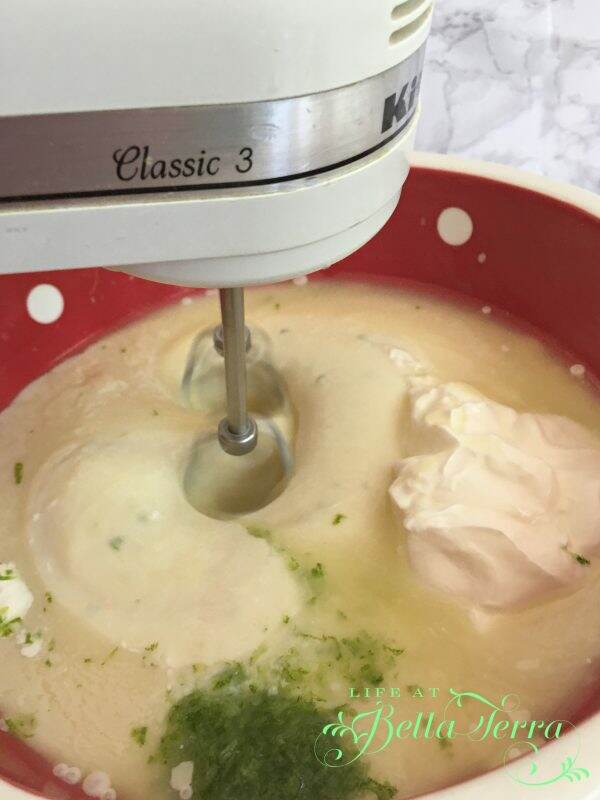
Mix sweetened condensed milk, sour cream, lime juice and lime zest together. By the way, I LOVE this zester by Microplane.

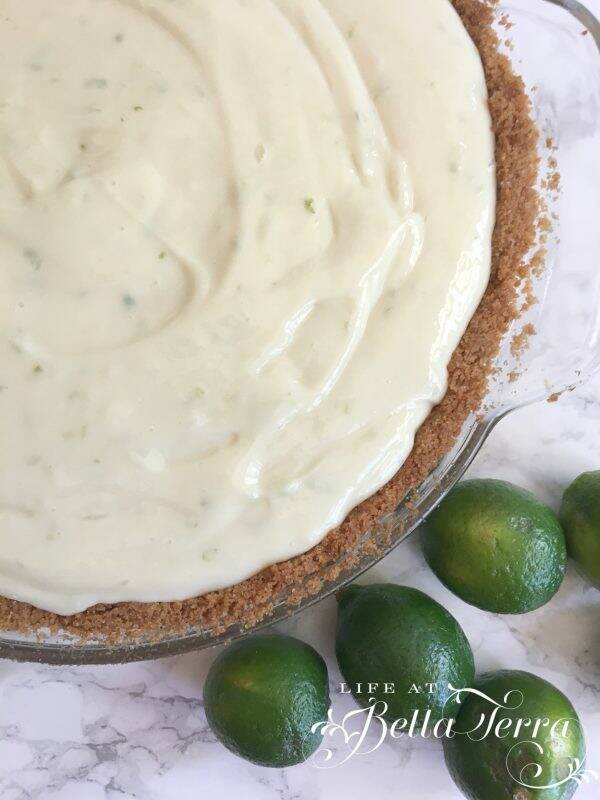
Pour the filling into a COOL crust and bake for ONLY A FEW MINUTES.  I was so surprised that this didn’t require more time in the oven (5-8 minutes).  DO NOT BROWN!

Here is what it looked like after I took it out of the oven. Not too dissimilar from the picture above but there are tiny pinhole bubbles just on the surface.  Chill pie thoroughly before serving.

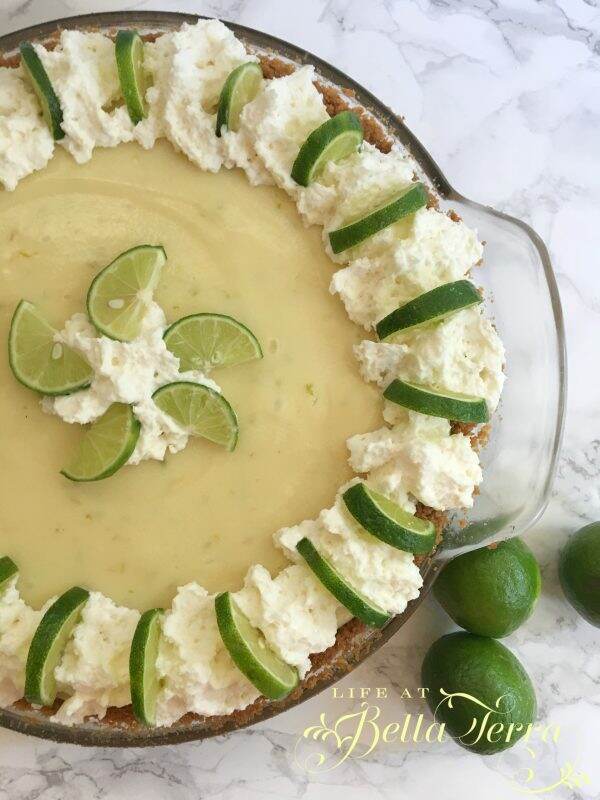
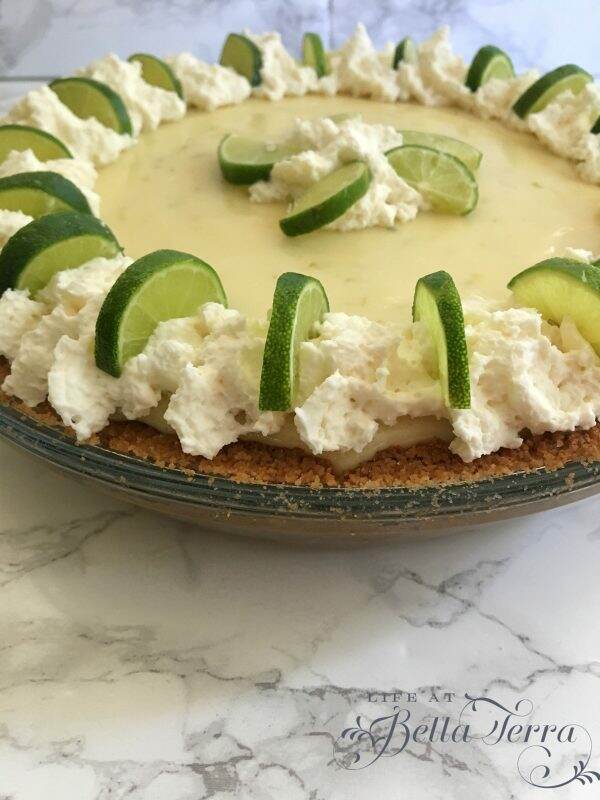
Top with whipped cream and lime slices. This is the perfect dessert for the summer!

Bon Appetit!

Here is the recipe for Key Lime Pie by Allrecipe:SaveSaveSaveSaveSaveSaveSaveSaveSaveSaveSaveSaveSaveSaveSaveSaveSaveSaveSaveSaveSaveSaveSaveSaveSaveSaveSaveSaveSaveSaveSaveSaveSaveSaveSaveSave


Key Lime Pie

  • 1 9" prepared graham cracker crust
  • 3 cups sweetened condensed milk
  • 1/2 cup sour cream
  • 3/4 cup key lime juice
  • 1 TBSP grated lime zest

Graham Cracker Crust

  • 1 1/2 cups finely ground graham crackers
  • 1/3 cup white sugar
  • 6 TBSP butter (melted)
  • 1/2 tsp ground cinnamon
  1. Preheat oven to 350 degrees F (175 degrees C).

  2. In a medium bowl, combine condensed milk, sour cream, lime juice, and lime rind. Mix well and pour into graham cracker crust.

  3. Bake in preheated oven for 5 to 8 minutes, until tiny pinhole bubbles burst on the surface of pie. DO NOT BROWN! Chill pie thoroughly before serving. Garnish with lime slices and whipped cream if desired.

To Make a Graham Cracker Crust

  1. Bake in preheated oven for 5 to 8 minutes, until tiny pinhole bubbles burst on the surface of pie. DO NOT BROWN! Chill pie thoroughly before serving. Garnish with lime slices and whipped cream if desired.

  2. Bake at 375 degrees F (190 degrees C) for 7 minutes. Cool. If recipe calls for unbaked pie shell, just chill for about 1 hour.


Hiking in Sedona, Arizona

On late Saturday afternoon, my daughter, Elisabeth, suggested we go hiking the next day……in Sedona, Arizona (a mere 2.5 hour drive).  Of course, I jumped at the chance to spend time with her and her best friend, Ella.

We left the house at 6:00 a.m. with an anticipated arrival time of 8:30 a.m.~ 30 minutes before the limited parking area opened.  Well, after stopping for gas and snacks, we arrived at the lot at 9:06 a.m. to find it completely FULL.  The attendant said that parking opened at 8:00 a.m. and the website was incorrect.  Sigh. The closest parking was 1/2 mile away.

West Fork Trail is touted to be one of the best trails in Arizona and one of the top 10 trails in the United States.    The trail is approximately 6.5 miles round trip and is rated easy.  Although, there are a few areas where short uphill stepping stones are used.

It was a little disconcerting to see the sign about the possible rabid fox.

Even though it was rather early in the morning, the sun was up and shining!

If you aren’t familiar with Sedona, it is a beautiful destination filled with red-rock buttes, steep canyon walls and pine forests. The town of Sedona is a popular tourist destination with several art galleries, shops, restaurants and hotels.

At the beginning of the trail, you pass through the ruins of the original Mayhew Lodge, which was operational from 1925 t0 1968.  Some of its famous guests include President Herbert Hoover, Clarke Gable, Jimmy Stewart, and Walt Disney. The family who owned it sold it to The Forest Service in 1968. Unfortunately, it burned down in 1980 and the Forest Service was unable to rehabilitate it for $200,000. You can explore some of the remains….seems a bit sad since this is such an incredible location.

The trail wasn’t challenging from an elevation perspective, but the path was soft and sand-like. There are also numerous stream crossings (at least 13) which are done with stepping stones and logs.

The nice part of having two teenage girls on this hike is that they LOVED posing for pictures! Both wore bathing suits and were able to cool off in the chilly waters of Oak Creek. The stream flows gently, and the hike is very pleasant and relaxing – only occasional sunlight reaches the canyon floor so the trip is ideal for the hot summer months.

There were abundant gifts from nature along the way.

The West Fork trail is 3.3 miles one way. However, it is possible to continue through to the upper end of the creek, and meet with dirt roads in the Coconino National Forest. This is a 14 mile trip, and may involve some swimming of deep pools.  We got turned around a bit because we weren’t paying attention to the trail markers, which are about every 1/2 mile.  My guess is that our 6.6 mile trip turned into 9 miles as we may have gone beyond the end of the trail. Fortunately, we weren’t the only ones hiking and got directions from a couple who obviously knew where they were going.

By the time we hiked back to the car, we had completed a good 4 hours of hiking (including stops for swimming and picture-taking).  With hot feet and hungry stomachs, we stopped at The Indian Gardens Market and Cafe in Oak Creek.  The sandwiches were delicious and sitting for the 2.5 hour drive home was welcomed. I LOVED spending the day with my daughter and her friend, who feels like a daughter.  I am a lucky person.

Key Points:

  1. Arrive as early as possible.  Even though the park’s parking lot states online they open at 9:00 a.m., they really open at 8:00 a.m.  Finding any parking in the area is challenging.
  2. Bring lots of water.  In spite of the plentiful shade, stay hydrated.
  3. Prepare to cross water, so wear water shoes, or ones you don’t mind getting wet.
  4. Sunscreen always
  5. Fire Danger is high~Stage 3 when we were there.  Surprisingly we saw someone smoking on the trail (really?).  Please be aware of fire restrictions.
  6. The trail is squishy and sandy and my hip felt it the next day.
  7. Wearing a bathing suit was a plus for the girls-they loved cooling off in the creek
  8. Pay attention to the trail markers, especially if you continue beyond the marked trail.
  9. We didn’t have any issues with insects
  10. It’s $10.00 to park at the trailhead.  If you walk in, it’s $2.00 per person.

For more information on the West Fork Trail, click here.

Happy Hiking!


SaveSave

SaveSave

SaveSave

SaveSave

SaveSave

SaveSave

SaveSave

SaveSave

SaveSave

SaveSave

SaveSave

SaveSave

SaveSave

SaveSave

SaveSave

SaveSave

SaveSave

SaveSave

SaveSave


Strawberry Rhubarb Pie

Fresh rhubarb is in season and the strawberries at the market are juicy and plump.  Now is the perfect time to make this very simple and easy pie.

The recipe is from Allrecipes.com and we’ve made two pies in the last two days.  I start with my tried and true pie crust recipe that I featured in a previous post. It takes just a few minutes to whip it up in the Cuisinart and 30 minutes to chill. Click here for the recipe.

In the meantime, gather these ingredients: strawberries, rhubarb, butter, sugar, flour and an egg.

Preheat oven to 400 degrees. Hull and wash strawberries. My son used the smaller side of a melon baller to remove the stem.

Cut the larger strawberries into smaller pieces.

Chop the rhubarb into bite-size pieces. I love how rhubarb looks like red celery.

Mix the flour and sugar together in a large bowl.

Toss in the chopped rhubarb and strawberries and let stand for 30 minutes to macerate.

Meanwhile, roll out the pastry dough for a 9 inch double crust pie. See all the chunks of butter and shortening~~those will become the flakey pockets in the crust.

Add the strawberry/rhubarb mixture to the bottom crust.

Dot with 2 Tablespoons of butter.

Add the top crust and crimp both crusts together with a fork to seal.

You can cut vents in the top crust or do a lattice crust on this pie. Brush the crust with egg yolk and sprinkle with sugar.

Bake for 35-40 minutes, or until bubbly and brown.  Cool on rack.

With hungry children, we cut into this pie a bit too early.  It was still warm to the touch and the juices from the rhubarb and strawberries had not thickened.  With the additional pie we made today, we will wait until it completely cools and see if that helps thicken the filling.

Enjoy!


Strawberry Rhubarb Pie from Allrecipes.com

[amd-zlrecipe-recipe:20]

SaveSave

SaveSave

SaveSave

SaveSave


Beginnings and Endings

I have been out of town for the last week and was unable to send my typical twice weekly blog posts.  But there is a good reason why.

Our oldest child, Benjamin graduated from the University of Virginia in Charlottesville last Saturday.  This is one of the country’s most beautiful educational institutions.  Rich in history with gorgeous architecture (designed by Thomas Jefferson), we have loved visiting him over the past four years.

Below is The Lawn~~a long stretch of grass from the Rotunda to the statue of Homer.  Here is where graduation exercises were held and fortunately the rain stopped just in time.

It’s hard to believe we brought this little rascal home from the hospital 22 years ago. Now, armed with 2 degrees (Economics and Foreign Affairs), he will be starting his first real job in August in Washington, DC.

After four years of rigorous undergraduate studies, he is beginning a new life’s chapter into the world of independence.  Not only is this an important time in life for him, but it is also creates a shift in our family.  Will he be able to come home for the holidays? What about family vacations?  Will he ever need us again?

As we re-imagine the fabric of our family unit, we are happy for his success.  Our whole family attended his graduation and for me, that was the best part~~all of us together in joyful reunion.

Another exciting ending is the sale of the Willetta historical restoration.  As of next Tuesday, this beautiful home will have a young family moving in.  I have remodeled and restored many houses, but this one took the longest to sell.  I truly love this house but in retrospect, never buy the biggest and best house on the street.  The Willetta house was the very first house built in 1922 as a showcase home for the subdivision.  Most of the other homes in the neighborhood were built later, on smaller lots with less square footage.  The architecture of Willetta is one of a kind.  There is no other house anywhere in our area that looks like this.  To read about the restoration, click here.

There are many beginnings and endings in the garden. Tomato production is up, but the artichokes have gone to flower.

The lettuce has bolted, but the melons and cucumbers are starting to produce.

School is officially over and Memorial Day is right around the corner. Spring is gone and Summer is upon us. Whatever beginnings or endings you are celebrating, I wish you and yours a safe holiday weekend.


All About Lavender

I just returned from 6 days in Virginia and Washington, D.C.  I had hydrangea and peony envy….the entire time I was there.  So today, I decided to stop pouting and start appreciating the plants that grow here in Phoenix. Lavender is one of those plants that conjures up romance, serenity and bliss.

Climate

The climate in Phoenix is PERFECT for growing lavender~~these beautiful plants thrive in full sun, heat and fast draining, low fertility soils. They are at their very best in the more arid climates found west of the Mississippi where heat, sun, dry growing conditions and poor soils predominate. Humid heat and compost-enriched, water retentive soils are the enemy of lavender.

We have lavender growing in several beds around the yard and most of it is English lavender, but I still haven’t figured out the variety~~is it Provence, Hidcote or Arbrialii?

What is it?

What is lavender? It’s a perennial herb that’s native to the Western Mediterranean region. Different types of lavender plants are hardy in different zones, but most is hardy in Zones 5 to 11.  Who knew (not me!) that lavender is in the mint family (which also includes basil, thyme, lemon balm, oregano, sweet marjoram, rosemary, sage, savory, and summer savory).

Lavender love heat! These plants need good air circulation to maintain healthy leaves. A good rule of thumb is to space the plants as far apart as they’ll grow tall. This ensures ample air circulation between plants.

Cutting

I try my hand at cutting lavender.  It is recommended that you do so early in the morning to preserve the oils in the flowers.  The snipping is near the base of the stems when the purple flowers are abundant.

Drying

Drying lavender is one of the easiest floral projects you’ll undertake. You can dry the flower heads by standing them upright in a vase without water.

I choose to bundle the flower stems together using ribbon, and will hang them upside down in a dry, dark, warm spot to dry. With either method, you will have dried lavender in about two weeks.

Uses

Dried lavender has many uses.  The fragrant, pale purple flowers and flower buds are used in potpourris.  Lavender is also used extensively as herbal filler inside sachets used to freshen linens. Dried and sealed in pouches, place lavender flowers among stored items of clothing to give a fresh fragrance and to deter moths.

I don’t know much about using lavender in a recipe (do you need a food grade lavender or can any lavender work?) but that might be something I will try next.

If you would like to see a post on making lavender pillows, click here.

Have a wonderful Wednesday!