1

Saturday Meanderings

Happy Easter (or Passover) weekend! The weather is certainly warmer in Phoenix but hoping it will get back down to something less than 88 degrees. Our Easter dinner will be small but we will do all the traditional family events just the same. Welcome to Saturday Meanderings where we chat about all things good and wonderful this week.

Amazing Online Magazine

Chic & Country Magazine

I just discovered Chic & Country magazine and I am SO impressed. This virtual magazine comes out quarterly (I think) and you can access it anytime.

Chic & Country is a magazine about country style interiors with a touch of French chic and Nordic whites, featuring house tours, home stories, decor ideas, food recipes, flower design, gatherings’ styling, gardens and unique travel destinations. The subscription is $20.00 a year. This is my new go-to read just before bed. Here is the link.

Doing a 5K

My daughter has a goal to do 52 hikes annually. And she’s added a few 10Ks as well. As a result, I am supporting her efforts to be more active so I am participating by signing up for the same races~but only the 5Ks. I can no longer run, as my knees cannot tolerate the impact after multiple knee surgeries. In completing the Shamrock Run last month, I received this Mr.T-like medal and cool t-shirt, so I am looking forward to participating in the Hippity-Hop run today.

A 5K sounds impressive but it is only 3.11 miles and my fast walking time is about 50 minutes. The good news is that I can log my time and get another t-shirt and medal!

Disappointed with Results

One of my garden goals this year is to grow abundant amounts of strawberries. Typically I will buy starter plants from our local nursery, but this year I purchased strawberry starter roots online from Gurneys. Twenty root stock and crowns arrive and I plant them according to the instructions.

All the strawberry plants showed good signs of growth for a few weeks and now nearly 50% of them are dead. Literally. No reason, as I am taking care of them. Every day I go out to my garden another plant has died. So I am supplementing with locally grown starter plants from Whitfill. Live and learn, I guess.

Best Cake Ever

Hands down, my new favorite cake! I made this for my daughter’s birthday in March and am excited to make another for this weekend. It is a London Fog Cake~ a chocolate cake with coffee, smothered in Earl Grey tea infused buttercream and then drizzled with salted caramel sauce. Oh my.

The recipe is from my favorite cake cookbook, Layered, by Tessa Huff. Truly a winner. And if I have shared this with you before, it’s worth repeating…..it’s that good!

New Eating program

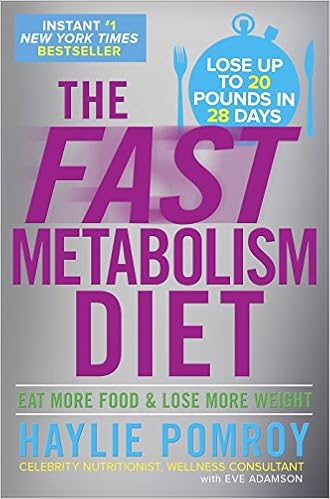
My metabolism is very slow, unfortunately. Unlike my son, who has an extremely fast metabolism, mine just chugs along. Barbara, from Mantel and Table, recommends this program to me to jump start my metabolism. We are both doing it for the next month.

I am completing my first week and love it so far! Grounded in real science and written by nutritionist, Haylie Pomroy, it’s a 28 day program. The hope is to mix things up and get my metabolism working at an optimal level. Will let you know how it goes! Here is a link to the book if you are interested.

Annual Lamb Cake

Traditional Easter Lamb Cake

As a child, I have fond memories of Mom’s lamb cake at Easter. Made in a cast iron mold, this cake is now an annual tradition in our home. I will be baking it on Saturday, with an orange blossom cake recipe. So excited to try this new cake as right now, our orchard is filled with orange blossoms. If you would like to see a post on how the lamb cake is made, click here. Isn’t he cute?

Easter Dinner table

Since we are expecting a few more guests, Easter dinner will be in the dining room. A few weeks ago I did a post on a yellow and blue Easter table (see here), but for Sunday, this one is more blue and pink.

If you missed the post this week on these sweet decoupage eggs, click here. The block print tablecloth is just the right shade of blue for Spring. The bunny plates from Pottery Barn connect the patterns and colors in the Royal Doulton Juliet plates. Scattered about are birds, bunnies, and even a stone frog.

That wraps it up for Saturday Meanderings. I hope you have a glorious and blessed weekend. My goal is to stay away from my phone and social media and just relax a little. I know I will be making adjustments to the Easter dinner so I do not stray from my new eating plan, but it will still be wonderful to share it with family and friends.

This post shared with Between Naps on the Porch Tablescape Thursdays #654


How to Make Decoupage Easter Eggs

Decoupage eggs

I have always wanted to try decoupaging eggs with pretty napkins for Easter and Spring. However, I couldn’t find any appropriate napkins laying around the house to do this. So instead, I find paper hand towels with a pretty peony pattern. This is a relatively easy DIY project and would be so fun to do with children or grandchildren too. Keep reading to find out how to make decoupage Easter eggs.

Materials

Materials for making decoupage eggs

After you find the perfect napkin or paper hand towel (mine is from Hester & Cook) you will need scissors, Mod Podge, eggs and a paint brush. You can find Mod Podge here or at any craft store. If you have not used Mod Podge before it is a water base sealer, glue and finish. Mine is a Matte finish, but if you like glossy, why not?

Fresh eggs from our hens

Regarding eggs, since we have SO many laying chickens I am using our fresh eggs. However, craft eggs would work, maybe even plastic or wooden eggs (see here). A neutral color would be my suggestion as I only use white eggs vs. the brown or blue eggs our chickens lay.

Blowing out the Eggs

Lightly tap in a hole at both ends

This is a relatively easy process. First of all, prepare your work surface. A good size piece of parchment paper is taped to the granite counter as my work area. With a metal skewer (or you can use a knife), I gently tap a hole in both ends of the egg at the tips.

If the egg cracks a bit, don’t worry as you will be covering it. Make sure you take a skewer or wooden pick and pierce the inner membrane of the egg. It will be MUCH easier to remove the contents if the inside of the egg is not whole. Last time my husband blew out the contents of eggs for me, he ended up bursting a blood vessel in his eye.

Break up the interior membrane

There is no need for this be difficult. A gentle, steady breath will release the contents of the egg easily. If not, try shaking the egg to “scramble” the insides.

After all the eggs are empty, I gently rinse them and wipe dry with a paper towel.

Adding the Paper

Cut out whatever pattern you like

Depending on the design of your napkin/hand towel, cut out a section. My hand towels are 3 ply so remember to check for that. The first one I did the white paper backing stuck to the egg, but the peony design did not.

Remember to separate any other layer

Using your foam brush (or any brush) paint the Mod Podge to the egg. I like using these disposable foam brushes as you can discard them when you are finished.

Brush egg with Mod Podge

Add your paper cut-out to the egg, smoothing the wrinkles and edges. You can also paint the Mod Podge right on the paper too. It will dry clear and keep the edges fastened to the egg.

Add your paper to the egg in pieces

Keep adding pieces of your paper to the egg. My peony paper is very thin and any overlap can be seen. It may not matter but it all depends on your pattern and how you want it to look in the end.

Letting them dry

Let egg dry

The eggs will need to dry to set the glue. I get better at this with each application.

Make as many as you want

What is nice about these eggs is that they will keep forever. And I can use these pretty eggs in my table decor if I ever do another peony themed tablescape like the one I did last spring. See it here.

Peony-theme luncheon

These eggs are so cheerful and fun. Now I am inspired to look at other napkins and for future projects. The possibilities are endless since there are now many papers especially for decoupage. See some ideas here.

Sweet peony eggs

And the best part? Using all the fresh eggs for a homemade quiche! I love it when there is no waste.

Using the egg leftovers

Thank you so much for joining me today. It feels good to accomplish something that I have been wanting to do. I hope you like this simple DIY project. We will more than likely dye our eggs the traditional way but it’s fun to have other egg options.

Happy Tuesday, my sweet friends!

If you enjoy this post, please share on Pinterest.


Saturday Meanderings

Tulips in the bulb garden

Can it possibly be another Saturday? Lately, I blink and a week has come and gone. I think the person who finds a way to slow down time could become very rich indeed! Welcome to Saturday Meanderings where we chat about all sorts of topics from the previous week.

Spring is Here..sort of.

Fireplace in my office

As I write this I am sitting in front of the fireplace freezing. Just two days ago I pulled out a pair of shorts (yes, the longer version) because the warmer temperatures. Today I have on multiple layers as this old house is drafty. March has come in like a lion and appears to be staying a lion! However, I am not complaining but enjoying the ups and downs of March.

Fresh Flowers

Daffodils in my tulipiere

Flowers have always played in important role in my life. I once worked for a company who had fresh flowers delivered to everyone’s desk weekly. When I worked in San Francisco, I would buy fresh flowers every Friday afternoon from a street vendor on my way home.

The Bouqs.com

In the 2003 movie, Something’s Gotta Give by Nancy Meyer, did you notice the fresh flowers in every room on the set? I guess I’m a flower geek as I notice those things. For me, flowers are therapeutic. They give me joy and make me happy.

Roses from South America

About 18 months ago, I subscribed to a monthly bouquet through The Bouqs.com. Eighteen bouquets later, I’ve been only disappointed twice. But the bouquet I received this month is so spectacular. Quite honestly, I don’t believe I have ever seen such beautiful roses. Direct from a flower farm in South America, these roses are STILL gorgeous after 2 weeks. I need to figure out how to get a commission for promoting them so much!

Projects this Week

Lots of windows in the family room

Window washing is a spring cleaning priority and while my husband was out of town, I did start the tedious task of cleaning the family room windows. It is very hard to find a window washer who wants to clean small panes and this room has 254 of them. And that’s only washing just one side.

Trim paint

Since the family room is shared with the animals~two dogs and a cat, some of the door and window trim is dinged or scratched. So after I wash the windows, I also do some touch-up painting where needed. In mason jars, I keep a small amount of room and trim color paint, so it is easily accessible for touch-ups.

Touching up the trim

Any over spill on the windows is cleaned up with a single edged razor. After two days of work, the family room windows are sparkling and clean. To see more about this room that was once an outdoor porch back in the 1940s, click here.

My neighbor’s garden

Slugs love beer

My sweet neighbor, Dawn, sent me this photo from her garden. She uses a bowl of beer to attract the slugs that are eating her plants…a remedy I shared with her a few years ago. Since I just started noticing some nibbles on my new plants, I, too, am pouring beer in my garden bowls! Remember to put the bowl at ground level and fill with any beer you have available.

Strawberries are looking good

As you know I am coddling my new strawberry plants and it seems like the strawberry cage (see here) is doing its job! The berries are beginning to form and hopefully we will have an abundance of them this season.

Strange Behavior

Hoppy, our resident quail

We have a single quail near the garden who thinks he/she is a chicken. Since this quail seems to have a foot problem, we call him/her Hoppy. Hoppy is never very far from the chicken coop and is often found trying to get in to be next to his/her adopted siblings.

Hoppy bossing around the Chickens

This week we let the chickens out to roam the yard and Hoppy tries to herd them back into the coop. I’ve never seen anything like this! Wanted to upload a video of bossy Hoppy but it wouldn’t cooperate.

Mysterious Shadow

Mysterious Shadow

Every morning I come downstairs and walk through the dining room on my way to the kitchen. I have never seen this shadow above the crystal chandelier that hangs above the dining room table. Never. So I snap this picture. Now every morning I look for this shadow and it has never appeared again. I noted the time on my phone when I took the picture and have been looking for this shadow ever since. Perhaps a once in a lifetime experience? Isn’t that odd?

Animal Fun

Sox in Dad’s chair

We have a Dad chair in the family room. No one sits in it but Dad. Ever. Except Sox. He gets a pass and jumps up in the chair whenever it is empty. Lucky dog.

Cooper looking over our South wall

Here is Cooper looking over our wall. This is a different perspective for me because I am outside our property on the street to the south. The wall is 6 feet tall, at least. Cooper is a very big dog and watches everything in the hood.

Andrea from Design Morsels

Inspired by my friend, Andrea from Design Morsels, I will be deep cleaning my range hood in the kitchen today. Andrea has a great post about this and you can see it here. Truly, after you read it you will start cleaning!

Have a wonderful weekend! Easter is just around the corner~

If you enjoy this post, please share on Pinterest.


Spring Front Porch Ideas

After putting up the new tulip wreath on the front door, the rest of the porch looks a bit tired after winter. If you missed yesterday’s post on how to make the front door tulip wreath, click here. Inspired by the pinks of this wreath, I am excited to come up with some new Spring front porch ideas.

Since I do not like to waste anything, many of the plants and colors from Valentine’s Day will continue on through the Spring. The pink geraniums and Latinia Rose cyclamen from Whitfill Nursery still look healthy and colorful. The stone rabbit will wear the pink polka dot ribbon for a few more months.

By the door, we have an iron bench and it is fun to place a blanket or pillow on it to soften the edges. The blue thrown has some of the same tones as the front door. Below, the Rose Bible by Reyford C. Reddell is one of my favorite rose reference books.

The two 5 foot cedar trees (artificial) flanking the front door are holding up well and require NO maintenance! I almost want to convert everything to faux plants because they are so easy! The quality is superb and can anyone really tell the difference?

Before you step up to the front door, the planting bed is looking exceptionally good this year. Only one plant didn’t survive the winter, but the rest are healthy and abundant with lavender, geraniums, scented geraniums and snapdragons.

If you have been following me for a while, you may recall the re-do of the rocking chairs on the porch. Repainting the chairs makes such a difference. Click here to see that post on sprucing up the front porch. It’s fun to see the before and after photos.

I was tempted to head to Target to buy some new spring pillows, but felt a bit lazy. Convinced I must have something here to use, I find these two sweet red/pink tulip pillows from my store. The colors are just perfect with the tulip theme. If you didn’t know I have a store, check out the Store tab at the top of the page.

The extremely heavy stone and concrete table is a yard sale find. Luckily we have two of them and they are weather-proof. And just big enough for a couple of cocktails and nibbles. Perfect for cashews are the fluted porcelain bowls by Epure, a recent treat in My Stylish French box subscription.

Scrounging the house and property for old items to put in new places is part of the fun. These two ducks have always been sitting by the front fountain….for years. Now they are integral pieces of the front porch spring decor!

So with minimal effort, I am able to transform the front porch from Valentine’s Day to Spring without any significant, additional cost. The wreath is less than $20 and the rest is just re-imagining my old stuff in new places.

Welcome Mat by Wayfair

This front door just makes me happy! I hope like my Spring-inspired changes.

It is typical of March to be warm one day and chilly and drizzly the next. Just when I pull out my first pair of shorts of the season, I am back wearing multiple layers. Crazy weather!

Have a wonderful Wednesday!

If you enjoy this post, please share on Pinterest.

This post shared with Farmhouse Friday Link Party #197, Between Naps on the Porch Metamorphosis Monday #635


How to Make a Tulip Wreath

If you recall, last year I added a new paint color to the front door. It is the perfect color for Spring and Summer. Surprisingly this shade of blue also works well for Autumn and Winter. Since tulips are currently blooming in the bulb garden, it seems appropriate to hang a tulip wreath on the front door. Join me today to make a tulip wreath. To see the front door color post for details, click here.

Michael’s is having a great sale on faux flowers and I scored 4 bunches of pink tulips for less than $20.00. See here. Initially the goal is to make an all pale pink wreath.

The challenge with our front door is that it is 48″ wide. Standard-sized wreaths tend to look a little dinky. So when I do create a wreath, abundance is the key. Naturally I did this DIY project out of order. It would make the most sense to start with your wreath frame and then determine the quantity of flowers you need. However, I didn’t want to buy another wreath frame and did some digging in the garage to find this 26″ grapevine one…..after I purchased the pale pink tulips.

My old glue gun

Supplies you need are simple: a wreath frame, flowers, glue gun and something to cut the flowers. For a nice selection of grapevine wreaths, click here.

Realizing that I may not have enough pink tulips to fill the wreath frame, I find some darker pink tulips that I had on hand from another project. With 4 bunches of light pink (14 stems each) and 2 bunches of dark pink (also 14 stems each), I have a total of 84 tulips. Before I start a project I want to make sure I do not run out of materials. Been there. Done that.

Using wire cutters makes this easier

Having wire cutters makes this job a lot easier to get through the plastic covering and the wire underneath. These are super affordable and you can order them through Amazon here.

Use glue when necessary

I start working on 1/4 of the wreath, knowing I can use 21 stems in that portion. This gives me a sense of what density of flowers will work. Most stems tuck easily and securely in between the grapevines.

Tucking in the flower stems

Don’t discard the leaves as they can be added to the wreath for fullness or just another pop of color. I hot glue the leaves randomly. Personally, I really don’t like using a glue gun because I tend to burn myself far too much. On this wreath, I use minimal gluing.

Adding leaves

As I am styling it, darker tulips are added for contrast. If you follow me on Instagram, I try to post a story daily and show these types of DIY projects in action.

As posted on IG

Continuing to add tulips around the entire wreath, I leave a space for a ribbon. Using the leftover bow from Valentine’s Day, I find that I don’t like it. The pink in the ribbon looks a little flat to me.

Bow or no bow?

Instead, I remove the bow and continue adding more tulips to fill in the gap. Much better!

So here is the finished tulip wreath! I think it looks so cheerful on the front door.

Since the wreath looks so nice, the rest of the porch looks a bit tired. Join me tomorrow to see how I spruced up the front porch to go with my new wreath!

Happy Tuesday! Spring has sprung and hopefully, everyone’s weather is improving. We are, of course, in the midst of our beautiful season so every day seems better than the one before.

If you enjoy this post, please share on Pinterest.


Easter Tablescape Ideas

Today, I am happy to share Easter tablescape ideas with many talented friends. Welcome to the Easter Table blog hop. At the bottom of my post you will find links to other holiday table ideas.

Since Easter is early this year, we will more than likely have our Easter dinner inside at the smaller round table located in our family room . We have always celebrated with family only and unfortunately not all our children are in town and can participate.

Tulipieres from The Enchanted Home

The Centerpiece

The set of tulipieres I purchased from The Enchanted Home a few years ago, is the star of the show. To see more about these tulipieres and how to fill them, click here. Since daffodils are now available and affordable vs. tulips, I find this to be the most attractive and economical solution.

Rose pattern damask

The Tablecloth and Dishes

With a neutral damask white tablecloth, this year I am experimenting with blue and white with the yellow daffodils. These blue and white dishes I have never used. This set remains out in our pool house for guests.

Each blue and white plate is a different pattern but in the same tones. I believe I may have purchased them from Horchow years ago. However, Amazon surprisingly has a great selection of new and vintage blue and white dishes. See here.

Stacked on top of a white beaded stoneware plate from Pottery Barn, provides a nice contrast to the gold charger.

I really struggle choosing the charger. The brushed gold ones did win in the end over the wooden scallop and silver ones. It’s time I invest in something neutral like white or wicker, which would look even better. To find super affordable brushed gold chargers, click here.

The Glassware

A simple Lenox water and wine glass with a gold rim complements the setting. Hard to believe these glasses are over 44 years old!

Pots de creme with a gold handle by JSC are small vessels for more fresh daffodils. I collect pots de creme and use them for many purposes.

Handmade nests and handprinted eggs as a place card

Easter Touches

The clay bunnies are a whimsical addition to remind everyone of the spring and Easter theme. Homemade nests from shredded paper and glue (see post here), hold a real egg shell painted with the guest’s initial~as a place card.

My favorite Wallace go-to flatware with a bee motif works well with this blue/white/yellow theme. Blue embroidered napkins are an antique store find.

Here are some fun overhead shots of the table.

I am so happy to share my Easter table theme and now onto the others!

If you enjoy this post, please share on Pinterest.

My sweet friend, Chloe from Celebrate and Decorate is hosting this Easter Tablescape Blog Hop. All you need to do is click on the names below and you will (hopefully) be taken to their website to see what they have in store for Easter. You will be able to open a new tab with each so you can return back to this page and just keep going. A fun way to see LOTS of other bloggers without having to search. Enjoy!

Celebrate and Decorate

Design Morsels

Home is Where the Boat Is

Living with Thanksgiving

Panoply

The Little Yellow Corner Store

My Hubbard Home

Everyday Living

Corner of Plaid and Paisley

The Sweet Sensations

Belle Blue Interiors

Red Cottage Chronicles

Zucchini Sisters

Life and Linda

Mantel and Table

Calypso in the Country

The Painted Apron

Blue Sky at Home

Me and My Captain

My Thrift Store Addiction

This post shared with Between Naps on the Porch Tablescape Thursday #652