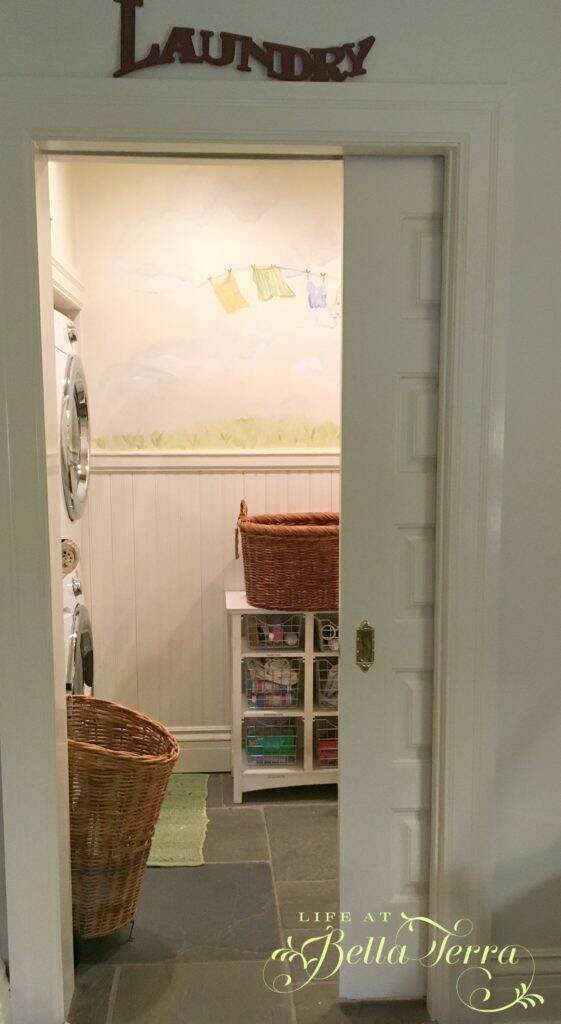
1

Our Master Bath

Our master bathroom is my sanctuary.  It is hard to even remember the original layout. Bathrooms have come a long way since the early 1900s.

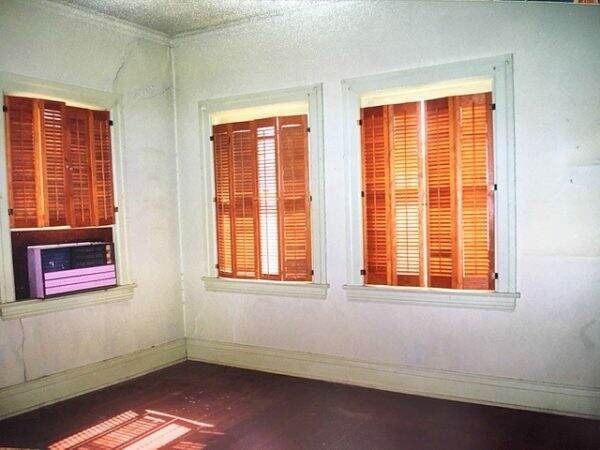
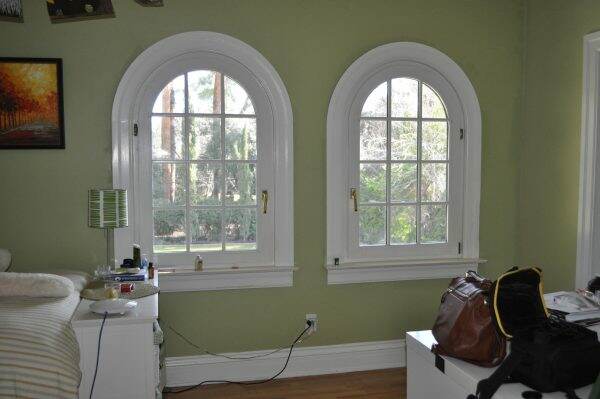
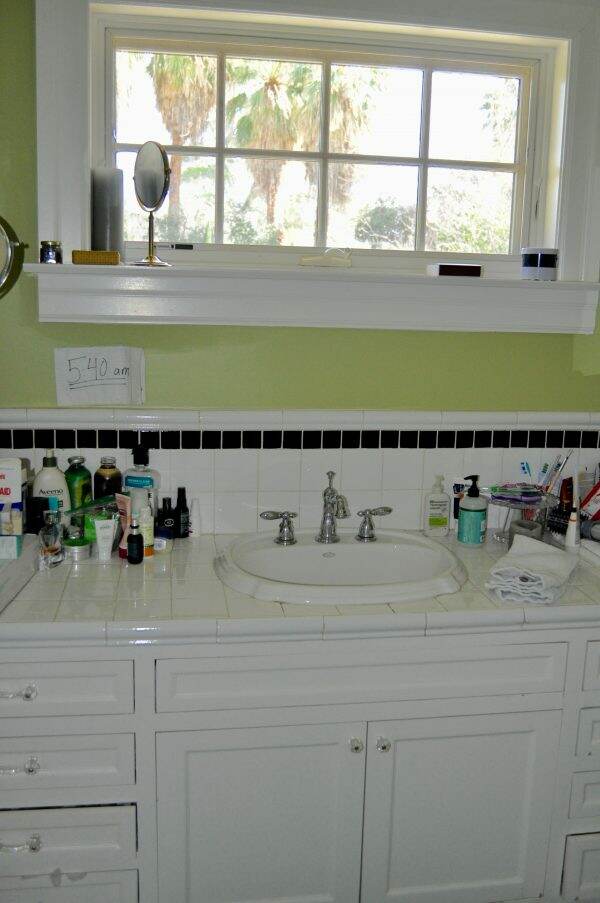
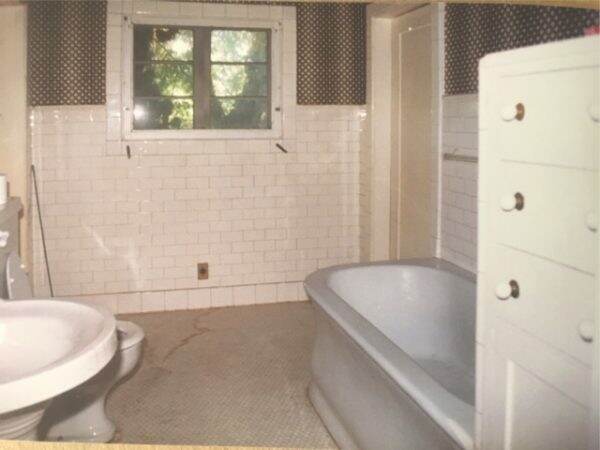
The original master bath looked like this~~love the dizzying wallpaper. The unique cast iron tub was moved to our daughter’s bathroom. We completely refigured and enlarged the space.

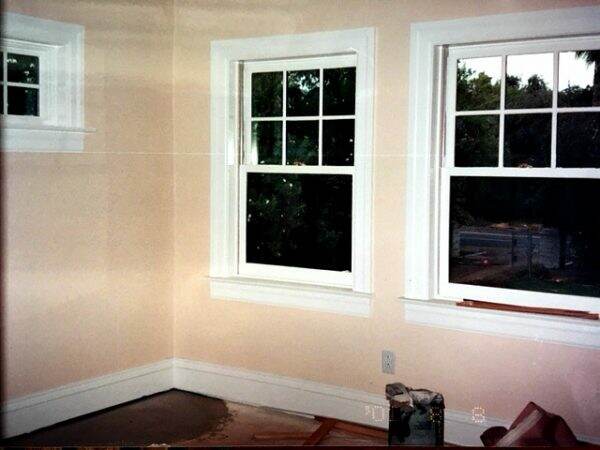
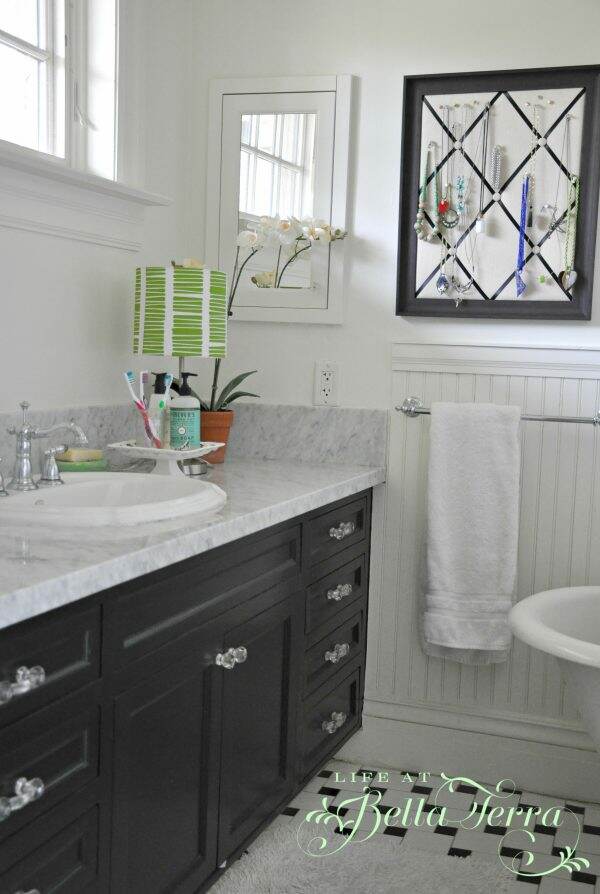
Here is the same perspective today. We replaced the window with two larger casement ones and added a Kohler soaking tub. We designed the tub enclosure so one of the raised panels in front can be removed if the plumbing needs attention.

There are two doors leading from the master bedroom into the bath/closet area. Perfect for privacy when the bathroom is needed for early morning use.

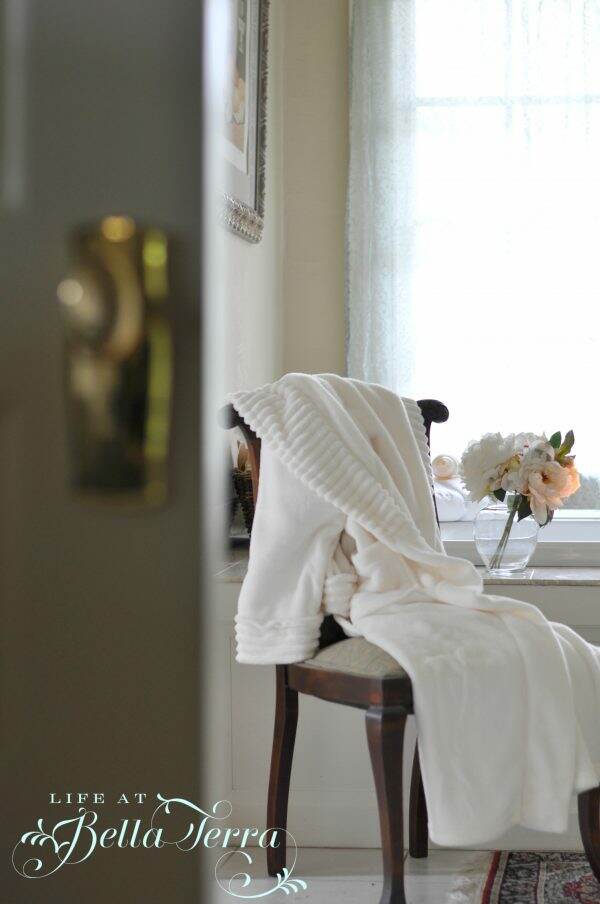
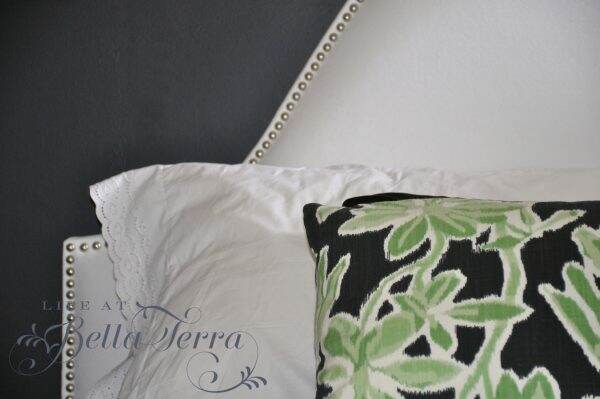
My sister, who is a master at sewing, made me a set of Bella Terra towels~~such a wonderful gift! The candle was another gift (lucky me!) from my friend, Lisa.

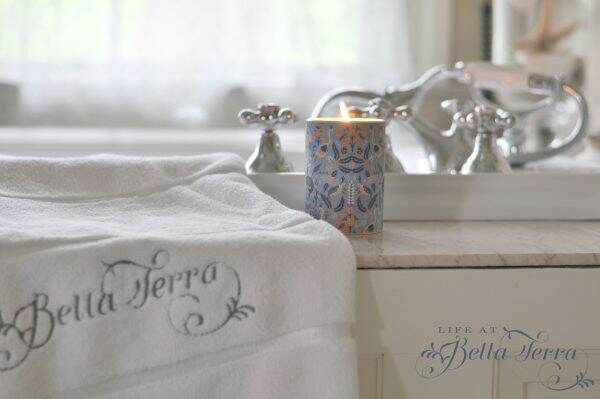
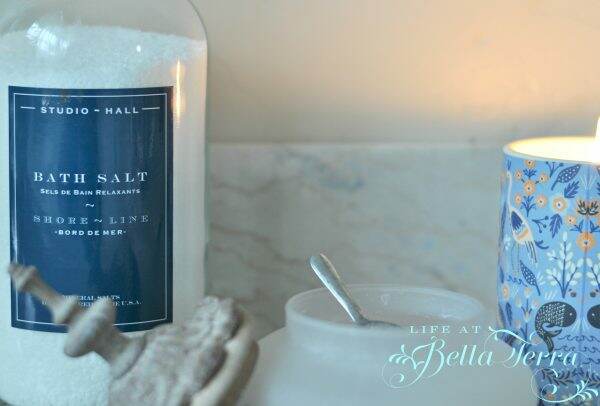
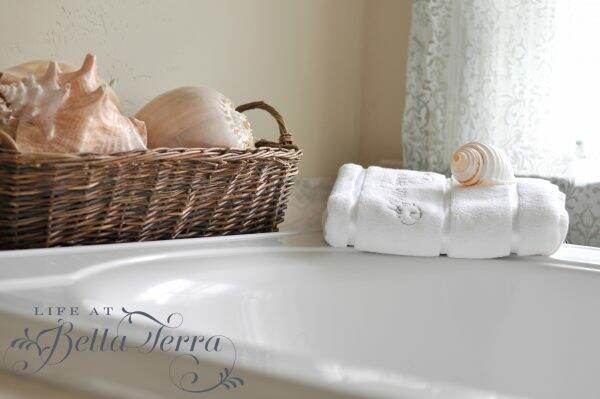
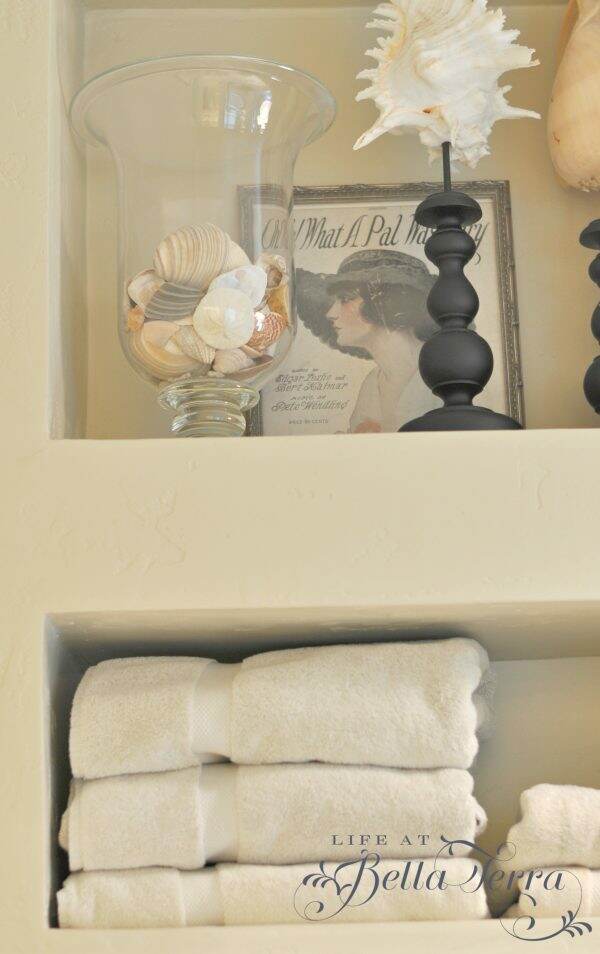
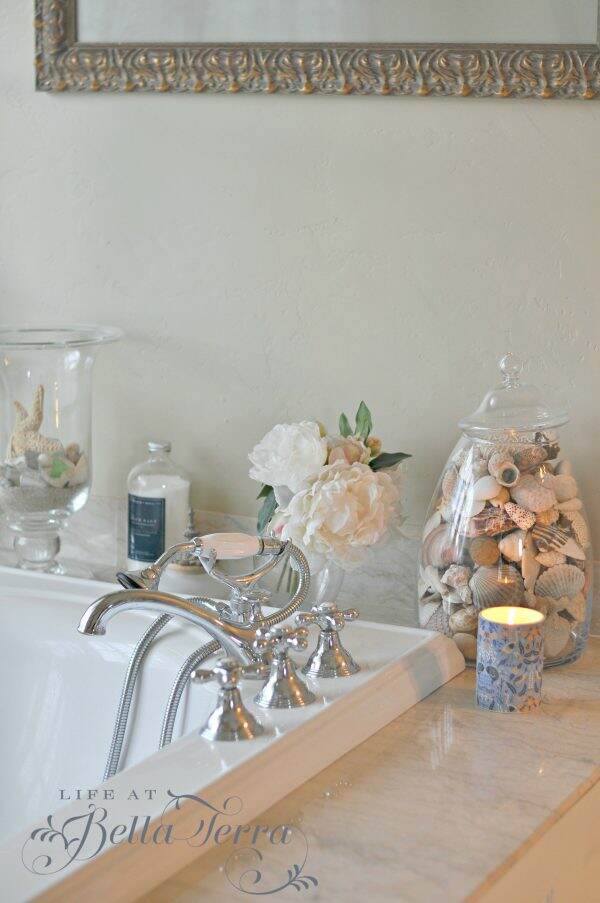
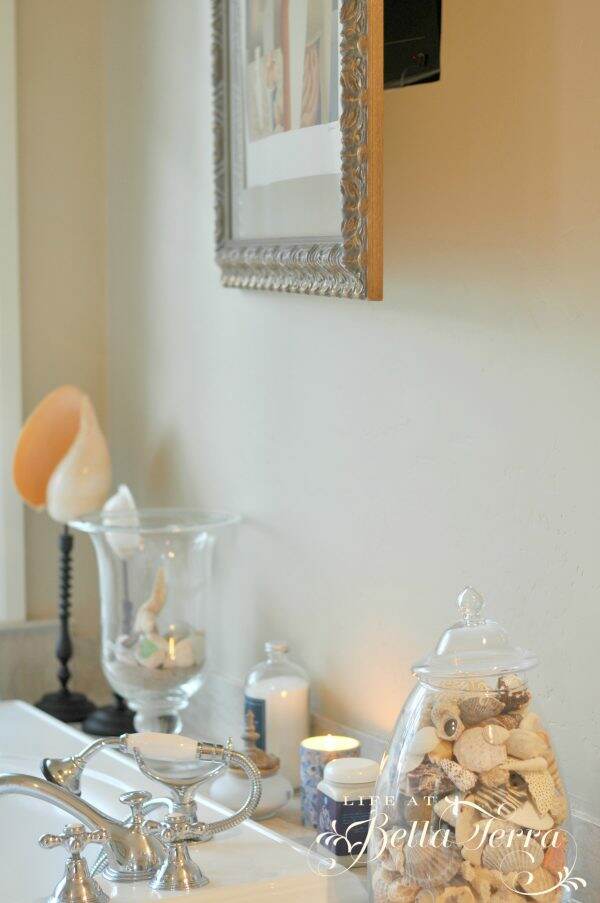
The tub has a wide marble shelf on all sides that is perfect for displaying my shell collection and providing easy access to candles, bath salts and towels. The large glass jars/containers are made by Simon Pearce.

My husband and I have separate sinks (yay!). The framed mirror is a medicine cabinet from Robern.

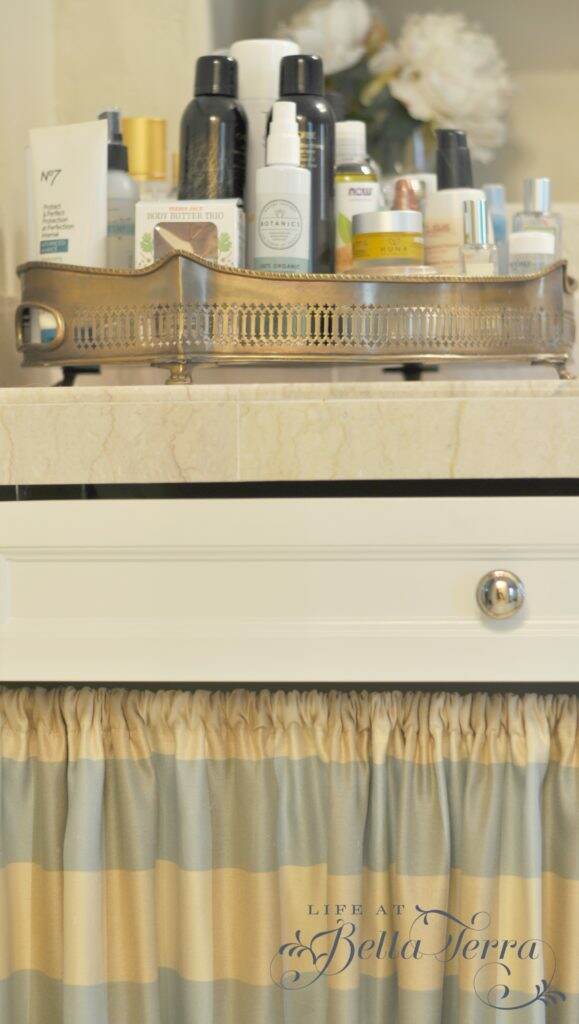
My cabinet was designed to have a make up table, but I never use it.  Instead, I covered the opening where a seat would have been, with a curtain.  This has become a great place for storing toilet paper and other supplies.  The curtain is changed out with the seasons, as are the towels and bath mats.

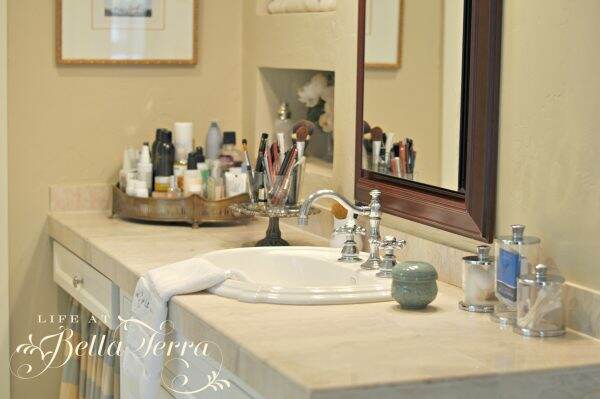
Everyday make up supplies are kept in French glasses on a small cake pedestal.  The older I get the less makeup I wear, so having a few things handy is very convenient.  Raised and off the counter, keeps things looking neat. A large brass tray holds everything from hairspray to mouthwash.

Sorry for the shift in light, but the natural light changed during these photos.  Begrudgingly I had to use overhead lights for some of these shots. 🙁

Cubbies were built into the wall for towels, bottles of water and more of my shells! The framed sheet music, “Oh! What A Pal Was Mary” was a gift from my dear friend, Gwen.

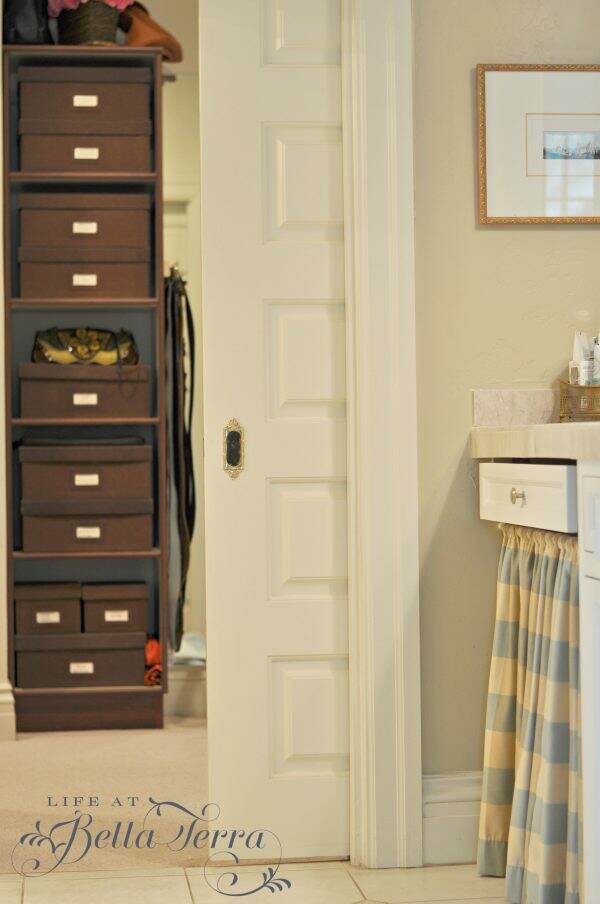
The walk-in closet is tucked beyond the pocket door.  A separate room houses the toilet and bidet.

Near the tub, behind the art, is a hidden television. I used acrylic vs. glass in the picture frame (for a lighter weight and to prevent any glass hazard). With a piano hinge on one side, the frame easily opens to expose a small  t.v. on an articulating arm.

Most older homes have small bathrooms and limited closet space. By reimagining this space, we were able to create an indulgent spot just for us. The tub is a perfect place for my weary bones after hours of gardening.  Separate sinks, a large shower with 2 shower heads and a private water closet provides all the niceties one needs when beginning or ending the day.


Large glass jars/container made in the USA:  Simon Pearce

Soaking bathtub, sinks, toilet, bidet and faucets by Kohler

Cabinets were custom made

Paint color (walls):  Cochise by Dunn Edwards SP2560 in eggshell

Paint color (trim): Dunn Edwards Cottage White SP 113 in semi-gloss

Medicine cabinets by Robern

Windows by Marvin

Window sheer by Pottery Barn


My Daughter’s Bedroom

When we first remodeled Bella Terra, the original intention of this room was to be a computer/TV/hang out room for our then 2 children.  But God works in strange ways and I became pregnant with our 3rd child in the middle of our 3 year renovation.  Of course the doctor had told me that it was highly unlikely I would get pregnant (my “advanced” age) coupled with my last pregnancy ending in a miscarriage.  Surprise!

This room had several problems~~large plaster cracks and a floor that significantly sloped to one side. The wood flooring was mismatched and in poor condition.  When we pulled up the floor boards, the joists were random heights, contributing to the non-level mess. Structurally, the corner of the house had settled. It was painted mental institution green.

Since every single window had to be replaced in the house, we took this opportunity to change the larger northern window to a smaller, fixed one. The original window led out to the top of the porte cochere and I envisioned late night escapes done by mischievous children.

Here is the renovated room prior to flooring.  It was painted a soft peach to match the Ralph Lauren florals I had chosen for her crib and bed~~perfect room for my new little girl.

When Elisabeth became a teenager, naturally she wanted a room change.  I still remember the day when she asked, “Mom, can I paint my room orange and blue?” Hmmm.  I asked what shade of orange.  She promptly showed me International Orange~~yes, that super bright, come save me in the middle of the ocean emergency color.  Groan.  But I have a fond memory of MY mother letting me paint my room a ridiculous shade of purple when I was that age. I smiled and said, “Sure!”

We agreed to painting two of the four walls orange, but two would need to be white~~for balance and a visual break in color.

We painted the room ourselves~a mother/daughter project and she was so proud when it was finished.  I admit I was hesitant at first, but the color is SO cheerful and happy.  There is quite a bit of painted white trim (baseboards, door/windows) which is crisp and clean against the orange.

Here’s the view when you step into her room.  The bed has assumed a few different positions, but this is her current layout (which gives her more friend space). The rolling cart acts as a night stand and is from IKEA.

When she graduated to a full size bed, I purchased the fabric headboard from Joss and Main.

There is always an abundance of stuffed animals on the bed. 🙂

The original room did have a closet, but during the renovation (pre-new baby), I reconfigured it to be used in the adjacent room. So we needed to add closet space.  We created these built-ins from the kitchen design department at Home Depot.  The white finish adds balance to the orange.


All my children LOVE to read and collect books so a bookcase was added to the side of the closet.


Across the room is her desk/work station. She has a cork board area and spaces designated for supplies.

A large world map mounted on a metal board provides magnetic ways for her to display trinkets and memorabilia.

As a Christmas present I painted a picture of Sox, her beloved dog.  Though not planned, I’m glad the blue works with her color theme.

I hope you enjoyed this brightly colored room! It reinforces the notion to take risks with paint color!


Paint Colors: Sherwin-Williams Manual Knockout Orange

Dunn Edwards 354 Van de Cane (white)

Large Pillow fabric:  Joann’s

Striped comforter fabric:  IKEA

Rug:  IKEA

Pencil containers:  IKEA

Pears and Women in black top paintings:  Artist – me

Beach painting:  Artist: my daughter

Lamp: IKEA

Custom Windows:  Marvin Windows


Exteriors: Before and After

Before-our home, Bella Terra

While I was in high school, my parents bought a 1771 Colonial home that needed extensive renovation.  I recall Mom and I spending countless hours consulting on this restoration project. That was the beginning of my love of historic home remodeling.

After

Bella Terra, built in 1910, is the 4th renovated home for us.  I have also purchased, remodeled and sold 5 others.  In looking through old photos, I thought you would like to see some Before and After shots.  Granted some of them are before digital cameras, but for the most part, you can see the improvements. To read more about the restoration of our home, click here.

Curb appeal and the attractiveness of the exterior creates a lasting first impression.  If it doesn’t catch your eye at first glance, then you can anticipate that the rest of the house is probably subpar. Here is the original entrance of a long brick ranch-style home that I remodeled in 2008. An unattractive security screen door, unsafe sidewalk, and deteriorating rafters, small scale light fixtures add to the ugly entrance.

Before

In order to create a wider entry, custom double doors were fitted.  We then added an overhang to break up the long, low, linear lines of the roof of the house.

After

Notice the improved walkway, the fresh paint and the well-lit entry. Here is the street view…..Before…

Before

And After…Notice the new windows, siding, roof, house and landscape lighting and the addition of shutters. This was one of my favorite remodels.  It has 5 bedrooms, 4.5 baths and the most amazing mud/laundry/craft/office room. The family who bought it still lives there.  Each time I see them, they remind me how much they love it.

After

This sweet small ranch has such potential.  Here is the front entrance before.

Before

Here is the after.  The colors were inspired by a home in Stonington Borough, Connecticut.  I removed the corner window, added wider shutters, new siding and a new darker roof color. The oval window provided some curves to a rather angular house. Adding a shuttered front door provides security and ventilation at the entrance.

After

Here is another long, low brick ranch. The front door was a cheap, hollow core closet door.  The odd stone below the brick is a bit of a challenge. I wasn’t wild about the roof, but after some research, I discover it is a very expensive composite with a lifetime warranty.

Before

With new windows, shutters, front entrance and landscaping, the entry looks much more appealing. And the roof is no longer an eye sore.

After

Here is the guest cottage to my latest restoration.  There was an apartment attached to the front of this.  When we demolished the building we discovered the original garage and barn doors.  Unfortunately we could not salvage the doors as they are too damaged.

Before

Here is what it looks like now as a newly converted guest cottage. New windows and doors, siding, landscaping and a custom built arbor, increase the curb appeal of this sweet structure. To read more about this Willetta home restoration, click here.

After

The main house, built in 1922, had been vacant for over 20 years and was in a state of disrepair when I purchased it.

Before

Finally it has been brought back to its original grandeur.  Removing the aluminum siding showcases the original clapboard, new roof, repaired columns, appropriate lighting and a new 2 story addition on the back makes this a historical charmer.

After

I love any and all before and after pictures~~ of people and makeovers, homes, just about anything.  As I sort through the thousands of photos, I will continue to share other remodels with you.

If you enjoy this post, please share on Pinterest.

This post shared with Between Naps on the Porch Metamorphosis Monday #645


A Peek into Our Wine Cellar

I apologize for the quality of the pictures, but I still haven’t mastered great photography yet.  Since this room has absolutely no natural light, they aren’t the best.  But hopefully you’ll get the idea.

The cellar is hidden behind this “bookcase”.  A local goodwill shop was having a book sale, 24 books for $2.00 so I bought all of these for $10.00!  My husband cut them to 2 1/2 inches wide to reduce the weight on the shelves.

The magic begins when you push against the shelves and this happens….

The door provides a “scary house” squeaking sound as it opens.  Instead of stairs, we created a serpentine path to the cellar.

I didn’t want the standard wine cabinets that you see in most cellars.  This room deserved a more rustic, casual look. The floor is stained concrete, which is perfect for any wine spills. Getting these chairs down the twisting, narrow entry was quite the challenge.  If we ever sell the house, the chairs will go with it!

Our design inspiration came from the wine cellar at the Hermosa Inn.

The ceiling is made with wood an old Illinois barn, that was being demolished.   The curved stone wall was added for character, in hopes that it would look like an original foundation wall.

The “floating” table is a convenient spot to serve wine or do tastings.

Around the corner is a copper sink, mirrored backsplash, shelves and storage.

There is a system for scanning new bottles and keeping an overall inventory.  This little machine creates a UPC code label which allows us to scan the bottles we use.

Since this is probably the best place to be in the middle of a hot Phoenix summer, we have a flat screen television and access to multiple channels.

I hope you enjoyed the tour of the secret wine cellar.


Chairs:  Pottery Barn

Wine Refrigerator: Viking

Wine Software: Sommelier

Sconces: Relics


Painting a Bedroom Black

When my eldest daughter went off to college, it was a good opportunity to update her room with a more sophisticated look.  It was painted a pretty green and had all the makings of a young teenage girl’s room.

Here are a few Before pictures:

In addition to green, her favorite color is black.  Painting her room black was a bold move.  But we have light floors (Canadian beechwood) and lots of white trim (baseboards, windows, doors, crown molding)…..to help break up any large expanse of black.

When you first walk in, there are two arched windows overlooking the front yard.

These windows face east and get the beautiful morning light.

I still wanted to keep her green desk chair and furniture but finding fabric that combined THIS green, black and white was a bit of a challenge.

We’ve never had curtains on these windows. I couldn’t figure out how to add curtains without covering up their architectural beauty.

After much pondering, I finally decided to do one big panel. The large drapery pulls across both windows and tucks to one side when not in use. It has a black-out liner so my daughter is finally able to sleep in a dark room.

This panel was made by Smith & Noble, using their designer fabric line, Madcap Cottage.  The fabric sample they sent matched the green and black perfectly~~the pattern was a bit of unconventional and playful. Plus their turnaround time was less than 2 weeks.

Her bed is tucked into an alcove that has a port hole window.  The headboard and wall lamp are from Joss & Main; the duvet cover from West Elm.  I made the bed skirt with leftover Waverly fabric I found in the basement. The matching decorative pillow was also made by Smith and Noble.

Her bathroom needed a facelift too.  We replaced the tile countertop with Carrera marble and repainted the base cabinet semi-gloss black.  The walls went from green to white.

Now when my daughter comes home from college, she has an updated room to use.  Though it was a big leap of faith to paint this room black, I am very happy with the crisp results.


Desk and chair: Ikea

Door, window, trim color:  Van de Cane DEW354 (a Dunn-Edwards paint but created by Sherwin-Williams)

Wall Color:  Sherwin-Williams Caviar 6990

Drapery Rod and C-hooks: Smith & Noble

Fabric: Hello Hidcote/Nightfall (17910) by Madcap Cottage

Artwork: Original drawings by my daughter


Painting a Laundry Organizer and its Challenges

I don’t know about you, but my laundry room often gets overlooked.  Not only does it hold the washer/dryer, but there is a utility sink, toilet, cat litter box, laundry shoot and a French rolling basket. It’s hard to make it pretty with a cat litter box…..is there anything more unattractive?

I purchased this piece of furniture with wire baskets years ago from Pottery Barn. Of course I didn’t have any great before pictures, but you can see it is white.

Laundry Organizer Ideas

The baskets hold everything from toilet paper to laundry pods to spot remover.  The wicker basket on top is the landing place for the laundry shoot located directly above. I’m not sure I still like the “clothes line” painting on the wall, but I don’t dislike it enough to paint over it just yet.

Painting a Laundry Organizer and its Challenges

Guessing the original paint was lacquer, I sanded the glossy finish so the new coat of paint would stick.  I used 400 grit paper that I wrapped around a sanding sponge.

In this photo, you can see the damage done by detergent spills.  I guess if it can get grass stains out, it can eat away at paint.

I tried hand sanding this~~just roughing up the surface a little.  However, when I applied my first coat of paint, it smeared and didn’t seem to stick.  So much so that I wiped it off.  Time for serious power tools. I then re-sanded it.

You may notice I have only one sock on…..that’s because I accidentally stepped on the lid which was facing up and of course, loaded with paint.  It wasn’t until I started walking on the terrace and leaving blue footprints behind that I realized it.  Truly, I am the messiest painter I know.

Here’s what it looked like after the first coat.  Obviously there was still an issue on having the paint stick to the surface.  I don’t know what they used to protect the surface, but it was very difficult to penetrate.  Of course I didn’t want to halt the project and buy a proper primer (which I should have done).

At this point, I am groaning because I thought this was going to be an easy, few hour project. But with the second coat, I was starting to see some progress.

Finally, this pain in the neck project was completed! Took me two days, but I like how the blue paint color goes with the slate floor.

Here’s a view up to the laundry shoot.

Now I need to update the rugs in this room and find a clever way to make the litter box look more appealing.

What I learned:

  1.  90% of painting is the prep work and I always want to short cut that.. Bad move.
  2. Remember where you put the exposed paint so you don’t step in it (lid, stir stick).
  3. Don’t wear your favorite socks while painting
  4. If you think a project will take a short period of time, double or triple that.
  5. I used plastic wrap to cover my paint brush so I didn’t have to keep washing it out between paint drying times.
  6. Pre-finished furniture has some coating which is nearly impenetrable-perhaps a different grit sandpaper and/or a suitable primer would have made this easier.

So, do you think? Should I keep the wall painting of the clothes on the line or paint over it?


Paint color-Valspar Duramax WV39009 Dutch Blue Exterior Semigloss (This leftover paint was our front door color a few years back).