1

Eating Healthy

Yesterday morning,  I noticed so many people photographing their breakfast and sharing it on Instagram.  So I was inspired to do the same.

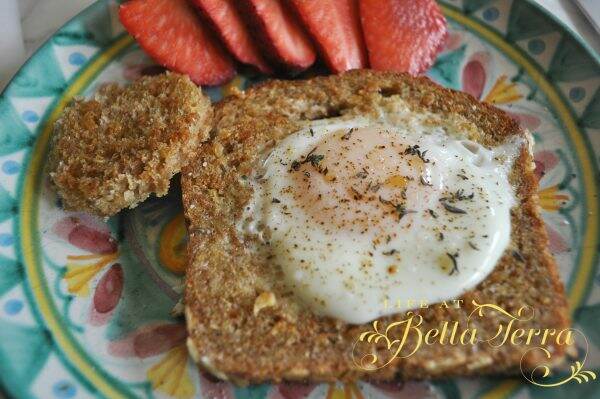
I made a fresh egg cooked inside a slice of 7 sprouted grains bread, seasoned with fresh thyme, sea salt and pepper. I toasted the bread in olive oil first, then cut out the hole and plopped in the egg.

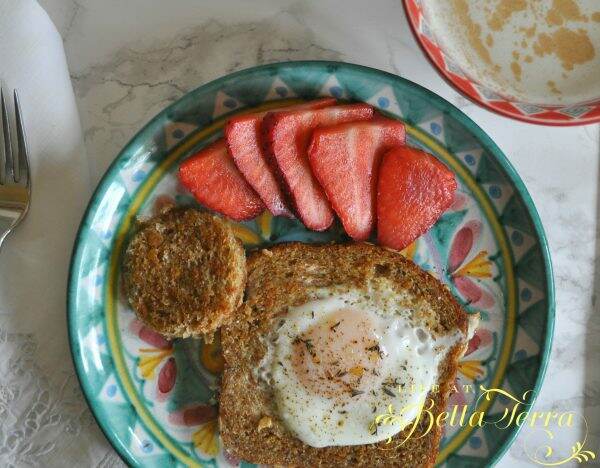
Since I had my cup of coffee earlier, I made hot matcha tea with hazelnut/cashew milk (see my post on making nut milk) and topped with cinnamon. A delicious and nutritious breakfast, utilizing simple ingredients.

The beginning of a new year is always a good reason to improve upon your health and diet. Though, generally, I consider myself to eat nutritious foods, I find myself skipping meals, eating on the run, all because I say I’m too busy.  As a result, I believe my metabolism is slower than it should be.  After years of creating and preparing meals and snacks for my family, I found myself hardly cooking since my oldest 2 went off to college.  My teenage daughter is starving at 3:00 p.m. after school and that’s when she has her big meal.  By 6:00 p.m. no one is hungry and at that point, why bother?

I was lacking imagination and preparing the same things over and over again and/or relying on take out foods when I was too pooped to cook. And of course, there was that glass (or two or three) of wine nearly every night…..

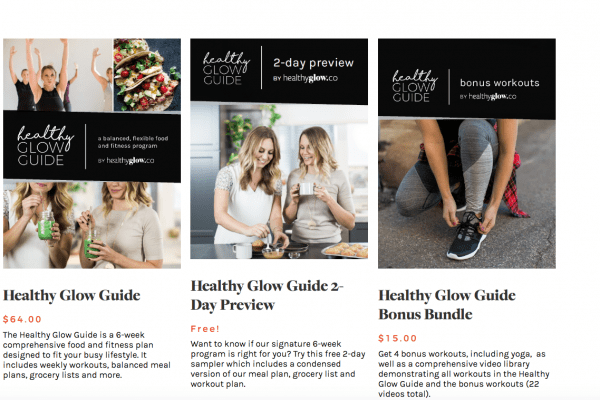
Adding a few LBs over the holidays didn’t help, so I was very excited to discover that a blogger I admire, Monique from Ambitious Kitchen (and others) put together a healthy eating/exercise plan called Healthy Glow.


It’s a 6-week program and for a mere $64 you can download all the recipes, shopping lists, eating guide, etc.  I thought, if nothing else, I may find some great new recipes.  And they have a 2-day preview of the plan that is free.

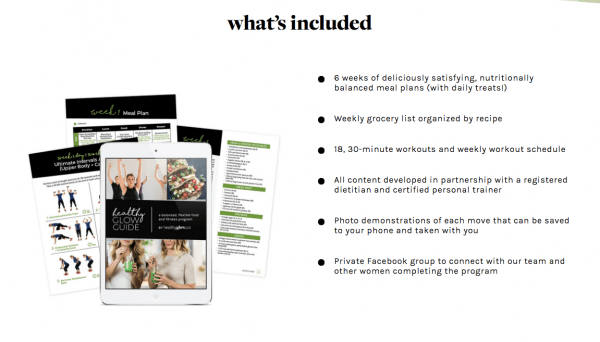
I personally like the shopping list ~~ so every Saturday we hit the grocery store and get all the items we need for the next week of recipes.  The serving size varies so you can increase or decrease the recipe (or make more and freeze it).  The Healthy Glow team make this a very easy plan to follow.  They also encourage you to dine out once a week and add a glass of wine too, if you’d like.

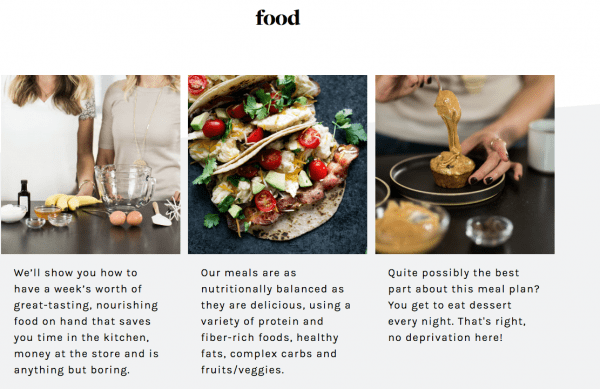
The coveted Nutella Stuffed Brown Butter Sea Salt Chocolate Chip Cookie recipe (that I made all the time for my son’s crew team) was created by Monique so I know she is able to eat healthy yet enjoy a variety of foods at the same time.

Even though the program says it’s designed for women, I’ve been preparing the foods for my husband too.  He has been adding other foods to satisfy his metabolic needs.  He has enjoyed the meals and especially looks forward to the diverse breakfast options (many made the night before and very appreciated on hectic mornings).

We have completed the first 6 weeks and have begun our 2nd round.  I felt like I was eating LOTS of food, but I didn’t gain a pound, actually I lost a few.  For the 2nd round, I am adding the nutritional information to the LOSE IT! app.  I didn’t realize that the nutritional information was in the packet (last time)  but it’s nice to know there is a good balance of protein, carbohydrates and fats.

I haven’t done any of their exercise recommendations because I already have a weekly routine.  But who knows?  It’s nice to have a fall back position if I become stuck in my current regime.

In summary, I’ve really enjoyed the recipes and eating in a different way.  Knowing what you will be having for each meal is so much easier than spending time staring at an open refrigerator door and wondering what to make for breakfast, lunch and dinner.

The egg in toast breakfast was inspired by a recipe in Week 2 of the Healthy Glow plan called Egg in a Frame.   It was absolutely yummy.  Calories: 307; Fat: 20.5 g; Carbohydrates: 22.8g; Sugar: 2.2g; Fiber: 2.8 g and Protein: 9.5 g.

Wishing you a healthy week!


Love is in the Air

I wanted to make something for my husband and the wonderful crew I have at the Willetta restoration.  One of my husband’s favorite desserts is homemade cherry pie.  I did think about making a whole one but we’ve been trying to eat healthy since the first of the year and I knew a huge pie would be a bad, albeit delicious temptation for both of us.

So I decided to keep the theme but on a smaller scale.  In a previous post, I shared my favorite pie crust recipe–which is super easy to make (especially in a Cuisinart).  After letting the pie crust dough chill, I rolled it out and found the largest heart-shaped cookie cutter I had.

I added canned (partially groaning here) cherry pie filling.  Normally I like fresh cherries but they are not in season so sometimes you need to improvise.

I wet the edges of the heart with water and added another heart-shaped dough piece.  A small fork served as the perfect tool for sealing the edges.

Next, I brushed the surface with an egg wash (just scrambled an egg) and then pricked the dough for air vents.

Baking was a bit of a challenge because I wasn’t sure how long~~but I set the oven to 375 degrees and started at 10 minutes.  I kept adding time in increments of 3 minutes so my total cook time, in a convection oven, was approximately 20 minutes.  Depending on the size of your cutter, my pie crust dough recipe made 9  4″x4″ hearts.  Lastly, I sprinkled the tops with sugar (used King Arthur’s Sparkling White Sugar).

I’m getting ready to run these down to the job site~~a small sweet surprise for my dedicated crew.  Happy Valentine’s Day!

If you have only one smile in you give it to the people you love.     Maya Angelou


All Things Valentine

February is the month of romance. I do some limited decorating for this fun holiday-who doesn’t love the colors of red or pink! As with most holidays, I am interested in its origins, its traditions and why we celebrate.  Here are a few fun facts about Valentine’s Day.

1. The most popular theory about the Valentine’s Day origin is that Emperor Claudius II didn’t want Roman men to marry during wartime.  Bishop Valentine went against his wishes and performed secret weddings.  For this, Valentine was jailed and executed.  While in prison, he wrote a note to the jailor’s daughter signing it “from your Valentine.”

2. The red rose was the favorite flower of Venus, the Roman goddess of love.

3.  In 1537, England’s King Henry VII officially declared February 14th the holiday of St. Valentine.

4. In the Middle Ages, young men and women drew names from a bowl to see who would be their Valentine.  They would wear this name pinned onto their sleeves for one week for everyone to see.  This was the origin of the expression “to wear your heart on your sleeve.”

5. Every Valentine’s Day, the Italian city of Verona, where Shakespeare’s lovers Romeo and Juliet lived, receives about 1,000 letters addressed to Juliet.

6.Based on retail statistics, about 3 per cent of pet owners will give Valentine’s Day gifts to their pets.

7. Arizona became the 48th State on February 14, 1912.

8. In addition to the United States, Valentine’s Day is celebrated in Canada, Mexico, the United Kingdom, France, Australia, Denmark, Italy and Japan.

9.  141 million Valentine’s Day cards are exchanged annually, making Valentine’s Day the second most-popular greeting card-giving occasion.

10. Physicians of the 1800s commonly advised their patients to eat chocolate to calm their pining for lost love. (Now that’s a good excuse!)

For your information:

The colorful painting was done by me last year in my attempt to do a new one for each holiday.

The pets featured above are:  Cooper,  an Akbash (from the Anatolian Shepherd family); Sox, our pocket Beagle; Tippy and Donovan- stray cats our girls found/rescued/captured in the yard.

The heart-shaped ravioli was made last Valentine’s Day from a recipe I found online.  If you have a heart- shaped cookie cutter, it was a relatively easy recipe to follow.

And if you love the wheat-etched spooner holding the tulips, you can purchase it through my online store!

Wishing you a happy and loving Valentine’s Day!


When Life Gives you Lemons

The orchard is full of fruit and flower buds are starting to appear!  We will need to glean the trees so the new buds have enough energy to produce a hearty crop next year. So the harvesting begins! So when life gives you lemons, bake!

The lemon tree, well, is not really a tree or a bush.  It is sort of a sprawling blob of green. I am sure it is decades old but it keeps producing wonderful fruit.  Not sure of its variety but year after year, this bush/tree gives up plenty of beautiful, fresh lemons.

Years ago, my friend, Joann Augur (who also now happens to be my art teacher), made a lemon cake for one of our Garden Hoes gatherings.  Yes, we were part of a group of gardeners called the Hoes and our husbands were the Hoses.   Garden humor.:)

Joann’s cake was so delicious I quickly asked for her recipe.  And even though it sat in my recipe book for years, I clearly remembered this incredibly tasty cake.   So in art class this week, I asked Joann’s permission to share her recipe.  After years of mentally tasting this cake, I finally made it with the abundance of lemons from our orchard.

First, cream the butter and sugar.  Add eggs, one at a time.

I LOVE my microplane/zester.  We received it as a gift and I can’t believe I’ve never had one before. Making lemon zest is so easy with this tool.

Add the zest to the sugar/butter/egg mixture.

Sift the dry ingredients.

In a separate bowl, combine lemon juice, buttermilk, and vanilla.  I didn’t have buttermilk and didn’t feel like making a special trip to the grocery store, so I made my own, using Emeril Laggasse’s homemade recipe.  You simply put vinegar or lemon juice (4 1/2 teaspoons) into one cup of milk and let it stand 15 minutes.  I decided to use lemon juice vs. vinegar since this is a lemon cake recipe.

Add the buttermilk combo and flour mixture alternatively to the sugar batter, beginning and ending with the flour.

Divide the batter into 2 loaf pans and bake at 350 degrees for 45 minutes to one hour (mine were done in 45 minutes in a convection oven).  While the cakes are baking, make the lemon syrup.

Cool the cakes for 10 minutes, remove from pans and place on a rack over a tray (cookie sheet).  Spoon the syrup over the cakes.  I also took a wooden skewer and added holes to the cake to help the syrup absorb even more.

Make the glaze and drizzle over the cakes.

This cake is SO yummy! According to Joann, this cake freezes well too.  Many thanks to Joann for allowing me to share this on my blog.


Lemon Cake

My sweet friend and art teacher shared her delicious lemon cake recipe with me.

  • 1/2 lb. unsalted butter (room temperature)
  • 2 1/2 cups granulated sugar (divided)
  • 4 Xtra large eggs (room temperature)
  • 1/3 cup grated lemon zest (6-8 lemons)
  • 3 cups all-purpose flour
  • 1/2 tsp baking powder
  • 1/2 tsp baking soda
  • 1 tsp kosher salt
  • 3/4 cup freshly squeezed lemon juice (divided)
  • 3/4 cup buttermilk (room temperature)
  • 1 tsp vanilla extract

For the Glaze

  • 2 cups confectioners' sugar (sifted)
  • 3 1/2 Tbsp freshly squeezed lemon juice
  1. Preheat oven to 350 degrees. Grease, flour and line bottom of two 8 1/2 x 4/1/4 x 2 1/2 inch loaf pans in parchment paper.

  2. Cream butter and 2 cups sugar in bowl of electric mixer with paddle attachment for 5 minutes or until light and fluffy. With mixer on medium speed, add eggs one at a time, and lemon zest.

  3. Sift together flour, baking powder, baking soda, and salt in a bowl. In another bowl, combine 1/4 cup lemon juice, buttermilk and vanilla. Add flour/buttermilk mixtures alternately to the batter, beginning and ending with the flour. Divide the batter evenly between pans, smooth tops and bake 45 minutes to 1 hour until done.

  4. Combine 1/2 cup granulated sugar with 1/2 cup lemon juice in a saucepan, cook low until sugar dissolves.

  5. When cakes are done, cool 10 minutes. Invert them on a rack and set over a tray. Spoon syrup over cakes.

  6. For the Glaze: combine confectioners' sugar and lemon juice in a bowl; mix with wire whisk until smooth. Pour over the tops of the cakes and allow glaze to drizzle down the sides.


A Winter Salad Favorite (and The Store is Officially Open!)

It’s been such a learning curve to understand the concept of selling online.  However, we are HOPING that all the bugs have been worked out and that shopping on our site will be easy and fun.  Nearly all of the items are one-of-a-kind so if you love it, purchase it quickly!  To start shopping, please go to the Store tab at the top of the Life at Bella Terra website. If you have ANY problems or questions, please contact us immediately. To see the original story of 2 Connecticut Yankees, click here.

~~~~~~~~~~~~~~~~~~~~~~~~~~~~~~~~~~~~~~~~~~~~~~~~~~~~~~~~~~~~~~~~~~~~~~~~~~~~~~~~~~~~~~

Here is one of my favorite winter salad recipes (by Pinch of Yum).  Pomegranates grow well here in Phoenix and they are the perfect addition to any dish this time of year because of the vibrant, red color of the juicy, gem-like seeds. Some stores offer the seeds already extracted from the fruit.  If you purchase them this way, make sure they are fresh.  I like getting the fruit and taking the seeds out myself.  If you extract the seeds over a bowl of water, the seeds will sink to the bottom and the paper-like inner fruit membrane will float.  Just skim that off and drain the seeds!

The ingredients include:  kale, walnuts, feta cheese, wild rice and pomegranates.

I like Uncle Ben’s Ready Whole Grain Medley which is a combination of brown and wild rice. It’s pre-cooked and ready to use after 90 seconds in the microwave.  Easy peasy.  Though the recipe calls for baby kale, I don’t believe I’ve ever seen baby kale available here.  I used regular kale and combined the green and red leafy kale for color.  The different textures and colors of the ingredients allow for a beautiful display before tossing.

The dressing is a subtle combination of shallots, honey, olive oil and vinegar.  The only labor is the chopping of the shallots.  The rest of the ingredients are easily combined in a blender or food processor.

This salad would also be perfect with a piece of grilled salmon or chicken on top.  The wild rice makes this a heartier salad that would stand up well with a protein addition. Isn’t this a pretty and festive salad?

We served this last night at an event at our home, along with my turkey chili and cornbread (doctored up with kernels of corn, cheese and diced green chiles). It was the perfect simple, cozy meal for friends. I’m all about easy and simple this time of year!

[amd-zlrecipe-recipe:3]

Save

Save

Save

Save

Save

Save

Save

Save

Save

Save

Save

Save

Save

Save

Save

Save

Save

Save

Save

Save

Save

Save

Save


Apples and My Favorite Recipe

After being raised on a wide variety of Connecticut apples, it’s hard not to be an apple snob.  But we do have a few varietals that grow well here in Arizona, depending on your Hardiness Zone.  At Bella Terra, we grow Anna apples that I harvest in June, which seems completely counter-intuitive to me.  I try to cold store them in the refrigerator, but unless I use them quickly, they tend to shrivel and get soft.

apples

In the White Mountains, we grow Golden Delicious and they harvest on a more typical fall schedule.  Golden Delicious are a good for eating and making applesauce. Not the best apple for making pies, because they are less firm and much sweeter, but beggars cannot be choosers.

Recently, Kari Anne at Thistlewood Farms did a fabulous post on apples.  I was so inspired after reading her blog, that I made an apple pie, not just any apple pie, but what I call Troop 184 Apple Pie.

When my daughter, Elisabeth was in 4th grade, I was a Girl Scout troop leader.  I thought it would be a great idea to teach 36 nine-year olds how to make a pie from scratch.  Our meetings were 1.5 hours long, not long enough to bake a pie, but long enough to make the dough and peel the apples, etc.  I envisioned each girl bringing home a freshly made 9″ pie to bake at home.  What the heck was I thinking?  First of all, trying to get 36 nine-year old girls to pay attention was a feat in itself.  But with rolling pins, sugar and flour?

One hundred pounds of apples, 50 lbs of flour, and 15 lbs of sugar later….well, you get the picture.  Fortunately, I “pre-made” most of the dough and “pre-cut” most of the apples.  We broke into 6 teams of 6 girls, and with lots of parent helpers, each girl left the meeting, covered in flour but with a full size pie to take home. I was exhausted and no one died of food poisoning.  All in all, it was a successful meeting.

I wouldn’t have survived cutting all those apples without one of these:

applepeeler

It’s an apple peeler and corer.  I don’t know what genius invented it but I marvel every time I use it.  I purchased mine several years ago from William Sonoma. They can also be found on Amazon.  This gadget seems to get a great deal of use at our house, especially when I need to peel larger quantities of apples (can be used for potatoes, too.)

applepeeler1
applepeeler2
applepeeler3

It peels the apple, cores it and then slices it just by the turn of the handle.  Works for all apples sizes-just brilliant!

slicedapples

I experimented with several pie dough recipes before I selected this one for my girl scout troop pie making extravaganza.  I swear this is my go-to pie crust recipe…Another lifesaver when making large quantities of pie dough, is my Cuisinart.  It is SO easy and simple to make a pie crust this way.

doughcuisinart

Just add all the ingredients and pulse away, adding more ice water as you go to get the proper consistency of dough.

dough2

What makes this dough so flaky is the combination of both vegetable shortening and butter.  Leaving large chunks of it in the dough makes for pockets of flakiness.  Though making this dough from scratch is VERY easy, when in a pinch, I love Trader Joe’s pie crust  as a substitute.  It’s a bit sweeter tasting too. You just have to plan ahead to defrost it properly or it’s difficult to lay open.

applepie1

In this recipe, I used our mountain apples, Golden Delicious.  Since they are naturally sweet, I just added less sugar.  I prefer a tart and firmer apple for pies.  But, being a good Yankee, I use what I have. Lately I’ve seen so many artistic pie crusts on Pinterest so I tried to be fancy by adding a maple leaf dough cut-out for the border.

piecrustleaf
applepie

You cannot beat the smell of an apple pie baking~~seems so appropriate for this time of year.  I hope this inspires you to bake a pie from scratch!

applepie2
applepieslice


[amd-zlrecipe-recipe:1]

Save

Save

Save

Save

Save

Save

Save

Save

Save

Save

Save

Save

Save

Save

Save

Save

Save

Save

Save

Save

Save

Save

SaveSave