1

Growing Chamomile

When I was planting my garden years ago, my sweet daughter opened up a whole packet of chamomile seeds and scattered them far and wide, while squealing, “Wheeeeeeeeee”.  For those of you that know me, I am a geometric person, who likes things planted in rows, straight rows  I had no idea where the seeds landed and after I got over the initial shock to my organized inner self, I delighted in the fact she was so carefree in her seed distribution.

As a result, this delicate flower from the daisy family is growing in numerous places, year after year.

Traditionally, chamomile has been used for centuries as an anti-inflammatory, antioxidant, mild astringent and healing medicine. According to U.S. National Library of Medicine, chamomile is one of the most ancient medicinal herbs known to mankind.

It is a member of Asteraceae/Compositae family and represented by two common varieties ~~ German Chamomile (Chamomilla recutita) and Roman Chamomile (Chamaemelum nobile).

The dried flowers of chamomile contain many terpenoids and flavonoids contributing to its medicinal properties. Chamomile preparations are commonly used for many human ailments such as hay fever, inflammation, muscle spasms, menstrual disorders, insomnia, ulcers, wounds, gastrointestinal disorders, rheumatic pain, and hemorrhoids. Chamomile is often used to treat mild skin irritations, including sunburn, rashes, sores and even eye inflammations. Who knew? For more information on the benefits and uses of chamomile, click here.

The chamomile garden patch is one of Sox’s (our beagle) favorite spot.  He smells SO good after romping around in the flower bed.

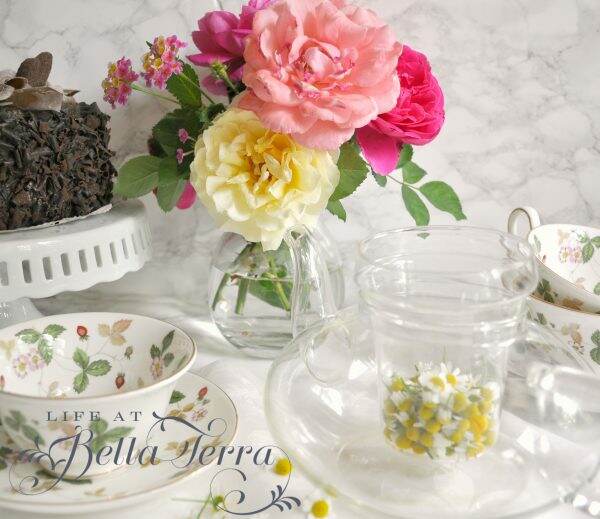
I decided to try making a tea this year using the fresh flowers vs. drying them.  Unlike many other herbs, you want to collect the blossoms only, not the leaves, stems or roots.  The best time to harvest is mid-morning, after the dew has evaporated but before the mid-day sun. Just pinch off the blossoms and shake off any dirt or insects.

As with most herbs, more quantity is needed when using fresh vs. dried.  I used 3-4 tablespoons of flowers.

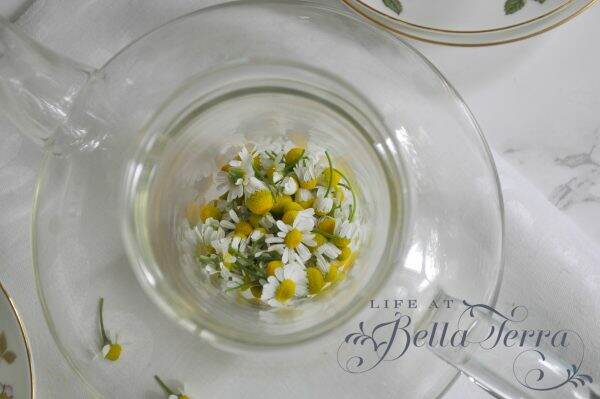
If you do not have a tea pot with a strainer, you can use cheesecloth to bundle the herbs. You can also just strain the tea from the blossoms after you are finished steeping.

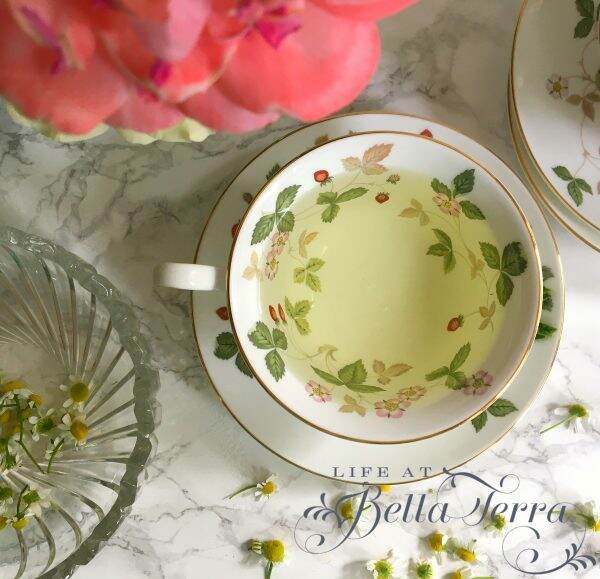
Add hot water and steep for 5 minutes.  Fresh chamomile tea has a clean, fruity, apple undertone which is different from dried chamomile. The Greek derivative of chamomile means “earth apple”. Makes sense.

I did add one mint leaf….which seemed to enhance the chamomile flavor, not overwhelm it.

I rarely add sweetener to my tea, and this one, in my opinion, doesn’t need anything!

After reading about all the benefits of this simple tea, I plan to drink it on a more consistent basis.

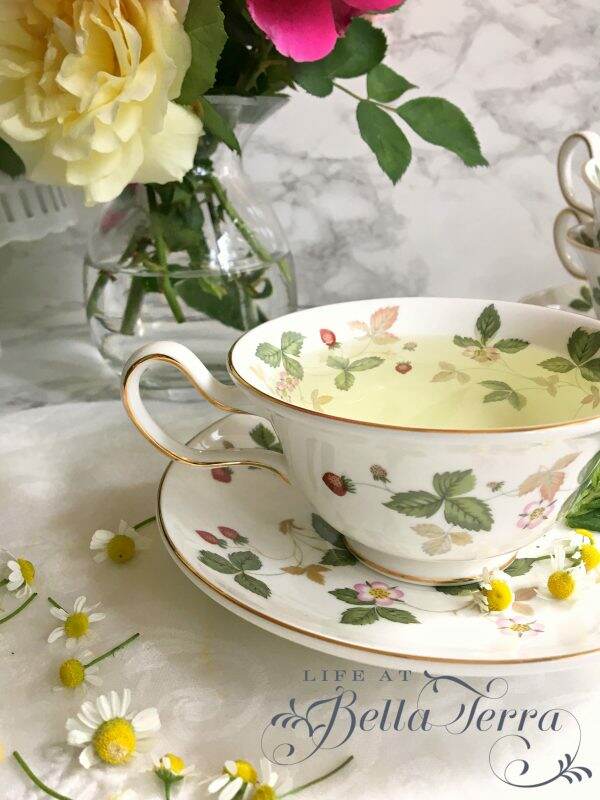
Perhaps I will experiment with adding lavender…..and concoct the perfect sleepy time tea!

Chamomile is extremely easy to grow. Roman chamomile is a perennial, growing from the same root year after year. German chamomile is an annual, but don’t expect it to grow in the garden for just one year! It self-sows freely and you can bet if you plant it one time, it will spring up in the garden from then on.

Have a wonderful weekend!


Lemon Blueberry Bread~gluten and grain free

My husband and I have been doing the Whole30 eating plan (no sugar, bread, alcohol, dairy, beans, peanuts, soy for 30 days) since the end of February.  We both said, “how hard can it be?” Surprisingly, we have felt great on the Whole30.  For a quick summary of this reset plan, click here.

As we slowly re-introduce food groups back into our routine, this is one of our favorite recipes.

Ambitious Kitchen recipe

I am a big fan of Monique from Ambitious Kitchen.  This is her recipe and it is gluten free, grain free, paleo, dairy free and it’s not too far off from the principals of the Whole30.  It takes only 15 minutes to prep and 45 minutes to bake and gives the kitchen that great “what-is-in-the-oven” smell.

It is the end of our citrus season so I am using the last of the lemons.  Who doesn’t like the pairing of lemons and blueberries?????

Lately, I am using coconut and almond flour for many of my recipes.  Though these flours don’t allow your baked goods to rise like all-purpose flour, they are still tasty and do the trick. You can order these flours online or many stores have them in stock. For almond flour, click here; and coconut flour here.

First step is to mix together all the dry ingredients.  In a separate large bowl,  you mix the wet ingredients, enjoying the fresh scents of lemon zest and juice. For the best zester ever, click here.

The only sweet ingredient in this recipe is maple syrup.  The first time I made this, I used a combination of maple syrup and raw coconut nectar and it worked equally as well.

Whisk the ingredients together.

Combine the wet and dry ingredients.  The consistency thickens quickly in reaction to the baking soda.

Fold in the fresh blueberries and put the batter into a parchment paper lined loaf pan.  I coated the parchment paper with an extra virgin olive oil non-stick cooking spray.

Bake at 350 degrees for 40 minutes (however, I have a convection oven and mine was done at 35-36 minutes).

There is a glaze you can add.  On this loaf, I completely forgot and just served the bread as is.  The glaze is made with a berry jam (I used sour cherry jam), which adds a bit of pink.

The children love this loaf and have no idea it is a healthier version. For me, this bread provides just the right nibble with a cup of coffee or tea.  It also satisfies my need to bake occasionally!

Lemon Blueberry Bread from Ambitious Kitchen


Lemon Blueberry Bread

This bread is paleo, gluten-free, dairy free, grain-free

  • 1 1/3 cups fine blanched almond flour
  • 1/3 cup coconut flour
  • 1 tsp baking soda
  • 1/4 tsp salt
  • 3 large eggs
  • 1/4 cup pure maple syrup
  • 1/3 cup freshly squeezed lemon juice
  • zest of 1 large lemon
  • 3/4 cup fresh blueberries or raspberries

For the Glaze

  • 1 Tbsp coconut milk from the can (just the top, the solid part)
  • 1 Tbsp fresh squeezed lemon juice
  • 1 Tbsp seedless raspberry jam
  • 1 tsp lemon zest
  • For garish, zest of 1 lemon
  1. Preheat oven to 350 degrees F. Line an 8×4 inch loaf pan with parchment paper or spray pan generously with nonstick cooking spray.

  2. In a large bowl, whisk together the dry ingredients: almond flour, coconut flour, baking soda and salt.

  3. In a separate large bowl, whisk together all wet ingredients: eggs, maple syrup, lemon juice, and lemon zest. Add dry ingredients to wet ingredients and mix well to combine. Lastly, fold in blueberries.

  4. Pour batter into prepared loaf pan and spread out evenly. Bake for 40-50 minutes until tester comes out clean. Allow loaf to cool completely in the pan before removing.

  5. Once loaf is cooled completely, make your glaze: Place a small pot over low heat and add coconut milk, lemon juice, jam and lemon zest. Stir constantly until ingredients are well-combined. Drizzle glaze on top and garnish with zest from 1 lemon. Cut into 8 slices and enjoy!


Scrumptious and Easy Appetizer

I am salivating as I write this because I’ve just discovered the easiest, most delicious appetizer!  One of the benefits of cleaning out my pantry (see post here) was the chance to organize piles of recipes I’ve collected….and finally making a few.

Inspired by the huge cherry tomato crop we are now harvesting, these 4 simple ingredients (tomatoes, garlic, mint and olive oil) are fabulous together. There is nothing better than a super easy recipe that gets rave reviews.

Here’s a selfie I took of the tomato plant (I thought the perspective was interesting).

tomatoes

There is always so much mint in the garden.  It’s one of those incursive plants that you just can’t kill. I was skeptical of mixing mint with tomatoes (yuck) as it seems like an unnatural combination.

Scrumptious and Easy Appetizer

I love the oil container my son bought me for Christmas (from Williams Sonoma)….it’s so handy vs. the large bottles.

The recipe calls for 7 cloves of garlic, but I always add more.  You can never have too much garlic. Also, try and make sure the tomatoes are roughly the same size and uncut so they bake evenly.

A little salt and pepper….

Toss it all together. Isn’t this beautiful?

And slow roast for 45 to 60 minutes.  I let mine roast for the full hour.  Ahhhh…the aroma! My kitchen smelled so good!

Look at these little gems, bursting with flavor!

I don’t know what the mint does to the tomatoes, but the flavor was so spectacular.  Tastes nothing like mint, but enhances everything else. Toast some slices of baguette, spread some nice soft goat cheese and top with the tomato mixture.

Absolutely heavenly!

I had some leftover roasted tomatoes and I added them to scrambled eggs.  I think you could spread this on cardboard and it would be divine.  When I finished the tomatoes, I poured the oil over a chicken breast before I popped it in the oven.  Again, it was superb and made the kitchen have that “what are you cooking that smells so good” smell.

We recently had friends over for dinner.  One of our guests, a Navy SEAL said he didn’t like cherry tomatoes but LOVED this recipe.

Enjoy!!!


Here is the Recipe for Slow-Baked Tomatoes with Garlic and Mint (originally published in the September 2010 issue of Better Homes and Gardens)

[amd-zlrecipe-recipe:18]


Valentine Dinner Party

Typically we are a bit casual when entertaining.  However, once a year we do a formal sit down dinner party for Valentine’s Day. This year we are having a Valentine dinner party for 5 couples. Generally we use the dining room, but the weather has been so glorious lately, we decided to have it outside on our back terrace. And now with the pandemic, having a dinner party outside while social distancing is a safe option.

The attire for the evening is Fetching for the women and Dapper for the men.

Inspiration is from this original photo from Style Me Pretty. I love the mood of this table~romantic, elegant, with shades of pink. See Style Me Pretty’s link here.

What is unique about this centerpiece is the various sizes of cups/vessels for flowers positioned on a long piece of raised wood.

I showed a picture of the wooden base to my husband.  Within a few hours he had made me this raised platform. (See post here).

I gather any and all cups, bowls, spooners, and vases that would fill the space. The plan is to abundantly fill each vessel with lots of flowers.

Keeping with soft pastels, I purchase hydrangeas, stock, tulips, roses, carnations (from Trader Joe’s, Fry’s and Safeway) and add some flowers from the garden. Aren’t these so pretty?

The brass candlesticks and tapers are a purchase from West Elm. I must say these tapers are my new favorite. They burn well and are nice and tall.

It was a bit time consuming to do this, but the results are spectacular.  Thankfully my sweet daughter, Elisabeth provides an extra set of hands.

Menus are printed on shades of pink card stock. I cut the edges with decorative scissors (purchased at Michaels ages ago). Using a 2 hole paper punch, we add holes at the top of the menu.

My daughter helps tie each menu with a pink satin ribbon.

I am so excited to use my very first set of china, Romance Collection- Juliet by Royal Doulton.  It has since been discontinued but the pattern is perfect for this dinner theme.

The gifts for each guest (Pink Champagne scented candles for the women and silk ascots for the men), also serve as a place card.    Using baker’s twine, I create pink card stock heart shapes with our guests’ names.

My husband had never worn an ascot before, nor had any of our guests.  It will be fun to see them figure out how to tie them. Quite dapper!

We serve Prosecco and a pink themed Ruby Red Grapefruit Greyhounds with Rosemary Simple Syrup (my favorite winter cocktail) with appetizers.  The recipe is from Farmgirl’s Dabbles and click here for the recipe.

Julie Greder, once again caters this event.  She never disappoints. Calm and gracious, Julie creates a delicious menu.  The large pink wine goblets are a purchase from Pier 1.

Here is the view before our guests arrive, as dusk is approaching.

The weather in Phoenix is spectacular this time of year. Cool enough for a fire in the fireplace, but cozy enough for our guests. We will have a wonderful evening with a very fun group of friends.

Wishing you a Happy Valentine’s Day!

If you enjoy this post, please share on Pinterest.

This post is shared with Between Naps on the Porch Tablescape Thursday #645.


Heart-shaped Ravioli

Do something special for Valentine’s Day!  We tend to stay home vs. going out to a restaurant. Fresh pasta is relatively easy and each year I make these for our family Valentine’s Day dinner.

This Four Cheese Ravioli recipe is dated 2/10/2010 from Annie’s Eats, a food blog.  She has since changed her blog name to Everyday Annie and has expanded to a food, fashion, lifestyle and travel blog.

First, I make the cheese filling (you can also use any cheese combination you like). The basic egg pasta is made with eggs, water, olive oil, flour and salt.

After combining the ingredients in a stand mixer with a paddle, you then knead the dough for 1-2 minutes by hand.

After the dough rests for 20 minutes, you flatten it with a rolling pin so it will fit into a pasta sheet roller.  I have one from KitchenAid that attaches to the front of my mixer.   If you don’t have a pasta sheet roller, then you can do it the old fashioned way~~with a rolling pin.

The goal is to get the dough smooth and supple.  By passing it through the rollers (starting at #1, the widest setting), you continue folding and inserting into the roller until you reach the desired thickness (I went up to #4). See how the dough changes.

I have a variety of heart-shaped cookie cutters.  For this recipe I selected the red one, which is 3″ in diameter.  Annie’s recipe doesn’t specify a size so I guessed on this.

Next, I cut hearts out of the long length of pasta.

The recipe calls for 2 teaspoons of filling, but I would guess that my hearts had 1 teaspoon of filling (therefore I wonder if a 5″ diameter heart would have been better?)

Dip a finger in water and lightly brush around the edges of the heart topped with filling.  Place one of the remaining pasta hearts on top and press edges together to seal.  Make sure to press out any excess air.

Bring a large pot of salted water to a boil.  Cook the ravioli until al dente, about 5 minutes.

Serve in warmed bowls with marinara sauce (or any sauce of your choice).

Also, if you live in Phoenix and don’t have the Pasta attachment for your KitchenAid, just let me know and I’m happy to lend it to you.

Bon appetit!


Pottery Barn Emma bowl, Wallace Napoleon Bee flatware, Ballard Design napkin

Here is the recipe for Heart-Shaped Four Cheese Ravioli.

[amd-zlrecipe-recipe:17]


My Kitchen Pantry

As embarrassing as this is, I have to show you the “before” picture of my kitchen pantry.  How do things get this messy?  It became the room that we just tossed stuff in.  You couldn’t even walk inside.  Moan. After hanging onto the door frame and stretching long and reaching in, nearly breaking my neck, I decided it was time to clean it.

Here is the “after”:

Ok. So I’m a little giddy over this.  I threw out all the expired food (2013, really?) and donated all the “near” expiration dates and those items I had multiples of (way too many garbanzo beans).

I finally sorted and organized piles of recipes I had cut out of magazines or printed off the internet. Years ago, when I was swamped with 3 little children, I hired my friend Linda to sort and organize my recipes.  She created these fabric covered binders which I use ALL the time.

All the food items are now organized alphabetically.

Shelves are labeled so hopefully, other family members will know where things are located.

I reduced my cookbook collection significantly, only keeping those I use or cherish.

Cleaning out this room made me realize we don’t need to buy Ziploc bags for a long time!

Beverages are now organized and in one place.

My sweet husband polished all the copper Martha Stewart cookie cutters I purchased long ago.  The salami and cheese ball are fake, but fun to use when staging for a party.  The miniature utensil rack was a gift I received several years ago from my sister, Joanie.

There are 9 foot ceilings in our home and I used the upper sections for hanging large platters that don’t seem to fit anywhere else.

The original pantry had one door that unfortunately would swing right into the adjacent door to the basement.  We resolved that by putting in two narrow swing doors with metal mesh screens.

Since I am not cooking on a daily basis for a large family, my husband and I decided to be more European and buy things as we need them.

I was inspired to clean this out after seeing one of those amazing pantries on Instagram.  As much as I sometimes complain about too much screen time, technology does have its benefits.

Have a wonderful week!