1

Homemade Ice Cream – Part 1- Pistachio

For the most part I eat rather healthy.  But on occasion I will indulge if the additional calories are worth it.  I won’t eat a junky dessert, but I will always say yes to a piece of homemade pie. And of course, with a scoop of homemade ice cream!

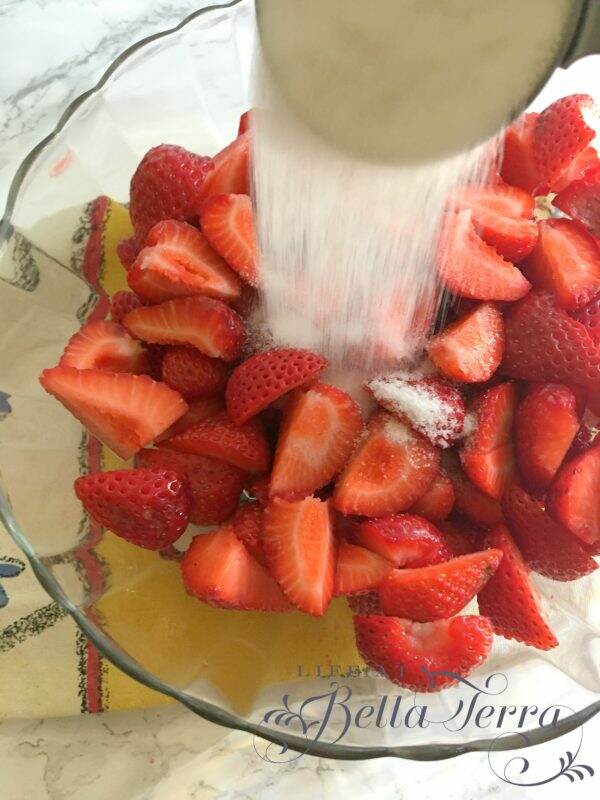
All summer long I’ve been wanting really good ice cream.  Not store bought, but the kind we used to get from a dairy farm, like Buttonwood Farms in Griswold, Connecticut.  All of the ice cream places nearby never have my favorites ~~pistachio and rum raisin.

This weekend I endeavored to create my own, homemade ice cream in the flavors I love.  We own the Cuisinart Frozen Yogurt, Ice Cream & Sorbet maker. This is a worthwhile purchase! I have only used it to create the fast version of vanilla~~ a mixture of whole milk, heavy cream, sugar and vanilla. Viola! 20 minutes later and you have homemade ice cream. It is a very easy way to make your own ice cream.

However, in order to make pistachio and rum raisin I stepped it up a bit and used a custard based version requiring eggs and heat.  Since I do not think I can put two recipes in the same blog post, I will feature the pistachio recipe today.

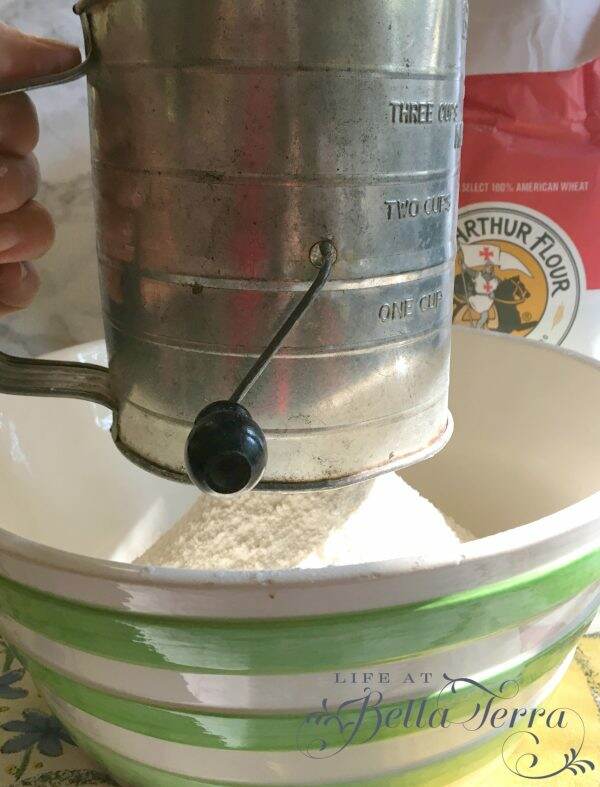
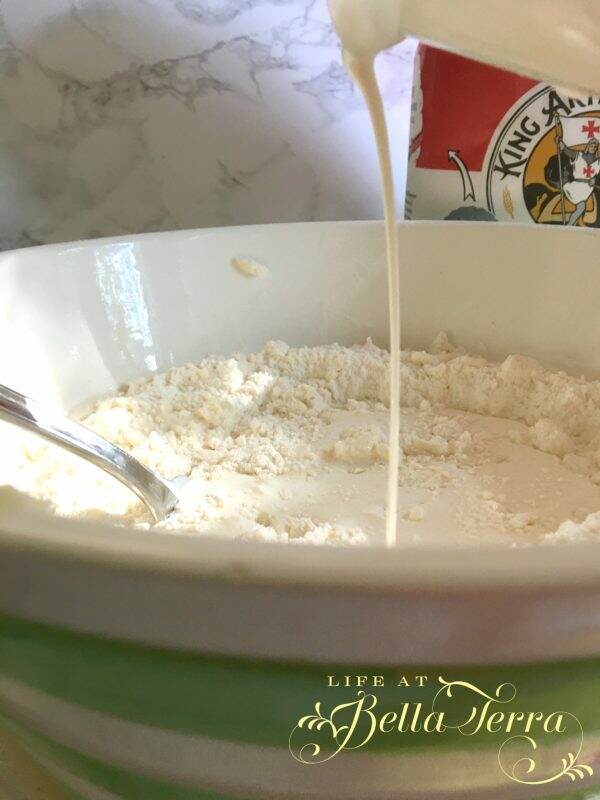
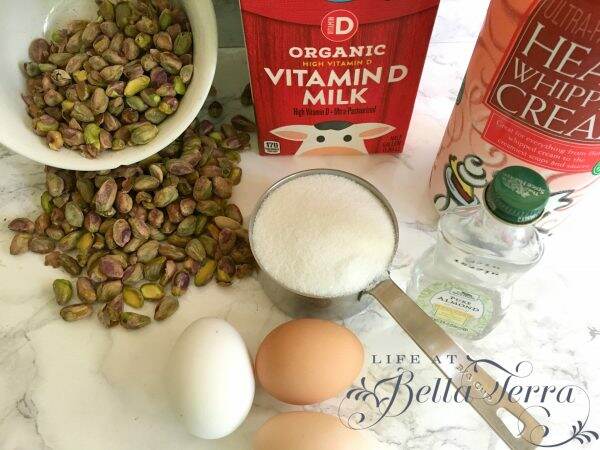
I started with a recipe from Epicurious.com, but adjusted it after I read all the comments (whole eggs vs. yolks, vanilla bean vs. almond extract, salted vs. unsalted pistachios, etc.).  Ice cream only requires a few ingredients: eggs, heavy cream, milk, sugar, pistachios and almond extract.

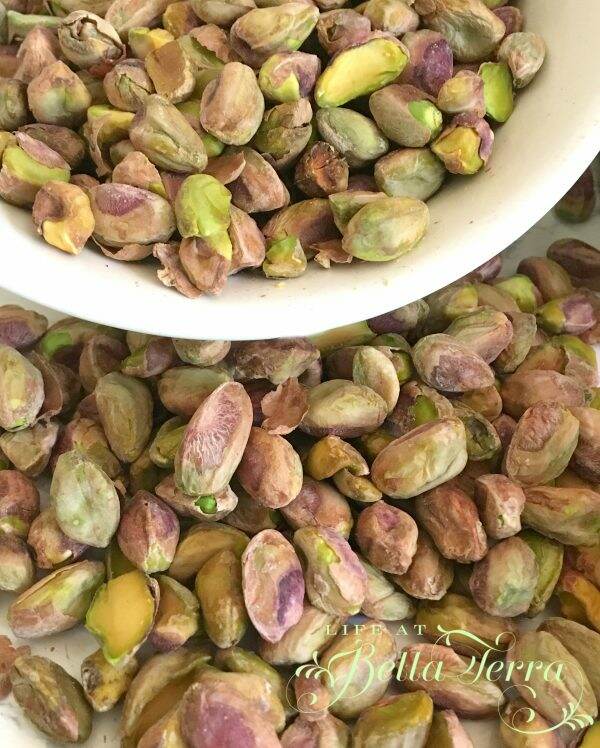
I used salted pistachios, that we had to shell.  The only fun part about this is was competing with my husband to see who could shell them faster.

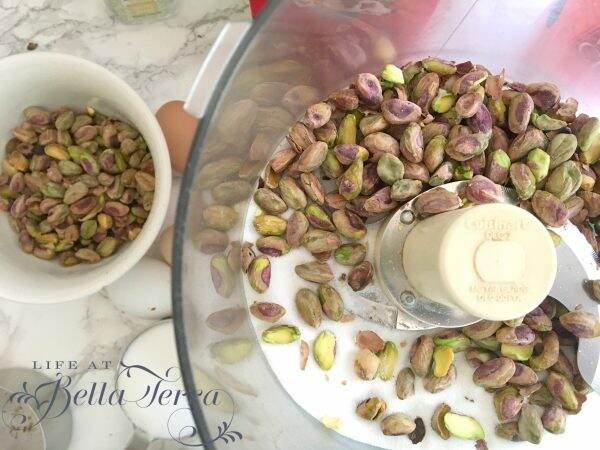
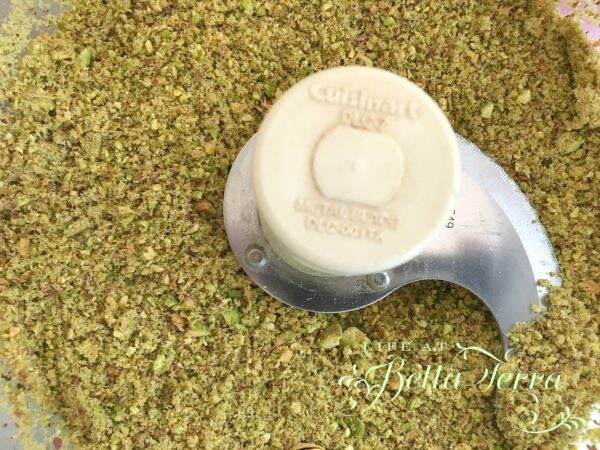
Finely grind pistachios and sugar in a food processor~~making sure you don’t turn it into nut butter.

Add the nut/sugar mixture to the milk and heat.  The recipe says to bring to a boil….I heated it until it was steaming with just wee little boil bubbles. Remove from the heat. Add the almond extract.

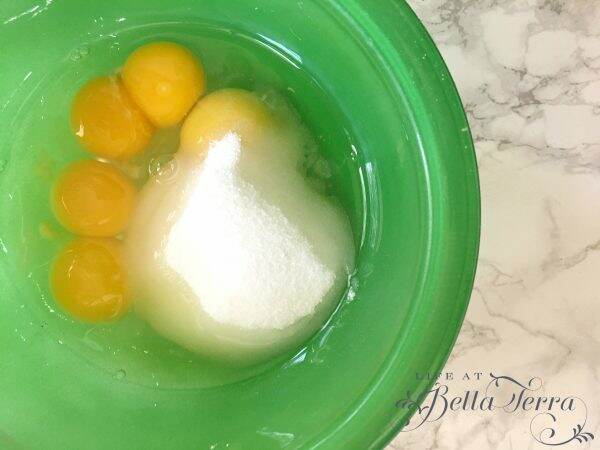
Whisk eggs and remaining sugar.  Here is where I altered the recipe~~I added whole eggs, not just the yolks (according to the comments whole eggs make the consistency creamier after freezing).  However, I was a bit surprised when I added the last egg and it was a double yolk-er…What to do?  I just left it and proceeded with the recipe.

This is the important part.  You need to mix the eggs in with the hot milk mixture, however, you do not want to “cook” the eggs.  I slowly added a little of the hot milk mixture while whisking the eggs.  I continued to add more milk, making sure I didn’t create cooked scrambled eggs.

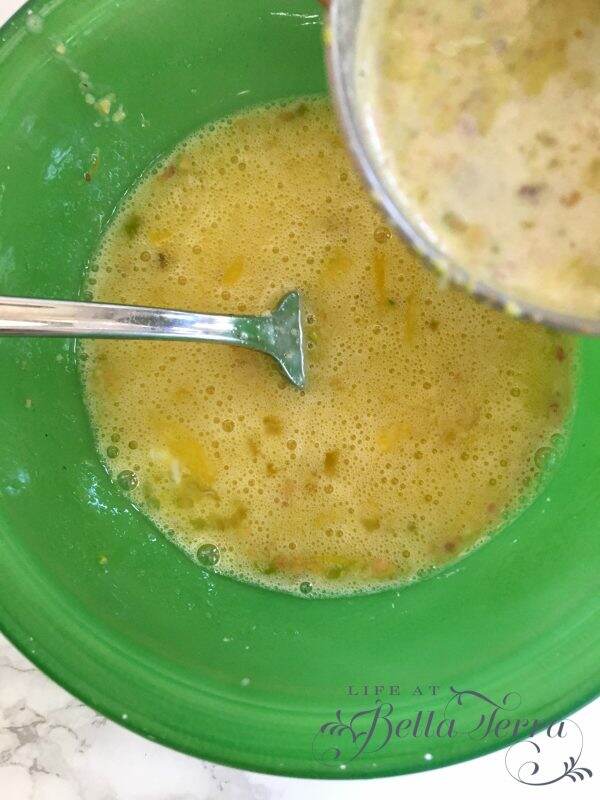
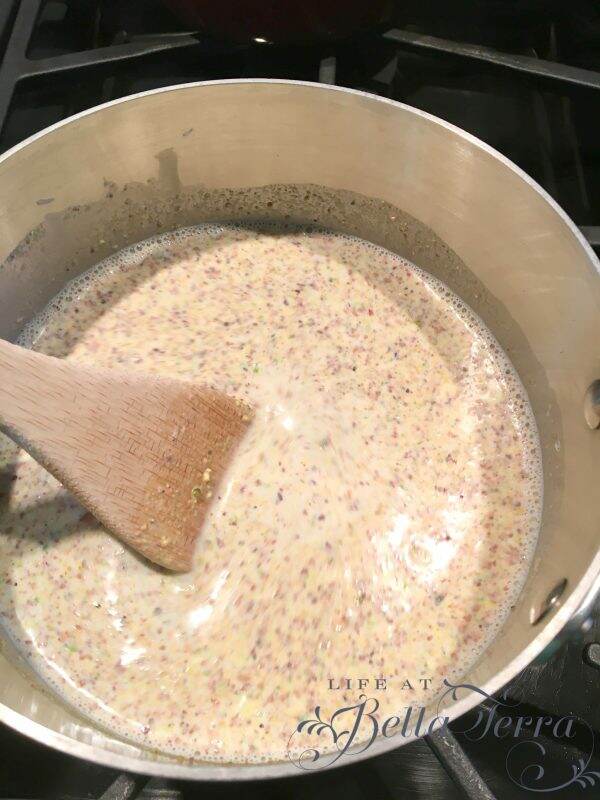
Gradually whisk all the egg mixture into the hot milk mixture.  Cook over low heat until the custard thickens and sticks to the back of the spoon-about 9 to 10 minutes.  It’s important to stir constantly during this thickening process.  DO NOT BOIL.

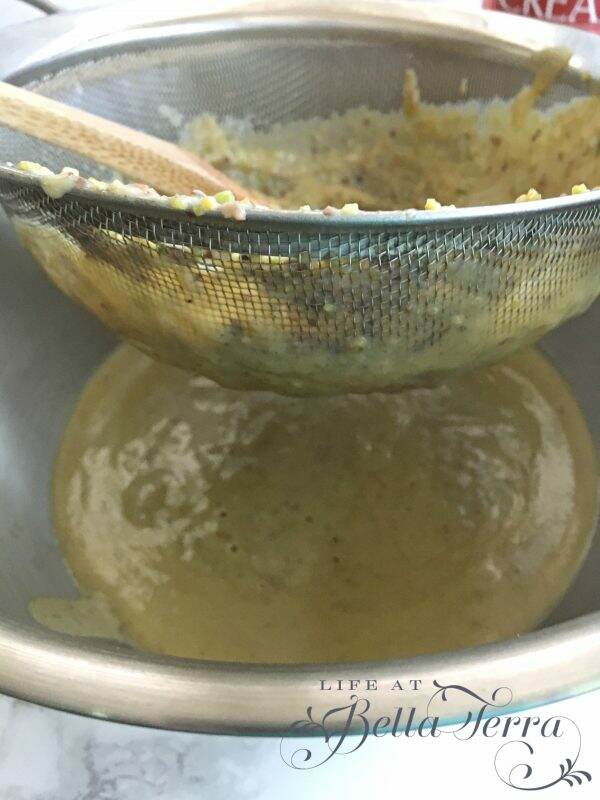
Strain the mixture into a large bowl.

Chill until cold (about 2 hours)  I did this by placing the bowl with the custard mixture inside a larger bowl filled with ice and then placed both bowls in the refrigerator.

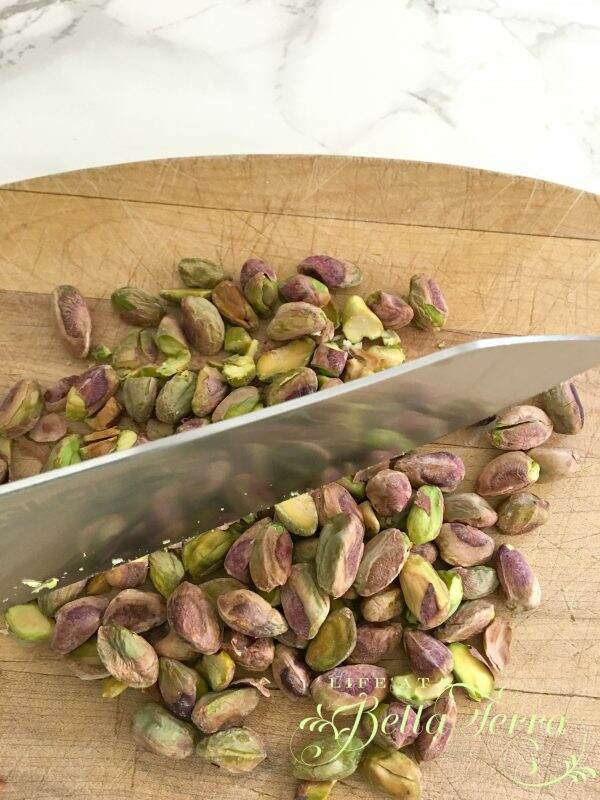
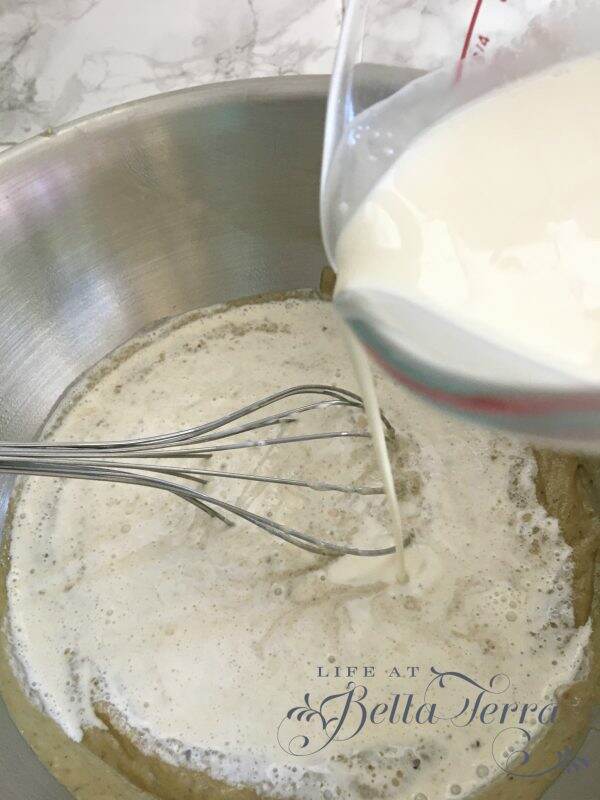
Remove the custard from the refrigerator and add heavy cream and chopped pistachios.

Process mixture into an ice cream maker according to manufacturer’s instructions.

Transfer to a container and freeze.

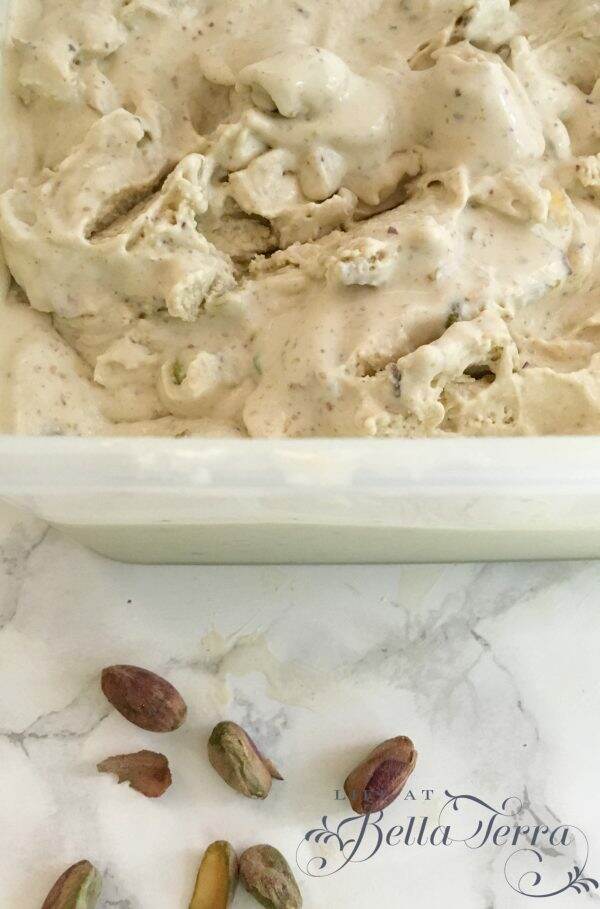
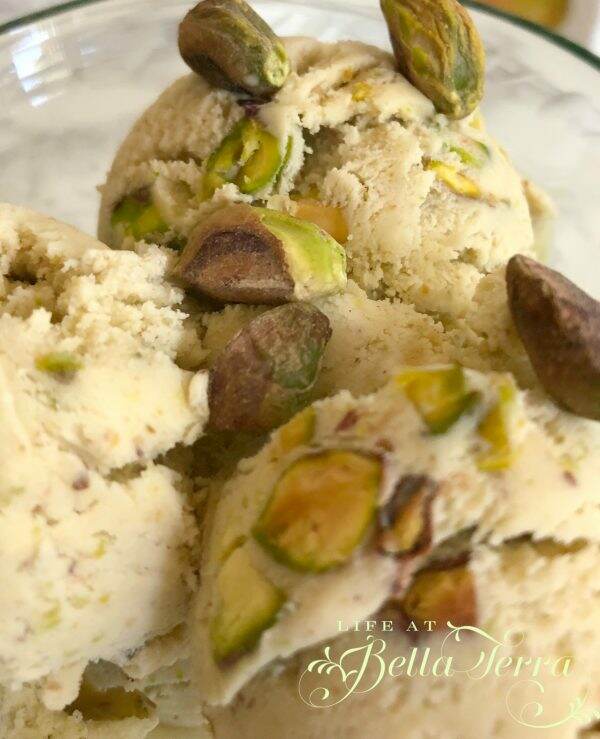
The ice cream had a very creamy consistency.

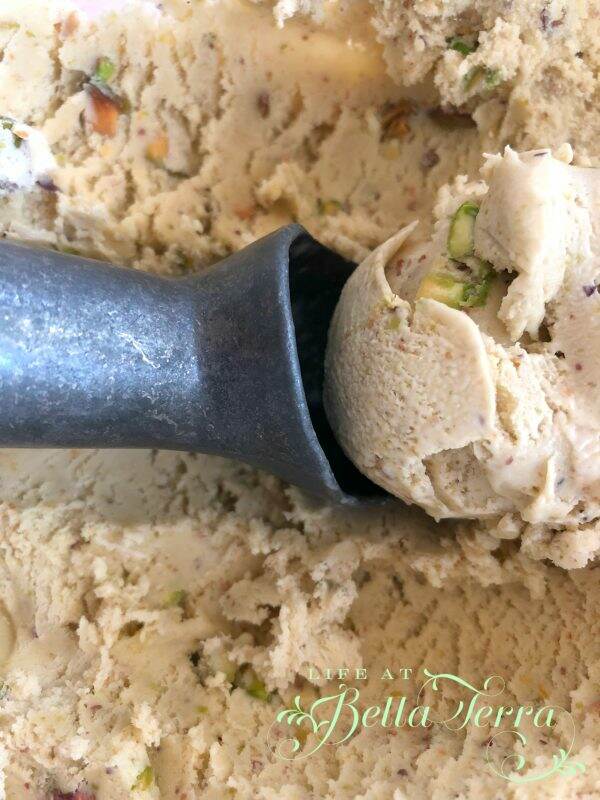
You can adjust the amount of pistachios as you like~~however, the more the merrier for me.

Have you ever made homemade ice cream? Making ice cream from scratch sounds a bit daunting, but it’s hard to ruin anything that has cream, sugar, and eggs in it. To see another ice cream recipe (Rum Raisin), click here.

If you enjoyed this post, please feel free to share it on Pinterest.

Pistachio Ice Cream Recipe adapted from Epicurious.com


Homemade Pistachio Ice Cream

Pistachio Ice Cream is my favorite and it's hard to find a delicous, terrific recipe. This is it!

  • 1 cup unsalted shelled pistachios
  • 3/4 cup sugar
  • 2 cups whole milk (do not use low or non-fat)
  • 1/2 tsp almond extract
  • 4 large egg yolks
  • 1 cup whipping cream
  • 3/4 cup unsalted, shelled pistachios (toasted and coarsely chopped)
  1. Finely grind 1 cup pistachios and 1/4 cup sugar in processor. Bring milk and ground pistachio mixture to boil in heavy large saucepan. Remove from heat. Mix in almond extract.

  2. Whisk egg yolks and remaining 1/2 cup sugar in medium bowl. Gradually whisk in hot milk mixture. Return custard to saucepan. Cook over low heat until custard thickens and leaves path on back of spoon when finger is drawn across, stirring constantly, about 10 minutes (do not boil). Strain into large bowl. Chill until cold, about 2 hours.

  3. Stir 1 cup whipping cream and chopped pistachios into custard. Process mixture in ice cream maker according to manufacturer's instructions. Transfer to container and freeze. (Ice cream can be prepared 3 days ahead.)


Strawberry Shortcake

Summer = Strawberry Shortcake.

I have fond childhood memories of picking strawberries at Malerba’s Farm in Norwich, Connecticut.  Unfortunately, this time of year, there are NO places to pick strawberries in Phoenix.  It is too hot.  However, the local grocery stores have California-grown berries that actually taste like strawberries. I researched a good recipe on the internet and found this one from Two Peas & Their Pod.

Preparing the strawberries is very easy.  Hull and slice or quarter the berries.

Sprinkle the berries with sugar and stir.  As the berries sit in the sugar, they will macerate and get juicy.

As you know, grocery stores offer those spongy individual cakes for this, but nothing beats a homemade biscuit. The prep time for this recipe is approximately 40 minutes…and well worth it.

In a large bowl, sift together the flour, sugar and baking powder. I like to use unbleached all purpose King Arthur Flour.

In order to have flaky biscuits, it is critical to cut in the butter correctly.  You will want to mix it sparingly, allowing for chunks of butter.

Add the heavy cream and vanilla and mix until just combined.

Lightly knead the dough together to incorporate all the crumbly dough pieces. Do not over mix.  Press the dough into the circle, about 1-inch thick and cut into rounds.

Place the biscuits on the baking sheet and refrigerate for at least 20 minutes. Brush with heavy cream and sprinkle with sugar.  The recipe calls for turbinado sugar (which I didn’t have), but I used coconut sugar instead. My guess is any sugar will do.

Bake the biscuits until golden brown, about 15-20 minutes.  Let cool completely.

Cut the biscuits in half horizontally.  Spoon the strawberries over the bottom of the biscuit and add a dollop of whipped cream.

Fruit is nature’s candy.  Enjoy it all this summer!


Strawberry Shortcake recipe by Two Peas & Their Pod.


[amd-zlrecipe-recipe:24]


Peach Pie

What is summer without a peach pie?  This year our tree didn’t produce enough peaches. My husband bought these beauties at Costco.  Unfortunately, they weren’t ripe and too hard.  I needed to make the pie the next day so I threw them into a paper bag, added a banana, and viola! In just one overnight, they were ripe-not too much so-but perfect for pie making!

I have made many peach pies before, but because they are SO juicy, the bottom crust often suffers from the wet and soggy syndrome. Since this pie was to be dessert at a friend’s house, I was determined to resolve that.

I googled a recipe from Serious Eats, as I have had good luck with them in the past.

Using my very easy pie crust recipe (see recipe here), I made the dough using my food processor. While the dough was refrigerating, I prepared the peaches for peeling. I typically don’t peel my peaches so this was a first for me. Note: Peeling is optional.

Drop the fresh peaches into a large pot of boiling water.  Do not crowd the peaches.  Boil for 30-40 seconds.

Remove the peaches and immediately place in an ice bath. Cool for 1 minute.

The skins will easily separate from the fruit.

The recipe calls for each peach to be cut into 8 pieces, but these were exceptionally large peaches so I cut them into chunks.

Add the cornstarch, sugar and lime zest and mix.  I’ve not used lime zest before so I was interested to see how it would impact the flavor.

Fill bottom crust with peach filling.

I made an extra effort to keep the pie crust chilled as much as possible.  I cut the top crust into strips for a basket weave pattern.

Apply the strips one at a time.

Alternate lifting up and laying down each strip until you have successfully completed a basket weave pattern for the top crust.

Trim off the excess pie crust edges.

Using a fork, crimp the outer edge of the pie to seal in the filling.

Brush the crust with a beaten egg and salt.

Sprinkle with sugar and then chill the entire pie for at least 20 minutes.  I did 40 minutes.

Place in the preheated 425 degree oven for 15 minutes. Then drop the temperature to 375 degrees and bake for 30-40 minutes until golden brown and the filling is bubbling over.

I added a pie crust shield to prevent the edges from browning too quickly. I wasn’t as wide as the pie dish but I believed it helped.


Here it is! The juices were bubbling and dripping out of the pie. Note to self: while pie is baking, put a pan beneath it or a piece of foil as the sweet drippings were stuck all over the bottom of my oven.

We brought the pie with some homemade vanilla ice cream to friend’s house so I do not have any pictures of a cut piece.

However, it was DELICIOUS!  Lots of peach pie juice, but the crust was NOT wet or soggy.  I believe keeping the crust chilled and then chilling the pie before baking was the key. Also, there wasn’t any noticeable lime zest flavoring~~I will assume it just enhanced the peaches.

Couple of points:

  1. I used a 9″ deep dish pie dish.  The recipe calls for a 9″ pie pan.
  2. I didn’t weigh my peaches so it’s highly possible I had over 4 lbs.
  3. The recipe instructs you to turn the pie dish while baking.  I did do this and the pie appeared to brown evenly.
  4. You can do any top crust you would like.
  5. Usually I add pieces of butter to a peach pie but didn’t do so this time.  I didn’t impact the flavor at all.
  6. The pie had quite a bit of juice.  However, the bottom crust was not soggy. Yippee!
  7. The homemade ice cream was done in a Cuisinart Ice Cream maker.  It took 20 minutes to make and a few hours to freeze.  Was really worth it.


Classic Peach Pie Recipe from Serious Eats

[amd-zlrecipe-recipe:23]


Lemon Ricotta Pancakes

I first tasted these delicious lemon ricotta pancakes at Shutters on the Beach in Santa Monica, California many years ago.  These pancakes are so light and lemony that I can literally still taste them in my memory. My desire to make them at home is impetus for purchasing the restaurant’s cookbook, The Summertime Anytime Cookbook by Dana Slatkin.

With our hot summer weather, the last thing you want is a filling meal in a hot kitchen.  We search for light, tasty, and healthy recipes.  Not so sure how healthy these are but they do pass the light and tasty test.

This recipe is perfect for breakfast, lunch or dinner.  The batter can be made the day before and refrigerated~~allowing for preparation flexibility. Ingredients are pretty straight forward~cake or all purpose flour, butter, eggs, lemons and lemon extract or oil. Of course, I love using this microplane as a zester, making for quick and easy fresh lemon zest.

Best zester/microplane here

One key to making these light and fluffy is beating the egg whites and then carefully folding them into the batter.   Pour 1/2 cup of batter onto a griddle or pan.

Cook until bubbles begin to form on the tops of the pancakes and the bottoms are golden. Be careful flipping them, as they are delicate.

Continue cooking until the pancakes are golden on the other side and dry in the middle.

The recipe says to sprinkle with confectioners’ sugar~~oops, I forgot to do that.  However, they were still amazing when served with warm maple syrup and fresh berries.

The recipe states it makes 6 large pancakes, but we made 10 smaller ones with the batter.

I really hope you try this recipe~~it’s one of my favorites!

Lemon Ricotta Pancake Recipe from The Summertime Anytime Cookbook by Dana Slatkin


Lemon-Ricotta Pancakes

This is the most requested recipe from Shutters on the Beach restaurant.

  • 4 large eggs
  • 1/4 cup granulated sugar
  • 2 tsp grated lemon zest
  • 1/2 tsp lemon extract or lemon oil
  • 1/4 cup cake or all-purpose flour
  • pinch kosher salt
  • 1 cup ricotta cheese
  • 2 Tbs unsalted butter (melted and cooled slightly)
  • 4 large egg whites
  • Canola oil or nonstick spray, for cooking
  • Confections' sugar, for serving
  • Maple syrup, for serving
  • Mixed berries, optional
  1. In a medium bowl, combine the egg yolks, sugar, lemon zest, and lemon extract; whisk until light in color and aerated, about 2 minutes. Whisk in the flour and salt, then whisk in the ricotta cheese and melted butter until just incorporated.

  2. In a separate bowl, whisk the egg whites to stiff peaks. Fold them into the batter, being careful not to overmix. The batter can be prepared the night before and refrigerated.

  3. Heat a griddle or a large sauté pan over medium heat and coat it lightly with oil. Pour 1/2 cup circles of batter and cook until bubbles begin to form on the tops of the pancakes and the bottoms are golden, about 2 minutes. Then flip carefully and continue cooking until the pancades are golden on the other side and dry in the middle.

  4. Transfer the pancakes to serving plates and sprinkle with confectioners' sugar, or keep them warm in a 200 degree F oven until ready to serve. Serve with syrup and berries on the side.

    Makes 6 large pancakes; serves two to three


SaveSave

SaveSave

SaveSave

SaveSave

SaveSave

SaveSave

SaveSave

SaveSave

SaveSave

SaveSave

SaveSave


My First Key Lime Pie

I have never made a key lime pie….ever.  I did try my hand at Lemon Meringue once and it was a total disaster.  We were at Ranch Market this the weekend. They had key limes for $0.99 a lb. and I couldn’t resist buying a big bag of them.

There are quite a few different recipes for key lime pie~~with and without eggs.  The recipe I chose was from Allrecipe because it was customer rated with 5 stars. There are so few ingredients required for this pie.

You can use either a store-bought graham cracker crust or it’s very easy to make your own from scratch.

Here’s how to make the crust. To get 1 1/2 cups of finely ground graham crackers, I used approximately 1.5 packages of graham crackers.  Using the Cuisinart, it took a few seconds to pulverize the crackers into crumbs. You can also put the crackers into a Ziplock bag and use a rolling pin to crush them.

Has anyone else noticed how small graham crackers have become?  I actually googled it and there have been numerous complaints on the reduction in size and diminished taste.  Graham crackers were a favorite childhood treat, but now they seem so skimpy. I digress…

Back to the pie. Add sugar and melted butter.  Cinnamon is optional but I included it in this recipe. Mix well.

Press the mixture into a 9 inch pie plate~~I used a measuring cup to tap the crumbs down.

Bake it at 375 degrees for 7 minutes.  Cool before adding the filling.

To make the key lime filling, squeeze this little tiny fellas until you get 3/4 cup of key lime juice. It took approximately 19 limes (14 or so limes = 1 lb.) and fortunately my strong son did all the squeezing.

This is the BEST hand-held juicer from Zulay that works for both lemons and limes.

Mix sweetened condensed milk, sour cream, lime juice and lime zest together. By the way, I LOVE this zester by Microplane.

Pour the filling into a COOL crust and bake for ONLY A FEW MINUTES.  I was so surprised that this didn’t require more time in the oven (5-8 minutes).  DO NOT BROWN!

Here is what it looked like after I took it out of the oven. Not too dissimilar from the picture above but there are tiny pinhole bubbles just on the surface.  Chill pie thoroughly before serving.

Top with whipped cream and lime slices. This is the perfect dessert for the summer!

Bon Appetit!

Here is the recipe for Key Lime Pie by Allrecipe:SaveSaveSaveSaveSaveSaveSaveSaveSaveSaveSaveSaveSaveSaveSaveSaveSaveSaveSaveSaveSaveSaveSaveSaveSaveSaveSaveSaveSaveSaveSaveSaveSaveSaveSaveSave


Key Lime Pie

  • 1 9" prepared graham cracker crust
  • 3 cups sweetened condensed milk
  • 1/2 cup sour cream
  • 3/4 cup key lime juice
  • 1 TBSP grated lime zest

Graham Cracker Crust

  • 1 1/2 cups finely ground graham crackers
  • 1/3 cup white sugar
  • 6 TBSP butter (melted)
  • 1/2 tsp ground cinnamon
  1. Preheat oven to 350 degrees F (175 degrees C).

  2. In a medium bowl, combine condensed milk, sour cream, lime juice, and lime rind. Mix well and pour into graham cracker crust.

  3. Bake in preheated oven for 5 to 8 minutes, until tiny pinhole bubbles burst on the surface of pie. DO NOT BROWN! Chill pie thoroughly before serving. Garnish with lime slices and whipped cream if desired.

To Make a Graham Cracker Crust

  1. Bake in preheated oven for 5 to 8 minutes, until tiny pinhole bubbles burst on the surface of pie. DO NOT BROWN! Chill pie thoroughly before serving. Garnish with lime slices and whipped cream if desired.

  2. Bake at 375 degrees F (190 degrees C) for 7 minutes. Cool. If recipe calls for unbaked pie shell, just chill for about 1 hour.


Cooking with the Sous Vide method

High-end restaurants have been using sous vide cooking for years to cook food to the exact level of doneness desired, every time. The technique recently became popular for home cooks with the availability of affordable and easy-to-use sous vide precision cooking equipment like the Anova Sous Vide Precision Cooker.

The “sous vide” part of sous vide cooking refers to the vacuum-sealed bags that are often called for when you’re using the technique. (The French phrase literally means “under vacuum.”) However, these days, when someone says “sous vide cooking,” they’re generally referring to any kind of cooking that takes place in a precisely temperature-controlled water bath, whether you’re actually using a vacuum-sealed bag or not.

I had never heard of  Sous Vide…until my son brought his Anova equipment home in his suitcase from college during winter break.  This concept sounded so foreign to me. Of course, I always think I am the last person to hear about something so hopefully this post will enlighten you too!

We made steaks for dinner using this method~~here is the step by step process.

Sous vide cooking is much easier than you might think, and usually involves three simple steps (instructions taken from Anova website):

1. Attach your precision cooker to a pot of water and set the time and temperature according to your desired level of doneness.

We attached the cooker to a large lobster pot and set the temperature to 131 degrees-which is the preferred temperature for medium rare.

2. Put your food in a sealable bag and clip it to the side of the pot.

My son, Benjamin generously seasoned the steaks with salt and pepper.

And placed them in their own large Ziploc bag.

Next, he added sprigs of fresh thyme.

He sealed the bags and submerged them into the water bath when it was at the desired temperature.

The bags need to have good circulation in the water so we clipped them to the sides of the pot.

The steaks, after 1.5 hours, were cooked to medium rare.

3. Finish by searing, grilling, or broiling the food to add a crispy, golden exterior layer.

The final step was grilling the steaks and getting the nice sear on both sides. This took only a few minutes.

The steaks were cooked perfectly!  From edge to edge, the meat was medium rare, without any overcooking. Using the Sous Vide method, you get high quality results each and every time. Since the steaks cooked in their own juices, the meat was very tender and moist.

This type of cooking does not require your full time and attention.  We literally clipped the bags to the pot and left it alone until it was done. It was also nice to know that sous vide cooking will not ruin an expensive cut of meat.

If you would like a more detailed guide to cooking meat this way, Serious Eats has a Complete Guide to Sous Vide Steaks.

I now understand why Benjamin enjoyed using this during college.  If you are looking for a cool, new cooking gadget…..this is it!  For more information on the Anova Procision Cooker, click here.

It’s nice when your children start to teach YOU new things!