1

Sprucing up the Front Porch
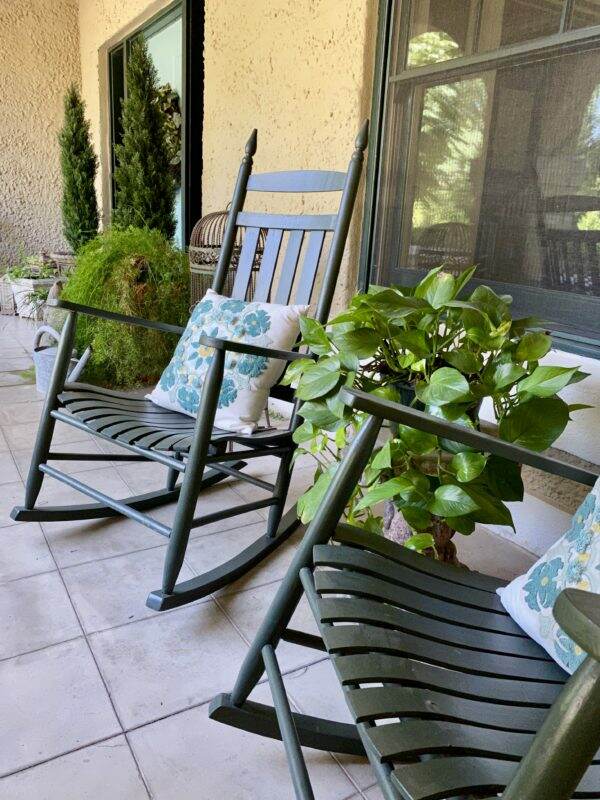
Here is another project that started out simply, and then took on a life of its own. With all this time at home, I am noticing there are so many areas that need sprucing up. This includes the front porch.

It all begins with the rocking chairs.

The four rocking chairs on the front porch did require new paint. This is a fairly easy DIY that can be done in a day. Lately I feel dangerous with a can of paint and a paintbrush! Don’t stand still too long or I will paint you!
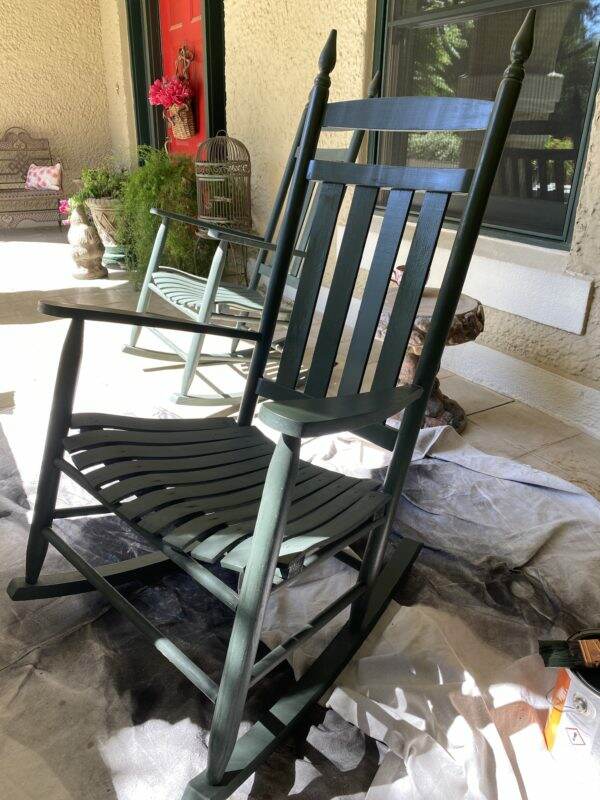
What a difference one coat of paint makes!

With the chairs looking so new and pretty, the rest of the porch paled in comparison. Remember the blog post on Selecting a Front Door Color? If you missed this post, click here.

Now the Front Door

Thanks to all of your great suggestions, the new paint color samples were purchased.

Picking a paint color online is a different experience than going to the paint store. Since curbside pick-up is the only option available at this time, I was a bit surprised when I opened the cans. For example, the Feverish Pink is a deep berry color online and the Gladiola is a spicy, rich dark paprika color. Look how different the tones are in real life! Much brighter than I expected.

The two blue paints are much lighter, too. However, after applying the samples, I was leaning toward the blues vs. the reds.

The pillow from Pottery Barn becomes my inspiration, because it is a combination of the dark greens and the cool blue. Not thrilled with the samples from Sherwin Williams, I dug out a can of the blue paint used in our library. That didn’t float my boat, either.

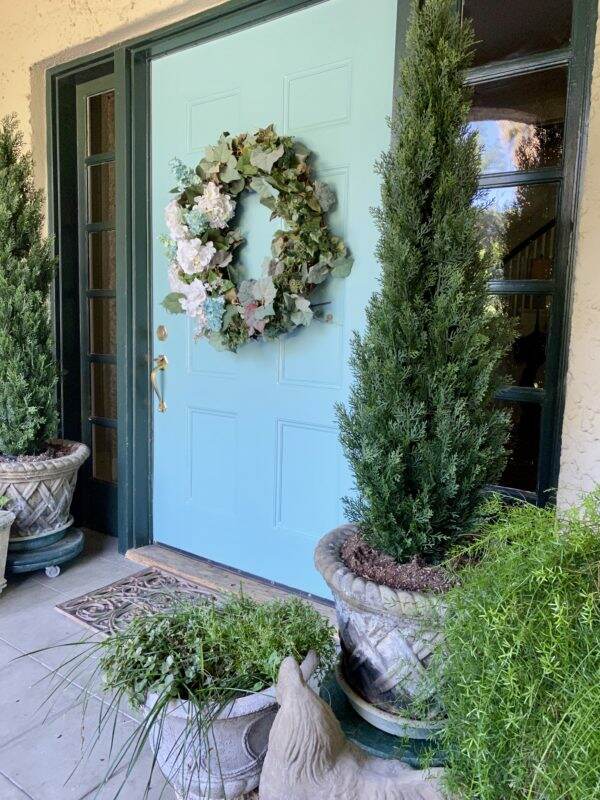
Referring now to a color palette, Drizzle is a bit darker with more green/gray overtones. I am convinced this is THE color and I take the leap and paint the entire door.

I am disappointed that the chip and the paint do not match. But I leave it hoping that the paint will darken as it dries.

Cleaning the Hardware

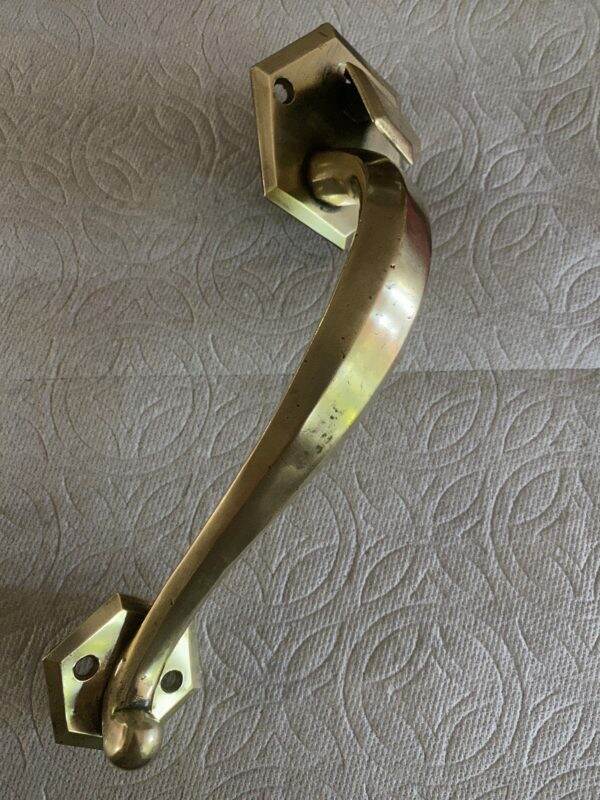
Meanwhile, it is the perfect opportunity to clean up the door hardware. The brass door latch is assumed to be original to the house. With a bit of elbow grease and brass polish it went from dull to dazzling.

Selecting New Plants~both real and faux

Keeping plants alive during the summer months is always a challenge in Phoenix. Since they are not on an automatic drip system, they require hand watering. As a result, the foliage around the front door suffers.

Instead of live plants, why not some artificial ones? I was able to locate these 5 foot tall cedar trees online through Amazon. I placed them inside the existing stone planter and will not need to water them ever.

After a recent visit to Whitfill Nursery, the addition of vinca and rose-scented geraniums will round out the foliage at the front door, and hopefully survive the summer heat. The asparagus vine does exceedingly well here.

Accessorizing
I love these old stone tables~~they are very heavy and ideal for the outdoor climate.

The finished porch

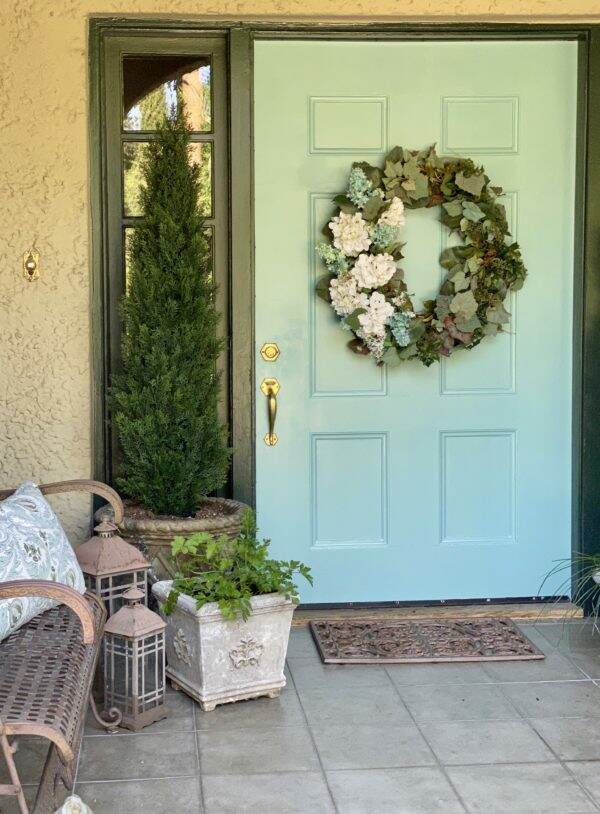
So here is the nearly finished spruced up front porch. The door color is growing on me, and my daughters love it. I’ve decided throughout this process that I am a conservative color person. Not sure why I am hesitant about throwing caution to the color wind, but I do wish I was more bold.

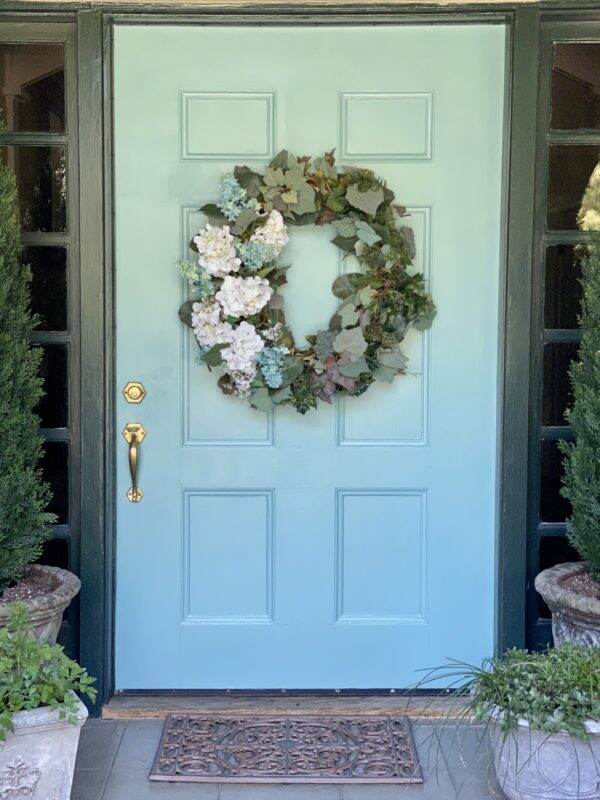
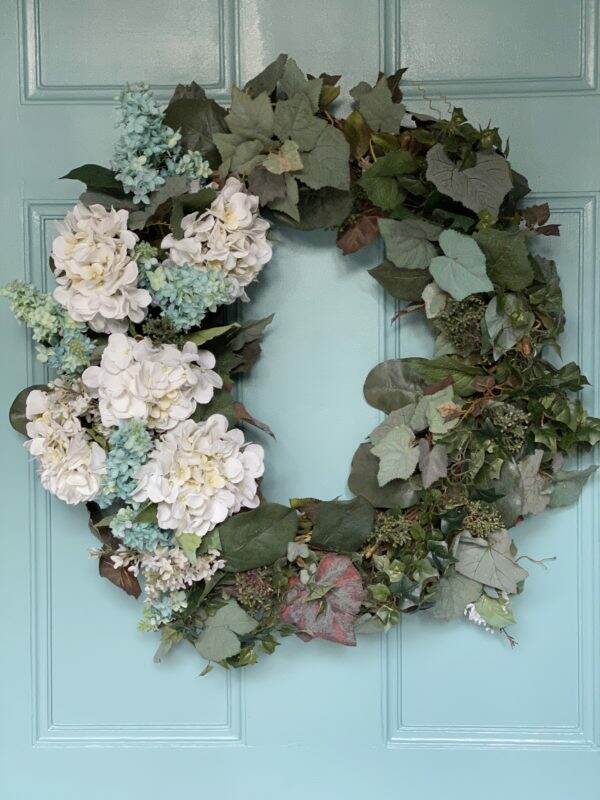
The wreath is re-designed to complement the door. Being a Connecticut Yankee, I love to repurpose items vs. buying new. To read an old post about re-working this wreath, click here.

The door/wreath before…

and After……
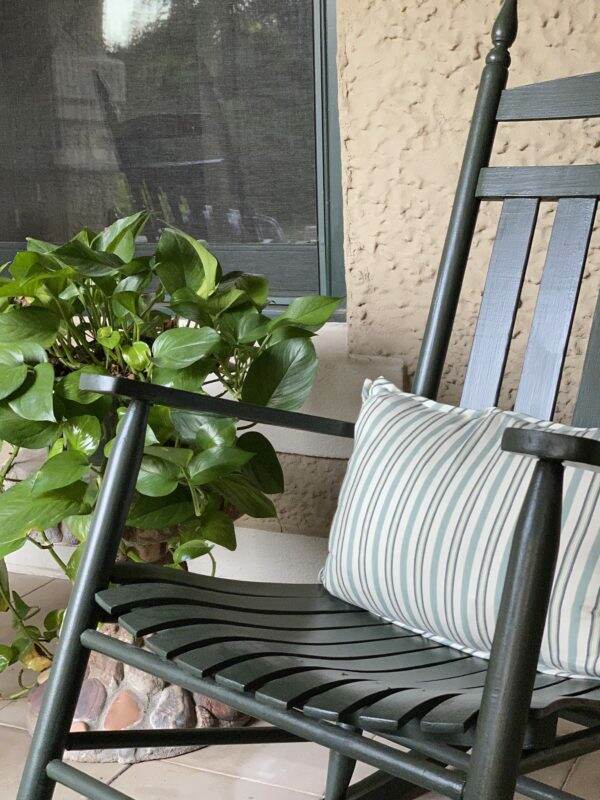
I am experimenting with different pillows on the chairs to see which ones look best.

Thank you to my friend, Joann, who told me to “STOP DEBATING. BLUE all the way”. I sometimes noodle these decisions over and over in my head, which is maddening. Though the door color feels a bit out of my comfort zone, I am leaving it up. Even my friend Anne, who loves bold colors, said it is growing on her.

The week seems to be flying by. Are you in the middle of any projects? Hard to believe it is already Wednesday. Have a wonderful one!


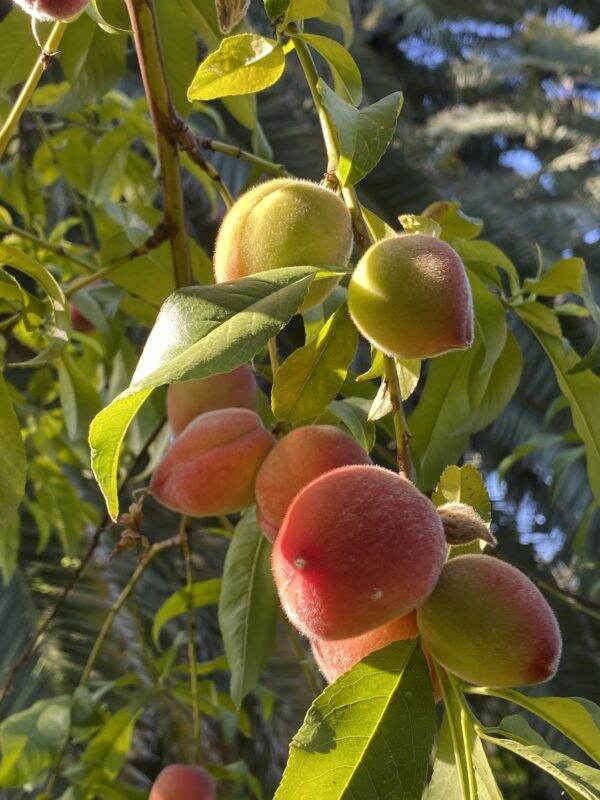

It is Peach Season!

Peaches always ripen here the first few weeks in May. The original peach tree died a few years ago, but we quickly replanted another. This year the fruit is abundant and delicious even though the tree is rather small. Picking is a daily obligation as one day a peach is hard and the next day, I am fighting the birds for it.

We call these our “bend over and eat peaches”. They are so juicy and so sweet. Many a shirt has been ruined with peach juice. And these peaches have FUZZ! Why don’t store-bought peaches have fuzz?

We have two peach trees. Depending on the size of the crop, there are many peach recipes that are favorites at our home.

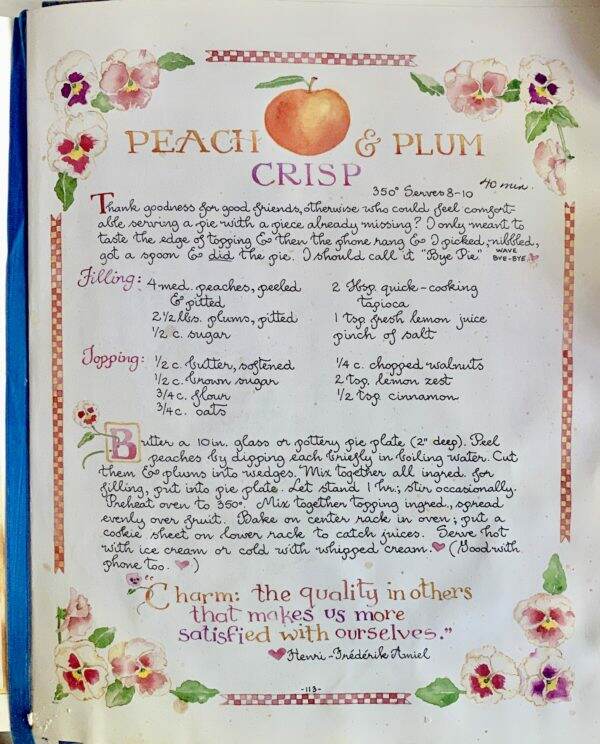
This year the first dessert we made is peach crisp. I use the recipe from one of my favorite cook books. If you are not familiar with Susan Branch, she is an author, watercolorist and designer. Though born in Southern California, she lives in an 1849 home in Martha’s Vineyard.

Her cookbooks are works of art with handwritten copy. One of my favorites is The Summer Cookbook. The peach crisp recipe is based on the Peach & Plum Crisp one in this book. You can tell I use this recipe a lot as the page is a bit dog-eared! I believe this book may be out of print, but Amazon has it here.

You can’t go wrong with anything crisp~~apple, peach, pear, and cherry. I use this recipe for all fruits because the “crisp” part is the perfect topping. I adjust the recipe by increasing the quantity of one fruit vs. two. Click here for the recipe.

What is interesting about picking fresh fruit, is that it doesn’t last very long. So I need to use the fruit within a few days. As a result, yesterday we made peach salsa.

I didn’t really follow a recipe this time. This batch is made with tomatoes (cherry ones from the garden), yellow and orange bell pepper (as I didn’t have any green or red), peaches, cilantro, red onion, jalapeƱo peppers, lime juice, and salt.

This salsa is perfect with chips, but also goes well with fish or chicken. If you would like to get the recipe from a previous post on Peach Salsa, click here. There are two other blog posts with peach recipes~~Tomato, Peach and Corn Salad (which is delicious!) and homemade Peach Pie.

We will be picking more peaches today and maybe peach ice cream this afternoon? At some point, my family will tell me they are “peached out”. That is my cue to preserve the rest of the harvest.

Have a peachy Tuesday!


An Abundance of Flowers

First of all, thank you for all the wonderful front door color suggestions and comments! It is so enjoyable to hear your thoughts on yesterday’s blog post. I am so excited to start experimenting with different colors. More to come.

I find it so interesting that some areas of the country are still experiencing snow, where we are having our first taste of summer. This last week the temperatures have been over 100 degrees and I’m just not ready for the summer heat.

Summer, for most areas of the country, means bountiful gardens and outdoor entertaining. Here in Phoenix, it is the opposite. My garden, for the most part, goes fallow. The intense sun burns the plants (unless you have big, broad leaves for protection). And you cannot do anything outdoors in the Valley of the Sun unless it is early in the morning or late at night. The heat can be dangerous and the thought of laying out in the sun equals skin damage.

Typically the summer is also our monsoon season~sometimes with rain and other times not. Dust storms blow through and cover the land with a layer of dullness. So I am trying to cherish the last bits of our Spring, where the gardens and flowers are bountiful.

Since it’s been a bit of a stressful week for me, today’s blog post is all about beautiful pictures~~the Spring we dream of during the last, long sweltering days of summer.

These photos were taken with my iPhone, during my walkabout yesterday morning. No editing done. One of the positives about spending so much time at home, is I find myself really “looking” at things. In the past, I took these flowers for granted. But now I find wonder in focusing in on each and every one of them. Look at the depth of beauty in the purple pansy or the pale yellow orchid!

I cannot express how grateful I am to have a yard to enjoy. A place to walk barefoot in the grass. A respite from the world’s nastiness. Where I have so many fond memories of my children’s escapades.

With each week, another flower blooms as one dies. My beautiful bulb garden, which provides such joy and color, is now gone. But the roses are at their peak so I don’t mourn the loss of the tulips and iris.

In addition to the flowers, the trees in the orchard are heavy with fruit. Soon we will have peaches and apricots and apples. I still think it is VERY strange to be picking apples in June vs. the romantic notion of doing so on a crisp fall day.

Clematis arch leading to guest cottage

During a tumultuous time, I need to seek a way to ground myself. I’ve decided, just by writing this post, that my two words for today are: Grace and gratitude. So grateful that we can connect via this blog and so grateful for you taking the time to write a comment. Your words of support and encouragement are priceless. Grace may take a little more effort for me!!! But like many things in life, it’s a work in progress.

Have a glorious Wednesday! What are your word(s) for today?


Saturday Meanderings

Here are some random thoughts for this beautiful Saturday morning. Yesterday, I completed cleaning the other half of the first floor to the well tower. If you missed Tuesday’s post about the potting shed, click here.

Some fun discoveries in the well tower. I found a box full of old love letters and photos. A lovely trip down memory lane. I often wonder how we will capture the same slices of life with technology? Remember the days when you rushed to the mailbox to see if someone had written to you? Texts and emails don’t seem to hold the same allure.

Young and carefree

I also found a batch of mail from November 2015, unopened. Apparently someone picked up the mail from the mailbox, detoured into the well tower and left it there. Fortunately it was mostly junk mail.

An unexpected well tower project

It is true that starting one project inevitably leads to another. During my well tower cleaning yesterday, I found more wreaths. Tired of having wreaths in multiple places (basement, garage, well tower), I gathered a few of them up. Protecting them in big black garbage bags, I made labels for each and hung them on a blank wall in the well tower.

Garden Update

The poppies are EVERYWHERE! During the day, their purple blooms are wide open. I didn’t realize that poppies close their blossoms at night. Wish I knew how to do time-lapsed photography to capture this.

Poppies open
Poppies closed

It is a hollyhock jungle out there. These perennials have spread all over the yard and are in various stages of blooming.

Primroses are another perennial that provide such an elegant display of pink happiness.

Primroses

Preserved Lemons

I’ve made a 2nd batch of these delectable, delicious morsels. We are using them in nearly everything~~from tuna fish salad to roasted vegetables, fish, and pasta dishes. I cannot believe I have gone through most of my life without these. If you haven’t made them yet, please do so. You will not be disappointed and they are super easy to make. Click here for the recipe.

Moving Forward?

I am excited that Arizona may be one of the states in Phase 1 of opening up our economy! My roll of elastic finally arrived so I am well equipped with masks. The best pattern can be found on the YouTube video from Hobby Lobby. This mask fits my face perfectly. I add pipe cleaners in the top seam so you can mold the mask to your face. It is two layers of 100% cotton fabric with a hole in the back to add a filter if necessary. Masks may become common in the future, so I’m happy I have a few to wear, just in case.

Still Washing Windows

Yes, I am still washing windows. My next big challenge is how to wash the windows at the top of the well tower. I will try Windex Outdoor where you attach the cleanser to a garden hose. The directions state you need to be within 5′ to apply it. Perhaps if I hang out of one of the windows and aim the hose at the adjacent ones?

Birthday Gift

Botswana Agate, Pearl & Swarovski Crystal Bracelet

My sweet 99-year old aunt (yes, 99!) sent me a check for my birthday. Typically I just deposit something like this, but I decided I wanted to buy something special to remind me of her. My Instagram friend, Tanya Lochridge makes beautiful jewelry. I ordered the bracelet above. I think this is a very nice gift to myself.

To Do List Completion

Fixing the wall

This week went by so quickly. I almost feel like I did too much. Keeping busy is my way of coping with the lockdown and we accomplished many projects. But I am pooped and hopefully tomorrow, will be my day of rest.

I was so excited to receive this photo from one of my followers. I have rose envy!! Thank you so much for sharing!

IMG_0199.jpg

Happy Saturday! Enjoy the weekend. Any special plans?


Propagating Roses

I have always wanted to learn how to propagate roses, especially the antique ones we have at Bella Terra. With a clean potting shed (see yesterday’s post here) and sheltering in place time on my hands, I thought I would try this.

Meet Quatre Saisons (Rose of the Four Seasons), R. damascene bifera). We have three of the original antique rose bushes that survived the property renovation. This is the oldest European rose to reliably flower more than once during the year. It is one of the most important historic roses, probably going back to the Romans or earlier. 

Quatre Saisons

This rose is not cultivated for the appearance of its shrubs as they are rather gawky and VERY prickly. Foliage is plentiful and leaves have a serrated edge. The blossoms are a bit unconventional and messy-looking but the scent is a mighty treat for the nose.

The reason I am so intrigued by having roses at Bella Terra is a reference made in a previous owner’s diary on April 1, 1922, when she wrote “saw first rose bloom”. When we were researching the house, we found these diaries at the Arizona Historical Museum. Apparently the roses are referenced many times as an important part of the landscaping. To know I am enjoying roses here just the same way someone did 100 years ago gives me great joy.

In Preparation

In preparation for the propagating process, I scrubbed and cleaned the clay pots I wanted to use. Since the success rate of propagating roses is about 50 50 to 75 percent (according the Dr. William C. Welch), cleaning the pots will help minimize any contamination. I then covered the hole at the bottom with a small rock.

Next I loaded up my clean pots and headed out to the compost pile. There are several sites on Google that recommend the type of medium to use for rose propagation. Our compost soil has always done wonders in the past and so I’m counting on it now.

If you missed my composting post, click here. With the pots filled with soil, it is now time to select roses.

How to Take the Cutting

Take a 12-inch segment of the stem, cutting at a 45-degree angle. The best cuttings usually come from the sides of the bush vs. the center. I made sure I used my sharpest and cleanest clippers, in order to avoid contamination or crushing the stem. I immediately put the cuttings in water while I continued cutting the others.

Cuttings taken from new growth vs. old, hardened wood are more likely to be successful. Spring or early summer is the best time to take these softwood cuttings. Select them in the early morning when the plant is most hydrated. Wish I wore gloves as these roses have such sharp thorns!

Remove Most of the Leaves

Remove all but the top two leaflets on the stem. Then, cut of the stem just above this top set of leaves. Removing the excess leaves helps to divert energy to root production. However, the stem still needs to continue with photosysthesis and feed itself until new roots are formed. Also remove any flowers. The flowers will consume energy, and you want to encourage the stem to refocus its energy on survival by sending out new roots. 

Prepare the Stem for Rooting

Using sharp pruners make a fresh cut on the bottom of the stem just below a stem node. I made the cut at a 45 degree angle. The stem node is where new growth typically forms. Then slice into the bottom stem about a quarter of an inch up, splitting the stem into open quarters.

Using a Rooting Hormone

Though this step is optional, a rooting hormone can help spur the plant into developing new roots. I purchased this rooting powder from my favorite nursery, Whitfill Nursery for $5.99.

Slightly moisten the split end of the rose cutting and then dip it into the powdered rooting hormone. Shake off any excess powder.

Plant the Cutting

Plant the cutting in a container filled with at least 6 inch of planting medium. Some recommend a mixture of coarse sand and vermiculite or a potting mix designed for roses. Keeping my fingers crossed that my homemade compost is sufficient.

Poke a hole in the potting medium (I used a screwdriver) and then insert the stem. Be careful not to rub off the rooting powder. Gently firm the soil around the stem and water well.

How cute is this pot~~a school Mother’s Day project made in 2004 by my son Benjamin!

Selecting the Location

Roses prefer a sunny location, but for rooting purposes it is best that they are shielded from the hot afternoon sun. It is important to keep the soil moist so the cutting does not dry out. Some people put a plastic bag over to create a humid environment.

I have placed the 5 pots on the window sill directly across from my computer, so I can check on them every day. The northern exposure will provide bright light but no direct sun.

Of course, I discovered the following advice AFTER I cut the stems. However, I did remove the flowers and buds, so hopefully I will have success. Here is what I read: “Moreover, avoid taking cuttings when your plant is heavily blooming. The plant is putting most of its energy into flower production rather than root development, so a cutting won’t readily root. If you must propagate when the plant is blooming, make sure to remove the flowers and buds from the cutting.”

I am planning to let them grow over the summer in these pots and then plant them in the fall? Or transplant them into bigger pots with a January 2021 planting? Still trying to figure that part out. If there are any rosarians out there, I welcome your help!

Here are some other photos that I’ve taken over time of these delightful roses. I wish you could scratch and sniff.

Lastly, it was difficult to decapitate the flowers off of the stems for this propagation. But not to fret! I am utilizing all the blossoms in a potpourri I am making for the hen house.

Have you ever propagated roses? What is your favorite species? Wish me luck and hopefully I will have 5 more Quatre Saisons soon!

Wishing you a delightful Wednesday! Today I am still washing windows (ugh!) and making face masks as my roll of elastic finally arrived!

References: The Rose Bible by Rayford Clayton Reddell


Cleaning out the Potting Shed

What started out as cleaning the windows to the well tower, turned into a full day of cleaning out the potting shed. The potting shed occupies the first level of the well tower. If you are new to the blog, the well tower is just that, it houses the well, which we re-activated when we restored this property. To see a previous post about the well tower, click here.

In order to get to the windows, however, I came across this mess. Most of it was my fault, as I recently have been searching for paint to do touch up for both the interior and exterior.

I am still trying to understand how things get so messy. But with many people using this space, it becomes a great dumping spot. The good news is I tackled it yesterday and decided to share it with you today.

When we restored the well tower, this was an empty space. An old tub and sink were “leftover” renovation items and we decided to repurpose them here.

This fabulous porcelain cast iron sink is BIG. One side is very deep and the other shallow. It’s a bit banged up but perfect for washing my garden tools and pots.

Leftover tile from Waterworks was used for the countertop and backsplash. The casement windows provide ventilation and a lush, green view right into the hollyhocks.

Washing the exterior window was a bit of a chore as I had to negotiate my way through the hollyhock jungle!

The bathtub is on a raised platform and is used as a dog bathtub. It’s impossible to get Cooper in there, but it is perfect for the smaller dogs.

The curtain panels cover 3 separate storage areas. I’m not wild about how they look but they are a Waverly old rose fabric and serve a purpose. Maybe they need a shorter hem?

One section is where we put all the paint cans. We have a local hazardous waste area where you can take old paint cans annually. This year I am committed to sorting through all these cans, labeling the good paint and tossing the old.

The other sections have numerous pots and gardening items. An old chippy wire basket keeps miscellaneous pots and supplies on the counter. Garden boxes hold seeds that I will need to sort through to see which ones are still viable.

I found these cute French hooks and put them up to hold my gardening bags. This way I can fill them with my tools and head out to the garden.

After removing two huge black garbage bags of trash, the potting shed is clean. I still have the other side to organize as I approach the final window on the first level.

Here is a larger view of the space. The well tower has 2 sets of spiral staircases that lead to the top. I don’t look forward to scrubbing that.

Entry into the well tower is through these gorgeous Dutch doors on the north and south side.

I am hoping to clean the rest of the room today, however, my back is aching.

Are you tackling any big projects during this lockdown? Some days I feel like it and other days, not so much. I don’t know about you but I am really ready for this virus thing to be OVER.

Have a wonderful and productive Tuesday!