1

Our Thanksgiving Table

Thank you so much for the feedback on my last post.  Based on consensus, I went with the silver beaded charger~~still surprised I hadn’t thought of it before.  A bit of thistle is stuck into the napkin for color and texture.

I was so excited when I made the decision to go silver, but then panicked because most of my stemware is rimmed with gold.  However, I was able to find enough plain glasses to use.

The centerpiece is a combination of potted plants from Whitfill Nursery (my favorite here in town) and fresh flowers.  Ornamental cabbages, alyssum, and dichodra were replanted in various size containers.  I used pot de creme vessels, cereal bowls and smaller bowls (that I purchased from West Elm and use for everything!).

The fresh cut flowers were purchased from Safeway.  I was a bit surprised they had protea, which has a fun shape and is a lovely shade of rose.  Coupled with roses and mums, the colors of the plate are well represented. Four silver candlesticks are staggered for height and dimension.

I added a few white pumpkins and a combination of real and artificial leaves.

One of my followers requested more room shots vs. close up photos, so here is a larger view of the dining room. My apologies for some of the darker photos.  Our dining room faces east and between the front porch and the porte cochere, the natural light is very limited. One of these days I need to invest in professional lighting.

On one side of the dining room is a fireplace.  Here on the mantle, the individual mercury glass votives spell GIVE THANKS.

The sideboard has our Pilgrim family (a Costco find several years ago) and a painting by the late California artist, Lynn Winans.

Wishing you and yours a blessed, loving Thanksgiving.  I am so thankful for your continued support and readership of my blog. We have so much to be grateful for~~our prayers are with those who have lost their homes to fire and hurricanes. To our service men and women who are away from their families this holiday, thank you for your service.

Sending big holiday hugs to you,


Making Pesto

It is the time of year that my basil is very abundant.  Once the weather gets too cold, all that luscious green herb goes black. Since it was 39 degrees one morning this week, it is time to harvest it.

I plant the basil next to the tomatoes in the garden. The general consensus is that basil – both the plant and extract made from the leaves – can be an effective natural deterrent for white flies, mosquitoes, tomato hornworms, aphids, houseflies, and asparagus beetles. The basil is also thought to (somehow) improve the flavor of the tomatoes if planted nearby.

My dear friend, Gwen gave me this recipe in 1993.  It has been my go-to pesto recipe since then.

Having a food processor makes this quick and easy.  If not, you will just do some chopping and blending.  I love recipes with a few ingredients-fresh basil, garlic, olive oil, pine nuts and two types of cheese.

Separate the leaves from the stem.

Place all the ingredients, except the olive oil in the food processor.

While the food processor is running, slowly add the oil.

Look at the beautiful color of the pesto.  As I was making this, the girls came into the kitchen asking what smelled SO good! The scent of basil is so unique and aromatic.

I have a ton of basil to use and will make several batches of pesto.  I tend to freeze this in 1-2 cup batches in Ziploc bags,  but you can also preserve it in the canning process. Or just store it in the refrigerator. We go through it so quickly so I do not know how long it will keep in the fridge.

There are so many uses for pesto~~ over pasta, in scrambled eggs, or as a sandwich spread. Dunking a piece of artisan bread in pesto with a glass of wine could be a whole meal for me!

Pesto is a great staple to have on hand during the holidays.  Please enjoy this simple recipe!


Simple Pesto Recipe (given to Mary by her friend, Gwen)

[amd-zlrecipe-recipe:30]


Book Signing at Patina Farm

This past weekend, I was fortunate to attend the book signing of one of my favorite bloggers, Courtney Allison of French Country Cottage.  I’ve never met Courtney and just started following her this year. However, she has inspired me to learn more about photography because every single thing she posts is stunning.

The photos in her first book are truly drool worthy.  It was such an opportunity to meet her since being a relatively new blogger, there is so much I don’t know.  I am always grateful when others share their knowledge. Having the book signing at Patina Farm was an extra special gift!

On our drive in to the farm from Santa Barbara, we passed a sign that said, “Flowers Ahead”. We pulled over to this sweet unmanned flower stand and purchased a few bunches of lilies to give the hosts. They were only a $1.00 per bunch and the money was left in a box ~~simply on the honor system.

Here we are at the entrance of the event. Janie is a dear friend who is an artist and an expert in anything to do with home decor and antiques. Janie also has the best jewelry!

Patina Farm is the home of Brooke (@velvetandlinen) and Steve Giannetti (@stevegiannetti)~~a design/architect duo that continues to impress the design world.  Their 5 acre farm was designed and built by them~~including cherished pieces they have collected around the world. The color palette is neutrals and soft pastels both in the home and garden.

This area, just off the kitchen, is the cover photo of their book, Patina Farm.

Fresh flowers were in every room.

Here are more house details. It is very apparent why they call their lovely home “Patina” farm. There is an abundance of textures and finishes.

Bowls of fruits and vegetables were in abundance.

Courtney was signing her book in the shade of an enormous oak tree.

I cannot recommend her book enough.  Drawn to a French country look, Courtney’s home is filled with wonderful decorating ideas and stories.

The property at Patina Farm is on different elevations.  Pebbled paths lined with lavender and rosemary lead you to secret spaces.

These fun wooden mushroom statues can be purchased from the Giannetti Home store or giannettihome.com

Steps lead you down to the donkey barn, greenhouse, shed, vegetable garden, rose trellis and lavender maze.

The guest cottage is set above the small pond and boat dock.

Brooke and Steve Giannetti were such gracious hosts.  They served light appetizers and lavender lemonade, with or without sparkling wine.

I was so happy to finally meet some of the bloggers I just know through the internet~~Karen from Sanctuary Home Decor.  I am disappointed to know I missed meeting Julie Blanner and Slim Paley, but respect and admire all the work they do.  It was also such a pleasure to meet the agent who provided all the guidance to both books~~Jill Cohen.

Being with others who love beauty and simplicity fed my soul.  We also met a group of 5 women (Debra, Cindy, Beth, Melissa and Tori) who traveled from Northern California together in celebration of Cindy’s birthday. Within minutes, we became fast friends and I hope we keep in touch!

It was a very civilized way to spend a Saturday afternoon.  Rubbing elbows with a house filled with talented individuals is inspiration at its best!

Even the cat seemed to enjoy it!

Have a wonderful week!


P.S. All the photos were taken by me….I think I see some improvement!


Growing Chamomile

When I was planting my garden years ago, my sweet daughter opened up a whole packet of chamomile seeds and scattered them far and wide, while squealing, “Wheeeeeeeeee”.  For those of you that know me, I am a geometric person, who likes things planted in rows, straight rows  I had no idea where the seeds landed and after I got over the initial shock to my organized inner self, I delighted in the fact she was so carefree in her seed distribution.

As a result, this delicate flower from the daisy family is growing in numerous places, year after year.

Traditionally, chamomile has been used for centuries as an anti-inflammatory, antioxidant, mild astringent and healing medicine. According to U.S. National Library of Medicine, chamomile is one of the most ancient medicinal herbs known to mankind.

It is a member of Asteraceae/Compositae family and represented by two common varieties ~~ German Chamomile (Chamomilla recutita) and Roman Chamomile (Chamaemelum nobile).

The dried flowers of chamomile contain many terpenoids and flavonoids contributing to its medicinal properties. Chamomile preparations are commonly used for many human ailments such as hay fever, inflammation, muscle spasms, menstrual disorders, insomnia, ulcers, wounds, gastrointestinal disorders, rheumatic pain, and hemorrhoids. Chamomile is often used to treat mild skin irritations, including sunburn, rashes, sores and even eye inflammations. Who knew? For more information on the benefits and uses of chamomile, click here.

The chamomile garden patch is one of Sox’s (our beagle) favorite spot.  He smells SO good after romping around in the flower bed.

I decided to try making a tea this year using the fresh flowers vs. drying them.  Unlike many other herbs, you want to collect the blossoms only, not the leaves, stems or roots.  The best time to harvest is mid-morning, after the dew has evaporated but before the mid-day sun. Just pinch off the blossoms and shake off any dirt or insects.

As with most herbs, more quantity is needed when using fresh vs. dried.  I used 3-4 tablespoons of flowers.

If you do not have a tea pot with a strainer, you can use cheesecloth to bundle the herbs. You can also just strain the tea from the blossoms after you are finished steeping.

Add hot water and steep for 5 minutes.  Fresh chamomile tea has a clean, fruity, apple undertone which is different from dried chamomile. The Greek derivative of chamomile means “earth apple”. Makes sense.

I did add one mint leaf….which seemed to enhance the chamomile flavor, not overwhelm it.

I rarely add sweetener to my tea, and this one, in my opinion, doesn’t need anything!

After reading about all the benefits of this simple tea, I plan to drink it on a more consistent basis.

Perhaps I will experiment with adding lavender…..and concoct the perfect sleepy time tea!

Chamomile is extremely easy to grow. Roman chamomile is a perennial, growing from the same root year after year. German chamomile is an annual, but don’t expect it to grow in the garden for just one year! It self-sows freely and you can bet if you plant it one time, it will spring up in the garden from then on.

Have a wonderful weekend!


Hollyhocks and a Gift for You

We have an ABUNDANCE of hollyhocks growing in our yard.  This is the closest thing to Jack and the Beanstalk~~as this small seed grows into a plant that is 10-12 feet tall. All the garden books suggest they grow to 8 feet, however, ours are so much taller. I’m 5’4″ and you can see this plant is double my height.

Hollyhocks, Alcea, is a genus of about 60 species of biennials and short-lived perennials.  They grow in moderately fertile, well-drained soil in full sun. It is recommended that you grow as an annual or biennials to limit the spread of hollyhock rust.

They come in a variety of colors.  I believe this chocolate-maroon one with a yellow throat is  called “Nigra”.

We have hollyhocks with single flowers in pink, fuschia, white and a carmine color.

Depending on your growing zone, they can be propagated in the spring or mid-summer.  We seem to have them blooming at all different times of the year in our yard.  They tend to take over an area, especially if they are allowed to self-seed.  You can see their growth in front of the well tower window.

“Chater’s Double” bears double flowers in a range of bright colors and paler shades, including pink, apricot, red, white, lavendar-blue, yellow and purple.  Notice how they look like a cross between a carnation and peony.

When the flower dies, then the seed pod becomes available.

Last year, we collected the seeds in a big plastic bag.  However, we failed to separate them according to color or blossom-type.  This year, I am trying to divide the seeds according to varietal/color.

Since we have an abundance of seeds, I would love to share them with you.  Please check your Plant Zone to see if you can grow hollyhocks.  If so, and if you would like some free seeds, please email me at marycrz@cox.net.  Include your name and mailing address.  Also, please be assured that I will not share any of your personal information.

I would love to see your hollyhocks in full bloom so please share any future photos with me! Happy growing!

Hollyhock information source:  The American Horticultural Society A-Z Encyclopedia of Garden Plants by Christopher Brickell & H.Marc Cathey


Gardening 101

The love of gardening is a seed once sown never dies.   Gertrude Jekyll

Someone recently asked me if gardening takes a great deal of time…and I’ve been pondering the question ever since.

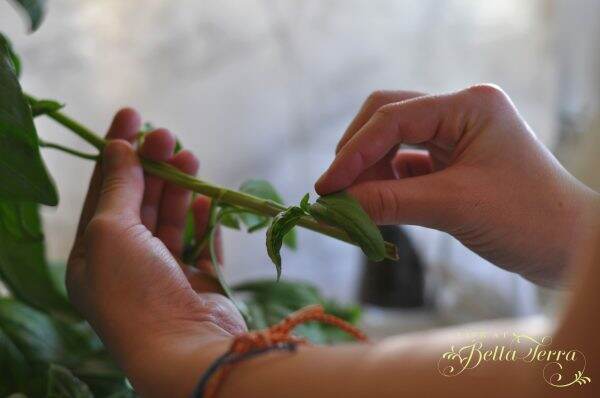
I’ve been gardening for as long as I can remember.   Having a garden was a way to teach my children to understand food doesn’t just appear on a styrofoam tray.  Growing something from start to finish takes time, love and is often unpredictable.  Many nights we would forage the garden to prepare dinner.   My two (now adult) children will be mortified that I am posting this picture of them!  Gardening became a family affair.

The hardest part of gardening is GETTING STARTED. I recall feeling intimidated and overwhelmed at first. But it’s really not hard and ANYONE can do it.  Plants need 3 things~~food, water and light.

You can start a garden in virtually any container or, if you love it as much as I do, you can set aside a designated area.  My garden inspiration was from Susan Branch’s The Summer Book. If you are not familiar with Susan Branch, her books are filled with sweet artwork, stories and recipes.

After years of loosey- goosey gardening, I decided to get serious.  I purchased a garden organizer, My Green Thumb by Gail Holmen….a big binder that helped walk me through the planning process. In digging through my notes, I found my original drawing for the garden layout.

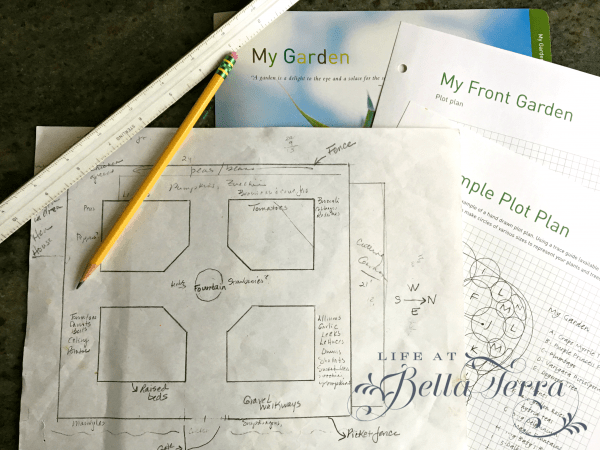
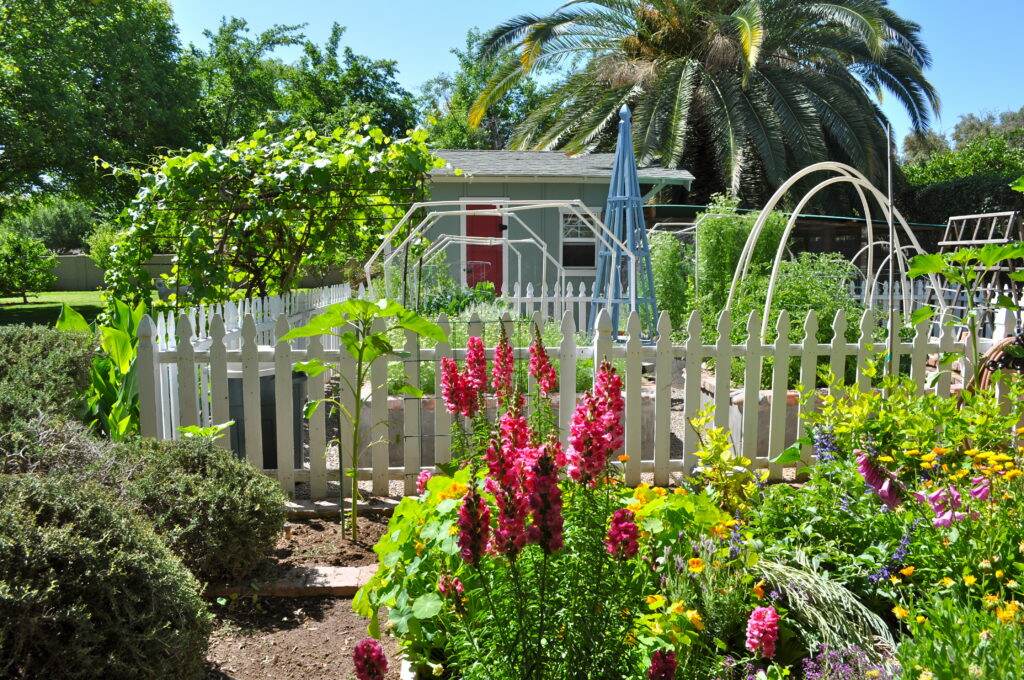
We designated a 16′ x 20′ fenced space adjacent to the hen house (a great place to toss excess greens). In designing our garden, I wanted raised bed planters for ease of planting and harvesting~~less strain on my back.  There are 5 planters in total made of concrete block, topped with a brick edge.

The garden gate entrance has a rebar arch with grape vines growing above.

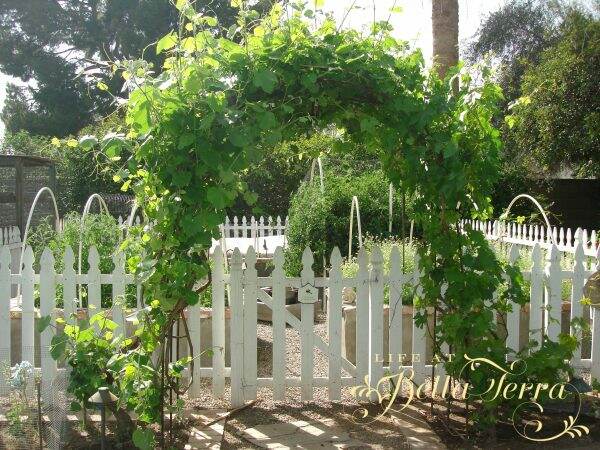
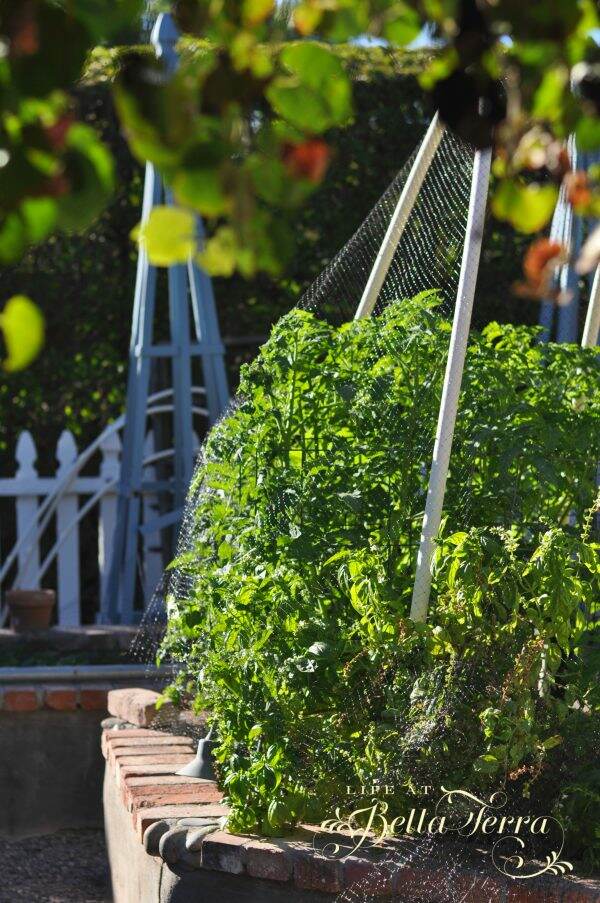
Depending on the time of year, the PVC pipe arches support bird netting, shade cloth or plastic covers. By inserting a 12″ rebar post into the ground, you can bend the PVC pipes to whatever size or height you need and slip it over the rebar.

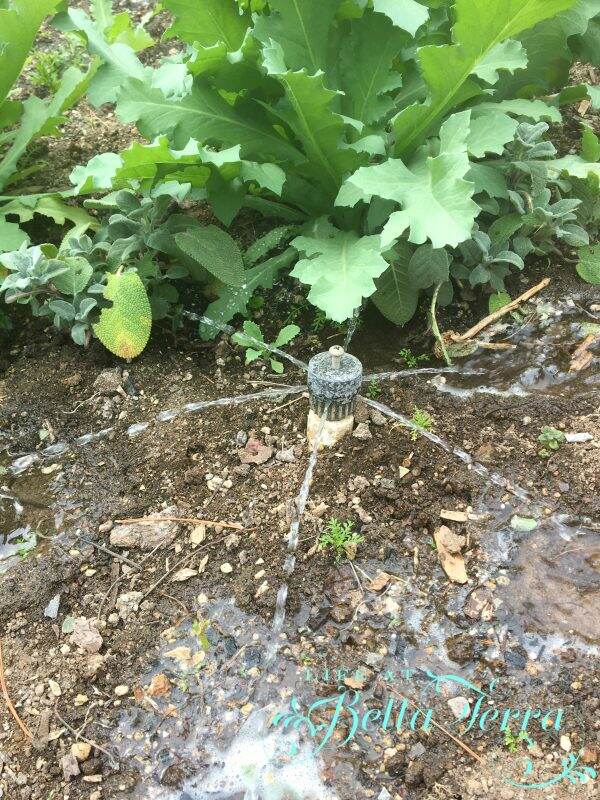
Due to the high heat in Phoenix, a watering system is critical. Alternately, there are drains in each raised planter so the beds don’t get water logged.

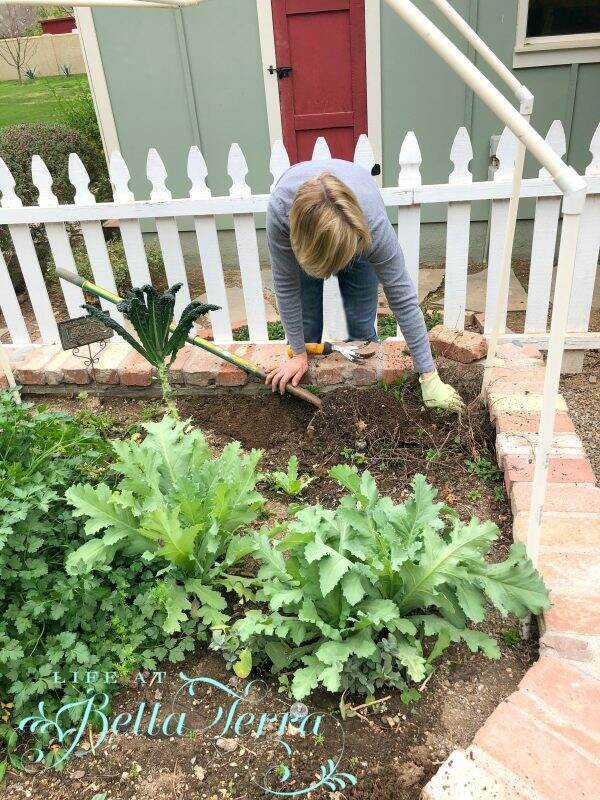
Once the infrastructure of the garden was established, then soil was added.  We compost all our natural scraps but sometimes we need to amend with commercial garden soil. Some people don’t turn their soil, but I do ~~this time I found an old garden glove, a plastic pot and previous plastic planting markers buried beneath the surface. Go figure.

It takes a ruthless spirit to yank older plants to make room for a new crop.

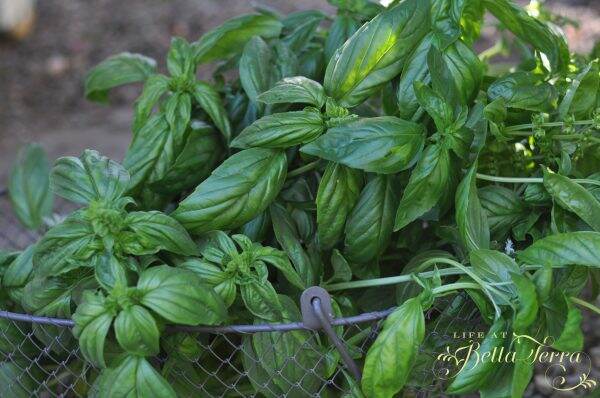
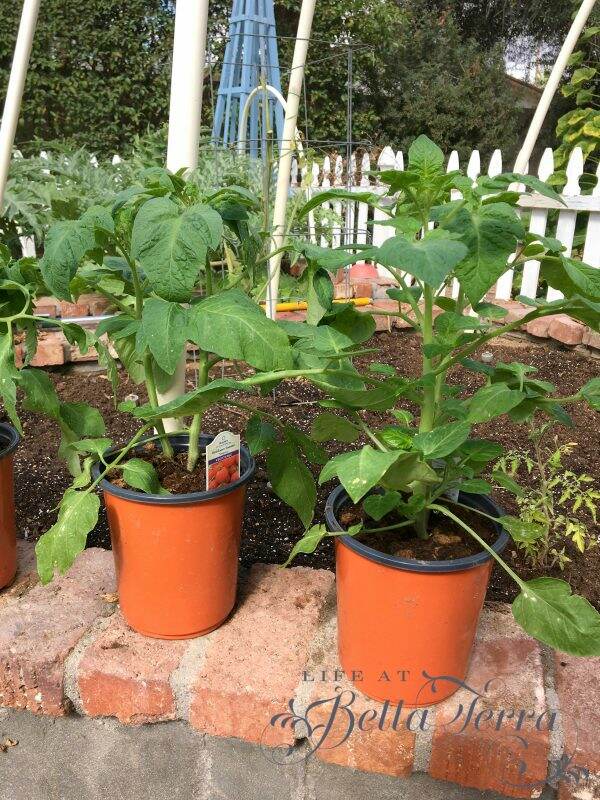
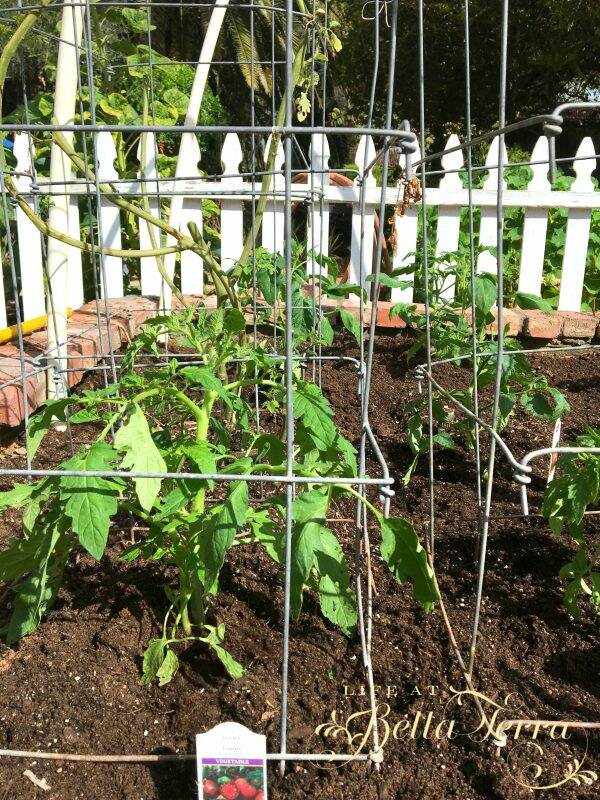
Depending on the time of year, I use a combination of seeds and starter plants.  Though seeds are less expensive, they do require a bit more maintenance (thinning).  Radishes and carrots I grow from seeds; tomatoes from starter plants.

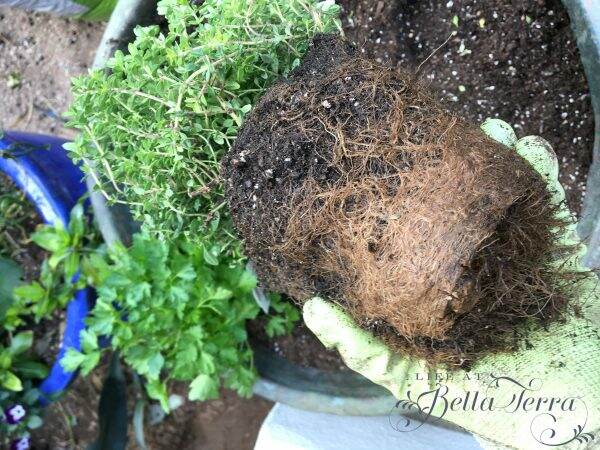
If your plants are root-bound, make sure you break the ball apart and give the roots a fighting chance to spread out. The roots on this plants were so congested that I had to use a knife to loosen them.

Please make sure to take into account the lighting available to your garden.  It took me a few years to figure out the best raised planter to raise tomatoes because they require full sun.

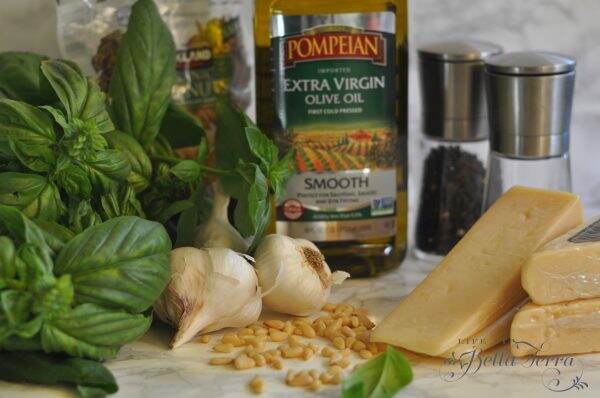
I generally try a new plant or variety each year.  This planting season I focused on heirloom tomatoes. Whitfill Nursery has a great selection.

For larger plants, cages or support structures are very helpful. I purchased these resusable cages years ago from Burpee. By the end of the season, you won’t even see the cages! Plus they collapse for storing.

It’s important to select the right plants for the right time of year.  Consult your local cooperative extension or nursery to determine your growing zone, plant selection and whether to plant seeds or starters.

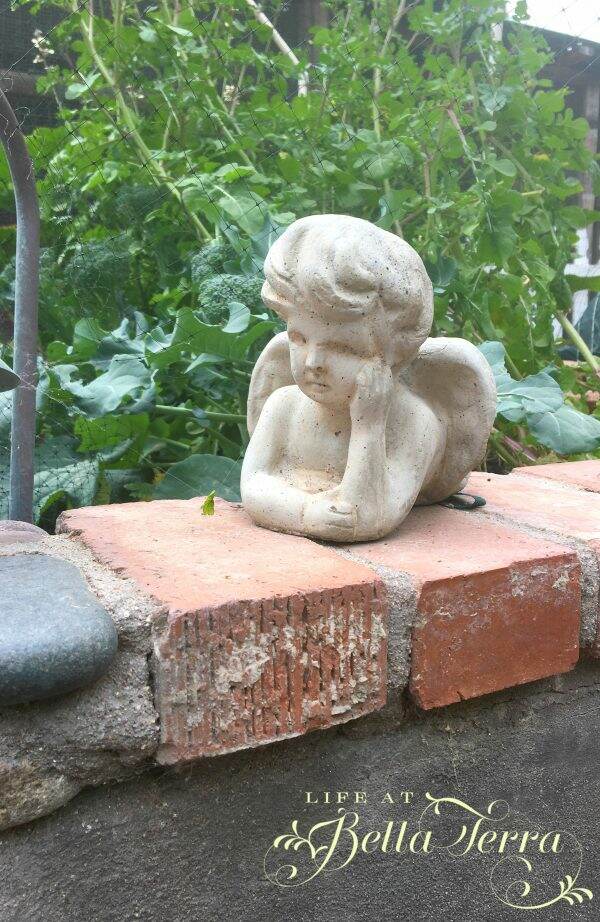
Once your garden is started, maintaining it is fun.  For me, I spend a few hours at the beginning of a new growing season, but for the most part, it doesn’t require much work.  My garden angel takes care of the rest!

And if you think you cannot grow anything and you have a black thumb, see the picture below.  This is red lettuce, growing in my gravel path.  No water, not much direct light and it’s growing all by itself!

Gardening for me, is a form of relaxation.  When my hands are in the dirt, my mind is quiet and calm.  I’m not thinking of ANYTHING else.  Connecting with the earth is always good for the soul.  So if you have the desire to garden, whether it be in a small container or a plot in your yard, take the leap.  There is such satisfaction in picking your own vegetables, fruit or flowers.

Happy Gardening!


P.S. My garden shoes are Sloggers~~best gift ever from my friend, Janie! They are SO comfortable too.