1

Valentine Dinner Party Ideas, Part 2

So happy you are here with me today to see the Valentine Dinner Party Ideas, Part 2 blog post. If you missed Part 1 yesterday, you can view it here. There is so much that goes into this party, it would be overwhelming to do it in one post, so I hope you enjoy the rest of it today.

The Table

Setting a beautiful table is something I love to do. It sends a message to our guests that they are important to us and that this evening is special. Whether you like Valentine’s Day or not, we think this is the perfect holiday to gather with those we cherish. So why not make a spectacular table?

For the last Valentine dinner party, I did not use a tablecloth. This year, though, I am drawn to the colorful Indian block prints. One of my Instagram friends, Darviny @dayswithdarviny, sources this beautiful fabric. I sent her pictures of my china and she gave me pink options to choose.

My husband made the raised 12″ x 6′ long center shelf (see post here). This focal point is the perfect place to stage all the flowers. Using individual vessels of different heights and sizes, I made the centerpiece out of an abundant display of roses, tulips, hyacinths (which smell heavenly), hydrangeas, snapdragons, and eucalyptus.

Flowers from Torchio Nursery

This year I ordered the flowers from Torchio Nursery in San Francisco. Instead of going to 3 or 4 locations to find a nice array, this nursery sends out a weekly list of what is available and then ships them to me.

Candle holders by West Elm

Adding tapers and votive candles, the centerpiece is complete.

This year, I also hung heart-shaped garlands – some purchased, some homemade (see post here) – from the ceiling using clear Command hooks. The white heart garland came from the shop at Whitfill Nursery, and the 3-dimensional heart garland came from LaMia Casa on Etsy here.

Since this is a Valentine celebration, I decide my Royal Doulton Romance Collection china is most appropriate. Napkins are pink linen, found on sale at Pottery Barn. I also opt for Wallace Napoleon Bee Gold accent flatware, which can be found here. Very affordable brushed gold chargers (link here.) The printed menu cards are at each place setting.

Typically we have rattan chairs around the table. However, in attempts to make it more elegant and comfortable, we bring out upholstered white wing and Parson chairs.

The Day of the Event

The table is set; gifts are in place at the table and the caterers arrive. Now it is time to get ready. Unfortunately I tend to leave outfit selection to the last minute. The black taffeta skirt (from Ann Taylor) I decide to wear is many years old. It seems that the zipper doesn’t quite make it to the top without a great deal of not breathing. The dreaded thickening of the waist after menopause…ugh!

Nonetheless I wear it. Fortunately, it fits beautifully beneath my dusty rose cashmere sweater (J. Crew), which covers any malfunctions. I slip on heels just before guests arrive.

Cocktail Hour

A few days before the event, I collect all the answers to the guests’ questions and create a “Who Am I” sheet printed on yes, pink card stock. During the cocktail hour on the front porch, each guest is given a drink and the Who Am I sheet.

Who Am I sheet

The goal is to mingle, ask questions and write in the name of the person who provides the answer. Naturally, it is a fun way to spark conversation and get to know other guests on a different level.

Edible Glitter in Champagne; glasses by Waterford

We serve champagne and Ruby Red Grapefruit Greyhounds with Rosemary Simple Syrup, both a pretty pink. Recipe is here. One of our guests always brings some fun cocktail additive. This time it is Rose Gold Brew Glitter, an edible glitter that we add to the champagne flutes. Very pretty and festive! Resource it here.

The hors d’oeuvres are individually plated for couples. Our bartender and servers wear masks. After fun games, delicious hors d’oeuvres and drinks, we make our way to the back terrace for dinner.

At the Table

Once we are seated at the table, the guests open their gifts. We get to share what we discover during the cocktail hour as the salad is served. This helps keep conversation flowing and stimulates lots of laughter!

The Wine

My husband carefully selects the wine pairings to go with each course. When the wine is being served, we share a thorough description of the wine region, year of harvest, maker and tasting notes.

The wine glasses are mostly vintage pink glass and add to the dinner theme.

Toasts about friendship, love, wisdom and peace are printed on paper ahead of time. Female guests read them to welcome the wine, salad, entree and dessert.

Dinner

Salad

By this time, conversation is very lively and the food is delicious. As I look down the table, I see happy faces and beautiful flowers.

Dessert

After Dinner

After the last course and wine, we continue to play the game of getting to know everyone a bit better. Soon a Waterford crystal biscuit jar filled with questions makes its way around the table. It is a delight to hear stories and shared memories from each couple.

Though a great deal of planning and work go into this evening, it is one of our most favorite events.

Expect the Unexpected

And then the winds kick up

We were watching the weather all week. The temperature predictions kept dropping, saying it might be really chilly. Then, the day of the dinner, the wind picks up. In my mind they seemed to be gale force winds, blowing everything over on the table. The candles will not stay lighted and my beautiful heart shaped garlands become a tangled mess.

But what can you do? The addition of propane heaters are a big help. Blankets and shawls are available for guests. Try and focus on what is important: engaging with your guests and living in the moment.

I hope you enjoy all the details and ideas regarding our Valentine Dinner Party. Even though our party is much smaller this year, we cherish our friendships and time together.

This post shared with Charming Homes & Gardens Link Party 47.


DIY Outdoor Bench

I find it curious when my husband, Scott, starts building this bench. We have many benches and seating areas around our property, so why is he building another? Read Scott’s narrative below to find out his motivation to create this DIY Outdoor bench.
The Story

My wife and I have dear friends who are wonderful parents and are very thoughtful, kind, smart and spiritual.  It’s a rare combination.  My wife Mary has those attributes.

Several years ago I found out that the wife enjoyed time outside in natural surroundings of quiet contemplation and spiritual introspection.  In early December I came across plans for a wooden “Leopold” bench.

Celebrating the Life and Legacy of Aldo Leopold | USDA
Aldo Leopold

Aldo Leopold (1887-1948) was a conservationist who built the benches for bird watching and nature photography.  Aldo’s bench plans have been refined and published at the Rogue Engineer (link here). I thought it would be a nice gift for our friend to use when she sits in prayerful revery.

The Materials

  • Drill/Driver
  • Mitre Saw (optional)
  • Circular Saw
  • Tape Measure
  • Pencil
  • Safety Glasses
  • 4 2x8x8′ pressure treated lumber (untreated if you are painting or staining)
  • 2 1/2″ exterior wood screws

Off I go to my local Home Depot for to purchase four 2”X8”X8” and some wood screws.  I don’t have the Rogue Engineer’s wood shop but the plans sound pretty straightforward.

Makita XSS02Z 18V LXT Lithium-Ion Cordless 6-1/2" Circular Saw, Tool Only

As I start cutting the wood, my sturdy and reliable Craftsman circular saw gives up the ghost.  No problem, who doesn’t need a new Makita 18v lithium battery circular saw? It’s a beautiful machine. Link here.

The Assembly

Wood is cut in accordance with the plans in short order.  Now the process of assembly.  I pre-drill all of the screw holes so that takes me a bit longer.  My pieces do not all fit tightly enough to hold themselves in place but eventually it all comes solidly together.

My wood is Douglas fir so there are the additional steps of staining and several coats of spar varnish to ensure a beautiful outdoor finish.  The plan suggests 30 minutes.  I lack that talent and have several additional steps (staining-drying then varnishing & drying -repeat (twice)).  For me it is 3 days to complete.

The bench is solid and heavier than you might think~ very sturdy.  Mary and I present it as a Christmas present to our wonderful friends and it is now used regularly. 

Though this is a wooden bench, I must say it is VERY comfortable! The angle of the back is just perfect and if you add a pillow or cushion, it just makes it even more cozy.

I think Aldo would be very happy to know someone is enjoying nature and solitude on his Leopold bench design.

Since being outside in the fresh air is such a necessary part of life now, this DIY outdoor bench is a wonderful project for anywhere in your yard.

If you like to build things, I strongly suggest checking out the Rogue Engineer. There are several projects with extensive tutorials. To see another build project that we use frequently, click here.

If you enjoy this post, please share on Pinterest.

DIY Monthly Blog Hop

Thanks for joining me today. Now onto our monthly DIY Blog Hop where the topic is Building something.

Niky from The House on Silverado makes this DIY Farmhouse Coffee Cup Stand.

Andrea from Design Morsels makes this DIY Corner Desk.

Chas from Chas’ Crazy Creations shows an Easy DIY Heavy Duty Garage Shelf here.

Tarah from Grandma’s House DIY builds a Hallway Closet into a Storage Room

Amy from Health Heart and Home creates this beautiful accent wall using wood trim here.

Kippi from Kippi at Home provides a step-by-step tutorial on how to make this sweet birdhouse. Check it out here.

Kim from Shiplap and Shells shows us How to Make a Faux Fireplace Surround here.

Thank you for joining me today for our monthly DIY Blog Hop. Hope this inspires you to build and create! Comments and feedback are like gold to us so thank you in advance for sharing your thoughts.

This post shared with Between Naps on the Porch Metamorphosis Monday #692.


Completed Projects of 2020 and onto 2021

Washing a floor stencil

When reflecting back on 2020, is it possible that we took on TOO many projects? Perhaps for me, keeping extra busy was a way to not focus on all the world’s problems last year. I guess the good news is that several things got done, but it feels like an exhausting year on many fronts. Here is a list of completed projects of 2020 and which ones we hope to tackle in 2021.

Italian Fountain

Our outdoor Italian fountain is transformed from ugly to pretty~the rusty spouts are replaced with new ones! See post here.

Master Closet

After the embarrassing condition of our master closet, it gets good cleaning and goes from a mess to a neat and organized space. See post here.

Dining Room

With a few great yard sale purchases, I am able to upgrade the dining room with these fabulous upholstered parsons chairs. A new coat of paint helps brighten the room, too! See post here.

Windows and Screens

Being confined to home gave us the opportunity to personally wash each and every window in our home, as well as the out buildings. Not only did we clean, but repair screens, touch up paint chips and make sure our windows are in good working order.

Cooper looking out clean windows

Back Terrace

Many new upgrades are added to the back terrace. Since we entertain a lot in this space during our better weather months, it is time and money well spent. A new tile backsplash, so desperately needed, is now pretty and easy to clean. All the upholstered furniture and rugs are thoroughly cleaned; the concrete/slate floor is treated with a sealant. Broken slate is repaired at the fireplace. See post here.

A clean and refreshed back terrace

Family Room

Another room benefitting from the great yard sale scores is the family room. New upholstered wing chairs and a round table is added; a gorgeous decorative chest becomes the bar storage. To see more about our family room, click here.

Potting Shed/Well Tower

In the spring, the potting shed in the well tower gets attention. Filled with dust and spider webs, it needs organizing and cleaning. See post here. Plus I finally create a storage system for most of my wreaths. See can see that story here.

Front Porch

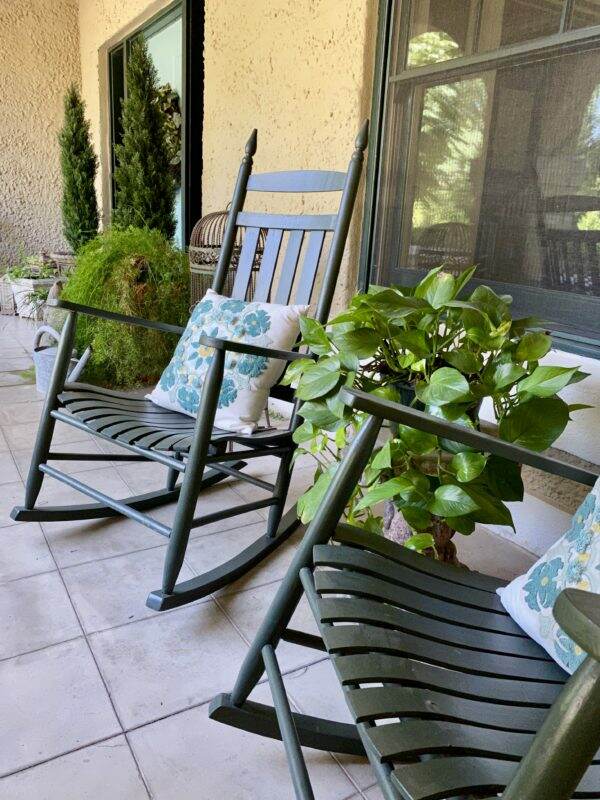
A lot of focus is on the front porch last year. New front door color, polished hardware, updated wreath, fresh paint on the rocking chairs and a new door mat. What a welcoming difference! See post here.

Guest Cottage

While sprucing up the front of the main house, it is time to also tend to the guest cottage. Using spray paint, the light fixtures are brought back to life (see post here). With your help and suggestions, the vintage mailbox is updated too! (another post here).

Back Staircase

Yesterday’s post is a summary on the back staircase. Though this project starts in 2019 and is completed just a few days ago, much of the work is done in 2020.

Flooding and Ghosts

2020 is a year to remember, not only for the pandemic but the series of unfortunate events we had with flooding. First a broken water heater in the basement and then the dishwasher in the kitchen. No pictures of either mess, just a blog post about Old Houses and Ghost Stories here.

Pool House Bathroom

Perhaps one of the most difficult new projects is stenciling the tile bathroom floor in the pool house. But the end result is stunning. See post here.

Closet and Storage Organization

Thanks to being part of a blog hop, the front hall closet gets completely re-organized. Nearly all of my table linens reside in this odd shaped space. See more here.

Hidden storage under the front staircase

Another storage organization project includes the hidden space under the front staircase. Slipcovers and decorative pillows are organized into bins and kept here.

Painting Furniture

Transforming an old piece of furniture into a Scandinavian style dresser at our cabin is a creative leap but with good results. To see this DIY project, click here.

Building New Things

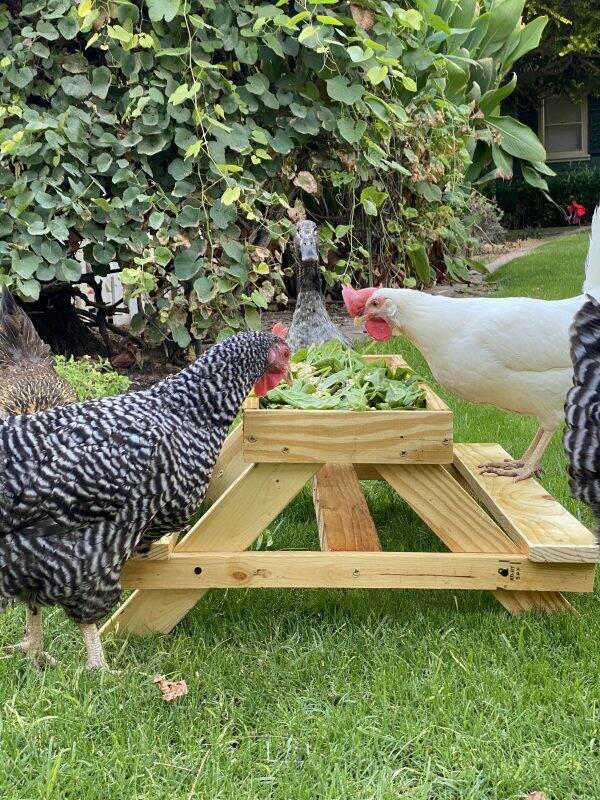
Even the chickens have a picnic table

My husband’s creativity and handiness produces a chick-nic table for our sweet hens. A fun and easy DIY project here.

Property Maintenance

Redwood staining the well tower; painting the trim

With the help of our professional painter, John Cruz, the well tower, barn and hen house get some sprucing up. To see more before and after photos, click here.

New Projects for 2021

Our master bathroom is looking a bit tired. The tile floor is the same as the pool house, bland and dated. Debating whether to try and stencil it or just demolish and put in new tile. The countertops are marble squares ~again a dated look. It might be time for a complete renovation. To see more on our master bathroom, click here.

Create a Cutting Garden

I am just receiving my seeds from Floret Farm and am looking forward to making space for an actual cutting garden. Not sure how well this will do in our climate, but it will be a learning experience.

Update our Kitchen

Since I haven’t thought this through, I’m not sure how or to what I want to do with our kitchen. It will all depend on the budget, but it would be nice to fix a few things and update others. More to come on this.

Organize the Entire House

I want to start at one corner and make sure each and every room is the best it can be. Is that even possible? I dream about a place for everything and everything in its place.

Do you have any projects for 2021? I can assure you that there will be less projects for me this year. Instead, I want to fill my year with more fulfilling and meaningful experiences~like art, friends, family and travel. Let’s hope the world will begin to open up once again.

Happy Wednesday! Stay safe and healthy!


Grilled Cheese and Tomato Soup

We recently held a small surprise birthday dinner party for my husband, Scott. All intentions for a larger surprise gathering evaporated with COVID. But since this is a landmark birthday, we did try to make it a bit special regardless. Here are the grilled cheese and tomato soup ideas we created based on a grown-up theme.

Entertaining at home is limited to very small groups. We are careful to be outside in the fresh air. As much as we want to include all our friends, we are being conscientious until this whole pandemic settles down.

In planning, I need to be more aware of how food is served, social distancing and the weather conditions. Our winters in Phoenix are chilly, especially at night and in the morning.

With the help of my children, we did all the cooking while trying to keep Scott out of the kitchen (that could be a blog post in itself!). It was a bit frenetic to say the least. Before any event I am so swamped I forget to take really good pictures of the setting and food. I need to get better at this!

The Menu

The menu for the dinner is:

The recipes for the creamy tomato soup and artisanal grilled cheese are from Bon Appetit’s October 2012 issue. Guests design their own sandwiches from a table of curated fixings.

The Fixings

To make the sandwiches have adult appeal (but who really doesn’t love a crisp, gooey grilled cheese sandwich?) you can vary the ingredients. For this party, the meat fillings for the sandwich include: thinly sliced ham, prosciutto, smoked brisket, and crispy bacon.

Pre-shredding the cheese allows for faster and even melting. Dill havarti, sharp cheddar, pepper jack, gruyere, and smoked gouda are good cheese choices.

Sliced sourdough bread is an easy store purchase, and you can use whole grain or rye. Whole grain mustard, fig and sour cherry jam, are nice spreads to add. Though we did not include these, thinly sliced apples and sauerkraut would work too.

The Soup and Salad

This easy, delicious tomato soup can also be made ahead of time and reheated. If you haven’t made my Winter Kale salad, this is a winner. For this particular event, I did not include the wild rice, but made the salad with chopped fresh kale, feta cheese, pomegranates and toasted walnuts. See the recipe here.

The beauty of this meal is that you can prepare most of it ahead of time. On the day of the event, slice and skillet (or broil) the bread, grate the cheese, make the salad. The soup can be prepared up to 2 days earlier. Just before guests arrive, re-heat the soup and set everything out.

The Preparation

Let your guests decide their fillings, and then finish the sandwich off on the grill or in the oven~hot for consumption. It is fun to take everyone’s order and with one person grilling, the sandwiches are ready quickly.

Soup is served in mugs so everything can fit onto one large plate.

Desserts

For dessert, our guests choose from either rich, fudgy brownies or Black Forest cake or both.

Brownies with walnuts from my son’s favorite cookbook, Bravetart
Black Forest Cake from one of my favorite cookbooks, Layered by Tessa Huff

This warm and comforting meal is very appropriate for a rather chilly evening outside. I was afraid the cake was too small to serve everyone, but thin slices are appropriate for this rich, dense and delicious cake. And I always forget to take off my apron!

Homemade layer cake!

Happy Tuesday, my friends! I guess the New Year has officially begun. How nice to have a weekend after the holiday! We are celebrating our youngest’s birthday this week and I will no longer have any teenagers at home. Where does the time go?

If you enjoy this post, please share on Pinterest.


Creamy Tomato Soup

This recipe can be easily doubled to feed a larger group and makes great leftovers.

  • 1/4 cup unsalted butter (1/2 stick)
  • 10 sprigs thyme (tied together)
  • 1 medium onion (thinly sliced)
  • 2 cloves garlic (thinly sliced)
  • 1/4 cup tomato paste
  • 2 28 oz. cans whole tomato
  • 1-2 tsp sugar, divided
  • 1/4 cup (or more) heavy cream
  • kosher salt, freshly ground pepper
  1. Melt butter in a large heavy pot over medium heat. Add thyme, onion, and garlic. Cook until onion is completely soft and translucent. 10-12 minutes. Increase heat to medium-high; add tomoato paste. Continue cooking, stirring often, until paste has begun to caramelize in spots, 5-6 minutes.

  2. Add tomatoes with juices, 1 tsp. sugar and 8 cups water to pot. Increase heat to high, bring to a simmer. Reduce heat to medium. Simmer until flavors meld and soup reduces to about 2 quarts (8 cups), 45-55 minutes. Remove soup from heat; let cool slightly. Discard thyme sprigs. Working in small batches, purée soup in a blender until smooth. Return to pot.

  3. DO AHEAD: Soup can be made 2 days ahead. Let cool slightly; cover and chill. Rewarm before continuing.

  4. Stir in 1/4 cup cream. Simmer soup until flavors meld, 10-15 minutes longer. Season to taste with salt, pepper, and remaining 1 tsp. sugar. Add more cream if desired.

For a lighter soup, omit the cream; or for a little decadence, add more cream or swirl in a little crème fraiche.


Grilled Cheese Sandwiches

The secret to making grill cheese for a crowd? Turn on the oven (or use the outdoor grill). Encourage guests to customize their sandwiches with the cheeses, breads and fixing you have set out. Then simply pop them on a baking sheet or grill and cook.

  • 3/4 cup unsalted butter, room temperature (1 1/2 sticks)
  • 16 1/4" thick slices assorted bread
  • 1 1/2 lb. Assorted cheeses (coarsely grated)
  • Assorted fixings (meat, spreads, etc.)
  • Kosher Salt, freshly ground pepper
  1. Arrange racks in upper and lower thirds of oven; preheat to 350 degrees. Set a wire rack inside each of 2 foil-lined rimmed baking sheets. Butter 1 side of each bread slice with about 1/2 TBSP butter.

  2. Heat a medium skillet over medium heat until very hot, at least 2 minutes. Melt 1/2 Tbsp butter in skillet. Add 2 slices of bread, buttered side down, cook, pressing down often with a spatula to ensure even basting and rotating pan frequently, until bread is evenly golden brown, 3-4 minutes. (Do not rush or increase heat, or your bread will burn before it can evenly toast).

  3. Transfer bread slices, toasted side down to prepared wire racks (this will keep bread crunchy). Repeat with remaining bread and butter, wiping out skillet between batches. (If all the bread doesn't fit on the racks, you may need to bake sandwiches in two batches).DO AHEAD: Bread can be toasted 1 hour ahead; let stand at room temperature.

  4. Garnish untoasted side of each slice of bread with fixings, then top each slice with a small handful of cheese (about 1 1/2 oz.), scattering evenly. Season with salt and pepper (do not skip this steps; it really elevates the flavors in the sandwich).

  5. Bake bread slices, rotation baking sheets halfway through, until cheese is thorougly melted, 10-12 minutes (begin checking after 8 minutes, some cheese melt faster than others). Working in batches, firmly press 2 cheese-topped sides of sandwiches together. Let rest for 1-2 minutes. Slice in half or into quarters. Serve hot or warm.

We grilled the sandwiches on an outdoor grill, not in the oven.  Either works fine.  Fixings can be:  sliced ham, prosciutto, bacon, smoked brisket.  Cheeses suggestions: cheddar, Swiss, Havarti, pepper Jack, gouda.  Spreads: fig jam, sour cherry jam, chutney, cranberry sauce, whole grain mustard, Grey Poupon.  Other: thinly sliced apples, sauerkraut. Get creative!


Restoration of an Antique Table

Once again, I am participating in the DIY Blog Hop. The focus for January is on tables. Today I have a guest blogger. My husband Scott recently completed the restoration of an old table that we’ve had for almost 26 years. Here’s Scott’s story about this unique piece of furniture.

The Table~Before

When my wife and I were married (seems like yesterday), our decorator and designer, Robert Lashua, catered our wedding reception.  One of the things he brought was this antique table. He beautifully staged it with an abundance of flowers and food. We kept it and have used (and abused) it for entertaining, ever since.  The table is the one on the left in a recent photo. And the drawer (an unusual feature on a table) is missing.

Drawers are warped and deteriorated

One of the legs is splitting. the drawer is coming apart, and the under table support for the drawer is half gone.  I am fixing the table so the drawer is functional and the table can continue to provide service for a couple of more decades. Mary loves this table because it’s wide and perfect for staging food for entertaining.

The drawer is apart in one corner and on the underside (see below).  In the picture on the left you can see one whole side of the under table drawer support is missing.   A consult with a woodworking master (Steve Renneckar) to figure out how to proceed proves invaluable.

 A trip to Home Depot provides the hardwood I need to replace one side of the structure for the drawer to slide on under the table.  I’m using some wood glue and Liquid Nails to pull the drawer together.  
  

You may be asking….why bother.  This is a very old table.  Take a look at the unique pin and cove round style dovetail on the drawer (below).  This method of joining corners was developed in the United States in the 1870’s.

This dovetailing is on Victorian and Eastlake furniture in the US and Canada from the 1870’s into the 1890’s. I have no idea how old this table might be but it’s certainly worth my time to bring it back to functionality.

The Work Begins

The first steps include fixing the split leg (liquid nails polyurethane and clamps), repairing the drawer and planning the under table structure (in the empty area of the center picture below). It is a mirror of the structure shown in the picture on right below.

There are several places where the wood is split or separated.  A lot of wood glue (Titebond here) and some clamps do the trick.  The boards of the table top are fitted together with dowel joinery but have separated a bit.  I attach hardwood strips to the edges of the table (first one end, then the other).  Using my two large bar clamps (40 plus inches- a Jorgensen and an Irwin – you can see them above on the drawer), I pull the slats together and screw hardwood strips underneath to hold them in place (below). You can find the clamps on Amazon here.

Now I need to finish the repair on the drawer and install the new vertical support for the hardwood drawer slides.  This is a hardwood drawer on hardwood slides.  What could go wrong 😑.

First step is to put the drawer back together and try to replace (with hardwood) the portion of the drawer that is gone.  The side of the drawer has a slot for the slats.  The part where I’ve circled is where the bottom of the drawer has disappeared.

Using maple hardwood (and my brand new Makita circular saw – the old Craftsman finally quit) I cut some pieces to replace the missing parts of the drawer.  I glue them, place them and clamp them.  That evening it started to rain so everything was moved into the garage.

Today it’s sunny and with the oversight and assistance from our son Benjamin, it’s time to finish the project.  First we sand down the repairs to drawer.  Then, slide it into the table (upside down at the moment) to make sure it still fit and to finalize the side support.

We cut and place the side piece and slide rails (tried nailing but ended up using screws. I check the final fit of the repaired drawer and ….

The After

 Project is complete- (other than waxing the slides and staining the new wood and maybe refinishing the top 😉).

Now the table can be used again. Mary loves the chippy old paint that is still seen on the sides.

The drawer works beautifully now. The original brass cup hardware looks great on this newly functioning drawer!

The artistry of joint construction like this is long gone. All the more reason to restore this table vs. buying a new one.

Thank you for joining me today and now it’s off to the DIY Blog Hop to see other table ideas from these talented bloggers.

If you enjoy this post, please share on Pinterest.

Tarah from Grandma’s House DIY writes about How to Remove Paint, Scuffs and Scratches from wood Furniture.

Chas from Chas Crazy Creations has a tutorial on a side table makeover.

Kim from Shiplap and Shells has A Simple and Easy Way to Upgrade a Garage Sale table here.

Kristin from White Arrows Home is showing some Creative End Table Ideas here.

Andrea from Design Morsels shows us how to refinish a wood table.

Niky from The House on Silverado displays a Winter Tiered Tray on her Entry table.

Kippi from Kippi at Home is demonstrating simple ways to update furniture

Please remember we all love comments and feedback!


Two More Holiday Mantels

Home Depot lantern

Happy Saturday, my friends! I hope you have enjoyed the past two posts on the two mantels my dear friends created when they visited here a few weeks ago. Today I want to present the last two holiday mantels. With 7 fireplaces, I will have three to decorate on my own. I can honestly say my friends have set the bar high and I only hope I can decorate the remaining ones with the same ingenuity and creativity as these.

If you missed the previous posts, here is the one on the romantic mantel in my art studio. And the link to the stunning, abundant one in the living room is here.

The Library

This cozy, small room is well used during the winter months. With the fireplace going, it is a popular spot with the pets. It is also a good place to stop and warm up as you are passing through to the family room. With only two chairs, it is also the perfect place for conversation or a glass of wine or cup of coffee.

Chas from Chas Crazy Creations

The mastermind behind this mantel design is Chas from Chas Crazy Creations. Chas is such a sweet person and I think she should have her own crafting show. Find an unusual object? Chas will quickly come up with 100 uses for it. Seriously, she can turn a pumpkin into a carriage. Not only is she creative, but I may have mentioned her Mindful Minutes~60 seconds a day to stop, breathe and do some relaxing exercises. Mindful Minutes can be found on Chas instagram account here.

Andrea from Design Morsels

Starting with a string or two of white lights, Chas patiently tucks coffee filters, yes, coffee filters in between each of the lights. Aided by the very talented Andrea from Design Morsels, they create an ethereal, angelic look in the library.

Since this is only the dark colored fireplace we have, the coffee filters look like a string of petticoats. How beautiful would this be in a girl’s room? I’m not sure you can dye coffee filters but I’m imagining pink ones like a ballerina’s tutu.

Even Sox loves this room and he approves of the garland! Often we find him sleeping in front of the fire. I love that the feminine look of the garland goes with the delicate inlaid design in the fireplace surround.

This garland also reminds me of a feather boa~with all its simplicity but impact. To see more about our library, click here.

The Outdoor Back Terrace Fireplace

Just when the talented team thought they were done with decorating fireplaces, my husband asked them to tackle the one on the back terrace.

Chloe from Celebrate and Decorate

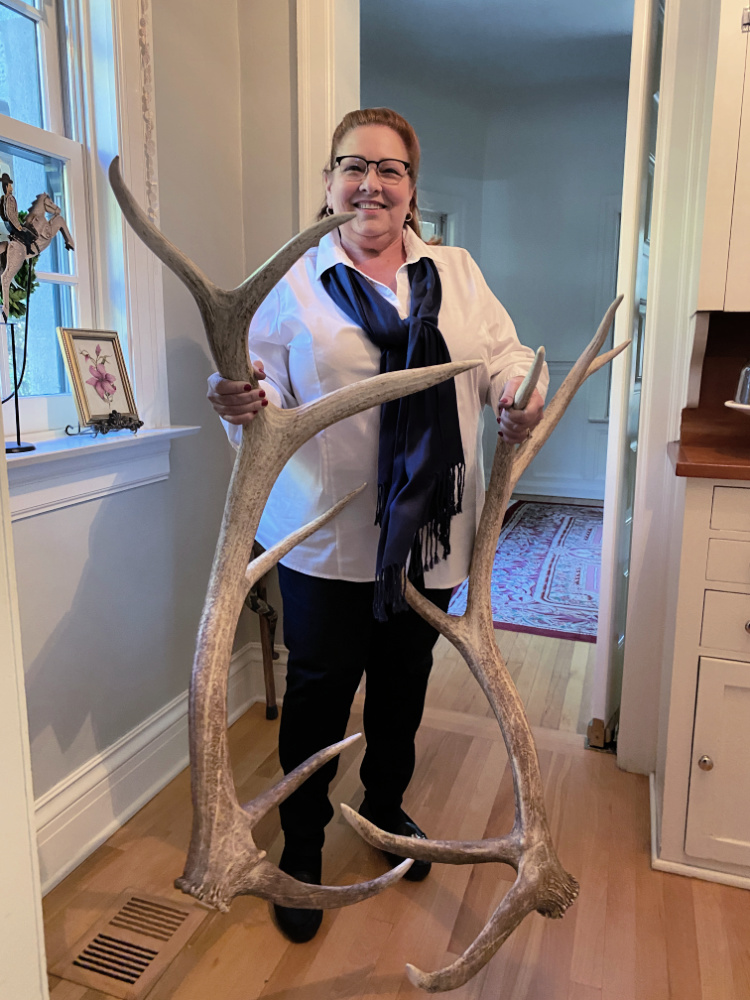
If you read the post about the antler centerpiece on the table setting in the orchard, then you know my friend Chloe from Celebrate and Decorate loves these antlers.

Chloe, Andrea and Chas

Since the fireplace is already rustic, Chloe uses the other antler as the base to the decorations. Chas and Andrea lend their expertise to the design.

Greens and sprigs are layered in between the antlers.

Red berries, crystal branches, pinecones and a red plaid ribbon really spruce up the look.

Over the summer, I purchased these lovely lanterns from Home Depot (see that bargain blog post here). Chloe made the fluffy bows and we use 4 lanterns to decorate the fireplace. These narrow pine trees are my favorite especially when they are clustered like a mini forest. Plaid bow from Home Depot. You can find similar at Amazon here.

So now the pressure is on for me to complete the last 3 mantels. My house looks confused~fall in one corner and Christmas/winter in another. But for some reason I’m in no hurry. With holiday music playing, I am taking my time. The goal is to truly enjoy this holiday without all the stress and rushing around.

Wishing you a wonderful weekend! It was actually 32 degrees here the other morning and I’m afraid to see if any frost damage occurred in the garden. Chilly starts and ends of the day, but nice and pleasant in between. Love the weather this time of year. Be well, everyone!

If you liked this post, please share on Pinterest.