1

An Abundance of Flowers

First of all, thank you for all the wonderful front door color suggestions and comments! It is so enjoyable to hear your thoughts on yesterday’s blog post. I am so excited to start experimenting with different colors. More to come.

I find it so interesting that some areas of the country are still experiencing snow, where we are having our first taste of summer. This last week the temperatures have been over 100 degrees and I’m just not ready for the summer heat.

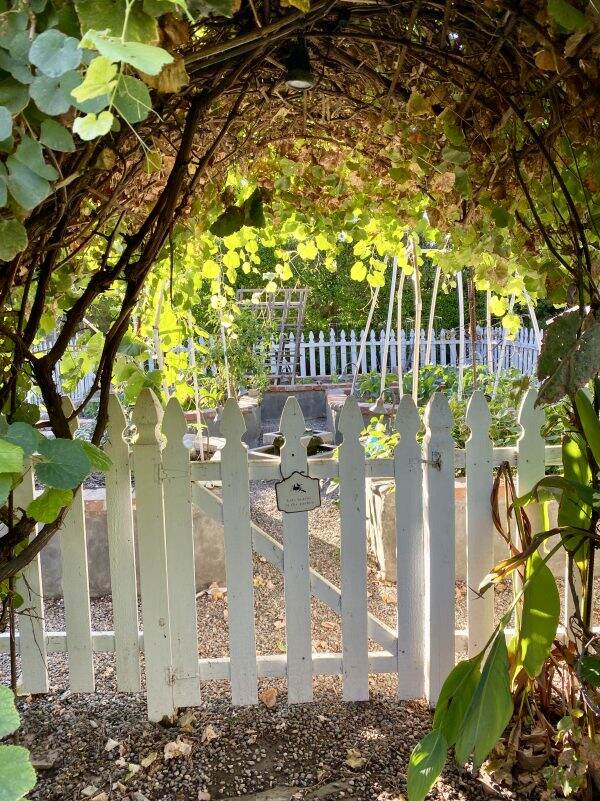
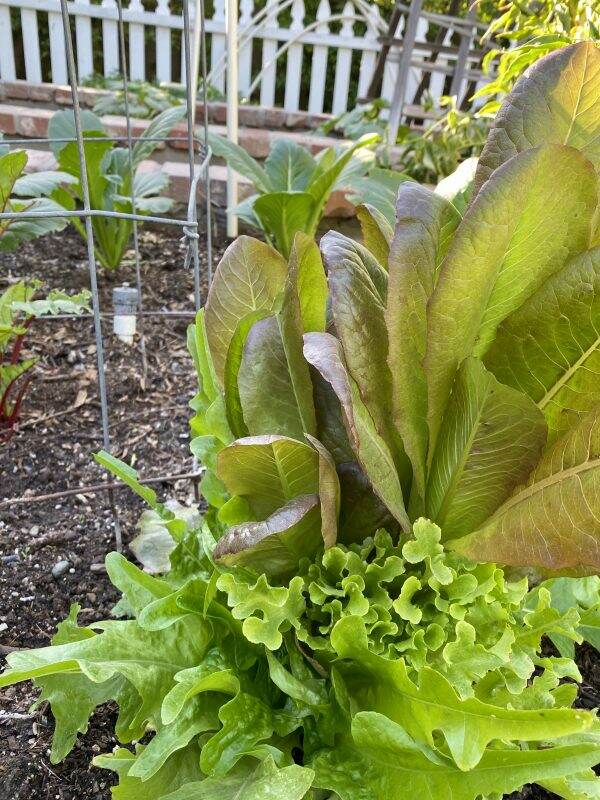
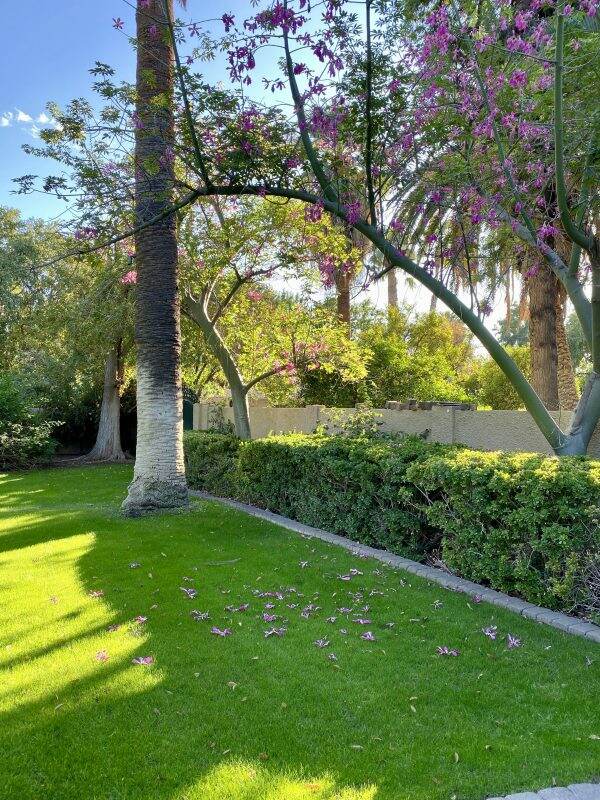
Summer, for most areas of the country, means bountiful gardens and outdoor entertaining. Here in Phoenix, it is the opposite. My garden, for the most part, goes fallow. The intense sun burns the plants (unless you have big, broad leaves for protection). And you cannot do anything outdoors in the Valley of the Sun unless it is early in the morning or late at night. The heat can be dangerous and the thought of laying out in the sun equals skin damage.

Typically the summer is also our monsoon season~sometimes with rain and other times not. Dust storms blow through and cover the land with a layer of dullness. So I am trying to cherish the last bits of our Spring, where the gardens and flowers are bountiful.

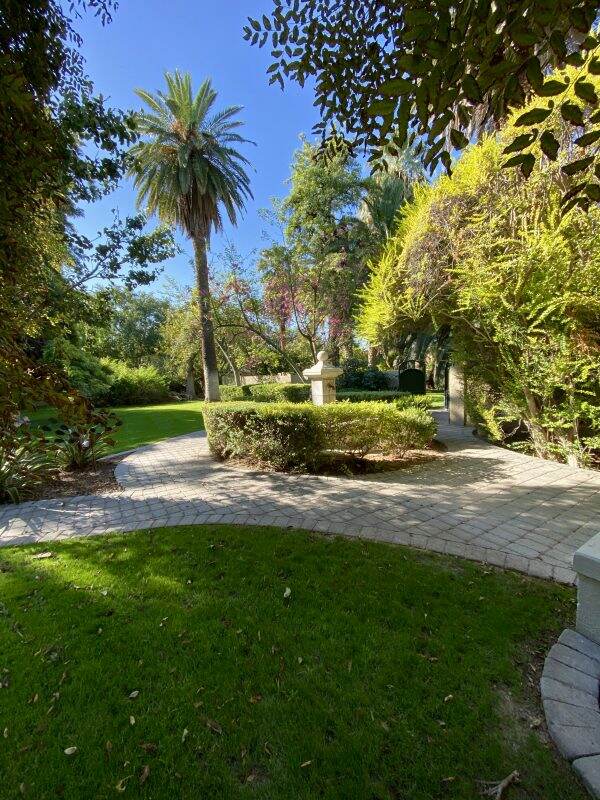
Since it’s been a bit of a stressful week for me, today’s blog post is all about beautiful pictures~~the Spring we dream of during the last, long sweltering days of summer.

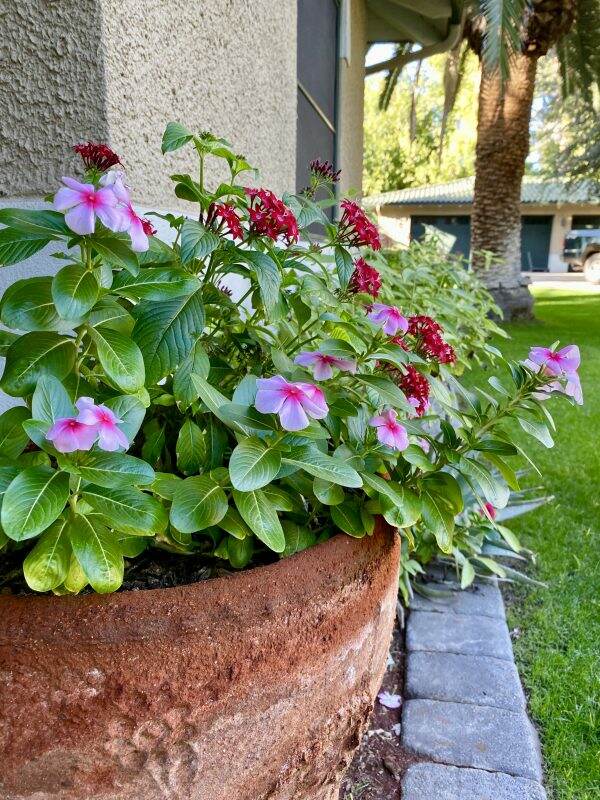
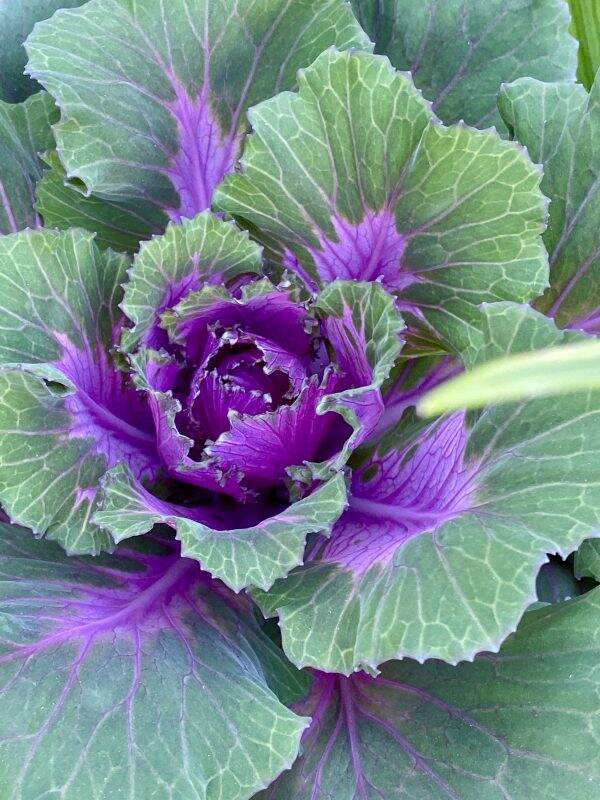
These photos were taken with my iPhone, during my walkabout yesterday morning. No editing done. One of the positives about spending so much time at home, is I find myself really “looking” at things. In the past, I took these flowers for granted. But now I find wonder in focusing in on each and every one of them. Look at the depth of beauty in the purple pansy or the pale yellow orchid!

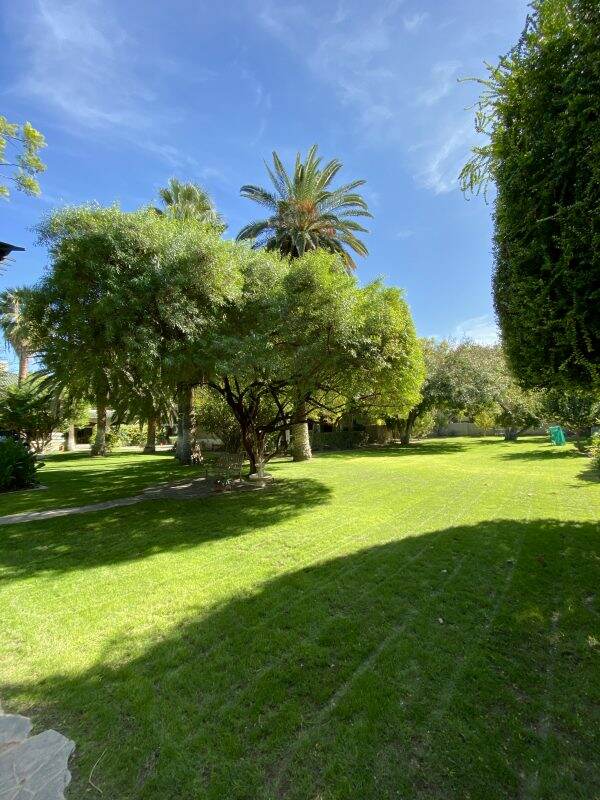
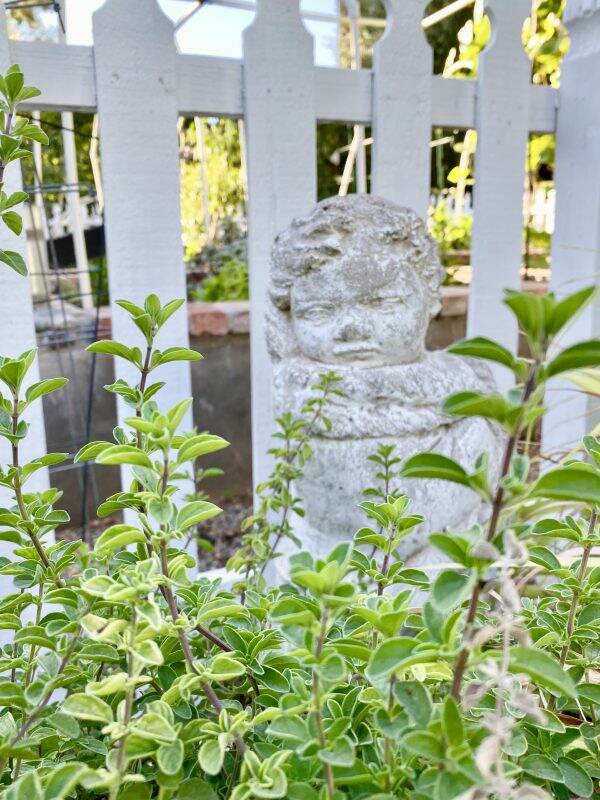
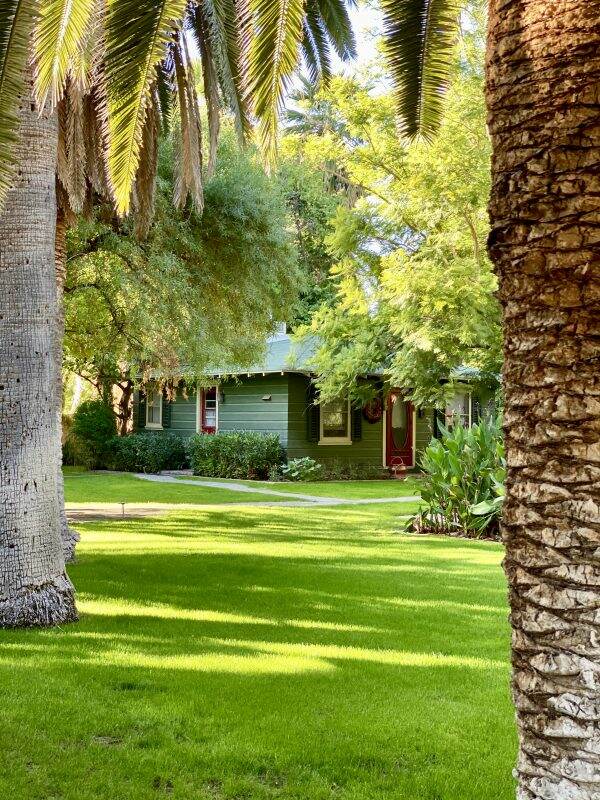
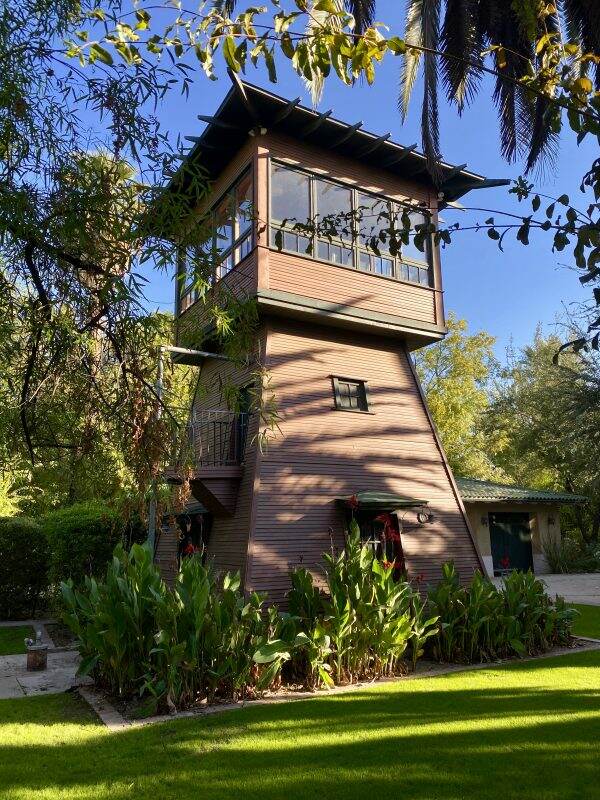
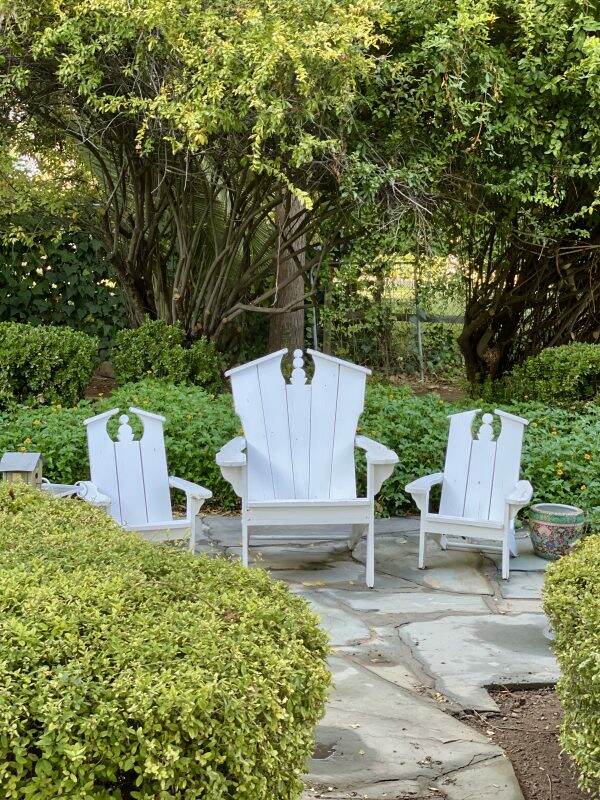
I cannot express how grateful I am to have a yard to enjoy. A place to walk barefoot in the grass. A respite from the world’s nastiness. Where I have so many fond memories of my children’s escapades.

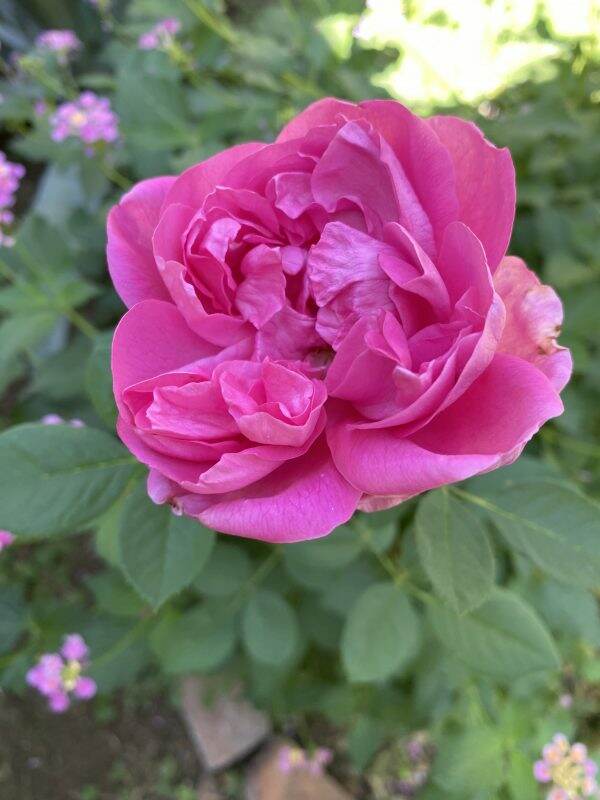
With each week, another flower blooms as one dies. My beautiful bulb garden, which provides such joy and color, is now gone. But the roses are at their peak so I don’t mourn the loss of the tulips and iris.

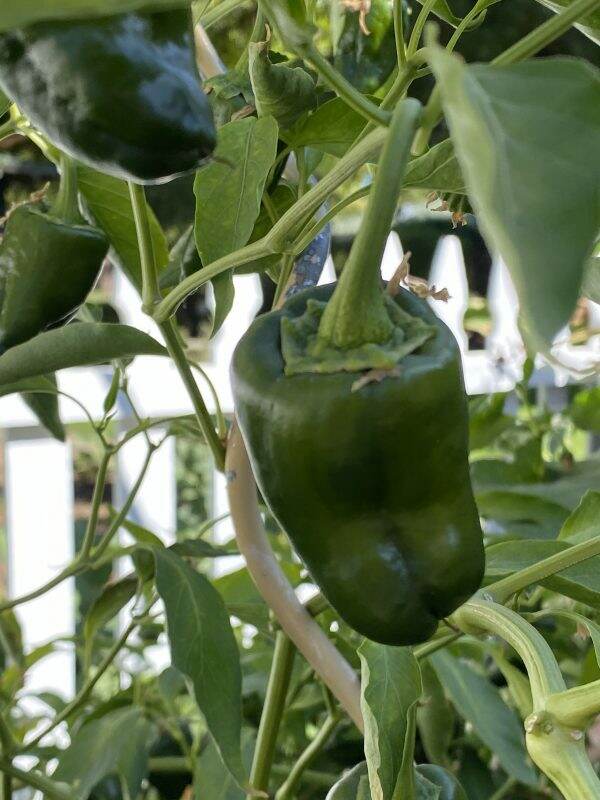
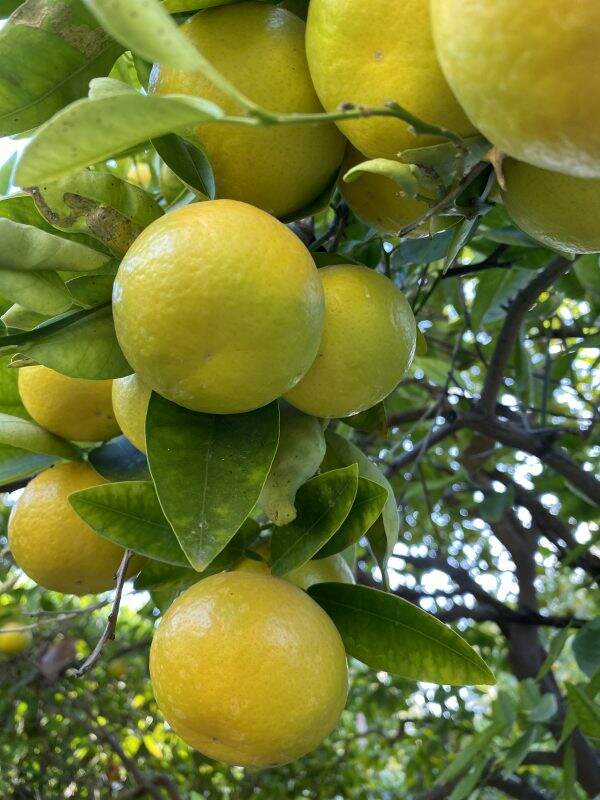
In addition to the flowers, the trees in the orchard are heavy with fruit. Soon we will have peaches and apricots and apples. I still think it is VERY strange to be picking apples in June vs. the romantic notion of doing so on a crisp fall day.

Clematis arch leading to guest cottage

During a tumultuous time, I need to seek a way to ground myself. I’ve decided, just by writing this post, that my two words for today are: Grace and gratitude. So grateful that we can connect via this blog and so grateful for you taking the time to write a comment. Your words of support and encouragement are priceless. Grace may take a little more effort for me!!! But like many things in life, it’s a work in progress.

Have a glorious Wednesday! What are your word(s) for today?


Composting 101

Since we are all staying at home for the next 30 days, it is the perfect time to start composting. Your family’s trash can be easily and inexpensively turned into organic plant food. About 30% of what we throw away can be used to make your own rich fertilizer.

We have been composting here at Bella Terra for a long time. The main reason is that we have a lot of yard waste and food scraps. And lately, having more people at home = more trash! It is one of the best ways you can personally reduce your carbon footprint. Plus with minimal effort, you will end up with the most beautiful black enriched soil imaginable.

The Browns

What you need to compost

You need “browns” and “greens” and water to compost properly. The browns are dead leaves and twigs and branches. The greens are your fruit scraps, grass clippings, vegetable waste, coffee grounds, and egg shells. Your compost pile should have an equal amount of browns to greens. You should also alternate layers of organic materials of different-sized particles. 

The brown materials provide carbon for your compost, the green materials provide nitrogen, and the water provides moisture to help break down the organic matter.

What NOT to compost

According to the Environmental Protection Agency (EPA), here is a list of items you should not compost:

  • Black walnut tree leaves or twigs
    – Releases substances that might be harmful to plants
  • Coal or charcoal ash
    – Might contain substances harmful to plants
  • Dairy products (e.g., butter, milk, sour cream, yogurt) and eggs*
    – Create odor problems and attract pests such as rodents and flies
  • Diseased or insect-ridden plants
    – Diseases or insects might survive and be transferred back to other plants
  • Fats, grease, lard, or oils*
    – Create odor problems and attract pests such as rodents and flies
  • Meat or fish bones and scraps*
    – Create odor problems and attract pests such as rodents and flies
  • Pet wastes (e.g., dog or cat feces, soiled cat litter)*
    – Might contain parasites, bacteria, germs, pathogens, and viruses harmful to humans
  • Yard trimmings treated with chemical pesticides
    – Might kill beneficial composting organisms

How We Compost

There are many different ways to compost at home, but I want to share with you how we do it. First, we gather the greens in a designated trash can located in the kitchen island. Here is where I dump our vegetable peels and fruit scraps, egg shells, and dead cut flowers. Since we recycle our Nespresso pods I do not have any coffee grounds to add. We fill this bin every few days and it gets taken to the compost area. When the kitchen shredder can is full, we add the paper scraps to the composter too.

In addition, once or twice a year, we shovel the top layer of the soil in the hen house and add it to the composter, to capture the goodness of chicken manure.

Composting Methods

We have two different composting methods. First we have two ComposTumblers . Granted these are a financial investment, but we’ve had them for years and they are still functioning just fine. These very large barrels make composting easy. You load the barrels, turn it a few times per day and in 14 days you have compost (weather and other factors may affect speed in decomposition). There are smaller barrels available from various companies like Walmart , Amazon and Wayfair, too.

We also have a hand made stationary bin that has 3 divided areas. The browns and greens are added to the bin and then moved as they progress to make space for newer compostable items. These bins are covered to contain any odor or keep pests away. A good compost pile shouldn’t smell. If it does it is not getting enough oxygen and the contents are just rotting. The compost needs to be aerated and turned frequently (with a pitch fork or shovel) to help with the decomposition.

Plus we cover the compost pile after aerating it. Since the decomposition process creates heat, the tarp keeps the heat in and any critters out. Naturally, during the summer the decomposition process is accelerated.

The benefits

We produce enough compost to fertilize the garden, supplement the soil at the base of the trees in the orchard and the planting beds. This soil is moist and smells so good and earthy.

What better way to help our planet and reduce our waste? It is a remarkable feeling to know we all can make soil from our trash. Think about that for a moment. I find it astounding!

Part of our gardening success is definitely attributed to having such incredible, nutrient-rich soil. Here is how my garden looks today.

Massive hollyhocks

Last April, I did a blog post on hollyhocks and offered free seeds. Click here for the post, but if anyone wants hollyhock seeds, please email me at marycrz@cox.net.

I strongly encourage you to consider composting. There are so many resources on the internet to help you establish a process that is suitable for your needs. You will be so delighted with the results.

If you are already composting, please let me know how you do it. Happy April Fool’s Day! Are you playing any pranks? This reminds me to put some blue food coloring in the milk carton! Have a lovely day.


Using Preserved Lemons in a Recipe

It’s been a little over a month since we made preserved lemons (hopefully together!) and it’s time to try a new recipe. If you missed the blog post about this, please click here. As you recall, my first attempt at making preserved lemons was a failure. But inspired by a friend who uses them all the time, I decided to give it another go.

Dutifully, I have shaken the jar daily and I am excited to see what has transpired since I last squashed these lemons into the jar. The recipe I am sharing today is from my friend, Kim, who is an excellent cook. She read my blog post about Preserved Lemons and shared one of her favorite recipes. She is one of those friends who is so talented in just about EVERYTHING she does, so I knew this recipe, Farfalle Pasta with Lemon Chicken and Herb Salad from Joanne Weir would be a winner.

The ingredients are so Mediterranean~~olive oil, fresh herbs, pasta and preserved lemons. The colors alone made me happy! The chicken stock that I favor is the one from Costco. In this recipe you will boil 5 cups down to 1 1/4 cups so keep an eye on the pan. The reduced broth is mixed with garlic, lemon juice, olive oil and spices.

Most of the herbs came straight from my garden ~~Italian parsley, cilantro and mint. Basil doesn’t do well here in the winter so that was purchased at Safeway, as was the baby arugula.

You have the option to either grill the chicken or use the cooktop. I used the grill. Cook the chicken to a golden brown. Don’t be distracted like I was and char it a bit more than necessary. (But you can cut those parts off!)

Thinly slice the chicken and reserve.

I was excited to dig into the Preserved Lemons to see what magic took place over the last 4 weeks.

The noticeable difference was the rinds are softer (and salty!). The recipe calls for 1 preserved lemon. Pull away the pulp and discard.

Thoroughly wash the preserved lemon peel. This removes most of the salt and brine.

Cut up the peel in a 1/4″ dice. I cut mine a bit too small and would make them bigger next time because they are so flavorful.

Boil the pasta. I just love farfalle~~such fun, cute bowties! Cook until al dente (which is less time than the package suggests).

Toss all the ingredients together and season with salt and pepper. Not only is this a yummy, attractive dish, but it has plenty of greens and protein too.

The flavor of the preserved lemons was tart and salty~~a tasty zing that is a bit unexpected and works beautifully with all the other flavors.

Some changes I might make to the recipe: The Italian parsley leaves from the garden were big and I would have torn them up a bit more. The recipe calls for cilantro sprigs, but I just used the leaves. I might chop the chicken up into smaller pieces too, but the slices worked well. If you wanted more crunch, perhaps pine nuts would be a fun addition!

Do you have a preserved lemon recipe you would like to share? I may post another one that I saw in the New York Times that involves fish. We have to use up our lemons! But now after tasting them, I would add them to my salads or eggs~~the possibilities are endless! This is a great batch and I am so glad I made them! (Thank you, Ret!)

Did this week fly by for everyone??!!What are you doing with the extra Leap Year day? Have a terrific Saturday!


Farfalle Pasta with Lemon Chicken and Herb Salad

  • 1/3 cup Extra Virgin Olive Oil (plus 1 Tablespoon)
  • 3 Tbsp lemon juice
  • 3 cloves garlic (minced)
  • 3/4 tsp ground cumin
  • Salt and freshly ground pepper
  • 3 boned chicken breast, (about 12 oz., trimmed)
  • 5 cups chicken stock
  • 12 oz dry farfalle pasta
  • 1/2 cup fresh Italian Parsley leaves, (washed and dried)
  • 3/4 cup fresh cilantro sprigs, (washed and dried)
  • 1/2 cup mint leaves, (washed and dried)
  • 1 1/2 cups fresh arugula, (washed and dried)
  • 1 preserved lemon (1/4" diced (optional))
  1. If you are cooking indoors, heat a cast-iron ridged grill over medium heat for 10 minutes. Otherwise, start a charcoal or gas grill. In a large bowl, whisk together 1/3 cup of the olive oil, lemon juice, garlic, cumin, salt and pepper. Reserve.

  2. In the meantime, using the remaining 1 tablespoon olive oil, and oil the chicken breasts. Cook the chicken until golden on one side, 3 to 4 minutes. Turn the chicken over, season with salt and pepper and continue to cook until done, 4 to 5 minutes (164 degrees). Slice the chicken across the grain into thin slices. Reserve.

  3. Place the chicken stock in a saucepan and over medium high heat, reduce by three-quarters. ( The reduce stock = 1.25 cups). Add the oil/lemon juice mixture and reserve.

  4. Bring a large pot of salted water to a boil. Add the farfalle and cook until al dente, 10 to 12 minutes. Drain the pasta and toss the pasta immediately with the oil/lemon mixture, chicken pieces, parsely, cilantro, basil, mint, arugula, preserved lemons, salt and pepper. Toss well, place on platter and serve immediately.

Serves 6 to 8.

To Drink: Sauvignon Blanc

Preserved Lemon~ remove pulp from the lemon and discard; thoroughly wash lemon rind under running water before dicing


Preserved Lemons

The very first time I preserved lemons was back in 2010. It was a failure. It is highly likely I did it incorrectly and based on that experience I never made them again, until now.

A friend recently told me she LOVED preserved lemons and used them all the time. Really? As a result I was inspired to make them again, plus the orchard is bursting with citrus. My friend shared her favorite recipe which was published in the New York Times, March 7, 1999. You can see it here.

According to Epicurious.com, preserved lemons are one of the indispensable ingredients of Moroccan cooking, used in fragrant lamb and vegetable tagines, chicken recipes and salads. Their unique pickled taste and special silken texture cannot be duplicated with fresh lemon or lime juice, despite what some food writers have said.

Since it takes a few weeks to “cure” the lemons, I thought you might want to make them along with me. It’s very easy. In a few weeks, we could try a recipe together using these lemons?

Ingredients

Start with 6 medium-size lemons, 1/2 cup kosher salt, 1 cup lemon juice, 1 Tablespoon cardamon pods and 3 bay leaves.

Preparation

Cut the lemons in quarters, leaving them attached at one end.

Rub the flesh with a little bit of the salt. This is unpleasant if you have any paper cuts.

Place 1 tablespoon of salt in the bottom of a 1-quart glass jar with a tight fitting lid. I used an old Bubbie’s Bread and Butter pickle jar.

In the Jar

Place the lemons in the jar alternating with the remaining salt, cardamom pods and bay leaves, pressing the lemons to fit them snugly in the jar. Note: you really have to push them down.

Pour in enough lemon juice to cover the lemons.

Put on the lid and refrigerate, shaking the jar daily for 2 to 3 weeks before using. Notice how I slipped a Meyer Lemon (orange rind) in there? I figured it wouldn’t hurt as it is considered a lemon.

Two to Three Weeks-Shake

Preserved lemons, covered with liquid and tightly sealed, will keep for several months in the refrigerator.

Some of the recipes from this New York Times article are: Fettuccini with Preserved Lemon and Roasted Garlic; Lamb Stew with Squash and Preserved Lemon; and Swordfish Baked with Preserved Lemons and Olives. Sounds good, right?

The first jar of these I made I DID NOT refrigerate them. I went back to that recipe and it specifically says to never refrigerate. So your guess is as good as mine. Hopefully this recipe will be better.

Has anyone made preserved lemons? If so, please share how you did it and the dishes you use them in.


Meyer Lemon Marmalade

I stumbled across this 2008 recipe from Simply Recipes and just happened to have several Meyer lemons that needed to be used. I am one of those people who love marmalade~~on freshly made bread with a cup of tea or coffee. There is something so romantic and very British about it.

Meyer lemons are a hybrid of a regular lemon and an orange. The skin is thinner and it is sweeter than a regular lemon. With this recipe, please note that you cannot substitute regular lemons for Meyer lemons.

If you live locally, Whitfill Nursery on Glendale Avenue is selling boxes of gorgeous organic Meyer lemons. With only 3 ingredients, you can have your very own fresh marmalade. What is also important to know is that the ratio for this recipe is 1:1:1, which makes this a simple recipe to use with any quantity lemons.

The recipe calls for 2 1/2 lbs. of Meyer lemons (about 9 lemons), 6 cups of water and 6 cups of granulated sugar.

After scrubbing the lemons clean, and discarding any damaged ones, I prepared the lemons by cutting 1/4″ off from both ends.

Working one lemon at a time, cut the lemon in half lengthwise and then cut the lemon half into several segments, lengthwise.

As you cut the lemons into segments, if you can, pull off any exposed membranes.

When you get to the final segment, cut away the pithy core. Remove all seeds from the segments. Reserve the seeds and any removed membrane or pith. You will need these later.

Cut each lemon segment crosswise into even pieces to make little triangles of the lemon peel and pulp until you have 6 cups of chopped lemons.

Put all of the seeds, membranes and pith you removed from the lemons into a bag fashioned out of two layers of cheesecloth or a muslin bag. I used my nut bag (from making almond milk). This is now referred to as your pectin bag. Typically one would add store-bought pectin. Since I had never done this before I was curious to try it~who knew this would become your pectin?

Place the lemon segments and 6 cups of water into a large, wide pot. Make sure it is NOT aluminum which will leach. Place the pectin bag in the pot with the fruit pulp and secure it to the pot handle. Make sure the bag is below the surface.

Bring mixture to a medium boil on medium high heat. Let boil, uncovered for about 25-35 minutes, until peels are soft and cooked through. Remove from heat.

Remove the pectin bag. Place the pectin bag in a bowl and let cool until it is comfortable to touch. Once the pectin bag has cooled to the point you can handle it, squeeze it like play-doh to extract any pectin. You should be able to get a tablespoon or two more from the bag. It has the consistency of sour cream. Return this pectin to the pan with the lemon mixture. Notice how I used a latex glove to protect my hand from any residual heat.

Measure out your sugar (6 cups) and add to the pan with the lemon mixture.

Heat the jelly mixture on medium high and bring it to a rapid boil. Secure a candy thermometer to the side of the pan. Make sure the thermometer doesn’t touch the bottom of the pan. The marmalade may take anywhere from 20 to 35 minutes or so to be ready to pour out. Please note that mine took a lot longer than 35 minutes. I think my lemons were extra juicy.

Note the golden color of the jelly

Testing the marmalade to see if it is ready can be done either on a plate or a spoon. I placed spoons in the freezer and when the mixture reached a temperature of 220-222 degrees F, I placed the marmalade on a frozen spoon and cooled it on a plate in the refrigerator for a few minutes.

When the jelly holds its shape (and doesn’t spread out), it is ready. When you push the jelly with your finger, it should wrinkle. If it is not ready, keep testing with a spoon. It took about 4 or 5 tests, before my marmalade was ready.

While the marmalade is in its second cooking stage, rinse out your canning jars, dry them and place them, without lids, in a 200 degree F oven. They should be in the oven at least 10 minutes before using them.

As the time approaches for the marmalade to be done, boil some water in a tea pot. Put the jar lids in a glass or ceramic bowl and pour the boiling water over them to sterilize.

Once the jelly has reached 220 degrees F or its “wrinkly” stage, remove the jelly pot from the heat. Carefully ladle the jelly into the jars, one at a time, leaving 1/4 “ head space at the top of the jars for a vacuum seal. Wipe the rims clean with a wet paper towel. Place the lid on the jar, securing with a jar ring. Work quickly.

The small leftover amount of marmalade was placed in a small bowl for immediate consumption

Allow the jars to sit overnight. You will hear them make a popping sound as the vacuum seal is created. The jelly will firm up as it cools.

I love the fresh, tart/sweet flavor of this marmalade. Now I need to make some fresh, warm bread!

For the complete recipe, please click this link https://www.simplyrecipes.com/recipes/meyer_lemon_marmalade/. Happy Saturday!


My Afternoon Walkabout

When the children were small, we would walk the entire property every afternoon. My son and I would have “who can pick the largest kumquat” contests in the orchard. I miss those days 🙁

My daily walkabout is not only a chance to get outside, but a way to free myself from technology, projects and other stress related items. I thought you might like to join me in seeing different parts of the property.

The weather has been so beautiful~blue skies, warmth from the sun but fall is definitely in the air. Our winter grass is in and it is green, green, green! The light this time of year is soft and golden.

View from the guest cottage to the orchard

Fall vegetables are taking off in the garden~~salad greens, bok choy, kale, Swiss chard, broccoli, cauliflower, snap peas, squashes, potatoes, peppers, tomatoes and herbs.

Having the garden located next to the hen house, allows ample feedings of garden scraps to the chickens.

The orchard is abundant with citrus~~we will still need to wait a few months but I can’t wait to pick fresh oranges, grapefruit, lemons, limes and kumquats.

We have plenty of pomegranates but they aren’t edible. Not sure why.

Flowers, flowers everywhere! This is the beginning of our colorful time which will last until next summer.

An original heirloom rosebush

How can these ornamental cabbages be so beautiful?

The guest cottage is hidden in the back northwest corner of the property and I love how it just appears out of nowhere. Feels a bit magical to me.

As much as I love the purple orchid trees, my favorite part is when the flowers drop and the ground becomes a sea of pink/purple.

The autumn sun provides some interesting shadowing on the well tower.

By the end of my walk, I feel rejuvenated. There’s something to be said for connecting with nature, feeling the ground beneath your feet and noticing all that changes with the season. What do you do daily to de-stress? Have a lovely Tuesday.