1

The Restoration Chronicles~Chapter 3

So much has happened in the last month since I wrote Chapter 2 of the Restoration Chronicles. To see previous posts, click here for Chapter 1 and here for Chapter 2. On this Saturday morning, I hope you will enjoy the latest installment of the renovation journey of Bella Terra.

As you may recall, the addition of a new kitchen and back terrace, started the domino effect in the rest of the house. On Chapter 2 we left off with the new fireplace chimney being constructed with two fireplaces. Since we were adding the large outdoor terrace on the first floor, we expanded the much needed new master bath and bedroom on the 2nd floor.

The pool equipment was moved to a more discreet location. Really, who thought it was a good idea to put it poolside?

As you may recall from the last chapter, nearly all the windows in the house had to be replaced with brand new, custom-made Marvin windows. However, the windows in the family room were beautiful, hand-cranked ones with the original wavy glass. I made the nostalgic decision to keep them. As you can see from the photo below, some of the windows were cut to accommodate window air conditioning units. These had to be re-made.

Hindsight is always 20/20. In keeping the original single paned family room windows, the room is hotter in the summer and quite cold in the winter. A few years ago we installed exterior Sunbrella rolling shades which are controlled with a remote. What a significant difference especially in the summer when we can keep the direct sun off the windows.

Here you can see the progress in the first and story additions. The plaster and stucco work is so messy.

This is the south view. Originally the upstairs terrace was very large. We expanded the footprint of the second story to leave a partial terrace which resulted in a better flowing master suite. As a result, we had to build a new roof.

The upstairs terrace is still a good size. This is the view of both the master bedroom and office French doors. If you can believe it, originally there was no railing at all.

The expanded second story addition also includes the master bath and closet.

I probably should have taken my clothes line down for the picture! Notice that the pool fence is no longer there. We had built a very substantial wrought iron fence around the pool.

One day I found the children shimmying up the pillars and sitting on the top. They could easily scale the 6 foot barrier. They were monkeys, not children. Instead, we taught them, at a very early age, how to swim. Many years later, we took down the fence as our whole perimeter of our property is secured, which meets city code on pool safety.

In this photo you can see the laying of the Ludowici roof tiles and the preparation on the exterior walls for the stucco finish. In the background is the new 3 car garage and workshop. We also had to remove one large palm tree due to its proximity to the house.

The round window with the eyebrow is in the master shower. The rain chain slows down the water from the roof during torrential rains.

Here is a different angle of the new addition. We tried to make the new parts look like they have always been here~~using the same architectural details as the original house.

I really do use that clothesline often!

Life at this time was hectic with 2 children and being very pregnant. Naturally, we wanted to make everything as normal as possible for them. But they didn’t know that living in the middle of this massive construction site was a bit unusual. Home is all about loving where you are, not matter what.

I almost wish I had a huge project like this as a distraction right now. But we’re trying to stay positive while keeping everyone in our thoughts and prayers.


St. Patrick’s Day Recipes

Whether you are Irish or not, I believe we all need the luck of the Irish right now! St. Patrick’s Day is special in our home as it is the birthday of both my daughter and my mother. To learn more about the history of this holiday, please click here . Today, I have two recipes for you: Guinness Pie and Baileys Irish cream cheesecake.

Last year, I made both of these recipes and since they were so delicious, I made them again! The original recipe for Guinness Pie was published in the New York Times but if you try and get it online, they make you pay for a weekly subscription. Not sure how I scored a paper copy of it, but the printable recipe is below. I will provide a link to the cheesecake recipe.

If you need a pie crust shortcut, I strongly recommend Trader Joe’s pie crust. It’s in the freezer section and I always have a couple on hand. It is the best 2nd choice to homemade.

Before I start any recipe, I gather all my ingredients.

Since this recipe requires a bit of chopping, having sharp knives is important. The sharper the knife the safer the chop.

With all the vegetables chopped and ready to go, cooking commences.

Carrots, celery, onion, garlic, mushrooms are cooked in a oven-safe pot. I used my one and only La Creuset pot~~which I love (and wish I had a few more!). While this cooks, your kitchen will smell so good!

The recipe calls for 3 pounds of brisket. Though it does not instruct to trim the fat from the brisket, I did~~about 7 oz. of it. The fresh rosemary was clipped from the garden. If you don’t have an herb garden, I really encourage you to have fresh herbs in a pot. Simple pleasures.

The recipe also calls for 4 cups of stout beer. I had two bottles of Guinness but when I measured it, the volume was only 3 cups. However, the beer did cover the beef in the pot, so I didn’t add more.

What makes this stew so delicious, is that, after sautéing all the vegetables and beef, it is slow-baked in the oven for 2 1/2 hours. After the appropriate baking time, freshly shredded cheddar cheese is added (or trotter gear, if you have it).

The dough can be placed in either a 8-inch square Pyrex dish or a pie pan. I used a 9″ deep dish glass pie dish. After I added the beef stew, I put the remaining cheddar cheese on top and then added a basketweave top crust using different widths of dough. With the leftover dough, I used shamrock cookie cutters for a decorative touch.

Using green food coloring, I painted the shamrocks with a pastry brush. This was the first time I had done this and was rather pleased with the results.

This is such a flavorful, hearty pie, which is perfect for this time of year. Though the recipe yields 6 servings, I could easily get 8 out of the pie.

The next recipe is very decadent but such a festive dessert for St. Patrick’s Day. Just a note: The recipe recommends a 5 hour refrigeration time so plan accordingly. Here is the direct link to the cheesecake recipe~~click here.

For the crust, put whole Oreo cookies in the Cuisinart to get 2 cups of crumbs~~approximately 18 to 20 cookies. Mix in melted butter.

The recipe tells you to put the crumbs in a spring form pan, yet isn’t clear on if they only go on the bottom or up the sides. Keep the crust on the bottom (per the pictures on the link). Bake for 8-10 minutes.

The directions were a little vague about wrapping the springform pan. I wrapped the bottom and the sides with double foil to make sure no water would enter during the hot bath.

Once the cheesecake is finished baking and has cooled, it needs to be refrigerated for at least 5 hours or overnight. I let mine cool overnight and made the chocolate ganache the next day.

This picture below is of the cheesecake from last year. My ganache is much shinier this year but since I haven’t cut into it yet, I wanted to show you what a slice looked like! I hope you try both recipes~~guarantee you will love them!

As always, I hope you are faring well with all the uncertainty. But we all know, that this too will pass. Please take care of your health and well-being as the roses will continue to bloom and the sun will rise. Being stressed certainly doesn’t help. It actually reduces your immune system. Kindness, laughter and hope haven’t been cancelled and I’m determined to stay focused and positive. Sending happy thoughts your way.


Guinness Pie

https://cooking.nytimes.com/recipes/1012397-guinness-pie

  • 4 Tbsp butter
  • 2 large red onions (chopped)
  • 4 cloves garlic (minced)
  • 2 carrots (peeled and chopped)
  • 2 ribs celery (chopped)
  • 10 mushrooms (trimmed and sliced)
  • 3 lbs brisket (preferably second-cut) or stew meat (chopped into bite-size pieces)
  • Kosher salt
  • Freshly ground black pepper
  • 2 Tbsp flour
  • 1 sprig rosemary
  • 4 cups (2 cans) Guinness or other stout
  • 1 cup trotter gear or 8 ounces Cheddar (freshly grated)

For the Pastry

  • 1 1/2 cups all-purpose flour
  • 2 1/4 tsp baking powder
  • 1/2 cup (1 stick) very cold unsalted butter (diced)
  • 3/4 tsp salt
  • 1 egg yolk (lightly beaten)
  1. Preheat the oven to 375 degrees

  2. In a large, ovenproof pan fitted with a lid, heat 2 tablespoons of the butter over medium-low heat. Add the onions and garlic and cook, stirring frequently, until soft, about 10 minutes.

  3. Add the carrots, celery, mushrooms and remaining 2 tablespoons butter and cook over medium heat, stirring frequently, until the mushrooms are dark in color and the moisture released by them has evaporated, about 15 minutes.

  4. Season the beef pieces all over with salt and pepper. Add the beef, flour and rosemary to the pan and cook over high heat, stirring often, for about 5 minutes.

  5. Add enough Guinness to just cover the beef. Cover the pan and put it in the oven for 1 1/2 hours. Remove from the oven and stir. If using trotter gear (http://cooking.nytimes.com/recipes/1012399-fergus-hendersons-trotter-gear), stir it in now. If using Cheddar, fold in about half. Return to the oven and cook for 1 hour more. If it remains thin, set the pan over medium-low heat, remove the lid and reduce the liquid.

  6. While the stew is cooking, prepare the pastry: sift together the flour, baking powder and salt into a bowl. Using a pastry cutter or your hands, quickly work the butter into the dough until it is the texture of coarse meal. Add ice water, a splash at a time, until a firm dough forms. Wrap the dough in plastic and refrigerate for at least 2 hours.

  7. Place the dough between two sheets of plastic wrap and, using a rolling pin, roll to the thickness of a computer mouse pad. Pour the stew into an 8-inch-square, 2-inch-high Pyrex dish or a deep 9-inch pie pan. If using Cheddar, scatter the remaining cheese across the top. Place the dough on the top of the pie and pinch it closed around the edges using the tines of a fork, then slash the center lightly with a knife. Brush with the egg yolk, place on a baking sheet and bake for 45 minutes, or until the pastry is puffy and golden

I use a Trader Joe’s frozen pie crust and did both a bottom and a top crust.  This is optional as the recipe only uses a top crust.


Importance of Smiling

“Sometimes your joy is the source of your smile, but sometimes your smile can be the source of your joy.” —Thich Nhat Hanh

Twice a week I take an hour long Pilates class at Maximum Pilates. Not only is Pilates physically good for me, but there is a sense of community with my classmates. During Monday’s class, I realized how often we all laugh, mostly at ourselves And between crunches we started talking about the benefits of smiling. Which of course prompted me to do some research and write this blog post.

My children-always laughing

I believe that you wear your life on your face after 40. Those with happy dispositions have happy wrinkles. And we all know people who are perpetually grumpy. It shows on their face. Granted, life can be difficult, and some people have more angst than others. But often we have choices on how we respond to those life’s challenges.

Image result for images of grumpy face

Research shows that there are physical and psychological benefits to smiling. You know the song…Smile and the whole world smiles with you. There is truth to that.

None of us want the RBF (resting bitch face), do we? I had never heard of RBF until my last Pilates class. Cracks me up that RBF is a thing.

How Smiling Affects Your Brain

Image result for images of babies smiling

According to behavior psychologist Sarah Stevenson, “Each time you smile you throw a little feel-good party in your brain.” Dopamine, endorphins, and serotonin increase when you smile. Those endorphins serve as natural pain relievers and act as the body’s own opiates. Hence, reducing blood pressure, increasing endurance and reducing pain. Sounds good to me!

According to Ron Gutman, the author of Smile: The Astonishing Powers of a Simple Act, “British researchers found that one smile can generate the same level of brain stimulation as up to 2,000 bars of chocolate.” Think of all the calories you can save by just smiling!

Even a forced smile can boost your mood. Usually we think that a positive experience is what makes us smile. While this is true, it’s also true that merely deciding to smile can provide a positive experience. 

Smiling Can Make You Look Younger

Image result for images of people smiling

In a small study, college students perceived older people who had happy smiles on their faces as looking younger than their age. The people with frowns on their faces were categorized as looking older.

Image result for images of faces

A smile provides you with a mini-facelift. Turning up the corners of your mouth raises your entire face, including cheeks, jowls, and neck. Try it now! Instead of spending $15,000 or more on a facelift, just smile.

Smiling can make you look thinner. In a recent study by a young psychology student at University of Missouri, sad faces randomized and flashed on a computer screen were judged to be heftier. A mouth turned down in a frown might give the impression that a person is weighed down by unhappiness. 

In her book, Forever Chic, the author, Tish Jett compares the differences in aging between American and French women. A famous French model recommends that the world’s most important ageless beauty secret is a smile.

Smiling could add years to your life, according to researchers. The wider you grin and the deeper your laughter lines, the more likely you are to have a long existence.

The impact of smiling on others

Image result for images of children smiling

Smiles can predict fulfillment in marriage . In a study cited by Gutman, the Smile author, the smiles of students were measured, and these ultimately predicted how long-lasting and satisfying the person’s marriage would be. Right! Who wants to live with a grouch?

Smiling makes you seem courteous, likable, and competentIf you look sad or anxious, perhaps others wonder if you know what you are doing. So perhaps a simple smile might be a shortcut to business success.When you smile, people treat you differently. You’re viewed as attractive, reliable, relaxed, and sincere.

Pure joy in the rain!

Smiling is contagious. If you like to help others and lift the spirits of everyone you see, just smile. 
One of my favorite pictures of my Dad and sister. Dad was always laughing

So what can we do to smile more? Are you ready to up your smiling game for a week? Don’t you think we need less fear and more smiles in this world right now?

Remind yourself to smile throughout your day and even force a smile onto your face periodically. That set of muscles is closely connected to your happiness and joy emotions. By smiling, you are signaling the emotional centers of your brain to tell them that everything is good. So even if it’s not, it will be soon.

I am boarding a plane today so I will need lots of sanitizer and smiles. Not sure if I will be posting on the blog while traveling this next week. But I will check in with you to see if you are smiling!

Have a fabulous Saturday!


Open Floor Plan or Not?

Jodi Cooper Design

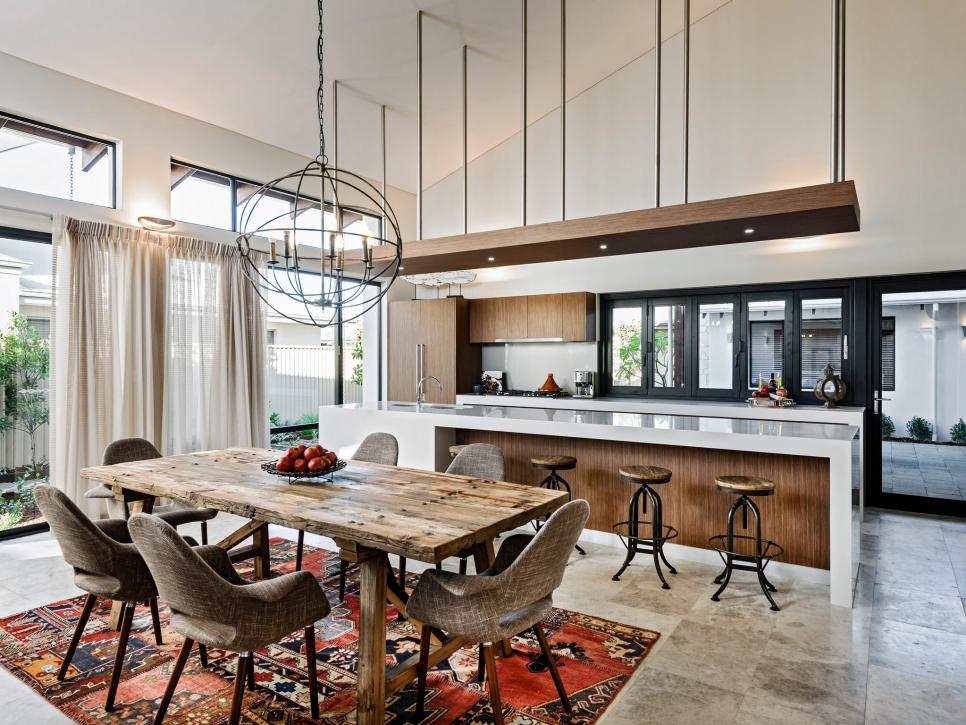
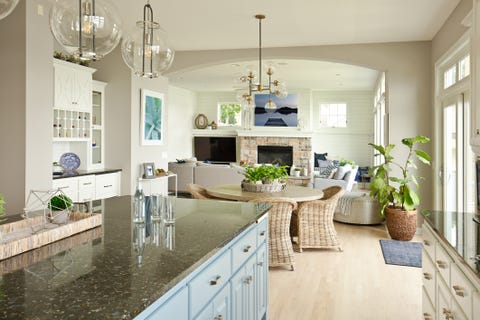
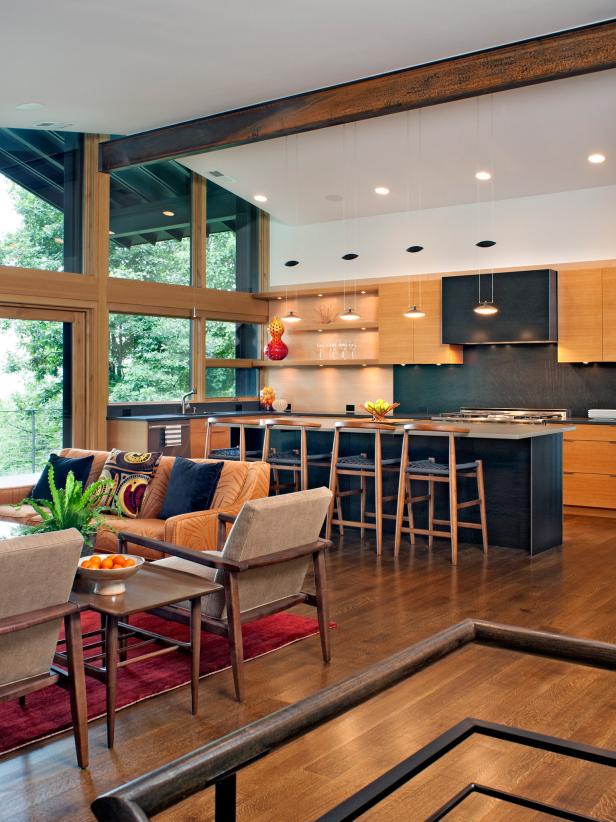
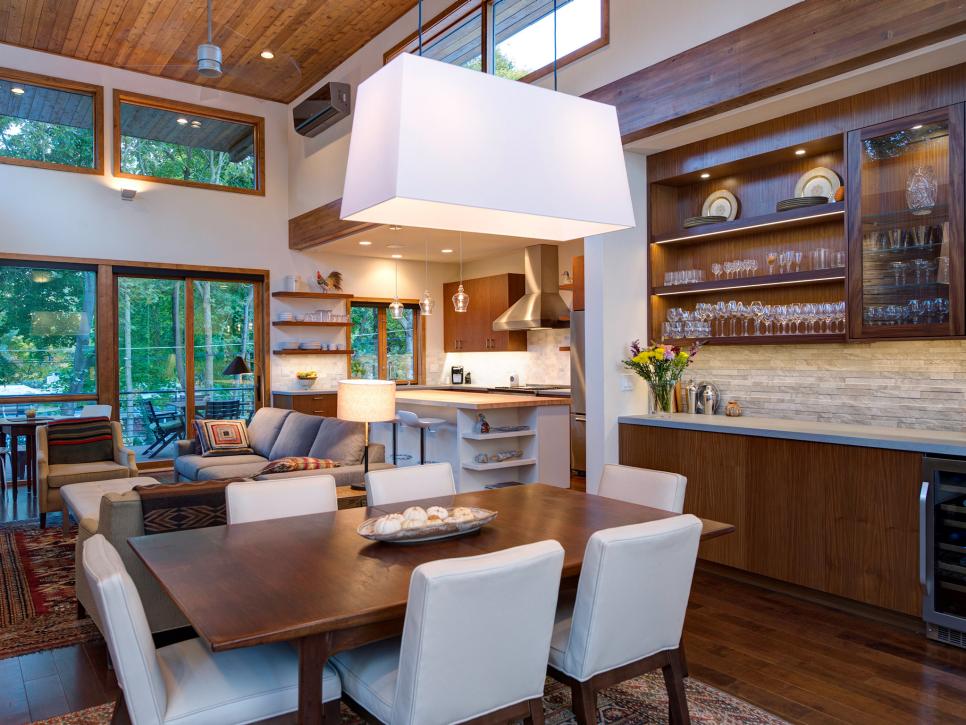
Do you like an open floor plan? According to Google, an Open plan is the generic term used in architectural and interior design for any floor plan which makes use of large, open spaces and minimizes the use of small, enclosed rooms. Are open floor plans going out of style?

Modern Kitchen Living Room Hone design with open concept
YinYang/Getty Images

I’ve never lived in a home with an open floor plan. The closest thing is our cabin in the mountains, where there is a large window-size opening between the kitchen and the main living room. It’s good for shouting through but not for much else. Sorry for the low quality photo~~it is the only one I have!

Since Bella Terra was built in 1910, it clearly has formal and private spaces. Our kitchen is definitely not an open one. The kitchen to me is my haven, my sanctuary. I prefer it to be separate from the living spaces. To see more kitchen details, click here for Part 1 and here for Part 2.

When I’m stressed, I tend to bake or cook, and want to do so by myself. There is a television in one of the cabinets, but I get to choose whether I want it on or not. The kitchen is open to the breakfast room, but it is not an active part of the house.

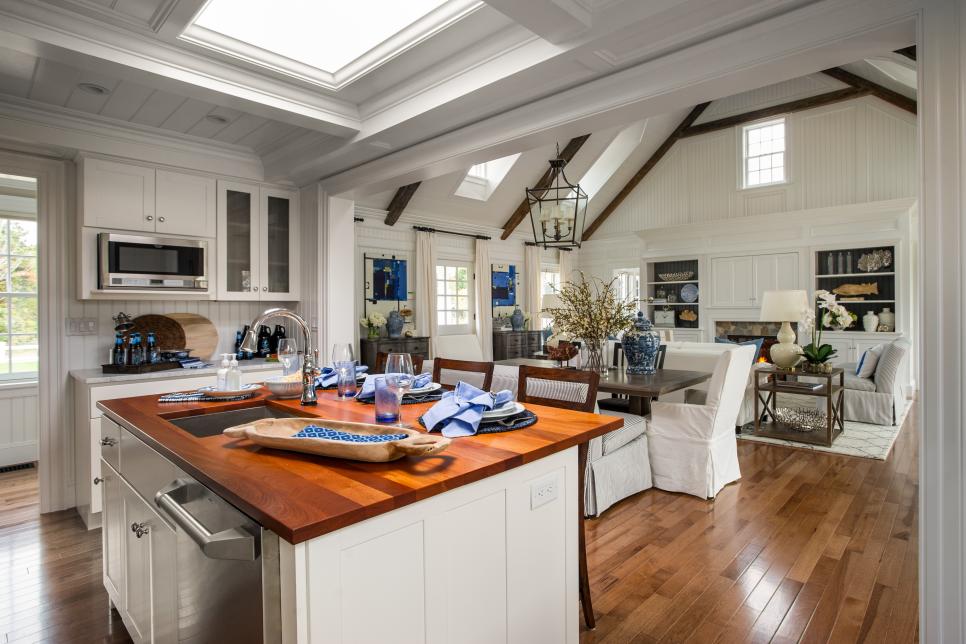
The kitchen island is rather large and that is where all our family and guests congregate anyway. I love my family but sometimes I just want to have my own space. Plus I am not a fan of the kitchen mess or smells infiltrating the living spaces. Rarely is my kitchen neat as a pin.

Even though I prefer a private kitchen, I know the open plan is popular. In one of my previous remodels for resale, I did open up the kitchen to the living room/dining room. To see more of the Glenn remodel, click here.

Removing the load bearing wall between the previous kitchen and living room

We recently visited friends who just moved. Their kitchen, dining room and living room are one big room. It was lovely but it got me thinking of whether I would enjoy the open concept or not.

When I was designing the addition to the Willetta remodel (see post here), the floor plan was original to 1922…..separate living room, dining room and kitchen. But the kitchen was oddly shaped and it made sense to expand this space.

Peninsula is the room divider

In addition to enlarging the kitchen, a family room was added on the first level and an updated master suite on the second story.

Clear pendant lamps define the end of the kitchen space
The New Addition: a small family room

A House Beautiful article by Hadley Keller, entitled Please Stop with the Open Floor Plans asks, “when did the walls become the enemy?” Somewhere in the early 1990s, builders began touting the attributes of “open plan”. Hadley suggests instead of open floor plans, to try and start using your rooms. Use the dining room more frequently, not just for Christmas dinner.

Carlton Architect + Design Build

There is a great deal of discussion of getting rid of the open floor plan, especially when it comes to kitchens. Some are suggesting that you add another “messy” kitchen that is hidden from the open floor plan kitchen. Oh my! The thought of keeping two kitchens clean??!!???

Kitchen is not part of the living room or dining room. Photo by Claire Paquin

According to HGTV here are some pros of open plan living . 1) Makes a small space feel larger; 2) Being part of the family (not isolated); 3) Entertaining is more social and convenient; 4) Gorgeous open site lines; 5) Eliminating underused space.

Matthew Collins, Uptic Studios

And the cons (by HGTV): 1) Makes a large space feel too big; 2) a messy kitchen is always on display; 3) No perfect way to contain the mess; 4) Load bearing walls; 5) Lack of privacy.

So what are your thoughts on this? Do you have an open plan kitchen/living and dining room? Or a separate and private kitchen? If so, please tell me what you love/dislike about it.

Happy Wednesday!


Butler’s Pantry Inspiration

We have a butler’s pantry. We do not have a butler. I would LOVE to have a butler like Mr. Carson from Downton Abbey, wouldn’t you? So, what is a butler’s pantry? According to Google, butler’s pantries are usually located in transitional spaces between kitchens and dining rooms, and used as staging areas for serving meals. They commonly contain countertops, and storage for candles, serving pieces, table linens, tableware, wine, and other dining room articles.

In Europe, the butler’s job was to keep the silver under lock and key. So he used to sleep in that room, and that’s why the room got the name butler’s pantry.

Our butler’s pantry, minus the butler, is located between the breakfast room and dining room. It contains most of our crystal, silver, some china (the rest is stored in the basement), candles, napkins, trivets, teapots, votives~~all the items I use for entertaining. To see a previous post on organizing the butler’s pantry, click here.

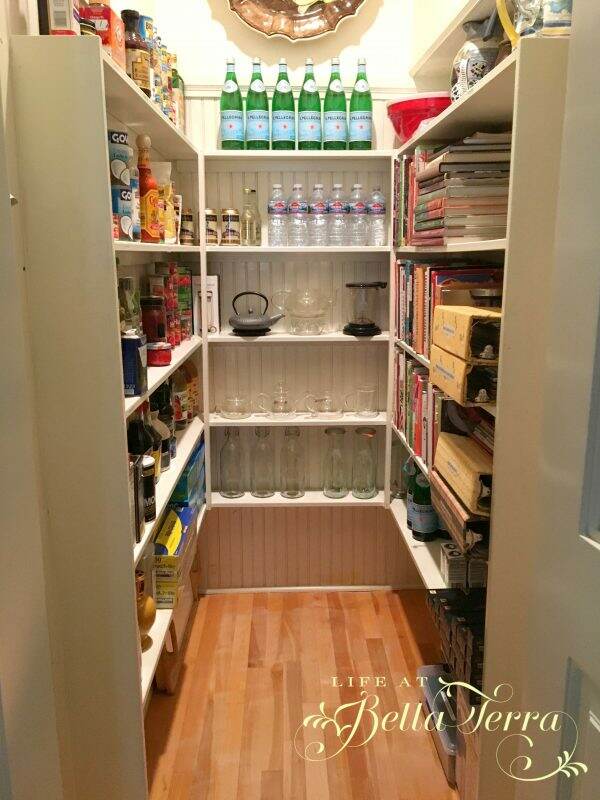
What is the difference between a butler’s pantry and a pantry? At our home, the butler’s pantry is a room you walk through to get to the dining room or kitchen. Our regular pantry is a walk-in closet. This is where I store our canned goods and non-perishable food items. I also keep my cookbook collection, beverages and back up non-food kitchen items (foil, Saran Wrap, Ziploc bags) in this space. To see the pantry organization project, click here.

In watching a recent episode of Restored on the DIY Network (which I highly recommend), Brett Waterman brings a 1913 California Mission Revival home back to life. Bella Terra is also Mission Revival architecture, so it was interesting to see the many similarities between the show’s home and ours. During this segment, Brett discusses the attributes of a butler’s pantry.

Since we live with ours every day, it is common to overlook some of its unique features. According to Brett, older butler pantries have wooden countertops. This was designed to prevent breaking the crystal glasses as you place them on the counter (vs. a harder surface like granite or stone).

Our pantry has a detail to the cabinets that isn’t present in contemporary cabinetry. The curvy edge bracket detail is not only decorative but serves as an actual support for the end cabinets.

The other detail that I just love is the curved transition in the wood from the countertop to the backsplash. This workmanship you rarely find today.

Since our home is over 100 years old, it is fun to find clues of a previous era. The cigarette burns on the wooden countertop near the sink prompt images of a former homeowner laying their cigarette down while washing a goblet or mixing a cocktail.

When I was restoring the Willetta house (click here to see that restoration project), I created a butler’s pantry, due to a challenging floor plan for the kitchen. The original kitchen spanned over 2 long and narrow rooms. This space was also visible as you walked into the front door. Therefore, it was important to create an elegant transition from foyer to kitchen. No one wants to see a messy kitchen when they enter a home.

Anytime I remodel a home, I create imaginary future owners and think of how they will utilize the house. Even though this butler’s pantry has the same custom cabinets as the kitchen, the cabinets are lacquered a different color.

The curtain softens the look below the new sink. The butcher block countertops are in keeping with a butler’s pantry feel. Hardware is a simple way to upgrade the look of the cabinets. I selected these elegant crystal knobs and pulls to finish the look. Hardware from House of Antique Hardware. Butcher block countertops from Floor and Decor.

In the Willetta house, I also took a useless storage space and converted it into a china, crystal, and silver closet, as it sat adjacent to the dining room. Who doesn’t need more space to store all those dinnerware items? To see more about this room and the stenciled floor, click here.

Cabinets from IKEA and butcher block counter from Floor and Decor

In this photo you can see the proximity of our butler’s pantry to the dining room. There are swing doors leading to the breakfast room and to the dining room. A small window to the left (unseen) provides light and ventilation to this transitional space.

Do you have a pantry? Do you have a space you would like to convert to a pantry?

I hope you enjoyed the tour of our butler’s pantry! Can you believe it is March already? Have a wonderful Tuesday.


Using Preserved Lemons in a Recipe

It’s been a little over a month since we made preserved lemons (hopefully together!) and it’s time to try a new recipe. If you missed the blog post about this, please click here. As you recall, my first attempt at making preserved lemons was a failure. But inspired by a friend who uses them all the time, I decided to give it another go.

Dutifully, I have shaken the jar daily and I am excited to see what has transpired since I last squashed these lemons into the jar. The recipe I am sharing today is from my friend, Kim, who is an excellent cook. She read my blog post about Preserved Lemons and shared one of her favorite recipes. She is one of those friends who is so talented in just about EVERYTHING she does, so I knew this recipe, Farfalle Pasta with Lemon Chicken and Herb Salad from Joanne Weir would be a winner.

The ingredients are so Mediterranean~~olive oil, fresh herbs, pasta and preserved lemons. The colors alone made me happy! The chicken stock that I favor is the one from Costco. In this recipe you will boil 5 cups down to 1 1/4 cups so keep an eye on the pan. The reduced broth is mixed with garlic, lemon juice, olive oil and spices.

Most of the herbs came straight from my garden ~~Italian parsley, cilantro and mint. Basil doesn’t do well here in the winter so that was purchased at Safeway, as was the baby arugula.

You have the option to either grill the chicken or use the cooktop. I used the grill. Cook the chicken to a golden brown. Don’t be distracted like I was and char it a bit more than necessary. (But you can cut those parts off!)

Thinly slice the chicken and reserve.

I was excited to dig into the Preserved Lemons to see what magic took place over the last 4 weeks.

The noticeable difference was the rinds are softer (and salty!). The recipe calls for 1 preserved lemon. Pull away the pulp and discard.

Thoroughly wash the preserved lemon peel. This removes most of the salt and brine.

Cut up the peel in a 1/4″ dice. I cut mine a bit too small and would make them bigger next time because they are so flavorful.

Boil the pasta. I just love farfalle~~such fun, cute bowties! Cook until al dente (which is less time than the package suggests).

Toss all the ingredients together and season with salt and pepper. Not only is this a yummy, attractive dish, but it has plenty of greens and protein too.

The flavor of the preserved lemons was tart and salty~~a tasty zing that is a bit unexpected and works beautifully with all the other flavors.

Some changes I might make to the recipe: The Italian parsley leaves from the garden were big and I would have torn them up a bit more. The recipe calls for cilantro sprigs, but I just used the leaves. I might chop the chicken up into smaller pieces too, but the slices worked well. If you wanted more crunch, perhaps pine nuts would be a fun addition!

Do you have a preserved lemon recipe you would like to share? I may post another one that I saw in the New York Times that involves fish. We have to use up our lemons! But now after tasting them, I would add them to my salads or eggs~~the possibilities are endless! This is a great batch and I am so glad I made them! (Thank you, Ret!)

Did this week fly by for everyone??!!What are you doing with the extra Leap Year day? Have a terrific Saturday!


Farfalle Pasta with Lemon Chicken and Herb Salad

  • 1/3 cup Extra Virgin Olive Oil (plus 1 Tablespoon)
  • 3 Tbsp lemon juice
  • 3 cloves garlic (minced)
  • 3/4 tsp ground cumin
  • Salt and freshly ground pepper
  • 3 boned chicken breast, (about 12 oz., trimmed)
  • 5 cups chicken stock
  • 12 oz dry farfalle pasta
  • 1/2 cup fresh Italian Parsley leaves, (washed and dried)
  • 3/4 cup fresh cilantro sprigs, (washed and dried)
  • 1/2 cup mint leaves, (washed and dried)
  • 1 1/2 cups fresh arugula, (washed and dried)
  • 1 preserved lemon (1/4" diced (optional))
  1. If you are cooking indoors, heat a cast-iron ridged grill over medium heat for 10 minutes. Otherwise, start a charcoal or gas grill. In a large bowl, whisk together 1/3 cup of the olive oil, lemon juice, garlic, cumin, salt and pepper. Reserve.

  2. In the meantime, using the remaining 1 tablespoon olive oil, and oil the chicken breasts. Cook the chicken until golden on one side, 3 to 4 minutes. Turn the chicken over, season with salt and pepper and continue to cook until done, 4 to 5 minutes (164 degrees). Slice the chicken across the grain into thin slices. Reserve.

  3. Place the chicken stock in a saucepan and over medium high heat, reduce by three-quarters. ( The reduce stock = 1.25 cups). Add the oil/lemon juice mixture and reserve.

  4. Bring a large pot of salted water to a boil. Add the farfalle and cook until al dente, 10 to 12 minutes. Drain the pasta and toss the pasta immediately with the oil/lemon mixture, chicken pieces, parsely, cilantro, basil, mint, arugula, preserved lemons, salt and pepper. Toss well, place on platter and serve immediately.

Serves 6 to 8.

To Drink: Sauvignon Blanc

Preserved Lemon~ remove pulp from the lemon and discard; thoroughly wash lemon rind under running water before dicing