1

Crackers and Edible Flowers

I have never made homemade crackers in my life. Over the last few days, I’ve been experimenting with discarded sourdough starter. When I feed my sourdough starter every week, I keep a small amount and toss the rest. Seems so wasteful, so I’ve been searching for recipes utilizing this discard.

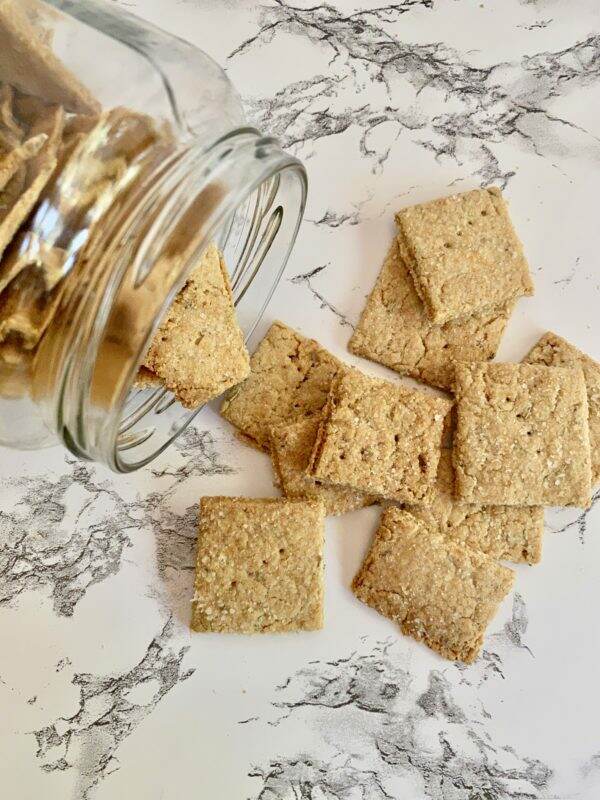
One way to use discarded sourdough starter is to make crackers. My first attempt at creating crackers occurred a few days ago. Here is the online recipe from King Arthur. I was able to get the dough only so thin with a rolling pin. They are tasty, though, with seasonings of garlic powder, rosemary and sea salt. Just a tad bit too thick. But a worthy recipe to try again.

The very next day, I saw a post on Instagram demonstrating cracker making using a pasta machine! How brilliant is that! And timely, as my sweet in-laws just sent me their hand-cranked pasta machine and all the attachments. Thank you, Bruce and Janiece!

Imperia Pasta Machine

This may be my new weekly addiction as the newly made batch of flatbread was E.X.C.E.L.L.E.N.T! The person responsible for the pasta machine/cracker making idea is Aimee from Twigg Studio. Her Instagram feed is @twiggstudios.

Aimee is a food and photography lover based in Devon, UK and I have made a few of her recipes. Visiting her website is a mini-vacation for me as I love her style and photos. And so does the rest of the world as she has 119,000 followers! In a previous post I shared one of her cakes and it was truly delicious. Click here for her vegan pineapple, lime and ginger cake.

wild garlic foraging
Aimee picking wild garlic

Here is another photo of her potato and leek pie using edible flowers in the crust. Not something I would have ever considered!

pressed flower pie
Twigg Studios garden pie ~~my next project?

Her flatbread recipe suggests using edible flowers and herbs and her crackers are truly a work of art. Feeling ambitious, my daughter Elisabeth and I thought we would try this flatbread recipe.

The ingredients are so simple~~sourdough starter, water, olive oil, flour, salt and fresh herbs/flowers.

Hope and Bubbles, my sourdough sisters

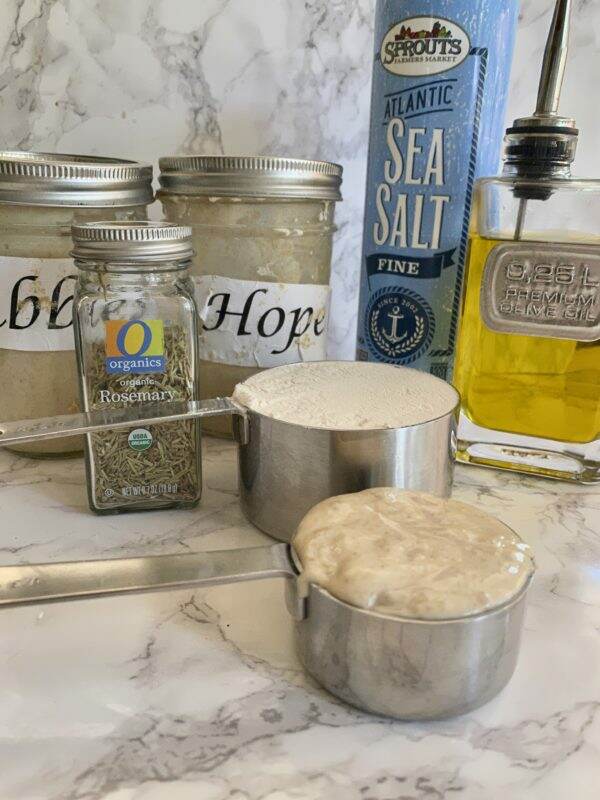
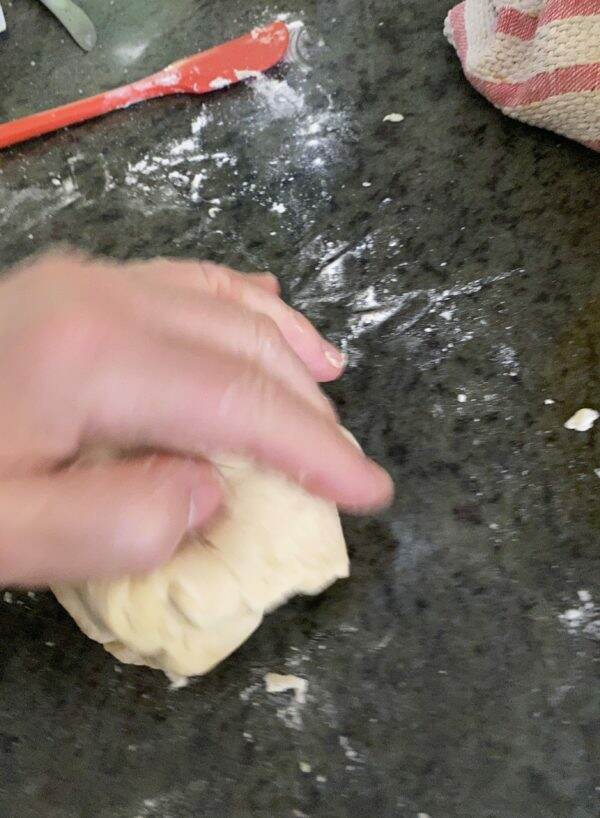
Combine the starter, water, and oil in a bowl and mix to combine. Add the flour and salt and bring together into a soft dough.

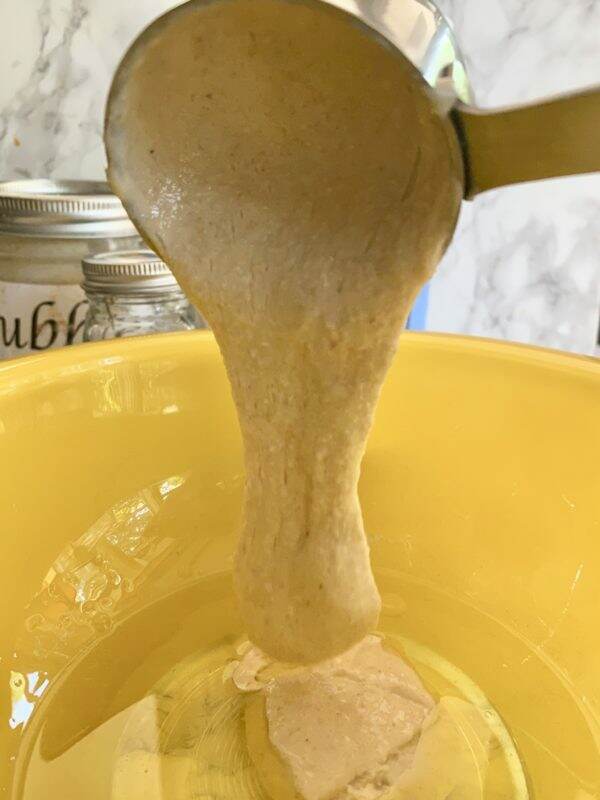
Knead the dough for a few minutes and then let it rest for 1 hour.

While the dough is resting, I search the yard for edible flowers. I was unaware how many flowers can be eaten~~from snapdragons to sunflowers. There is an extensive list of flowers on Aimee’s website. Click here for the list. Naturally, be careful not to include flowers that may be toxic or ones treated with pesticides.

My bounty consists of fresh basil, sage, nasturtium, pansy, primrose, chamomile and chive flowers and roses. After some research, I discovered an additional list of edible flowers online~~I had no idea hollyhocks are edible or I would have added them.

After the resting period, the dough is now ready for the pasta machine.

The dough is soft and pliable. Using more flour during handling prevents sticking. Starting with the widest setting, the dough is fed through the machine.

With each pass through the pasta machine, the setting is lowered. Roll the dough until very thin. Add the flowers and herbs to one half of the length and fold it over to cover it.

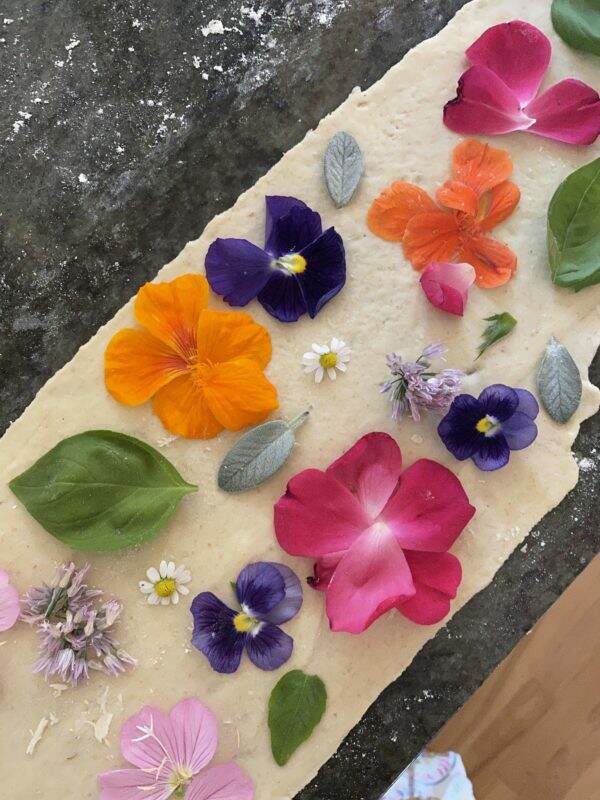
Turn the machine back up a few notches and roll the dough through again until it is as thin as possible.

Isn’t this dough beautiful??!!!

Take the second half of the dough and repeat. Cut the dough into 4 long crackers.

Place the dough on parchment paper on a cookie sheet and brush with olive oil.

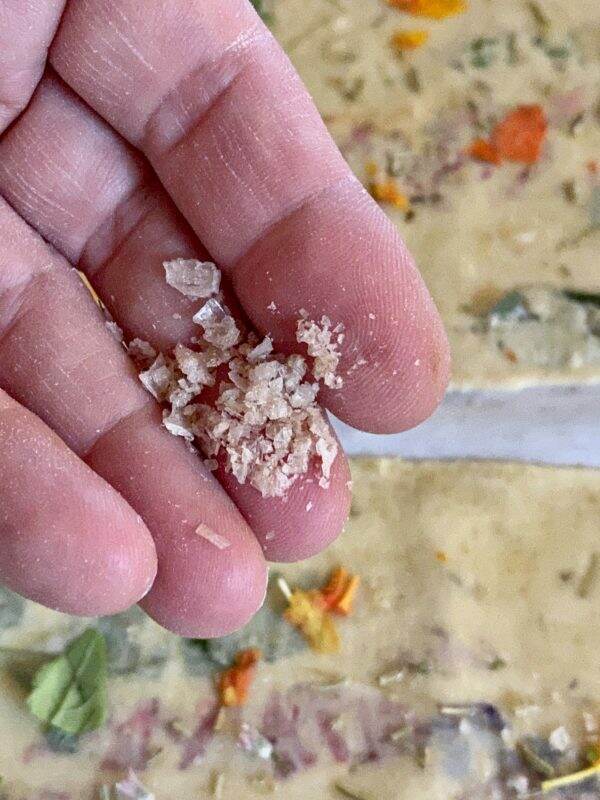
You can use any salt, but I sprinkled smoked Maldon flaked sea salt on the dough, with some more fresh herbs, dried rosemary and additional flowers.

Bake for 10-12 minutes until golden and crispy.

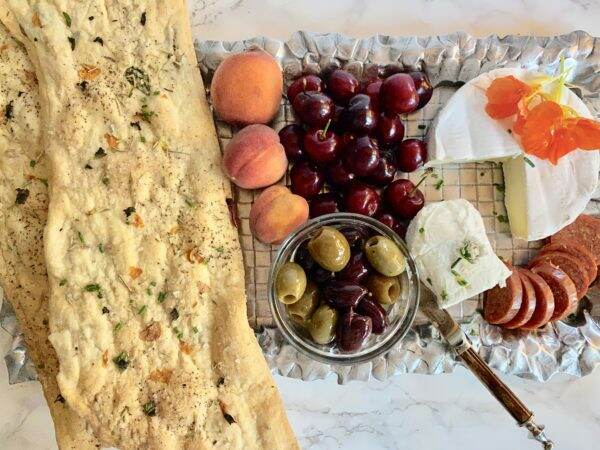
Naturally, trying something new is a bit challenging. But in retrospect, I would make these flatbreads every week. They are delicious and think of all the seasoning possibilities~~parmesan, garlic, gruyere.

The pasta machine is the perfect solution to getting the dough nice and thin vs. hand rolling (at least for me).

In addition to learning how to use the pasta machine, it was helpful having Elisabeth assist on this. The dough is long when it comes out of the machine so extra hands were needed. If you have a pasta attachment to your KitchenAid mixer, I am sure that would work well too. If not, just try to roll the dough as thin as possible with a rolling pin.

Here is the second piece of dough and you can see where the flowers have been stretched throughout. It will take some practice to get this as picture perfect as Twigg Studios, but the flavor was so good regardless.

It is fun to be challenged by a recipe and then have good results! Now that I have the hang of it, the process will not be so daunting.

Aimee’s flatbreads are so inspirational as well as beautiful.

floral sourdough discard crackers
Twigg Studios flatbread crackers

I tend to get into a baking rut, so I love trying a new recipe that forces me out of my comfort zone. If you have a challenging recipe, send it my way. I am always excited to try something new!

Hope you are having a terrific Tuesday. Can you believe Memorial Day is this coming weekend?

Happy baking!


Sourdough Starter Crackers

thin crispy crackers, a great way to use some sourdough discard. decorated with edible flowers and herbs

  • 1/3 cup sourdough starter (unfed from the fridge)
  • 4 tbsp water
  • 2 tbsp olive oil
  • 1 cup plain flour
  • 1 tsp salt
  • flaked salt, pepper, basil, rosemary, flowers

To make the dough

  1. Add the starter, water and oil in a bowl and mix together to combine.

  2. Add the flour and salt and mix in and bring together into a soft dough. If you need a drop more water, you can add a little more. (different brands of flour absorb differently and some starters have more water than others to it cannot be exactly precise, the dough needs to be firm, but pliable.)

  3. Knead dough for a few minutes until it is smooth and roll into a ball. Cover it and leave it to rest at room temperature for 1 hour.

  4. Take the dough and flatten it. You can cut it in half and roll two pieces or roll one large piece.

  5. Using the pasta machine on the widest setting, start rolling the dough. After the first roll, fold in half and roll through again. Then turn the setting down and roll through the dough. Keep rolling and lowering the setting each time. Roll the dough until it is very thin.

  6. Add the flowers and herbs to one half of the length of the dough and fold over the other half to cover it. Turn the pasta machine back up a few notches and roll the dough through again. Roll it through again until it is as thin as possible.

  7. Preheat oven to 180c/350f

  8. Line two baking trays with baking paper. Cut the dough into four long crackers, or to fit the size of the baking tray. Brush each one with oil, then scatter over more herbs, flowers and some flaked salt and freshly ground pepper.

  9. Bake for 10-12 minutes or until golden and crispy.


Saturday Meanderings

It has been an interesting week. What started with a lovely, relaxing Mother’s Day and ended with a flooded basement. The good news is the governor’s quarantine is over and life in Arizona is slowly getting back to the new normal.

Garden Update

The garden is abundant with artichokes, eggplant, fennel, cherry tomatoes, shishito peppers and fresh herbs ready to harvest. However, I have a garden mystery and hope someone can help me solve it.

Kale usually does very well here, even during the warmer months. We enjoyed one green and two purple healthy and producing kale plants over the last several months. But last month, my gorgeous kale plants went from this….

To this, literally overnight.

What kind of creature would have done this amount of damage? None of the other plants have been touched, just the kale.

This week, my husband created a fortress around the green kale plant, in hopes it may produce again.

Another, very big and disappointing discovery this week occurred in the bulb garden. You may recall that last fall, I planted hundreds of bulbs and rhizomes. This spring we enjoyed the fruits of my efforts.

During my walkabout, I was shocked and stunned to see that someTHING has stolen/eaten? all my tulip and hyacinth bulbs! There are hundreds of little holes with nothing in them. The bulbs have vanished!

I’ve have never seen anything like this! The irises have not been attacked, I hope, but maybe this critter is eating everything from below ground? Help.

New Projects

Well, this one is not so new, but we are finally making some progress on the back staircase. I posted about this last August (click here), but the project obviously stalled. The sisal carpeting is past its prime and what a dirty and smelly job it is to remove the rug and the excessive amounts of dried glue underneath. Not to mention, possibly old lead paint too.

Using a heat gun to get rid of the glue is nasty business, but the most time consuming part is taking out hundreds of carpet staples. Since I never want to glue down a rug here again, I’m debating what to do. Perhaps just staining and finishing the treads and painting the risers? We still have the final 6 steps to go. Ugh.

So excited about receiving this gorgeous green tile from Home Depot. We will use it as a backsplash behind the outdoor barbecue. It is 9 3/4″ x 9 3/4″ porcelain Monteca Encaustic tile. Quite surprising, but Home Depot has many beautiful tile selections online. Click here for link. It also comes in blue.

It was easy to order online and then curbside pickup at the store. My favorite tile man, Rick, will be doing this project in June for us.

After a rather significant meeting at City Hall yesterday morning, I had hoped to spend Friday afternoon relaxing or painting or just having “me” time. Well, that didn’t last long. While washing the lunch dishes, we suddenly ran out of hot water. Taking my daughter to the basement to show her how to re-light the water heater, we discovered a flood in progress. One of the 75 gallon water heaters split. What a mess!

I am SOOOO happy I cleaned the basement last year (click here to read that post) or this would have been much worse. Fortunately the Christmas room items were off the floor and on shelves so we did avoid a bigger disaster. To see our Christmas room, click here.

We will be spending the weekend cleaning up and replacing the water heater. These are the moments when living in an apartment sounds attractive. Sigh.

Wishing you a stress-less weekend.


Sprucing up the Front Porch

Here is another project that started out simply, and then took on a life of its own. With all this time at home, I am noticing there are so many areas that need sprucing up. This includes the front porch.

It all begins with the rocking chairs.

The four rocking chairs on the front porch did require new paint. This is a fairly easy DIY that can be done in a day. Lately I feel dangerous with a can of paint and a paintbrush! Don’t stand still too long or I will paint you!

What a difference one coat of paint makes!

With the chairs looking so new and pretty, the rest of the porch paled in comparison. Remember the blog post on Selecting a Front Door Color? If you missed this post, click here.

Now the Front Door

Thanks to all of your great suggestions, the new paint color samples were purchased.

Picking a paint color online is a different experience than going to the paint store. Since curbside pick-up is the only option available at this time, I was a bit surprised when I opened the cans. For example, the Feverish Pink is a deep berry color online and the Gladiola is a spicy, rich dark paprika color. Look how different the tones are in real life! Much brighter than I expected.

The two blue paints are much lighter, too. However, after applying the samples, I was leaning toward the blues vs. the reds.

The pillow from Pottery Barn becomes my inspiration, because it is a combination of the dark greens and the cool blue. Not thrilled with the samples from Sherwin Williams, I dug out a can of the blue paint used in our library. That didn’t float my boat, either.

Referring now to a color palette, Drizzle is a bit darker with more green/gray overtones. I am convinced this is THE color and I take the leap and paint the entire door.

I am disappointed that the chip and the paint do not match. But I leave it hoping that the paint will darken as it dries.

Cleaning the Hardware

Meanwhile, it is the perfect opportunity to clean up the door hardware. The brass door latch is assumed to be original to the house. With a bit of elbow grease and brass polish it went from dull to dazzling.

Selecting New Plants~both real and faux

Keeping plants alive during the summer months is always a challenge in Phoenix. Since they are not on an automatic drip system, they require hand watering. As a result, the foliage around the front door suffers.

Instead of live plants, why not some artificial ones? I was able to locate these 5 foot tall cedar trees online through Amazon. I placed them inside the existing stone planter and will not need to water them ever.

After a recent visit to Whitfill Nursery, the addition of vinca and rose-scented geraniums will round out the foliage at the front door, and hopefully survive the summer heat. The asparagus vine does exceedingly well here.

Accessorizing

I love these old stone tables~~they are very heavy and ideal for the outdoor climate.

The finished porch

So here is the nearly finished spruced up front porch. The door color is growing on me, and my daughters love it. I’ve decided throughout this process that I am a conservative color person. Not sure why I am hesitant about throwing caution to the color wind, but I do wish I was more bold.

The wreath is re-designed to complement the door. Being a Connecticut Yankee, I love to repurpose items vs. buying new. To read an old post about re-working this wreath, click here.

The door/wreath before…

and After……

I am experimenting with different pillows on the chairs to see which ones look best.

Thank you to my friend, Joann, who told me to “STOP DEBATING. BLUE all the way”. I sometimes noodle these decisions over and over in my head, which is maddening. Though the door color feels a bit out of my comfort zone, I am leaving it up. Even my friend Anne, who loves bold colors, said it is growing on her.

The week seems to be flying by. Are you in the middle of any projects? Hard to believe it is already Wednesday. Have a wonderful one!


It is Peach Season!

Peaches always ripen here the first few weeks in May. The original peach tree died a few years ago, but we quickly replanted another. This year the fruit is abundant and delicious even though the tree is rather small. Picking is a daily obligation as one day a peach is hard and the next day, I am fighting the birds for it.

We call these our “bend over and eat peaches”. They are so juicy and so sweet. Many a shirt has been ruined with peach juice. And these peaches have FUZZ! Why don’t store-bought peaches have fuzz?

We have two peach trees. Depending on the size of the crop, there are many peach recipes that are favorites at our home.

This year the first dessert we made is peach crisp. I use the recipe from one of my favorite cook books. If you are not familiar with Susan Branch, she is an author, watercolorist and designer. Though born in Southern California, she lives in an 1849 home in Martha’s Vineyard.

Her cookbooks are works of art with handwritten copy. One of my favorites is The Summer Cookbook. The peach crisp recipe is based on the Peach & Plum Crisp one in this book. You can tell I use this recipe a lot as the page is a bit dog-eared! I believe this book may be out of print, but Amazon has it here.

You can’t go wrong with anything crisp~~apple, peach, pear, and cherry. I use this recipe for all fruits because the “crisp” part is the perfect topping. I adjust the recipe by increasing the quantity of one fruit vs. two. Click here for the recipe.

What is interesting about picking fresh fruit, is that it doesn’t last very long. So I need to use the fruit within a few days. As a result, yesterday we made peach salsa.

I didn’t really follow a recipe this time. This batch is made with tomatoes (cherry ones from the garden), yellow and orange bell pepper (as I didn’t have any green or red), peaches, cilantro, red onion, jalapeƱo peppers, lime juice, and salt.

This salsa is perfect with chips, but also goes well with fish or chicken. If you would like to get the recipe from a previous post on Peach Salsa, click here. There are two other blog posts with peach recipes~~Tomato, Peach and Corn Salad (which is delicious!) and homemade Peach Pie.

We will be picking more peaches today and maybe peach ice cream this afternoon? At some point, my family will tell me they are “peached out”. That is my cue to preserve the rest of the harvest.

Have a peachy Tuesday!


Happy Mother’s Day

I am giving myself permission to do nothing this weekend. The week has been filled with so many projects, I will need a vacation after this quarantine is over! I dream about staring at the ocean with an umbrella drink in my hand. But it is time to slow down a bit and enjoy this Mother’s Day weekend!

Early advocate for Mother's Day Anna Marie Jarvis - ABC News ...
Anna Jarvis

Who started Mother’s Day and why? Mother’s Day was first celebrated in 1908 when Anna Jarvis held a memorial service for her mother. Her campaign to make Mother’s Day a recognized holiday in the United States began in 1905, the year her mother, Ann Reeves Jarvis died.

Ann Jarvis had been a peace activist who cared for wounded soldiers on both sides of the American Civil War, and created Mother’s Day Work Clubs to address public health issues. Anna Jarvis wanted to honor her mother by continuing the work she started and to set aside a day to honor all mothers because she believed a mother is “the person who has done more for you than anyone in the world”. (from Wikipedia).

My mother, Julia Ukleja Brostek

In 1914, President Woodrow Wilson signed a proclamation designating Mother’s Day, held on the second Sunday in May as a national holiday to honor mothers. Owing to the efforts of Anna Jarvis, by 1911 all U.S. states observed the holiday.

My mother passed away in 2014. She was 89 years old and was suffering from dementia. Dad insisted Mom stay at home and we had a wonderful caregiver who took excellent care of my mother.

It is hard for me to describe my mother, as she wasn’t a warm and cuddly type of person. Mom had a sense of duty and a great deal of pride. She was rather strict with the girls in the family as she didn’t want us to become “fast steppers”. It was important for her to instill lady-like tendencies~~no chewing gum, no drinking beer from a bottle, no swearing or dressing provocatively. Education and grades were important to her~~anything less than an A wasn’t acceptable. She had high expectations of all 5 of us.

My parents on their wedding day

I remember her lectures and often hear her in my head. She didn’t wear her heart on her sleeve and she wasn’t an easy person to get to know. But she made sure we were well-behaved, dressed appropriately and had everything we needed for a happy childhood.

My mother loved art~~ to paint and draw. I have fond memories of doing that with her. She could turn a sow’s ear into a silk purse. With little money, she could transform a piece of furniture she found on the side of the road to a priceless heirloom.

While I was in high school, Mom and Dad purchased and restored a 1774 historical home in Norwich, Connecticut. During the restoration, Mom carefully removed layers and layers of wallpaper, eventually getting to the first original one. She sent the piece she retrieved to Schumacher and they replicated the design, naming it “Norwich”. The restoration of this old home was their pride and joy. It was a wonderful place to bring our friends.

As the empty nesting years were approaching, Mom went back to school and then started a new career. She was practical. After 25 years, she retired from the State of Connecticut and enjoyed her pension until her death.

When I had my children, I took the lessons learned from my mother, but I adjusted them to fit my life. I would like to think I gleaned the best from her and then improved upon them for my three.

I have had a big corporate career, own my own business and nothing has fulfilled my life as much as being a mother. The blessings and love that my children provide cannot be put into words. Every day I am grateful for their presence in my life.

Wishing you a happy Mother’s Day~~whether you are a mother or have mothered others. Our weather is beautiful, albeit a bit warm, but I understand snow storms are happening in the east. Wherever you are, have a safe and lovely weekend.


Project Dilemma Solved!

I can’t tell you how much I APPRECIATE all the great comments regarding the vintage mailbox dilemma. If you missed yesterday’s post discussing the sad looking mailbox, click here. If you are visiting via HomeTalk, here is the post about the exterior light project that started the conversation about the mailbox re-do. As you can see below, freshly painted exterior light fixture makes existing mailbox stick out like a sore thumb.

I combined all of your wonderful thoughts and decided to do this to the mailbox. I spray painted the inside, sides and back the same color as the guest house light fixture~~an oil rubbed bronze, which is quite dark. Since there was some rust, the Rust-oleum paint will hopefully slow down any further deterioration.

In spraying the sides, I was careful not to get any of the overspray on the front or top.

After allowing these sections to dry, it was time for hand painting the front and top of the box. The metal isn’t smooth, but not hammered either. In this next photo, you can see the difference between the painted and unpainted surfaces.

Using spray paint on the front isn’t an option. Since the oil rubbed bronze spray paint is very dark in hue, I hand mixed the paint to use on the front. I combined Mars Black and Burnt Umber to create a warmer black. Sorry for the shadowy photos as I took these photos at night.

Hand painting the top of the mailbox allowed me to see how the new paint would look before I attempted the more visible face of the box.

Here is the top prior to painting the diamonds.

At this point, I really like the fresh paint and so I take a deep breath and continue onto the front! Using 3 different size brushes, I make my way around the diamonds and the curlicue.

I decide to sand the curlicue because I want to remove that drip of old pale green paint which I failed to notice beforehand. I wait for the black paint to dry first. Thankfully, I am able to get most of the paint drip off.

With so many leftover craft items, I have two tubes of gold and bronze Rub ‘n Buff metallic finish for the diamonds and curlicue. Though the instructions say to rub it on, I elect to use a small paintbrush.

Yes, Rub ‘n Buff can be used on metal. And it dries quickly! To see another project where I used this product, click here.

At this point, I’m not sure if the Antique Gold is too bright but I paint all the diamonds. I take the time to touch up with the black/umber paint where I get sloppy.

The Spanish Copper Rub ‘n Buff tube is a bit solidified and the contents will not easily come out. However, a bronzy liquid squirts out instead, and I use it anyway on top of the gold to tone it down.

I also paint this bronzy liquid on the curlicue to cover any scratches and dings. I paint the two rivets gold.

So here is the before…..

The mailbox after…..

Unfortunately the sun is shining directly on the front this morning, so the light in the after photos is not the same.

The light and mailbox before….

The light and mailbox after……

The mailbox still has its vintage charm, but the new paint makes such a positive difference.

Thank you to Karen, Barbara (from Mantel and Table) Janie, Linda, Marty, Karin, and Louise for your helpful comments. They truly gave me the inspiration to take the leap and paint this mailbox! I may have to spray it with a protective clear coat as I am not sure how my acrylic paints will hold up over time.

Marty, a subscriber, asked to see a bigger picture of the guest cottage. Again these were taken this morning with the eastern light exposure.

The hollyhocks have taken over the corner garden and the jacaranda tree is in full bloom.

It is such a beautiful morning here. The temperatures are in the low 70s and my morning walkabout was so joyful on this glorious Wednesday!

Enjoy your day! Please remember you can follow me on Instagram @lifeatbellaterra or Facebook. To see more pictures of the guest cottage, click here. Thank you for joining me today from HomeTalk and if you like what you see, I would love for you subscribe to Life at Bella Terra.

Products Used:

Rustoleum Oil Rubbed Bronze spray paint

Rub ‘n Buff Wax Metallic Finish-Spanish Copper and Antique Gold

Golden acrylic paints-Mars Black and Burnt Umber