1

Easy DIY ~A Ribbon Tree

Ribbon from Costco

I love ribbon and have numerous rolls from everyday use to seasonal themes. However, as you know, storing lots of ribbon gobbles up space. For my everyday go-to ribbon, I keep this space saving ribbon tree in my craft/mud room for easy accessibility.

Other Ribbon Storage areas

Other ribbon storage in our craft/mud room

Ribbon snippets are collected by color and stored in a drawer. And when we were designing the craft/mud room, there is a special pull out space for hanging ribbon near the gift wrapping area. Christmas/holiday ribbon is in a large tub in the Christmas room in the basement. To see more of my mudroom, click here.

This is a very easy DIY and quite honestly, I wasn’t going to share it with you. Mostly because I thought you may not be interested. However, I did post this simple project to HomeTalk and as of this morning, it has 22,000 views. So maybe it is a valuable DIY after all.

Check it out
Do Not Use Spray Foam

Making the Ribbon Tree

All you will need for this project is a pot or container, a wooden dowel and Plaster of Paris (or other cement type medium), and duct tape if you have a hole at the bottom of your pot. Do not use spray gap filler foam. I tried that first and it was a complete disaster.

Colorful green pot from Whitfill Nursery, $8.00.

Cover your hole with duct tape.

Measure the height of your dowel. Some things to consider: 1) how many spools of ribbon do I want to stack? 2) Do not make the dowel so high that the weight of the ribbons will topple your container. My dowel height is 28 inches.

Mark and cut your dowel. A knife will cut through it easily.

Adding the Plaster

Mix your Plaster of Paris according to the manufacturer’s directions. You can find Plaster of Paris at Walmart, Michaels, or any hardware store. I did this in stages as I didn’t have a large enough container to mix it all at once.

Since I didn’t want to hold the dowel while the Plaster of Paris is drying, I made a cardboard circular cut out that will sit in the bottom of the pot. This is done by tracing the outside of the pot base onto cardboard.

Cut a hole through the circular cardboard to secure the dowel

Place the dowel and cardboard circle in the bottom of the pot, and fill with the Plaster of Paris mixture.

Pour the mixture to approximately an inch from the top or you can fill all the way. It really doesn’t matter.

In order to keep the dowel in the center of the pot, I also made two cardboard rectangles, each with a center hole. Slide both pieces of cardboard over the top of the dowel. Now the dowel will remain in place until the mixture hardens. Plaster of Paris sets rather quickly (30-45 minutes) and fully cures within 48-72 hours.

Here is how the pot and plaster looks after all is dry. Notice how sloppy I am with spills on my pot. These easily rub off with water.

This step is optional but I fill the top inch with sphagnum moss. After all it is a flower pot. You can leave it be or fill it with colorful glass stones, regular stones, seashells, whatever you’d like. It will be covered most of the time by the spools of ribbon so this step is optional.

Add Your Ribbon

Now you can stack your ribbon on the dowel.

What I love about this ribbon tree is that it takes up very little counter space. Unlike most ribbon storage this one is vertical and fits well into a corner in my craft/mud room. The loose ends of the ribbon are secured with push pins.

My “daily” ribbon is what I use on our egg cartons or gifts of homemade bread. Everything looks so much better with a bit of ribbon, doesn’t it? Having ribbon right there within reach saves me time searching through drawers or bins looking for it.

Well, that’s my DIY tip for the day! I’m not a very crafty person so I hope you find this one valuable.

It is Tuesday and I am dreaming about the water. Every year for as long as I can remember, we go to the ocean for a few weeks in July. Pacific….Atlantic…sometimes both. The thought of sitting under an umbrella listening to crashing waves while reading a brain-candy book…..ahhh.

Enjoy your Tuesday wherever you are.

This post shared with Tuesday Turn About#58 Fun in July

Karin’s Kottage Centerpiece Wednesday Linky Party,

Charming Cottages and Gardens Week 16

and Chas’ Crazy Creations To Gramma’s House We Go Link Party 202

Creative Crafts Linky Party #3


Scandinavian Cabin Touches

Vintage snow shoes

Last week I posted my thoughts of adding more Scandinavian touches to our cabin in the White Mountains of Arizona. The typical decor in our area is mountain-style, lots of carved bears and pine wall treatments. If you missed that post, click here to see some lovely ideas.

Unfortunately, our cabin is a remodeled flip so many of the finishes are over-the-counter hardware store. The choices aren’t offensive, but very vanilla. Without realizing it, I have been collecting items that are along the Scandinavian, Black Forest, European theme.

Umbrella Stand with Rosemaling

By the front door, this umbrella stand is painted in the traditional Norwegian style of rosemaling.

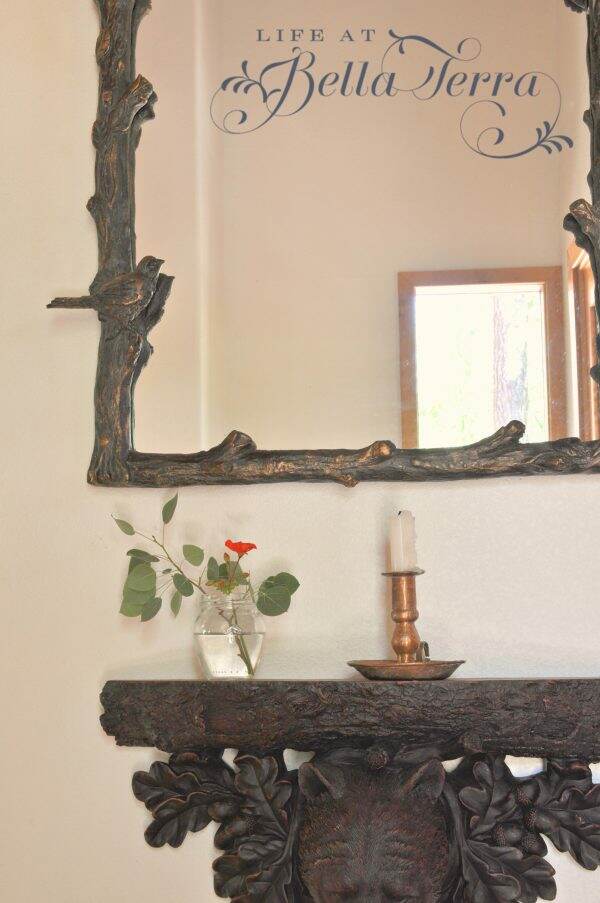
Also, in the front entry we have a Black Forest style carved bear shelf with a lodge-like bird/twig mirror.

And there happens to be another carved mirror of similar style on the staircase landing.

Black Forest style mirror

Subconsciously, I have been designing the cabin with a more old Scandinavian style. Being a Connecticut Yankee, I am always looking for affordable ways to make changes that can add some charm and warmth.

During my numerous trips to Home Depot, I know they have decorative molding in stock. You can see their vast selection online. Would I be able to add more interest to my very plain kitchen cabinets using affordable hardwood trim?

Decorative Trim from Home Depot

Using this very inexpensive mitre box and saw by Stanley (also Home Depot), I cut the molding at 45 degree angles to fit inside the existing Shaker style cabinet door.

Affordable Mitre Box from Home Depot

The molding cut rather easily and fits nicely inside the the cabinet stile. If I am going to add this to all the cabinets, I will definitely use a power tool to make all the cuts.

Adding Decorative Trim

After all four sides are mitered, I taped them in place. Next I repeated the same process with the narrower trim. At this point, I don’t want to affix anything permanently until I can step back and get a good look at it.

Here is how the cabinet looks with the additional decorative trim. What do you think? Granted the finishes are different but my options would be to stain and finish the trim like the cabinet (and get rid of the dated knobs), or paint the cabinets and the trim? Or just paint the molding?

In order to get a sense of what a painted cabinet looks like, I made a drawing paper template by taping 3 pieces of sketching paper together. Using a leftover can of green paint, I paint the template of the cabinet’s panel.

Unfortunately, I didn’t take pictures of the steps, but you can envision it, right? Next I watched a 3 minute tutorial on rosemaling by Sea Lemon on YouTube (what did we do before YouTube). Here is my first attempt at rosemaling. Try not to laugh.

So this gives you a sense of what a painted, rosemaling cabinet front would look like! Since I really didn’t have an artistic plan, and am using whatever paint is available, you will need to have some vision here. Maybe more rosemaling? Or just a few images on opposite corners would be enough~~or even some squiggles in the middle? Or nothing at all?

Do you like it better before?

Or after? Remember this is just a very rough mock-up. Colors and design can be changed.

As much fun as I think this project would be, I am afraid the granite is all wrong. The color and style is definitely not my choice, but to change it? Yikes. Maybe it would make sense to do something like this on the island cabinets first and see how it goes?

As always, I LOVE your input. There’s so much about this room that needs help. Either I will leave it as is or just jump in with both feet. It’s all a bit intimidating!

As the ideas swirl around in my head, I hope you are having a relaxing weekend. Any projects on your horizon?

P.S. To see more of our cabin from a previous post, click here.


10 Things I Love in My Kitchen

Most of my time is spent in the kitchen. I love the kitchen overall, but I have a few favorites that, if I were to design another kitchen, I would definitely include. Here is my list of top 10 items I love and use heavily in the kitchen.

Nespresso Machine

My Nespresso Machine is the one of the best birthday gifts I have ever received. Called Creatista by Nespresso and Breville, it continues to perform multiple times day after day. This machine steams the milk and creates a range of coffee choices from espresso to macchiato. A day doesn’t go by when I don’t use this machine. A very worthy investment!

My happy cups are designed by Jennifer Orkin Lewis and purchased from Anthropologie, but not sure they are still available. To see why I call these happy cups, click here.

Double Sinks with Double Faucets

I am so glad I purchased two high quality Franke stainless steel sinks (which look as good as the day I bought them). However, when I told plumber that I wanted a faucet for each sink, he thought I was nuts. Typically one faucet will serve two sinks.

My two Kohler Artifacts faucets in polished nickel allow two people to be washing dishes or using the sinks independently. Both have a 2 function pull-down spray heads. The faucets were pricey, but again, well-worth every penny!

My Pot Filler

My pot filler is located right above the stove. The arm extends over each burner so I can fill multiple pots easily. This affordable luxury allows me to fill my large cooking pots right there vs. hauling them across the kitchen. Very helpful when I am making several pots of pet food. Mine is a Chicago Faucets Softflo Pot and Kettle filler.

Compost Bin

Disguised as a door, this pull out allows me to slide all my vegetable and fruit scraps off the island counter and right into bin inside. It is a collection method that is so convenient and small enough for easy transport to the composter on a weekly basis.

Hidden Step Stool

Tucked under the toe kick on the island, this step stool pulls out and collapses to 4″ in height. My cabinet guy added a piece of toe kick trim and a handle on the front for accessibility.

It easily pops up and provides a 2-step stool for reaching those top shelves. To see a tour of my kitchen and resource this stool, click here for Part 1 and here for Part 2.

My Pedestal Organizer

Just to the left of the stove, are nearly all the things I need to cook. This vintage Italian pedestal plate holds various oils and seasonings, all within reach. It is a time saver as I don’t need to go hunting for spices or condiments while cooking.

Collection of Small Bowls

White bowls from West Elm; blue bowls from The Findery

I use these bowls every single day from measuring ingredients for recipes to serving nuts or dips. The bowls are collected from various places~our trip to Italy, West Elm, The Findery (Waco) and vintage stores. My friend, Connie gave me a stack of small glass Duralex bowls from France. It is still one of my all-time favorite gifts.

Salter Family Scale

I don’t think this is a vintage scale, but I sure have had it a long time. While I own a fancy digital one, I seem to use this more often. Not only is it functional and nostalgic, but also pretty sitting on top of the shelf above the stove.

Weather Station

Even though the weather in Phoenix is mostly clear and sunny (approximately 300 days per year), I check our weather monitor every day. The wireless weather station is positioned in our orchard and transmits up to 1000 feet. This monitor has rain, temperature and humidity sensors that relay the information back to this LCD console. Made in the USA, this makes a great gift!

Paper Shredder

Staples Professional Series Paper shredder

Don’t laugh (well most people find this amusing), but I have a heavy duty shredder in the kitchen by the island. This is used multiple times a day.

When the mail comes in I stand at the shredder and discard all the junk and unwanted mail in this receptacle. The shredded paper gets tossed into the composter and recycled. I still cannot believe how much non-essential stuff we get in the mail! But at least I am converting it into soil for the garden. To see my composting blog post, click here.

Wishing you a terrific Tuesday. It is supposed to be 109 degrees here today. I hear the mountains calling to me, so I am hoping to dash back there to enjoy the 80 degree weather. In the meantime, stay cool and make this a marvelous day.

This post shared with Charming Homes & Gardens Week 16


Stenciling a Tile Floor

House Project
Pool house at our historic home

Happy Saturday morning! We continue to check things off our list of home projects that need to get done. However, I am beginning to tackle a new project that I’ve been wanting to try~stenciling a tiled bathroom floor in the pool house.

Pool House Bathroom

In retrospect, I am not sure why I selected this floor tile. It appears in both the pool house and our master bathroom. And I don’t like it in either place.

Our home restoration took years to complete. My guess is that I had renovation fatigue about two years in and selected a tile that was available, affordable and not offensive. I would not select this tile today.

Pool House Bathroom

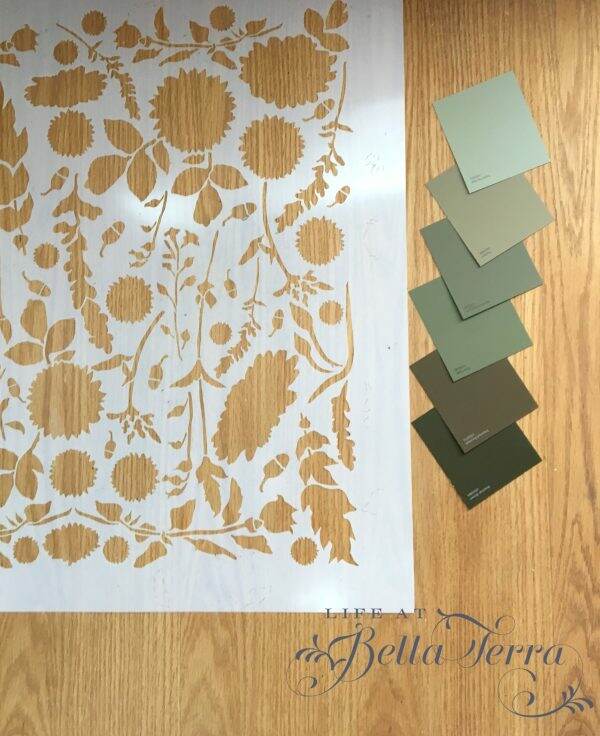
So what is the solution to jazzing up this vanilla floor? It will be too expensive to remove the tile. So I will try my hand at stenciling it. The search for an attractive stencil pattern in an appropriate size came up empty. Fortunately, I discovered that Royal Design Studios will make custom size stencils.

Working with their design department, I was able to order one (13.0625″ x 13.0625″) that will work perfectly with my tile size. The cost is $39.50. Not bad.

Custom size stencil from Royal Design Studio

I need to research the steps to prepping the tile, repairing any grout problems, and selecting paint types and paint colors.

Blue/White themed pool house bathroom
Hand painting done by Tina Silvernail

The bathroom walls are white with decorative blue images. I am not sure whether to keep them or just re-paint all the walls white. I find them to be sweet, but is it dated?

Sweet hand painted images in pool house bath

The pool house theme is mostly blue, white and yellow. Since this is the only blue/white space anywhere at Bella Terra, I want to continue that with the stencil color choices.

My inspiration for the colors in the stencil may be a few shades of blue, similar to this vase.

So wish me luck! I am hoping that stenciling the floors will give it an old world look. Any time I start a project that will have dramatic results, I hold my breath a bit. There will be a great deal of prep work to do and so I don’t expect this project will be done quickly. But I will keep you posted!

Though I have never stenciled on tile before, I have had success in stenciling on concrete and wood. To see the stenciled floor project done on concrete, click here.

Stenciling a Concrete Floor

To view the stenciled wood floor project, click here .

Getting Ready to Stencil a Wood Floor

Have a wonderful weekend. It’s very quiet here and I have so much catching up to do with being out of town for a week~bills to sort, the refrigerator to clean, and laundry. Plus I am dreaming of Scandinavian solutions to our cabin and will keep you up to date on what crazy ideas I develop! If you missed my last post about this, click here.

Thanks for joining me this morning!

This blog post is shared with:

Karins Cottage Centerpiece Wednesday Linky Party.

Charming Homes and Gardens Week 15


Old Scandinavian Charm and Decor for our Cabin

Last September, my husband attended a board meeting in Vail, Colorado. Naturally I tagged along! If you haven’t been to Vail Village, you are transported to a quaint, charming European hamlet. Loaded with Scandinavian decor everywhere you go, the experience is a magical one right here in the United States.

Sonnenalp Resort

We stayed at the Sonnenalp Resort, a boutique lodge and our room made me feel like yodeling. A cozy fireplace, cuckoo clocks, window boxes spilling with colorful flowers were some of the treats we enjoyed during our stay.

Cuckoo Clock at Sonnenalp Resort, Vail
Stock photo of Sonnenalp Resort

One of the highlights of the trip, for me, was exploring Axel’s of Vail, a European clothing store in Vail Village. Decorated in old Scandinavian decor, the architecture of the store, as well as its contents far exceeded my expectations.

Axel's of Vail

Most retail stores do not go to the expense to make their exteriors so exquisite. The wood carvings, the iron hardware and the abundant flowers transport you from Vail to Norway in seconds.

Axel's of Vail

At one of the board meeting dinners, I had the pleasure of sitting next to the owners of Axel’s, Axel and Janie Wilhelmsen. What a warm and engaging couple! The conversation was lively and as a result, a visit to their spectacular home was arranged.

Some people are enamored with Hollywood celebrities. I am not. But I do get very excited when I am invited to see someone’s unique and spectacular home. I don’t know about you, but I am tired of seeing the same design styles over and over again.

Vail Luxury Magazine Summer 2013 by Vail Daily Magazine Group - issuu
As featured in Vail Luxury Magazine~a view of the kitchen

The next day, my friend, Missy and I traveled to this treasure of a home. Yes, they have a living roof (also called a green or garden roof). The plants grow each year on top of a waterproof membrane. Living roofs provide good insulation, are long lasting and often seen in Norwegian homes.

Home with a Living Roof

The Wilhelmsens, being such gracious hosts, provided a full tour of the guest house and main home, which they built and designed themselves.

Below is their guest cottage. What a delight for their friends and family to stay here!

Guest Cottage with Scandinavian decor

Each room is more breathtaking that the next. The kitchen in the main house, which is part of an open plan with the living room, did not feel like a kitchen at all. The cabinets are beautifully hand painted and even the refrigerator was covered with a decorative panel, making the kitchen feel as furnished as the dining and living room.

And look at this stove/oven! Even the pedestal on which it sits, is beautifully painted!

Antique Stove/Oven

I did not take many pictures, because after all, this is their home and I wanted to respect their privacy. But it was hard not to capture every single luscious detail! The wood carvings alone were spectacular. Touches such as matching handmade chandeliers made this a one-of-a-kind home.

Scandinavian dining Room

Even the television is hidden behind a gorgeous hand painted cabinet. This Scandinavian type of folk art painting is called rosemaling. What is the difference between rosemaling and tole? Rosemaling is painting on wood, whereas tole is painting on tin. I now have a desire to learn how to do this!

Clearly, having logs and chinking walls add enough Scandinavian character, but look at that carved headboard and those comfortable linens.

So you are probably asking, what is Mary sharing this with us today? Well, quite honestly I have not stopped thinking about this house since I saw it last September. The Wilhelmsens’ home is so warm, welcoming and appropriate in the mountains of Colorado.

I would love for our cabin to have this European/Scandinavian charm and decor. However, I would imagine all that wood carving would be a bit cost prohibitive, though Janie was kind enough to share her resource.

While at our cabin, I started to notice that I already have a few Scandinavian pieces that I have acquired over time. I never really thought of a strategy to decorate the cabin this way, but I would love to try.

In a future blog post, I will share some thoughts and hopefully you can help me along the way to add enough, affordable touches to make our cabin unique and charming. It’s a stretch, but I am hopeful!

As a side note, I want to thank my friend, Missy who acquired the invitation to Axel and Janie’s home. Also, if you are ever in Vail Village, you must visit their store (and you can order online). Their philosophy is: Romance is the very thread that weaves our collections together, from Italian handmade sartorial clothing to the rugged leathers that imbue the spirit of the west.” Their “modest” objective is to be the best store in the world. This is a family run business. Their lovely children, Candice and Axel, Jr. model all their clothing. I can honestly say I am very impressed with their collection of goods, but more importantly, their sincerity, passion, elegance and commitment to family is genuine.


The Back Terrace Project is Complete

House Projects
View to the back terrace

Back in March, during the lockdown, we created a list of home projects to tackle. As I was washing all the windows in the house, my husband started working on the back terrace. Like most projects, the back terrace morphed into something bigger…..yet better. To see that post of projects, click here.

Before
After

The barbecue needed cleaning. That led to putting up new tile on the backsplash behind the grill. Of course, the tile requires a sealer to protect it. That spilled over into sealing the slate countertops. I shared that project a few weeks ago when the BBQ was completed. If you missed that post, please click here!

Sealing the slate countertops

The Floors

Now that the countertops look so good, the floors paled in comparison.

But before sealing the floor, they need a good cleaning. Pressure washing the concrete/slate floors significantly helps to remove the dirt and stains. My husband did this one half of the terrace at a time. We own the Subaru pressure washer but you can easily rent one, too.

After the floors are clean and dry, sealer is applied to both the slate and the concrete. We tried a satin finish first and didn’t like it. So we decided on this Home Depot Behr Premium Wet-Look Sealer.

Using a long handled roller, the sealer spread easily on the floor.

Here is one section done and it is a vast improvement.

After half of the terrace was dry, we moved the furniture and began the process on the other half.

The Rugs

The outdoor rugs have never been washed so this is a great opportunity to vacuum them and pressure wash to remove several years of dirt. Purchased from Rug Studio several years ago, these two 8′ x 10′ rugs are SO affordable.

I just checked and they are still available online. Click here for the link. Prices are a bit higher, but not by much. I am so pleased with how these rugs are holding up outside in our hot summer heat.

Shop Vac Wet ‘n Dry vacuum

Now the floors are now cleaned and sealed, the barbecue area is complete, and well, the upholstered furniture looks like the ugly sibling. Truly, we have used this furniture outside for years. The cushions however, other than spot cleaning, have not been deeply cleaned….ever.

The Furniture

This Bissell Little Green is one of our best purchases. This little spot and stain cleaner is great for both upholstery and carpeting. If you have pets or families who spill, this is the toy for you! Being small and light weight, it is so easy to haul around. It’s approximately $100.00 and can be ordered online through Amazon. Click here for link.

All furniture cushions and decorative pillows are Sunbrella fabric and clean easily with the Bissell.

All the outdoor (really indoor) furniture was purchased from Crate and Barrel many years ago. Since this terrace is covered and somewhat protected from the elements, the furniture has survived fairly well.

The Finished Product

Here is the finished terrace. It sparkles and even smells clean. The black cabinet on the right side of the photo is a new addition. This piece used to be in the family room but will now store placemats, candlesticks, vases and other outdoor entertaining items.

I will at some point need to refinish the mahogany dining and coffee table, but not until the weather cools down a bit. The chandelier over the table needs replacing too. If you have any suggestions, please share! Also, I am still debating whether the rugs clash with the tile. Unfortunately when I selected the tile, I didn’t even consider the rug design. Let me know what you think.

We are so pleased with how the floor turned out. Custom covers are made for all the outdoor pieces and we must cover all the furniture before our dreaded summer dust storms arrive.

It feels SO good to get these projects checked off the list. Extra kudos to my husband for doing all the work on this space. We can’t wait for cooler temperatures and no more COVID so we can entertain here again.

I hope everyone took some time off and enjoyed the July 4th holiday. Are you working on any home projects?

If you missed the blog post on Fall Entertaining on the back terrace, please click here.

To see the actual restoration/construction project of the back terrace, click here.

Sometimes in my posts, I provide links to the products. Sometimes I get a stipend at no cost to you. Other times I don’t get anything but want to share my resource.