1

Aspiring to Achieve Historical Authenticity

If you have ever owned a historical home, there is a sense of stewardship that comes with it. For me, it’s hard to imagine someone prior to 1910 dreaming about building this house we now enjoy. But many older homes are stripped of the original architecture and details, losing historical authenticity, for more modern design and function.

The Design-Architect Unknown

In 1910 Feng Shui wasn’t a well known concept here. But the architect knew how to design this structure with a flowing floor plan. How innovative to create ways to capture the light, protect itself from the harsh summer sun/heat and feel warm and engaging in the winter~all without air-conditioning.

Ludowici bottle green tiles protect the roof

Multiple fireplaces provide heat. The exterior walls are 18″ thick, built with bricks and designed to allow good air flow. Imagine that.

When I come downstairs in the morning, I always take the front staircase. The bottom step places me into the eastern morning sun pouring into the windows in the Spring and Winter months. During the summer, the large 3 foot wide exterior overhang blocks the bright, blistering sun and bathes the rooms in ambient light. It is quietly magical.

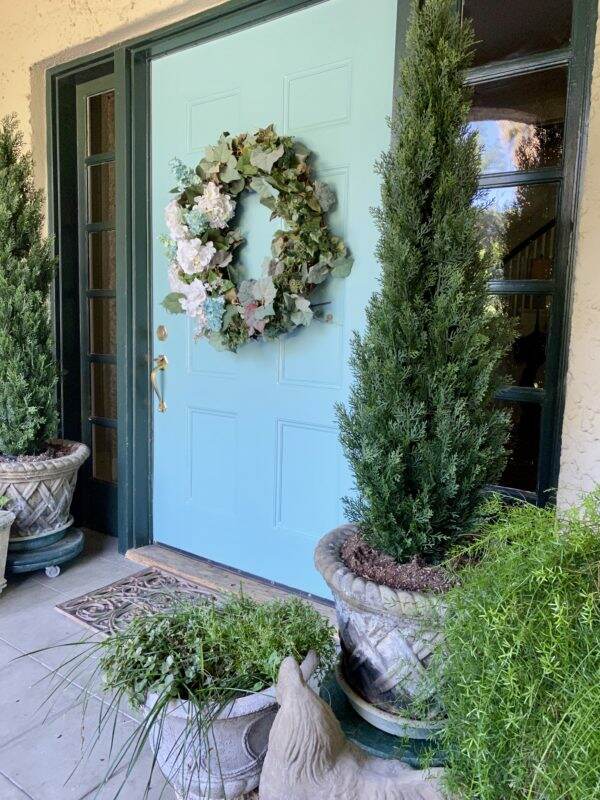
One of my favorite visual sites is standing in the dining room and looking through the foyer into the living room. It is as if the architect is trying to put the rooms in a frame, like a painting.

Adding the Mechanicals

The challenge with restoring a house that is rich in history is how do you preserve its authenticity, while making it livable in the 21st century. This is the state of the house after purchasing it in 1999. There is no central air conditioning. The existing coal chute is still in the basement. All the windows are rope and pulley with single paned glass. The electrical panel has a Frankenstein switch and bees are making hives in the walls. It is uninhabitable.

Adding all new mechanicals is a critical step and we take great care to hide as much as we could. HVAC chase vents are made to look like part of the wall and architecture. The above picture shows a corner of the dining room where the HVAC chase blends in with the original trim and cove ceiling.

The Details

Beautiful detailed brass vent covers are painted with pastel colors from a previous owner. Re-plated with brass, they are stunning reminders of a different time.

All the windows require replacing and are custom made to today’s standards. Thank you, Marvin Windows. Each and every detail of the original sash, head, grill, mullion, ogee, casing, sill, stool and apron is replicated. Most of the windows are 6 or 8 panes over 1. Windows created for new parts of the house are crafted to look like they have always been there with fine moldings and windowsills.

Walls, Doors and Floors

I don’t know about you but I can tell the difference in sound when I enter a room with plaster walls vs. drywall. It is difficult to find someone that does high quality plaster work in Phoenix. Maybe it’s easier back east or in historical communities, but our contractor wanted us to remove all the lathe and plaster(with its horse hair) and replace it with drywall. Cheaper, faster and easier was his reasoning.

Many of the walls are severely cracked, or in the case of my son’s room, saturated with honey from the bees. There are many problems in fixing the plaster but in retrospect, I’m glad I held my ground. It is the subliminal and solid quietness of plaster gives a sense of strength to these walls.

The same goes for real hardwood floors vs. engineered or laminate. I can tell the minute I step on a floor whether it is the real deal or not. The light Canadian beech planks are 2 1/8″ wide and an amazing 12′ long. You can’t find lengths like that today in real hardwood. Though we matched the flooring in the new areas, they lack the patina and history as the original.

In restoring the house, we found original pocket doors buried in the walls in the dining room. This 5 panel door style is the template for all the new doors we added in the house.

The House Today

These are just a few elements of design we used to achieve historical authenticity. Are we purists? No. The kitchen and bathrooms are 21st century. We now have air conditioning vs. sleeping porches.

But I believe that when you step foot into this lovely, unique historical home, you clearly get a sense of what life was like 108 years ago. Over time, the land was carved up into other parcels and we cherish the remaining 2 acres. With Phoenix being the fastest growing city in the U.S., we only hope this land stays whole. It certainly will as long as we are living here.

We feel blessed to call Bella Terra home. As we continue to add memories here, we hope to enrich this space even more with love, laughter, kindness, joy and hope.

Sending Wednesday hugs to all! If you want to see some of the original restoration stories and pictures, check out The Restoration Chronicles, Chapters 1-5. Have a wonderful day!


Making Lavender Pillows

The world needs more lavender to promote calmness and wellness, don’t you think? I love sachets, but the larger lavender pillows are getting my attention lately. However, is it me or do they seem expensive? $49.95 for a 7″ square lavender pillow? So what better way to get a lavender pillow than make them yourself.

Finding the Right Lavender

Naturally I am seeking a highly fragrant, good quality lavender. Though I have lavender growing around our property, it isn’t all that fragrant after I dry the buds. To see a previous post on lavender, click here.

On Etsy, I found lavender buds (Lavandula Augustifolia) that are bulk wholesale, mostly used for weddings from StressTamerSpa. The reviews are excellent, plus you have the option to order 1/4 lb. up to 10 lbs.

The minute I received the 2 lb. package in the mail I knew what is was because of the heavenly scent. Lavender doesn’t weigh all that much so two pounds is quite a good quantity.

Picking Fabric

Over the years I have collected lots of fabrics. But there are many things you could use~old vintage napkins or handkerchiefs. I even have a old embroidered tablecloth that has seen better days. Taking cuts of fabric from it might just be lovely.

For a 7″ square pillow, cut two pieces fabric 8″ x 8″ (allowing for 1/2″ seam on all four sides). You can mix or match patterns or keep both sides the same. Or you could just fold one piece of fabric 8 x 16″. To make this easy, I put blue tape on the counter as a measurement guide.

Put the same side fabric together and pin if necessary.

Once the fabric is cut, I machine-stitched the seam 1/2″ from the fabric edge, leaving a small un-stitched section. If you don’t have a sewing machine, these pillows are small enough to slip stitch the edge. If you decide to do that, just adjust the overall measurements without the 1/2″ seam.

I always like to clip the corners so they are crisp and not rounded. Turn the pillow where the front of the fabric is facing out.

Filling the Pillow

Well, I tried this two ways and the second attempt is the way to go. Using a large measuring cup, I put the pillow in the bottom with the hole at the top. This way, if I spill any lavender it will be collected vs. all over the kitchen.

At first I used an orange, rubber funnel with a relatively narrow spout. The lavender buds slowly went into the pillow. This took some time……too much time in my opinion. However, I filled the pillow with approximately 6 oz. of lavender buds.

I slip stitched the hole closed. Sorry I failed to take a photo as I was talking on the phone at the same time. The downsides to multi-tasking!

The next pillow, I made the hole bigger and rolled up a piece of copy paper to use as a funnel. This way I could pour a larger quantity of lavender in much faster. The paper allowed the buds to slip right in.

So here is how the first two came out! Honestly, being around this much lavender makes you a bit loopy and mellow! I felt like I needed fresh air as the scent is so strong! But aren’t they cute?

I am so lucky to have some friends in my life that have helped with recently, and I will give these lavender pillows as gifts.

The hope is that the two pound bag of lavender will fill 5-6 pillows. At $39.99 for the bag, that’s $6.67 to $8.00 per pillow. Sure beats spending $49.95 per pillow! I didn’t time how long it took me to make one, but it wasn’t that long. And inhaling all this lavender has made this afternoon so relaxing!

Happy Saturday to you! We had a huge monsoon storm the other night and finally a bit of rain. The yard is a mess with all the plant debris so this weekend will be filled with clean-up chores. Hope you have a fun weekend planned! See you next week.

This post shared with

Thursday Favorite Things #454

Charming Homes & Gardens #21

Creative Crafts Linky Party #4


Using Summer Zucchini~Two Different Ways

Lately I have been craving zucchini….go figure. I’ve been lightly sautéing it in butter with salt and pepper and just eating bowlfuls of it. However, I still have more in the refrigerator and decided to whip up an old favorite, zucchini lasagna. This low-carb dish is a repeat meal at our home and it freezes well too.

With the balance of the zucchini, I thought I would try Ambitious Kitchen’s recipe for Grain-Free Chocolate Chip Peanut Butter zucchini bread.

Making Zucchini Lasagna

I tend to stray from recipes based on what I have in the fridge. Sometimes I make it without meat and sometimes with either turkey or ground beef. Since we are cutting down on our red meat consumption, this recipe also works well with ground turkey or chicken.

Quite honestly, anything smothered in tomato sauce and cheese is very edible in my opinion. For this recipe I am using 1 lb. ground turkey.

First I slice the zucchini really thin….it helps if you have a mandolin where you can adjust the blades. Arrange the zucchini in a colander and sprinkle each layer with salt. Set the colander somewhere it can drain.

After sautéing the onions and garlic in olive oil, I add the turkey. Turkey tends to be bland so here is where you want to step up the seasoning.

I add onion powder, garlic powder, Worcestershire sauce, red wine, salt, and pepper.

For the tomato sauce, I used up all the leftover sauce in the refrigerator and also added some roasted tomatoes I made last week. This is another worthy “clean out the fridge” recipe. To see another recipe where you use whatever you have in the refrigerator, click here.

Since my container of ricotta was opened and not completely full, I added some leftover cottage cheese, slightly beaten egg, and some spinach.

In a greased casserole dish, layer the bottom with the half of the tomato/meat sauce.

The next layer is the zucchini but I blot it first with paper toweling as the salt makes the zucchini “sweat”.

Using the ricotta mixture, spread that on top of the zucchini slices.

Top with cheese. I didn’t have any mozzarella, but I did have Monterey Jack.

Now repeat the entire process again, starting with the tomato/meat sauce on top of the shredded cheese.

Top the final layer with the Parmesan cheese. Cover the casserole with foil and bake in a 325 degree oven for 45 minutes. Remove the foil, increase the temperature and bake another 15 minutes (or longer to get the top brown and bubbly).

Any leftovers freeze well. I am always delighted when I am starving and I find a serving in the freezer waiting for me.

Grain-Free Chocolate Chip Peanut Butter Zucchini Bread

Since I already had all the ingredients this went together very quickly.

It feels a bit like cheating to have vegetables in your dessert, right? But zucchini provides a rich texture and moisture in this low-carb, nutritious recipe. Click here for the direct link to Ambitious Kitchen’s recipe for this.

Below I’ve included the recipe for the lasagna from All Recipes. However, again, I tend not to follow it completely but it does provide a guideline for quantities and ingredients. I believe you can add and subtract ingredients and it will still taste fabulous. A recipe that is flexible is my kind of recipe.

Happy Wednesday! Eat your veggies! And stay safe out there.

This post shared with:

Between Naps On the Porch Tablescape Thursday #623

Charming Houses and Gardens

To Gramma’s House We Go DIY Link Party


No Noodle Zucchini Lasagna

  • 2 large zucchini
  • 1 Tablespoon salt
  • 1 lb ground beef
  • 1.5 teaspoons ground black pepper
  • 1 small green bell pepper (diced)
  • 1 oninon (diced)
  • 1 cup tomato paste
  • 1 (16 oz)can tomato sauce
  • 1/4 cup red wine
  • 2 Tablespoons fresh basil (chopped)
  • 1 Tablespoon fresh oregano (chopped)
  • 1 15 oz. package frozen chopped spinach (thawed and drained)
  • 1 pound fresh mushrooms (sliced)
  • 8 ounces shredded Mozzarella cheese
  • 8 ounces grated Parmesan Cheese
  1. Preheat oven to 325 degrees F (165 degrees C). Grease a deep 9 x 13 inch baking pan

  2. Slice zucchinin lengthwise into very thin slices. Sprinkle slices lightly with salt; set aside to drain in a colander

  3. To prepare the meat sauce, cook and stir ground beef and black pepper in a large skillet over medium high heat for 5 minutes. Add in the green pepper and onion; cook and stir until meat is no longer pink. Stir in the tomato paste, tomato sauce, wine, basil, and oregano, adding a small amount of hot water if sauce is too thick. Bring to a boil; reduce heat and simmer sauce for about 20 minutes, sitrring frequently.

  4. Meanwhile, stir egg, ricotta, and parsley together in a bowl until well combined.

  5. To assemble lasagna, spread 1/2 of the meat sauce into the bottom of prepared pan. Then layer 1/2 the zucchini slices, 1/2 the ricotta mixture, all fo the spinach, followed by all of the mushrooms, then 1/2 of the mozzarella cheese. Repeat by layering the remaining meat sauce, zucchini slices, ricotta mixture and mozzarella. Spread Parmesan cheese evenly over the top; cover with foil.

  6. Bake for 45 minutes. Remove foil, raise oven temperature to 350 degrees F (175 degrees C), and bake an additional 15 minutes. Let stand for 5 minutes before serving.


Tuesday Tidbits

My recent monthly subscription from The Bouqs

First of all, I want to thank you for the all the words of support about the death of our cat, Tippy. I still wait for her to hop up in my lap at night and I know that will take some time to fade.

Back to School

Yesterday, we moved our youngest daughter into her first apartment as she begins her sophomore year in college. Naturally, she is nervous and excited all at once which resulted in some eye-rolling and impatience, but I am used to all of that by now. To see my empty nesting post last year, click here.

Retro refrigerator by Home Depot

Check out the very cute refrigerator I found in the Back to School catalog at Home Depot. I feel like I’m becoming a Home Depot groupie.

Cooper, Cooper, Cooper….

My last trip out of town, I received the above photo from my daughter, who was at home housesitting. Cooper, our Akbash, experiences anxiety when there is a change in his routine. The way he shows us his displeasure on leaving him is to chew up the down sofa cushion. I love how Elisabeth uses duct tape to try and keep it together. Sigh.

Not only were there feathers everywhere in the house, but also out in the yard. I still feel like I’m coughing up a feather every now and again.

Cooper, looking innocent

After 3 hours of hand stitching the inner section, I finally reconstructed the cushion. We desperately need a new sofa, but who wants to make a large investment into something new, if Cooper thinks this is his chew toy.

A New Time Saving Product

Have you seen these grill mats? After deep cleaning the BBQ, my husband discovered these Kona grill mats. I was skeptical at first, but was very pleased with how they work. In addition to keeping your grill clean, the meat still has sear lines and this doesn’t change the cooking pattern.

With a sink right next to the grill, I just drop the mats in and easily wash them. We have had good luck using these.

My Stylish French Box

Quarterly, I treat myself to Sharon Santoni’s My Stylish French Box. Sharon lives in France, writes a beautiful blog, and one of these days, I would love to sign up for one of her brocante tours.

This subscription is a luxury as every beautifully-wrapped, sweet-smelling box is delivered straight from France to your door. This box always seems to arrive when I need a joyful boost. If you need a lovely gift for yourself or someone else, here is the link.

This quarter’s theme is entertaining and includes:

a deep blue stoneware oil jug by Digoin, a chic set of salad servers by Sabre, a delicate linen embroidered table runner by Charvet, beautifully wrapped 9 Lucienne beeswax candles by Apis Cera, a mustard pot by Pommery, a melamine service tray from Au Bain Marie, an antique brooch, a roll-on lavender oil and a resident artists’ botanical.

In addition, I entered a contest with them and won an additional August box, which I sent to my sister, Susie for her birthday!

Our Weather

This summer, like several other places in the US, we are experiencing record breaking temperatures. The National Weather Service is declaring an excessive heat warning until Thursday. For the last month, we have been in triple digit heat, every single day.

Last night, my oldest daughter and I were in Tempe, about 30 minutes away and got caught in a huge storm.

NWS Phoenix Storm Event Summaries
Photo from the National Weather Service

I felt like Dorothy in the Wizard of Oz as debris and signs were flying across the road and bouncing off the car as we attempted our way home. The monsoon winds hit in full force, with lots of lightning but little to no rain. The visibility from the dust made getting home really treacherous.

Does anyone else feel like God is trying to tell us something this year?

Easy Desserts

When I was in Waco in June, I met Sherri from Mad Dash Mixes. Sherri and her daughter catered one of the meals at the seminar. The creamy tomato basil soup she served was delicious and of course, Sherri and I became fast friends. To read about my visit to Waco, click here.

As a result, she let me take several samples of her Mad Dash Mixes. These pre-packaged, time saving mixes can be used numerous ways. I am now just experimenting with a few, but so far, I am very impressed.

Using their plain cheesecake mix, I added softened cream cheese and freshly whipped cream. Layered in a glass with fresh strawberries and a dollop of whipped cream, this is a very easy, quick summer dessert.

The selection ranges from soups, dips, desserts and marinades. What a great gift for the holidays and if you are innovative, there are many ways to substitute ingredients and use them in recipes.

Happy Tuesday! Yesterday, I finished stenciling the very last tile in the pool house bathroom floor. I cannot tell you how happy I was, especially after spending hours wedged between the toilet and the wall to get those pesky ones done. Now 2 coats of polyurethane and I then I am F.I.N.I.S.H.E.D.

Stay cool and safe wherever you are!


Life at Bella Terra’s Greatest Hits

Garden entrance

Thank you for visiting my blog on Tuesday, Wednesday and Saturday! I am so grateful to my faithful readers and all the new people who are joining us every week. Your comments and questions make my day. Since many of you are new, I thought it might be fun to share some oldies but goodies. Let’s call it Life at Bella Terra’s greatest hits!

Here at our home, we have the good fortunate of space where we enjoy everything from gardening to outdoor entertaining. Here are a few areas of interest.

Gardening and Chickens

My blog post Gardening 101 stemmed from the question, “does gardening take a great deal of time”? After the initial garden plan, the actual work to plant, harvest and maintain a garden is minimal and seasonal. And the benefits are enormous! To see this detailed post, click here.

Composting 101

Another popular post is about Composting 101, which is an ideal project to start during COVID. Being home and creating more waste, composting is the answer to having great soil for your garden. If you could recycle 30% of your trash to make rich fertilizer, why not? See that post, here.

Before and Afters

Our home BEFORE

Don’t you love to look at other people’s homes? I certainly do! And it is a bonus if there are good Before and After pictures. I actually have a file where I keep renovation photos of other projects as inspiration.

After

Our historic home is always going through a constant renovation. However, the initial restoration was the most significant. In an attempt to capture that journey, I am writing The Restoration Chronicles. So far there are 5 chapters and if you haven’t read our story, click here for Chapter 1.

Entertaining

table2

COVID has definitely put a monkey wrench into our socializing and entertaining. We feel blessed to be the stewards of this unique historical property and share it often to host everything from charitable events to proms. The orchard is one of the areas of the property we use for large sit-down meals. For more details about one of our dinners in the orchard, click here.

I long for the day when we can open up our home and our arms and welcome guests again. If you are dreaming of when we can all reconnect, here is an autumn entertaining post.

Cooking, Baking and Making

The summers do put a cramp in my cooking, as it is almost painful to turn on the oven in the triple-digit heat. However, the minute there is a touch of autumn in the air, I am back to baking. This past year, I learned how to bake sourdough bread from scratch, using starter that I carried home on a plane from Washington, D.C.

My sourdough starters~Hope and Bubbles

If you need a new project while we are all stuck at home, baking bread using a natural yeast, is so rewarding. I just recently shared more sourdough starter with someone who reached out to me and now I have a new friend. Bake bread. Make friends. Check out my post, Sourdough Starter Basics here.

Of course, there are all sorts of recipes in the files of Bella Terra. But here are a few favorites. Key Lime Pie post

Farfalle pasta with Lemon Chicken and Herb Salad

Together we made Preserved Lemons (see recipe here) and then we used them in some fabulous recipes, like the one above. This delicious chicken pasta salad is ideal for the summer~as it can be eaten warm or cold. Check out the recipe here.

DIY and Home Improvement

I am not much of a crafter, but I do like to tackle projects myself, sometimes moaning along the way.

The most recent is a hand stenciled tile bathroom floor in our pool house. If you missed that post you can see it here.

To see the post on the Mailbox/Exterior Light on Guest Cottage, click here

We have accomplished quite a few projects this year, and several with your helpful comments. From the great advice on the vintage mailbox above, to helping select a front door color, your feedback is gold! See that post, here.

Organizing

Staying organized is such a challenge, but I am inspired to be better at it when I see others accomplishing these tasks. This year, getting the master closet organized was a big win. To see the embarrassing before pictures and the fabulous after shots, click here.

Keeping heavily used spaces like the pantry is always a challenge. But it looks so nice when it is neat and tidy. See the improvements here.

Pets

Cooper~loves to sit

For those of you who have pets, you know how important they are to family life. Our two dogs, two cats and numerous chickens are all part of our daily existence here. The Best Kind of Friend is a blog post about the bond we have with our pets, how they shadow us daily and love us unconditionally. Read it here.

Tippy and Donovan
Sox

Thank you for all your kind words during Sox’s recent back injury and Tippy’s current failing health. We share in the joy of their presence and the grief of their loss.

Just Getting Through Life

The Importance of Good Friends

You have provided loving ears to some of my life’s challenges as we enter new phases of maturity. It was only a year ago, when I was struggling with empty nesting (see post here). But with the pandemic, nearly everyone is home again! Now, next week I will do a repeat performance as we move our daughter out of the house to start her sophomore year in college. Ah, the ups and downs!

Image result for images of babies smiling

We have talked about Kindness (see post here) and how important it is to Smile (see post here) and how to age well (see post here). Even though we cannot get together physically, we have such a supportive community right here on this blog. The goal with each and every blog post is to provide you with something interesting and important. And I’ve learned so much from all of you along the way.

Sharing my painting journey

Again, I cannot express how delighted I am that you have been with me from the beginning and I extend a warm welcome to new readers. In a world that seems to be filled with division and anger, it is my hope that Life at Bella Terra will be a bright spot in your day.

Happy Tuesday, my friends! If you ever want to see more content on any topic~gardening, recipes, home improvement, decorating, seasonal, whatever it is, please let me know! Thank you.

This post shared with Tuesday Turn About #61


Processing Tomatoes

San Marzano tomatoes from my garden

You need lots of tomatoes

Back in early June, after harvesting the San Marzano tomatoes from my garden (thank you, Whitfill Nursery), I made fresh tomato sauce. However, I did not process it with the hot bath canning method, but froze the fresh sauce in individual zip-loc bags. Recently, when my friend, Rick said his tomato source has 50 lbs. of tomatoes available, I willingly said yes, not knowing what I was getting myself into.

50 lbs. of Roma tomatoes

The thought never crossed my mind what 50 lbs. of tomatoes looks like, but it is a lot. But there in nothing better than having a fresh batch of sauce from summer tomatoes in the middle of winter. Because of the volume of tomatoes, I will need to process them using the hot bath method.

Safety First

The last time I used the hot bath method in making tomato sauce a few years ago, I badly burned my hand (all my own fault). So I am a little wary making it this time.

But, like with most things, your memory dulls and my desire to have fresh tomato sauce overrode my fear of burning myself again. If you have never processed food for long term storage, it is a good thing to know. Especially after the events of this year. When the food supply is challenged, having a pantry filled with your homemade goodies is a comforting thought. And now is the time to do it with the summer’s bounty available.

There are several recipes available for making tomato sauce, but I love using the simple one from my friend, Rick. With only 4 ingredients~tomatoes, garlic, olive oil and salt, you have a great tasting sauce.

Enlist Helpers

Before you start a project like this, you may want to consider inviting your friends over to help. This is not a one-person project, nor do I suggest you do this with your spouse. There is a reason the women from the farm would gather and do this as a collective group. It is repetitive, time-consuming work but made faster with great conversation and friendship.

Get the Right equipment

Get the proper size jar

It is important to have the right tools on hand too. Since you are working with sterilized jars and tops, boiling water and hot sauce, you need equipment to help. You can purchase jars from Walmart or through Amazon. Determine what size jar you will need (all depends on how many servings you want per jar). For 16 oz. jars, click here; 8 oz. jars, click here; and for complete canning kits, click here.

Processing tomatoes the wrong way can have serious side effects. There is much debate about safely canning tomatoes and you want to make sure you take all precautions in doing so. Sterilization of jars, hot bathing them for the proper amount of time, adding acidity for an extra level of protection are few things to know before getting started. Make sure you have a large stockpot. If not, here is a link to one.

Large pot needed

Making the Sauce

For a quick summary on making the sauce, you stem, core and cut the tomato into 16 pieces. I add an extra step here, where I wipe away most of the seeds out of the tomato before I cut it into pieces. In the meantime, slightly cook the garlic in olive oil and then add the tomatoes and salt.

Cook the tomatoes for 15-20 minutes, until the skins separate from the tomatoes.

Here is where I deviate from the recipe. Instead of using a food mill, I put the tomatoes into a Cuisinart and reduce them to sauce. I skip the step about refrigerating it overnight (I don’t have the space for this much sauce), but pour the sauce into sterilized jars.

I like this device which sits on the jar, because the mouth is wide and the sauce funnels right in; and it has a measuring device on the side so you don’t overfill. I leave a 1/2 inch space at the top.

Safety guidelines recommend adding an additional acid to the top of the tomato sauce before you process it. Your choices are citric acid or bottled lemon juice. For citric acid powder, click here.

Getting Ready to Hot Bath

Next, wiping down the rim of the jar will ensure your lid seals properly.

Now the jar is ready to go into the hot bath. Again, proceed with caution as you are putting something heavy into boiling water.

I submerge the jars and simmer for 40 minutes.

You know when you have sealed the jars correctly, as the center button in the lid will pop down as the jar cools. It is rather satisfying to hear pop, pop, pop as all the lids complete the seal.

Whether you decide to can tomatoes or not, below is Rick’s recipe using 3 lbs. of tomatoes and it is worth making.

It is also possible to process certain foods with the oven method (jams, especially). To see that process, click here to see how I made fig preserves.

Since we really don’t know what the supply chain will be over the holidays, tomato sauce or other homemade preserved foods will be a wonderful gift. So if you have access to an abundance of fruits or vegetables, think about canning them for yourself or your friends.

I hope you have some fun plans this weekend. Happily I am up at the cabin again appreciating the cooler mountain temps. The plan is to do some painting (on canvas), and get some biking or walking in. Enjoy!


Rick’s Tomato Sauce

This recipe uses 4 ingredients and makes the most delicious tomato sauce

  • 6 TBSP olive oil (extra virgin)
  • 1 TBSP minced garlic
  • 3 lbs Ripe plum (Roma) tomatoes (stemmed, cored and cut into pieces (16 pieces))
  • 2 tsp Kosher salt
  1. Heat oil in a large pot over medium-high heat. Add garlic and cook 20 seconds until fragrant (do not brown). Stir in tomatoes and salt. Raise heat and bring to boil. Reduce heat and simmer vigorously, stirring frequently, until sauce has thickened slightly and tomato skins are starting to separate from flesh, 15 to 20 minutes.

  2. Pass sauce through the medium disc of a food mill. Discard skin and seeds. Return the milled sauce to the pot. Bring to a vigorous simmer and reduce by half for a thick sauce. 

  3. Let sauce sit (overnight in refrigerator is best). Bring to room temperature and skim off any floating olive oil (the tomato oil is great for other uses). 

  4. Season with additional salt to taste. The sauce is ready to serve and can bee seasoned with oregano, red pepper flakes or basil.

    Recipe can easily be multiplied given the amount of tomatoes available and the size of the pot.

    Sauce freezes well and is suitable for wet bath canning.


This post shared with Tuesday Turn About #61

Between Naps on the Porch Metamorphosis Monday #603

Inspire Me Mondays with My Uncommon Slice of Suburbia

Tips & Tutorials #440 by Home Stories A to Z

Tuesday Turn About #62