1

Making Fabric Pumpkins

This is not a DIY project I was looking forward to but was forced to try. Years ago, I purchased several beautiful fabric pumpkins at a school fundraiser. Every year when I unpack them they look fabulous. Not this year. For some reason, weevils (?) infiltrated the fabric pumpkins and had a year to reproduce. It was so gross!

So I discarded the pumpkins that were badly damaged. In saving the pumpkin stems, I wasn’t sure if the weevils are taking up residence in there. Placing the stems in ziplock bags, I put them in the freezer just in case.

Since I have leftover fabric at the cabin, next on the shopping list is filler for the pumpkins. The infested ones had both dried kidney beans and rice. Unfortunately, Safeway is completely out of dried kidney beans (go figure). So I am forced to use rice. Next thing to buy is bay leaves.

Since most of the residual pumpkin stems are on the smaller side, I measure the fabric for a 10″ circle using a Pyrex bowl.

The only thread I could find up here is from the Dollar Store and doesn’t look like the best quality. So I use four strands on my larger needle. Using the basting stitch, I go around the entire circle of fabric.

By tightening up the thread, you create a pouch which is ready for the filling.

On this first pumpkin, I use only rice. In retrospect, I may have overfilled it as the pumpkin is a bit hard and not a pliable. In order to prevent future weevils, I add bay leaves too.

You will need strong thread (or 4 strands like mine) because in order to close the pumpkin, you must pull it together to minimize the opening.

Taking the needle, I sew back and forth, and side to side to securely close the top.

Using a glue gun, I affix the stems to the top of the pumpkin. (Thank you to my friend and neighbor, Kathy for letting borrow this!)

Holding the stem in place for several seconds, guarantees a secure fit. If you don’t have actual pumpkin stems, you can use a stick or cork and apply it the same way.

For the next pumpkin, I use a bigger bowl to measure for a medium size one (the bowl is 13-14″ in diameter). I repeat the same process but instead of using just rice, I put about 1/2 cup of rice in the bottom and use polyester fiber fill. The combination of the two makes a more pliable pumpkin.

This one is a little more difficult to stitch due to the thickness of the fabric.

Again, secure the stem to the pumpkin with the glue gun.

Here are the results of this DIY project. It is interesting that the fabric plays a role in how the pumpkin performs. The stiffer the fabric, the less squishy the pumpkin.

In addition to adding bay leaves to the filler, I am also placing several bay leaves inside the plastic storage box. Let’s hope these little critters are dead and gone.

To see how I use these fabric pumpkins for fall decorating in previous years, click here.

This post shared with Thursday Favorite Things


DIY Wreaths Using Natural Materials

I love incorporating natural materials into any DIY project for two reasons. 1) You cannot replicate nature and its beauty; 2) Natural products are free and do not cost anything. Good quality faux branches and flowers are expensive. And even though they are pretty, they are not genuine or unique as Nature provides. Have you ever made a wreath using natural materials?

Cattails

Materials You will Need

Currently, I am still at our cabin in the mountains and resources and supplies are very limited. There is a Walmart about a 25 minute drive from here and often, they are low on inventory. The only wreath frames available are 2 18″ grapevine wreaths for $4.74 each. In addition, I needed a wire cutter for $4.88 and floral wire for $1.47. Any kind of wreath frame will work.

Walmart’s faux floral section is so depleted and what is left, well, let’s just say it isn’t my taste. However, I was recently very inspired by a blog post written by Christine from Designs and Events. She made a wreath using roadside plants and greens. Since I’ve never made a wreath using natural materials, I thought I’d give it a try. Don’t you just love it when someone or something inspires you?

Foraging for Plant Material

The mornings here are crisp and cool now which is a great time to scavenge and hunt for just the right foliage. I do not know the names of these plants and they could be weeds for all I know. But I am looking for different textures, colors and sizes to make sure the wreath is interesting.

Wreath #1

Prep Your Work Space

Armed with my straw basket I set out looking for a variety of cuttings. The oak and aspen trees provide good material for the backdrop of the wreath. When I return home, I spread out a plastic tablecloth to assemble the wreath. Be prepared for a few bugs too.

Fill in the Background

I cut the oak leaves into manageable sizes and wire them to the grapevine wreath. Then I add the aspen greens, tucking them among the oak.

Here is what the wreath looks like at this stage.

Add Different Elements

Next I add this very fall looking flower (not sure the name), tucking the stems in with the greenery.

Using an odd number of sprig groupings, I sprinkle them around the wreath.

Next I add this soft, tubular shaped grass (?) with its sage green tones.

Since I don’t have a glue gun up here, I am tucking the stems in the wire used to secure the oak and aspen leaves. With the grapevine structure, it is easy to slip the stems into that as well.

These dark, rusty red branches already have dried leaves on them. Placing them on the bottom of the wreath, will lead your eye to the center. Another option would be to break them into smaller pieces and scatter them through the whole wreath.

Finding fresh thistle with its purple spikes was a painful delight. They are SO thorny and prickly. Wearing gloves is important while working with them.

So here is Wreath #1. Ribbon would be a great addition however, I failed to buy one.

Wreath #2

With the second wreath I decide to do something a bit loose and less complicated. Using the leftover grasses, I wrap them with the floral wire around the second grapevine form.

Isn’t this just pretty as is?

Using a few pumpkin and amaranthus picks from Walmart for $0.97 each, I only decorate one side. Here are some autumn picks from Amazon.

Faux pumpkin pick
Faux Amaranthus pick

Here is how Wreath #2 looks!

The fun part of this project is that you can create whatever you want. This is a very cost effective way to make your very own wreath with natural materials for under $10.

Neccesity is the Mother of invention here at the cabin. Not having lots of material available is forcing me to think out of the box. I put the second wreath up by our front door and it looks just perfect there!

Wishing you a fabulous weekend!

If you love wreaths and follow Pinterest, I have a Wreath Board you can find here. As always, if you enjoyed this post, please share with others.

This post shared with Tuesday Turnabout #66

Charming Homes and Gardens #24

To Grammas House We Go Link Party #209

Creative Crafts Linky Party #7


Odd Shaped Closet Solutions

Do you have an odd-shaped closet? Like most older homes, we have a front hall closet in our foyer. Since we rarely wear coats or jackets here, having a closet to hang them in is just bonus space. This particular closet isn’t square, because it tucks underneath the U-shaped front staircase.

One side of the closet has a 9 1/2 foot ceiling while the other side is 6′ tall. One side is shallow at 16″ wide while that other is 24″ wide. Oddly shaped, indeed! Instead of outerwear, this closet houses most of my tablecloths, table runners, napkins and lampshades. I want to share with you some of my odd-shaped closet solutions.

The Before

The closet accommodates our battery box for the security system and an HVAC chase cuts into the closet interior. Plus there is no lighting.

Hall Closet Before

Another embarrassing photo as the closet is a mess. It’s a good place to shove things out of the way when you are having company. Obviously, it is in need of organization and cleaning. Plus, my apologies for the quality of the photos. It’s hard to take pictures inside a small, dark closet!

Shelving Solutions

Using shelf sliders, you can build pull out shelves for easy storage

Originally, the closet had no shelves or rods. Adding two fixed shelves to fit into the deeper side of the closet, and two pull out “shelves” instantly adds storage space. These are custom made to fit the area, using conventional drawer slides. Making the shelves to fit is easy.

Black/white pulls are from Anthropologie
Creating a pull out area for table cloths keep them wrinkle-free and easy to find

Designing the rack for hanging the tablecloths is fun as it pulls out so I can get access to all the tablecloths. Using wooden dowels placed into a box made from 3.5″ x 3/4″ sections of wood, this is a simple DIY project.

Lighting

Battery operated lighting is added for some illumination. These wall mounted string pulled lights use 2 D batteries. However, there are many other kinds of lights you can find. Here is a link to some that are motion sensor, which I would probably choose now if I didn’t already have these.

Sort and Organize

After emptying out all the contents into the front hall, I took the time to inventory the contents. I did the Marie Kondo method on each item~did it bring me joy? Surprisingly, I had good memories of most of the tablecloths (the one I bought in Italy, that bargain at the yard sale, etc) but a nice pile will be donated to the thrift store. To see how I used this method in our master closet, click here.

The remaining tablecloths are measured and labeled using circular paper tags that you typically see on key chains. These are secured to the tablecloth with a safety pin.

Other tablecloths are folded and placed on the fixed shelves. These linens don’t require as much maintenance as the ones on the hanging rods. The shelves are labeled to differentiate the different shaped linens ~round, square, rectangular.

Different Uses for Ordinary Things

I also add inexpensive double bathroom towel bars to the closet to hang the table runners.

Using bathroom towel bars is a great solution for storing table runners.

The current organization system for napkins is binding like ones together in ribboned packages. Napkins are labeled, ironed and ready to go.

The napkin packages are placed in baskets and sit on one of the fixed shelves. Seasonal napkins are stacked and any tassels or other table decor items are placed in Zip-loc bags.

And there is room on the shelf for placemats.

Use the Space Above Your Head

The final area for storage opportunity is taking advantage of the section of the closet that has a 9 1/2 foot ceiling. Placing a pulley system on the ceiling, allows me to store items up and out of the way.

For me I don’t ever seem to have storage space for lamp shades. Back in the day, I would change out lamp shades for each season (whiter, lighter ones for summer and so on).

I tie the end of the rope to the lamp shade rings and then cover the shades in plastic for protection.

Hoist them up by pulling on the rope and tuck them away and out of sight!

Creative solution to storing lampshades

The rope is quite long so I wind it into a neat, small circle and let it rest on the table runner bar. Think of all the things you can tuck up out of sight!

The After

What I like about this closet is that is has storage ideas that work perfectly for this space. The closet is just right around the corner from the dining room, so all linens that are needed for setting a lovely table are within reach. Hanging the finer linen helps keep it wrinkle free and ready to go on the table.

Hall Closet After

I hope you enjoy today’s blog post about closet storage. A delightful group of friends are sharing their Small Space and Closet organization tips. Please check out their information and leave lots of comments!

This post shared with Metamorphosis Monday #606 Between Naps on the Porch

Chas from Chas’ Crazy Creations is giving solutions on How to Organize a Closet with these tips, tricks and hacks.

Andrea from Design Morsels is sharing her tips on Sweater Storage!

Tarah from Grammas House DIY focuses on the small spaces in her Master Bathroom.

Niky from The House on Silverado on Bathroom Drawer and Linen Closet Organization.

Cynthia from Create with Cynthia is doing a roundup of small space organization ideas.

Kristin from White Arrows Home is sharing multi-tasking Closet ideas.

Kippi from Kippi at Home is showing us her Home Office and her Organizing Solutions.

I hope you have enjoyed today’s blog hop and picked up a few new and interesting organizational ideas.

If you enjoyed this post, please share it on Pinterest.


Saturday Meanderings

Thank you for joining me today as I share my Saturday meanderings. Happy Labor Day weekend! If you ask most people, they probably don’t realize why this is a federal holiday. In 1894 Congress passed an act making the first Monday in September of each year a legal holiday. Labor Day celebrates the social and economic achievements of American workers. Let’s remember the contributions workers have made to the strength, prosperity, and well-being of our country. There is nothing like the American work ethic and ingenuity, especially during the pandemic.

Wherever you are, please enjoy your time with family and friends. I’m praying for a peaceful weekend, so be safe and smart.

Let Them Eat Cake

I spent the first few days of September tackling my lengthy To Do list. You know, those nagging items that you put off until the last minute. But I did take some time and make a new recipe from The Kitchen McCabe. This Vanilla Bean Olive Oil Cake is so dense, moist and flavorful.

Somewhere in our home is my fluted Bundt pan but for the life of me I couldn’t find it. Instead, I used a plain tube pan, which in retrospect, allow more space for the icing and strawberries. My neighbor said it was one of my best cakes, so click here for the link to the recipe.

I am a fan of The Kitchen McCabe, as you might remember this gorgeous Candied Orange Olive Oil Cake with Cornmeal and Rum from a small luncheon with friends. If not, click here for that post.

Baking Bread

My least favorite time to cook in the kitchen is during the summer in Phoenix. Even though we have air conditioning, the minute you turn on the oven, it’s just too darn hot. Being teased this week by cooler temperatures in the morning, we made sourdough bread. The process is time consuming (takes all day) but the results are worth it. The yield produced two loaves of dried cranberry/walnut; one loaf of sourdough and enough dough for two pizzas.

Remember if you live nearby and want some sourdough starter, please reach out. I have happily shared it with two others so far and each are making bread with siblings of Bubbles and Hope (it’s normal to name your starter…..). Want to learn more about sourdough? Check out my Sourdough 101 blog post here.

Pumpkin Disaster

My huge fall disappointment involves my large collection of velvet and fabric pumpkins. I have literally owned these for years. Each year I store them in plastic boxes to keep them dust free. This year, I opened the box and every pumpkin is infested with bugs. Eeewwww. The critters ate into the fabric. The filling appears to be dried beans but these bugs are similar to the ones you get in your pantry?

These pumpkins are a staple in my fall decorating. Does anyone know how to prevent this? I have seen tutorials on making fabric pumpkins and rice, beans are the filling of choice. I certainly don’t want to go to the effort to make more and then have this happen again.

Happy Hens

The 14 baby chicks we acquired in the Spring are now laying…..alot! Each day we have 8-10 fresh eggs. So if anyone is in the area and would like fresh eggs, please let me know. We sell them for $5 a dozen (less than the Farmer’s Market).

Fortunately, I have a beautiful egg apron, made by my sister, Susie. Not only did she embroider chickens on the front, but the apron has my blog name on the back. Wish I took a picture of the entire apron as it is really cute. The apron has ten individual pockets for me to use when I collect eggs every afternoon. It feels like such a luxury to have something so pretty and practical.

Where Were you a Year Ago?

A year ago today, I was touring this beautiful Scandinavian home in Vail. This property has since become my inspiration for our mountain cabin. I don’t believe I have ever been in a home that is so unique, warm and welcoming.

Garden Update

My garden is always a bit stressed during the summer and especially this year, with little to no rain and record breaking temperatures. The no rain part is particularly worrisome.

This week I ripped out all the toasted plants and am adding compost to the soil in preparation of fall planting. The fountain in the middle is being repaired too! The only two plants that are still thriving are basil and my shishito pepper plant.

We’ve added new PVC structural posts over multiple beds to hold shade or frost cloth. I will be writing a new post about that soon, as it has been very helpful to protect plants through extreme weather.

Have you been making your own compost during this pandemic? It is super easy and a great way to turn your food scraps into organic fertilizer. If not, check out this great post on Composting 101. See it here.

Cute Affordable Kimono

Kimono in C Mustard Floral

You will never see my name and fashion in the same sentence. I’m just not very good at it. But I must share this great find and it is only $23.99. It is a nice long kimono and comes in numerous colors and designs. Here I have it paired with a white tank and pants with pale blue accessories. You can view it on Amazon here. Every time I wear it, I get compliments. Not bad for under $25.

We are spending the weekend (and hopefully longer) up in the mountains. It is SO quiet right now. Sox is asleep at my feet and I’m just enjoying all the non-noise. My geraniums finally look amazing! Looking forward to a weekend of R & R.

Have a fabulous 3 day holiday!

If you enjoy this post, please feel free to share it on Pinterest.


Household and Family Information Binder

Our Household/Family binder is one of those tools that provides me with peace of mind. We’ve all asked ourselves, “if I had to leave my house suddenly, what would I take?” I would definitely grab this binder. With technology, you could put all this information on your computer. But I’m still not convinced our data is secured. Our Household/Family binder is packed with pertinent information organized into tabs. This is an active and working tool in our everyday lives.

Reason Behind Creating this Binder

In 2001, the great tragedy of 911 shocked our nation and the world. Suddenly, terrorism was at our doorstep and the way we proceeded with life changed drastically. At that time, I have a 9 month old, and two toddlers. My husband is traveling domestically and internationally. And we are attending large, heavily crowded events. The feeling of vulnerability forced me to think about all the “what ifs.”

In October 2001, we are scheduled to take an international trip and a trans-Atlantic cruise. This is our first trip ever without the children. Plus we would be completely out of touch for periods of time. A rotating set of trusted caregivers will be watching the children. How will they know about all the ins and outs of the house? And God forbid, what if something happened to us? Or one of the children?

It is very much my nature to focus during unsettling times and create working solutions as a way to feel a little more in control. This is when I developed this binder.

A Well-Used Binder

Fast forward to 2020 and the binder is somewhat laughable. In its current condition, the binder is falling apart. All updated information has been shoved inside. You can tell by the cover photo that it was last officially updated in 2009. It is covered in stains and spills too, but obviously well used!

What is currently happening in our country is disconcerting. For me, it is reminiscent of the fear and chaos of 2001. And in the last 19 years, our life stage has changed. Our children are older with two of our 3 children living independently. Some of the information is now obsolete and outdated. So it is time to refresh and clean up the binder.

Making the Binder/Tabs

Find a binder that you like with the proper size spine. Mine is an 1.5″ 3 ring binder with clear plastic cover. It is simple to make a spine label using Word. The tab inserts are made using Avery Label downloadable template.

Tabs in the Binder

Here is a list of the tabs I have in our binder. Obviously you can tailor this to fit your family and lifestyle.

  • Emergency Information
  • Children Information
  • House Info/Contacts
  • Auto Info
  • Insurance (house, auto, life)
  • Animal Information
  • Security Procedures
  • Paint Colors/Filter Sizes

What Goes in Each Tab

Since we do have house sitters to look after our animals and home, the emergency section includes pertinent information for someone who doesn’t live here on a regular basis. We also have a separate binder for house sitters with daily instructions on mail, garbage, how to work the television, when to feed the pets, etc.

Emergency Info

  • Water Shut Off instructions
  • What to Do in a Power Outage
  • What to Do if a car is stolen
  • Who to Contact if something were to happen to us (with their names, addresses, phone numbers, relationship, etc.)
  • List of immediate neighbors and their contact information
  • Police Emergency and Non-Emergency #s

Children Info

  • Doctors contact information
  • Each child’s DOB, SS#, Contact Info
  • All vaccinations
  • Copies of Passports, Credit Cards, Global Pass, Medical Insurance

Home Information/Contacts

  • Our House Street Address and phone number
  • List of all contractors/maintenance personnel and their contact information
  • All Utility companies account #s and phone numbers

Auto Information

  • Insurance Identification Cards
  • Make, Model, VIN#, License Plate to each car
  • Names and Addresses for Car Repair
  • Auto Insurance Information
  • Road Side Service Information
  • Onstar Information
  • Copies of Drivers Licenses, Recent Auto Repairs

Home/Auto/Life/Medical Insurance

  • Summary of Residential and Auto Coverage
  • All current insurance policies for home(s), car(s), life, umbrella, travel

Security Procedures

  • Alarm Instructions
  • Fire Alarm Instructions
  • How to Operate Gates
  • Legend for Alarm Codes
  • Programming Guide

Animal Information

  • List of animals, their breed, description, age
  • Veterinarian/Groomer contact information
  • Animal Control License #s
  • Microchip Information
  • Current pictures of each animal
  • Vaccination Certificates
  • Recent Medical information

Paint Colors and HVAC Filters

This section may seem a bit out of line with the others, but I cannot tell you how many times I reference our paint colors. Plus the filters are replaced every month and we have several vents. This is a great section to add items like this.

  • Current paint colors for exterior and interior of all buildings
  • List of sizes of filters for each area of the house

The House/Family information binder is a time saver too. If I need a copy of a passport or medical identification card, it is readily available, without me having to search. When the children were little, I would have current photos with their height, weight and descriptive information readily available. Who can remember all of that, especially in the middle of a crisis or emergency?

My theory is that if you plan and prepare for the worst, then the worst will never happen. Do you have a Household/Family Binder? With an active and busy life, it is comforting to know that there is a place where important information is kept and can be accessed easily.

This post shared with To Grammas House We Go #207

Creative Crafts Linky Party #5

Turnabout Tuesday #65-My Wee Abode

If you enjoyed this post, please share it with others on Pinterest


Styling for Fall

I can honestly say I felt a slight drop in temperature this weekend. Well, even though it remains hot here, it is a perfect time to think about styling for fall!

What a grueling summer we are having. For the next several weeks, fall weather will tease us. But every year, we get our Indian summer and the temperatures will go way up again. But a girl can dream about crisp, cooler mornings and wearing long sleeves again, right? It’s only a matter of time Fall will be here, so why not think about styling for fall now?

Despite the lingering summer heat, it doesn’t mean that we shouldn’t get into the mood. Today’s blog post is pulling out the best of fall decorating from previous years.

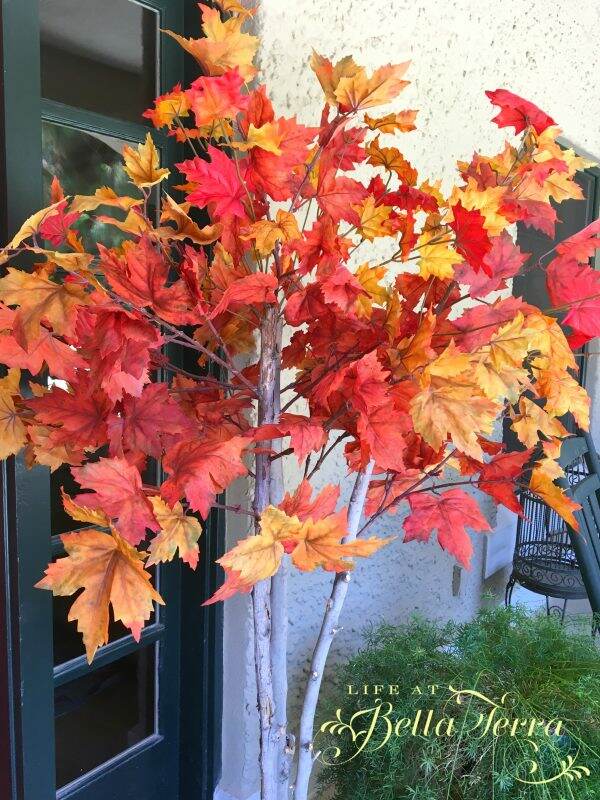
It’s hard to believe it was two years ago that I made these life size autumn trees. To see this DIY, click here.

This year I am thinking about making several smaller fall trees, ones I can put on mantels or use as centerpieces.

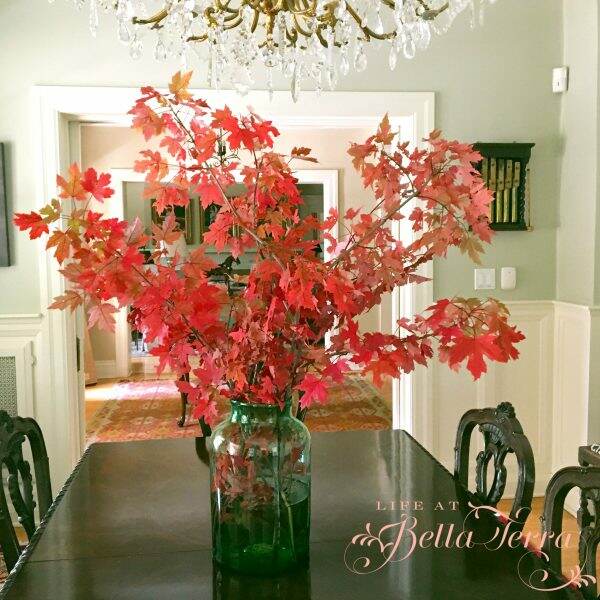
Or maybe large branches with fall leaves on them? Each year we go to the mountains and I will cut branches from real trees that have autumn leaves. I feel a bit guilty doing this so it might be time to create faux ones that I can use year after year.

Best Fall Candles

I am a big fan of Rosy Rings candles as each one looks like a work of art and smells heavenly. The candles are in investment, but they last from year to year. Plus they make terrific gifts. Click here for the link.

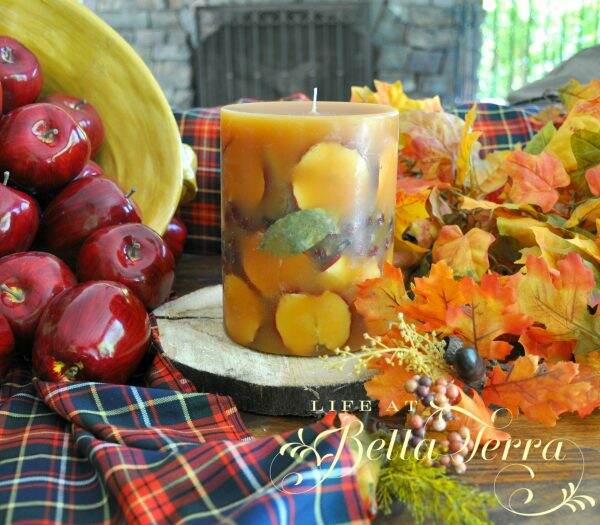
I cannot wait to pull this out again soon and fill the rooms with a seasonal fragrance. There’s a bit of a story around this Spicy Apple Candle. Click here for the post.

Each year I decorate one of my prized antiques, a Hepplewhite secretary, dating from 1790 to 1800. I bought this at a time when I had little disposable cash and every penny counted. But I am so glad I made the investment because it gives me such joy.

With 4 glass shelves, I get to do some creative fall magic with it. Too bad it is tucked into a corner of the living room, but I am always pleased to doll it up for this season. To see how I decorated it in the past, click here.

An easy, quick way to add seasonal decor is to switch up pieces of art. I don’t recall where I purchased the art above (I think an auction house), but it screams autumn. In addition, I have a few pieces I have personally painted, but now I am inspired to create a new one.

It doesn’t take much to add color and texture to your fall seasonal decor to your kitchen. A coffee cups, pumpkins, and hand towels are affordable ways to change things up a bit. Here are some cute towels on Amazon.

This spring I acquired a few great yard sale finds. This particular piece, especially with the artwork above, gives an autumn vibe in our family room. I cannot wait to play with the decor and see how I can change it up.

So are you ready for fall? Is it getting cooler where you live? If so, send some lower temperatures our way. Since we are without children, the fall decorating this year will be just for us. I have a new front door color that is more spring/summer-ish so that will be an interesting challenge to decorate. To see the new front door color, click here.

My fall focus is going to be on natural and already owned items. For the natural items I am dreaming about acorns, pinecones, branches, succulents and wood. My collection of baskets, scarves, throws, pottery and lots of velvet pumpkins will be incorporated.

Do you have any decorating plans for the fall? Please share your thoughts and ideas as you always inspire me! Have a terrific Tuesday. Happy September!

This post shared with Tuesday Turn About #64

Charming Homes and Gardens #64

If you enjoyed this blog, please share it on Pinterest later.

For your convenience, I try and provide links to items you may like. If you make a purchase as a result, I may receive a small stipend for this service, at no cost to you.