1

Exteriors: Before and After

Before-our home, Bella Terra

While I was in high school, my parents bought a 1771 Colonial home that needed extensive renovation.  I recall Mom and I spending countless hours consulting on this restoration project. That was the beginning of my love of historic home remodeling.

After

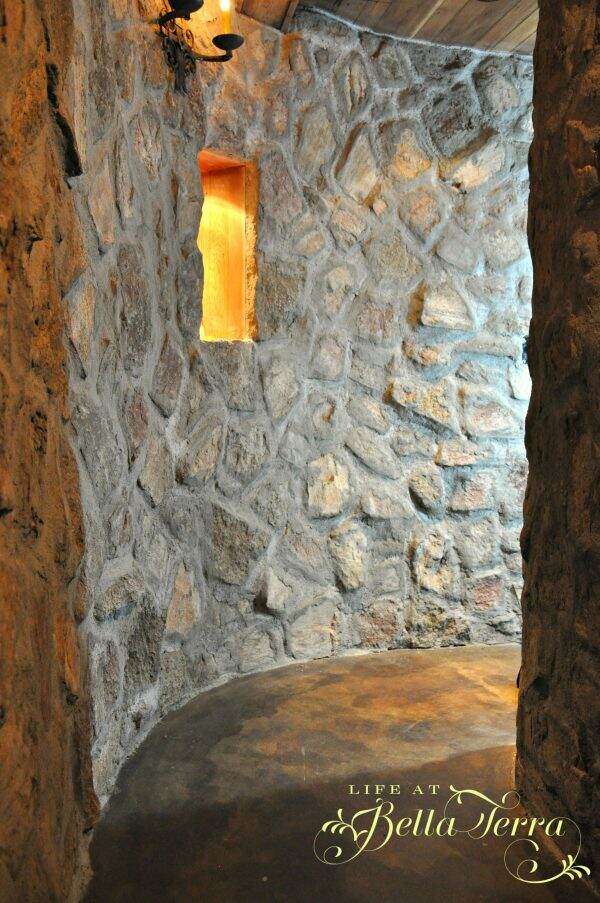
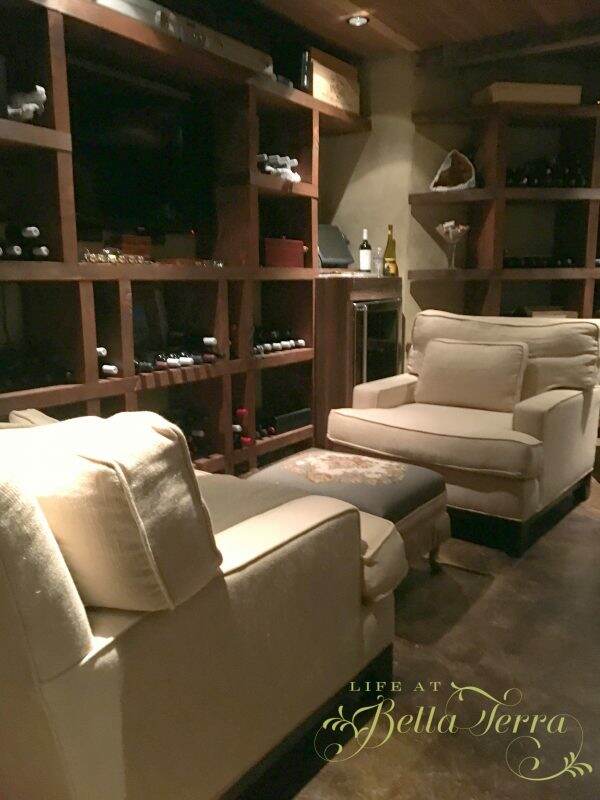
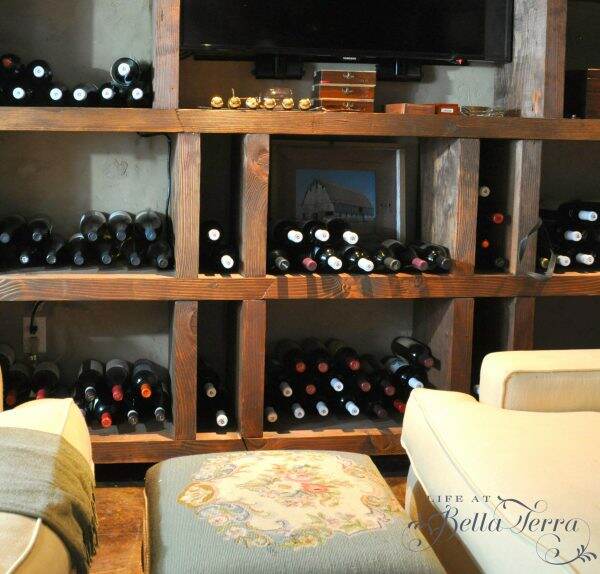
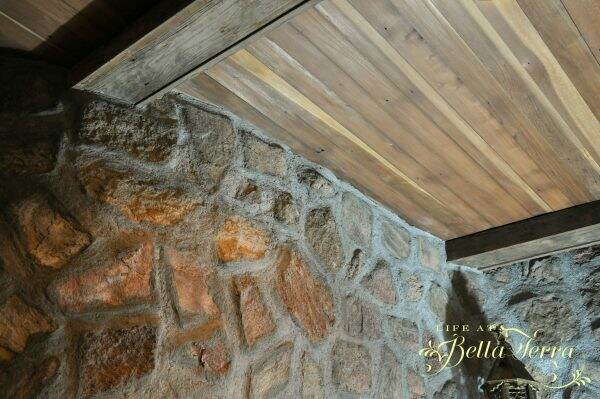
Bella Terra, built in 1910, is the 4th renovated home for us.  I have also purchased, remodeled and sold 5 others.  In looking through old photos, I thought you would like to see some Before and After shots.  Granted some of them are before digital cameras, but for the most part, you can see the improvements. To read more about the restoration of our home, click here.

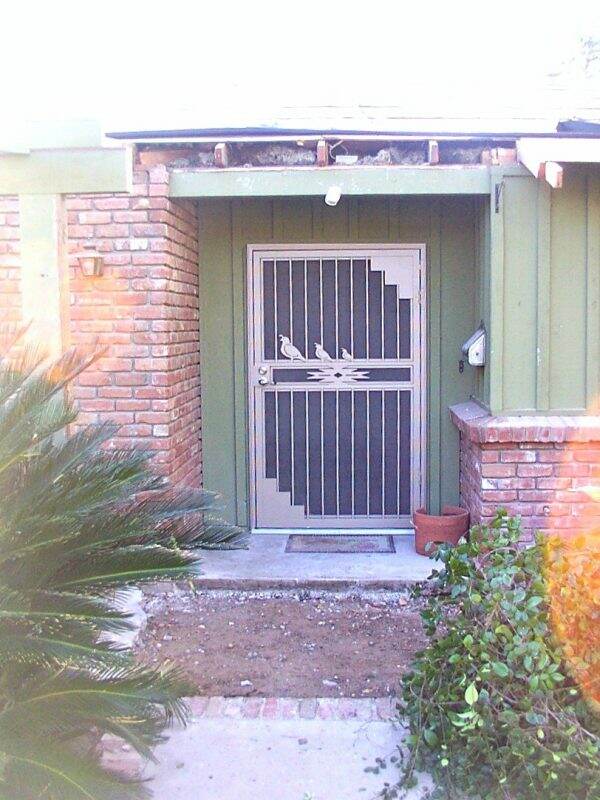
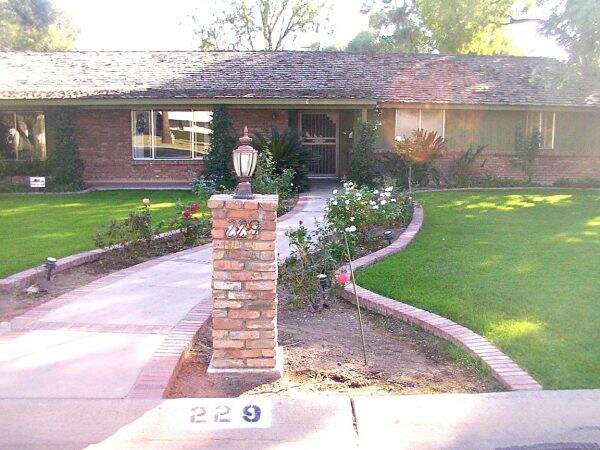
Curb appeal and the attractiveness of the exterior creates a lasting first impression.  If it doesn’t catch your eye at first glance, then you can anticipate that the rest of the house is probably subpar. Here is the original entrance of a long brick ranch-style home that I remodeled in 2008. An unattractive security screen door, unsafe sidewalk, and deteriorating rafters, small scale light fixtures add to the ugly entrance.

Before

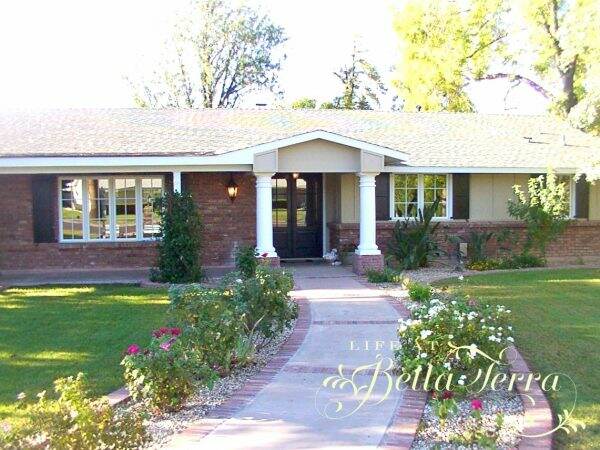
In order to create a wider entry, custom double doors were fitted.  We then added an overhang to break up the long, low, linear lines of the roof of the house.

After

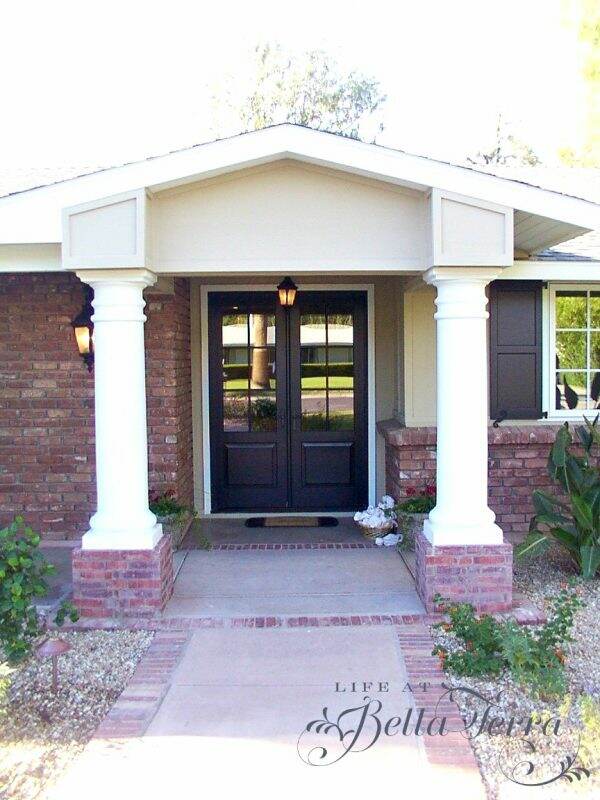
Notice the improved walkway, the fresh paint and the well-lit entry. Here is the street view…..Before…

Before

And After…Notice the new windows, siding, roof, house and landscape lighting and the addition of shutters. This was one of my favorite remodels.  It has 5 bedrooms, 4.5 baths and the most amazing mud/laundry/craft/office room. The family who bought it still lives there.  Each time I see them, they remind me how much they love it.

After

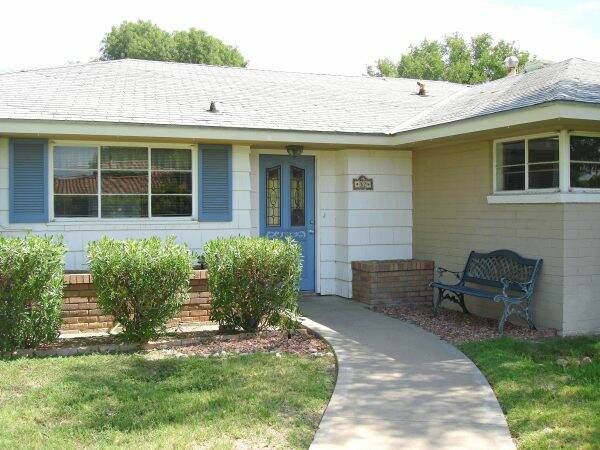
This sweet small ranch has such potential.  Here is the front entrance before.

Before

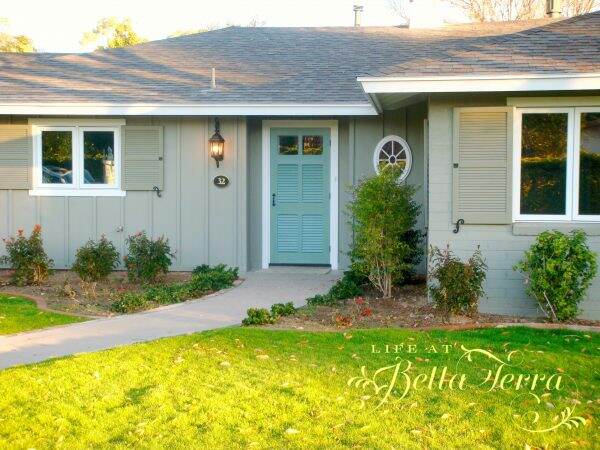
Here is the after.  The colors were inspired by a home in Stonington Borough, Connecticut.  I removed the corner window, added wider shutters, new siding and a new darker roof color. The oval window provided some curves to a rather angular house. Adding a shuttered front door provides security and ventilation at the entrance.

After

Here is another long, low brick ranch. The front door was a cheap, hollow core closet door.  The odd stone below the brick is a bit of a challenge. I wasn’t wild about the roof, but after some research, I discover it is a very expensive composite with a lifetime warranty.

Before

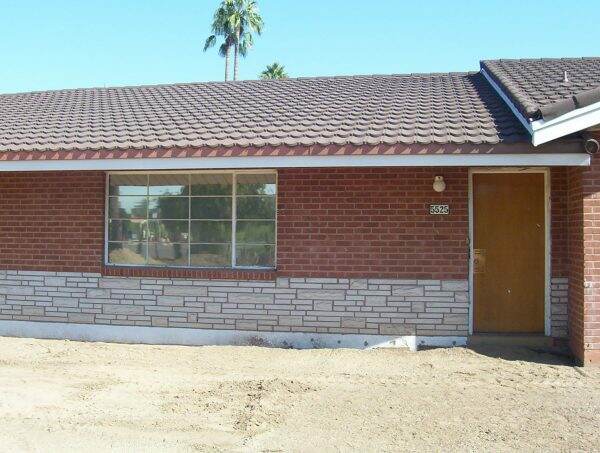
With new windows, shutters, front entrance and landscaping, the entry looks much more appealing. And the roof is no longer an eye sore.

After

Here is the guest cottage to my latest restoration.  There was an apartment attached to the front of this.  When we demolished the building we discovered the original garage and barn doors.  Unfortunately we could not salvage the doors as they are too damaged.

Before

Here is what it looks like now as a newly converted guest cottage. New windows and doors, siding, landscaping and a custom built arbor, increase the curb appeal of this sweet structure. To read more about this Willetta home restoration, click here.

After

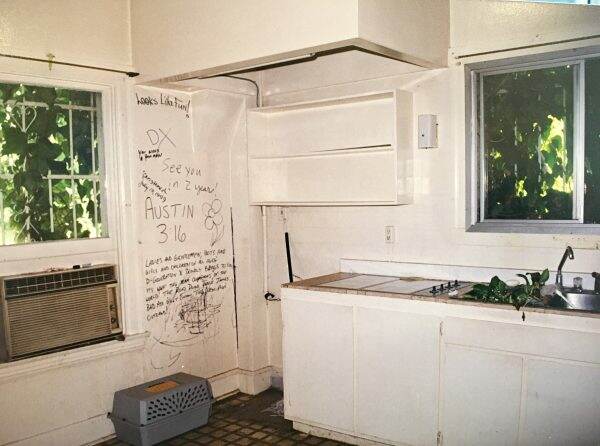
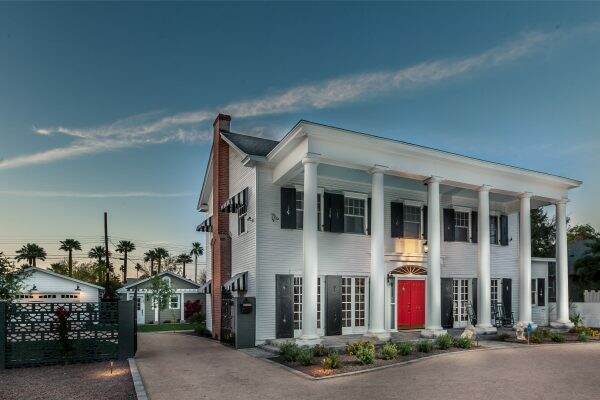
The main house, built in 1922, had been vacant for over 20 years and was in a state of disrepair when I purchased it.

Before

Finally it has been brought back to its original grandeur.  Removing the aluminum siding showcases the original clapboard, new roof, repaired columns, appropriate lighting and a new 2 story addition on the back makes this a historical charmer.

After

I love any and all before and after pictures~~ of people and makeovers, homes, just about anything.  As I sort through the thousands of photos, I will continue to share other remodels with you.

If you enjoy this post, please share on Pinterest.

This post shared with Between Naps on the Porch Metamorphosis Monday #645


A Peek into Our Wine Cellar

I apologize for the quality of the pictures, but I still haven’t mastered great photography yet.  Since this room has absolutely no natural light, they aren’t the best.  But hopefully you’ll get the idea.

The cellar is hidden behind this “bookcase”.  A local goodwill shop was having a book sale, 24 books for $2.00 so I bought all of these for $10.00!  My husband cut them to 2 1/2 inches wide to reduce the weight on the shelves.

The magic begins when you push against the shelves and this happens….

The door provides a “scary house” squeaking sound as it opens.  Instead of stairs, we created a serpentine path to the cellar.

I didn’t want the standard wine cabinets that you see in most cellars.  This room deserved a more rustic, casual look. The floor is stained concrete, which is perfect for any wine spills. Getting these chairs down the twisting, narrow entry was quite the challenge.  If we ever sell the house, the chairs will go with it!

Our design inspiration came from the wine cellar at the Hermosa Inn.

The ceiling is made with wood an old Illinois barn, that was being demolished.   The curved stone wall was added for character, in hopes that it would look like an original foundation wall.

The “floating” table is a convenient spot to serve wine or do tastings.

Around the corner is a copper sink, mirrored backsplash, shelves and storage.

There is a system for scanning new bottles and keeping an overall inventory.  This little machine creates a UPC code label which allows us to scan the bottles we use.

Since this is probably the best place to be in the middle of a hot Phoenix summer, we have a flat screen television and access to multiple channels.

I hope you enjoyed the tour of the secret wine cellar.


Chairs:  Pottery Barn

Wine Refrigerator: Viking

Wine Software: Sommelier

Sconces: Relics


My Kitchen Pantry

As embarrassing as this is, I have to show you the “before” picture of my kitchen pantry.  How do things get this messy?  It became the room that we just tossed stuff in.  You couldn’t even walk inside.  Moan. After hanging onto the door frame and stretching long and reaching in, nearly breaking my neck, I decided it was time to clean it.

Here is the “after”:

Ok. So I’m a little giddy over this.  I threw out all the expired food (2013, really?) and donated all the “near” expiration dates and those items I had multiples of (way too many garbanzo beans).

I finally sorted and organized piles of recipes I had cut out of magazines or printed off the internet. Years ago, when I was swamped with 3 little children, I hired my friend Linda to sort and organize my recipes.  She created these fabric covered binders which I use ALL the time.

All the food items are now organized alphabetically.

Shelves are labeled so hopefully, other family members will know where things are located.

I reduced my cookbook collection significantly, only keeping those I use or cherish.

Cleaning out this room made me realize we don’t need to buy Ziploc bags for a long time!

Beverages are now organized and in one place.

My sweet husband polished all the copper Martha Stewart cookie cutters I purchased long ago.  The salami and cheese ball are fake, but fun to use when staging for a party.  The miniature utensil rack was a gift I received several years ago from my sister, Joanie.

There are 9 foot ceilings in our home and I used the upper sections for hanging large platters that don’t seem to fit anywhere else.

The original pantry had one door that unfortunately would swing right into the adjacent door to the basement.  We resolved that by putting in two narrow swing doors with metal mesh screens.

Since I am not cooking on a daily basis for a large family, my husband and I decided to be more European and buy things as we need them.

I was inspired to clean this out after seeing one of those amazing pantries on Instagram.  As much as I sometimes complain about too much screen time, technology does have its benefits.

Have a wonderful week!


Organizing the Butler’s Pantry

The butler’s pantry is a service room between a kitchen and dining room, typically equipped with counters, a sink, and storage space for china and silver.  The origin of the butler’s pantry was between 1810-1820. Our butler’s pantry fits that definition to a tee.
The only thing missing in our butler’s pantry is the butler.  I would really like a butler.
Above is a typical day in the butler’s pantry-messy and unorganized.  There is tall upper storage on either side, a sink in the middle and the original wood countertops.  Several drawers are below on both sides as well.
This weekend I decided to clean and organize this pantry.
The original shelf paper was rubber and started to break down (since I first did this nearly 17 years ago).  I replaced it with Con-Tact, a non-self adhesive fabric with a non-slip grip purchased at The Container Store.
I washed each and every glass, got rid of the chipped, cracked and mismatched ones.  I rediscovered items I loved but had overlooked. This project took so much longer than I anticipated, but everything sparkles and is in place.
The drawers below hold everything from napkins to candles.
Each drawer is labeled which helps me put things back where they belong.  I love my labeler.
There is flat storage for trays and behind the skirt under the sink, I keep large vases for flowers.
 Living in an historical home can offer some experiences of what has come before.  The countertop on either side of the sink is marked with cigarette burns~~my assumption is that back in the day one would lay down their cigarette to make a cocktail or wash a glass.
After I completely reorganized the left side of the pantry, I tackled the right side, which holds some of my china.
And my pots de creme collection (as if I make pots de creme all the time!!!)….
I have too many sets of china and most of the dinnerware is stored in the basement.
Here are the after photos.  Sorry for the quality as I took it early this morning them rather low light.
This project took nearly 3 days to complete as I found many pieces of silver that needed polishing, crystal needing washing, plus the sorting and organizing part.  Now I know why people had butlers to do all this work!


My Kitchen – Part 2

Yesterday, I visited the home of a friend who is an interior designer with a contemporary, minimalist style.  I was amazed that she lives with absolutely no clutter.  Nothing. Granted, we have vastly different lifestyles but when I came home, I felt my home was cluttered.

Isn’t it interesting how different we are and how we live?

Anyway, back to the kitchen.  Welcome to Part 2.  If you missed Part 1, please click here.

Baking/Prep section:

In the baking/prepping section, the retractable shelf for the mixer and food processor provides additional workspace.  Equipped with their own electric outlet, these appliances can be pulled out when in use and tucked away later. All bowls and baking items (flour, baking powder, etc.) are stored in cabinets nearby.

Utilizing the 4″ toe kick under the kitchen island, a collapsible stool is hidden in that dead space.  This stool was used ALL the time when the children were my little baking helpers.

The Step-Fix collapsible stool is made in Germany by Hailo. This could also easily fit into a drawer and I believe it’s less than $50.

The double Dacor ovens allow baking choices from pure convection to regular baking. We tend to use the upper oven much more than the lower one, but it’s nice to have an additional oven on hand, especially during the holidays.

It’s frustrating to be in a kitchen and lack electrical outlets.  I made sure this didn’t happen by adding a plug strip under the large kitchen windowsills.

We have three refrigerator sections.  The side-by-side SubZero refrigerator and freezer are fabulous.  They provide more than enough storage and refrigeration for our family of 5. Grizzly Welding made the iron door pulls.

Double drawers (also made by SubZero) were initially installed for everything and anything child related. The drawers provided easy access to snacks and drinks.  The 3rd refrigerator is the glass front wine unit by U-Line.

Dining and everything else:

The island in the center of the kitchen is very large and serves as the hub for all family activity-baking, cooking, school projects, sewing, dining, and entertaining.

In the island is an additional sink ~~very handy and convenient for fruits and vegetables coming out of the freezer. Our reverse osmosis system is located here too, steps from the ice maker.

Two warming drawers are also housed in the island, on the range side.

In the center of the island is a pastry shelf, which helps break up the expanse of the island. I also like to seasonally decorate it, but it can also be used while entertaining for desserts or other items.

The goal was to create a high functioning kitchen in a classic design that would look like it had always been there. I love this room as it truly is where everyone gathers.

I hope you enjoyed the kitchen tour.  I am now off to declutter.


Dacor Double Ovens

Dacor Warming Drawers

Kinetico R-O system

Stepfix by Hailo

U-Line wine refrigerator

Wedgewood china tea cups/pot

Subzero Refrigerator/Freezer and Drawers


My Kitchen – Part 1

The original kitchen was woefully inadequate. Gotta love the electric cooktop right next to the sink!  It was so small we converted this space into the breakfast room.

We desperately needed a new kitchen. Trying to add such a vital room to a 100+ year old home took some careful design and planning.  Thankfully we had a wonderful architect who understood how important it was to ensure the transition from the old to the new was seamless. I wanted the new kitchen to look like it was original to the house.

When designing the kitchen, I divided it up into working sections~~cooking, baking, prepping, cleaning, storage and dining.

The Cooking Section:

The cooking area is set off to the side in its own alcove.  The main focus is the 6 burner Dacor range. The two deep drawers below hold all the pots and pans I use on a regular basis.

One of my favorite parts of the cooking alcove is the pot filler.  It is so easy to fill stock pots vs. carrying them across the room from the nearest sink.

The two pull out drawers on either side of the Dacor 6 burner gas range as used for oils and seasonings.

Everything I need while cooking is close at hand. Utensils are kept in vintage crocks within easy reach. Being left handed, all this sits to the left of the range.

The spice drawer is filled with Tupperware spice containers that are labeled.  I do love matching labels but haven’t gotten around to making these look all the same.

I just read that narrow width, light flooring is back in style.  We matched the original floors using Canadian Beech.  See? If you wait long enough, everything comes back in style!

On a vintage pedestal stand, I keep the daily essentials~~salt, pepper, oils, sauces, vinegar out on the counter.  A roll of paper towel is very close to help with wipe ups and spills.

To the right of the range is our coffee/tea station.  To see more about this, click here.

The Cleaning Section:

The cleaning area supports 2 sinks with their own individual faucets.  I’ve never had a kitchen with 2 faucets (usually there is one faucet that both sinks share), but we use both sinks ALL the time.  The two sinks/faucets allows 2 people to do separate tasks without being in each other’s way.

The faucet pulls out and can be used as a sprayer.  Buttons on the faucet change the water from a stream to a spray.

Investing in good sinks is a must. These deep Franke sinks were well worth the money.  They still polish up nicely and provide enough space to wash the most difficult items.  When the children were little, they would sit in the water and play while I prepared meals.

Dishwashers are on either side of the sink.  There are 3 pullout trash containers-one for regular trash; one for composting and one for recycling.

The L shaped bank of casement windows overlook the backyard and terrace, providing an abundance of natural light and ventilation.  These were installed so I could keep an eye on the children playing in the backyard and pool. The latest harvest from the garden is often found on the windowsills.

I hope you enjoyed seeing some of my kitchen.  My next post will focus on the baking, storage and dining sections.


Architect: Cathy Hayes Architecture, Phoenix

Dacor range

KitchenAid dishwasher

Fisher Paykel dishwasher drawers

Marvin Windows

The Chicago Faucet Co.-potfiller

Waterworks tile

Franke sinks

Cabinetry-custom, Lacquer finish in Cottage White

Hardware-Restoration Hardware

Flooring-Wildwood Custom Flooring, Phoenix

Kitchen Faucets- Clyde Hardware, Phoenix.