1

Cleaning out the Potting Shed

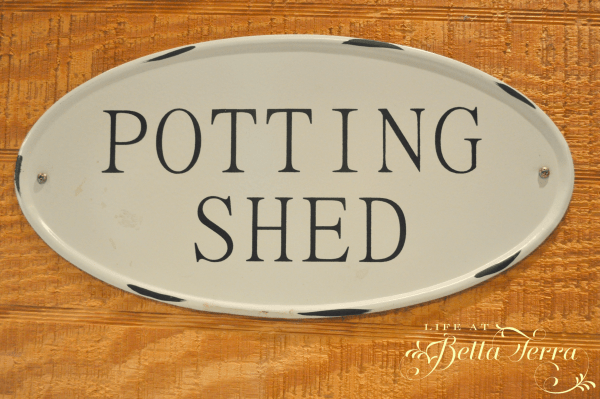
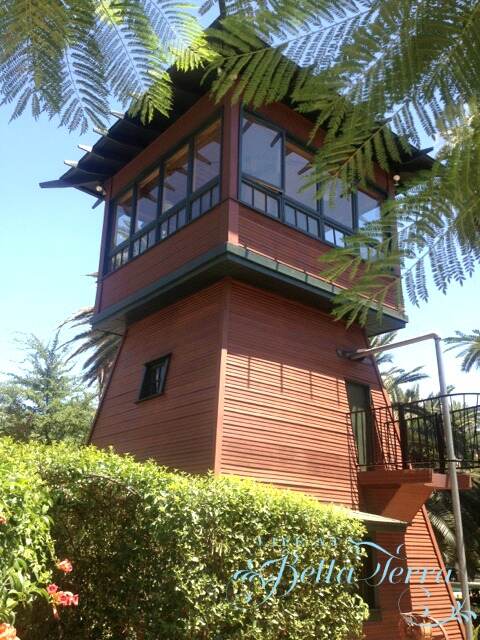
What started out as cleaning the windows to the well tower, turned into a full day of cleaning out the potting shed. The potting shed occupies the first level of the well tower. If you are new to the blog, the well tower is just that, it houses the well, which we re-activated when we restored this property. To see a previous post about the well tower, click here.

In order to get to the windows, however, I came across this mess. Most of it was my fault, as I recently have been searching for paint to do touch up for both the interior and exterior.

I am still trying to understand how things get so messy. But with many people using this space, it becomes a great dumping spot. The good news is I tackled it yesterday and decided to share it with you today.

When we restored the well tower, this was an empty space. An old tub and sink were “leftover” renovation items and we decided to repurpose them here.

This fabulous porcelain cast iron sink is BIG. One side is very deep and the other shallow. It’s a bit banged up but perfect for washing my garden tools and pots.

Leftover tile from Waterworks was used for the countertop and backsplash. The casement windows provide ventilation and a lush, green view right into the hollyhocks.

Washing the exterior window was a bit of a chore as I had to negotiate my way through the hollyhock jungle!

The bathtub is on a raised platform and is used as a dog bathtub. It’s impossible to get Cooper in there, but it is perfect for the smaller dogs.

The curtain panels cover 3 separate storage areas. I’m not wild about how they look but they are a Waverly old rose fabric and serve a purpose. Maybe they need a shorter hem?

One section is where we put all the paint cans. We have a local hazardous waste area where you can take old paint cans annually. This year I am committed to sorting through all these cans, labeling the good paint and tossing the old.

The other sections have numerous pots and gardening items. An old chippy wire basket keeps miscellaneous pots and supplies on the counter. Garden boxes hold seeds that I will need to sort through to see which ones are still viable.

I found these cute French hooks and put them up to hold my gardening bags. This way I can fill them with my tools and head out to the garden.

After removing two huge black garbage bags of trash, the potting shed is clean. I still have the other side to organize as I approach the final window on the first level.

Here is a larger view of the space. The well tower has 2 sets of spiral staircases that lead to the top. I don’t look forward to scrubbing that.

Entry into the well tower is through these gorgeous Dutch doors on the north and south side.

I am hoping to clean the rest of the room today, however, my back is aching.

Are you tackling any big projects during this lockdown? Some days I feel like it and other days, not so much. I don’t know about you but I am really ready for this virus thing to be OVER.

Have a wonderful and productive Tuesday!


The Restoration Chronicles~Chapter 3

So much has happened in the last month since I wrote Chapter 2 of the Restoration Chronicles. To see previous posts, click here for Chapter 1 and here for Chapter 2. On this Saturday morning, I hope you will enjoy the latest installment of the renovation journey of Bella Terra.

As you may recall, the addition of a new kitchen and back terrace, started the domino effect in the rest of the house. On Chapter 2 we left off with the new fireplace chimney being constructed with two fireplaces. Since we were adding the large outdoor terrace on the first floor, we expanded the much needed new master bath and bedroom on the 2nd floor.

The pool equipment was moved to a more discreet location. Really, who thought it was a good idea to put it poolside?

As you may recall from the last chapter, nearly all the windows in the house had to be replaced with brand new, custom-made Marvin windows. However, the windows in the family room were beautiful, hand-cranked ones with the original wavy glass. I made the nostalgic decision to keep them. As you can see from the photo below, some of the windows were cut to accommodate window air conditioning units. These had to be re-made.

Hindsight is always 20/20. In keeping the original single paned family room windows, the room is hotter in the summer and quite cold in the winter. A few years ago we installed exterior Sunbrella rolling shades which are controlled with a remote. What a significant difference especially in the summer when we can keep the direct sun off the windows.

Here you can see the progress in the first and story additions. The plaster and stucco work is so messy.

This is the south view. Originally the upstairs terrace was very large. We expanded the footprint of the second story to leave a partial terrace which resulted in a better flowing master suite. As a result, we had to build a new roof.

The upstairs terrace is still a good size. This is the view of both the master bedroom and office French doors. If you can believe it, originally there was no railing at all.

The expanded second story addition also includes the master bath and closet.

I probably should have taken my clothes line down for the picture! Notice that the pool fence is no longer there. We had built a very substantial wrought iron fence around the pool.

One day I found the children shimmying up the pillars and sitting on the top. They could easily scale the 6 foot barrier. They were monkeys, not children. Instead, we taught them, at a very early age, how to swim. Many years later, we took down the fence as our whole perimeter of our property is secured, which meets city code on pool safety.

In this photo you can see the laying of the Ludowici roof tiles and the preparation on the exterior walls for the stucco finish. In the background is the new 3 car garage and workshop. We also had to remove one large palm tree due to its proximity to the house.

The round window with the eyebrow is in the master shower. The rain chain slows down the water from the roof during torrential rains.

Here is a different angle of the new addition. We tried to make the new parts look like they have always been here~~using the same architectural details as the original house.

I really do use that clothesline often!

Life at this time was hectic with 2 children and being very pregnant. Naturally, we wanted to make everything as normal as possible for them. But they didn’t know that living in the middle of this massive construction site was a bit unusual. Home is all about loving where you are, not matter what.

I almost wish I had a huge project like this as a distraction right now. But we’re trying to stay positive while keeping everyone in our thoughts and prayers.


Open Floor Plan or Not?

Jodi Cooper Design

Do you like an open floor plan? According to Google, an Open plan is the generic term used in architectural and interior design for any floor plan which makes use of large, open spaces and minimizes the use of small, enclosed rooms. Are open floor plans going out of style?

Modern Kitchen Living Room Hone design with open concept
YinYang/Getty Images

I’ve never lived in a home with an open floor plan. The closest thing is our cabin in the mountains, where there is a large window-size opening between the kitchen and the main living room. It’s good for shouting through but not for much else. Sorry for the low quality photo~~it is the only one I have!

Since Bella Terra was built in 1910, it clearly has formal and private spaces. Our kitchen is definitely not an open one. The kitchen to me is my haven, my sanctuary. I prefer it to be separate from the living spaces. To see more kitchen details, click here for Part 1 and here for Part 2.

When I’m stressed, I tend to bake or cook, and want to do so by myself. There is a television in one of the cabinets, but I get to choose whether I want it on or not. The kitchen is open to the breakfast room, but it is not an active part of the house.

The kitchen island is rather large and that is where all our family and guests congregate anyway. I love my family but sometimes I just want to have my own space. Plus I am not a fan of the kitchen mess or smells infiltrating the living spaces. Rarely is my kitchen neat as a pin.

Even though I prefer a private kitchen, I know the open plan is popular. In one of my previous remodels for resale, I did open up the kitchen to the living room/dining room. To see more of the Glenn remodel, click here.

Removing the load bearing wall between the previous kitchen and living room

We recently visited friends who just moved. Their kitchen, dining room and living room are one big room. It was lovely but it got me thinking of whether I would enjoy the open concept or not.

When I was designing the addition to the Willetta remodel (see post here), the floor plan was original to 1922…..separate living room, dining room and kitchen. But the kitchen was oddly shaped and it made sense to expand this space.

Peninsula is the room divider

In addition to enlarging the kitchen, a family room was added on the first level and an updated master suite on the second story.

Clear pendant lamps define the end of the kitchen space
The New Addition: a small family room

A House Beautiful article by Hadley Keller, entitled Please Stop with the Open Floor Plans asks, “when did the walls become the enemy?” Somewhere in the early 1990s, builders began touting the attributes of “open plan”. Hadley suggests instead of open floor plans, to try and start using your rooms. Use the dining room more frequently, not just for Christmas dinner.

Carlton Architect + Design Build

There is a great deal of discussion of getting rid of the open floor plan, especially when it comes to kitchens. Some are suggesting that you add another “messy” kitchen that is hidden from the open floor plan kitchen. Oh my! The thought of keeping two kitchens clean??!!???

Kitchen is not part of the living room or dining room. Photo by Claire Paquin

According to HGTV here are some pros of open plan living . 1) Makes a small space feel larger; 2) Being part of the family (not isolated); 3) Entertaining is more social and convenient; 4) Gorgeous open site lines; 5) Eliminating underused space.

Matthew Collins, Uptic Studios

And the cons (by HGTV): 1) Makes a large space feel too big; 2) a messy kitchen is always on display; 3) No perfect way to contain the mess; 4) Load bearing walls; 5) Lack of privacy.

So what are your thoughts on this? Do you have an open plan kitchen/living and dining room? Or a separate and private kitchen? If so, please tell me what you love/dislike about it.

Happy Wednesday!


Butler’s Pantry Inspiration

We have a butler’s pantry. We do not have a butler. I would LOVE to have a butler like Mr. Carson from Downton Abbey, wouldn’t you? So, what is a butler’s pantry? According to Google, butler’s pantries are usually located in transitional spaces between kitchens and dining rooms, and used as staging areas for serving meals. They commonly contain countertops, and storage for candles, serving pieces, table linens, tableware, wine, and other dining room articles.

In Europe, the butler’s job was to keep the silver under lock and key. So he used to sleep in that room, and that’s why the room got the name butler’s pantry.

Our butler’s pantry, minus the butler, is located between the breakfast room and dining room. It contains most of our crystal, silver, some china (the rest is stored in the basement), candles, napkins, trivets, teapots, votives~~all the items I use for entertaining. To see a previous post on organizing the butler’s pantry, click here.

What is the difference between a butler’s pantry and a pantry? At our home, the butler’s pantry is a room you walk through to get to the dining room or kitchen. Our regular pantry is a walk-in closet. This is where I store our canned goods and non-perishable food items. I also keep my cookbook collection, beverages and back up non-food kitchen items (foil, Saran Wrap, Ziploc bags) in this space. To see the pantry organization project, click here.

In watching a recent episode of Restored on the DIY Network (which I highly recommend), Brett Waterman brings a 1913 California Mission Revival home back to life. Bella Terra is also Mission Revival architecture, so it was interesting to see the many similarities between the show’s home and ours. During this segment, Brett discusses the attributes of a butler’s pantry.

Since we live with ours every day, it is common to overlook some of its unique features. According to Brett, older butler pantries have wooden countertops. This was designed to prevent breaking the crystal glasses as you place them on the counter (vs. a harder surface like granite or stone).

Our pantry has a detail to the cabinets that isn’t present in contemporary cabinetry. The curvy edge bracket detail is not only decorative but serves as an actual support for the end cabinets.

The other detail that I just love is the curved transition in the wood from the countertop to the backsplash. This workmanship you rarely find today.

Since our home is over 100 years old, it is fun to find clues of a previous era. The cigarette burns on the wooden countertop near the sink prompt images of a former homeowner laying their cigarette down while washing a goblet or mixing a cocktail.

When I was restoring the Willetta house (click here to see that restoration project), I created a butler’s pantry, due to a challenging floor plan for the kitchen. The original kitchen spanned over 2 long and narrow rooms. This space was also visible as you walked into the front door. Therefore, it was important to create an elegant transition from foyer to kitchen. No one wants to see a messy kitchen when they enter a home.

Anytime I remodel a home, I create imaginary future owners and think of how they will utilize the house. Even though this butler’s pantry has the same custom cabinets as the kitchen, the cabinets are lacquered a different color.

The curtain softens the look below the new sink. The butcher block countertops are in keeping with a butler’s pantry feel. Hardware is a simple way to upgrade the look of the cabinets. I selected these elegant crystal knobs and pulls to finish the look. Hardware from House of Antique Hardware. Butcher block countertops from Floor and Decor.

In the Willetta house, I also took a useless storage space and converted it into a china, crystal, and silver closet, as it sat adjacent to the dining room. Who doesn’t need more space to store all those dinnerware items? To see more about this room and the stenciled floor, click here.

Cabinets from IKEA and butcher block counter from Floor and Decor

In this photo you can see the proximity of our butler’s pantry to the dining room. There are swing doors leading to the breakfast room and to the dining room. A small window to the left (unseen) provides light and ventilation to this transitional space.

Do you have a pantry? Do you have a space you would like to convert to a pantry?

I hope you enjoyed the tour of our butler’s pantry! Can you believe it is March already? Have a wonderful Tuesday.


What Paint and (a lot) of Elbow Grease Will Do

The Foyer-Before

I know you love Before and After pictures. This blog post is about a neglected foyer that transforms to a gorgeous stately entry, using paint and a lot of elbow grease.

Let’s look at the grand exterior of this 1920s historical house I restored/remodeled. This beautiful home is now owned by a wonderful young family. In spite of its deterioration, the house has such a gorgeous front door and impressive entrance.

The Before

As you may recall, this Jeffersonian house was built in 1922 and prior to my purchasing it, was locked up and unused for 20 years. This house spoke to me and it was so sad that it was in this state of disrepair.

The foyer is grand, albeit very shiny, very FUSCIA and very gold.

Foyer-Before

The previous owner was a little heavy handed with the gold paint. The plaster curlicues are glued to the walls and the staircase. But look at this arched door?

Entry to the kitchen

The entire home is in need of updated electrical. But can you see the potential in this space?

The pink madness continues up the stairs to the second landing.

But the bones are there, aren’t they?

An exhaust vent is cut into the linen cupboard.

During the Restoration

Under the heavy layers of paint there is a mahogany bannister. Using a heat gun, I carefully peel back years and years of paint. We remove the gold plaster accoutrements and prime the room a neutral paint color.

This is a tedious process, but well worth it in the end. I am concerned about how blotchy the railing looked. Will it take the stain the same way?

Here is the view to the inside of the front doors. There was a lot of trippy paint in this house….maybe too many hallucinogens? Go figure.

The side panels open up to allow in fresh air, but keep the front door secure

In stripping off the paint on the posts, we realize they are pine and will not stain like the mahogany railing. We decide to leave those white and repaint them the same color as the balustrades.

The front foyer looks better all ready just by toning down the paint color.

The handrail is carefully sanded by hand to remove any residual paint. After some research to solve the blotchy problem, I prepare the surface with a pre-stain conditioner by Minwax. It prevents blotchiness and conditions the dry and thirsty wood.

Here is the railing with the new stain on it. Using Minwax PolyShades, I am able to apply stain and polyurethane in a one step. I am very happy with the results.

After painting the walls and balustrades, the stair treads and flooring are refinished.

The upstairs linen cupboard is given a new custom door. The missing chandelier is replaced with this one from Ballard Designs (Claire 6-arm chandelier in Etruscan Gold). It is the perfect size and shape for the space.

The existing downstairs chandelier is too big and hung too low….plus the beads and crystals are plastic. Obviously not original to the house. Here is the Before picture again….

The After

And here is the finished After photo!

In the entry, the new small pendant is elegant with a short drop so it works better with the ceiling height. I could have sworn I bought it from Pottery Barn, but I couldn’t find it online. If anyone needs the resource, let me know and I can search through my files.

Professional photography by Adam Peter, My Haus Photo
A completed restoration!

Structurally, this room was sound. It just needed some love. The floors are original and brightened up with light sanding and refinishing. The house is staged with furniture prior to going on the market.

The restored front foyer is now appropriate to the quality of this stately home. The darker handrail highlights the beauty of the staircase. Personally, I wanted to be the one to bring this bannister back to life. I would often imagine all the hands that have gone up and down this over the last 100 years.

Though this house was neglected and a huge eyesore, after a 9 months re-birth, it is now a neighborhood gem. It fills my heart to know that a young family have made it their home and are creating their own wonderful memories.

I did write a few blog posts during this renovation so if you would like to go back and read them, here are the links. The Willetta Remodel, click here. The Willetta Renovation is Finished, click here.

Have a wonderful Tuesday!

Resources:

Professional photos: Adam Peter, My Haus Photo

Painter: John Cruz, Ultimate Interiors

Electrician: Tony Boyer, Boyer Electric

Flooring: Wildwood Custom Floors

Staging: Castle Designs

Hardware refinishing: My husband


The Restoration Chronicles~~Chapter 2

Back Northwest corner of main house-Before

Welcome to Chapter 2 of the restoration journey of our 110 year old historic home. A few weeks ago, I shared Chapter 1 of The Restoration Chronicles which focuses on the front of the main house. Well, let me take you around to the back of the house, because the renovation/restoration work here is so much more extensive. To read Chapter 1, click here.

The original kitchen in the main house was not only small, but the electric stove was an inch away from the kitchen sink. Not sure how that ever passed inspection! I began dreaming of designing my ideal kitchen. It was evident that we had to expand onto the back of the house. Like dominos, that decision set in motion a series of renovation improvements.

View from the well tower to the main house-site of the future kitchen and basement.

There was no garage but a feeble lean-to that was more of a broken down carport. You can see remnants of it (gray roof) in the bottom of the above photo. Eventually that was removed and a circular driveway installed.

Though the house already had a very small, dirt basement, the kitchen addition provided an opportunity to create a bigger basement. You can see where the hole for it has been excavated. So above the basement “hole” is where my new kitchen will be located.

Back of house during construction

This photo shows the new foundation walls to the kitchen. The basement walls at this point have been secured and made water tight.

After

Now that the kitchen/basement has been added, we need to make sure the new addition flows with the rest of the house. I am so grateful for the help and creative genius of our architect, Cathy Hayes. She made all the puzzle pieces fit together!

We do so by creating a large, outdoor covered terrace. A two-story fireplace is built on the south end. This becomes the focal point for both the downstairs and 2nd story patios. To see a previous post about the back terrace, click here.

Back Terrace during construction
Back Terrace After

The new additions on the first level created yet again, MORE opportunities to expand the second story, but that will be in Chapter 3! Ka-ching, ka-ching!

2nd Story Master Terrace

The photo below shows the new kitchen addition, with the stucco and roof tiles being applied. The carport is no longer there.

The view of the kitchen this morning

I love the large exterior roof overhangs. Whoever designed this house, took into account the sun and its placement during the day. These large 3 foot overhangs are so effective in protecting us from the extreme heat in the summer, especially on this western side of the house.

During all this construction, yes, we were living in our double-wide Cavco trailer, or manufactured home. The construction site was a real live playground for our two toddlers, who were happy as clams with all the dirt piles, excavators, and trucks.

It was a very joyful time for them, as they had no clue about the stresses or challenges of such a major restoration. Any dangerous parts of the project were off limits to the children, but I allowed them to play freely and get as dirty as they wanted.

Since the entire property was an active construction site, parking our cars was only allowed at the very front of the house.

Parking only in the front of the house

Below is a red wagon that I used multiple times a day. I hauled groceries and children back and forth from the front of the house to the double-wide, which was parked at the very rear of the lot. It was rough terrain and approximately 300 feet from the car to the trailer. The wagon would only hold 2 children and one bag of groceries so I made that walk, back and forth, so many times. One day, the wagon had enough. Its wheels fell off and it sighed with exhaustion. I felt like I lost a trusted companion.

Our Christmas card photos were rather fun during the 3 year restoration project. We really worked hard at keeping our sense of humor!

Yes, I am pregnant in that photo. More to come about that!

I hope you have enjoyed Chapter 2 of The Restoration Chronicles. Did you have a nice Valentine’s Day? Personally, I was happy to stay home and just enjoy a quiet Friday night.

Thank you again for following my stories here on the blog and on Instagram and Facebook. I just learned how to do Instagram Stories. Woohoo! IG Stories only stays online for 24 hours. Please check them out and tell me what you think.

Have a terrific weekend!

If you enjoy this post, please share on Pinterest.

This post shared with Between Naps on the Porch Metamorphosis Monday #638