1

Project Dilemma Solved!

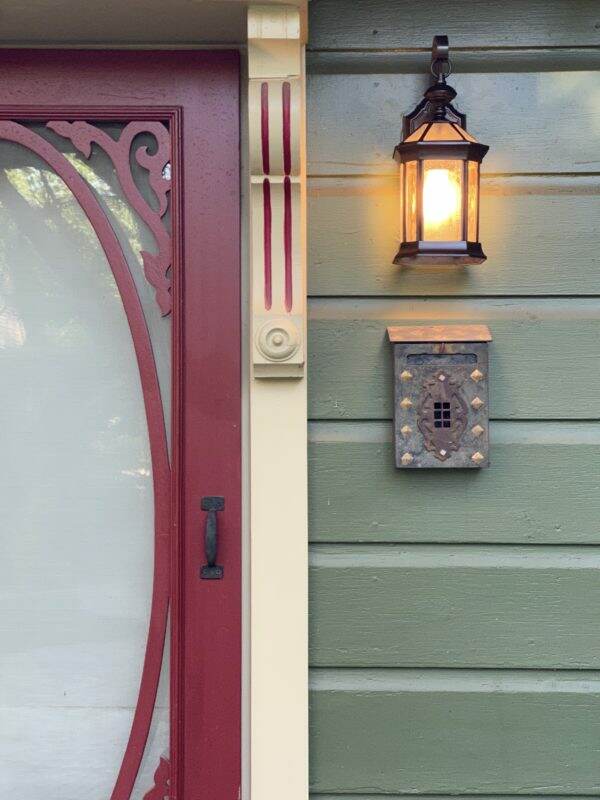
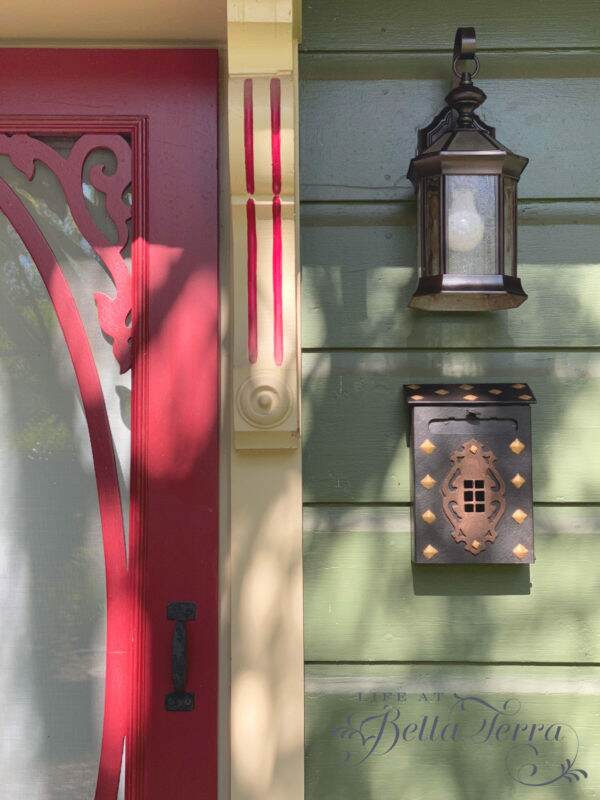
I can’t tell you how much I APPRECIATE all the great comments regarding the vintage mailbox dilemma. If you missed yesterday’s post discussing the sad looking mailbox, click here. If you are visiting via HomeTalk, here is the post about the exterior light project that started the conversation about the mailbox re-do. As you can see below, freshly painted exterior light fixture makes existing mailbox stick out like a sore thumb.

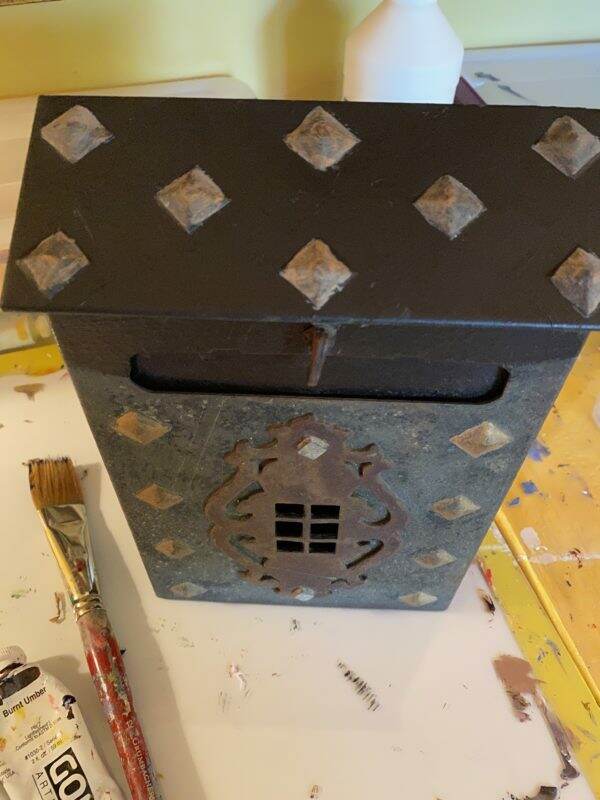
I combined all of your wonderful thoughts and decided to do this to the mailbox. I spray painted the inside, sides and back the same color as the guest house light fixture~~an oil rubbed bronze, which is quite dark. Since there was some rust, the Rust-oleum paint will hopefully slow down any further deterioration.

In spraying the sides, I was careful not to get any of the overspray on the front or top.

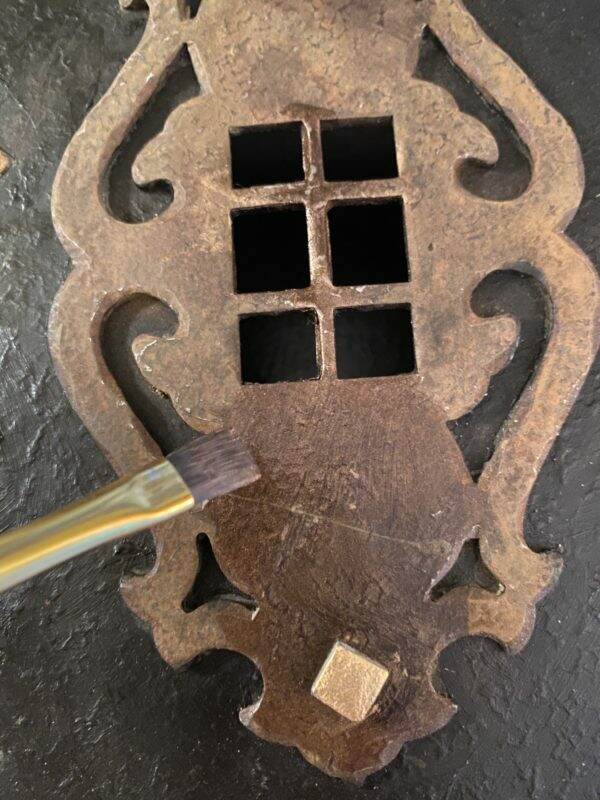
After allowing these sections to dry, it was time for hand painting the front and top of the box. The metal isn’t smooth, but not hammered either. In this next photo, you can see the difference between the painted and unpainted surfaces.

Using spray paint on the front isn’t an option. Since the oil rubbed bronze spray paint is very dark in hue, I hand mixed the paint to use on the front. I combined Mars Black and Burnt Umber to create a warmer black. Sorry for the shadowy photos as I took these photos at night.

Hand painting the top of the mailbox allowed me to see how the new paint would look before I attempted the more visible face of the box.

Here is the top prior to painting the diamonds.

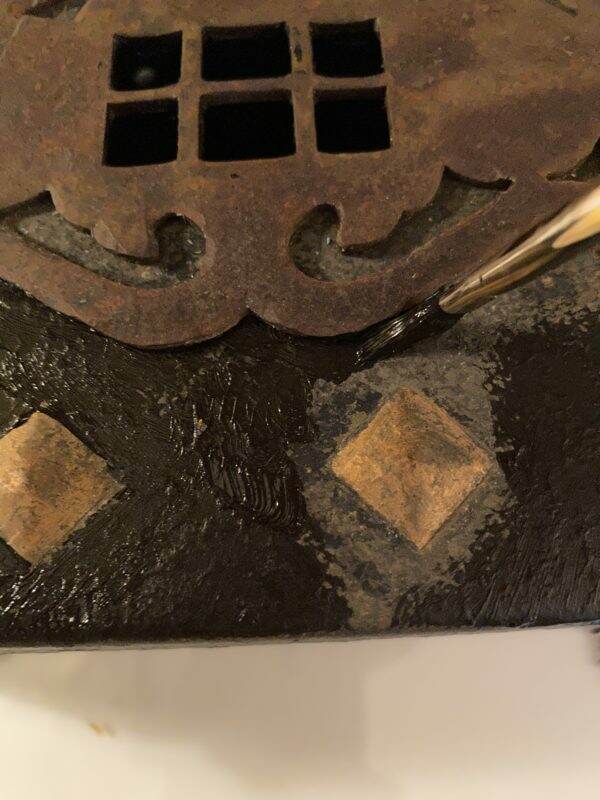
At this point, I really like the fresh paint and so I take a deep breath and continue onto the front! Using 3 different size brushes, I make my way around the diamonds and the curlicue.

I decide to sand the curlicue because I want to remove that drip of old pale green paint which I failed to notice beforehand. I wait for the black paint to dry first. Thankfully, I am able to get most of the paint drip off.

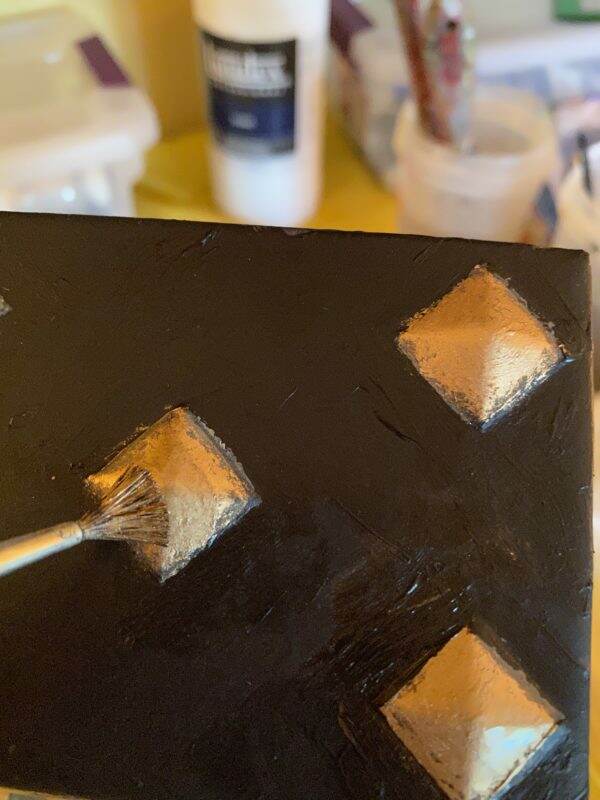
With so many leftover craft items, I have two tubes of gold and bronze Rub ‘n Buff metallic finish for the diamonds and curlicue. Though the instructions say to rub it on, I elect to use a small paintbrush.

Yes, Rub ‘n Buff can be used on metal. And it dries quickly! To see another project where I used this product, click here.

At this point, I’m not sure if the Antique Gold is too bright but I paint all the diamonds. I take the time to touch up with the black/umber paint where I get sloppy.

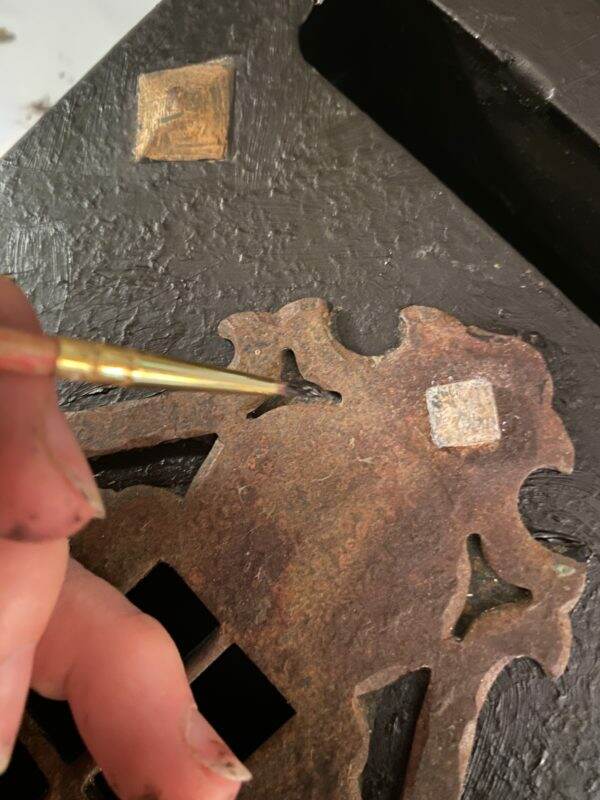
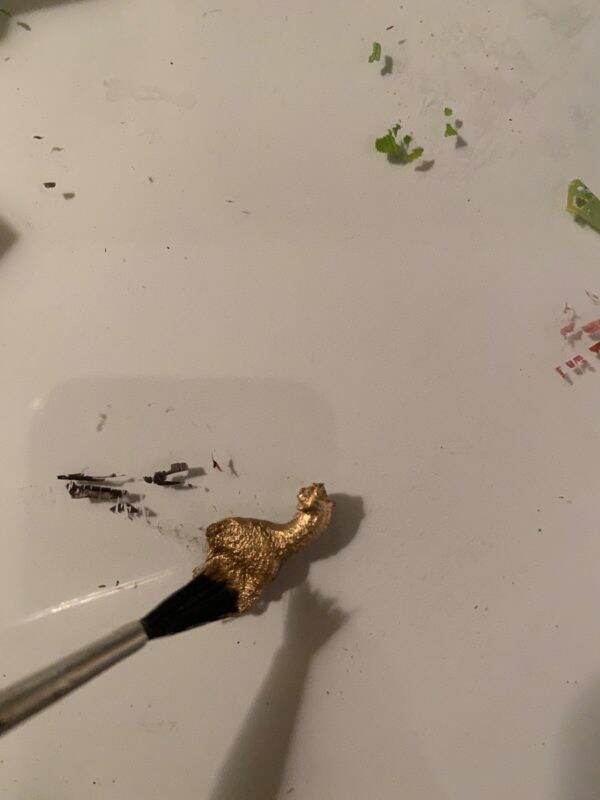
The Spanish Copper Rub ‘n Buff tube is a bit solidified and the contents will not easily come out. However, a bronzy liquid squirts out instead, and I use it anyway on top of the gold to tone it down.

I also paint this bronzy liquid on the curlicue to cover any scratches and dings. I paint the two rivets gold.

So here is the before…..

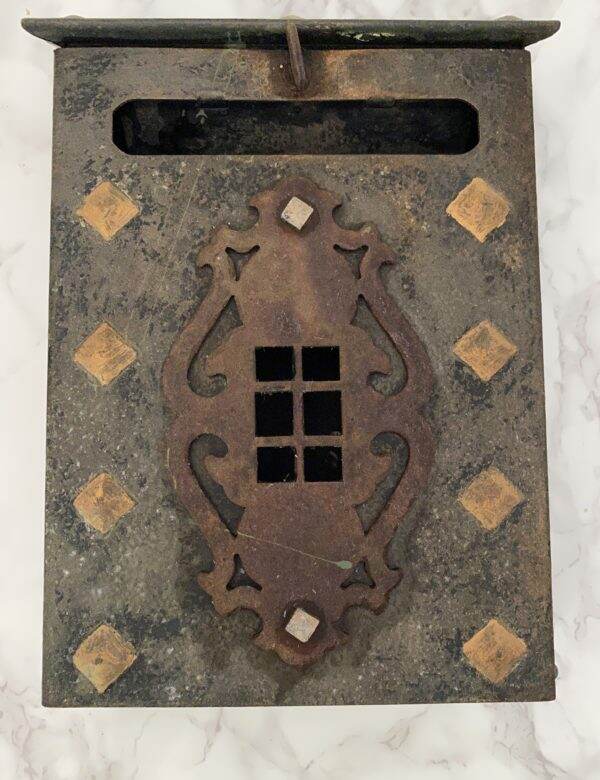
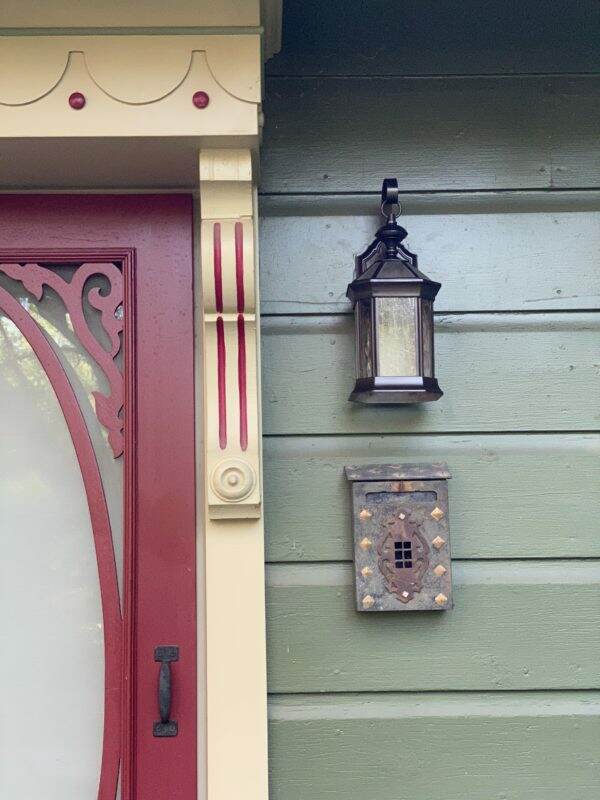
The mailbox after…..

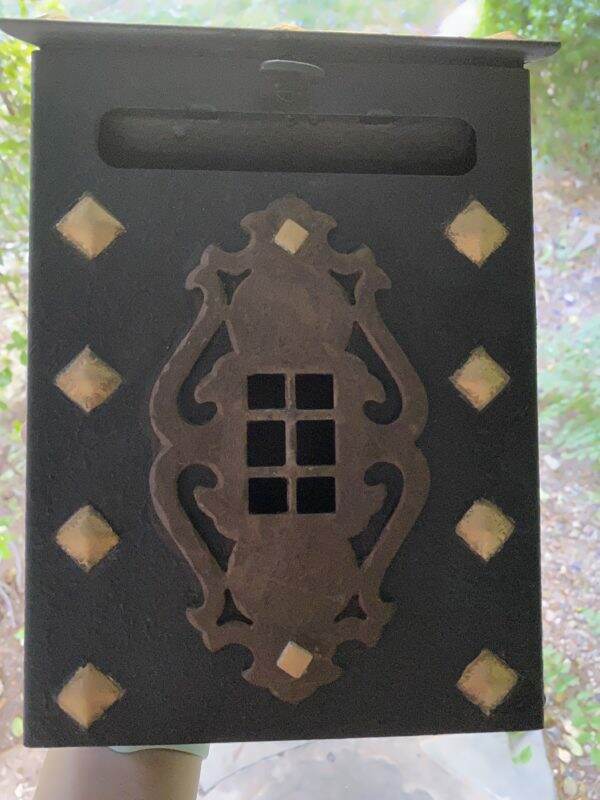
Unfortunately the sun is shining directly on the front this morning, so the light in the after photos is not the same.

The light and mailbox before….

The light and mailbox after……

The mailbox still has its vintage charm, but the new paint makes such a positive difference.

Thank you to Karen, Barbara (from Mantel and Table) Janie, Linda, Marty, Karin, and Louise for your helpful comments. They truly gave me the inspiration to take the leap and paint this mailbox! I may have to spray it with a protective clear coat as I am not sure how my acrylic paints will hold up over time.

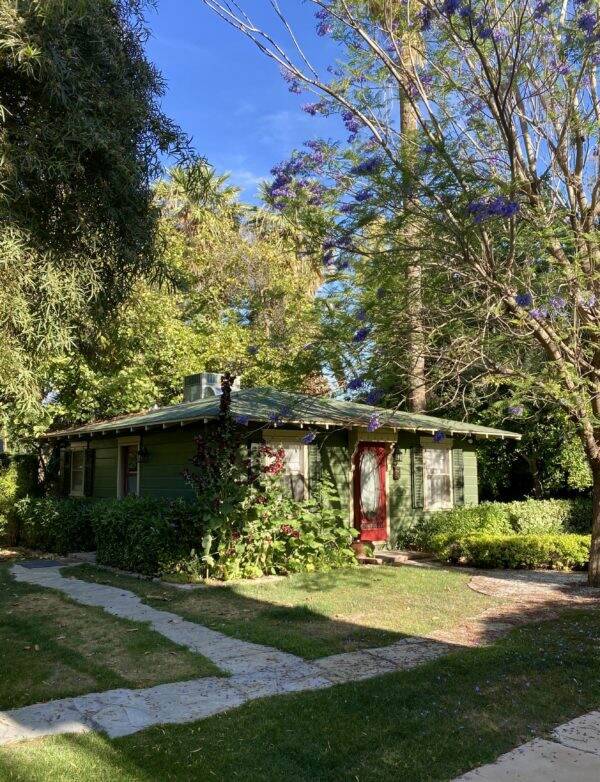
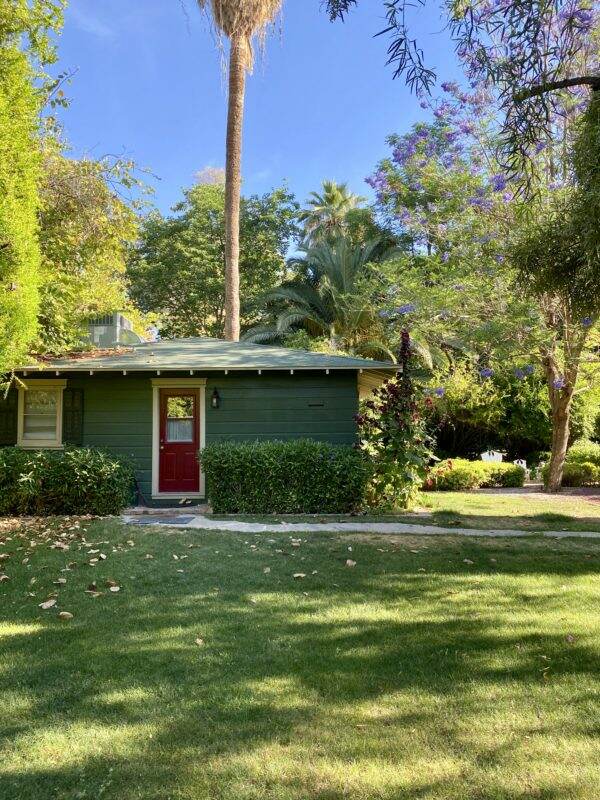
Marty, a subscriber, asked to see a bigger picture of the guest cottage. Again these were taken this morning with the eastern light exposure.

The hollyhocks have taken over the corner garden and the jacaranda tree is in full bloom.

It is such a beautiful morning here. The temperatures are in the low 70s and my morning walkabout was so joyful on this glorious Wednesday!

Enjoy your day! Please remember you can follow me on Instagram @lifeatbellaterra or Facebook. To see more pictures of the guest cottage, click here. Thank you for joining me today from HomeTalk and if you like what you see, I would love for you subscribe to Life at Bella Terra.

Products Used:

Rustoleum Oil Rubbed Bronze spray paint

Rub ‘n Buff Wax Metallic Finish-Spanish Copper and Antique Gold

Golden acrylic paints-Mars Black and Burnt Umber


Project Dilemma

The exterior lights to the guest cottage were looking tired and faded. What started as an easy DIY project now has me stumped about another. It seems like every time I start one project, it inevitably leads to ones I haven’t considered.

As you can see below, the exterior light fixtures to the guest house look like this. The original oil rubbed bronze finished has oxidized and faded over time.

Side entrance

I do like the classic shape of the lantern, which fits the quaint exterior of the guest cottage. Often I like the design of a light, but don’t like the finish. If you find a light you like, it is easy to change the appearance with paint.

After carefully removing the light (please make sure the power is OFF or have a licensed electrician do this), I cleaned it thoroughly. I did this by using water and a paper towel. Since the glass panels did not slide out, I carefully taped all the places that I wanted paint-free.

This is the most tedious part of the preparation, but it is better to prepare and prevent rather than repair and repent. I wasn’t quite sure of the color I wanted, so I painted them a Rust-oleum brown first and then lightly used an oil rubbed bronze spray over the brown.

After removing all the blue painters tape, the lights look brand new. I am please with the clean and fresh look.

Now the entrance looks a bit more perky.

I posted this project on HomeTalk and so far it has had nearly 10,000 views. To read the more detailed DIY on painting lighting fixtures, click here. However, one HomeTalk comment was “the lights look so good, is the mailbox next?”

Quite honestly, I never even noticed how sad the mailbox looks. It is a vintage box and I’ve haven’t seen another like it. But, the metal mailbox does look like the ugly sibling now. What should I do with it?

The gold-ish diamonds are also on the top of the box and a bit raised from the surface.

I like the design of the box because the front opens forward for you to reach your mail.

So what should I do to the mailbox? Leave it alone? Re-paint the black or another color? Paint the whole thing? Just give it a clear coat? If so, shiny or satin? I cannot remove the curlicue piece on the front as the rivets are welded in.

This mailbox does need a face lift! Please send me your thoughts as I’d love to wrap up this project this week. Since I received so many good ideas on my front door color request, I am hoping I can tap into your expertise on this one!

Have a wonderful Tuesday! To see more on this sweet guest cottage, click here.


Selecting a Front Door Color

It appears I’m in a bit of a painting frenzy. Not the artwork kind of painting, but the “what needs painting next” kind of painting. Paint is one of those home improvement items that is rather affordable, easy to use and makes a significant impact.

Since the front porch is looking a bit tired, I am pondering ways to make some affordable improvements. I do believe it is time to re-think the color of the front door. Red seems appropriate as it is the complement to the dark green house trim. But it is time for something different.

Selecting Colors with Web Technology

Sherwin Williams has a color technology section on their website which allows you to “paint” different colors into your own photo. I uploaded a picture of the front door and began experimenting with different colors. How cool is this! It is ColorSnap Visualizer for the web and you can do an interior room or the exterior of your home.

With an icon, you “paint” the area you are interested in. You can choose up to 8 colors from the color charts on their website and create “My Color Palette”.

At the bar on the bottom of the screen, you can see the colors I selected to try~~black, dark green (like the trim), cayenne, sage, and two shades of blue.

I have always loved a high gloss black door with beautiful brass hardware. You see many of these in London. However, when I tried it on this software, the front door almost looks like a big black hole. And would the black be too dark against the green?

What if I were to paint the door the same as the trim color?

Sage green almost always looks so beautiful on doors, but not so sure on mine. Sorry for the blurry photo as I was taking pictures of my computer screen with my phone.

Several years ago I did have a French Blue door. I loved it! I was into all things French back then. Not sure I want to repeat it?

Here is the ColorSnap Visualizer with a few different shades of blue.

What if I just need a different color red?

Since our home is historical, I am pre-disposed to doing a color that will be appropriate for the age. Or do I? Should I consider a stain?

My confidence level is fairly low on selecting colors, so I would appreciate ANY feedback on this. I know many of your have a great eye for these things.

Our local Sherwin Williams has curbside pick up during the quarantine so I may start painting a few color patches and see what happens.

Have a beautiful Tuesday!


The Restoration Chronicles~~Chapter 4

Building the Pool House

Welcome to Chapter 4 of The Restoration Chronicles! I love a good Before and After story and we have many of those here at Bella Terra. I hope you have read the previous chapters where construction of the kitchen/basement, back terrace, and master suite additions to our historic 1912 home have started.

Quite frankly, I have no recollection of making the decision that we needed a new building by the pool. But with two toddlers and a baby on the way, there is much during that time that I don’t remember.

However, there was an existing ramada hidden under all the foliage to the west of the pool. Initially we didn’t even know it was there. It was so rotted and overgrown that it had to be demolished.

Working with an experienced architect (Cathy Hayes of Hayes Studios), we designed the building with the same architectural elements as the main house~~green tile roof, window accents, and overhanging eaves. Again, we used Marvin Windows and Ludowici historical roof tile.

Since we already had a guest cottage, the City of Phoenix doesn’t allow you to have additional guest quarters. Therefore, the architect listed the rooms as Game Room, Exercise Room, and Hall with two covered patios. There is a total of 845 livable square feet and 345 square feet of covered patios.

Red lettering indicates current use

I don’t have any pictures of early construction, but here you can see the pool house prior to stucco and paint. Much of the new construction was occurring simultaneously and I am assuming I was off solving other problems vs. taking photos.

Family Life

In the middle of all of this, we welcomed our third child into the world, a baby girl, Elisabeth! Unfortunately, her clavicle broke during birth, but she’s healthy and has a sweet nature . We are all still living in the double wide trailer. Sigh.

For the most part the pool house has been for guest. But when the children were teens, we splurged and made it their space. It is heavily used when the children come home as it is still a gathering place with their friends.

Pool House Details

There is an outdoor shower, which I just love. There is something about showering outside in the privacy of all the foliage. Plus a great stop to rinse off after swimming in the pool.

Where the “Hall” is located, there is plumbing for a full kitchen if one is required in the future. I put primitive pine cabinets in place for storage and also to hide the plumbing. Hardwood flooring is throughout. The window over the sink overlooks the hen house and garden.

Here is a glimpse of the bedroom. There are two antique beds that can be pushed together for a king-size one if needed. We had the walls faux painted back in the day when that was in style. Not sure if I will re-paint, but I’ve held off doing a detailed post on the interior until I decide.

The bathroom is a good size and has access to the outdoor shower.

Here is the view out of the pool house’s front French doors.

The pool house is the perfect place for our out-of-town guests. It is completely private with a spacious living area to relax. During this quarantine, I may just spend a weekend out there to feel like I am getting away!

I hope you enjoyed the latest edition of our home restoration journey. If you haven’t read the previous chapters of The Restoration Chronicles, click here for Chapter 1; here for Chapter 2 and here for Chapter 3.

My goal this week is to finish some already started projects. I need to have sense of completion……on something!

What projects are you working on? I really miss painting and hope to get some art time in this week too. Have a wonderful Tuesday.


Saturday Meanderings

Here are some random thoughts for this beautiful Saturday morning. Yesterday, I completed cleaning the other half of the first floor to the well tower. If you missed Tuesday’s post about the potting shed, click here.

Some fun discoveries in the well tower. I found a box full of old love letters and photos. A lovely trip down memory lane. I often wonder how we will capture the same slices of life with technology? Remember the days when you rushed to the mailbox to see if someone had written to you? Texts and emails don’t seem to hold the same allure.

Young and carefree

I also found a batch of mail from November 2015, unopened. Apparently someone picked up the mail from the mailbox, detoured into the well tower and left it there. Fortunately it was mostly junk mail.

An unexpected well tower project

It is true that starting one project inevitably leads to another. During my well tower cleaning yesterday, I found more wreaths. Tired of having wreaths in multiple places (basement, garage, well tower), I gathered a few of them up. Protecting them in big black garbage bags, I made labels for each and hung them on a blank wall in the well tower.

Garden Update

The poppies are EVERYWHERE! During the day, their purple blooms are wide open. I didn’t realize that poppies close their blossoms at night. Wish I knew how to do time-lapsed photography to capture this.

Poppies open
Poppies closed

It is a hollyhock jungle out there. These perennials have spread all over the yard and are in various stages of blooming.

Primroses are another perennial that provide such an elegant display of pink happiness.

Primroses

Preserved Lemons

I’ve made a 2nd batch of these delectable, delicious morsels. We are using them in nearly everything~~from tuna fish salad to roasted vegetables, fish, and pasta dishes. I cannot believe I have gone through most of my life without these. If you haven’t made them yet, please do so. You will not be disappointed and they are super easy to make. Click here for the recipe.

Moving Forward?

I am excited that Arizona may be one of the states in Phase 1 of opening up our economy! My roll of elastic finally arrived so I am well equipped with masks. The best pattern can be found on the YouTube video from Hobby Lobby. This mask fits my face perfectly. I add pipe cleaners in the top seam so you can mold the mask to your face. It is two layers of 100% cotton fabric with a hole in the back to add a filter if necessary. Masks may become common in the future, so I’m happy I have a few to wear, just in case.

Still Washing Windows

Yes, I am still washing windows. My next big challenge is how to wash the windows at the top of the well tower. I will try Windex Outdoor where you attach the cleanser to a garden hose. The directions state you need to be within 5′ to apply it. Perhaps if I hang out of one of the windows and aim the hose at the adjacent ones?

Birthday Gift

Botswana Agate, Pearl & Swarovski Crystal Bracelet

My sweet 99-year old aunt (yes, 99!) sent me a check for my birthday. Typically I just deposit something like this, but I decided I wanted to buy something special to remind me of her. My Instagram friend, Tanya Lochridge makes beautiful jewelry. I ordered the bracelet above. I think this is a very nice gift to myself.

To Do List Completion

Fixing the wall

This week went by so quickly. I almost feel like I did too much. Keeping busy is my way of coping with the lockdown and we accomplished many projects. But I am pooped and hopefully tomorrow, will be my day of rest.

I was so excited to receive this photo from one of my followers. I have rose envy!! Thank you so much for sharing!

IMG_0199.jpg

Happy Saturday! Enjoy the weekend. Any special plans?


Propagating Roses

I have always wanted to learn how to propagate roses, especially the antique ones we have at Bella Terra. With a clean potting shed (see yesterday’s post here) and sheltering in place time on my hands, I thought I would try this.

Meet Quatre Saisons (Rose of the Four Seasons), R. damascene bifera). We have three of the original antique rose bushes that survived the property renovation. This is the oldest European rose to reliably flower more than once during the year. It is one of the most important historic roses, probably going back to the Romans or earlier. 

Quatre Saisons

This rose is not cultivated for the appearance of its shrubs as they are rather gawky and VERY prickly. Foliage is plentiful and leaves have a serrated edge. The blossoms are a bit unconventional and messy-looking but the scent is a mighty treat for the nose.

The reason I am so intrigued by having roses at Bella Terra is a reference made in a previous owner’s diary on April 1, 1922, when she wrote “saw first rose bloom”. When we were researching the house, we found these diaries at the Arizona Historical Museum. Apparently the roses are referenced many times as an important part of the landscaping. To know I am enjoying roses here just the same way someone did 100 years ago gives me great joy.

In Preparation

In preparation for the propagating process, I scrubbed and cleaned the clay pots I wanted to use. Since the success rate of propagating roses is about 50 50 to 75 percent (according the Dr. William C. Welch), cleaning the pots will help minimize any contamination. I then covered the hole at the bottom with a small rock.

Next I loaded up my clean pots and headed out to the compost pile. There are several sites on Google that recommend the type of medium to use for rose propagation. Our compost soil has always done wonders in the past and so I’m counting on it now.

If you missed my composting post, click here. With the pots filled with soil, it is now time to select roses.

How to Take the Cutting

Take a 12-inch segment of the stem, cutting at a 45-degree angle. The best cuttings usually come from the sides of the bush vs. the center. I made sure I used my sharpest and cleanest clippers, in order to avoid contamination or crushing the stem. I immediately put the cuttings in water while I continued cutting the others.

Cuttings taken from new growth vs. old, hardened wood are more likely to be successful. Spring or early summer is the best time to take these softwood cuttings. Select them in the early morning when the plant is most hydrated. Wish I wore gloves as these roses have such sharp thorns!

Remove Most of the Leaves

Remove all but the top two leaflets on the stem. Then, cut of the stem just above this top set of leaves. Removing the excess leaves helps to divert energy to root production. However, the stem still needs to continue with photosysthesis and feed itself until new roots are formed. Also remove any flowers. The flowers will consume energy, and you want to encourage the stem to refocus its energy on survival by sending out new roots. 

Prepare the Stem for Rooting

Using sharp pruners make a fresh cut on the bottom of the stem just below a stem node. I made the cut at a 45 degree angle. The stem node is where new growth typically forms. Then slice into the bottom stem about a quarter of an inch up, splitting the stem into open quarters.

Using a Rooting Hormone

Though this step is optional, a rooting hormone can help spur the plant into developing new roots. I purchased this rooting powder from my favorite nursery, Whitfill Nursery for $5.99.

Slightly moisten the split end of the rose cutting and then dip it into the powdered rooting hormone. Shake off any excess powder.

Plant the Cutting

Plant the cutting in a container filled with at least 6 inch of planting medium. Some recommend a mixture of coarse sand and vermiculite or a potting mix designed for roses. Keeping my fingers crossed that my homemade compost is sufficient.

Poke a hole in the potting medium (I used a screwdriver) and then insert the stem. Be careful not to rub off the rooting powder. Gently firm the soil around the stem and water well.

How cute is this pot~~a school Mother’s Day project made in 2004 by my son Benjamin!

Selecting the Location

Roses prefer a sunny location, but for rooting purposes it is best that they are shielded from the hot afternoon sun. It is important to keep the soil moist so the cutting does not dry out. Some people put a plastic bag over to create a humid environment.

I have placed the 5 pots on the window sill directly across from my computer, so I can check on them every day. The northern exposure will provide bright light but no direct sun.

Of course, I discovered the following advice AFTER I cut the stems. However, I did remove the flowers and buds, so hopefully I will have success. Here is what I read: “Moreover, avoid taking cuttings when your plant is heavily blooming. The plant is putting most of its energy into flower production rather than root development, so a cutting won’t readily root. If you must propagate when the plant is blooming, make sure to remove the flowers and buds from the cutting.”

I am planning to let them grow over the summer in these pots and then plant them in the fall? Or transplant them into bigger pots with a January 2021 planting? Still trying to figure that part out. If there are any rosarians out there, I welcome your help!

Here are some other photos that I’ve taken over time of these delightful roses. I wish you could scratch and sniff.

Lastly, it was difficult to decapitate the flowers off of the stems for this propagation. But not to fret! I am utilizing all the blossoms in a potpourri I am making for the hen house.

Have you ever propagated roses? What is your favorite species? Wish me luck and hopefully I will have 5 more Quatre Saisons soon!

Wishing you a delightful Wednesday! Today I am still washing windows (ugh!) and making face masks as my roll of elastic finally arrived!

References: The Rose Bible by Rayford Clayton Reddell