1

Saturday Meanderings

Morning at the cabin

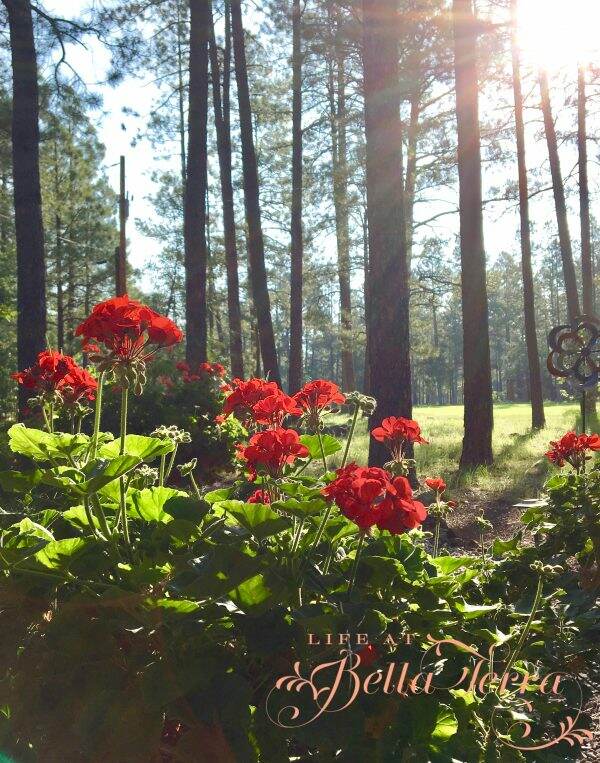
Can it be mid-August already? Am I seeing school buses again? This must be the fastest year ever as it feels like I am in fast forward mode ALL the time. As you read this, I am at our mountain cabin, inspiring to relax. My visions of dinner outside and cooler temps will hopefully come true. Welcome again to another Saturday Meanderings, where we chat about all good and wonderful things.

Curious Results

My friend, Rick’s tomato sauce results

My friends, Rick and Janie sent me a picture of their homemade tomato sauce. Hmmm. Rick, with 40 lbs. of tomatoes made 16 jars (pint) of sauce =32 cups of sauce. I, with 60 lbs. of tomatoes made 20 jars (pint) of sauce =40 cups of sauce. Wondering why my yield is less…Guessing that I probably reduced my sauce down more (but that much more?) could be the reason.

In my pantry

We’ve agreed to get together and do a taste test because if I can get the same flavor and consistency and more yield, I will note that for next year’s sauce making project. If you missed the post on the 4 Ingredient Tomato Sauce, you can see it here.

Holiday tea towels

Look at these cute vintage holiday tea towels! Hester & Cook has a great selection this year. I am not sure how I will use them, but perhaps as a gift wrap for some fresh baked goodies? I just love the nostalgic vibe-it reminds me of my childhood. Natural 100% cotton and priced at $16.00 each. They measure 19″ wide by 33 1/2″ long. You can find them here.
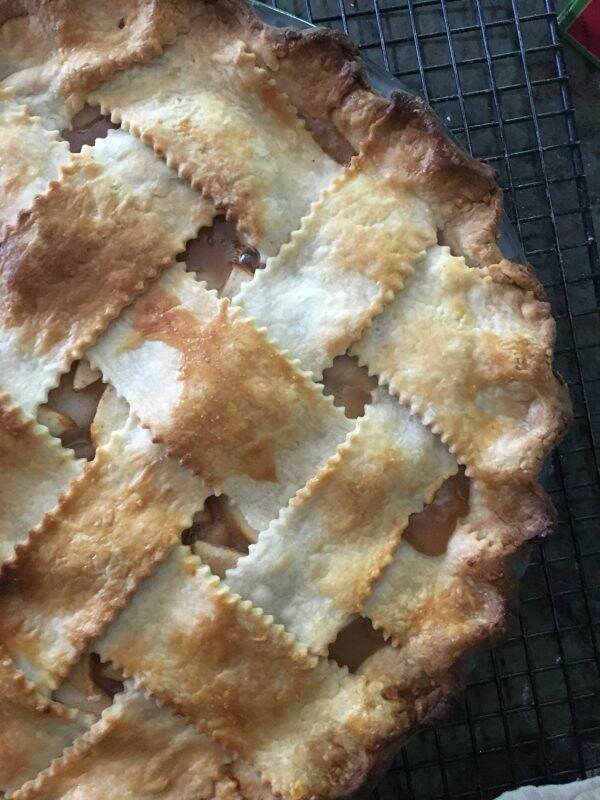
Easy Summer Dessert

Peach Galette from Serious Eats

Trader Joe’s frozen pie crust is a staple in my freezer. With the abundance of fresh fruit like cherries and peaches, you can make this easy dessert with just a few ingredients.

Occasionally, when I unroll the TJ pie crust, it breaks apart. But since they package it between two large sheets of plastic wrap, I just take a rolling pin and do a few swipes over the plastic. The crust comes together nicely and then it is ready to use.

Pile the fruit in the middle with the suggested ingredients, curl up the edges of the pie crust, brush with a bit of egg wash and you are ready to bake.

Cherry Galette

Your friends and family will be impressed with your galette and they never need to know how easy peasy it is. I have made this recipe with cherries, peaches, apricots and apples. For the peach galette, here is the recipe from Serious Eats. And this yummy Rustic Cherry galette recipe is from She Wears Many Hats.

DIY-Vintage Bottle Labels

the Secret to making your own DIY Faux Vintage Labels for Bottle.
Vintage Labels from The Ponds Farmhouse

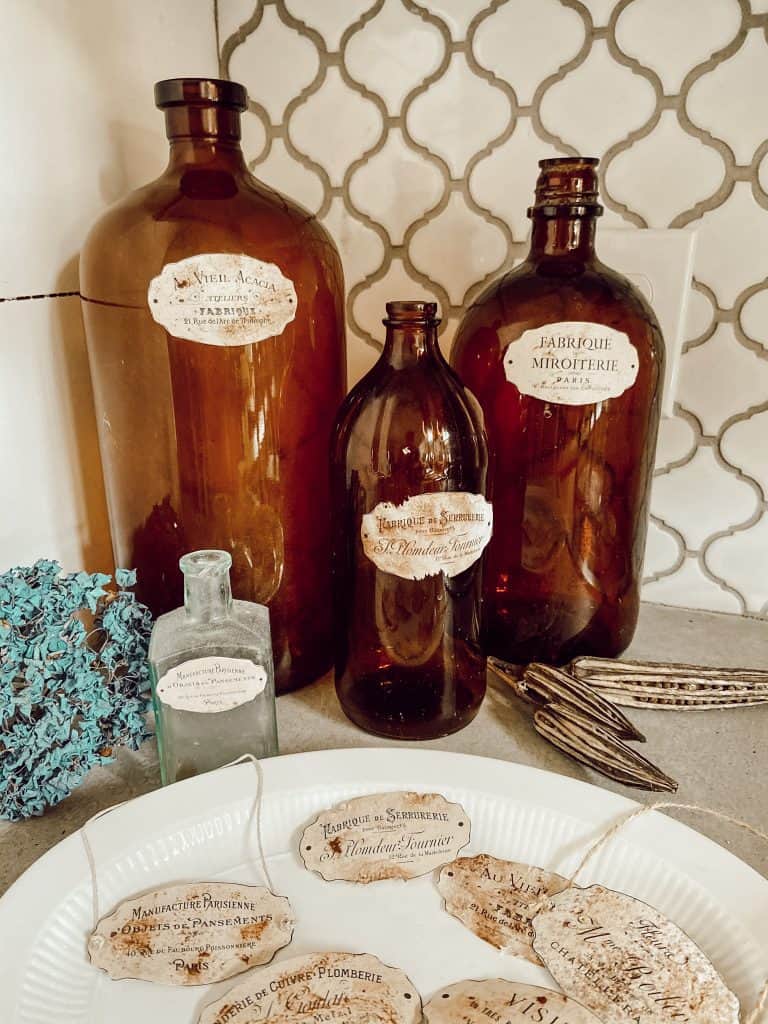
With fall and Halloween right around the corner, my friend, Rachel from The Ponds Farmhouse has a great tutorial about making these labels for your fall decor. Aren’t they amazing? See it here.

Kitchen Love

Photo by The Scout Guide

I love looking at pictures of kitchens. Often I dream about designing a new kitchen (not that I don’t enjoy mine) and what elements to include. The Scout Guide just posted a fabulous article about creating a timeless kitchen. There is some really great information. See it here. Also, as an FYI, The Scout Guide has publications in individual cities and you can own a franchise too. Check it out here.
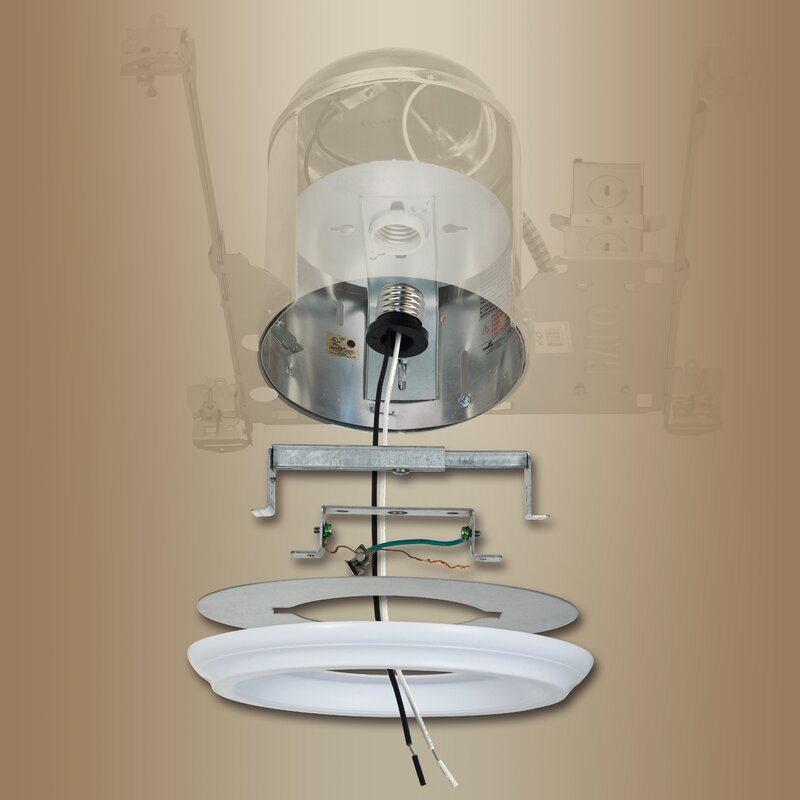
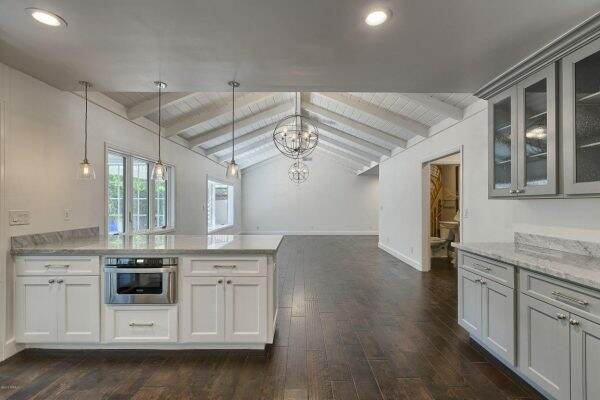
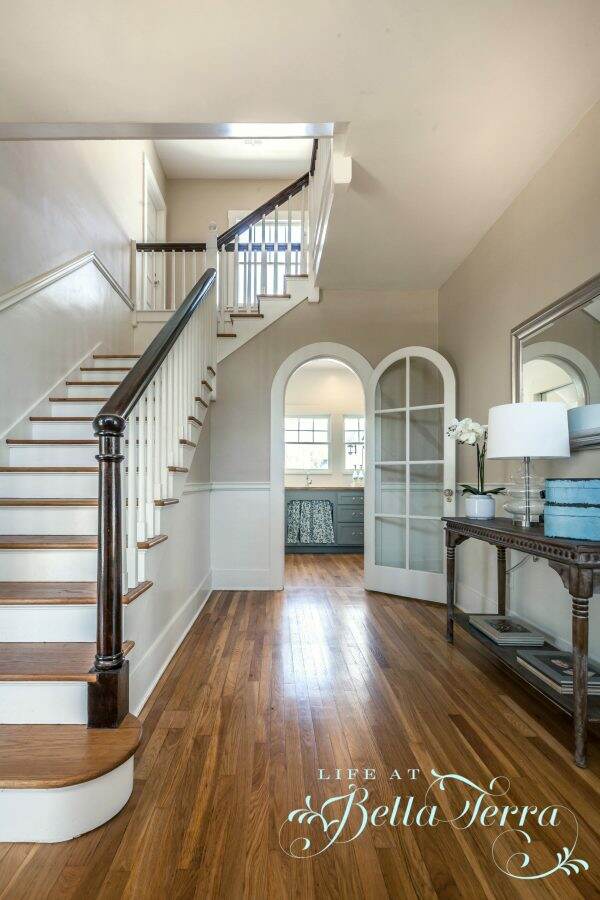
Home Renovation

My last home restoration

In 2004, I developed a home renovation/restoration business called Picket Fences, Inc. While pregnant with my third child and running errands, I had an ah-ha moment, pulled over to the side of the road, and quickly wrote down the beginnings of what would be a business plan for my company, Picket Fences. I love breathing new life into older properties and after many years in corporate America, this new adventure was right up my alley. Long before Fixer Upper or other HGTV shows became popular, I had a few home remodels under my belt.

Patio Home Renovation

The goal at that time was to buy one house per year in our mature neighborhood, improve it, sell it and make enough money to pay for the children’s tuition and one great family trip. It actually fulfilled my creative nature and allowed a flexible schedule while raising 3 children.

Entry to a historic home restoration

However, everyone started getting on the bandwagon and it became more and more difficult to find homes, at a reasonable price, and make a profit while maintaining my reputation and high standards. At first there was little to no competition. And then investment companies would pay more for properties, do really inferior work and “flipping” became the norm.

Butler’s pantry renovation

Here is an article from Apartment Therapy about 3 former house flippers who reveal why they quit flipping houses. If you think this is the occupation for you, please read this because it is filled with the realities of home flipping. It is not as glamorous as it seems. You can read it here.

To see the Before and After pictures of the restoration of a 1922 Jeffersonian home I did, click here.

Well, that wraps up another Saturday Meanderings. Thanks for joining me!

Have a wonderful weekend!


Room by Room~Front Hall

View from the upstairs landing to the front hall

Welcome to the Room by Room series where I feature one room of our historic home in detail. Whether you call it a foyer, entryway or front hall, this is the area where you enter our home after you step through the front door. We are so blessed that this space is a good size ~ 12 feet by 16 feet.

The Front Door

Outside of Front Door

I do believe this door is original to our home which is nearly 110 years old. This 6 raised panel solid wood door is a generous 4 feet wide and has the original brass hardware and ball tip final hinges. Just a quick note that the topiary cypress trees are faux and can be found here.

Front door inside view-Valentine’s Dinner 2020

On either side of the door are side lights with 6 mullioned sections, which allows the eastern or morning sun into the front hall.

The Staircase

The staircase with sisal runner

Once you cross the front door threshold, you are directly across from the staircase. The front entry acts as the center of a wheel with spokes leading to the several different areas of the house. The staircase leads to the second story and bedroom quarters. The mahogany handrail is worn smooth by many trips up and down the stairs over the past 10 decades. Memories are embedded in that railing and often, when my hand glides down it in the morning, I think of all the other people who have touched it during their lifetimes.

The Living Room

View to the living room

Once inside the front hall, and on your left, the wide opening to the living room gives you a glimpse of many original features, like the coffered ceiling. To read more about our living room, click here.

The Dining Room

View to the dining room

Off to the right, opposite the living room, is the entrance into the dining room. During the home’s restoration, we discovered original pocket doors hidden in the walls. What a find!

Pocket Doors discovered during restoration

The Powder Room

Adjacent to the staircase are two 5 panel doors~one leading to the small powder room; the other to the hall closet.

Doors to powder room and hall closet

Before the restoration, this powder room was hardly functional. I recall a toilet seat with a celestial horoscope design on it and a full size vanity. It was impossible to sit without bumping your knees against the sink. However, we did keep the original push button toilet which allows for a nice hearty flush.

Since this room is so small, a tiny Kallista sink and custom scaled-down vanity is designed for the space.

A peek into the powder room

Hall Closet

The other door is the hall coat closet (funny as we rarely wear coats here in Phoenix) that serves as a storage closet for many of my linens.

Hall closet is storage for tablecloths/napkins

To see more fun storage tips and information on this closet, like a pulley system for lampshades, click on my post about this odd-sized closet here.

Hidden Storage

Hidden storage

Another very unique feature in the front hall is the hidden space under the staircase. Not only is there a large area to store all my pillows and table leaves, but there is easy access to the powder room plumbing. On a rope and pulley system, the raised panel slides down below the floor.

To see more about this unusual yet clever space, click here.

Hall Table

Petticoat or Pier table

The burl wood hall table with the mirror below is something I always refer to as a petticoat table. According to the Clermont State Historical Site, the reason behind referring to this as a petticoat table a myth. According the story, these mirrors are called “petticoat mirrors” and are installed to allow ladies to check to make sure that their petticoats were not showing beneath their skirts. Often located in hallways, where a woman would be entering or leaving a house, it seems sensible.

Mirror inserted in table

However, this is called a pier table. The purpose of the mirrors is decorative. Reflecting light around a room on highly-polished surfaces, including mirrors, glass, crystal pendants on chandeliers, or fine wood surfaces, was a way of demonstrating wealth. 

Regardless whether it is a petticoat or pier table, I have never seen another one like it and I have no idea how old it is.

Other Unique Features

Original brass vents

Our home did not have any central air conditioning, but we did utilize the existing heating vents to retrofit the house with a modern heating and cooling system. The beautiful heating grates had been painted over in dated shades of pastel blue and pink. In order to bring them back to their original beauty, we found a resource to brass plate them.

The hardwood floor is original Canadian beech and is so solid and sturdy.

Architectural details

There are some interesting architectural details only found in the front hall. Angular corbels and trim detail delineates the transition from the hall and staircase unique.

New light fixture

Much to our dismay, the previous owners took all the original light fixtures. Selecting the right scale and style is a bit challenging, but this one works. The crystals tie into the much more elegant chandelier in the adjacent dining room. I cannot recall the resource for this.

Cross Stitch Prayer

Hard to believe that I did this cross stitch over 43 years ago…yikes. It hangs in our front hall, where we strive to open our doors to joy and love.

Front Hall table; flowers from @thebouqs.com

In the center of the front hall is a carved antique small drop leaf table. Typically I like to have fresh flowers and candles on this table. Our house rule is that the first 3 rooms (living room, dining room and front hall) of the house remain clean at all times. The rest of the house is fair game!

Thank you for joining me today for another episode of Room by Room. Have a happy Wednesday! Today I am picking up 60 lbs. of Roma tomatoes~you know what I’ll be doing this weekend!


Ways to Enhance Your Entry

Like every first impression, the entrance to your home says alot about you. Is it welcoming? Warm? Impressive? Easy to find? Often we take the entries of our homes for granted, because we are in and out of them frequently. So it’s time to step back and ask yourself the question, how can I create an impressive entrance?

Front Entry Update

Getting ready for our pre-renovation party 1999

Sometimes your entry needs a major facelift. This photo is our house prior to the extensive restoration. It is the only picture I found of the front door that shows the bare light bulb on the front porch. And back then, there were security bars on all the windows and doors.

Front Entrance today

With new house paint, removal of the security door and bars, new front door paint color, new light fixtures we transform the scary front of our home into something much more welcoming. Adding plants and a bench do add to the notion that we actually want you to enter the house and stay awhile.

Bella Terra

To read a detailed version of the restoration of the front of our home, click here.

Willetta Restoration before

I must be attracted to home with security doors as the same appears at the 1922 home I restored in downtown Phoenix. Even with missing light fixtures and significant deterioration, this is still an impressive entry. Plus the front door does have wonderful opening sidelights for ventilation.

Willetta restoration during

After all the white aluminum siding was removed, we found the original clapboard in good condition. The columns need significant work as does the under roof of the terrace.

Front Door Color

Willetta Restoration After

Sometimes a simple can of paint can really change up the look of your front door. Previously painted white, the double front doors look fabulous in this color red. For a more in-depth review of the historic Willetta restoration, click here.

Numbers

Here is the before and after of a remodel I did on a small ranch house. In addition to changing the front door, the house siding and removing the brick planter, note the old house numbers.

Here is the after with lots of changes. But the personal touch I love on this house is the custom made gold plated number 32. Made by an artisan in Connecticut, this is a unique look in Phoenix.

In lieu of a screen door, the shuttered door allows in light and ventilation to a rather dark entrance.

A Front Walkway

Before

This is one of my first “for sale” remodels. There is a lot wrong with the entrance to this house. It needs a new door as the hollow core closet one makes no sense. The mixture of brick and stone confuse me. But because the house is so flat and linear, it desperately needs a welcoming walkway.

After

With a winding path of tumbled pavers, your eye goes directly to the front door (sorry for the quality of this old photo). The solar lights enhance the path at night.

Front Entry Decor

Each season I change up the decor on my front porch. A new wreath, pillows, a throw, new plants~anything to freshen it up for that time of year. To see more about this front porch re-do, click here.

Adding Pretty Elements

Before

It doesn’t take much to freshen up your front entry. Recently, I painted the exterior fixtures and mailbox to our guest cottage. A simple project like this produces big results. To learn more about painting both these items, click here.

Know Your Home’s Architecture

In a small gated community here in town, I found this sweet patio home. However, the entrance does not fit with the style of the house. Between the dated French provincial front doors and the alpine-like peaked roof, I felt like yodeling every time I entered. The light fixture is 1980s. Structurally it looks wonky.

The wooden spindles and beams are removed. Columns are added and receive a coat of stucco. New fascia board gives the roof some beef.

During

With a new front door with sidelights, an appropriate scaled light fixtures and new paint the front door becomes the focal point in this entrance.

After

Here are some pretty entry pictures I did find on the internet. I just love all the window panes around this door.

Better Homes and Gardens

In each photo, your eye is drawn to the front door…which is exactly what you want to achieve.

Houzz

I hope this inspires you to spruce up the entrances of your home! Happy Wednesday!

If you enjoy this post, please share on Pinterest.

This post shared with Between Naps on the Porch Metamorphosis Monday #648


Back Staircase Renovation

This back staircase renovation is finally finished. What a bear. Truly, this project took so many twists and turns and over a year to complete. Thanks for visiting today to see the good, the bad and the ugly of the back staircase renovation. To see the original post back in August 2019, click here.

Deteriorated Rug

This all started when the quality of the sisal rug runner was deteriorating. With an active family, the life span of sisal on steps is about 8 years. This is the second installation of the same runner and quite frankly, even though I love the look, I am tired of replacing it every 8 years.

For some reason, Cooper loves laying on the top landing. With determination, he used his paws to release the rug from its glue and then folds it up underneath him. Go figure.

Oh, Cooper!

As you can see, it is quite the mess.

Sisal rug coming apart everywhere

Rug Removal

The first task is removal of this rug only to reveal 2 layers of gross glue and hundreds of carpet staples underneath. Between the dust and fibers, it is a dirty job. However, the rug did hide several problems and imperfections, that are revealed for the first time.

Glue is so thick it looks like the rug pattern

Unforeseen Problems

Cracked stair treads, jury-rigged risers, some odd looking leveling material~all extremely unsightly. The walls adjacent to the stairs are plaster and the area where the wall meets the step is full of holes.

Plaster cracks along the wall

The original stairs have layers of old paint and stain. We did consider sanding them down to bare wood to stain them, but it appears some of the treads may be different woods. They would never take the stain evenly.

Broken treads
Jury-rigged risers

What Can be Done?

Since I believe in fixing problems, not hiding them, we realize we need a contractor to repair all of this. It took weeks to find someone (anyone) who wants to work on this. We finally get one bid and it is over $5,000. Sigh.

So the project sat for a few months while we debate what to do. I really do not want to glue down another rug. And the thought of seeing another carpet staple was unimaginable. Finally, determination is born out of frustration.

I will learn to plaster. How hard can it be? Like frosting a cake, so I think. The recommendation from the hardware store is to use Fixall. This spackling compound is a dry powder mixed with water. It works fine, however, I didn’t realize that when it dries, it really DRIES, hard and immovable. Very difficult to sand down but for the most part, my initial application is somewhat smooth. I only find out later that the better material would have been MH Ready Patch (and easier to sand down).

Hot gun removes glue

We remove the creepy glue with a heat gun; sand down the stairs; reinforce the broken treads with a hardwood overlay; replace the broken risers and sand down the weird leveling compound.

Scrapers and pliers remove carpet staples
Weighting down the wood
Broken treads are reinforced with hardwood

New Solutions?

Initially, our plan is to paint the stairs and then add a carpet runner. However, when I posted about that in July, a trusted friend questioned my choice in stair runner. This gave me pause. The last thing I want to do is add another runner that will need replacing in a few years.

Cotton rug runners

Bad Lighting

We change plans again and the decision is made to just paint the treads and see where that leads us. While working for months in this space, I realize the lighting is just horrible. There is only one can light in the ceiling that is 16 feet high.

A lone can light

I call our electrician and ask if I can easily put a pendant light in place of a can light. He gives me the thumbs up and I purchase this one from Wayfair. We are scheduled to have the light put in by a professional and he cancels due to a last minute conflict.

Recessed Light Converter Kit
Westinghouse Can Light Converter Kit here

So I google how to switch out a can light to a pendant and we do it ourselves. In retrospect it is very challenging because of the height of the ceiling and not having a flat plane to put a ladder. My husband gets extra points for this difficult installation. Hanging on a 6′ long chain, the light is now lower and illuminates the space so much better.

Birch Lane Aadhya 3 Light Lantern Pendant from Wayfair here

We hire our favorite painter, John Cruz to paint the walls a high reflective white Sherwin Williams SuperPaint~what a difference this makes!

Now it Echoes?

In the past, the staircase displayed a gallery of the children’s artwork. But they are no longer children and as sad as it is, the artwork is taken down to paint the walls. Interestingly, once the sisal runner is gone and all the children’s artwork is removed, this space sounds hollow and echoes. I realize now the role the rug and art played in absorbing noise.

After the steps are properly sanded and cleaned and walls taped off, I paint the treads a dark navy blue and the risers a bright white (same as the wall color). The navy paint is a premium exterior latex enamel in semi-gloss.

Taping a Runner

The space looks so crisp and clean, but the navy edges against the plaster walls do not look are sharp as I would like. We live with this for a few weeks, but I am still longing for the look of a runner.

Frog Tape is used to create edges

So I make the decision to turn the navy paint into the “runner”. By painting the outer edges of the steps and risers in white, I am also hoping that solves the step to wall transition. What a complete pain this is! The steps are varying widths and different angles. Making sure the runner is in the middle involved a lot more math than I am used to doing. Quite a nightmare.

More Problems

Of course it takes 2 coats of white paint to cover the navy and I hold my breath while I am doing it (as my husband isn’t quite enthralled yet). Naturally, nothing goes smoothly and while I am painting the white, our cat, Donovan decides it is time to run up the stairs!

I suppose this is a good excuse to do another coat of navy paint on the steps as I need to paint the risers navy as part of the visual runner.

When I finish the painting, I am happily walking down the steps with my supplies. And then the paint lid drops and navy paint sprays onto the freshly painted white edge. Arggg! Thankfully it wipes up easily. This project has really tested my mettle!

Finally….it is done.

So what do you think? I love how fresh and cheerful it looks. I MAY do a center stripe or add side stripes to the runner down the road. But right now, I feel like I need to leave it alone.

Once a dull and poorly lit space, the back staircase is bright and cheerful. To make the change even more impactful, I decide to use this space to hang my artwork. So I pull out some of my favorite ones and hang them.

As I continue to hang more art, the canvases will absorb the sound and reduce the echoes.

For right now, I decide to leave a few of the cat’s paw prints, just because it makes for a good story!

Here is a longer shot with my iPhone to give you an idea on how the back staircase renovation looks overall.

Before and After:

What a project! I am so grateful it is finished (for now). This staircase feels like my own personal art gallery with the white walls and better lighting. Since it took so long, it’s hard to imagine what it did look like before.

With many unexpected twists and turns, decisions and indecisions and multiple delays, this staircase renovation project was a challenging one. Fortunately it is located in a place in our house that is not highly visible. This project took about 1 year longer than I would have like take. Quite honestly, I am glad it is over.

Happy Tuesday!

If you enjoy this post, please share on Pinterest.

This post shared with Between Naps on the Porch Metamorphosis Monday #625.


Traveling Teacup Adventure

US map with teacup routes

How exciting to be part of the Traveling Teacup series. My dear friend, Barbara from Mantel and Table is behind this wonderful way for people to have a shared experience through her beautiful pink rose teacup. What started out as a photo challenge back in March, is now a lovely, civilized way for people to connect during this pandemic. This teacup has traveled far and wide and will continue to do so after it leaves Bella Terra. Stories are told and collected and I hope you enjoy this teacup’s visit to our historic home.

The Teacup Arrives

The teacup arrived at our gates lovingly packaged. I can honestly say I am feeling very responsible for the care and keeping of this cup! Look where it has traveled! Carefully I unpack it and feel a need to introduce this beauty to our home and life. Made in South Korea by Hankook China, this teacup and saucer feels a bit heavier than my other teacups. It has a fun circle handle too, so it is easy to hold. Somewhere along the way, someone names the cup, Tessa Rose.

The Morning Chores

Tea service available in my Store

To start the day, Tessa Rose tags along with me as I do my daily chores. But like for most guests, we pull out the red carpet. Such a beautiful teacup deserves a silver tea service (in my Store). And of course, fresh homemade apple cider donuts. The cider is made from apples from our tree in the orchard (my first time making cider). To get the donut recipe, click here.

After steeping two Twinings Lady Grey teabags, we head out to the hen house and garden. It is a beautiful morning with temperatures in the low 70s. While taking advantage of having tea while I work, I set up a small table just for me and Tessa Rose. I love how the early morning dappled light adds a slight blue cast to the photo.

Using my treasured linens, the table feels extra special for Tessa Rose. To sit and have a cup of tea listening to the clucking chickens and chirping birds is the ideal way to start a day…..in spite of the chores! To see the recent post on how I store an organize my fine linens, click here.

Into the Garden

Next we look in on the garden. Since I recently planted the fall garden, I am checking to see how the new plants are faring. Unfortunately, the birds got to my lettuces and greens, so a cover is applied in hopes to allow the chewed down stubs to grow again. My trusted companion and shadow, Sox wants to be part of the tea party.

Next stop is the hen house to feed and water the chickens. It’s a bit early but a few eggs are available for gathering.

On our way back to the house, I return garden tools to the potting shed. Here is my chance to show Tessa Rose our unique well tower. This historic structure, built in the early 1900s, is home to the original water well. The building is completely restored with a newer well water system. To learn more about this restoration, click here.

During the morning walkabout, I show Tessa Rose a quick peek at our guest cottage and pool house before we head back inside.

Gifts for my daughter

Just Hanging Out

Yesterday was a big baking day! Tessa Rose helps me gather items for my youngest child, Elisabeth. She is a sophomore in college and we hope to connect today so I can give her some goodies~homemade quiche, donuts, sourdough bread, a fall candle and some comfy jammies.

Next we head up to my art studio. A recent request from a friend to donate one of my paintings for a charitable event is a bit of a surprise. I need to pick one, frame it and hope someone will want to buy it!

Tessa Rose keeps me company throughout the day. She is by my side as I write more blog posts, pay bills, sort and organize mail and pack for a trip out of town.

Tessa Rose in the master closet

Day is Done

After a busy day, and in the true Mantel and Table tradition, I thought I would try my hand at an evening cocktail with tea as an ingredient. Using my brother and sister-in-laws’ honey, chamomile tea, gin and fresh lemon juice, we make the Birds and Bees. This refreshing cocktail recipe is from Juan Coronado from The Bazaar, South Beach.

With a long day behind us, Tessa Rose is washed and packed away for her next adventure to Portland, Oregon. Many thanks for Mantel and Table for allowing me the chance to participate in this wonderful teacup adventure! Bon Voyage, Tessa Rose!

If you enjoy this post, please share with others on Pinterest.

This image has an empty alt attribute; its file name is teacuppin-600x900.png


Birds and Bees

This refreshing cocktail is made with chamolie tea, honey, gin and fresh lemon juice

  • 2 teabags chamomile
  • 1/2 cup honey

For the Cocktail

  • 2 oz gin
  • 1 oz honey-chamomile syrup
  • 1 oz. fresh lemon juice
  1. Make the chamomile-honey syrup: Place tea bags in ½ cup boiling water for 5 minutes; remove tea bags, squeezing water from them; discard bags. Add honey and stir to dissolve. Let syrup cool to room temperature. Makes about ½ cup; extra syrup will keep, refrigerated, for up to two weeks.

  2. Make the cocktail: Combine gin, syrup, and lemon juice in a cocktail shaker filled with ice; shake vigorously and strain into a coupe or martini glass.


Saturday Meanderings

Happy Saturday! My hope is that Saturday Meanderings is to have a conversation with you about odds and ends about the previous week. So pull up a chair and grab a cup of coffee and let’s chat.

Boy did this week fly by and it is a stressful one that I am happy to have behind me. Do you ever have one of those weeks that everything you touch doesn’t go smoothly? The planets feel a bit misaligned for me lately.

My goal of heading back to Phoenix this week from our cabin is delayed due to car trouble. Finding a big puddle of pink fluid under the car didn’t bode well and this creates a delay in my trip home. As I am writing this post, I am awaiting to hear the status. If I didn’t have a million things to do in the Valley, I’d love to stay here. But I cannot complain to have another few days in our beautiful mountain weather.

I did start a new project with hopes of sharing it with you today, but that too, did not go according to plan. Last month, I wrote a blog post indicating my desire to add more Scandinavian touches to our mountain cabin. (see blog post here). Well, the re-painting of this chest of drawers is my first real attempt to do so. Here is a sneak peak.

Cabinet before

This cabinet has 8 drawers of varying sizes. I have 6 of the 8 painted as my dilemma seems to be the these two drawers that are different from all the others. The two center drawers looks like 8 smaller ones with 8 ring pulls. So long story short, I decided to wait for the new pulls to arrive before I determine what the painting design will be. And the pulls came in the wrong size and I was 2 pulls short.

So as of today, the project is stalled until the new hardware comes in….and for my next trip to the cabin.

Mindful Minute

https://www.instagram.com/p/CFPk7LInrt8/

Since this week held more stress than others, I am so grateful to have access to Mindful Minutes. If you aren’t familiar with this, I cannot recommend it enough. My friend, Chas (from Chas’ Crazy Creations) has daily exercises on Instagram to reduce stress and they are a minute long. But I can honestly say, the one minute of taking a break from the computer (or other chores) and doing her brief exercises and breathing techniques is a LIFE SAVER. Seriously, it is the best thing you can do for yourself every day.

In addition, Chas is such a kind soul. She is the type of friend all of us need. Please get to know her. You will be so delighted that you did. Here is her link to Instagram; and her link to her blog.

Someone or something stole my pears

Last year, lo and behold, I discovered we have a pear tree at our cabin. This tree NEVER produced fruit before and was shockingly, full of pears. This year, the pear tree is also producing a great deal of fruit. Until this week. It has two pears left. The rest of the pears are GONE.

It’s a mystery as the pears are not on the ground. They have just vanished. Does anyone have any idea why this would happen? Is there a local pear thief? An animal?

Naturally I am so disappointed because last year I made the best pear dessert, A Pear and Caramel Pie (see recipe here) and pear preserves. Looks like I will just need to purchase some pears from the Farmers Market.

Rosary Beads

I recently received a payment for some work I was subpoenaed to do for a law firm who is suing the City. Long story, but lots of nastiness involved. Since the check felt like dirty money to me, I spent it on a set of rosary beads. If you have been following me from the beginning, you know I collect rosary beads (see post here).

Seraphym Designs, based out of Santa Fe, New Mexico makes the most gorgeous original heirloom rosary beads. Each design is carefully handcrafted in the United States and contains replicated devotional metals that date between the 14th and 19th centuries. In 2015, Seraphym Designs was commissioned to make an original St. Serra rosary for Pope Francis during his visit to the US.

Not only does the founder, Arasely Rios creates rosaries but she also makes beautiful jewelry. If you are looking for a unique one of a kind gift (they have a wedding rosary), I suggest you visit their website. And now I feel like I took bad money and spent it on something good.

Drone Video on my last Restoration

Video done by Austin Ely

Recently I was contacted by the owner of my last restoration remodel asking if I would give permission for the before and after photos to be used for a virtual historical home tour. Looking back at previous projects is such fun, as I forget many of the details over time.

Here is a 2:33 minute drone video that was done after the completion of the Willetta Restoration. I truly think it is one of my best renovations. Video created by Austin Ely. To see more information on this 1922 Jeffersonian home, please click here.

Thank you for all the great advice

I hope you read the blog post this week on rejuvenating my fabric pumpkins. So many people offered solutions to the bug infestation (thank you, bay leaves) and alternative filling. Instead of rice or beans which tend to get bugs, readers suggested pebbles and cat litter. Such great ideas and I cannot wait to try them.

Always love getting feedback from you!If you missed this easy DIY post, click here.

Beginners Blogging Retreat

If you are looking for a small group where you can learn how to build a blog, this is the retreat for youo. Learn more about this blogging retreat for beginners in Arizona. Group size will be limited to 12. You will learn about setting up your blog, writing better content, search engine optimization and how to promote your blog.

As you know, I started blogging to keep a living record of life here around our historic property/farm. And for the first few years, I happily dabbled in it. Last year I attended my first blogging seminar and realized just how much I don’t know.

I set my sights this year to learn more, because if you are always learning you are always growing, right? Well, there is SO much to learn about blogging and who knew? I certainly didn’t. But what I have learned is that what works for one person who has been blogging for 10 years, doesn’t necessarily work in today’s social media saturated world.

So, a group of talented friends are putting together a Beginner’s Blogging Retreat and we are holding it here at Bella Terra. If you are interested or have friends who are interested, please click here.

The seminar is for the person who either wants to start a blog or is in the beginning stages. It will be a fun day here at Bella Terra with good food, new friends, great information with lots of personal attention. Plus there is a discount for those who sign up before October 15.

We know that in light of COVID the world can change on a dime, but we are limiting the class to 10-12. It will be held on our back terrace, which is outdoors and has plenty of room to social distance. And it will be on November 12th when the weather is glorious.

If this is your jam, we hope you will consider attending! Also, feel free to reach out to me if you have questions or concerns.

Last fall~trip to Connecticut

That’s All Folks!

Well, that about wraps it up for this Saturday. Hoping your week went well. Thank you all for joining me!The official first day of fall is just around the corner! As soon as I get to Phoenix, fall planting begins! Stay safe and healthy out there!

If you enjoy this post, please feel free to share on Pinterest.