1

Cinco de Mayo

Image from istockphoto.com

Since we are a border state to Mexico, Cinco de Mayo is often celebrated here on May 5th. Cinco de Mayo is NOT Mexican Independence Day and it isn’t a federal holiday in Mexico either. So why do we acknowledge this holiday?  Cinco de Mayo was first celebrated in the United States in Southern California in 1863 as a show of solidarity with Mexico against French rule. This holiday is more of a general celebration of Mexican heritage and culture. A unusual fact: Denver, Colorado has the largest Cinco de Mayo celebration.

I love to cook but I can honestly say I really don’t make many Mexican recipes. The reason is because we have SO many great restaurants who serve authentic south of the border food. We take the accessibility of this cultural food for granted. But if you are interested in participating in this fiesta, here are some quick tips.

Grilled corn on the cob

What You Need

Here is a relatively easy way to celebrate Cinco de Mayo and enjoy some of the tasty foods available. Some important items to have on hand are:

  • Carne Asada~ is a dish of grilled and sliced beef, usually skirt steak, sirloin steak, tenderloin steak, or rib steak. It is usually cooked with a marinade and some searing to impart a charred flavor. 
  • Tortillas
  • Guacamole
  • Cilantro
  • Cojita Cheese
  • Chopped white onion
  • Lime slices
  • Salsa
  • Corn on the Cob
  • Watermelon
Fresh tortillas from Food City

Fortunately, we have some grocery stores who offer a full variety of ethnic and Hispanic food choices. We are able to purchase carne asada, already marinated and ready to go. Food City provides everything we need for this meal. And their produce department is off the charts!

Pre-marinated carne asada at Food City

Preparation

It takes minimal prep work to dice the onions, slice the limes, crumble the cheese and chop the cilantro.

The best basic guacamole recipe is from Serious Eats and takes 15 minutes to make. See the recipe here.

Best Basic Guacamole recipe from Serious Eats

Another FABULOUS recipe is Elote which is grilled Mexican Street Corn, again from Serious Eats. You will LOVE this! Recipe here. I have made this multiple times and it is a winner.

Elote

Easy Cooking

A quick grilling of the carne asada and cutting into bite sized pieces, is all it takes to prepare the meat.

Grilling the carne asada

Put all the fixings into bowl so your guests can help themselves to the cheese, onions, cilantro and limes.

Serve buffet style

Warm the tortillas in an oven or microwave and wrap in a towel until ready to serve.

Warm tortillas

This is such an easy, simple and delicious meal to serve anytime, but definitely for Cinco de Mayo!

A Mexican feast

For dessert, slices of cold watermelon and cookies are a great option.

Fresh watermelon

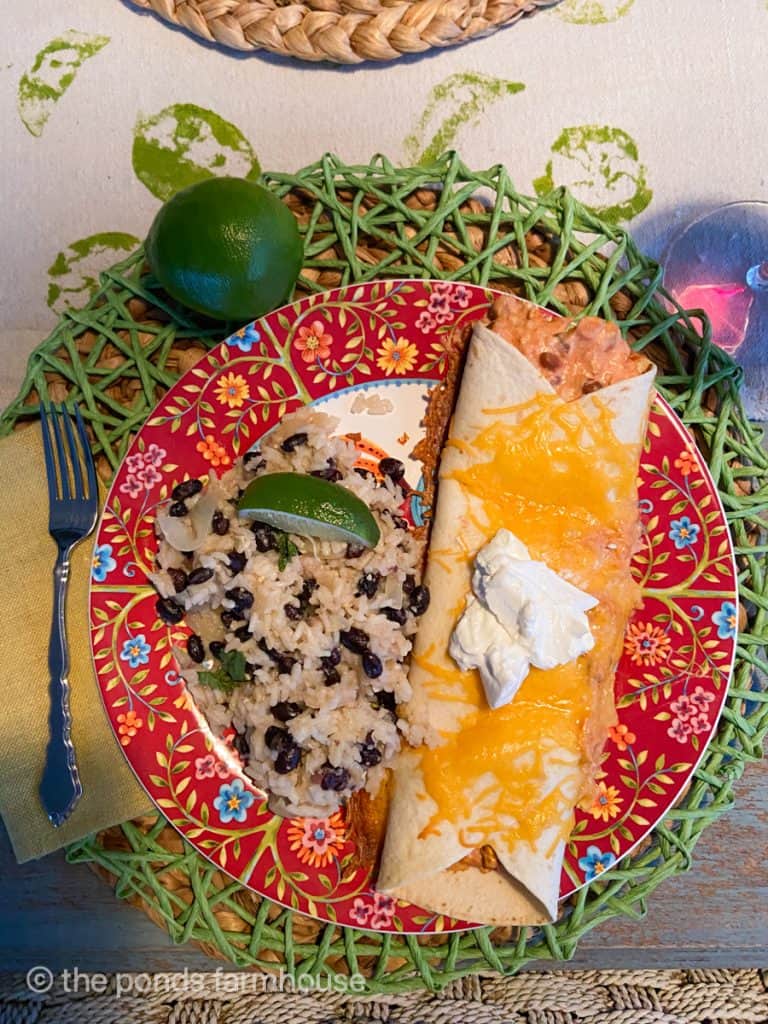
For more Cinco de Mayo ideas, a group of blogging friends create a Cinco de Mayo Virtual Supper Club. See my friend, Rachel’s Cilantro Lime Black Beans side dish. Rachel also has wonderful ideas for Cinco de Mayo table setting too! Click here to see more.

Rachel from The Ponds Farmhouse

My friend, Chloe from Celebrate and Decorate makes a fabulous tissue paper garland which is perfect for this holiday. To see her post, click here.

Celebrate and Decorate tissue garland

I hope you are inspired by all the festive table decorations and delicious food. May is just around the corner and remember, Cinco de Mayo is May 5th.

Happy Wednesday, my sweet friends! I am traveling this week and hope to get a Saturday Meanderings out to you. Enjoy the rest of April and we will chat again soon.

If you enjoy this post, please share on Pinterest.


How to Make Decoupage Easter Eggs

Decoupage eggs

I have always wanted to try decoupaging eggs with pretty napkins for Easter and Spring. However, I couldn’t find any appropriate napkins laying around the house to do this. So instead, I find paper hand towels with a pretty peony pattern. This is a relatively easy DIY project and would be so fun to do with children or grandchildren too. Keep reading to find out how to make decoupage Easter eggs.

Materials

Materials for making decoupage eggs

After you find the perfect napkin or paper hand towel (mine is from Hester & Cook) you will need scissors, Mod Podge, eggs and a paint brush. You can find Mod Podge here or at any craft store. If you have not used Mod Podge before it is a water base sealer, glue and finish. Mine is a Matte finish, but if you like glossy, why not?

Fresh eggs from our hens

Regarding eggs, since we have SO many laying chickens I am using our fresh eggs. However, craft eggs would work, maybe even plastic or wooden eggs (see here). A neutral color would be my suggestion as I only use white eggs vs. the brown or blue eggs our chickens lay.

Blowing out the Eggs

Lightly tap in a hole at both ends

This is a relatively easy process. First of all, prepare your work surface. A good size piece of parchment paper is taped to the granite counter as my work area. With a metal skewer (or you can use a knife), I gently tap a hole in both ends of the egg at the tips.

If the egg cracks a bit, don’t worry as you will be covering it. Make sure you take a skewer or wooden pick and pierce the inner membrane of the egg. It will be MUCH easier to remove the contents if the inside of the egg is not whole. Last time my husband blew out the contents of eggs for me, he ended up bursting a blood vessel in his eye.

Break up the interior membrane

There is no need for this be difficult. A gentle, steady breath will release the contents of the egg easily. If not, try shaking the egg to “scramble” the insides.

After all the eggs are empty, I gently rinse them and wipe dry with a paper towel.

Adding the Paper

Cut out whatever pattern you like

Depending on the design of your napkin/hand towel, cut out a section. My hand towels are 3 ply so remember to check for that. The first one I did the white paper backing stuck to the egg, but the peony design did not.

Remember to separate any other layer

Using your foam brush (or any brush) paint the Mod Podge to the egg. I like using these disposable foam brushes as you can discard them when you are finished.

Brush egg with Mod Podge

Add your paper cut-out to the egg, smoothing the wrinkles and edges. You can also paint the Mod Podge right on the paper too. It will dry clear and keep the edges fastened to the egg.

Add your paper to the egg in pieces

Keep adding pieces of your paper to the egg. My peony paper is very thin and any overlap can be seen. It may not matter but it all depends on your pattern and how you want it to look in the end.

Letting them dry

Let egg dry

The eggs will need to dry to set the glue. I get better at this with each application.

Make as many as you want

What is nice about these eggs is that they will keep forever. And I can use these pretty eggs in my table decor if I ever do another peony themed tablescape like the one I did last spring. See it here.

Peony-theme luncheon

These eggs are so cheerful and fun. Now I am inspired to look at other napkins and for future projects. The possibilities are endless since there are now many papers especially for decoupage. See some ideas here.

Sweet peony eggs

And the best part? Using all the fresh eggs for a homemade quiche! I love it when there is no waste.

Using the egg leftovers

Thank you so much for joining me today. It feels good to accomplish something that I have been wanting to do. I hope you like this simple DIY project. We will more than likely dye our eggs the traditional way but it’s fun to have other egg options.

Happy Tuesday, my sweet friends!

If you enjoy this post, please share on Pinterest.


St. Patrick’s Day Dinner Ideas

Mixing real and faux flowers

Top of the morning to you! Tomorrow is St. Patrick’s Day and time to make a special meal. Typically, corned beef and cabbage is served on St. Patrick’s Day, but a few years ago I discovered two recipes that are winners. Thanks for joining me today to get some St. Patrick’s Day dinner ideas.

Guinness Pie

If you love pot pies, you will definitely find this recipe from the New York Times exceptional. Beef with tender vegetables is cooked and reduced in stout beer for hours. Then it is laden into a flaky crust and baked. It is truly incredibly delicious.

Cutting Shamrocks

This year I am making 3 pies~one for my daughter in college, one for my neighbor who is having hip surgery and one for us. Using a cookie cutter, I will add decorative pastry shamrocks to celebrate St. Patrick’s Day.

Using green food color on pastry shamrocks

Last year, I did use green food coloring on the pastry dough. Surprisingly, it worked out well ! May branch out and do a pot of gold design this year!

Pie before baking

Every year I make this recipe, I ask myself, “Why am I not making this all the time?” So good and hearty especially on a cold night or rainy afternoon.

For the complete tutorial and recipe, click here to see last year’s post.

Bailey’s Irish Cream Cheesecake

Boozy, sinful and decadent, this Bailey’s Irish cream Cheesecake is topped with a thick layer of chocolate ganache. This is a great St. Patrick’s Day dessert and your friends and family will love it! Recipe from Oh My Goodness Chocolate Desserts.

Most of the ingredients I have on hand, with the exception of the Oreo cookies. Since I am also making 3 cheesecakes, I did need to buy more Bailey’s and cream cheese.

Crumb the Oreos and mix with melted butter. Push this mixture into a 9″ springform pan, partially up the sides. Bake for 8-10 minutes.

Perhaps the most challenging part of this recipe is wrapping the pan with two layers of aluminum foil. Make sure the foil is tight and secure so no water gets in during the baking process.

Foil wrap

Pour in the cheesecake mixture into the prepared pan. Bake, rotating once halfway through.

You will need to refrigerate the cheesecake at least 5 hours or overnight, before adding the ganache.

Pouring the ganache

Look how beautiful this cheesecake is!

Bailey’s Irish cream Cheesecake

I suppose a good glass of red wine or an Irish stout will be perfect with the main course. And you won’t need a drink during dessert because there is plenty already in the cheesecake.

Hope you have a fun and festive St. Patrick’s Day. If you did not see my St. Patrick’s Day table, click here.


Bailey’s Irish Cream Cheesecake

Boozy, sinful and decadent this cheesecake is loaded with Bailey's Irish Cream, and topped with a thick layer of chocolate ganache and Oreo crust.

For the crust

  • 5 Tbsp unsalted butter (melted)
  • 2 cups Oreo Cookie crumbs ((use whole cookies with filling))

For the Cheesecake filling

  • 3 (8 oz.) packages of cream cheese (softened)
  • 1 1/3 cups sugar
  • 1/4 cup cornstarch
  • 3 eggs
  • 1 1/2 tsp vanilla extract
  • 1/2 cup Bailey's Irish Cream

For the Chocolate Ganache

  • 1 1/4 cups heavy cream
  • 12 oz semi-sweet baking chocolate-chopped
  1. Preheat oven to 350 degrees

  2. Mix together Oreo crumbs and melted butter, press the mixture into 9" springform pan and bake for 8-10 minutes; set aside to cool.

  3. Once the crust is cooked, wrap pan with two layers of aluminum foil and bring the foil up the sides of the pan and make sure it is tight and secure so no water gets in during the baking process!!

  4. With electric mixer, mix cream cheese and sugar on medium speed until smooth.

  5. Add cornstarch and continue to mix until fully incorporated, decrease the speed to low and add eggs one at a time, then add vanilla extract and Bailey's.

  6. Pour batter into prepared pan and place in a roasting pan. Fill rosting pan about a quarter of the way with hot water and bake at 350 degrees for 55-65 minutes, rotating once halfway through (until the cheesecake is set around the edges and slightly loose in the center).

  7. Remove springform pan from the water bath and set on a cooling rack to cool, then remove aluminum foil and refrigerate (for at least 5 hours or overnight). When it's completely cooled run a thin knife around the edge and take off the ring of the springform pan.

  8. Over a double boiler melt chopped chocolate until completely smooth and has no lumps, then stir in heavy whipping cream (from the fridge). It should be very thick and creamy so you could spread it on top tof the cake but also on sides without dripping. Use just 2/3 of the ganache and set the cake in the freezer for 5-10 minutes to harden the ganache. Take the cake from the freezer and reheat the rest of the ganache but this time it should be smooth (but not too thin) so you can pour it over the cake to make the smooth and shiny surface.

  9. To keep the shine of the ganache, let it cool at room temperature and then store the cake in the fridge.


Easter Tablescape Ideas

Today, I am happy to share Easter tablescape ideas with many talented friends. Welcome to the Easter Table blog hop. At the bottom of my post you will find links to other holiday table ideas.

Since Easter is early this year, we will more than likely have our Easter dinner inside at the smaller round table located in our family room . We have always celebrated with family only and unfortunately not all our children are in town and can participate.

Tulipieres from The Enchanted Home

The Centerpiece

The set of tulipieres I purchased from The Enchanted Home a few years ago, is the star of the show. To see more about these tulipieres and how to fill them, click here. Since daffodils are now available and affordable vs. tulips, I find this to be the most attractive and economical solution.

Rose pattern damask

The Tablecloth and Dishes

With a neutral damask white tablecloth, this year I am experimenting with blue and white with the yellow daffodils. These blue and white dishes I have never used. This set remains out in our pool house for guests.

Each blue and white plate is a different pattern but in the same tones. I believe I may have purchased them from Horchow years ago. However, Amazon surprisingly has a great selection of new and vintage blue and white dishes. See here.

Stacked on top of a white beaded stoneware plate from Pottery Barn, provides a nice contrast to the gold charger.

I really struggle choosing the charger. The brushed gold ones did win in the end over the wooden scallop and silver ones. It’s time I invest in something neutral like white or wicker, which would look even better. To find super affordable brushed gold chargers, click here.

The Glassware

A simple Lenox water and wine glass with a gold rim complements the setting. Hard to believe these glasses are over 44 years old!

Pots de creme with a gold handle by JSC are small vessels for more fresh daffodils. I collect pots de creme and use them for many purposes.

Handmade nests and handprinted eggs as a place card

Easter Touches

The clay bunnies are a whimsical addition to remind everyone of the spring and Easter theme. Homemade nests from shredded paper and glue (see post here), hold a real egg shell painted with the guest’s initial~as a place card.

My favorite Wallace go-to flatware with a bee motif works well with this blue/white/yellow theme. Blue embroidered napkins are an antique store find.

Here are some fun overhead shots of the table.

I am so happy to share my Easter table theme and now onto the others!

If you enjoy this post, please share on Pinterest.

My sweet friend, Chloe from Celebrate and Decorate is hosting this Easter Tablescape Blog Hop. All you need to do is click on the names below and you will (hopefully) be taken to their website to see what they have in store for Easter. You will be able to open a new tab with each so you can return back to this page and just keep going. A fun way to see LOTS of other bloggers without having to search. Enjoy!

Celebrate and Decorate

Design Morsels

Home is Where the Boat Is

Living with Thanksgiving

Panoply

The Little Yellow Corner Store

My Hubbard Home

Everyday Living

Corner of Plaid and Paisley

The Sweet Sensations

Belle Blue Interiors

Red Cottage Chronicles

Zucchini Sisters

Life and Linda

Mantel and Table

Calypso in the Country

The Painted Apron

Blue Sky at Home

Me and My Captain

My Thrift Store Addiction

This post shared with Between Naps on the Porch Tablescape Thursday #652


St. Patrick’s Day Table

Even though we are not of Irish decent, we celebrate St. Patrick’s Day, March 17th, because it is the birthday of my daughter, Julianna and my mother, Julia. That, in itself, is a good reason to set a St. Patrick’s Day Table. However, who is St. Patrick and why is this holiday celebrated around the world?

A Little History

St. Patrick’s Day is celebrated annually on March 17, the anniversary of his death in the fifth century. The Irish observe this day as a religious holiday and have so for over 1,000 years.

Image from Irish Central

St. Patrick, who lived during the fifth century, is the patron saint of Ireland and its national apostle. Born in Roman Britain, he was kidnapped and brought to Ireland as a slave at the age of 16. He later escaped, but returned to Ireland and was credited with bringing Christianity to its people. 

Mixing Old and New

For this year’s St. Patrick’s Day table, I am using this fun piece of contemporary fabric from my friend, Anne. I couple it with my antique English china, Fondeville Ambassador Ware 6762. The rich shades of green, gold, pink, blue and yellow make these gold-rim plates one of my favorites.

To me, this is the essence of collected chic~mixing bold patterns with elegant tableware.

Stacking the antique china on the simple brushed gold chargers enhances the gold in the pattern. Adding the crackled gold rim clear salad plate from Leslie Roy does not diminish the platter floral design. Similar chargers can be found here. These chargers are so affordable and I use them frequently.

Of course, I love my Wallace silver/gold bee patterned flatware (see link here) which seems to go with just about any place setting I create.

Made in Waterford, Ireland, the Waterford crystal Marquis water goblets and Lismore wine glasses are in keeping with the Irish theme. Gold trim napkins softly fold and find a home inside the wine glass. See similar napkins here.

Making it Festive

With a fun and festive holiday like St. Patrick’s Day, it is easy for the table decor to become kitschy or juvenile. Trying to keep the table elegant, but fun, I add gold shamrocks to the tablecloth. Since I bought these several years ago, you could use gold coins instead.

Each place settings get a light up shamrock necklace for a little whimsy. See similar necklace here.

The Centerpiece

Brass candlesticks from West Elm brighten up the table. Set up in our family and surrounded by windows, the table changes color as the day progresses.

The centerpiece is a vintage Westmoreland oval footed milk glass bowl with hydrangeas, peonies and green glitter shamrocks. It is the perfect size for this round table.

Will you be celebrating St. Patrick’s Day? My daughter will be 24 years old and my mother, if alive, would be celebrating her 91st. Time marches on, doesn’t it?

Wishing you all a happy Tuesday. We are having unusually warm weather (in the high 80s), but the temperatures are to drop back down into the low 60s this week. My poor garden is so confused.

Just a reminder that any words that are italicized bring you to the source. If it is a product on Amazon, please note that I am an Amazon Affiliate. If you purchase something through my website, I receive a small (very small!) stipend, which doesn’t affect the price you pay at all. My goal is to make sourcing the items easy for you. Thank you for your continued support.

If you enjoy this post, please share on Pinterest.

This post shared with Between Naps on the Porch Tablescape Thursday #650


Valentine Dinner Party Ideas, Part 2

So happy you are here with me today to see the Valentine Dinner Party Ideas, Part 2 blog post. If you missed Part 1 yesterday, you can view it here. There is so much that goes into this party, it would be overwhelming to do it in one post, so I hope you enjoy the rest of it today.

The Table

Setting a beautiful table is something I love to do. It sends a message to our guests that they are important to us and that this evening is special. Whether you like Valentine’s Day or not, we think this is the perfect holiday to gather with those we cherish. So why not make a spectacular table?

For the last Valentine dinner party, I did not use a tablecloth. This year, though, I am drawn to the colorful Indian block prints. One of my Instagram friends, Darviny @dayswithdarviny, sources this beautiful fabric. I sent her pictures of my china and she gave me pink options to choose.

My husband made the raised 12″ x 6′ long center shelf (see post here). This focal point is the perfect place to stage all the flowers. Using individual vessels of different heights and sizes, I made the centerpiece out of an abundant display of roses, tulips, hyacinths (which smell heavenly), hydrangeas, snapdragons, and eucalyptus.

Flowers from Torchio Nursery

This year I ordered the flowers from Torchio Nursery in San Francisco. Instead of going to 3 or 4 locations to find a nice array, this nursery sends out a weekly list of what is available and then ships them to me.

Candle holders by West Elm

Adding tapers and votive candles, the centerpiece is complete.

This year, I also hung heart-shaped garlands – some purchased, some homemade (see post here) – from the ceiling using clear Command hooks. The white heart garland came from the shop at Whitfill Nursery, and the 3-dimensional heart garland came from LaMia Casa on Etsy here.

Since this is a Valentine celebration, I decide my Royal Doulton Romance Collection china is most appropriate. Napkins are pink linen, found on sale at Pottery Barn. I also opt for Wallace Napoleon Bee Gold accent flatware, which can be found here. Very affordable brushed gold chargers (link here.) The printed menu cards are at each place setting.

Typically we have rattan chairs around the table. However, in attempts to make it more elegant and comfortable, we bring out upholstered white wing and Parson chairs.

The Day of the Event

The table is set; gifts are in place at the table and the caterers arrive. Now it is time to get ready. Unfortunately I tend to leave outfit selection to the last minute. The black taffeta skirt (from Ann Taylor) I decide to wear is many years old. It seems that the zipper doesn’t quite make it to the top without a great deal of not breathing. The dreaded thickening of the waist after menopause…ugh!

Nonetheless I wear it. Fortunately, it fits beautifully beneath my dusty rose cashmere sweater (J. Crew), which covers any malfunctions. I slip on heels just before guests arrive.

Cocktail Hour

A few days before the event, I collect all the answers to the guests’ questions and create a “Who Am I” sheet printed on yes, pink card stock. During the cocktail hour on the front porch, each guest is given a drink and the Who Am I sheet.

Who Am I sheet

The goal is to mingle, ask questions and write in the name of the person who provides the answer. Naturally, it is a fun way to spark conversation and get to know other guests on a different level.

Edible Glitter in Champagne; glasses by Waterford

We serve champagne and Ruby Red Grapefruit Greyhounds with Rosemary Simple Syrup, both a pretty pink. Recipe is here. One of our guests always brings some fun cocktail additive. This time it is Rose Gold Brew Glitter, an edible glitter that we add to the champagne flutes. Very pretty and festive! Resource it here.

The hors d’oeuvres are individually plated for couples. Our bartender and servers wear masks. After fun games, delicious hors d’oeuvres and drinks, we make our way to the back terrace for dinner.

At the Table

Once we are seated at the table, the guests open their gifts. We get to share what we discover during the cocktail hour as the salad is served. This helps keep conversation flowing and stimulates lots of laughter!

The Wine

My husband carefully selects the wine pairings to go with each course. When the wine is being served, we share a thorough description of the wine region, year of harvest, maker and tasting notes.

The wine glasses are mostly vintage pink glass and add to the dinner theme.

Toasts about friendship, love, wisdom and peace are printed on paper ahead of time. Female guests read them to welcome the wine, salad, entree and dessert.

Dinner

Salad

By this time, conversation is very lively and the food is delicious. As I look down the table, I see happy faces and beautiful flowers.

Dessert

After Dinner

After the last course and wine, we continue to play the game of getting to know everyone a bit better. Soon a Waterford crystal biscuit jar filled with questions makes its way around the table. It is a delight to hear stories and shared memories from each couple.

Though a great deal of planning and work go into this evening, it is one of our most favorite events.

Expect the Unexpected

And then the winds kick up

We were watching the weather all week. The temperature predictions kept dropping, saying it might be really chilly. Then, the day of the dinner, the wind picks up. In my mind they seemed to be gale force winds, blowing everything over on the table. The candles will not stay lighted and my beautiful heart shaped garlands become a tangled mess.

But what can you do? The addition of propane heaters are a big help. Blankets and shawls are available for guests. Try and focus on what is important: engaging with your guests and living in the moment.

I hope you enjoy all the details and ideas regarding our Valentine Dinner Party. Even though our party is much smaller this year, we cherish our friendships and time together.

This post shared with Charming Homes & Gardens Link Party 47.