1

Same Flowers – 2 Different Ways

When I was in my 20s, I offered to take a work shift for my friend, Gwen allowing her to escape on a weekend mountain trip.  When Gwen returned, she presented, as a thank you, a collection of wild grasses and cattails she had gathered on her trip, wrapped in burlap with a gorgeous ribbon.

The sweet gesture made such an impression on me…so much so that I truly think about nearly each and every gift I give.

With Valentine’s Day around the corner, you may be giving flowers as a gift to a loved one, friend or co-worker. Here are two very different presentations with the same roses.

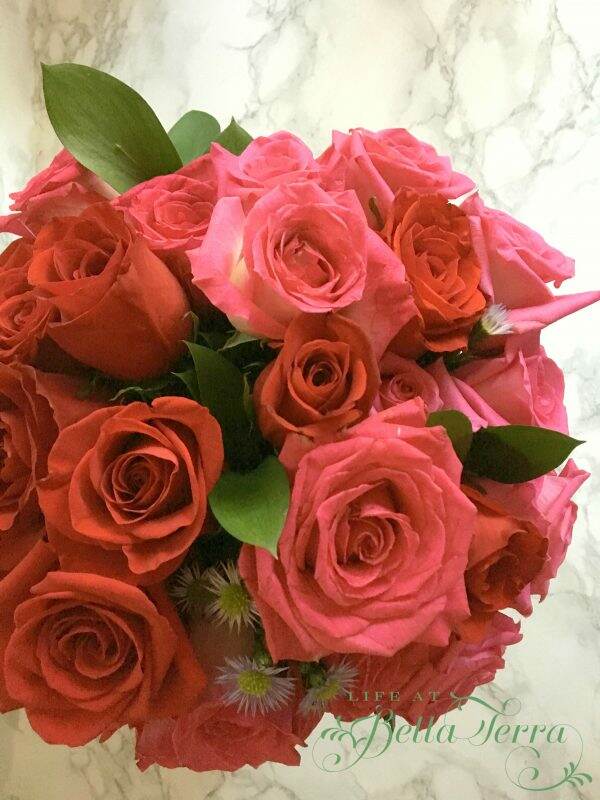
I bought the roses at Safeway.  I wanted all pink roses but they only had 2 dozen available. I wasn’t sure about mixing pink and red but I added 2 dozen red anyway.

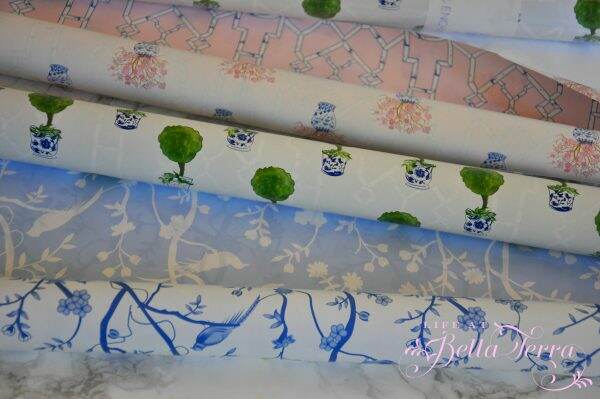
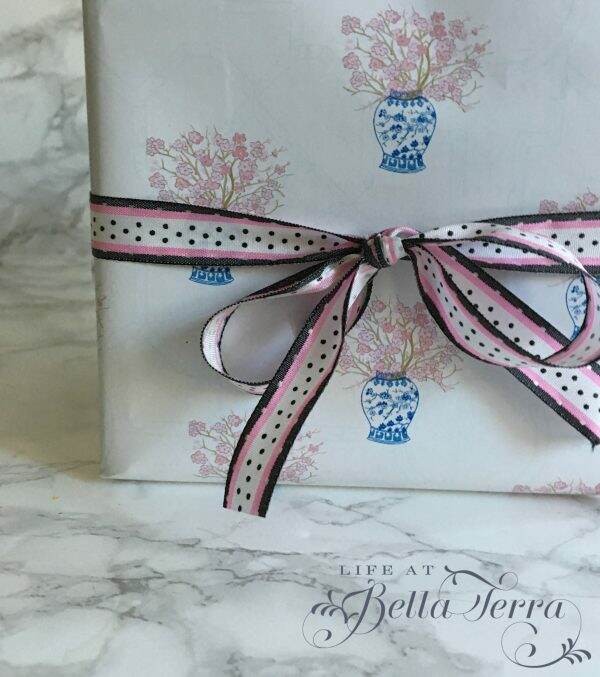
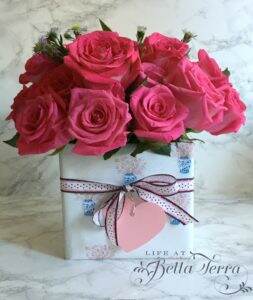
I covered a box (I used a square box) with wrapping paper.  I initially wanted a solid color but I didn’t have anything so I used this sweet paper from The Enchanted Home. The ribbon was a scrap that I had in my drawer and it works with the colors of the paper.

I was just at Michaels and they have several different size boxes, in both solids and prints, which would work too.

I found (in my collection of vases in the basement), a round, short glass container that would fit snuggly into the box.

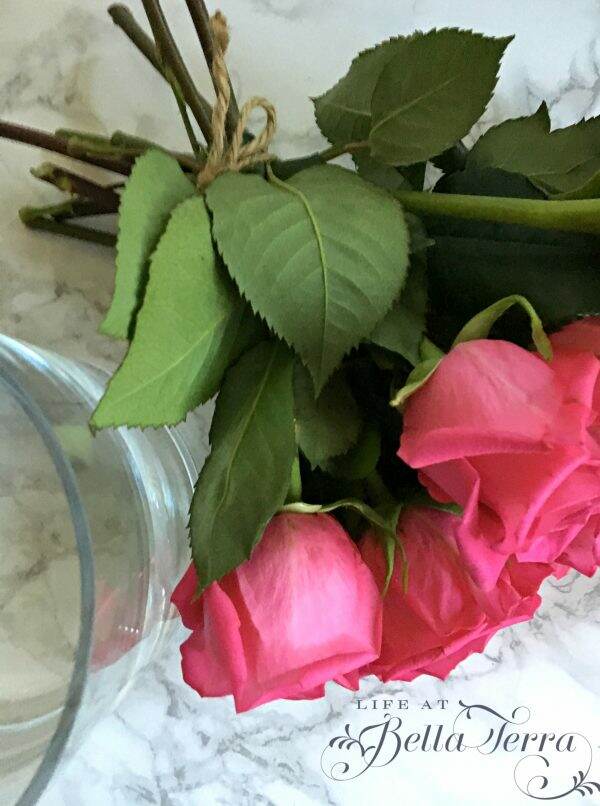
Gathering 8 roses in a bunch, I wrapped them in twine. I continued to do this with the balance of the roses, until the container felt full and lush.

With a craft punch (again, from Michaels) I cut a heart out of pink paper stock and tied it with baker’s twine.

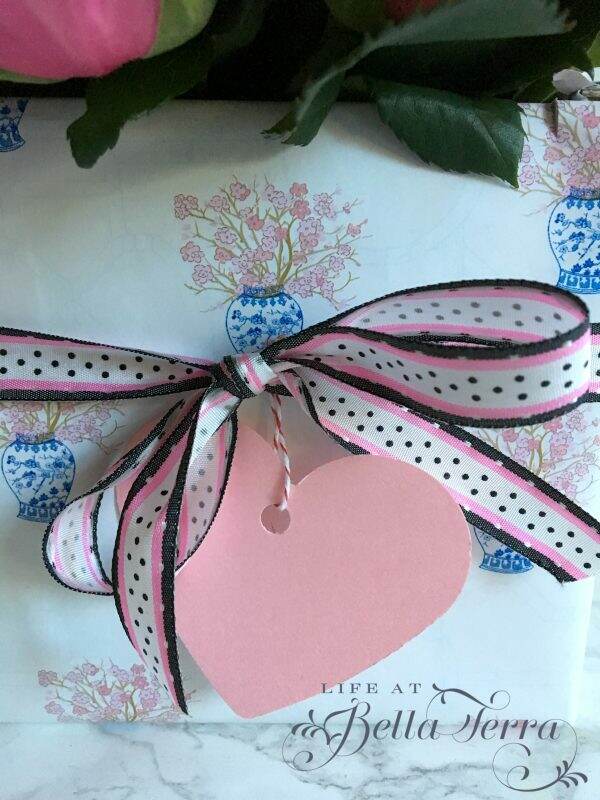
Here is the finished product.  The picture below shows this arrangement with all pink roses.

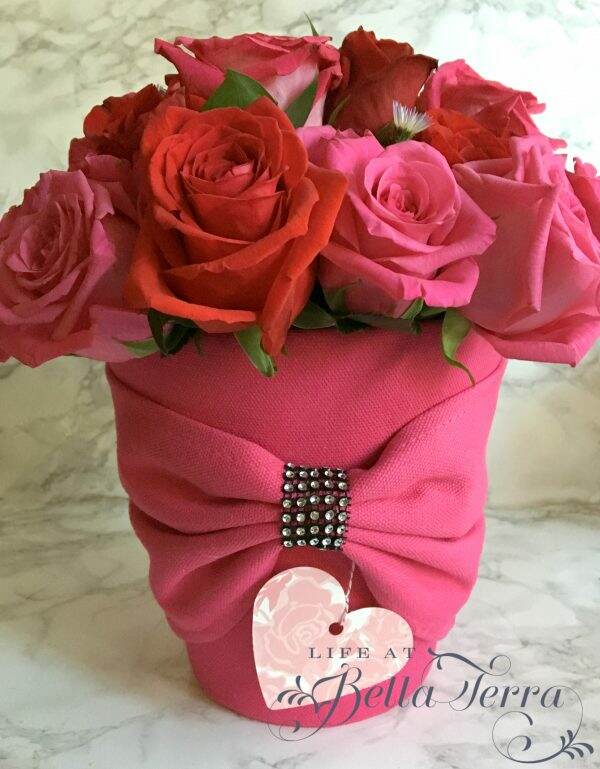
Since the container for the next arrangement was a bit larger, I added the red roses to the mix.

This pink, fabric-covered basket (from Debi-Lilly) was purchased from Safeway last year for $2.00.  Our grocery store often has great discounts on their floral products, especially after a holiday. It is normally a plant holder, but the glass container fit right into it.

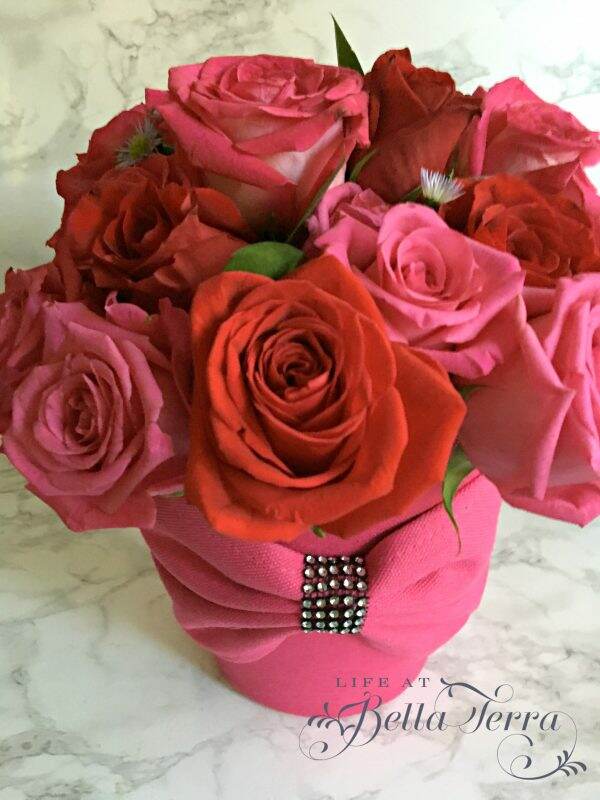
It’s interesting how a solid color container creates a totally different look. And I don’t mind the red and pink roses in the same arrangement.

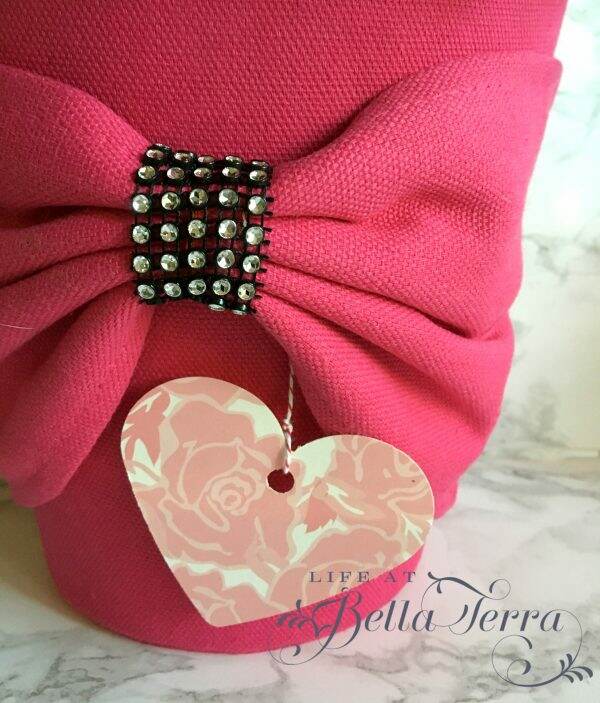
I added a different color craft paper heart, to create some interest.

So use your imagination when presenting flowers.  It doesn’t need to be expensive or luxurious.  Being thoughtful is priceless and the recipient of your gift will appreciate it.

Is there one you like better than the other?


The Importance of Friendship

Yesterday I was feeling out of sorts.  Blah.  Not physically sick but emotionally restless.  I tried exercising and that didn’t fix it.  I ate healthy food all day to no avail.  Typically I wake up each morning in a happy state ready to tackle the day with lots of focused energy.  I was wandering around aimlessly trying to pin point what was bothering me.

Have you had one of those days where you are on the verge of weeping?  Well, that was me. I felt like I was ready to have a good cry, yet I couldn’t understand why.

That afternoon I got a call from my friend, Janie, who wanted to spontaneously meet me at Whitfill Nursery as she needed flowers for her garden.  I LOVE Whitfill Nursery and enjoying a sunny day surrounded by plants, flowers and a dear friend sounded like what I needed.

Maybe I was missing all the wonderful activity from the holidays-where the house was filled with my children, their friends and laughter.  Maybe I was just overtired…

But spending time with my dear friend filled my soul.  As she loaded her cart with bedding plants, I took some of these photos.  Nothing like the simplicity and beauty of nature to help reset your compass.

I believe that situations and people cross your path when you need it most.  We went into the Garden Shop at Whitfill where Maya Angelou‘s words of wisdom jumped out at me.

Janie had no idea that asking me to join her in flower shopping would make me feel better.  The warm greetings and conversation from both Janis and Patti at Whitfill help ease my weepiness. Being around the friends, flowers and sunshine was my soul food.

The saying at our house is “in order to be a good friend you have to have good friends”. I feel so blessed to have dear friends who enter my life at the most random times, but always when needed.  At the end of the day, companionship and great conversation was my medicine. This is balm for my soul.

Do something nice for a friend today.  You never know if they need you.


Making Quilts, Making Mistakes

Before I left for college, my Mom made me a sweet, simple quilt. Quite frankly, I was surprised that she had the time to make this. Being the middle of 5 children and often overlooked, her gift made me feel extra special.  Today it is a bit dog-eared and frayed around the edges but it remains an endearing keepsake.

Quilting Tips

Because I cherish this handmade gift from my Mom, I wanted to make quilts for my two girls.  How hard can it be, right? I took Home Ec in 7th grade….

Finding pre-cut 10″ x 10″ squares in Christmas fabric helped push the decision over the edge. I found these in a quilting store in Pinetop, AZ but you can also find them online in various colors.

Quilting Tips

The designer is Kate Spain and she has a website filled with colorful items such as rugs, bedding, pillows, quilt fabric bundles and patterns.  On her website, she has new designs for 2018, if you are feeling ambitious!

Having all the coordinating fabric pre-selected is a big time saver.  The packet comes with 42 – 10″ x 10″ squares (you can buy 5″ ones too).  Depending on how creative you want to be, you can design the quilt any way you’d like. Julianna’s fabric is predominantly red, green and black (her favorite color).  Elisabeth’s is red, turquoise and green.

Since I’m a novice, I decided to just keep the 10″ squares and make a block print quilt. Nothing fancy schmancy.

I laid the squares out in the pattern I liked best,

and then sewed them together, a row at a time.

My first mistake: I wasn’t careful in sewing the seams at the same 1/2″.  As a result, the squares didn’t line up exactly as they should, which caused problems later on.  I was trying to do this secretively and precision wasn’t top of mind.

I pressed all the seams flat…feeling rather professional.  Here’s a look at the underside of the top layer.  I don’t know what the attraction was, but every time I took the quilt out to work on it, the cats and our dog, Sox felt a need to help.

Making Quilts

After all the pieces were sewn together, I selected velvet for the borders-red for Elisabeth and black for Julianna.

My next mistake:  I didn’t realize how hard it is to sew velvet.  I don’t know if it was due to the fabric or combining the surfaces of velvet and cotton.  The border kept slipping and as a result I am sure the seams were not consistently 1/2″.

I found really soft black and red fabric for the back of the quilt.

For the filler, I used a thin polyester batting.  All fabric, thread and batting supplies were purchased at Hobby Lobby.

For the quilting part, I machine stitched all the squares in Julianna’s quilt.  This became problematic when the squares weren’t completely square and it didn’t lay flat properly.  I had to undo some of the stitching and correct my problem later. A complete pain.

To quilt all 3 layers of Elisabeth’s, I hand stitched only where the squares intersected.

Here is the finished product that the girls opened on Christmas morning.

After the fact, I realized I had not put their names on the quilts.  I should have embroidered one of the squares before I assembled it.  Then I got the great idea to do an iron-on label, using Avery Labels light fabric transfers. I created the wording on my computer, printed the mirror image and followed the directions.

I practiced ironing the transfer on a scrap piece of cotton fabric and it looked fine.  So I proceeded to add the transfer to the quilt.

I thought I was being careful to keep the iron moving, but then the fabric started to smell.

And it ended up looking like this!!!! I had burnt the fabric and ruined the square.

I was sick over this.  What I failed to consider is that when using the hot iron, the polyester batting must have overheated and melted. Not only did it smell bad, but the texture of the square was now stiff and scratchy.

I quickly went online and found another packet of these same holiday squares from Etsy.  I am awaiting shipment.  When it arrives, I plan to take a new square, embroider it, and then carefully remove the burnt square and replace it.

Here are the lessons I learned from this project:

  1.  Be as accurate as possible when sewing the seams.  A square stops being a square when one side is not sewn straight. It will show up later when you quilt all three layers together.
  2. If using velvet or another “slippery” fabric, know it will move while sewing.  Use plenty of pins or slowly stitch it. Again, straight seams are important.
  3. Do not use an iron transfer with the quilt completely assembled. Do any personalizing prior to assembly.

In spite of some of the challenges, the girls really love the quilts.  Elisabeth was such a good sport when I showed her the damage and tried boosting my spirits.  The good news is I am confident I can repair this……I hope…:)