1

Style Trends in 2021

Calming blue in my living room is in style!

Honestly, I have never been in style. Whether it be fashion, interior design, or haircuts, this is an area where I remain classic and traditional, not trendy. But with all the articles coming out about what’s in for 2021, I may just be in sync with the Style Trends in 2021, at least in home decor.

Grandmillenial Style

First of all, who came up with this unfortunate name? I’ve also heard it called Granny Chic? Ugh. Why not Collected Chic? Or Storied Style?

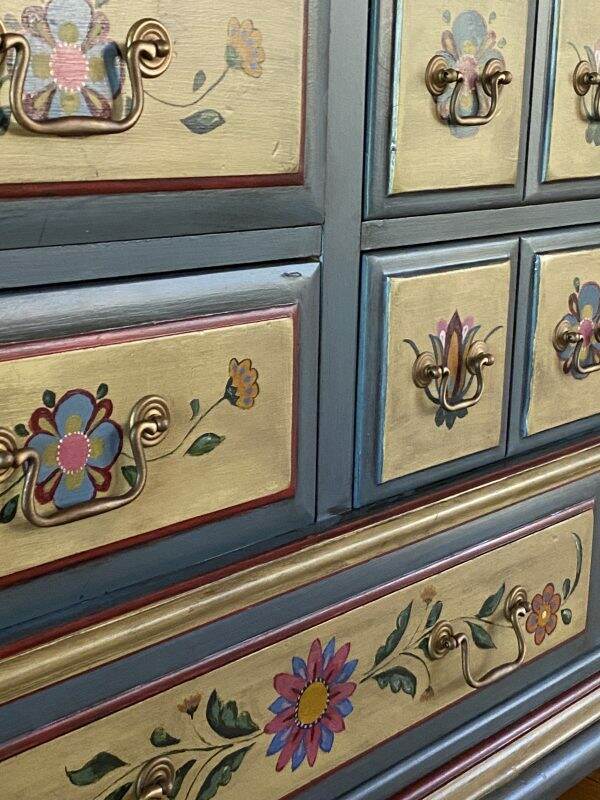
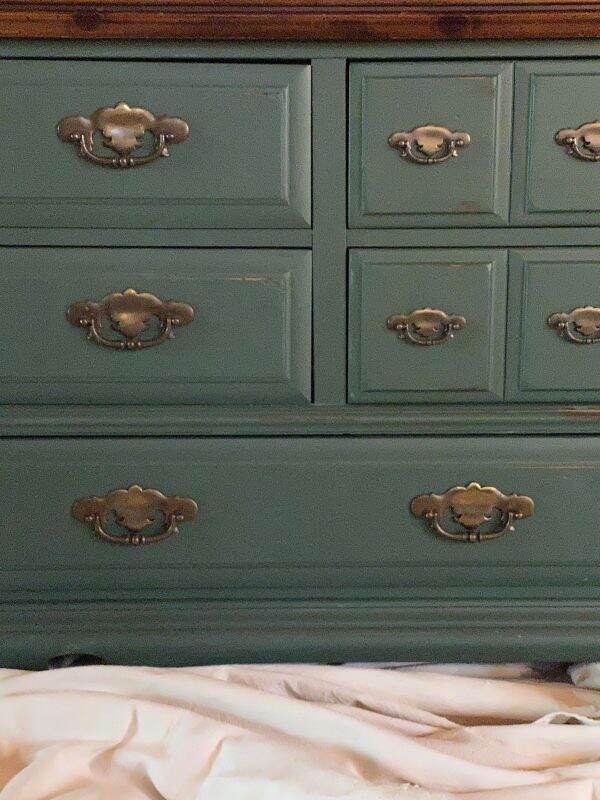
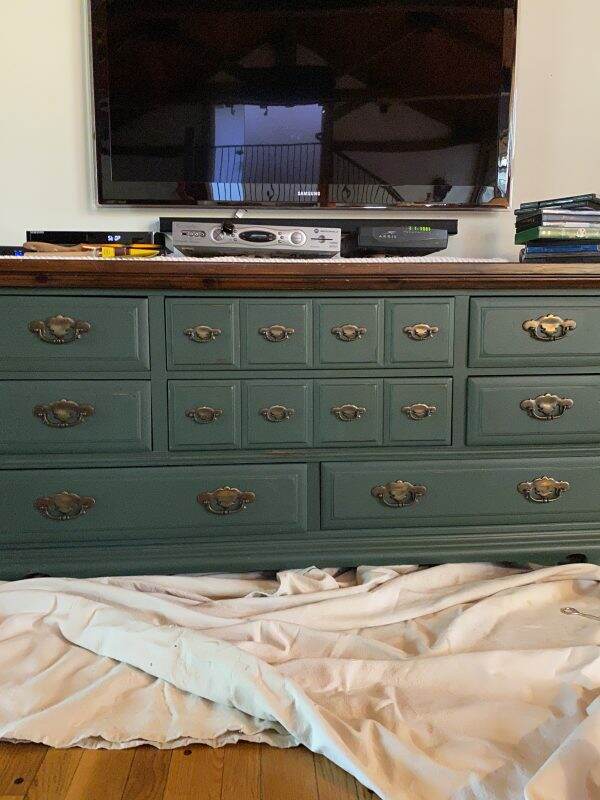
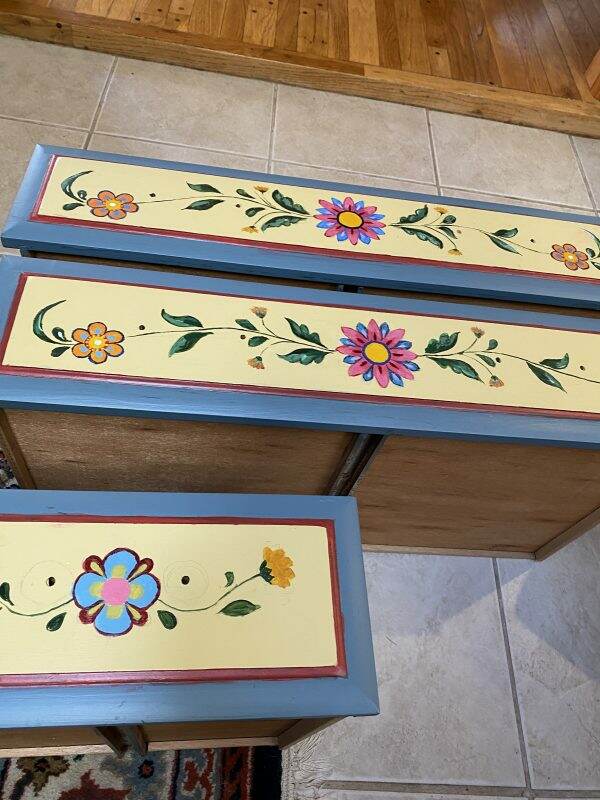
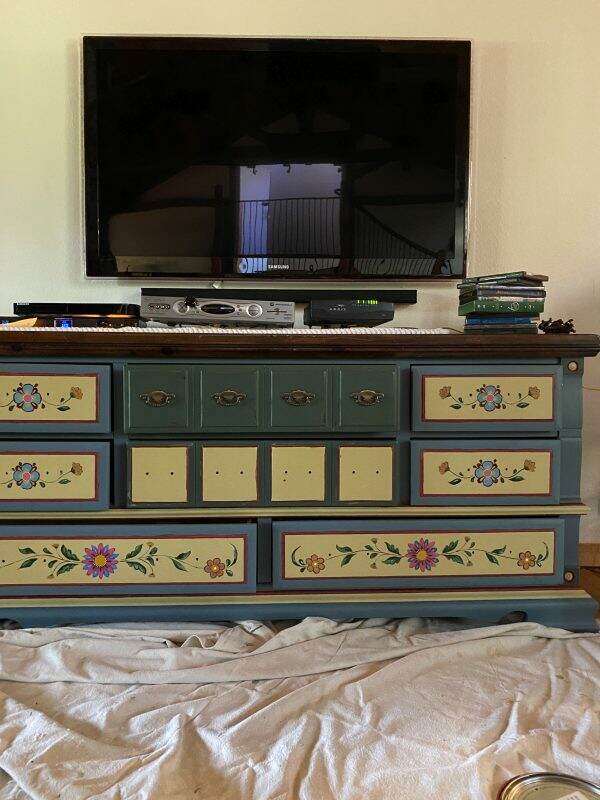
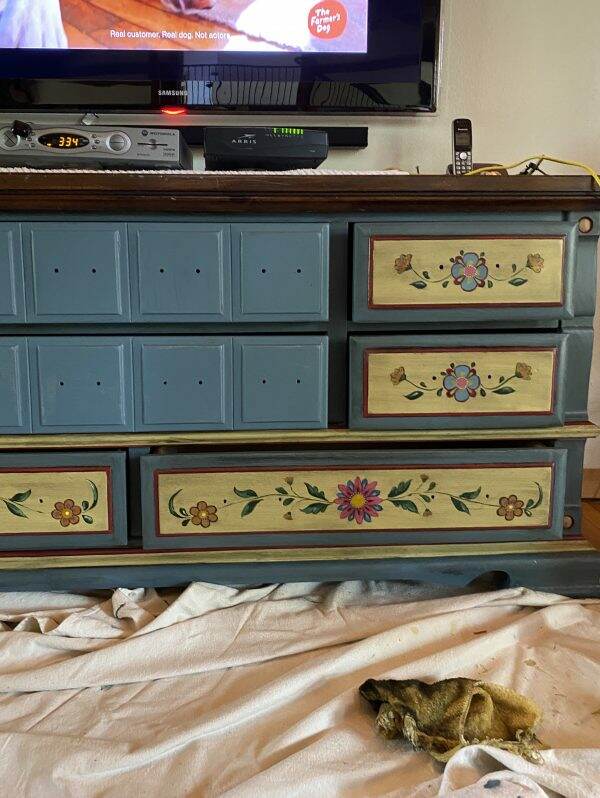
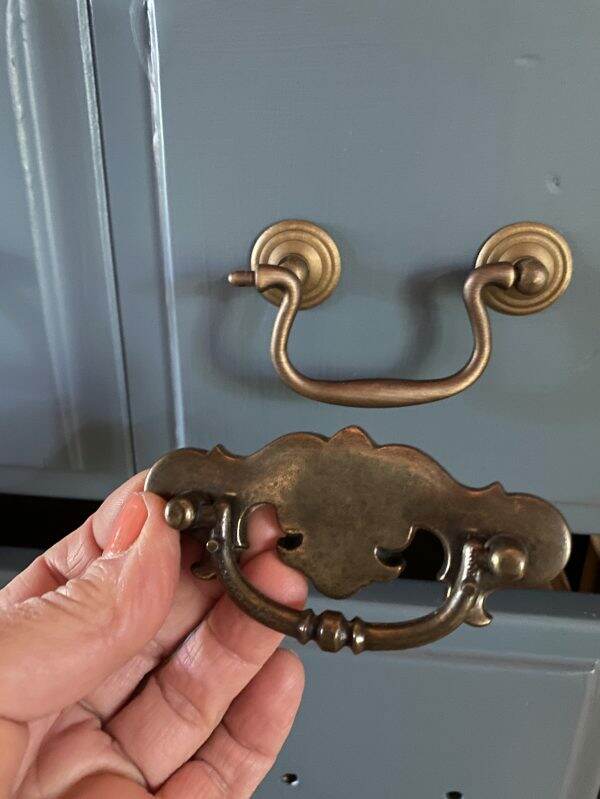
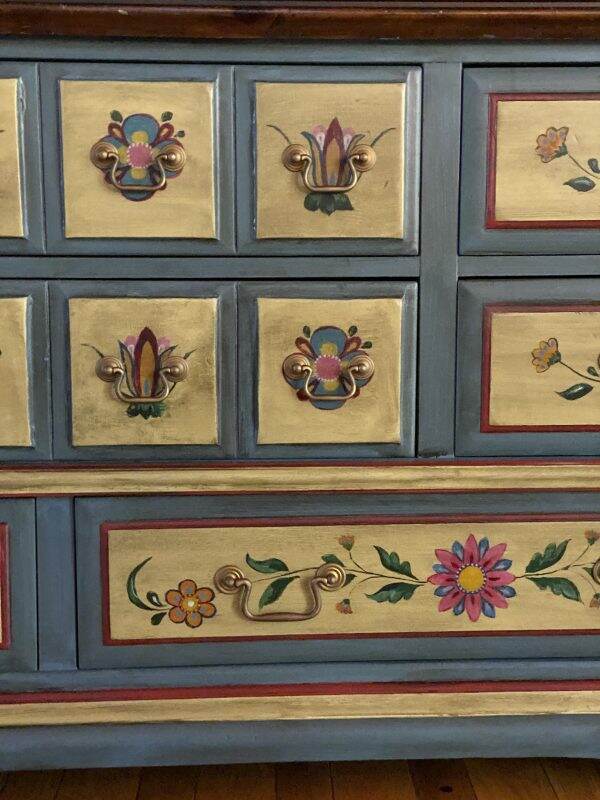
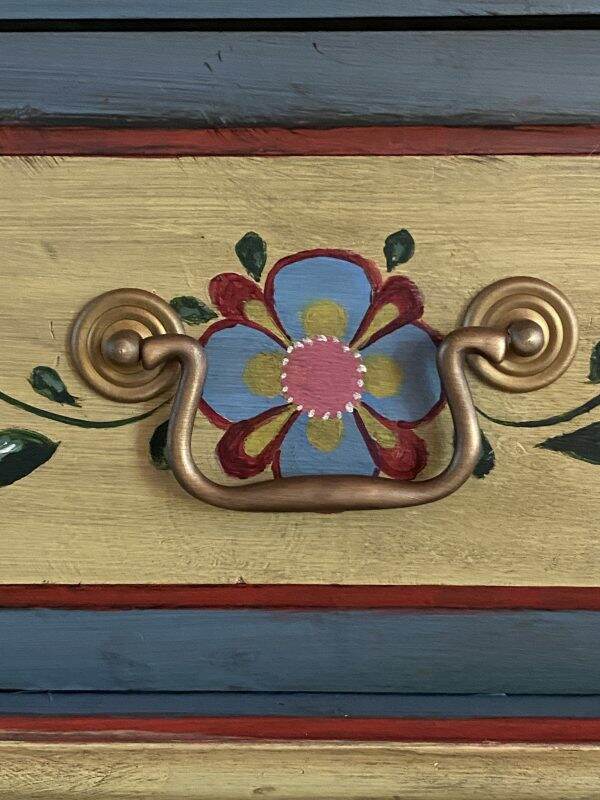
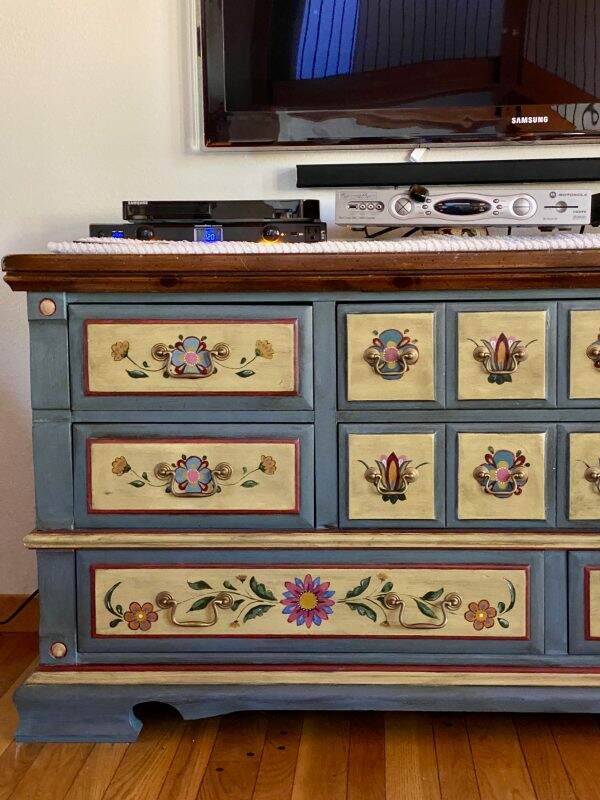
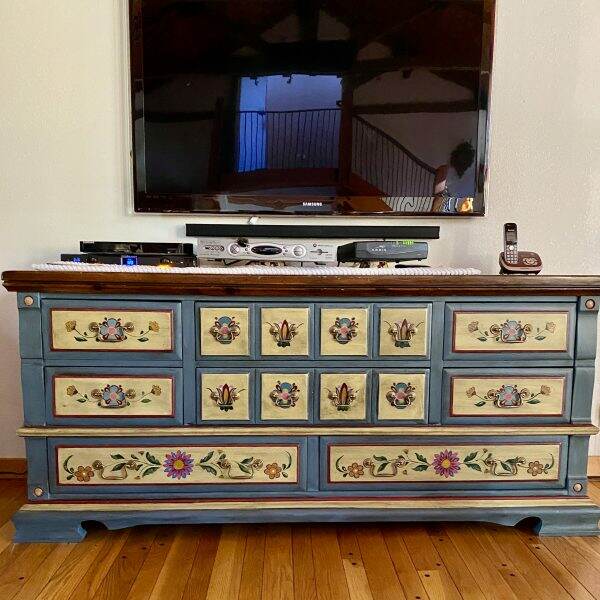
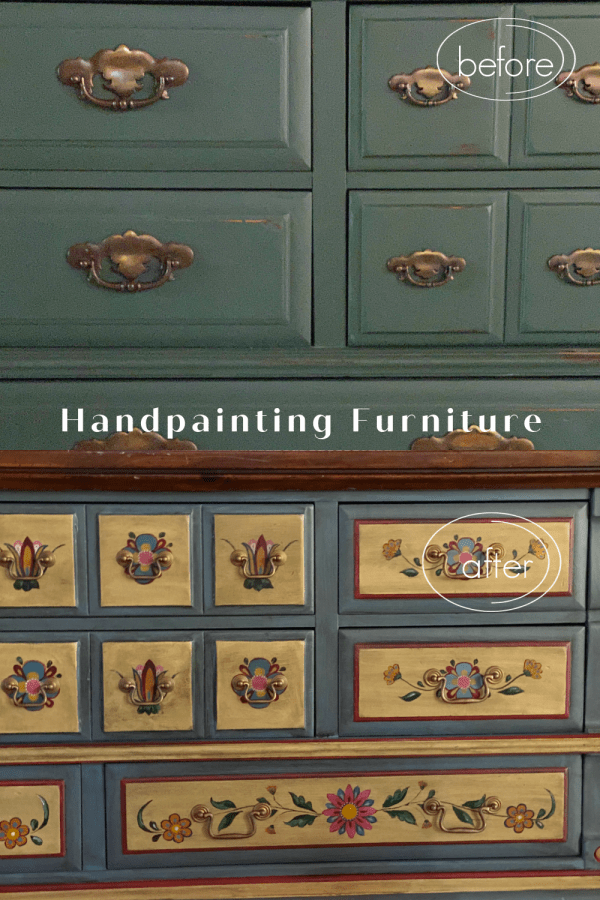
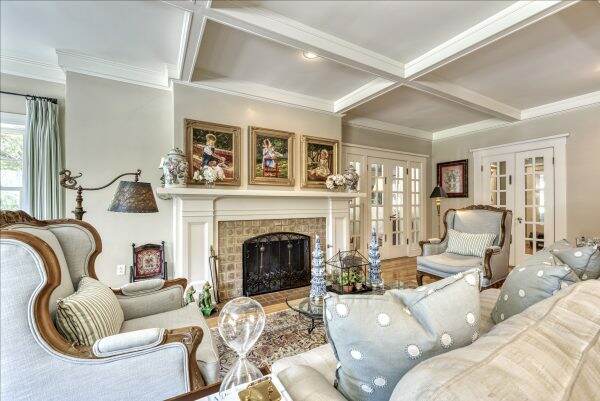
But what is Grandmillenial style? Let’s agree to just call it Collected Chic. According to Better Homes and Garden, it is a combination of traditional style adopts old-school design trends (think: skirted tables, patterned upholstery, floral wallpaper, and richly stained wood furniture) with a fresh spin for the 21st century. By mixing in a few modern elements, the style is nostalgic and comfortable without looking kitschy.

House & Home

It is a return to old fashioned comforts we grew up with and is strongly trending, especially due to COVID. Dark wood furniture is in, but mixed with some updated pieces. Traditional and classic is rising in popularity. Yay!

Color is In

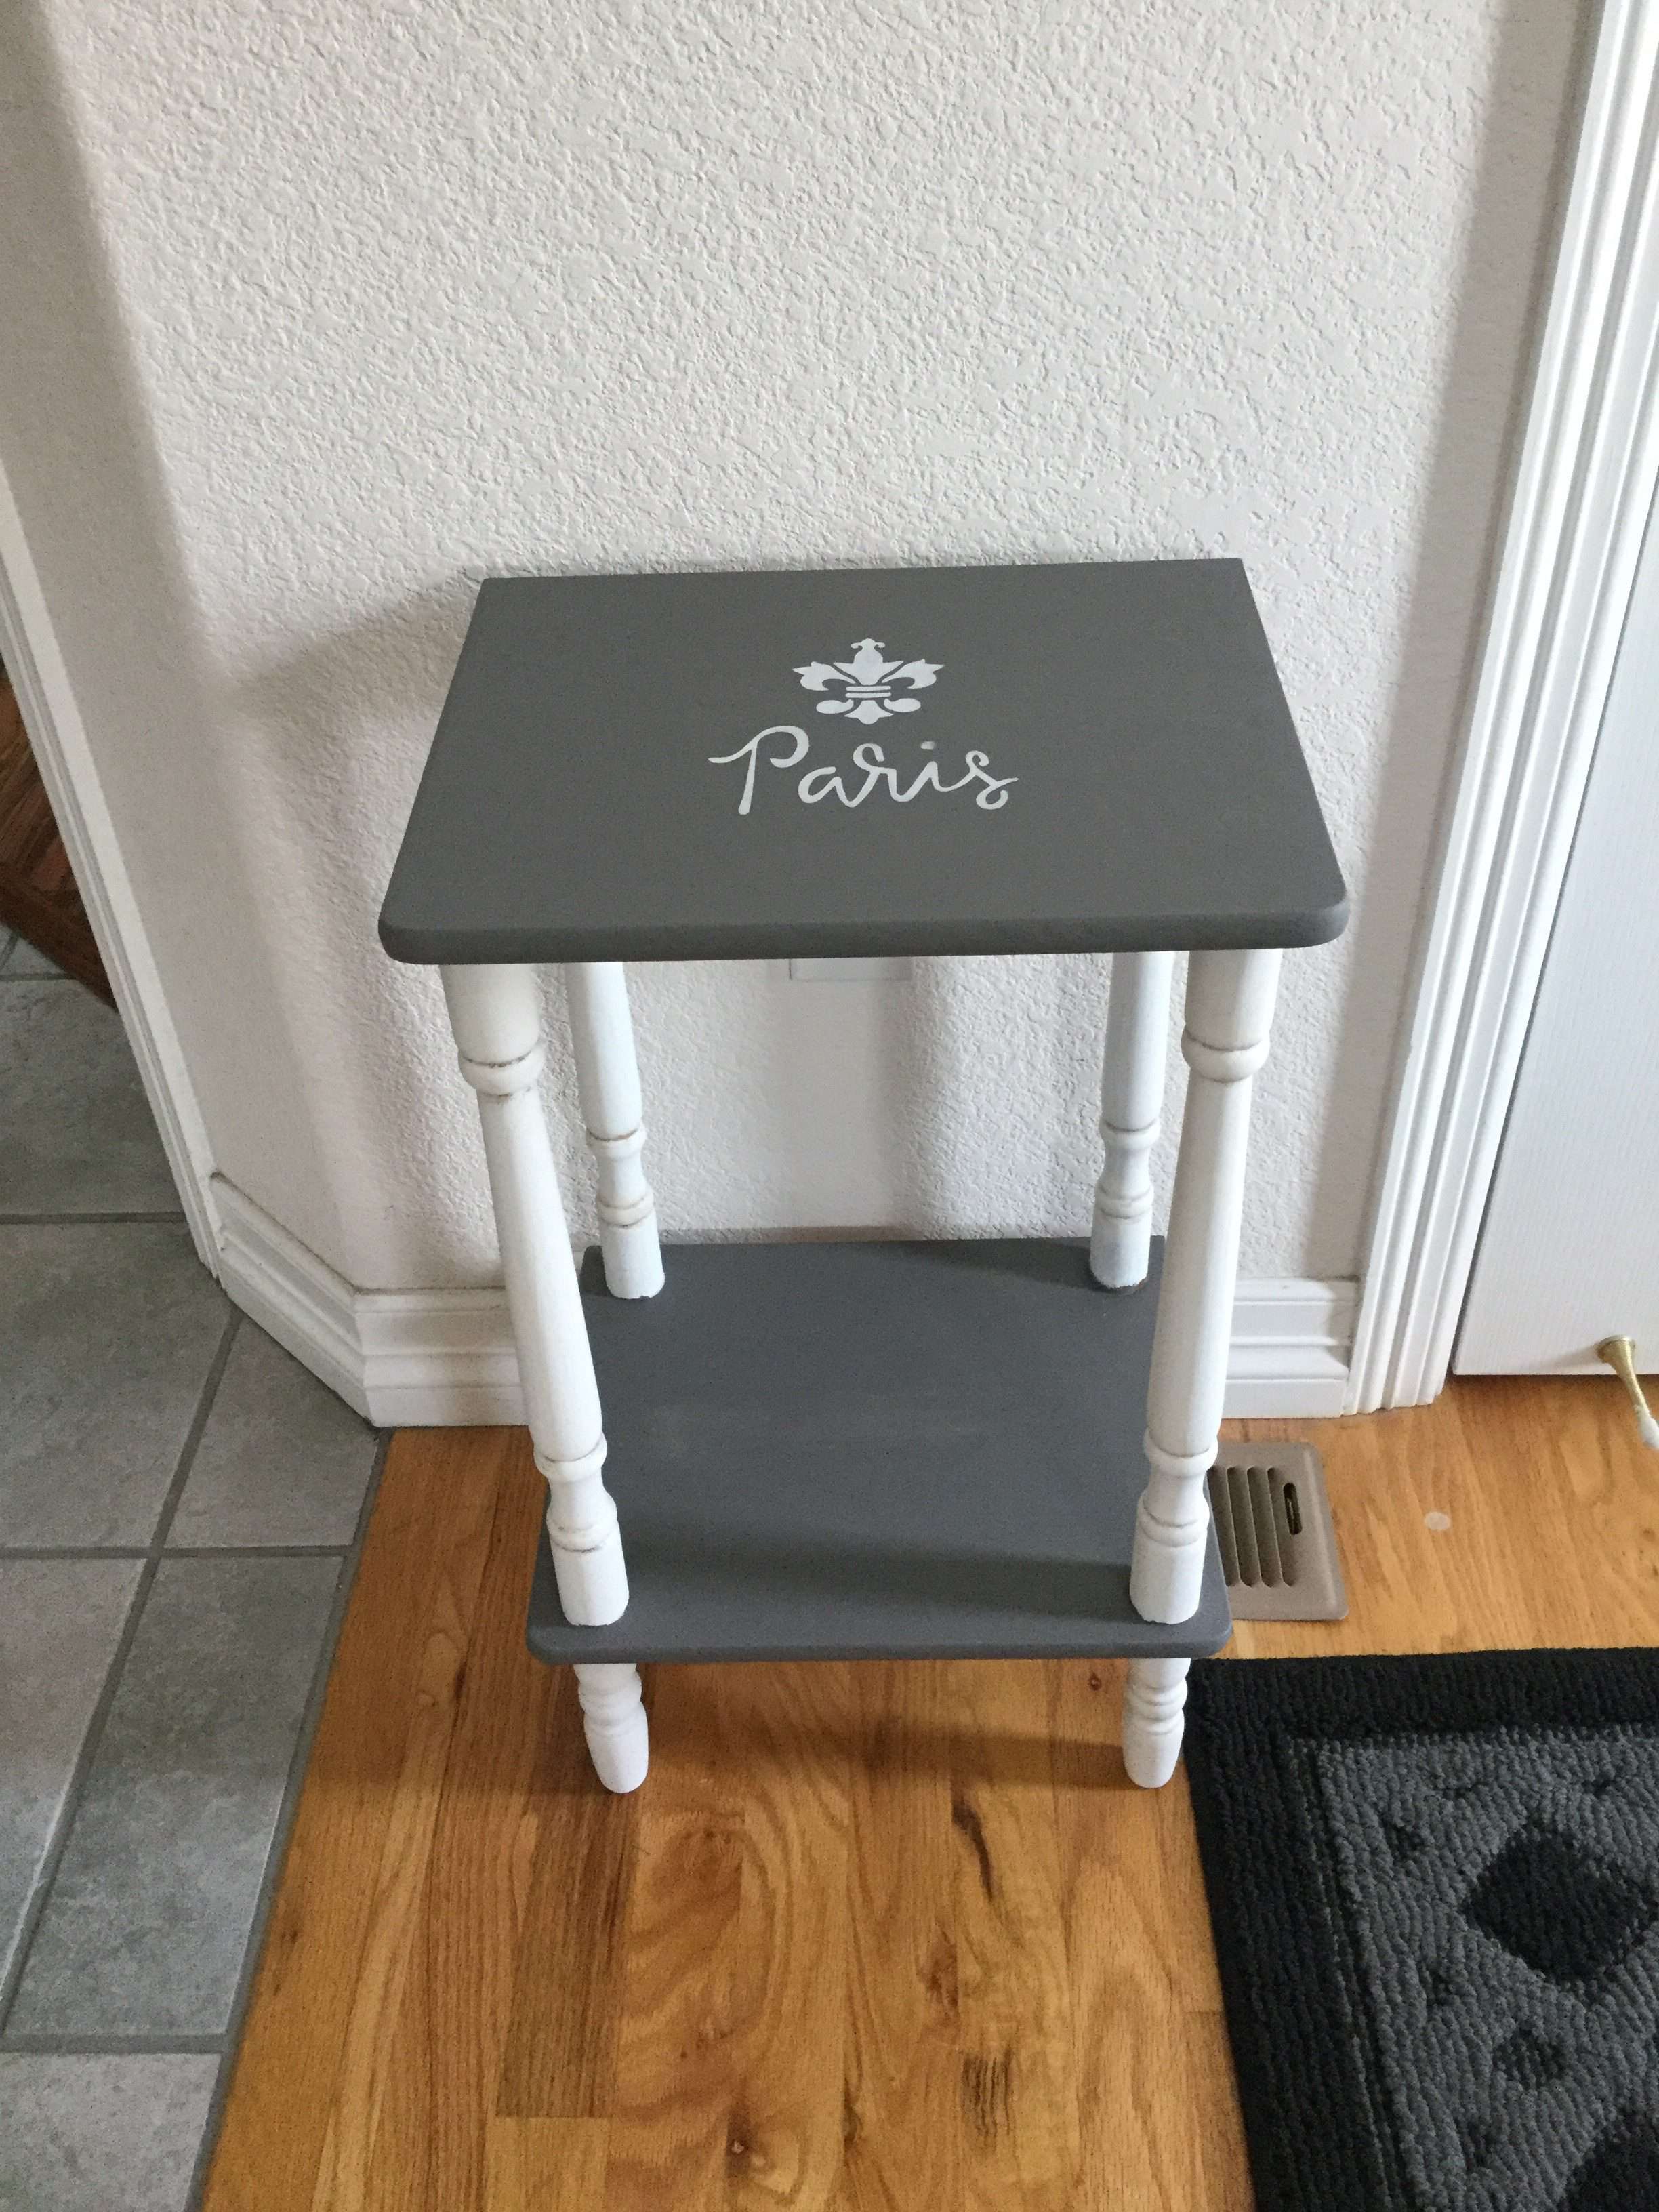
Warm, welcoming colors (fabrics and wallpaper) are in. White and monochromatic is out. With people spending so much more time at home, it makes sense that we need environments that provide a sense of calm and security. Calming blues are also trending (like my library~to see more about this room, click here).

Natural Materials

Materials like rattan or cane webbing, organic fibers and live plants are continuing to be in style.

Closed Floor Plans

Our Kitchen

Throughout 2020, many families had to learn how to co-exist under the same roof from morning until night. The appeal of open floor plans, where each room flows seamlessly into the next, has greatly diminished. An article in Better Homes and Gardens states: “The pandemic has forced us to recognize how important our space is, and open floor plans aren’t always the best decision when it comes to intentionally using a room. Carving out a designated space for different activities, such as remote work or homeschooling, allows for more privacy and limits distraction.”

To see the post where we discuss Open vs. Closed Floor plan, click here.

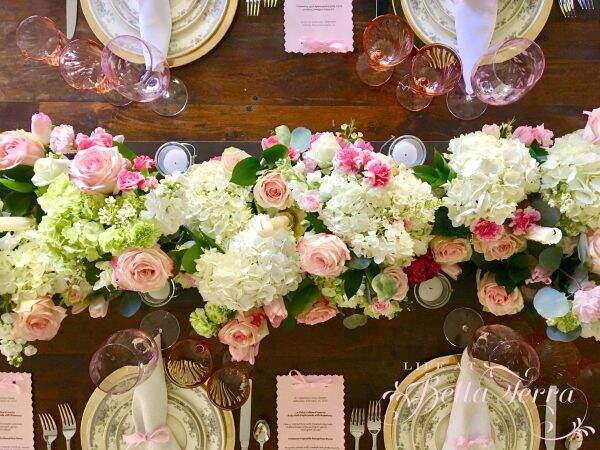
Silver and Beautiful Tablescapes

My tea service

Sadly, silver was also neglected for years, deemed too “high maintenance” and pushed aside for bamboo flatware, goldware, etc. Grandmothers and mothers bemoaned that their heirs didn’t want their silver… and you can still purchase it for a fraction of the original cost on eBay.

But thanks to the Collected Chic generation, we are slowly seeing a return to silver, especially when creating beautiful tablescapes which has become an art form within this group.  And it’s not just the Collected Chic who have taken to the tablecloth: at the time of writing, the hashtag “tablescape” on Instagram yielded over 1.3 million results!

Home Entertaining

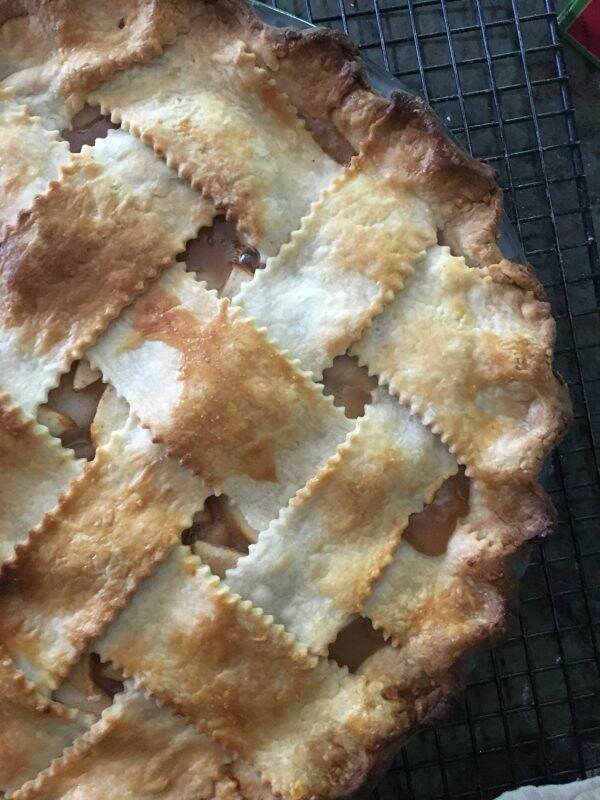
Once we are past COVID, the prediction is that there will be a surge in home entertaining. Many people are cooking more and setting tables for their families while being cooped up at home. Starved for socializing, entertaining will increase.

Home Offices

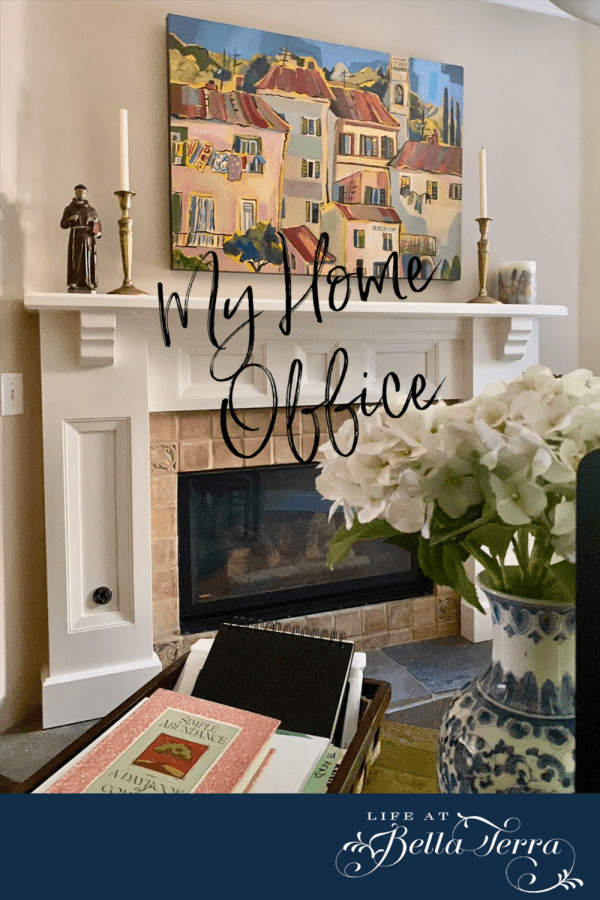
No surprise here as millions of people are now working virtually. And as corporations look to reduce overhead and real-estate costs, working from home is here to stay. There are so many articles on how to make your work space beautiful and personalized in your home. To see my home office, click here.

Collections

My Rosary bead collection

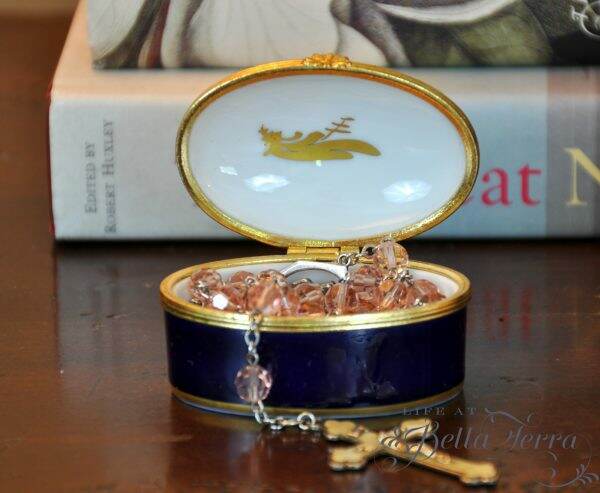
This is in keeping with the Collected Chic style. Antique, heirloom, or new collections tell a story and fill our homes with cherished memories. My collections range from rosary beads to sand from different beaches around the world. What do you collect? To see more about my collections, click here.

Charm Bracelets

My charm bracelet

One article I read also states that charm bracelets are back in style! One of my early childhood memories is sitting on my mother’s lap and playing with her charm bracelet. Since no one seems to know what happened to it, I decided to start one for myself. Janice Mullen @janice.mullin (or @terraceoaksantiques), finds fabulous vintage charms and has been a great resource in helping me create my unique bracelet.

The information in this post is a compilation of trends from Better Homes and Gardens, The Glam Pad, The Insider, The Washington Post, and Real Simple. What other trends do you see emerging this year?

I hope you enjoyed the holiday weekend. Wishing you a merry Tuesday!

If you enjoy this post, please share on Pinterest.

This post shared with Between Naps on the Porch Metamorphosis Monday #626


Restoration of an Antique Table

Once again, I am participating in the DIY Blog Hop. The focus for January is on tables. Today I have a guest blogger. My husband Scott recently completed the restoration of an old table that we’ve had for almost 26 years. Here’s Scott’s story about this unique piece of furniture.

The Table~Before

When my wife and I were married (seems like yesterday), our decorator and designer, Robert Lashua, catered our wedding reception.  One of the things he brought was this antique table. He beautifully staged it with an abundance of flowers and food. We kept it and have used (and abused) it for entertaining, ever since.  The table is the one on the left in a recent photo. And the drawer (an unusual feature on a table) is missing.

Drawers are warped and deteriorated

One of the legs is splitting. the drawer is coming apart, and the under table support for the drawer is half gone.  I am fixing the table so the drawer is functional and the table can continue to provide service for a couple of more decades. Mary loves this table because it’s wide and perfect for staging food for entertaining.

The drawer is apart in one corner and on the underside (see below).  In the picture on the left you can see one whole side of the under table drawer support is missing.   A consult with a woodworking master (Steve Renneckar) to figure out how to proceed proves invaluable.

 A trip to Home Depot provides the hardwood I need to replace one side of the structure for the drawer to slide on under the table.  I’m using some wood glue and Liquid Nails to pull the drawer together.  
  

You may be asking….why bother.  This is a very old table.  Take a look at the unique pin and cove round style dovetail on the drawer (below).  This method of joining corners was developed in the United States in the 1870’s.

This dovetailing is on Victorian and Eastlake furniture in the US and Canada from the 1870’s into the 1890’s. I have no idea how old this table might be but it’s certainly worth my time to bring it back to functionality.

The Work Begins

The first steps include fixing the split leg (liquid nails polyurethane and clamps), repairing the drawer and planning the under table structure (in the empty area of the center picture below). It is a mirror of the structure shown in the picture on right below.

There are several places where the wood is split or separated.  A lot of wood glue (Titebond here) and some clamps do the trick.  The boards of the table top are fitted together with dowel joinery but have separated a bit.  I attach hardwood strips to the edges of the table (first one end, then the other).  Using my two large bar clamps (40 plus inches- a Jorgensen and an Irwin – you can see them above on the drawer), I pull the slats together and screw hardwood strips underneath to hold them in place (below). You can find the clamps on Amazon here.

Now I need to finish the repair on the drawer and install the new vertical support for the hardwood drawer slides.  This is a hardwood drawer on hardwood slides.  What could go wrong 😑.

First step is to put the drawer back together and try to replace (with hardwood) the portion of the drawer that is gone.  The side of the drawer has a slot for the slats.  The part where I’ve circled is where the bottom of the drawer has disappeared.

Using maple hardwood (and my brand new Makita circular saw – the old Craftsman finally quit) I cut some pieces to replace the missing parts of the drawer.  I glue them, place them and clamp them.  That evening it started to rain so everything was moved into the garage.

Today it’s sunny and with the oversight and assistance from our son Benjamin, it’s time to finish the project.  First we sand down the repairs to drawer.  Then, slide it into the table (upside down at the moment) to make sure it still fit and to finalize the side support.

We cut and place the side piece and slide rails (tried nailing but ended up using screws. I check the final fit of the repaired drawer and ….

The After

 Project is complete- (other than waxing the slides and staining the new wood and maybe refinishing the top 😉).

Now the table can be used again. Mary loves the chippy old paint that is still seen on the sides.

The drawer works beautifully now. The original brass cup hardware looks great on this newly functioning drawer!

The artistry of joint construction like this is long gone. All the more reason to restore this table vs. buying a new one.

Thank you for joining me today and now it’s off to the DIY Blog Hop to see other table ideas from these talented bloggers.

If you enjoy this post, please share on Pinterest.

Tarah from Grandma’s House DIY writes about How to Remove Paint, Scuffs and Scratches from wood Furniture.

Chas from Chas Crazy Creations has a tutorial on a side table makeover.

Kim from Shiplap and Shells has A Simple and Easy Way to Upgrade a Garage Sale table here.

Kristin from White Arrows Home is showing some Creative End Table Ideas here.

Andrea from Design Morsels shows us how to refinish a wood table.

Niky from The House on Silverado displays a Winter Tiered Tray on her Entry table.

Kippi from Kippi at Home is demonstrating simple ways to update furniture

Please remember we all love comments and feedback!


A DIY Chicken Feeder Picnic Table

Since Mary is busy getting ready for houseguests, I am filling in today! So here is a DIY project I made this week. Inspired by photos seen on Pinterest and Etsy, this chicken feeder picnic table is aptly named a chicknic table!

Not everyone likes projects.  However, a friend sent me a picture of one of these several months ago and I decide I want to make my own. I buy some scrap wood from Home Depot and use a pallet from the delivery of a new dishwasher.  It all crystallizes today.  Here’s the finished project.  I will walk through the construction as cryptically as I possibly can.

The first step is to cut the base of the table.  I cut a piece of 24” X 24” plywood into 3 — 8” X 24” pieces.  

Next I cut the pieces for the edges of the table.  I pre-drill, glue and screw them in place.  The plywood is 3/4” so the drilling and screwing are done carefully.

The legs of the table come next.  Four pieces, the same length, cut at 45° on both ends.  They attach to the underside of the table with screws coming in through the underside edge of the table. Again, you should pre-drill the holes to minimize splitting.

Finally, I put on the braces and seats.  The side braces are long enough to glue and screw the seats in place. I install the center brace after attaching the side braces. I have no plans so this is done on the fly.  Measure twice and cut once.

My tools include two drills (one, an old school Craftsman which plug in (my battery powered DeWalt died on me 😐) and my Makita (very reliable for driving screws).  See link here. I also use a Milwaukee circular saw (link here), some screws, liquid nails glue, the wood and a square and measuring tape.  A miter saw will work well for the project too. Here is my favorite mitre saw (here).

Cooper approves

Here’s the finished project with my quality control executive doing an inspection.  This project took a couple of hours of work.  I seal it with some spar varnish and may put drain holes in the table top (although it will be under cover).

 The chickens (and our duck) got their first look at it today.  It takes them awhile to find it but seem to appreciate the spinach and scratch.  Maybe I’ll build a couple more.  🐔🐔🐔🐔🦆

To see another project of mine, click here. Thanks for joining me today! Mary will be back again soon.

If you enjoyed this post, please share on Pinterest.


Hand painting Furniture

When we purchased our cabin, the previous owner left a few pieces of furniture. I don’t consider them to be my style, yet it is nice to have furniture already there that doesn’t require moving. This plain, brown dresser is a large piece left behind that we moved into the family room. Placed under the flat screen television it houses all the television equipment and family games.

The Original Cabinet

A few years ago, my daughter and I painted it green, sanding the edges for a rustic effect. We left the top of the dresser the original brown. The drawers in the middle look like 8 individual small ones, but they are really 2 large drawers with 8 small pulls.

The Inspiration

As you know I am trying to add a more Scandinavian/European flair to the cabin (see that previous post here). Since I have never been in love with this piece, the decision to hand paint it made sense. Searching the internet for hand painted Swedish antiques, I am inspired by these photos.

Antique Swedish Painted Cupboard for sale at Pamono
Dalton Bain - Kim Faison Antiques - Scandinavian Painted Chest - Sold

The Plan

Starting with a rather rough sketch, the design and colors are developed.

The actual flower design is inspired by this photo.

Painting the Base

The blue and parchment paint choices for the base cabinet are historical colors from Benjamin Moore. Instead of getting full size quarts, I purchase these in sample sizes from Ace Hardware. The deep red is leftover paint from a previous project. The actual colors names are up at the cabin but if you need them, let me know.

Most of the cabinet is painted blue; the drawer faces are parchment, and the drawer detail is in red. I do need to put on two coats of paint to completely cover the previous green. The hardware appears dated to me and I am looking for drawer pulls that are less bulky and intrusive.

At this point, the parchment looks more yellow and I am hoping to add an antique glaze at the end to tone everything down a bit.

Adding the Detail

Next, I hand sketch the design on the larger drawers. Using my acrylic paints, I select the color combinations I want to use. Any mistakes I make I figure I can clean up later.

I paint the large drawers first (2 of them) and then continue with the smaller drawers (4 of them).

The Obstacles

So far I am happy with the results. And now I struggle with what to do with the two center drawers. I attempt to paint them in the same fashion as the larger drawers, but think it may be too busy. Do I leave them plain blue? So I sit and stare at my options for a few days.

I consult a few of my very artistic friends and ask their opinion. Whatever I do can be always painted over, right?

The new hardware finally arrives! These Restorers Classic Curved pull handles with rosettes are in antique brass. Their smaller profile will be less dominant than the existing ones. See the link here.

But the sizes are wrong for the smaller ones and I am two short on the larger drawers. What was I thinking when I ordered these? Here you can see the style of the new hardware vs. the old, but the pull is too long. So I wait another 2-3 weeks for the right size hardware.

Adding the Glaze

In the meantime, I decide to paint individual flowers on the 8 smaller drawer fronts and antique glaze the entire piece.

Before glazing
After glazing

The Finished Piece

So here is the finished piece…..well, I think it’s finished. I am wondering if I should add a red border to the 8 smaller drawer faces? And I am thinking about painting the top blue vs. leaving it wood. Your thoughts?

New pulls from Van Dyke’s Restorers

Once I am certain it is “finished”, I will put a coat of satin polyurethane over the hand painting to protect it.

Now I just need to find a way to hide the television equipment. It is so ugly, right? I do miss those huge armoires where you could tuck it all away and out of sight.

These colors go nicely with the oriental rug in the family room and adds lots of color to the rather bland walls. And I am so happy to have another daunting project in the rearview mirror!

Happy Tuesday to everyone. We are experiencing the most glorious cooler mornings and beginning to have my cup of coffee outside……finally after the hottest summer on record. Yippee!

If you enjoy this post, please share on Pinterest.


Hidden Storage in Front Hall

Upon entering our front hall, you see our grand staircase and an antique petticoat table. But tucked in behind the mirrored table, is a wainscoting panel, just to the left of the door to the powder room. Several months after we purchased the house, we discovered that this panel is not permanently fixed, but slides down to reveal hidden storage under the stairs.

The hidden space

A rather ingenious system with a rope and pulley, the panel drops down below the floor level. Painting of baby chicks done by my friend, Jane Horn.

Rope and pulley system

As the panel slides down, you can see the original lathe and plaster construction of our 110 year old home.

My Mess

Now comes the embarrassing part. This hidden storage area is a collection point for all my seasonal pillows, slip covers for the family room sofa, dining room table leaf and pillow inserts. It is an area that I have been wanting to organize, but as you know, out of sight, out of mind.

After removing all of the items, you can see that this is a rather large space, probably created to provide access to the plumbing to the powder room.

Sorting and Organizing

After cleaning and wiping down this space, I begin to re-organize the contents. Heading to Target, I purchase large plastic storage tubs. Inventory is rather low after the Back-to-School sales, but I start with 6 large containers. Click here for a good selection of stackable plastic storage boxes from Amazon.

Making labels for each box helps with the sorting and organizing. The four different sets of sofa slipcovers takes up a great deal of space.

Since Target didn’t have enough plastic tops for the containers purchased, I keep all the pillows in plastic bags so they don’t get dusty. I utilize all the space under the stairs.

The dining room leaf is placed in a fabric pocket I made with an unused tablecloth. I lean the leaf against the boxes, as it will not fit any other way.

Now when I need a seasonal item, this new organizational system will save time and effort.

Do you have a project that you keep putting off? This under the stairs storage is definitely one that would bother me each season. I am so happy I finally tackled it! To see my recent post about another storage project in the front hall, click here.

If you enjoy this post, please share it on Pinterest!

Today, I am happy to be part of a blog hop that revolves around front hall projects!

We all love it when you visit and comment so please enjoy the following DIY Front Entryway Projects. Niky from the House on Silverado jazzes up her front hall for Fall.

Chas from Chas Crazy Creations turns this $1 garage sale find into a sweet side table.

Do you ever wonder how to revamp, update, or makeover a side table? I have been dabbling in making over a few furniture pieces and when I saw this side table for $1 at a garage sale, I thought what have I got to lose! In this post I'm doing a side table makeover with painting, stenciling, and glazing.

My friend, Andrea from Design Morsels loves the color red and check out this colorful front hall project here.

red entry

Tarah from Gramma’s House DIY makes clever use of a space in her front entryway. See it here.

Creating shelves and hidden storage beneath a narrow plant table in our entryway for boots and boot dryers and whatever else we may need to store

Thank you so much for joining me today! Have a wonderful week!


Saturday Meanderings

Happy Saturday! My hope is that Saturday Meanderings is to have a conversation with you about odds and ends about the previous week. So pull up a chair and grab a cup of coffee and let’s chat.

Boy did this week fly by and it is a stressful one that I am happy to have behind me. Do you ever have one of those weeks that everything you touch doesn’t go smoothly? The planets feel a bit misaligned for me lately.

My goal of heading back to Phoenix this week from our cabin is delayed due to car trouble. Finding a big puddle of pink fluid under the car didn’t bode well and this creates a delay in my trip home. As I am writing this post, I am awaiting to hear the status. If I didn’t have a million things to do in the Valley, I’d love to stay here. But I cannot complain to have another few days in our beautiful mountain weather.

I did start a new project with hopes of sharing it with you today, but that too, did not go according to plan. Last month, I wrote a blog post indicating my desire to add more Scandinavian touches to our mountain cabin. (see blog post here). Well, the re-painting of this chest of drawers is my first real attempt to do so. Here is a sneak peak.

Cabinet before

This cabinet has 8 drawers of varying sizes. I have 6 of the 8 painted as my dilemma seems to be the these two drawers that are different from all the others. The two center drawers looks like 8 smaller ones with 8 ring pulls. So long story short, I decided to wait for the new pulls to arrive before I determine what the painting design will be. And the pulls came in the wrong size and I was 2 pulls short.

So as of today, the project is stalled until the new hardware comes in….and for my next trip to the cabin.

Mindful Minute

https://www.instagram.com/p/CFPk7LInrt8/

Since this week held more stress than others, I am so grateful to have access to Mindful Minutes. If you aren’t familiar with this, I cannot recommend it enough. My friend, Chas (from Chas’ Crazy Creations) has daily exercises on Instagram to reduce stress and they are a minute long. But I can honestly say, the one minute of taking a break from the computer (or other chores) and doing her brief exercises and breathing techniques is a LIFE SAVER. Seriously, it is the best thing you can do for yourself every day.

In addition, Chas is such a kind soul. She is the type of friend all of us need. Please get to know her. You will be so delighted that you did. Here is her link to Instagram; and her link to her blog.

Someone or something stole my pears

Last year, lo and behold, I discovered we have a pear tree at our cabin. This tree NEVER produced fruit before and was shockingly, full of pears. This year, the pear tree is also producing a great deal of fruit. Until this week. It has two pears left. The rest of the pears are GONE.

It’s a mystery as the pears are not on the ground. They have just vanished. Does anyone have any idea why this would happen? Is there a local pear thief? An animal?

Naturally I am so disappointed because last year I made the best pear dessert, A Pear and Caramel Pie (see recipe here) and pear preserves. Looks like I will just need to purchase some pears from the Farmers Market.

Rosary Beads

I recently received a payment for some work I was subpoenaed to do for a law firm who is suing the City. Long story, but lots of nastiness involved. Since the check felt like dirty money to me, I spent it on a set of rosary beads. If you have been following me from the beginning, you know I collect rosary beads (see post here).

Seraphym Designs, based out of Santa Fe, New Mexico makes the most gorgeous original heirloom rosary beads. Each design is carefully handcrafted in the United States and contains replicated devotional metals that date between the 14th and 19th centuries. In 2015, Seraphym Designs was commissioned to make an original St. Serra rosary for Pope Francis during his visit to the US.

Not only does the founder, Arasely Rios creates rosaries but she also makes beautiful jewelry. If you are looking for a unique one of a kind gift (they have a wedding rosary), I suggest you visit their website. And now I feel like I took bad money and spent it on something good.

Drone Video on my last Restoration

Video done by Austin Ely

Recently I was contacted by the owner of my last restoration remodel asking if I would give permission for the before and after photos to be used for a virtual historical home tour. Looking back at previous projects is such fun, as I forget many of the details over time.

Here is a 2:33 minute drone video that was done after the completion of the Willetta Restoration. I truly think it is one of my best renovations. Video created by Austin Ely. To see more information on this 1922 Jeffersonian home, please click here.

Thank you for all the great advice

I hope you read the blog post this week on rejuvenating my fabric pumpkins. So many people offered solutions to the bug infestation (thank you, bay leaves) and alternative filling. Instead of rice or beans which tend to get bugs, readers suggested pebbles and cat litter. Such great ideas and I cannot wait to try them.

Always love getting feedback from you!If you missed this easy DIY post, click here.

Beginners Blogging Retreat

If you are looking for a small group where you can learn how to build a blog, this is the retreat for youo. Learn more about this blogging retreat for beginners in Arizona. Group size will be limited to 12. You will learn about setting up your blog, writing better content, search engine optimization and how to promote your blog.

As you know, I started blogging to keep a living record of life here around our historic property/farm. And for the first few years, I happily dabbled in it. Last year I attended my first blogging seminar and realized just how much I don’t know.

I set my sights this year to learn more, because if you are always learning you are always growing, right? Well, there is SO much to learn about blogging and who knew? I certainly didn’t. But what I have learned is that what works for one person who has been blogging for 10 years, doesn’t necessarily work in today’s social media saturated world.

So, a group of talented friends are putting together a Beginner’s Blogging Retreat and we are holding it here at Bella Terra. If you are interested or have friends who are interested, please click here.

The seminar is for the person who either wants to start a blog or is in the beginning stages. It will be a fun day here at Bella Terra with good food, new friends, great information with lots of personal attention. Plus there is a discount for those who sign up before October 15.

We know that in light of COVID the world can change on a dime, but we are limiting the class to 10-12. It will be held on our back terrace, which is outdoors and has plenty of room to social distance. And it will be on November 12th when the weather is glorious.

If this is your jam, we hope you will consider attending! Also, feel free to reach out to me if you have questions or concerns.

Last fall~trip to Connecticut

That’s All Folks!

Well, that about wraps it up for this Saturday. Hoping your week went well. Thank you all for joining me!The official first day of fall is just around the corner! As soon as I get to Phoenix, fall planting begins! Stay safe and healthy out there!

If you enjoy this post, please feel free to share on Pinterest.