1

Happy First Day of Fall 2020

Today fall begins in the United States and everywhere else in the northern hemisphere. The autumn equinox — also known as the autumnal equinox, the fall equinox or the September equinox — occurs when the sun moves directly over the Earth’s Equator, bringing virtually the same amount of daylight and darkness on that particular day. Happy first day of Fall 2020!

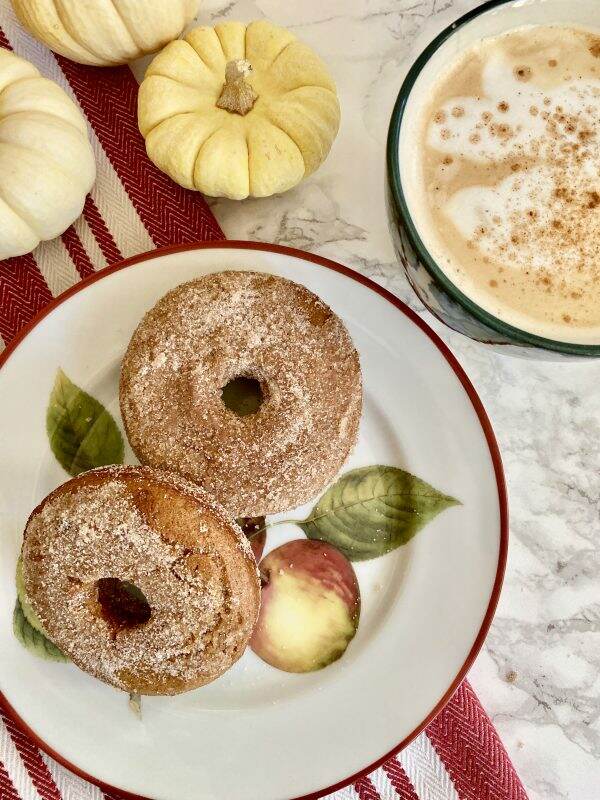
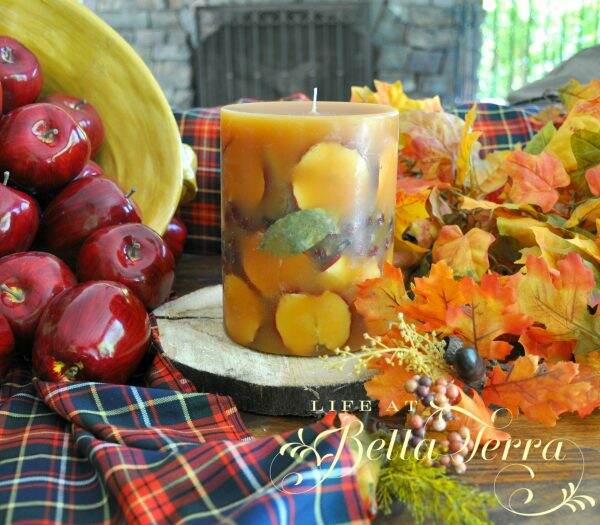
Pumpkins, apple cider donuts and sweaters are the things I think of during this season. However, it is still triple digits here in Phoenix and will be for the next week. It’s ghastly. But this seems to happen every year so no one is really surprised. We just like to complain about it.

Since our temps are so high, several of the nurseries haven’t gotten their fall flowers or pumpkins yet. We probably will not see those until October. But in celebration of the end of one season and the beginning of another, I dusted off the autumn wreath and it is officially on the front door.

Spring and Summer Front Door

As you recall, this Spring I stepped out of my comfort zone and painted a new front door color. I am a bit concerned about how other wreaths from different seasons will look up against the blue.

But, boy, do I have to tell you I am L.O.V.I.N.G these fall tones against the new color. I bought this 28″ wreath on Etsy as my challenge is finding a wreath large enough for the 4 foot wide front door. Most wreaths are 18-24″ wide, which is too small for the scale of the door.

Since this is what I would consider an expensive wreath, I take care and store them properly in between seasons. There are two different ways I store my wreaths, click here and here.

Lucky me, orange is the complementary color to blue! So the door color works with the Fall seasonal ones. Yay!

Love this doormat

Now that the highlights of the front porch are the door and wreath, I really didn’t want to add any thing that would compete with this focal point. During my trip to Whitfill Nursery (you know, my happy place), I am able to score some wonderful plants that have a fall vibe.

Henna Coleus is rich with gold and burgundy tones and pick up on the shades in the wreath. Coupled with sweet potato vine the planters now whisper Fall.

At the beginning of the summer, you may recall that I purchased two artificial evergreens to survive on the front porch over the summer. I love that these require NO maintenance and they provide a lovely backdrop for smaller planters. The cedar faux plants have held up beautifully over the summer and I look forward to decorating them at the holidays.

I am a big fan of ornamental grasses, especially the way they look blowing in the wind. Though the 2 containers I purchased from Whitfill did not have a name tag, I am guessing this is Fountain Grass, with delicate mauve feathers.

The natural fall look on the front porch is the opposite of what I typically do, however, I like the calmness of it all.

One of the biggest lessons in 2020 is getting out of our comfort zone. It’s easy to replicate the same look over and over again, but when forced to do something different, the results can be surprising.

The bench by the front door is the perfect place for an orange pillow and throw.

More orange pillows are put on the rocking chairs. Also, Amazon has the greatest selection of orange and fall pillows here.

To see the re-painting of these rockers and the entire porch re-do from May, click here.

What is a front porch with some boots or Sloggers? I really love these gardening shoes/boots, especially with the chicken design. Not only are they comfortable but waterproof too. Trust me on this, you will enjoy these as much as I do. Plus what a great gift for any gardener (thank you, Janie!) Here is the link.

Printable from Anderson + Grant, click here

Front Porch 2020 is a bit less understated than in previous years. That doesn’t mean I may not keep adding fall flowers and pumpkins. But I am enjoying its natural elements and its peaceful serenity.

What are you doing on this first day of Fall 2020? Is it cooling off where you live? Have you started your fall decorating? Tomorrow I hope to make apple cider donuts. Maybe if I do fall things, fall will come.

Happy Tuesday!

If you enjoy this post, please feel free to share on Pinterest.


DIY Wreaths Using Natural Materials

I love incorporating natural materials into any DIY project for two reasons. 1) You cannot replicate nature and its beauty; 2) Natural products are free and do not cost anything. Good quality faux branches and flowers are expensive. And even though they are pretty, they are not genuine or unique as Nature provides. Have you ever made a wreath using natural materials?

Cattails

Materials You will Need

Currently, I am still at our cabin in the mountains and resources and supplies are very limited. There is a Walmart about a 25 minute drive from here and often, they are low on inventory. The only wreath frames available are 2 18″ grapevine wreaths for $4.74 each. In addition, I needed a wire cutter for $4.88 and floral wire for $1.47. Any kind of wreath frame will work.

Walmart’s faux floral section is so depleted and what is left, well, let’s just say it isn’t my taste. However, I was recently very inspired by a blog post written by Christine from Designs and Events. She made a wreath using roadside plants and greens. Since I’ve never made a wreath using natural materials, I thought I’d give it a try. Don’t you just love it when someone or something inspires you?

Foraging for Plant Material

The mornings here are crisp and cool now which is a great time to scavenge and hunt for just the right foliage. I do not know the names of these plants and they could be weeds for all I know. But I am looking for different textures, colors and sizes to make sure the wreath is interesting.

Wreath #1

Prep Your Work Space

Armed with my straw basket I set out looking for a variety of cuttings. The oak and aspen trees provide good material for the backdrop of the wreath. When I return home, I spread out a plastic tablecloth to assemble the wreath. Be prepared for a few bugs too.

Fill in the Background

I cut the oak leaves into manageable sizes and wire them to the grapevine wreath. Then I add the aspen greens, tucking them among the oak.

Here is what the wreath looks like at this stage.

Add Different Elements

Next I add this very fall looking flower (not sure the name), tucking the stems in with the greenery.

Using an odd number of sprig groupings, I sprinkle them around the wreath.

Next I add this soft, tubular shaped grass (?) with its sage green tones.

Since I don’t have a glue gun up here, I am tucking the stems in the wire used to secure the oak and aspen leaves. With the grapevine structure, it is easy to slip the stems into that as well.

These dark, rusty red branches already have dried leaves on them. Placing them on the bottom of the wreath, will lead your eye to the center. Another option would be to break them into smaller pieces and scatter them through the whole wreath.

Finding fresh thistle with its purple spikes was a painful delight. They are SO thorny and prickly. Wearing gloves is important while working with them.

So here is Wreath #1. Ribbon would be a great addition however, I failed to buy one.

Wreath #2

With the second wreath I decide to do something a bit loose and less complicated. Using the leftover grasses, I wrap them with the floral wire around the second grapevine form.

Isn’t this just pretty as is?

Using a few pumpkin and amaranthus picks from Walmart for $0.97 each, I only decorate one side. Here are some autumn picks from Amazon.

Faux pumpkin pick
Faux Amaranthus pick

Here is how Wreath #2 looks!

The fun part of this project is that you can create whatever you want. This is a very cost effective way to make your very own wreath with natural materials for under $10.

Neccesity is the Mother of invention here at the cabin. Not having lots of material available is forcing me to think out of the box. I put the second wreath up by our front door and it looks just perfect there!

Wishing you a fabulous weekend!

If you love wreaths and follow Pinterest, I have a Wreath Board you can find here. As always, if you enjoyed this post, please share with others.

This post shared with Tuesday Turnabout #66

Charming Homes and Gardens #24

To Grammas House We Go Link Party #209

Creative Crafts Linky Party #7


Styling for Fall

I can honestly say I felt a slight drop in temperature this weekend. Well, even though it remains hot here, it is a perfect time to think about styling for fall!

What a grueling summer we are having. For the next several weeks, fall weather will tease us. But every year, we get our Indian summer and the temperatures will go way up again. But a girl can dream about crisp, cooler mornings and wearing long sleeves again, right? It’s only a matter of time Fall will be here, so why not think about styling for fall now?

Despite the lingering summer heat, it doesn’t mean that we shouldn’t get into the mood. Today’s blog post is pulling out the best of fall decorating from previous years.

It’s hard to believe it was two years ago that I made these life size autumn trees. To see this DIY, click here.

This year I am thinking about making several smaller fall trees, ones I can put on mantels or use as centerpieces.

Or maybe large branches with fall leaves on them? Each year we go to the mountains and I will cut branches from real trees that have autumn leaves. I feel a bit guilty doing this so it might be time to create faux ones that I can use year after year.

Best Fall Candles

I am a big fan of Rosy Rings candles as each one looks like a work of art and smells heavenly. The candles are in investment, but they last from year to year. Plus they make terrific gifts. Click here for the link.

I cannot wait to pull this out again soon and fill the rooms with a seasonal fragrance. There’s a bit of a story around this Spicy Apple Candle. Click here for the post.

Each year I decorate one of my prized antiques, a Hepplewhite secretary, dating from 1790 to 1800. I bought this at a time when I had little disposable cash and every penny counted. But I am so glad I made the investment because it gives me such joy.

With 4 glass shelves, I get to do some creative fall magic with it. Too bad it is tucked into a corner of the living room, but I am always pleased to doll it up for this season. To see how I decorated it in the past, click here.

An easy, quick way to add seasonal decor is to switch up pieces of art. I don’t recall where I purchased the art above (I think an auction house), but it screams autumn. In addition, I have a few pieces I have personally painted, but now I am inspired to create a new one.

It doesn’t take much to add color and texture to your fall seasonal decor to your kitchen. A coffee cups, pumpkins, and hand towels are affordable ways to change things up a bit. Here are some cute towels on Amazon.

This spring I acquired a few great yard sale finds. This particular piece, especially with the artwork above, gives an autumn vibe in our family room. I cannot wait to play with the decor and see how I can change it up.

So are you ready for fall? Is it getting cooler where you live? If so, send some lower temperatures our way. Since we are without children, the fall decorating this year will be just for us. I have a new front door color that is more spring/summer-ish so that will be an interesting challenge to decorate. To see the new front door color, click here.

My fall focus is going to be on natural and already owned items. For the natural items I am dreaming about acorns, pinecones, branches, succulents and wood. My collection of baskets, scarves, throws, pottery and lots of velvet pumpkins will be incorporated.

Do you have any decorating plans for the fall? Please share your thoughts and ideas as you always inspire me! Have a terrific Tuesday. Happy September!

This post shared with Tuesday Turn About #64

Charming Homes and Gardens #64

If you enjoyed this blog, please share it on Pinterest later.

For your convenience, I try and provide links to items you may like. If you make a purchase as a result, I may receive a small stipend for this service, at no cost to you.


Making Lavender Pillows

The world needs more lavender to promote calmness and wellness, don’t you think? I love sachets, but the larger lavender pillows are getting my attention lately. However, is it me or do they seem expensive? $49.95 for a 7″ square lavender pillow? So what better way to get a lavender pillow than make them yourself.

Finding the Right Lavender

Naturally I am seeking a highly fragrant, good quality lavender. Though I have lavender growing around our property, it isn’t all that fragrant after I dry the buds. To see a previous post on lavender, click here.

On Etsy, I found lavender buds (Lavandula Augustifolia) that are bulk wholesale, mostly used for weddings from StressTamerSpa. The reviews are excellent, plus you have the option to order 1/4 lb. up to 10 lbs.

The minute I received the 2 lb. package in the mail I knew what is was because of the heavenly scent. Lavender doesn’t weigh all that much so two pounds is quite a good quantity.

Picking Fabric

Over the years I have collected lots of fabrics. But there are many things you could use~old vintage napkins or handkerchiefs. I even have a old embroidered tablecloth that has seen better days. Taking cuts of fabric from it might just be lovely.

For a 7″ square pillow, cut two pieces fabric 8″ x 8″ (allowing for 1/2″ seam on all four sides). You can mix or match patterns or keep both sides the same. Or you could just fold one piece of fabric 8 x 16″. To make this easy, I put blue tape on the counter as a measurement guide.

Put the same side fabric together and pin if necessary.

Once the fabric is cut, I machine-stitched the seam 1/2″ from the fabric edge, leaving a small un-stitched section. If you don’t have a sewing machine, these pillows are small enough to slip stitch the edge. If you decide to do that, just adjust the overall measurements without the 1/2″ seam.

I always like to clip the corners so they are crisp and not rounded. Turn the pillow where the front of the fabric is facing out.

Filling the Pillow

Well, I tried this two ways and the second attempt is the way to go. Using a large measuring cup, I put the pillow in the bottom with the hole at the top. This way, if I spill any lavender it will be collected vs. all over the kitchen.

At first I used an orange, rubber funnel with a relatively narrow spout. The lavender buds slowly went into the pillow. This took some time……too much time in my opinion. However, I filled the pillow with approximately 6 oz. of lavender buds.

I slip stitched the hole closed. Sorry I failed to take a photo as I was talking on the phone at the same time. The downsides to multi-tasking!

The next pillow, I made the hole bigger and rolled up a piece of copy paper to use as a funnel. This way I could pour a larger quantity of lavender in much faster. The paper allowed the buds to slip right in.

So here is how the first two came out! Honestly, being around this much lavender makes you a bit loopy and mellow! I felt like I needed fresh air as the scent is so strong! But aren’t they cute?

I am so lucky to have some friends in my life that have helped with recently, and I will give these lavender pillows as gifts.

The hope is that the two pound bag of lavender will fill 5-6 pillows. At $39.99 for the bag, that’s $6.67 to $8.00 per pillow. Sure beats spending $49.95 per pillow! I didn’t time how long it took me to make one, but it wasn’t that long. And inhaling all this lavender has made this afternoon so relaxing!

Happy Saturday to you! We had a huge monsoon storm the other night and finally a bit of rain. The yard is a mess with all the plant debris so this weekend will be filled with clean-up chores. Hope you have a fun weekend planned! See you next week.

This post shared with

Thursday Favorite Things #454

Charming Homes & Gardens #21

Creative Crafts Linky Party #4


A Woodland Table

Since it is still summer, it is almost hard to think ahead to fall or winter. But during a very chilly day at our mountain cabin, I was inspired to put together this woodland table. Actually, with some different elements it could also be a summer camping/s’more theme. It was fun for me to put this together as entertaining accoutrements are limited up north.

The Tablecloth

Starting with a leftover bolt of fabric, the colors are appropriate for a warm, cozy dinner. You don’t necessarily need a bonafide tablecloth. Think of the vast possibilities with any fabric available.

Olana by Waverly

The Place Setting

In my blog post about fun Home Depot finds, here are the dishes that coordinate well with this table’s theme. If you missed yesterday’s post, see it here.

The 14″ wood disc chargers are also from Home Depot. They are large and thin. In retrospect they would probably look better with a round plate, but I think this works. Click here for the link. Online the price is $55.98/for 4.

At the cabin, I don’t have many centerpiece items, mostly because when we entertain it is often casual. My antique wooden dough bowl is a good size and my go-to for creating the centerpiece of the table.

The Centerpiece

Channeling my inner Bonnie Chase, I scoured the cabin for items to use. If you don’t follow Bonnie Chase, can that woman design a table! I love how she uses unusual things and incorporates them into her gorgeous table settings. You can also find her on Instagram @bonniechasedesigns.

Meet Mr. Squirrel and his pinecones.

I didn’t want it to feel too juvenile so I looked to nature for a solution. There are many evergreens in our natural setting so I clipped a few branches to add fullness and color.

Using some wonderful dried flowers to tuck among the branches, color and texture is slowly added.

The centerpiece is now starting to look less cute and more purposeful.

The Place Cards

Let’s talk about these place cards. We attended a charitable event and our hostess, Kathy found these on Etsy and had them made for the table. Aren’t they wonderful? They come from Latvia so Kathy recommends you may want to check the shipping costs beforehand. Kathy glued a wooden pick and then stood the reindeer upright in a bed of green moss.

First of all, I wouldn’t have thought to look for something like this on Etsy. However, the selection is quite good. Here is the link to Ludoviko Boxes, the resource for this particular reindeer place card.

Without getting too carried away, I found a few more floral and fauna elements to add to the theme. At an auction house, I picked up this Ainu Hokkaido Black Bear and cub and love the details of the hand carving.

Well, today I am back in the triple digit heat and the serenity of the mountains is becoming a distant memory. I hope this woodland table setting has you dreaming of cooler days and the autumn ahead.

Please share your fun table setting ideas. I typically set a holiday table but don’t often do something themed in between. And have a wonderful Wednesday! Wherever you are, I hope you are in great spirits and not letting the weight of the world get you down.

This post may contain affiliate links and I will be compensated a small amount if you make a purchase after clicking on my links. There is no cost to you.

This post shared with:

Tablescape Thursday #619 Between Naps on the Porch

Thursday Favorite Things #450 with An Artful Mom

Inspire Me Mondays by My Uncommon Slice of Suburbia


Wrap Up Wednesday

Lately, life feels like a lot of loose ends. The ups and downs of the pandemic, the constant barrage of bad news, the light at the end of the tunnel brightens and then dims. I don’t know about you, but I feel a bit untethered. Of course, some days are better than others. But, wait. What day is it? So today’s blog post is wrapping up the stories on previous editions. Let’s get some loose ends wrapped up!

Propagating Roses Project in April

Remember me attempting to propagate roses a few months ago? I did all this research and had the right tools and equipment? My goal was to create more of the heirloom roses that have been growing on our property for many years.

Well that project was a total failure. Not one of the stems took root and all of them died…in a matter of days. Seriously. It’s hard to admit when such an ambitious project bites the dust. However, I am not giving up. I will try again in the fall when the temperatures are cooler. To read more of my lofty rose goals, click here.

However, like most things in life, there is a bright spot. One of my lovely subscribers, Shaun took the time to send me pictures of her beautiful roses. So I am living vicariously through her stunning rose pictures. Thank you, Shaun.

Back Staircase Project

As you may recall, the back staircase project started last August. Yep, nearly a year ago. The existing sisal rug was separating on the edges and showing wear and tear. To see that post, click here.

Though we have made progress, it has been slow and painful. The last report from me showed us struggling to remove layers of carpet glue and old paint. See that May post here.

Well, I’m happy to report that the stripping is complete and the stairs are down to bare wood. However, in doing so, we found 3 broken threads and one jury-rigged upright. To get these repaired by a professional, the first bid was a whopping $3,500.

That is enough to take the wind out of your sails, so the project is on hold until we get more opinions. Right now it would be easier to just cover the problems with carpet, but I can’t do that. This has become more challenging that we expected. But this will get done.

The Bulb Garden

It was so joyful watching the heavily planted bulb garden bloom in the spring with an abundance of iris, tulips and hyacinths. I was a proud bulb mama, carefully inspecting each and every blossom on my daily yard walkabouts.

And then the bulbs disappeared. Literally. I know there is something living below ground just munching his/her way around the yard. But I haven’t done anything yet because it just seems a bit overwhelming. Fighting with a varmint? I just don’t have the energy. But the fall will be here soon and I WILL want to replant my bulbs. So there is more work to be done there….sigh.

The Pool House Bathroom Floor

Tile painted with the primer coat

This week, I started a new floor stenciling project in the pool house. If you follow my stories on Instagram, you have seen my progress. The stencil painting will start after letting the primer and base coat dry for a full week. More to come!

Sharing Sourdough Starter

Ursula with her first loaf of bread!

In April, I wrote a post on Sourdough Starter basics. An old friend, Tanya reached out to me as a result. She indicated her daughter (who used to be in my Girl Scout troop and attended the same grammar school as my youngest), wanted to learn how to make bread.

Bubbles and Hope, my sourdough starter

Happily, I shared some of my sourdough starter and basic information on bread making. Meet Ursula and her first loaf of sourdough bread! She is now a rising sophomore in college and loves baking.

I am so happy that her first loaves were successful and she continues to bake bread. Tanya and Ursula, thank you for sharing your pictures! To see more about Sourdough Starter Basics, click here.

Pretty Masks

Johnny Was Masks

My dear friend, Janie, asked me to share my resource for pretty masks. Now that these have become a fashion accessory, I do try and have them match with whatever I am wearing. Fashion and my name are never in the same sentence so this is possibly the only fashion tip you will get from me!

Johnny Was, known for their boho chic designs, has a Buy a Mask, Donate a Mask program. Made from repurposed and assorted fabrics, I find these masks comfortable and attractive.

For $25.00 you can get a package of five masks~and 5 will be donated. Not only will you look cute but do a good deed too.

JOHNNY WAS SIGNATURE PRINT- PACK OF 5

Hands down, one of the best benefits of writing this blog is hearing your comments, feedback and getting your pictures. Truly, it makes my day. And in this complicated, disturbing world, I can’t even begin to tell you how much that means to me. You are my inspiration. Keep them coming!

Well, that wraps it up for the Wednesday, July 15th. Stay sane. Stay grounded. Let’s lift each other up in the meantime.