1

Getting Back to Basics

I am from the generation that grew up with one television.  The only time we were allowed to watch it was Sunday night. After a bath (there was no shower) and in our jammies, we would all sit together and watch a show.   The television was never on during the week but we didn’t seem to miss it.  Our lives were full of school, athletics and activities. 

Weekends were spent playing down the street with the neighborhood kids.  We knew it was time to come home when we heard Dad’s whistle~~you know, the one that you use your middle finger and thumb?  The one I never mastered? Heck, I can’t even do a regular whistle.

Make a connection
Sunflower in my garden

We were middle class America~~Mom and Dad and five children.  It was a good life where there was a clear distinction between right and wrong.  There were simple rules to live by, such as “if you can’t say something nice, don’t say anything at all”.

Each of us had our responsibilites~~cleaning the house, doing laundry, mowing the lawn, taking out the garbage. Dinner was always served around a big table.   We ate together as a family. We knew that Christmas and birthdays were the only time we got gifts. Grades were very important to my folks and we never wanted to let them down. My parents lived within their means.
Getting Back to Basics
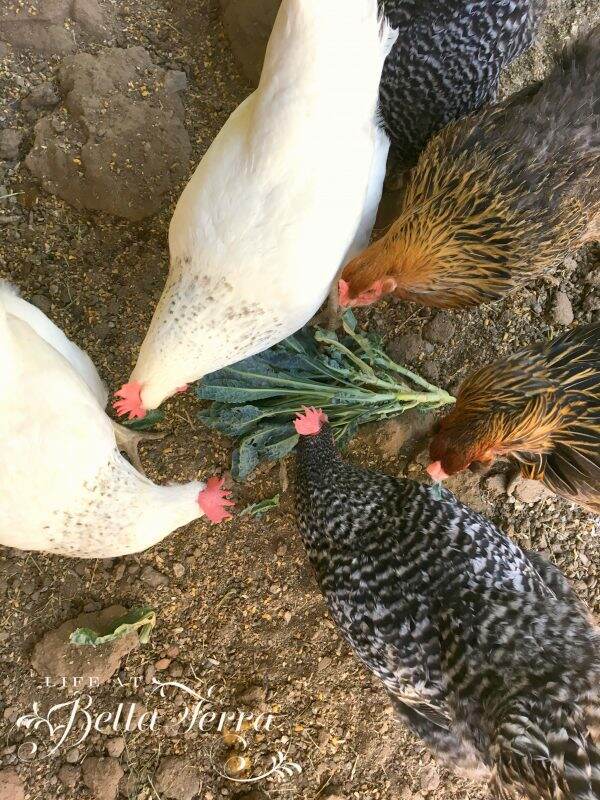
Chicken life

It’s time to slow down

Sometimes I think the world is moving too fast.  As much as I appreciate what technology has added to our lives, it is difficult to avoid being over connected.  Facebook, Instagram, Twitter, Snapchat, 24/7 news, and the hundreds of channels accessible to us.  Am I the only one who wants to shut my eyes and cover my ears? When was the last time I laid in the grass and watched the clouds sailing by?

Lay in the grass! Look at the clouds!

The other day I realized I felt weird without my iPhone.  Remember when the only phones in the house were the wall phone in the kitchen with the extra long cord and the extension by the parent’s bed?  And you could listen in on someone’s conversation if you slowly and quietly picked up the other receive ?

The need for simplicity

I don’t want to sound like an old person but I long for some of that simplicity.  We NEED the quiet, the simple, the honest, and the genuine. Our souls are not fed by the number of Instagram followers we have nor the number of likes on Facebook.

My flower garden

I had a social media epiphany lately.  After researching all the ways to get more followers, more likes, more exposure, I realized I was spending hours checking social media.  Today, I finally put down my phone and thought, “what the heck am I doing?”

My friend, Connie’s cat

All this research was supposed to help support my blogging. But when I really stopped to think about it, I was straying from my core values. I felt like I was going down the wrong path, trying to become something that didn’t feel honest, genuine or simple. Starting this blog did not include the goal of making money or getting advertisers.  It was born from the loss of both my parents…a way for me to document life in order to perhaps slow it down. And here I was trying to increase subscribers, viewers, likes, etc. and wasting hours of my day.  For what?

Art Exhibit at Hirshhorn Plaza, DC

Why I blog

Here are the reasons I started Life at Bella Terra.

1) In this crazy and often cruel world, I want to capture simple goodness.  I want to provide to you, my subscribers, a place that is beautiful, creative, thoughtful, educational and interesting.  Every day I am so grateful for my life, my world, my family and my home.  This gratitude is worth sharing.
Getting Back to Basics | Put Down Your Phone
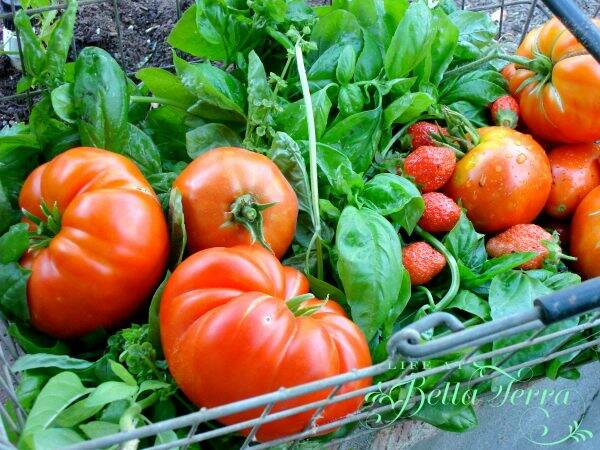
A good summer harvest

Bella Terra is a safe harbor for our children, a warm place for our friends and family, a historical gem for our city.  We are its guardians. In what feels like an unsafe world where you are cancelled for having your own thoughts and opinions, everyone is welcome here.
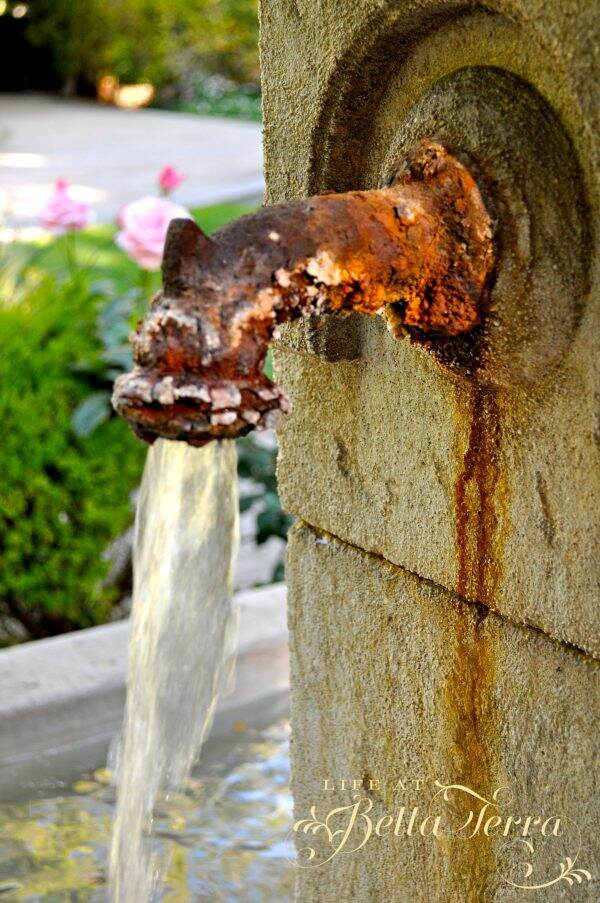
Old Italian fountain in our front yard

2) This blog allows me to look at my life through a different lens.  When you spend a great deal of time in a place, it is a challenge to look at things objectively.  How did I not see the really ugly paint color in my kitchen?  However, I did see it in my photographs.

When I set a table, it looks good to me.  In a photo, the silverware is cattywampus and how did I miss all the dust on the table?  I’m learning something new every day. I am seeking more grace in my daily activities.
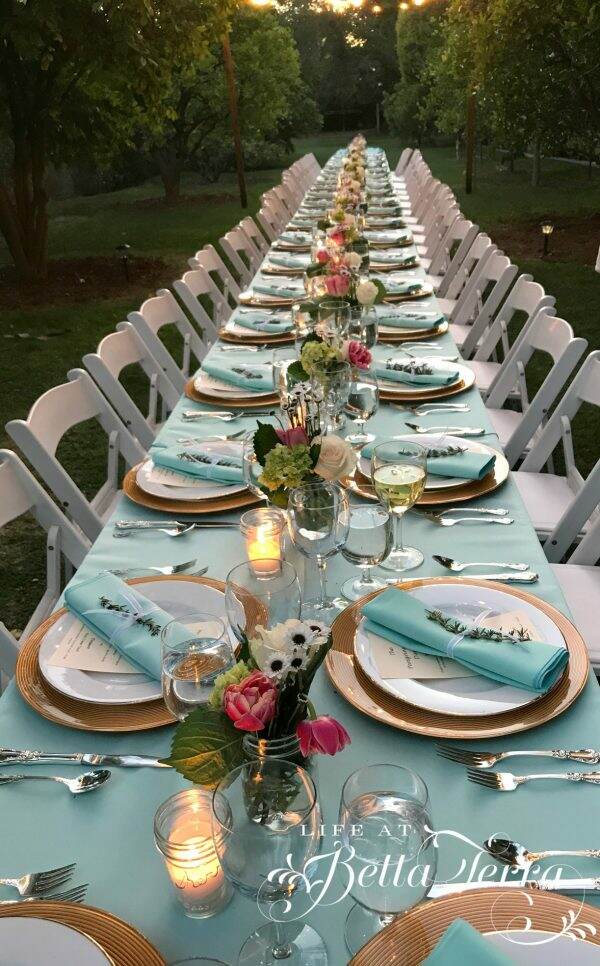
Dinner in the Orchard

3) This blog is a living diary.  I try and share what makes me happy, what inspires me, and perhaps something new that I have learned.  I am excited to share that with you. It is with great hope that what makes me happy, makes you happy.

A favorite cup of Joe

Quite honestly, I don’t care about Instagram’s algorithm.  Nor am I feeling as if I have to post something every day.  I have a life to live and why would we want to waste precious time staring at our phones?

My personal goals are to post something on Tuesday, Wednesday and Saturday. However, I will blog only when I am inspired to share something with you, not because of some fake deadline or sense of responsibility. 
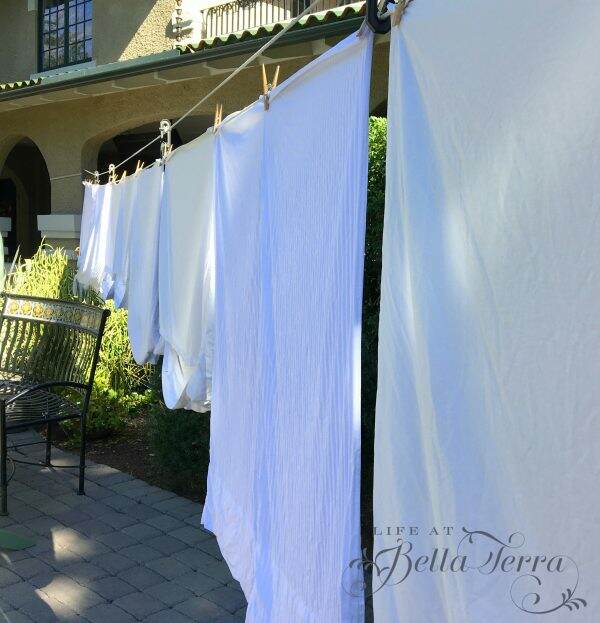
Fresh and clean

Thank you for listening to my revelations about blogging and Life at Bella Terra. As always, I love hearing what you like about this blog, what you would like to see more of, and while you’re at it, what you don’t like.  If you family or friends are needing a bit of beauty, I hope you refer them here.

My artwork

So if you feel like life is spinning a bit out of control, put down your phone, turn off the television.  Make a connection with someone you love or someone you would like to get to know better.  Help someone in need. Find depth and meaning in the simplest of things. The world needs more love, honesty and human connections.

P.S. I wrote this post back in February 2018. And look what has happened since then. We do need to care for ourselves and be graceful and patient with others.


September Garden Guide

tomato transplants

After wonderful monsoon weather and a nearly dead garden, I am so excited to get the beds ready for Fall planting. Here is my September Garden Guide for zone 9b. The only problem lately is the influx of mosquitos resulting from all the rain. And those nasty little fellas just love biting me. But I am determined to start gardening again! It is also time to see what my gardening buddies are up to this month too!

Good Soil Structure

Healthy soil has lots of worms

One of the foundations of a good garden is have equally good soil. It’s important to know your soil type. There are three soil types~ clay, loam, and sandy. Loam is the most desirable as it is a balanced mix of all three. How do you determine your soil type?

Our composted soil

The best way to tell what type of soil you have is by touching it and rolling it in your hands.

  1. Sandy soil has a gritty element – you can feel sand grains within it, and it falls through your fingers.
  2. Clay soil has a smearing quality, and is sticky when wet.
  3. Pure silt soils are rare, especially in gardens.
Soil test kit

Or you can purchase a soil analysis test (see one here) which will include the pH and mineral content. I just ordered mine as the last time a soil test was done on my garden was in 2012. The results take 6-8 days online so I will be sending my test kit in today!

Getting the Beds Ready

Emptying the composter

Most of the beds are laying fallow over the last month and require a new burst of good soil. Since we do compost nearly everything we can, I have a large quantity of this amazing nutritious dirt.

Preparing the beds

These compost tumblers make composting easy and I cannot recommend them enough. For a good selection of compost items, click here. Composting is feeding your soil for free! Plus it is a great way to get rid of 30% of your waste.

Getting beds ready for planting

The compost is placed on the top of the existing soil. I do not turn the soil much but I allow it to sit for a week or two before I start planting. To see my tutorial on composting, click here.

Check your Watering system

Flower garden soaker hose system

Last season, we had a drainage problem in one of the raised beds. What resulted was stagnant, stinky soil and poor vegetable growth and harvest. Now is a good time to make sure all systems are working properly. Too much or too little water can ruin a crop.

Our beds are equipped with an automatic watering system and the flower bed has a drip soaker hose with a timer. But sometimes these fail so it’s important to make sure they are in the best condition at the beginning of a planting season.

Shade Cloth?

In May, I did add shade cloth to protect the plants in the garden from the blistering summer sun. Since September is one of those months where it may still get really hot or we may see a shift to cooler temperatures, I will leave the shade cloth up for a while.

It is very easy to remove and during the winter months I replace the shade cloth with frost cloth on those few days we see below freezing temperatures.

Since the Valley of the Sun has different microclimates, it will be interesting to see how September pans out, weather-wise.

My planting guide for September

Time to plant these!

Starting early in the month, here is a list of items I hope to plant:

  • Beets
  • Broccoli
  • Brussel Sprouts
  • Cauliflower
  • Tomato transplants
Fresh from the garden

Closer to September 15th, I will add:

  • Kale
  • Lettuces
  • Carrots
  • Radishes
  • Garlic

Since our weather has been a bit out of the ordinary (heavy rains, cooler temps), I will adjust what I plant and when. When the night temperatures fall in the 70s, the bulk of the planting will take place.

Autumn flowers

Here is a list of annuals and perennials to sow. I actually have seeds (carnation, larkspur, sweet pea, and stock) that I ordered from Floret Farm back in the Spring, but the planting for these seed groups takes place in the fall here.

  • African Daisies
  • Alyssum
  • Aster
  • Bachelor Buttons
  • Bells of Ireland
  • Calendula
  • California Poppy
  • Carnation
  • Delphinium
  • Forget-Me-Not
  • Hollyhocks
  • Larkspur
  • Lupines
  • Nasturtium
  • Pansy
  • Petunia
  • Phlox
  • Shasta Daisy
  • Snapdragon
  • Stocks
  • Sweet Pea
  • Sweet William
  • Verbena
  • Viola
Picket fence needs tending

The white picket fence around the garden is looking a bit tired. It’s an ambitious project but I hope to paint it when it cools off a bit.

As many gardeners around the country are winding down their gardens, here in Phoenix we are just starting a big planting season. I cannot wait!

Thanks for joining me today. And now off to the Garden Blog hop.

Garden Blog Hop

Chas from Chas Crazy Creations tells us The Actual Truth and Reality of Growing My Seasonal Garden.

Chas from Chas Crazy Creations

If you have seen Kim’s garden, it’s hard to believe she makes any mistakes. However, today she is sharing 8 Mistakes Made in My Flower Garden and you can see it here.

Kim from Shiplap and Shells

Stacy from Bricks ‘n Blooms has a lovely garden in New Jersey. This month she shares How My Garden NJ Is Changing to Fall. See it here.

Stacy’s New Jersey Garden

Thanks for joining me today! I hope everyone had a relaxing the Labor Day weekend.

If you enjoy this post, please share on Pinterest.


Room by Room~Front Hall

View from the upstairs landing to the front hall

Welcome to the Room by Room series where I feature one room of our historic home in detail. Whether you call it a foyer, entryway or front hall, this is the area where you enter our home after you step through the front door. We are so blessed that this space is a good size ~ 12 feet by 16 feet.

The Front Door

Outside of Front Door

I do believe this door is original to our home which is nearly 110 years old. This 6 raised panel solid wood door is a generous 4 feet wide and has the original brass hardware and ball tip final hinges. Just a quick note that the topiary cypress trees are faux and can be found here.

Front door inside view-Valentine’s Dinner 2020

On either side of the door are side lights with 6 mullioned sections, which allows the eastern or morning sun into the front hall.

The Staircase

The staircase with sisal runner

Once you cross the front door threshold, you are directly across from the staircase. The front entry acts as the center of a wheel with spokes leading to the several different areas of the house. The staircase leads to the second story and bedroom quarters. The mahogany handrail is worn smooth by many trips up and down the stairs over the past 10 decades. Memories are embedded in that railing and often, when my hand glides down it in the morning, I think of all the other people who have touched it during their lifetimes.

The Living Room

View to the living room

Once inside the front hall, and on your left, the wide opening to the living room gives you a glimpse of many original features, like the coffered ceiling. To read more about our living room, click here.

The Dining Room

View to the dining room

Off to the right, opposite the living room, is the entrance into the dining room. During the home’s restoration, we discovered original pocket doors hidden in the walls. What a find!

Pocket Doors discovered during restoration

The Powder Room

Adjacent to the staircase are two 5 panel doors~one leading to the small powder room; the other to the hall closet.

Doors to powder room and hall closet

Before the restoration, this powder room was hardly functional. I recall a toilet seat with a celestial horoscope design on it and a full size vanity. It was impossible to sit without bumping your knees against the sink. However, we did keep the original push button toilet which allows for a nice hearty flush.

Since this room is so small, a tiny Kallista sink and custom scaled-down vanity is designed for the space.

A peek into the powder room

Hall Closet

The other door is the hall coat closet (funny as we rarely wear coats here in Phoenix) that serves as a storage closet for many of my linens.

Hall closet is storage for tablecloths/napkins

To see more fun storage tips and information on this closet, like a pulley system for lampshades, click on my post about this odd-sized closet here.

Hidden Storage

Hidden storage

Another very unique feature in the front hall is the hidden space under the staircase. Not only is there a large area to store all my pillows and table leaves, but there is easy access to the powder room plumbing. On a rope and pulley system, the raised panel slides down below the floor.

To see more about this unusual yet clever space, click here.

Hall Table

Petticoat or Pier table

The burl wood hall table with the mirror below is something I always refer to as a petticoat table. According to the Clermont State Historical Site, the reason behind referring to this as a petticoat table a myth. According the story, these mirrors are called “petticoat mirrors” and are installed to allow ladies to check to make sure that their petticoats were not showing beneath their skirts. Often located in hallways, where a woman would be entering or leaving a house, it seems sensible.

Mirror inserted in table

However, this is called a pier table. The purpose of the mirrors is decorative. Reflecting light around a room on highly-polished surfaces, including mirrors, glass, crystal pendants on chandeliers, or fine wood surfaces, was a way of demonstrating wealth. 

Regardless whether it is a petticoat or pier table, I have never seen another one like it and I have no idea how old it is.

Other Unique Features

Original brass vents

Our home did not have any central air conditioning, but we did utilize the existing heating vents to retrofit the house with a modern heating and cooling system. The beautiful heating grates had been painted over in dated shades of pastel blue and pink. In order to bring them back to their original beauty, we found a resource to brass plate them.

The hardwood floor is original Canadian beech and is so solid and sturdy.

Architectural details

There are some interesting architectural details only found in the front hall. Angular corbels and trim detail delineates the transition from the hall and staircase unique.

New light fixture

Much to our dismay, the previous owners took all the original light fixtures. Selecting the right scale and style is a bit challenging, but this one works. The crystals tie into the much more elegant chandelier in the adjacent dining room. I cannot recall the resource for this.

Cross Stitch Prayer

Hard to believe that I did this cross stitch over 43 years ago…yikes. It hangs in our front hall, where we strive to open our doors to joy and love.

Front Hall table; flowers from @thebouqs.com

In the center of the front hall is a carved antique small drop leaf table. Typically I like to have fresh flowers and candles on this table. Our house rule is that the first 3 rooms (living room, dining room and front hall) of the house remain clean at all times. The rest of the house is fair game!

Thank you for joining me today for another episode of Room by Room. Have a happy Wednesday! Today I am picking up 60 lbs. of Roma tomatoes~you know what I’ll be doing this weekend!


Dividing Irises

Bearded Iris

In our USDA planting zone (9b), the best time to divide iris rhizomes is this time of year. Established plants need to be divided every third or fourth year or whenever the clumps become crowded and flowering decreases. This is best done in August after flower stalks have died back. I can honestly say that dividing iris in the summer heat is not a fun thing to do.

Bearded Iris

As you know, once you buy a property it is fun to go through the seasons to see what will bloom in your yard. Since our property was a major restoration construction site for 3 years, large portions of the landscaping have been re-designed. However, many plants/trees that were planted by previous owners over the last 100+ years still remain.

An Overgrow Bed of Irises

The front bed is dense with iris

A section of our landscaping bed nearest the street is chock-a-block full of a smaller white iris. I have no idea who or when these irises were planted. Since we have been living here for 20 years, this iris bed is in dire need of attention. It is a cluttered mess.

Since the original rhizome (the “mother”) will produce several offshoot rhizomes you can only imagine how entangled this planting bed is currently. Dividing them gives them space to grow and flower.

My bulb garden

If you are new to my blog, two years ago I did create a separate bulb garden on the south side of our parcel. The hope is to divide these irises and place some of them in the newer bulb garden. To see my bulb garden project, click here.

Tools You Will Need

Time for a better pitchfork like this one

It’s impossible to garden here without a hat, water bottle and since we’ve had so much rain, a mosquito repellent. I place a tarp down so I can sort and separate the rhizomes.

Using a pitchfork to gently lift the rhizomes and roots, I quickly realize that this will be a difficult project. As stated earlier, dividing irises should take place every 3-4 years. Since nothing has been done in the past 20 years, these rhizomes are firmly embedded, so much so, that I bend the tine of the pitchfork.

Parts of the Iris

You will quickly see the rhizome protruding from the bottom of the iris fan. The roots hang freely below. In the picture above you can see how long the rhizome has grown.

Digging up rhizomes

Condition of the Rhizome

After carefully releasing several iris, I am ready to prepare them for replanting. First I check the condition of the rhizome. If any parts are rotted or showing signs of extensive infestation, I will not replant. However, if just the end or tip has decay, you can cut off the bad areas.

Rotted parts of the rhizome

In order to determine the condition of the rhizome, I place them in a bucket of water to wash off the excess dirt. Here I can evaluate the condition, length and hardiness of the rhizome.

Washing rhizome

Many of the rhizomes are in big clumps and others are just long and linear. Separate these rhizomes from the mother with a sharp knife and discard of the mother, as it will no longer produce blooms. You can break apart the clumps and trim the rhizome to approximately 3-4 inches, using a sharp, clean knife or garden shears (found here).

Cut the rhizome to 3-4 inches in length

For the rhizomes you decide to keep, cut the leaf fans back so they’re about four to six inches long. This helps the plant focus on growing roots before winter.

Trim the fan to 4-6 inches

Replanting

To plant, dig a shallow hole and create a mound in the middle where the rhizome will sit. Place the rhizome on the mound with the roots in your hole. Cover the roots and then place a thin layer of soil over the rhizome. You want the rhizome itself to sit just below the surface, lightly covered in soil. Push any errant roots under the soil with your finger.  

It’s easy to make the mistake of planting irises too deeply. The rhizomes of these plants should be partially exposed to the elements, or thinly covered with soil in hot climates. If they’re buried too deeply, they won’t do well.

Newly planted iris

Since the long overdue extraction of the rhizomes is rather difficult, I still have half a bed to go. But several are now clean and freshly planted in the ground. While digging up the rhizomes, I also discover many miscellaneous bulbs. I am not sure if they are freesias or paperwhite narcissus so it will be fun to see what comes up in the Spring.

My bulb garden in 2021

Irises in Phoenix bloom around Easter time. I plan to fertilize all my bulbs and rhizomes in January, February and March. Hopefully I will have an abundant crop of spring blooms to share with you. Check your area to see when it is the ideal time for you to plant and divide irises.

Happy Gardening! Make sure you keep reading to see what my other gardening friends are up to this month. It is such fun to see their gardens in other parts of the country!

I would love for you to follow me on Pinterest. Please share this pin if you enjoy my post!

Now Off to the Gardening Blog Hop

Well, since my cutting garden is a bit of a failure, I am excited to read Kim from Shiplap and Shells post about 9 Common Cut Flower Garden Challenges and Solutions. See it here.

Shiplap and Shells

Chas from Chas Crazy Creations is sharing When to Harvest Your Garden Vegetables here.

Chas Crazy Creations

Stacy from Bricks and Blooms is enjoying her flower garden and let’s us peek into Gardening Zone 6a Summer Flowers here.

Bricks ‘n Blooms


Christmas in July

Holiday table setting

I am so delighted to be part of a very talented group of bloggers who are celebrating Christmas in July. What exactly is Christmas in July? I did some research and you can read more about it at the bottom of this post. Psychologically, in the sweltering Arizona heat, a mental escape to Christmas it is a quick way to beat the high temps.

Pinks, burgundy and silver for a different holiday scheme

But right now, some stores already have their autumn decorations up and retailers seem to dictate the seasons long before they arrive. Each Christmas, I do try to decorate something/someplace in a “different” way. For years I would put our decorations in the same areas. But stepping back and looking at your space with a critical eye, can spark refreshing ideas on how to use the decorations you already have. Whether it be a new color combination or a holiday theme, by mixing it up a bit, tends to keep me out of a decorating rut.

Experiment with Color

Being a bit of a traditionalist, I do love reds and greens for Christmas. However, last year, instead of focusing on Christmas colors, I based my decorations on the shades and tones of each individual room. Since we do decorate nearly the entire house, there is a great deal of pleasure in making each room unique and different.

Our dining room (see post here) has a beautiful Oriental rug with shades of cranberry, pink and greens. This rug isn’t going anywhere as it is very high quality and the perfect size for the room. But red and green in a room whose dominating colors are cranberry/pink/teal, just doesn’t work well.

Pink it is!

Pink ornaments from Michaels

Though pink isn’t a traditional Christmas color, I am able to find this large container with ornaments in the blush/pink tones. The ribbon is typically available on Amazon here. But it is currently out of stock. A pink polka dot ribbon in similar shades can be found here.

In addition to the ornaments, these glittery floral picks are also from Michaels. Please note that I waited to the early part of December to look for pink-toned items. The inventory is so low at that point, but by chance I did find one container of ornaments hidden along with these pink blush picks on a low shelf. If you are looking for a unique color, I recommend starting your search a lot earlier than December!

Addition of a fresh tree

Armed with ornaments and ribbon, we did splurge on a fresh evergreen tree in a corner of the room. This tree is the perfect size for the dining room, elevating the entire Christmas theme (and smell) of the room.

Surprisingly, I did find pink Christmas wrapping paper to give the gifts under the tree a similar theme.

For a tree skirt, I gently wrapped my pink/white Valentine quilt around the base of the tree. Again, try and utilize what you have on hand.

With the tree complete and in the pink, now I need to focus on the rest of the room.

The Mantel

Being a historic home, we have a fireplace in nearly every room. With a wide and deep mantel, they are perfect for holiday decorating. In the dining room, I apply a faux garland, white lights and tuck in dried pink peppercorns, pink hydrangea and a sparkly pink ball floral wire.

The bottle brush trees in shades of pink, teal, evergreen add height and dimension to the linear mantel. For fun and balance, I hang the pink balls on fishing line on clear Command hooks on the underside of the mantel.

You don’t need to buy new holiday items every year. Here’s a photo of Christmas 2019 where I use the same pink balls, but in a different application. Playful and festive, they are hanging from the crystal chandelier over the dining room table. Reimagine and repurpose!

More festive touches

With the tree decorated and the mantel adorned, the rest of the room gets a few pink touches.

Pink satin ribbon with boxwood wreaths are pinned to the tops of the upholstered Parson chairs. These wreaths are an after Christmas significantly discounted purchase from Ballard Design. I use them year after year in different ways and they look as good as they day they arrived. See boxwood wreaths here.

Our Christmas dinner is a bit on the formal side and many memories are shared here in this room. Instead of using our traditional red/green, it is fun to change it up a bit to go with the rest of the pink/blush/tree decor.

The sparkly bits of the centerpiece are glittered pine cones, silver trees, coppery votives and silver mint julep cups as vases.

Natural elements like fresh greens, deep ruby pomegranates, alstroemeria and pink roses bring color to the table. Dark cranberry ribbon secure the napkins and a sprig of greens tie it all together. Plain white dishes, pink glassware are layers toward a compliment of colors.

With a burgundy/pink toile tablecloth, the entire new color scheme pulls together.

I can honestly say this is one of my favorite holiday rooms. Getting the colors right with minimal cost is so rewarding. Just writing this blog post and seeing the photos over again, makes me so happy.

Since this is a time of celebration, change your decorations up a bit. If you always put the snow globes in the same place every year, think of where else you can still display them but in a new and exciting way. And if you are buying a unique item or color, don’t wait until December to do it. Most stores will be out of stock by then.

What is Christmas in July?

Per Real Simple Magazine, according to legend, Christmas in July was first celebrated at a summer camp in 1933, when Keystone Camp in Brevard, North Carolina decided to dedicate two days (July 24 and 25) to the holiday—complete with cotton fake snow, a decked-out tree, a gift exchange, and, of course, Santa.

The tradition carries on today, and blistering-hot Southern summers have yet to stop the camp’s tradition—now they simply go for a dip in the lake post-presents. 

Thanks for joining me today! And now let’s see what these talented gals are sharing below.

Christmas in July Blog Hop

Don’t you love looking at other holiday ideas? Me, too. My sweet friend, Rachel from the Pond’s Farmhouse is the host and clever coordinator. I you are visiting me from The Pond’s Farmhouse, welcome to my historical home.

Let’s get started and see what the other 13 bloggers have in store.


Click on the highlighted links below to follow along on the tour.

Stacy Ling – Bricks N Blooms –/– Chloe – Celebrate & Decorate –/– Anne & Ann Marie – Simply 2 Moms –/– Cindy – County Road 407 –/– Jenn – Down Shiloh Road –/– Kelly – The Tattered Pew –/– Rachel – The Ponds Farmhouse –/– Mary – Life At Bella Terra –/– Michele – Vintage Home Designs –/– Jen – MIdwest Life & Style –/– Kim – Shiplap & Shells –/– Kristen – White Arrows Home –/– Andrea – Design Morsels –/– Chas – Chas Crazy Creations


Gathering Seeds

Sunflower Seeds

It is time again for our monthly blog hop where my fellow gardening buddies share news from their gardens. Most gardens around the country are now abundant with fruits and vegetables. But in USDA Hardiness zone 9B (Phoenix, Arizona), my garden is past its prime. Since it is difficult to do a great deal of summer gardening in our triple digit temperatures, I just let the garden go. A few plants manage to make it through to fall, but not many. Actually, it is a time I start collecting and gathering seeds.

Procut Gold Sunflower Seeds from Floret Farm

In February I received seeds from Floret Farm. This is my first time ordering from them and my yield was less than expected. I place the blame on very hungry birds who were successful in pulling out the fragile shoots, which I should have covered. But the sunflowers that did make it, are just beautiful. Even though I did hope to cut armloads of them, the birds seem to be enjoying them even more.

Look how these sunflowers attract a flock of peach faced lovebirds! Seeing these stunning birds in the garden frequently is rewarding.

Dinner!
Peach faced lovebirds enjoying the sunflowers

Now the sunflowers are past their prime. The petals are dry and falling off and the stems are leaning over as if they are ready to go to sleep. Since this is my first time harvesting the sunflower seeds to use at a later date for planting, or sprinkling with salt for eating, I need to do some research.

Dying Sunflower head

Prior to harvesting the seeds, you need to look for a few clues that it is time to harvest. You can let the flower dry on or off the stem until the back of the head turns brown, the foliage turns yellow, the petals die down, the seeds look plump and somewhat loose.

From what I gather from the internet, there are two ways to harvest the seeds from a sunflower.

Cut off the Head

Heads removed from the plant

Since I did this just before leaving town, I put all the dried sunflower heads into a paper bag. When I get home, I will remove the seeds using a fork or just rubbing my hands over the head. These flower heads may have been left on the plant a bit too long, as they look incredibly dry to me.

Leave the Heads on

Experimenting with the second option, I leave the sunflower heads on the plants. By wrapping the heads in tulle and securing with ribbon, hopefully the seeds will dislodge and fall within the netting bag. Can you see the “face” in the above photo? A bit creepy, right?

ProCut Gold Sunflower
ProCut Red Sunflower

There is joy in growing sunflowers, as it is fun to watch the stages of growth. They are fast growing and are so pretty in the garden. Not to mention all the birds and bees they attract too. Hopefully I will get viable seeds and grow them again next season.

Getting out the sunflower seeds

Wish me luck!

Hollyhocks

Hollyhocks in full bloom

Our property has an abundance of hollyhocks as they grow like weeds in multiple beds. I love these plants because there are many different colors option and petal formations. When they are in full bloom, these flowers make a grand statement. Gathering hollyhock seeds is VERY easy.

Like most plants, as they are dying, hollyhocks are not very attractive. Their flowers fall off, and their tall stalks wither and tip over. But that is all for a purpose. As the stalks hit the ground, the seeds fall out and the propagation process begins all over again.

Hollyhock seed head

At the base of the flower, the seed head exists. Stacked up like little dominos, the flat black seeds are numerous.

Seeds easily fall out

Using small paper envelopes, I tap the seed head and let the seeds fall in.

Collecting seeds

With a marker, I label the hollyhocks based on color of flower, or number of clusters of blooms. The first time I planted hollyhocks, nothing happened the first year. I nearly forgot about them and then lo and behold, I now have hollyhocks everywhere. The birds must play a role in spreading them too.

It is tempting to cut down a plant when it is dying, but letting it go through the entire process helps provide the most nutrients back to the seeds. I am always tempted to pull tulips and daffodils after their prime, but the energy does go back into the bulb for the next season.

Whatever stage your garden is at currently, please consider saving seeds. They make excellent gifts and there is something satisfying about growing generation after generation of plants.

The Monthly Gardening Blog

Now let’s see what my fellow gardening bloggers are featuring this month.

Chas from Chas Crazy Creations shows us some easy DIY Garden Plant Care here.

Stacy from Bricks ‘n Blooms gives us an early summer garden tour here.

Kim from Shiplap and Shells has 9 ways to protect your garden from extreme heat (geez, I need to read this one!). You can see it here.

Gardening is so rewarding wherever you live. From lowering blood pressure to providing food, it’s a worthwhile endeavor.

If you enjoy this post, please feel free to share on Pinterest.