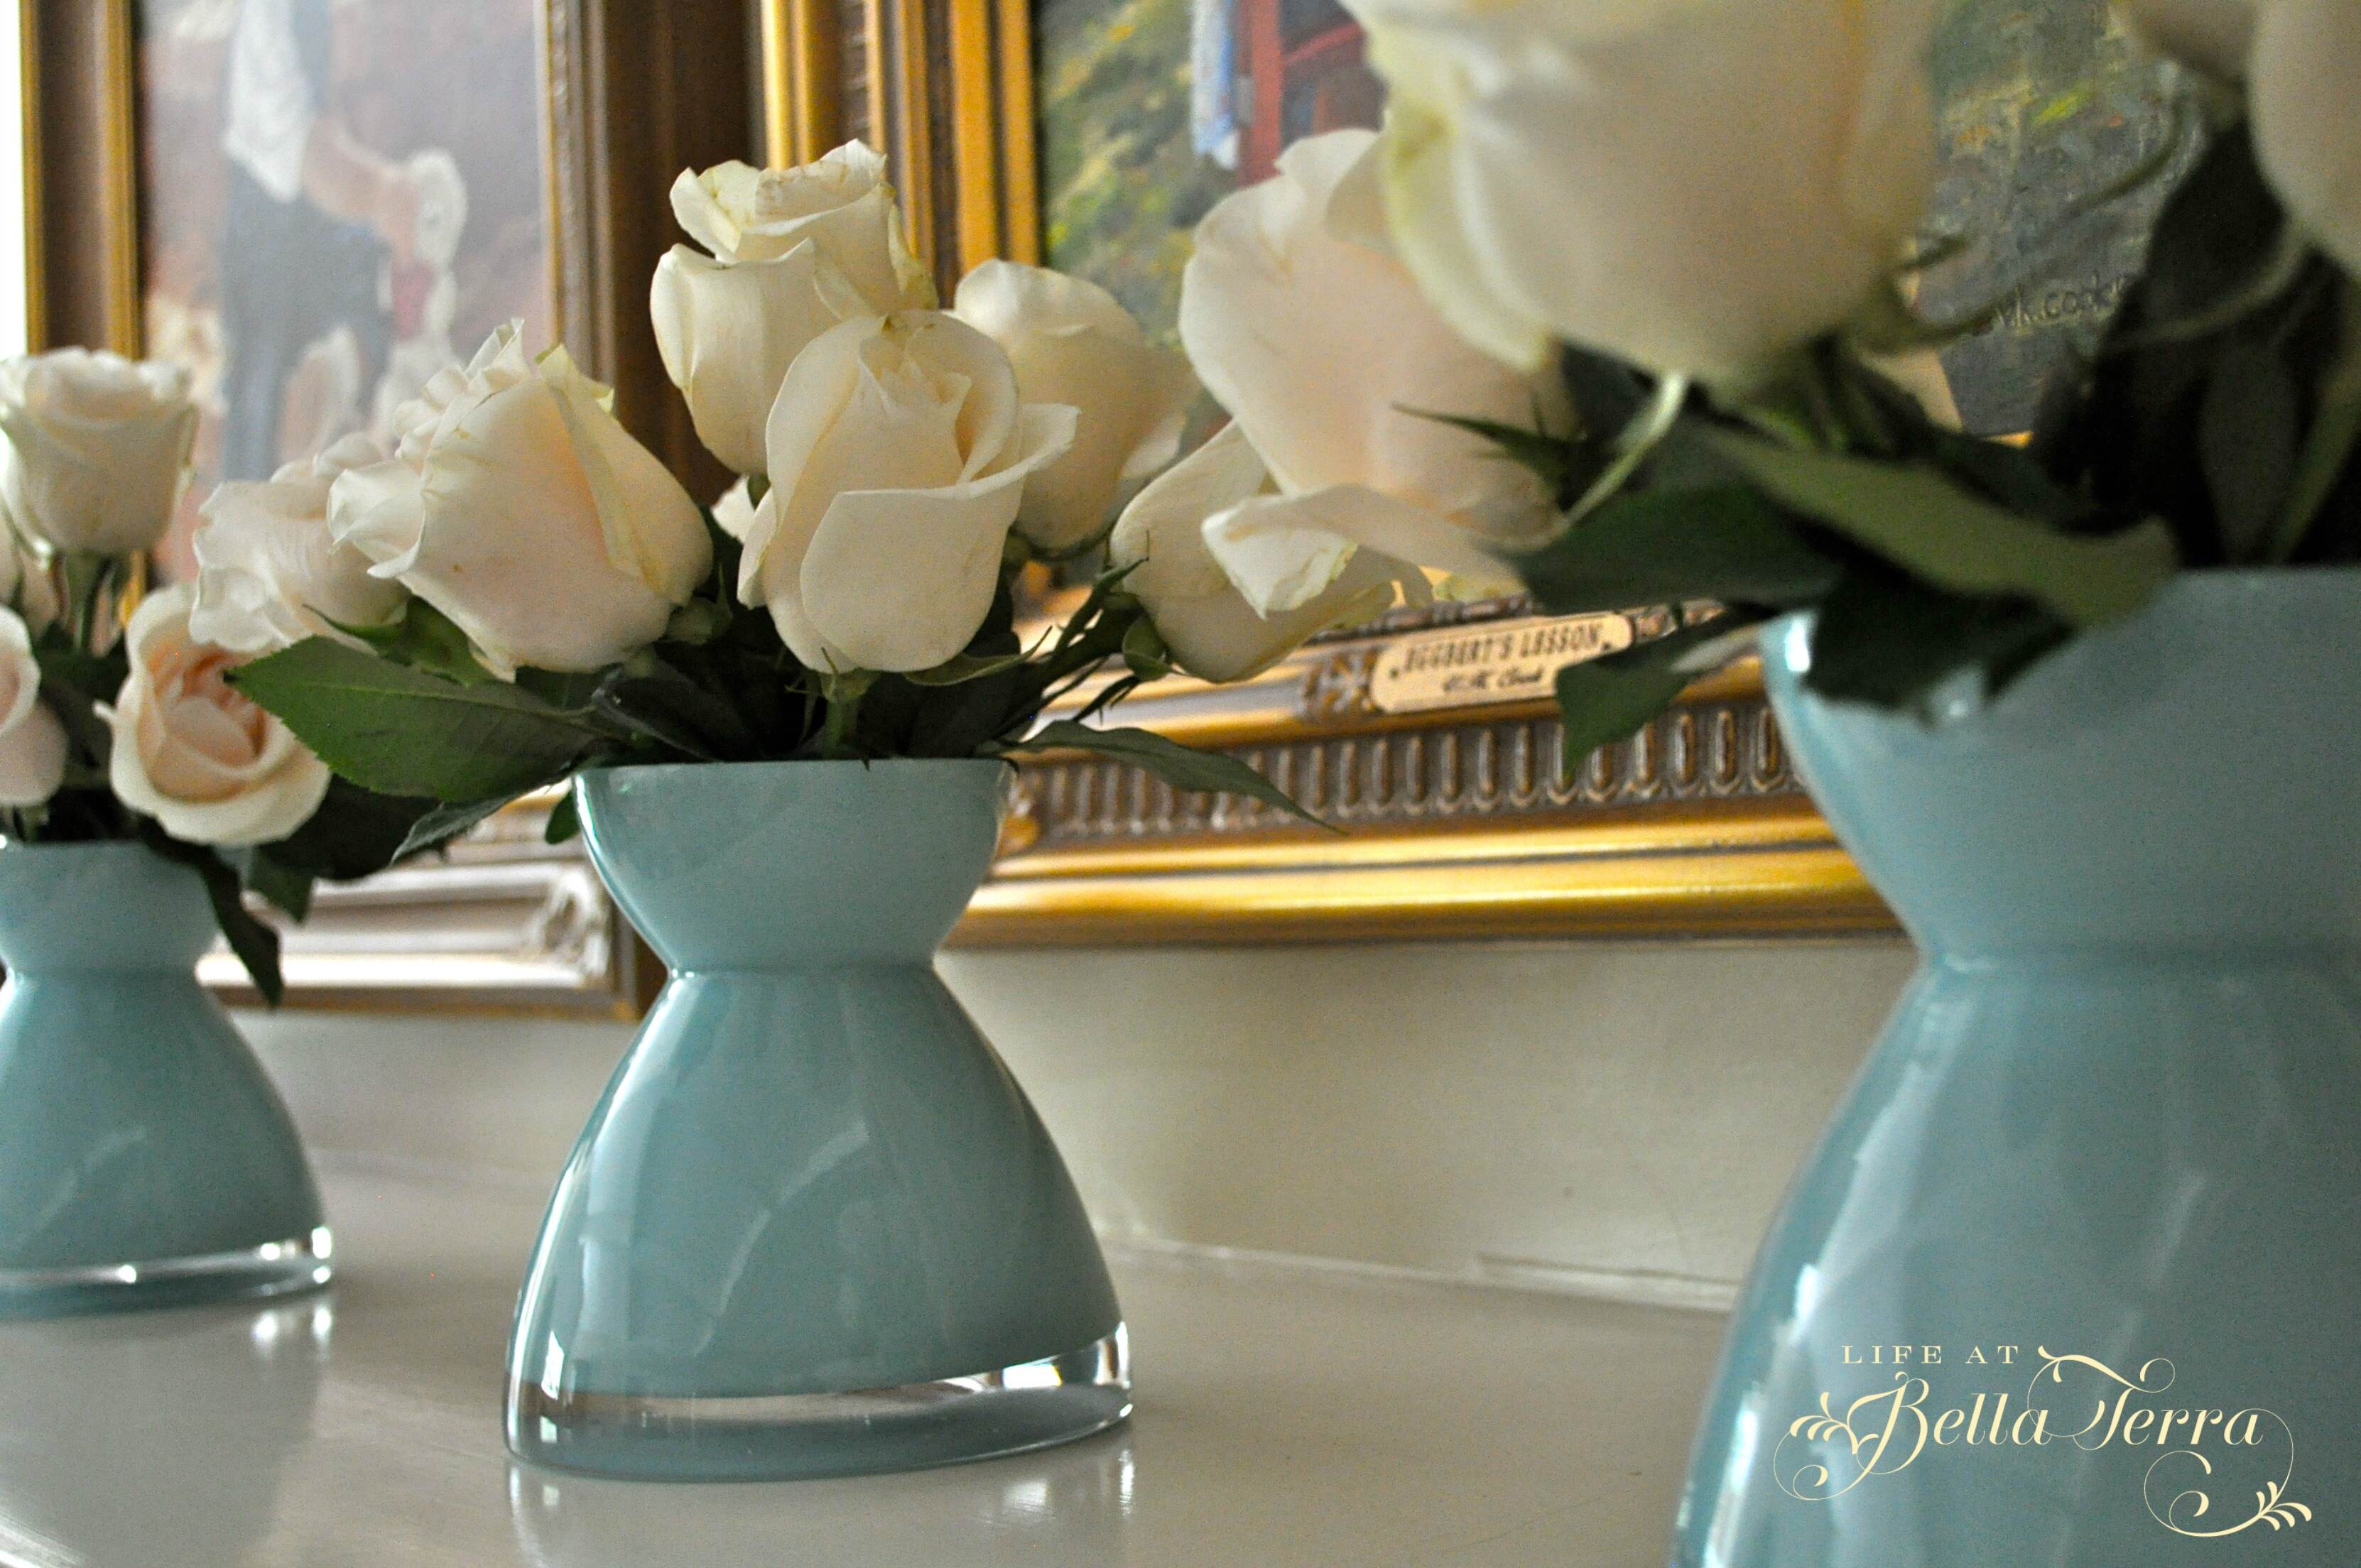
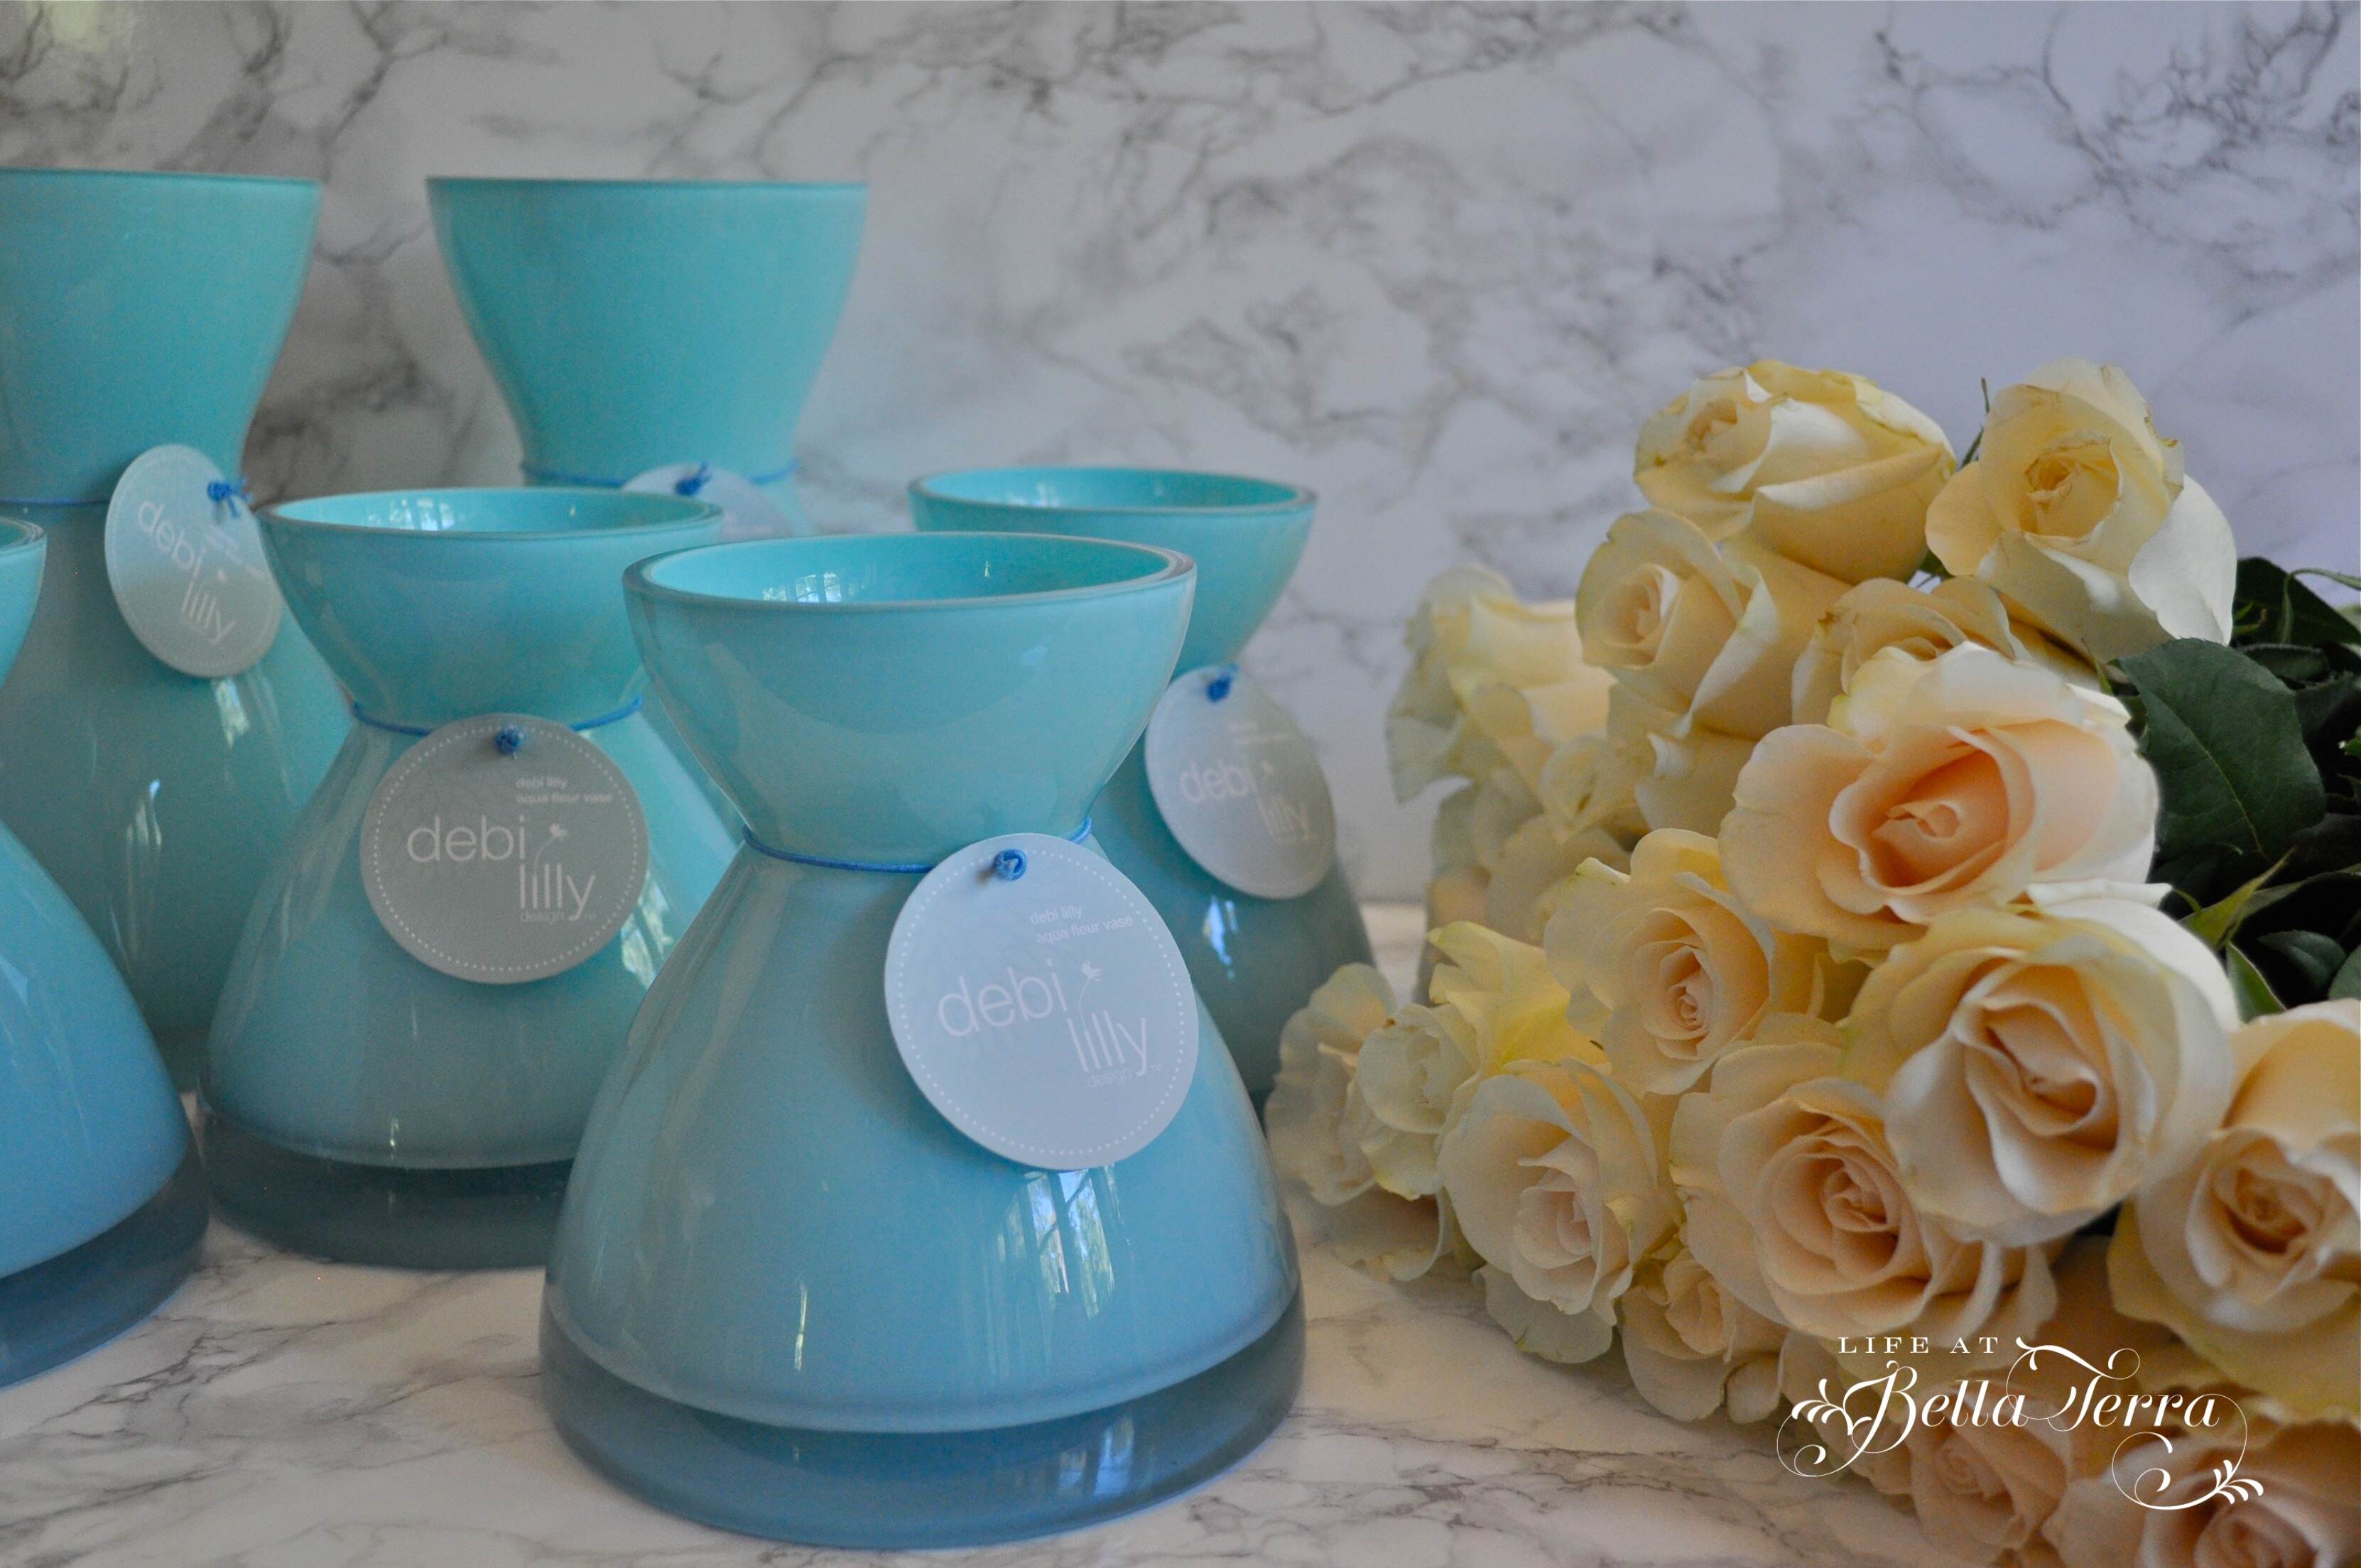
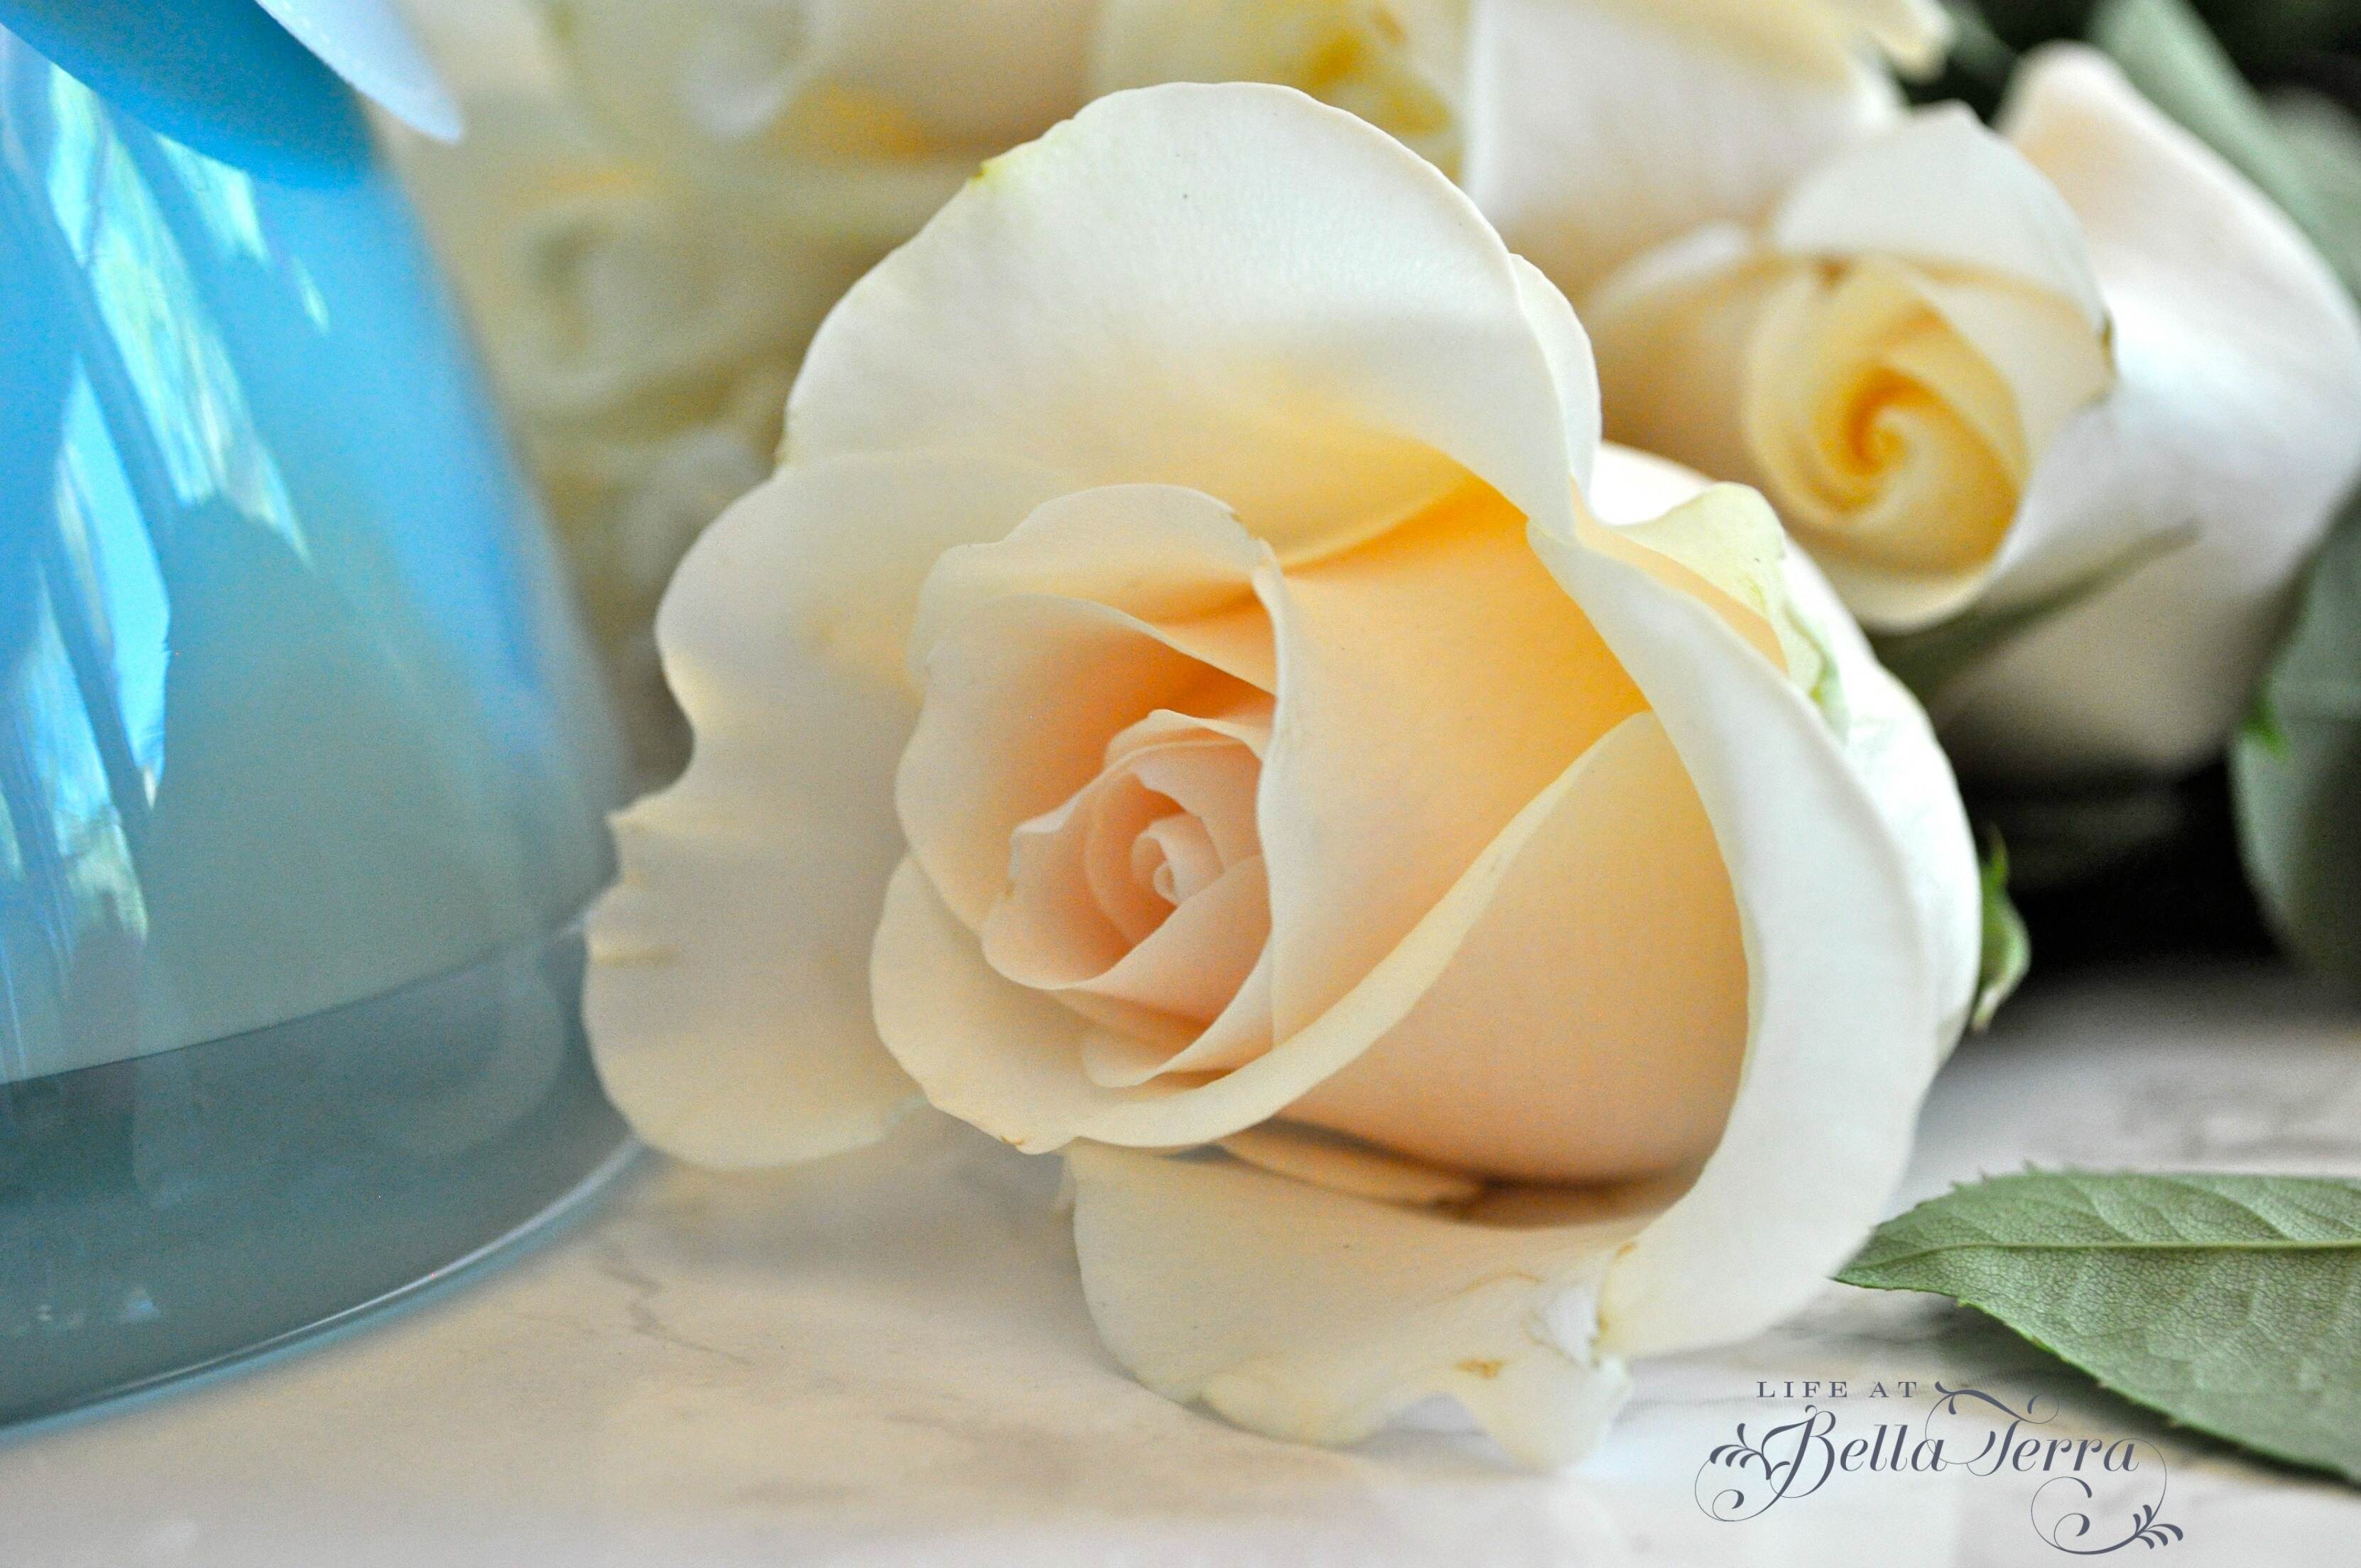
I love a bargain, especially an unexpected one! During a simple grocery shopping trip to Safeway a few months back, I stumbled upon a 75% off display of floral items. Not that I need any more vases, but I was so drawn to the cool, serene blue color of these glass ones designed by Debi Lilly. I purchased 6, yes 6 of the smaller ones at $3.25 each and the two larger ones were $3.75.
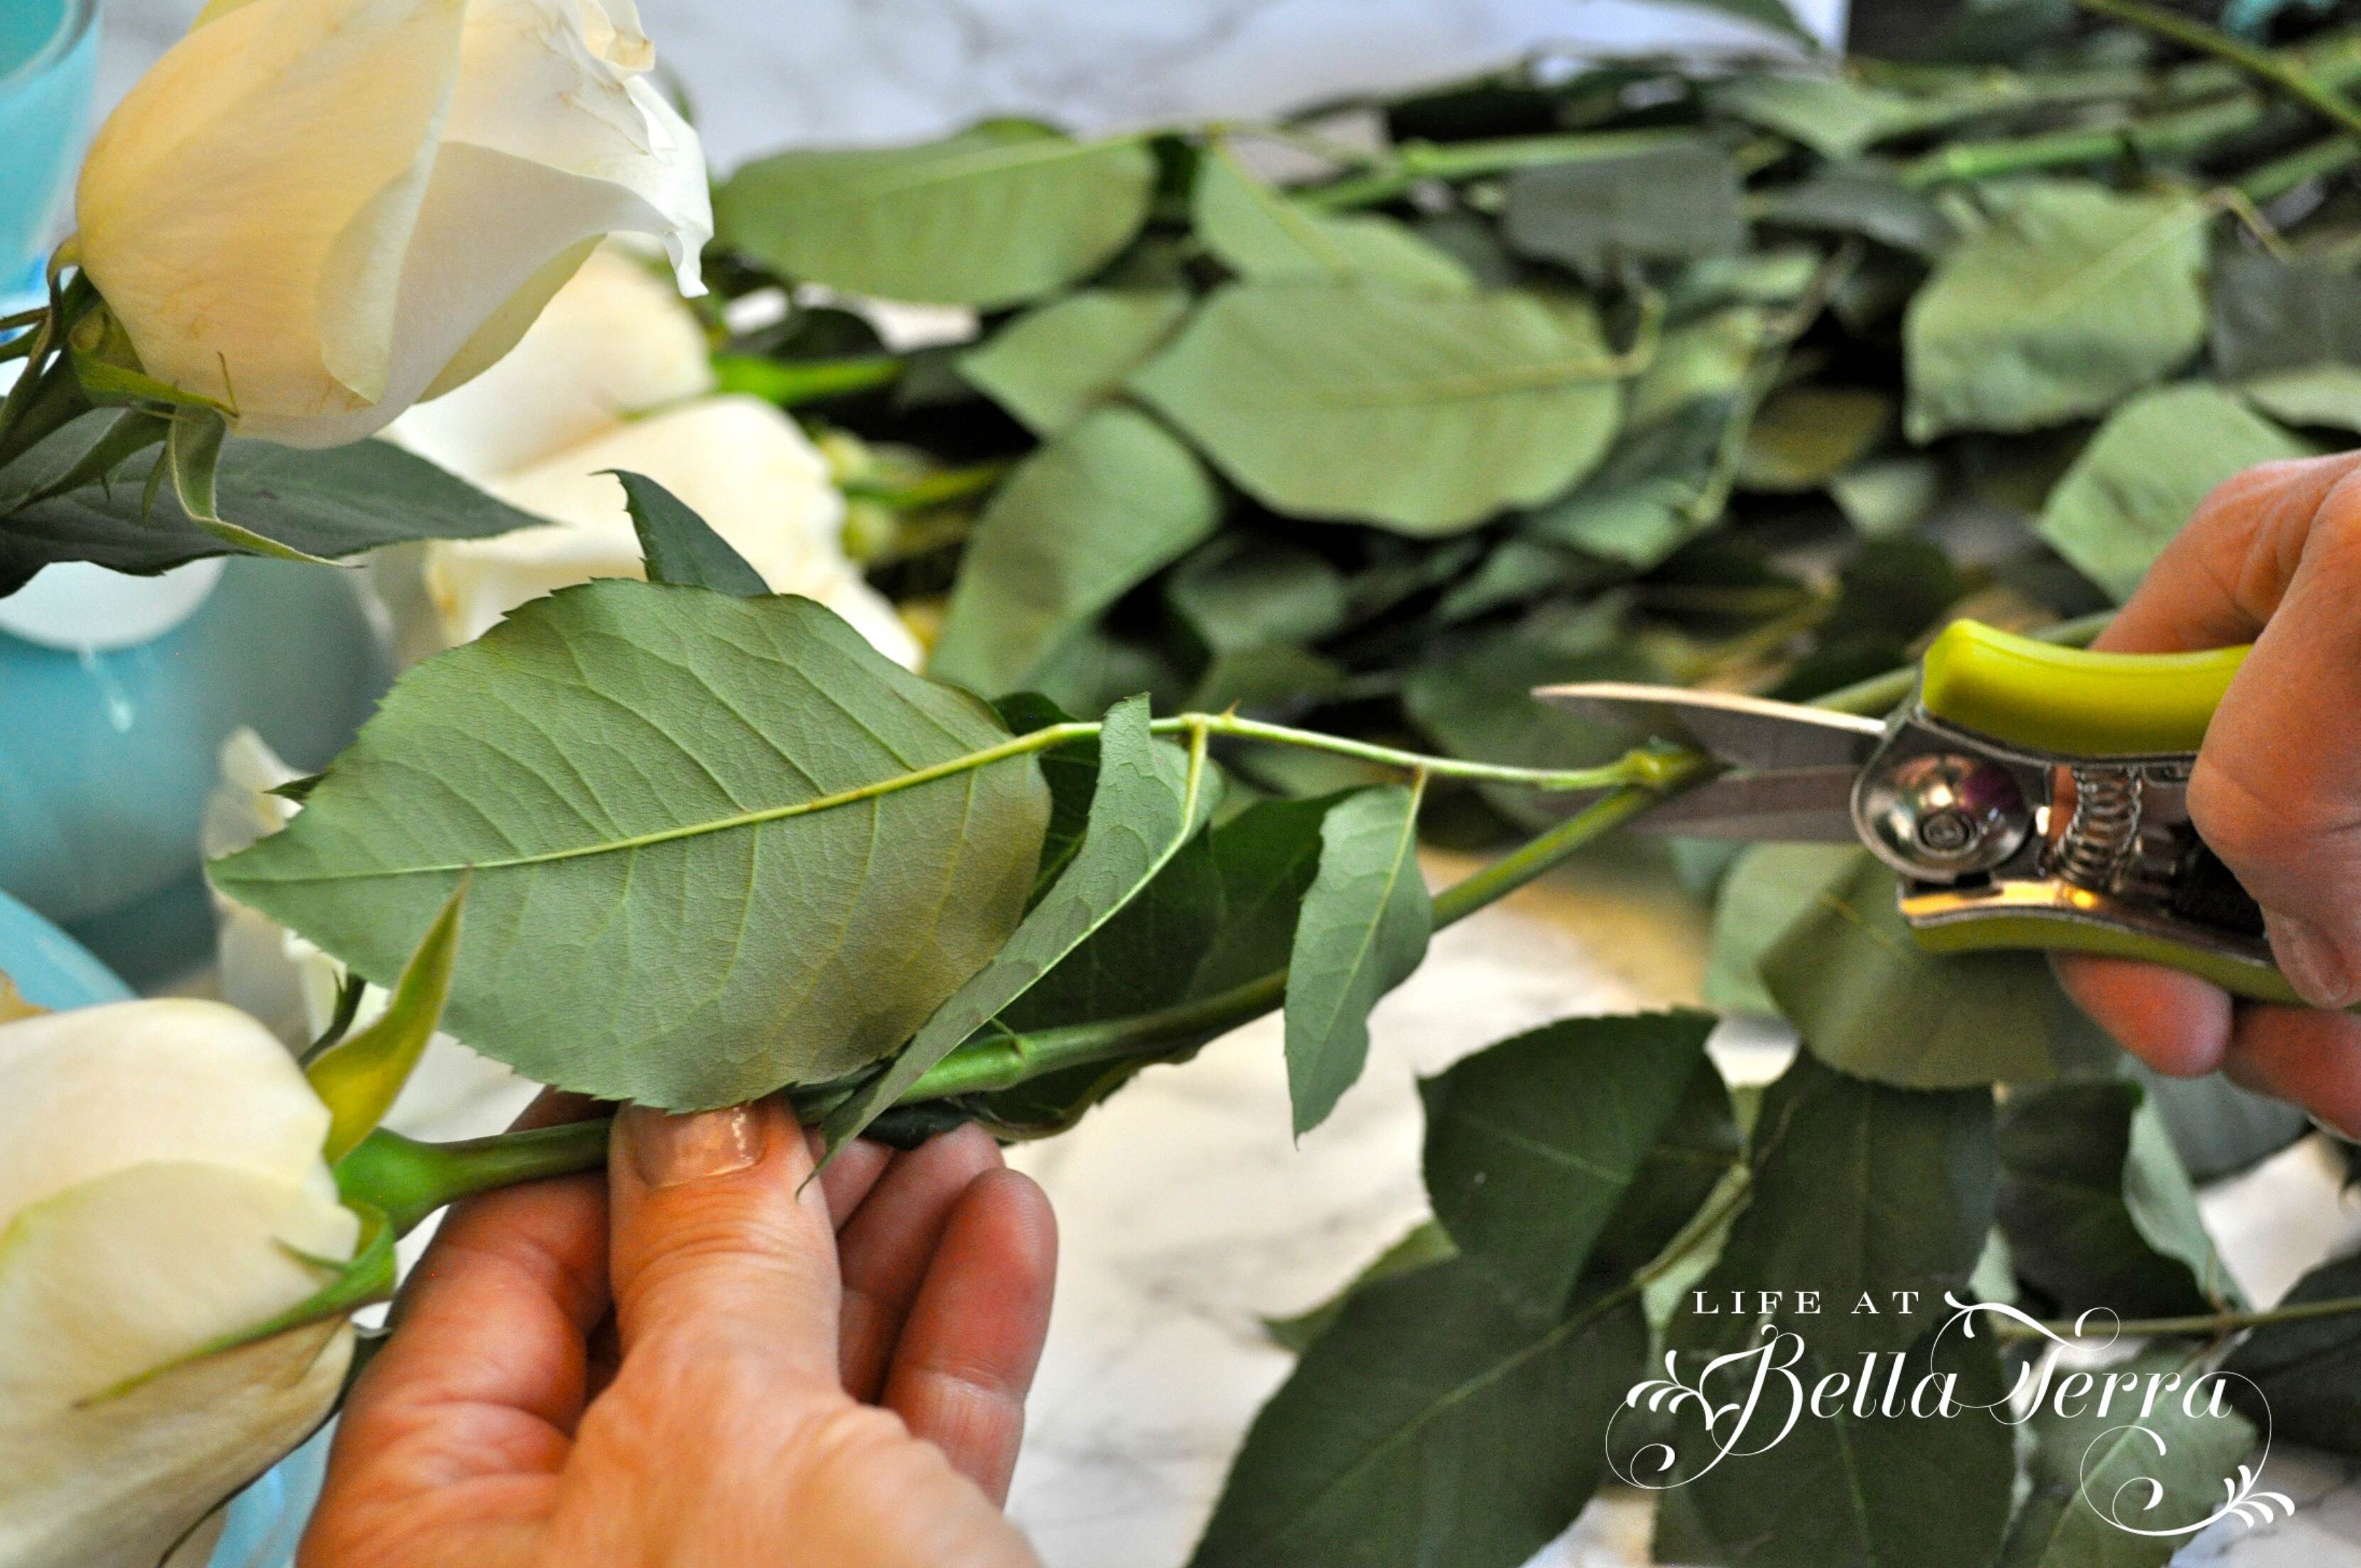
Don’t they just make you happy? I also bought the most beautiful white roses with a pale pink blush to the petals. Hard to believe the flowers cost more than the container but I’m thrilled with my discovery! It’s nice to find unique items in ordinary places and at such a great price.
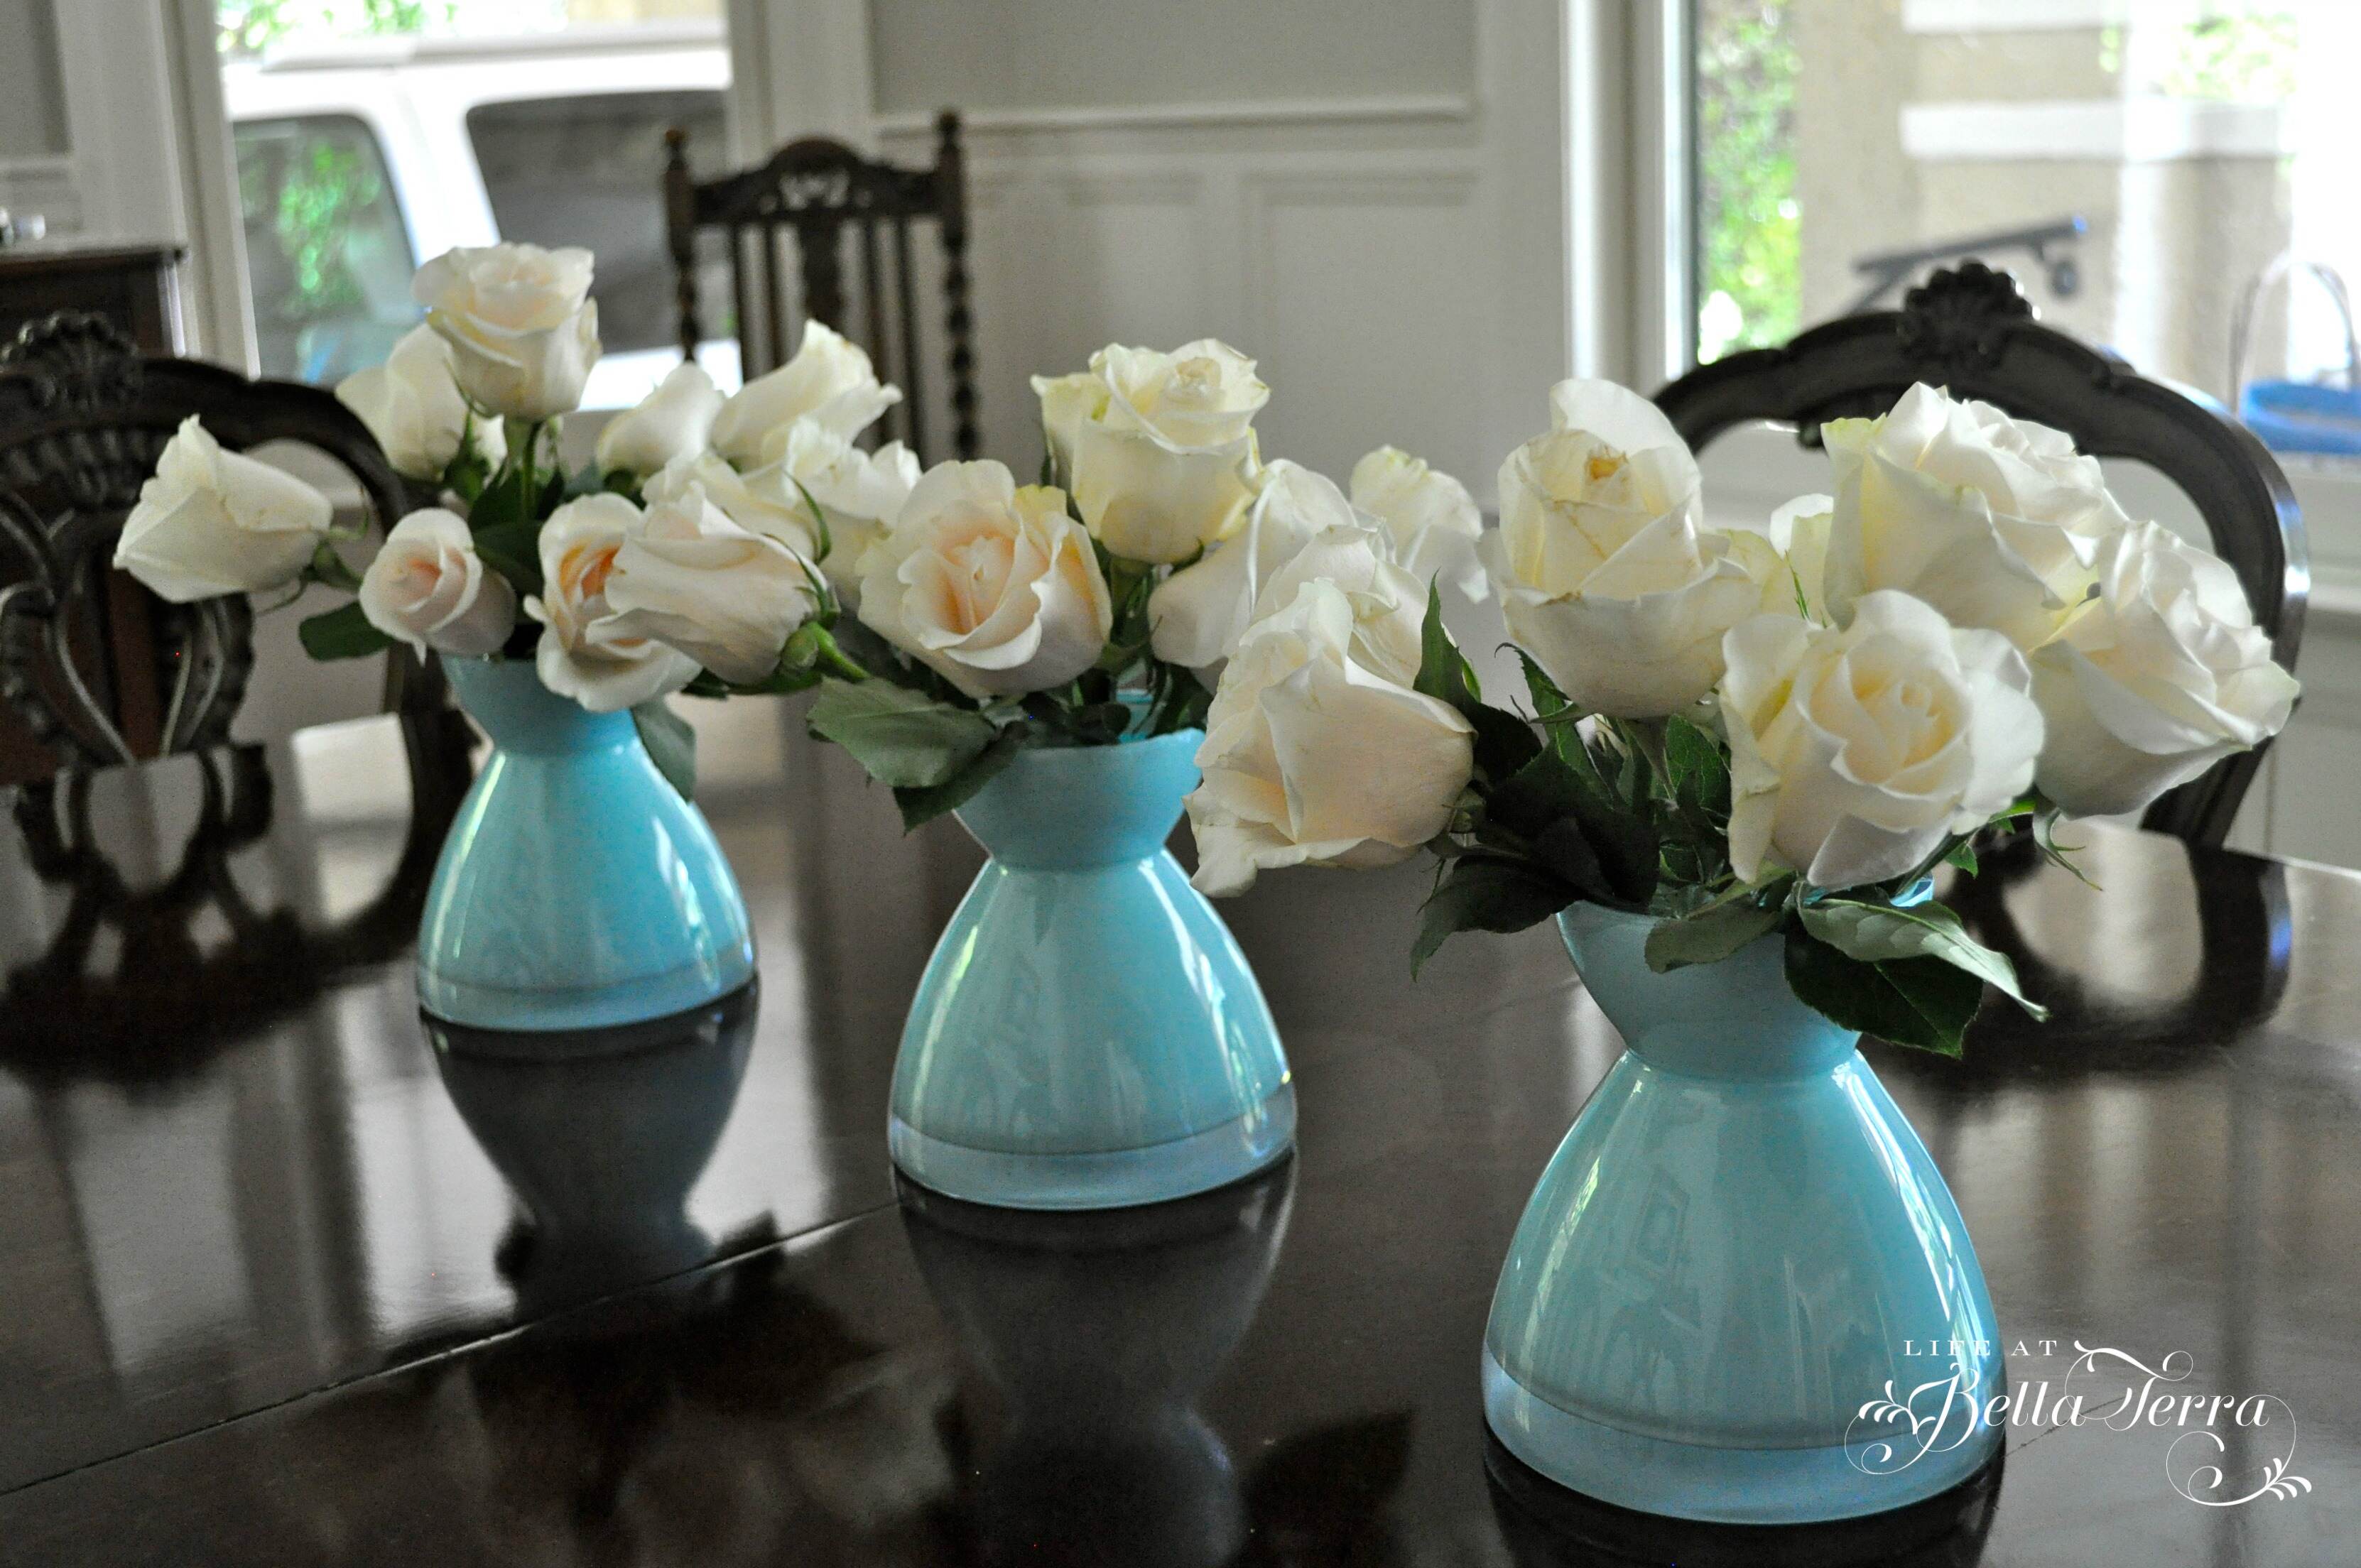
A very long time ago, I worked for a company that had fresh flowers delivered to everyone’s desk each week. Flowers add such an elegant touch to every environment. Wouldn’t this make a great hostess gift or a “just because” gift to a friend or family member?
I get to enjoy 3 arrangements on the living room mantel and 3 on the dining room table! The blue containers are perfect for adding a touch of spring to the house! Love, love, love a bargain!!!!
I hope you have a bargain story of your own. Also, treat yourself to some flowers ~~you deserve it!
Save
Save
It’s All in the Details
|
The Willetta project is moving along and I’ve got my fingers crossed that it will be completed by March 25. Right now, we are putting all the pieces of the puzzle back-the kitchen cabinets, countertops, appliances, tiling, final window and door trim, and final paint.
The last 5% of any renovation/restoration is the most important. Generally that’s when your work crew is looking to their next job and may be losing interest. It’s the last chapter that requires the most attention to detail. Picking the right faucet, cabinet hardware, the door knobs is what I call the house’s jewelry….it’s what people notice. Even though most of the investment is behind the walls in the form of new electricity, plumbing, HVAC, it’s the details that win over a potential new owner.
The Willetta house had many original details that we have chosen to preserve. However, much of it was covered in layers upon layers of paint or deterioration.
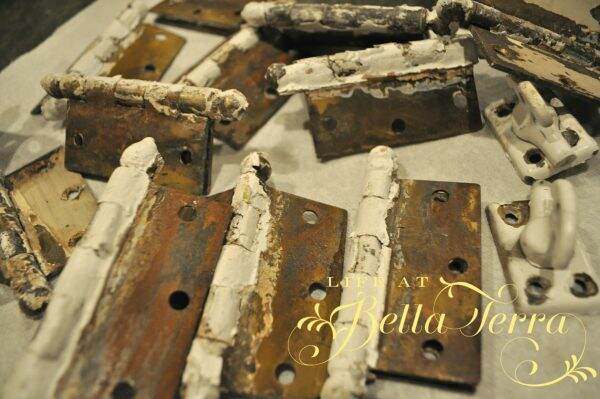
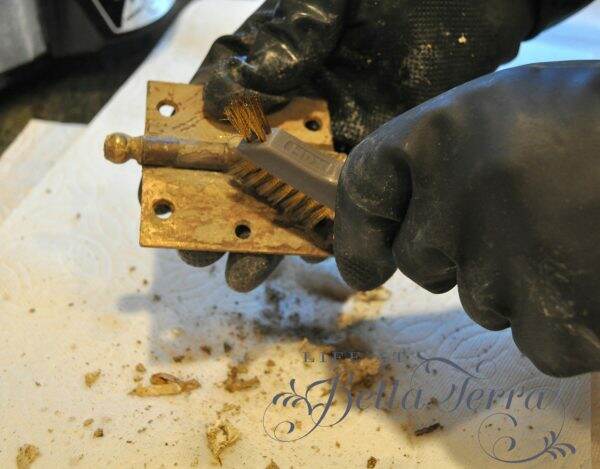
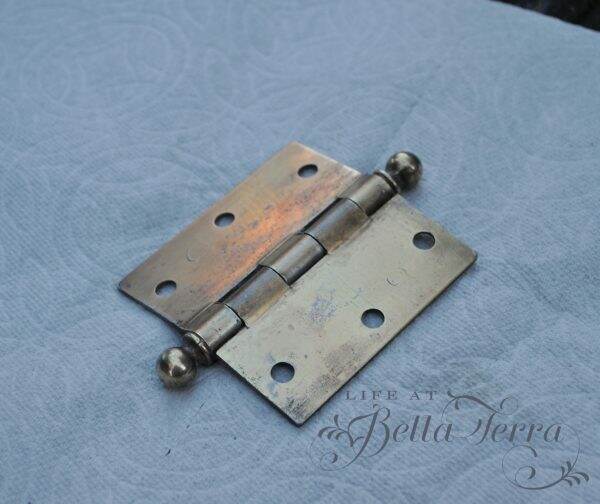
These solid brass door hinges with the ball pin are very expensive to replace, if you can find them at all. My husband accepted the task of cleaning all of the hardware from the house. In our relationship, I’m the more organic one-never wanting to use chemicals and exhausting natural ways to accomplish tasks.
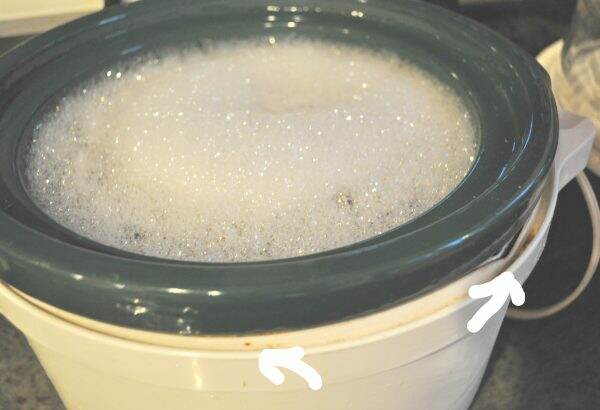
I have an old crock pot I dug out of the basement and read that you can “cook” hardware overnight to loosen the gunked up paint. Note the dents and the rust….after using this for cleaning hardware do not prepare food in it…
I added some dish soap and turned it on high and left it on the counter in the kitchen overnight. Not the best idea because the smell the next morning in the kitchen wasn’t very pleasant-a dusty, stale, old smell. Just what you’d expect from boiling decades of old paint from hardware.
The paint was loosened up quite a bit, however, my husband thinks that soaking the hardware in the chemicals work better. He used Klean Strip Stripper for wood, metal and masonry and Brasso Metal Polish.
At least one has choices!
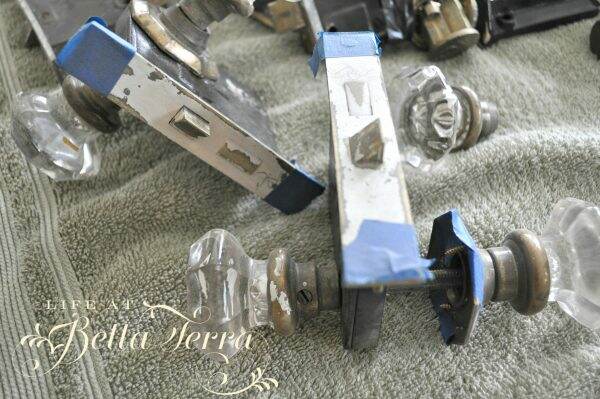
All the interior doors have skeleton keys and mortise locks–of course there are no keys to be found, but the octogonal hardware is so attractive and matches the plate behind the glass door knobs.
I can’t wait to show you the finished house at Willetta~~it is such a gem and worthy of all this tedious work. Big hugs to Scott for cleaning up the “jewelry”!
Painting/Stenciling a Concrete Floor
|
Silver, crystal, linen and china closet
At the Willetta restoration, we created a large closet off of the dining room by enclosing a portion of an old adjacent storage area. The purpose of this room is to become the silver, crystal, linen and china closet. I’ve always wanted a separate space to store my “stuff”- large trays, candlesticks, tablecloths, dishes, silverware and entertaining items. This 6′ x 7′ closet will be PERFECT for the new homeowners to do just that.
Dining Room Before
The challenge is that the floor in the new closet is concrete and is flush with the dining room floor which is hardwood. Adding new flooring on top of the concrete doesn’t make much sense as it would have create an awkward transition.
What could I do to make the floor feel more formal, like the dining room, without adding tile or more wood? After pondering this for a few days, I asked myself, “How hard could it be to stencil/paint the concrete floor?” So I googled “how to paint a concrete floor” and watched the YouTube video by Annie Sloan, entitled How to stencil a concrete floor in 10 easy steps.
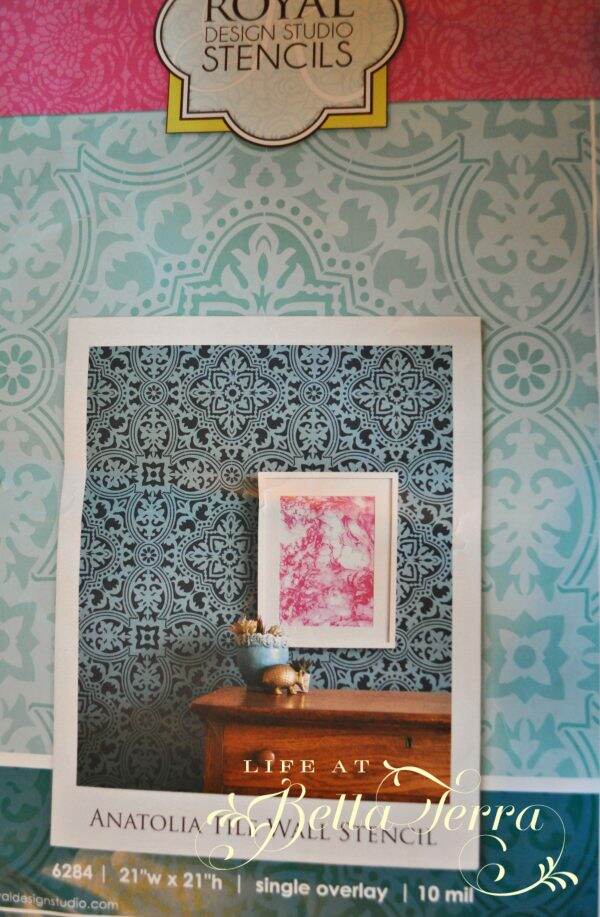
The video is set to catchy music and yes, in 10 easy steps, Annie Sloan creates a beautiful floor. So easy peasy, right? To make it even more convenient, you can buy the entire stenciling kit from Royal Design Studio Stencils.
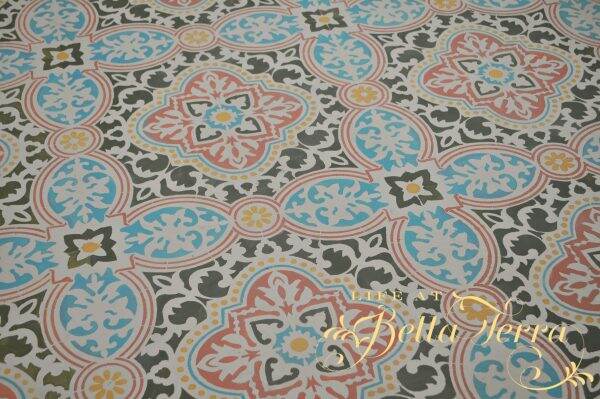
The stencil that is used in the video is the Anatolia Wall Stencil. However, the packaging below shows the stencil using 2 colors only (which in retrospect would have been MUCH easier!). In the video, there are five different colors. The stencil dimensions are rather large at 21″ x 21″.
Within minutes, I purchase the stencil kit online and figured nothing ventured, nothing gained. Right?
The kit is complete with the stencil, the paint, the brushes and the top clear coat.
I’ve never stenciled anything elaborate before so I didn’t realize you needed special brushes, but thank goodness they came in the kit. However, there wasn’t any information on what brush to use with what color. I had 4 colors and 5 brushes. No problem, as I thought I could wing it.
Starting the Stenciling Process
When the kit arrived a few days later, I didn’t see any instructions in the box. So I called Royal Design Studios and asked where I could get a copy of the instructions of the floor that was created in the video. They told me that there weren’t any written instructions. Yikes. So, my smart painter, John, suggested I do screen shots of the video and print them out.
So armed with 20+ pages of instructions and my stencil kit, I began painting the floor over the weekend.
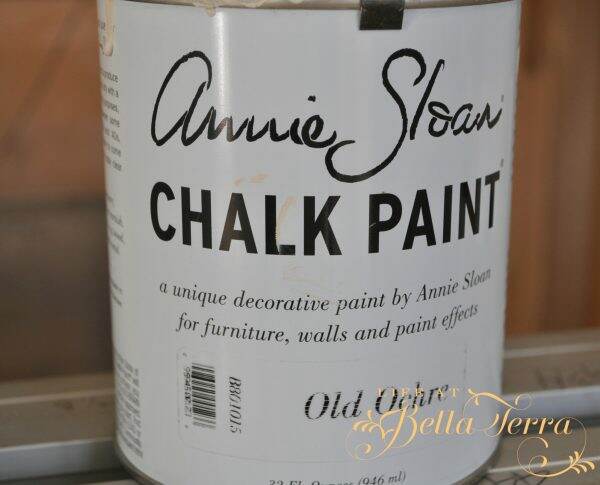
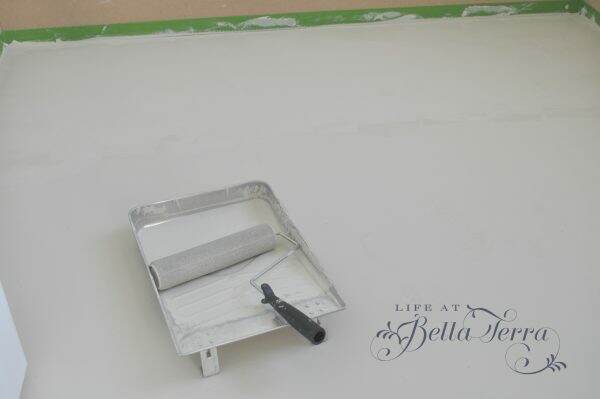
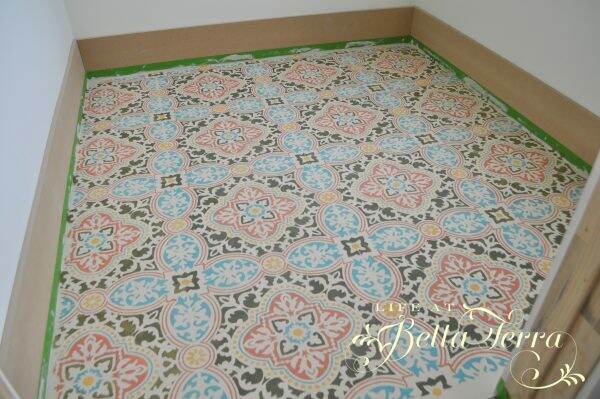
First, I taped off the baseboard (which hasn’t been painted) with painter’s tape and painted the floor Old Ochre Chalk Paint. The paint is a very warm white and rolled on rather well–velvety in a way. I used a foam roller as recommended in the video. The paint dried very quickly, however, I waited until the next morning to do a second coat.
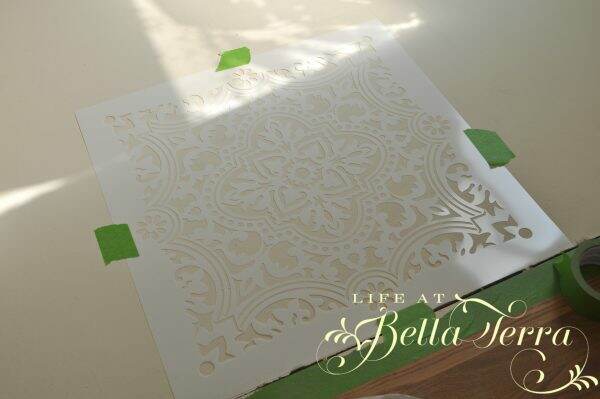
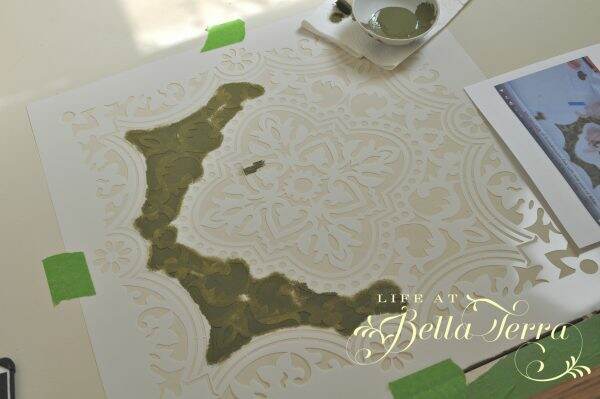
After finding and marking the center line of the room, I placed the first stencil at the doorway and put the right edge of the stencil on the center line. You can see here that the concrete floor is flush with the dining room hardwood floor. I used green Frog painter’s tapeto secure the stencil and protect any paint from spilling onto the hardwood floor.
Since the paint brush sizes weren’t designated to a specific color, I would use the largest brush on the bigger parts of the stencil and then work my way down. The first color was Olive~~I’m so glad I printed out the steps as it’s a bit confusing trying to determine what color goes where on the clean stencil.
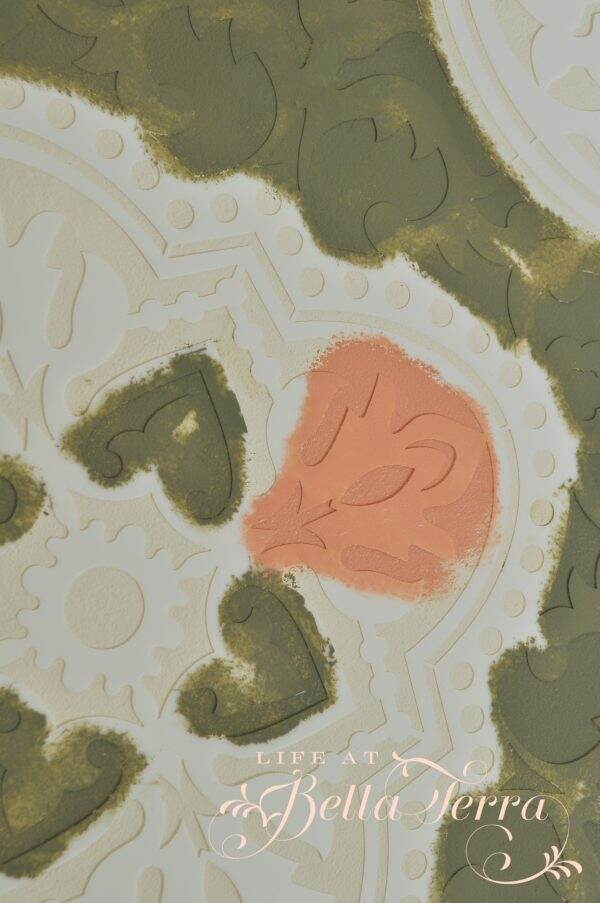
Next came a color that required blending of a pink and yellow paint–I will refer to it as salmon. The stencil brushes have a blunt cut, so I gently dabbed paint onto the stencil.
At this point, I have completed the olive and salmon paint colors. Notice the paint and the paper towel in the photo below. It is important to dab off any excess paint on the paper towel before applying to the stencil.
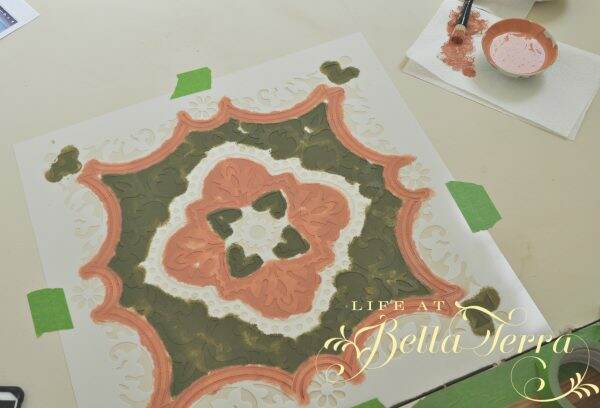
Yellow paint next, then followed by the blue.
The chalk paint dried very quickly so I didn’t need to wait to proceed with the next stencil. It was relatively easy to line up markers on the edge, re-tape the stencil to the floor, and repeat.
The first few stencils seemed to take an eternity, because I was proceeding cautiously. With the colors now on the stencil, I didn’t need to refer to the notes anymore so the process went a bit faster. By the end, I was able to complete a tile in 30 minutes. Mid-way through, I washed the stencil off with soap and water, as the dried paint began accumulating.
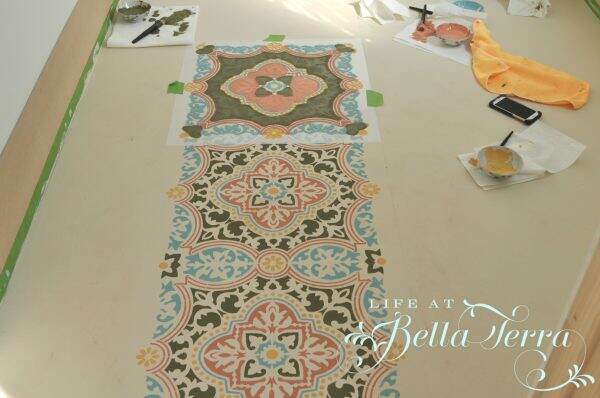
The center portions of the floor could accommodate the entire stencil, however, when I got close to the baseboards, only a partial stencil would fit. It was a little tricky because it was hard to keep the stencil in place, even when secured with the tape. This step requires patience.
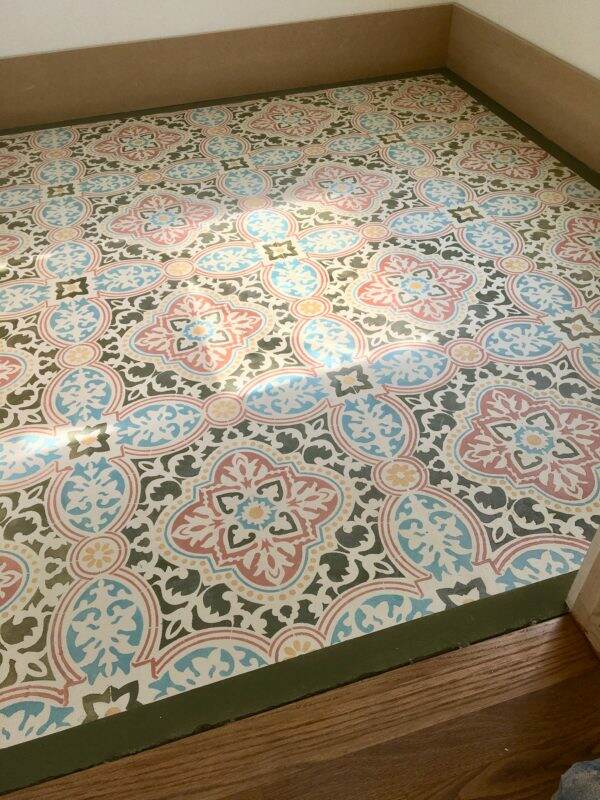
All in all, I painted this stencil 16 times to cover the 6′ x 7′ space.
With the stencils completed and the paint dry, I now paint the edges with a 2″ border of the olive paint to complete the look.
Finishing the Floor
In order to protect the floor I finished it with 2 coats of the clear floor lacquer provided in the kit.
I am so happy with the results! In retrospect, this was labor intensive and I was so sore from sitting or kneeling on the hard concrete floor for hours on end. From start to finish, I would say I invested 10-12 hours of labor, not counting the drying time. However, this project was well worth it.
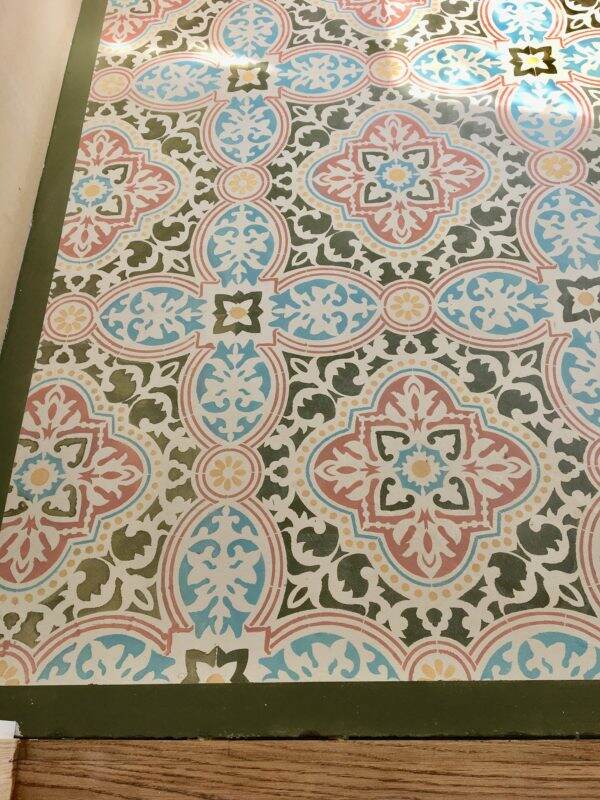
I always love to do something unique and personal to each of the homes I restore/remodel. This historic Willetta home now has an original piece of art by me. To see more about the Willetta restoration, click here.
Here you can see the proximity of this storage area to the formal dining room. The floor is so pretty you can leave the door open!
I hope you have enjoyed watching the transformation of this special room. If you love Before and Afters or restorations of historical homes, I invite you to browse my website. If you like what you see, please sign up to get my weekly blog posts! You can also find me on Instagram @lifeatbellaterra.
DIY Girls’ Night Out
|
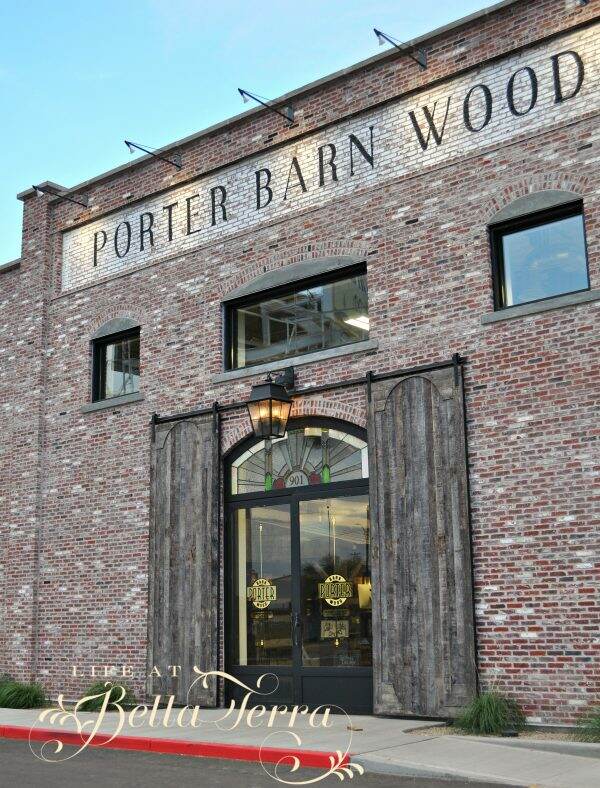
My friend and neighbor, Dawn, invited me to a spontaneous DIY Girls’ Night Out at Porter Barn Wood in Phoenix. I have to chuckle because I don’t believe I’ve ever gone on a Girls’ Night Out. I am so swamped that when I do have a moment, I tend to spend it here at Bella Terra. But, Dawn is such a spectacular person with a large heart and the event, which included making a sign, sounded quite fun.
Here is the adorable young family behind Porter Barn Wood. Thomas is a woodworker, metalworker, and plays in a Bluegrass band. They provide reclaimed wood, slab lumber, antiques, and many other things as well as provide woodworking, milling, blacksmithing and just about anything you need. Plus they have classes that include creating a barn wood wall to dinner and bluegrass concerts ( events calendar).
With the popularity of barn wood doors and the farm house style, this is the place to go. They own this facility in downtown Phoenix and the event was held here last Friday night.
When we arrive,The Coronado, a restaurant located on N. 7th Street, was serving wine and appetizers while we made our signs. This restaurant specializes in vegetarian and vegan dishes but with a Cordon Bleu spin.
In typical “barn” like fashion, the wine was served in mason jars….love that! The roasted veggies, hummus and homemade tortilla chips were delicious (and healthy)!
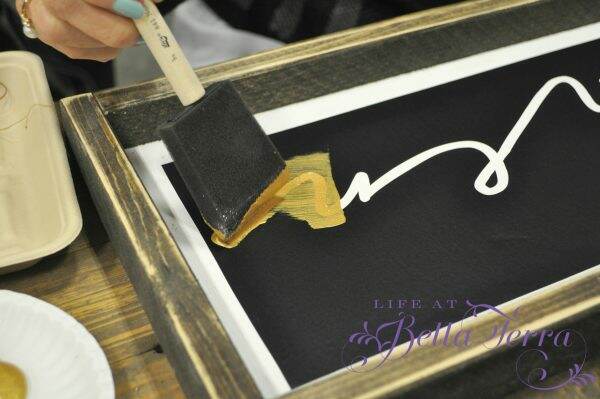
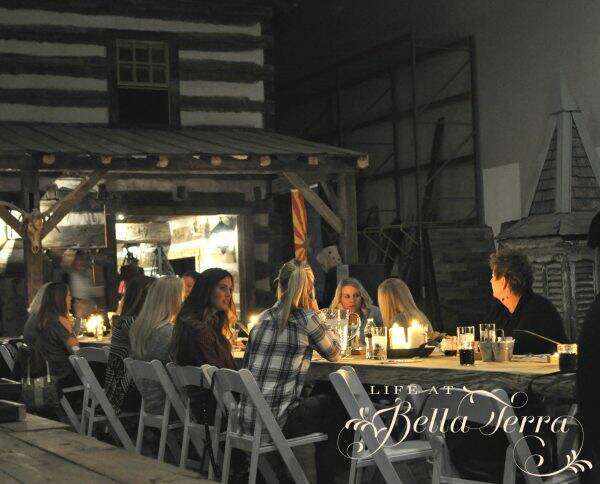
Porter Barn Wood made the frames and the background wood was painted white. We sat at picnic tables awaiting instruction.
After peeling off the back side of the stencil, we carefully centered it on our frames.
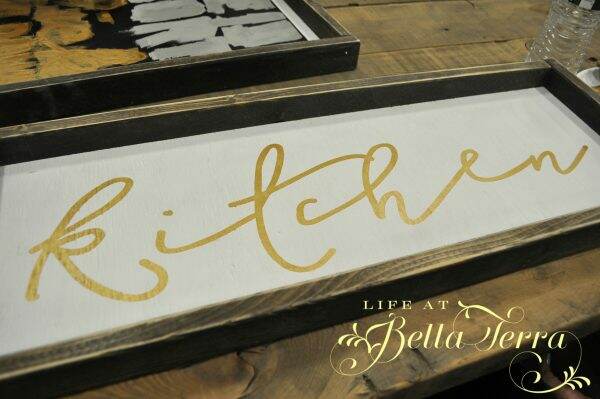
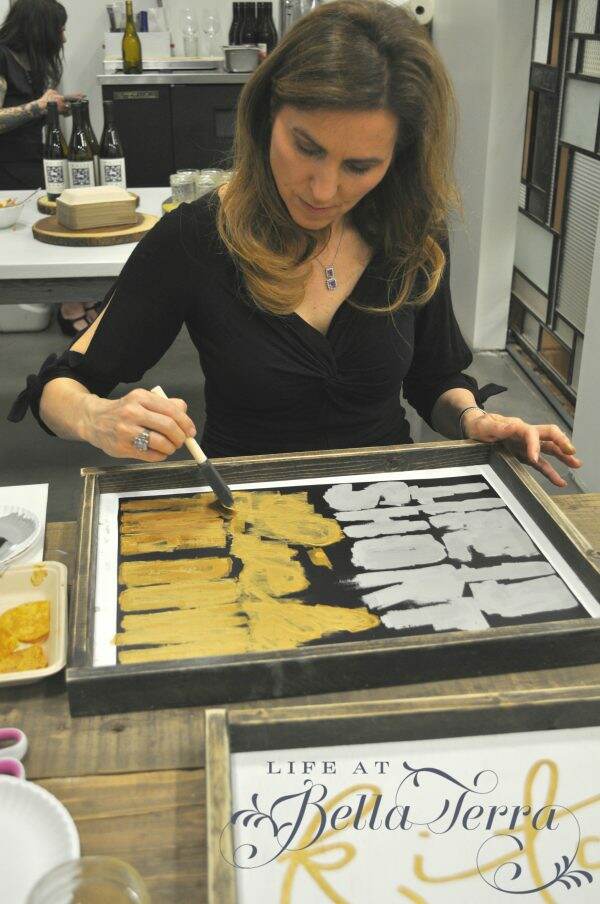
We then peeled off the front clear material, exposing the stencil to be painted. We were able to choose the colors we wanted and applied the acrylic paint with foam brushes.
Dawn chose a gray paint for part of her stencil and then gold for the rest.
While our signs dried, dinner was served. Instead of renting long tables with white table cloths, Thomas decided that morning (!) to plane down large reclaimed trees and created 3 16 foot lengths of wood to make the tables. The smell of fresh cut wood and the beauty of the tree-tables made dinner extra special (and I believe these tables are for sale!).
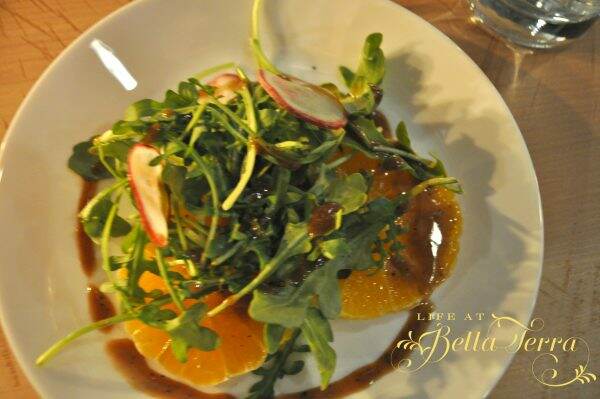
Dinner was amazing. Liam Murtagh, one of the owners of The Coronado, introduced each course and gave the history behind all the ingredients. The first course was a beautifully presented Farm Salad utilizing ingredients from local farms (arugula from Blue Sky Organic Farms; radishes from Agave Farms, tangelos from FarmYard) with a black pepper agave vinaigrette.
The main course was Mashed Garlic Potatoes under a Tepary (heirloom) Bean Croquette with Rosemary Roasted Tomatoes and a Vegan Demi Glas.
Of course we had a different wine with each course while listening to a fabulous solo artist Hannah Risley, a talented 18-year old singer and guitarist.
I am still dreaming about dessert. Who knew that vegan/vegetarian food could be so delicious? We had a Mesquite Flour Snickerdoodle with dark chocolate with Aqua Faba meringue (this was so delicious I wanted to lick my plate) with Candied Hibiscus.
During dinner we had the chance to sit near and chat with two wonderful young women~~~all in all, it was a spectacular way to spend a Friday night with a sweet friend. Also, I was so impressed with Thomas and Liam, as young business owners who are so passionate about what they are doing. They are such a great addition to our growing downtown area.
Plus I got to take home my very own sign! Maybe this Girls’ Night Out thing is worth pursuing!!!!
Thank you, Dawn, for inviting me!
Save
Save
Save
Save
Save
Save
Save
Save
Save
Hosting an English Tea Party at Our Historic Home
|
What an honor to host a charitable English tea party event at Bella Terra, our historic home in Phoenix, Arizona. Speaking at this tea is New York Times best selling author, Rhys Bowen. Since Rhys Bowen is British, our fundraiser’s theme is a proper English tea party. And if you aren’t familiar with her books, you must add them to your reading list! Many are on the New York Times Bestseller’s list.
The Entrance
This afternoon event is set outside. As guests arrive, they travel through the gated entrance with a tea cup wreath to the side garden.
The Attire
And what is a tea party without a fabulous hat! Nearly all participants arrive wearing such lovely head attire. Fortunately for me, Dillards has such a great selection of springtime head wear. And the tea length Ralph Lauren dress is a comfortable choice for this event.
Me sporting my new hat from Dillards
With anys fundraiser, one needs to minimize expenses. My dear friend, Linda, let me to borrow her extensive collection of old English china.
The Table Setting
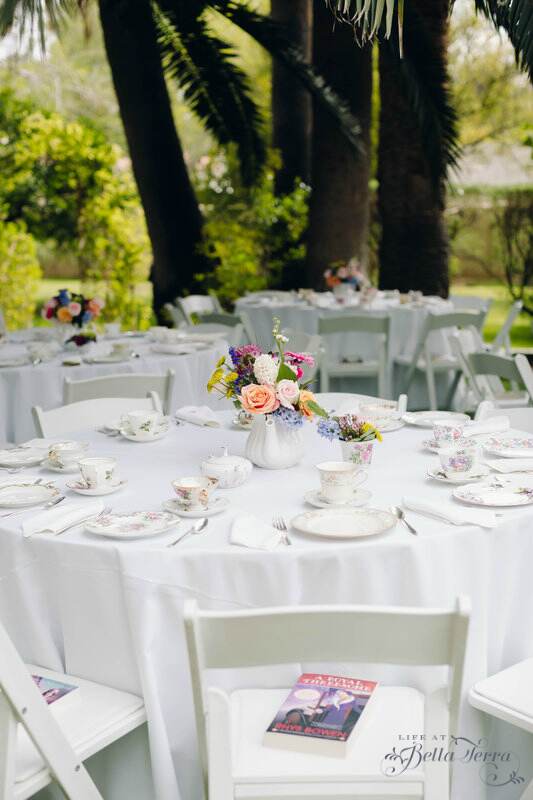
Susan, my lifelong friend and co-sponsor is the best person to help organize the event. Using Party People, we easily rent the tables, chairs and linens. Julie Greder is a very creative local caterer. She creates a fabulous menu centered around the English tea theme.
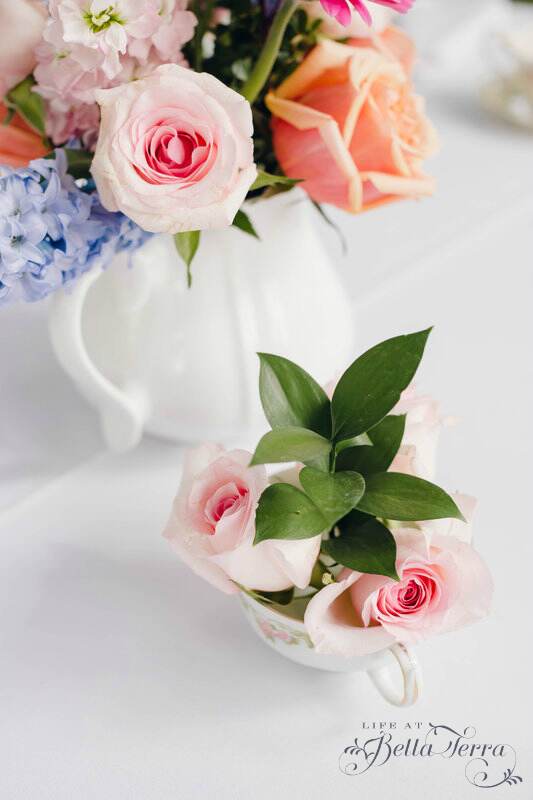
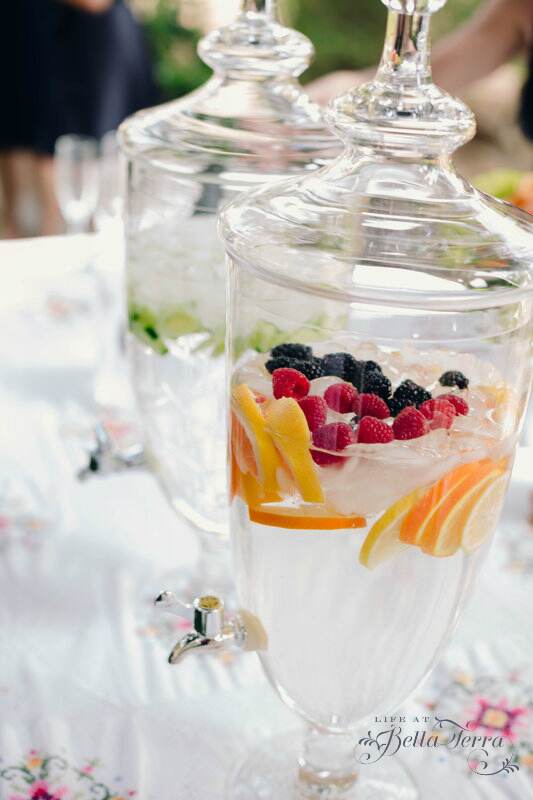
The tables, set in the side garden, remain cool under the shade of the immense date palms. As our guests gather and mingle, we serve chilled champagne. It is such a civilized time to make new friends and participate in interesting conversation.
The Menu
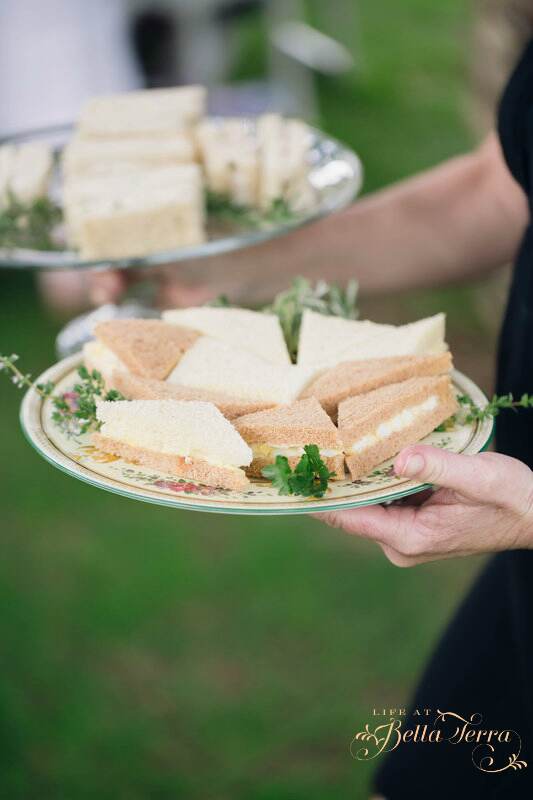
Everyone claims their seats at the tables, and we begin to enjoy the delicious menu. Teacups are filled English tea. The menu includes: Currant scones with fresh Devonshire cream and lemon curd; cucumber dill, champagne egg salad and tarragon chicken salad sandwiches (no crusts).
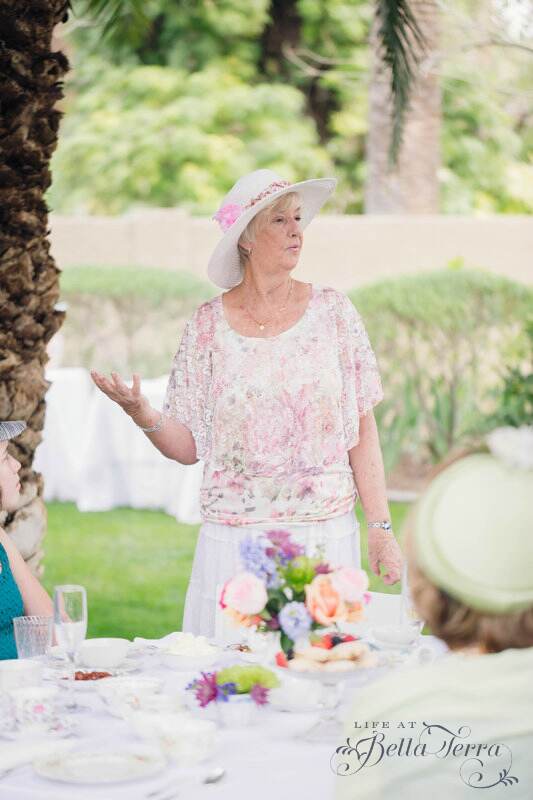
Next, for dessert, come lavender shortbread cookies and chocolate praline tarts. Rhys regals us with her stories of being an author. With a longstanding career as a an author, we learn about her inspiration for her settings and character development.
The Presentation
As a parting gift, our guests receive a package of French macarons fromBonbon Macarons. These macarons rival anything I’ve tasted in Paris.
The Charity
With nearly 40 people in attendance, we raise significant contributions for a non-profit organization that works through one of our local high schools. Family to Family Foundation provides scholarships to students in rural El Salvador.
Living in a low socio-economic area with no funds for schooling, these children are unable to receive an education. Each year the students from Brophy College Prep travel to this village in El Salvador to meet these scholarship students.
What an enjoyable and very informative day! Between the delicious food, stylish hats and outfits and Rhys’s delightful personality, it is the perfect afternoon. We hope this will become an annual fundraising affair.
Thank you for joining me on my very first blog post! I hope this inspires you to subscribe and follow more adventures from Life at Bella Terra. To see the second fundraising English tea event with Rhys Bowen, please click here.
If you enjoyed this post, please feel free to share with others on Pinterest
For more information about Rhys Bowen and her books (I just completed the Royal Spyness series), check it out here: http://rhysbowen.com/
Photos were done by Unfading Beauty Photography http://unfadingbeautyphotography.com/SaveSaveSaveSaveSaveSaveSaveSaveSaveSaveSaveSaveSaveSaveSaveSaveSaveSaveSaveSaveSaveSaveSaveSaveSaveSaveSaveSaveSaveSaveSaveSaveSaveSaveSaveSaveSave
 Don’t they just make you happy? I also bought the most beautiful white roses with a pale pink blush to the petals. Hard to believe the flowers cost more than the container but I’m thrilled with my discovery! It’s nice to find unique items in ordinary places and at such a great price.