1

The Well Tower and Fall planting

The well tower is a unique fixture on our property. Originally designed to pump and house the equipment for the well, it was in a deteriorated state when we purchased our property back in 1999. But over time we did restore it and it serves multiple purposes now in 2021. It becomes a topic of conversation because the first floor is the potting shed, which is pertinent to my fall gardening.

I found some original pictures of our well tower during a recent cleaning and organizing spree.  The well tower was built to do just that~~using a pulley system to draw water up from the well back in 1912, long before there was city-wide water availability.

When we bought our home in 1999, the well tower was dilapidated and quite the eyesore. When I look back on these early photos, I am always astounded about its poor and decayed condition.

The building has been restored and with the permission of the City of Phoenix’s Historical department, we were able to put in 2 additional floors and adjust the architecture to allow for a viewing area at the top. These are connected by way of two circular staircases. I added the fireman pole at the back of the 2nd floor as an alternative escape method.  A new well was added and provides all the water for our 2+acres.

The first floor functions as my potting shed, where I store my garden tools, seeds, soil, and pots. 

This great old double porcelain sink is actually from the original house kitchen and is being repurposed in the well tower.

A large tub is installed at counter height as a convenient way to wash the dogs.  We used leftover Waterworks tile for the countertop.

My favorite go-to place is Whitfill Nursery for my flowers, vegetables and herbs.  I plan to return for more flowers as they were getting a larger selection in a week. 

But I have good start on kale, lettuces, broccoli, cauliflower, a variety of tomatoes, and many herbs. Happily, these new plants are sitting in our own homemade composted soil. For more information on Whitfill Nursery, click here.

I’ve neglected my flower garden last year, but am hoping to abundantly plant so I have cutting flowers available. The flower garden is located next to the vegetable garden.  Here’s a picture of it 2 years ago when it was full of flowers and colors.  I’m hoping to achieve that again.

Here’s a glimpse of my first group of flowers purchased from my favorite nursery!

As soon as the flower garden is fully planted, I will snap some photos for you.

Happy Fall and happy planting!


It’s Been A Year!

A year ago today, I sent my first blog post of Life at Bella Terra.  It was an intimidating moment, because I thought “who would ever want to read this?”  I don’t consider myself a very good writer and I’m really trying to improve upon that.  But your words of encouragement have brought me back to the computer to post again and again.  If it wasn’t for your kindness and support, it would have been easy to just quit.  Thank you for your loyalty and feedback and comments. Truly. From the bottom of my heart.

Each time I send out an email letting you know I’ve created a new post, I am praying you find it interesting, enlightening or even motivating.  I try to share a small piece of loveliness in hopes that I can brighten your day. As I look out into the world, I believe we each need to find sources of joy and create our own beauty.  Whether it be feeling the warmth from a freshly picked tomato, or the scent of a homegrown flower, these moments of perfection can only help feed the soul.

Blogging for me, is a chance to stop and capture a sliver of time, an exquisite photo or a recipe that bursts with flavor. Plus it is forcing me to attack those cluttered corners of the house or undone projects while showing you my progress. But I can honestly say, I am still a long way from feeling confident about creatively illustrating that to you. But I will keep trying.

So here is a look back at the year and some of my favorite photos and posts.

My very first blog post was about the New York Times Bestselling author, Rhys Bowen and the fundraising English tea we had here at Bella Terra.

And other events we happily hosted here…..

Recipes shared…..

My Renovations and Restorations….

Travel and leisure…..

Decorating and Design…

The holidays….

Cleaning, Organizing, and Updating…

Sharing our home and yard….

My attempt at art….

Flower arranging..

Our pets…

And a few DIYs….

My online store….

There is still so much to learn, especially better photography, writing and getting my watermarks the same size on every photo.  So thank you again for following me and sharing my blog with others.

PLEASE send in your comments~~What area of interest would you like for me to expand? What are your favorite topics? How often should I post (trying to do a maximum of twice per week)? What can I do to be better for you?  My goals for the next year are to do a contest or giveaway and conduct a real survey into your likes and interests.

Here’s to one year and onto the next!! I couldn’t have done it without you.


Save

Save

Save

Save

Save

Save

Save

Save

Save

Save

Save


Cold Brew Coffee

Is cold brew coffee all the rage in your area?  Two years ago, I never even heard of cold brew….naturally thinking it was maybe some new kind of beer.  I began noticing it at the Farmers Market and occasionally on the shelves at the grocery store, but until recently, I never tried it.  I’ve always been a “brew your own/hot cup of coffee in the morning” gal.

Since then, I now notice it EVERYWHERE and it appears to be a marketing phenomenon. So what’s the big attraction?  I finally did some research and if you are as unfamiliar with cold brew as I am, then hopefully this will be the Cliff notes on cold brew.

Why is cold brew coffee different from hot brewed coffee?  According to ToddyCafe, a roasted coffee bean contains many compounds that are extracted during the brewing process. Some of those compounds, including certain oils and fatty acids, are soluble only at a high temperature. During the cold brew process, coffee beans are never exposed to high temperature. Deceptively simple, cold water brewing extracts the delicious flavor compounds (and some of the caffeine) from coffee beans, but leaves behind myriad bitter oils and biting fatty acids, including undesirable elements such as ketones, esters and amides.  You can serve cold brew coffee concentrate either hot or cold.

Cold brew coffee is not iced coffee, either. Iced coffee is pouring hot brewed coffee over ice.  Cold brew coffee is like sun tea~~naturally extracting the flavor with water and time.

You can certainly buy cold brew coffee but it’s very simple to make yourself at home.

I am experimenting with 3 different brewing techniques using a French press, a Ball mason jar, and a Teavana strainer. Plus I am using 3 different types of coffee: 1) old (really old) Mexican coffee beans from my freezer; 2) French Roast beans from Peet’s coffee; 3) already ground coffee from World Market.

There are many theories as to the perfect ratio of bean to water, however, it appears that the ratio is from 1/4 lb. of coffee beans to 4 cups of water. I used this ratio~~ 1/4 cup of coffee grounds to 1 cup of water.  You can adjust the strength based on your personal preference.

In the Ball mason jar, I added 1/4 cup of medium coarse grounds  from the freezer beans.

Then I add 1 cup of filtered water from our reverse osmosis system. Stir well and cover with cheesecloth.

Next, I added medium coarse Pete’s coffee grounds to the French Press and filled with water.

And lastly, I added regular Italian Roast ground coffee from World Market to a Teavana tea strainer with the appropriate amount of water.

 h

Now all three were ready to sit and wait 12- 24 hours.  I couldn’t fit the French Press into the refrigerator so it sat out on the counter for 24 hours.

The next day, I strained the coffee grounds out of all three. The jar with the cheesecloth was the most difficult.

Both the French press and Teavana strainer were extremely easy due to the built-in straining system.

Here’s the VERDICT!!! The old coffee beans brewed in the Ball mason jar produced the weakest brew and was a bit lifeless.  No surprise there and just confirms that you should discard any coffee beans that have been sitting in your freezer for years (embarrassing…).  Not the fault of the coffee bean.

The winner:  The strongest and most flavorful coffee was the Peet’s French Roast coffee in the French press.  The pre-ground coffee from World Market (done in the Teavana tea strainer) was also very good.  I’ve come to the conclusion that it may not be critical to grind your own beans, but to use a fresh coffee roast that you like.

Some stronger brews can be diluted with water or milk~~and of course it is fun to experiment with flavorings.

We use our cold brew concentrate for iced coffee, however, it can be heated also.  Below I’ve added my homemade almond milk.  For the blog post on making nut milks, click here.

From what I have read, cold brew coffee concentrate will last up to 2 weeks in your refrigerator. It does have a smoother taste, yet all the flavor of coffee…and very handy to use.


All About Lavender

I just returned from 6 days in Virginia and Washington, D.C.  I had hydrangea and peony envy….the entire time I was there.  So today, I decided to stop pouting and start appreciating the plants that grow here in Phoenix. Lavender is one of those plants that conjures up romance, serenity and bliss.

Climate

The climate in Phoenix is PERFECT for growing lavender~~these beautiful plants thrive in full sun, heat and fast draining, low fertility soils. They are at their very best in the more arid climates found west of the Mississippi where heat, sun, dry growing conditions and poor soils predominate. Humid heat and compost-enriched, water retentive soils are the enemy of lavender.

We have lavender growing in several beds around the yard and most of it is English lavender, but I still haven’t figured out the variety~~is it Provence, Hidcote or Arbrialii?

What is it?

What is lavender? It’s a perennial herb that’s native to the Western Mediterranean region. Different types of lavender plants are hardy in different zones, but most is hardy in Zones 5 to 11.  Who knew (not me!) that lavender is in the mint family (which also includes basil, thyme, lemon balm, oregano, sweet marjoram, rosemary, sage, savory, and summer savory).

Lavender love heat! These plants need good air circulation to maintain healthy leaves. A good rule of thumb is to space the plants as far apart as they’ll grow tall. This ensures ample air circulation between plants.

Cutting

I try my hand at cutting lavender.  It is recommended that you do so early in the morning to preserve the oils in the flowers.  The snipping is near the base of the stems when the purple flowers are abundant.

Drying

Drying lavender is one of the easiest floral projects you’ll undertake. You can dry the flower heads by standing them upright in a vase without water.

I choose to bundle the flower stems together using ribbon, and will hang them upside down in a dry, dark, warm spot to dry. With either method, you will have dried lavender in about two weeks.

Uses

Dried lavender has many uses.  The fragrant, pale purple flowers and flower buds are used in potpourris.  Lavender is also used extensively as herbal filler inside sachets used to freshen linens. Dried and sealed in pouches, place lavender flowers among stored items of clothing to give a fresh fragrance and to deter moths.

I don’t know much about using lavender in a recipe (do you need a food grade lavender or can any lavender work?) but that might be something I will try next.

If you would like to see a post on making lavender pillows, click here.

Have a wonderful Wednesday!


A 1922 Historic Home Restoration is Finished!

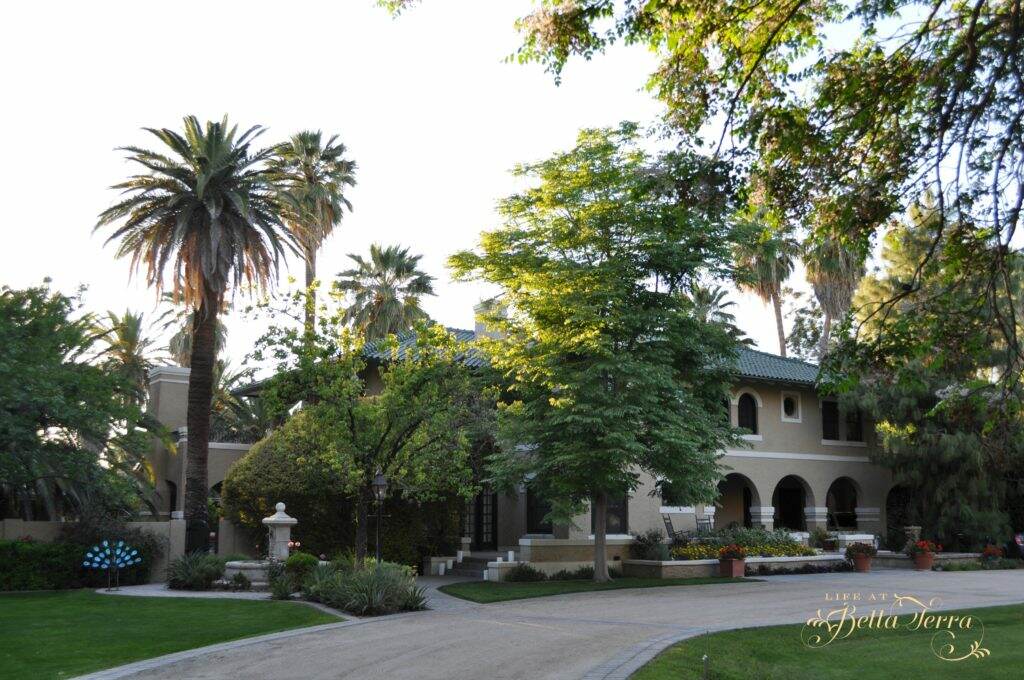
After 8 months of extensive renovation, we are proud to show you the results of the 1922 restoration in one of Phoenix’s most lovely neighborhoods.  This Jeffersonian grand dame is worthy of all the time, money and energy it took to make this restoration a reality.

If you would like to see previous posts on this, please click here and here.  For some reason, this renovation consumed more energy than I imagined.  I’ve been contemplating as to why that is so and I’ve come to the conclusion that this house elicited many emotions for me.

First of all, I find it troubling that someone could let this architectural gem deteriorate so greatly.  When it was being built in the early 1920s, it is evident that great care and pride went into every detail.  It is obvious that many people have loved this house over the decades. Yet the last 20 years it sat empty and neglected, sad and lonely.

When you let something like this go, the steep slope of decline happens rather quickly.  My heart actually hurt when I first walked into the house.  I could envision what it was like in its prime~~a home filled with laughter, activity, parties, and celebrations.  But when I purchased it in August 2016, it was filled with debris~~depressed and abandoned.

The Exterior

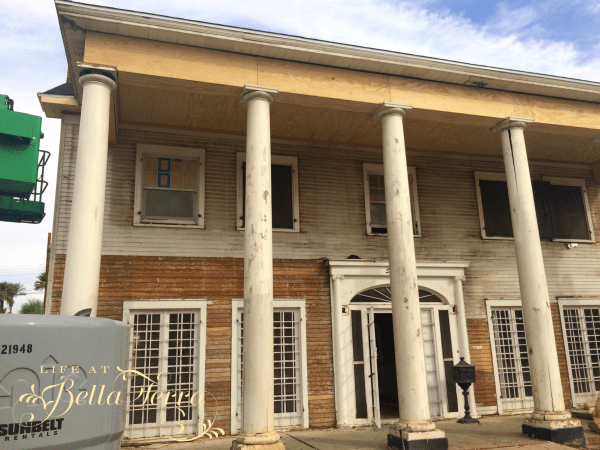
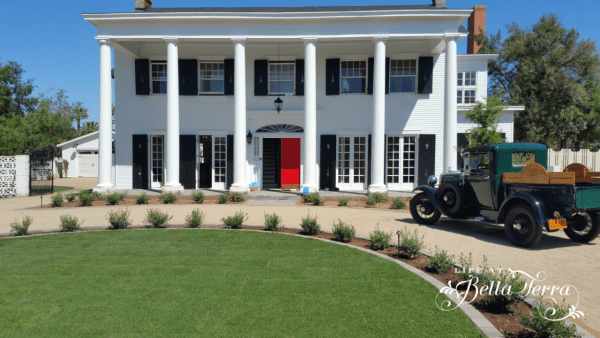
The home was covered in aluminum siding and the only activity involved pigeons who had taken it over as their residence.  If you look closely, the aluminum siding is falling off and I held my breath hoping the original clapboard siding is underneath.  We stripped all the aluminum siding off (and recycled it). A local company was able to replicate any missing or damaged clapboard.

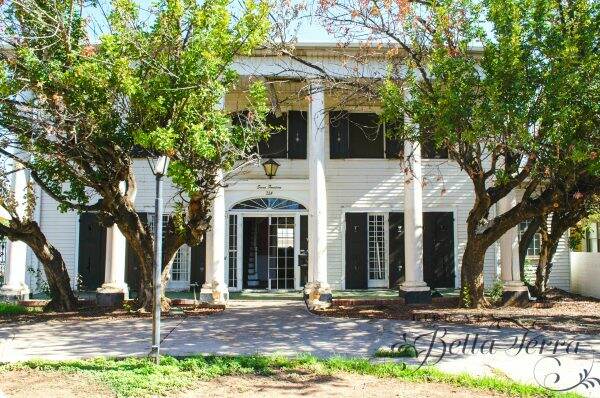
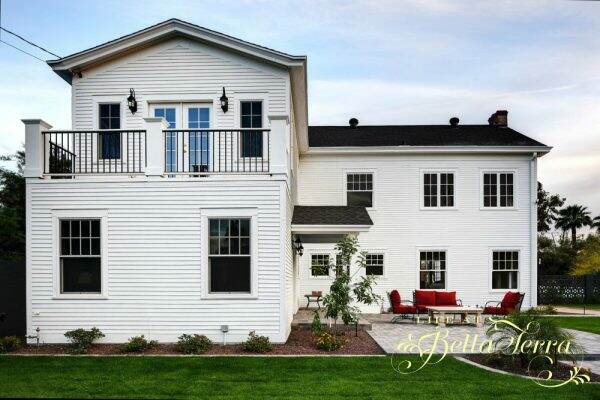
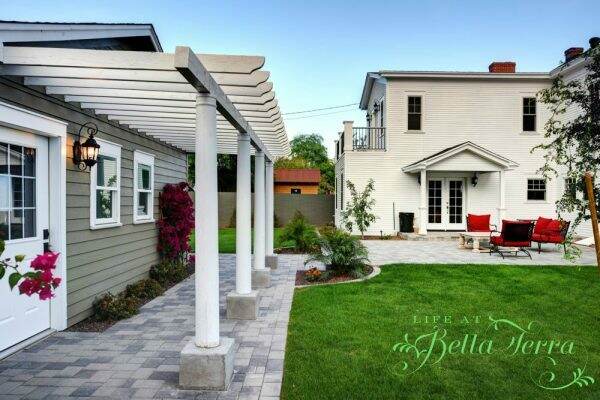
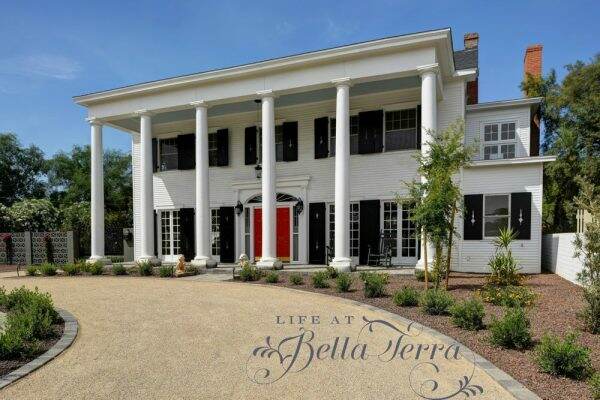
With a fresh coat of paint, a newly rebuilt front terrace and overhang, new roof, light fixtures and all new landscaping, the house is now back to its former glory.  How fun that my neighbor, David Stanton, is kind parked his antique car in front for these photos.
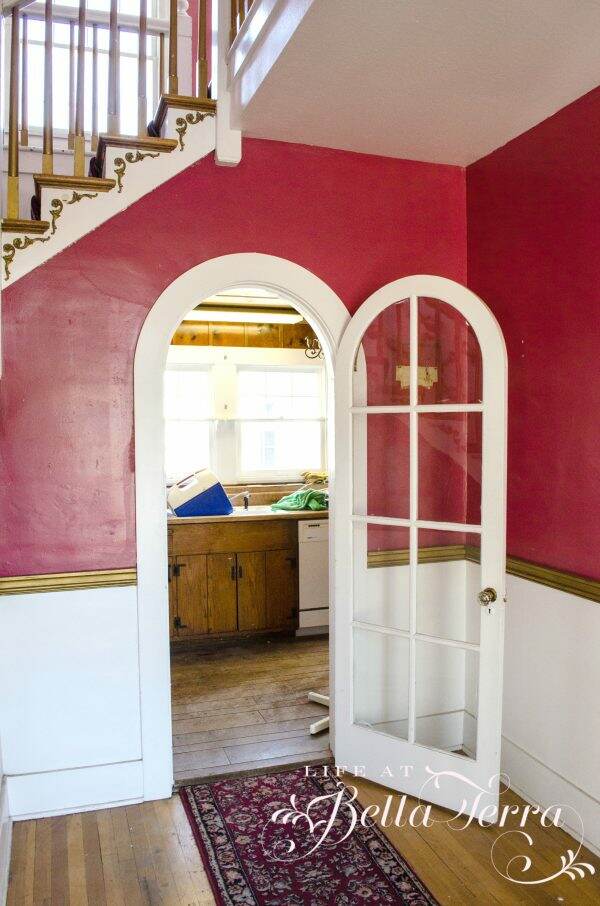
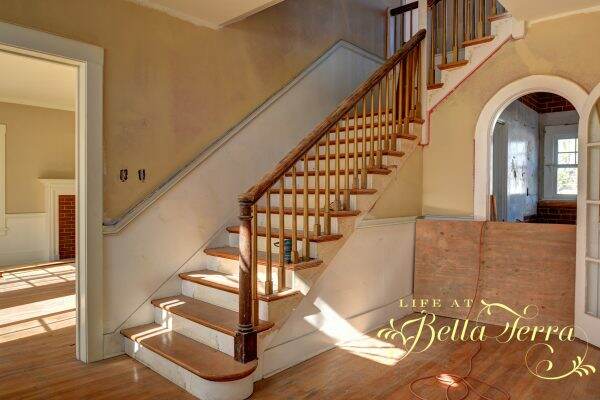
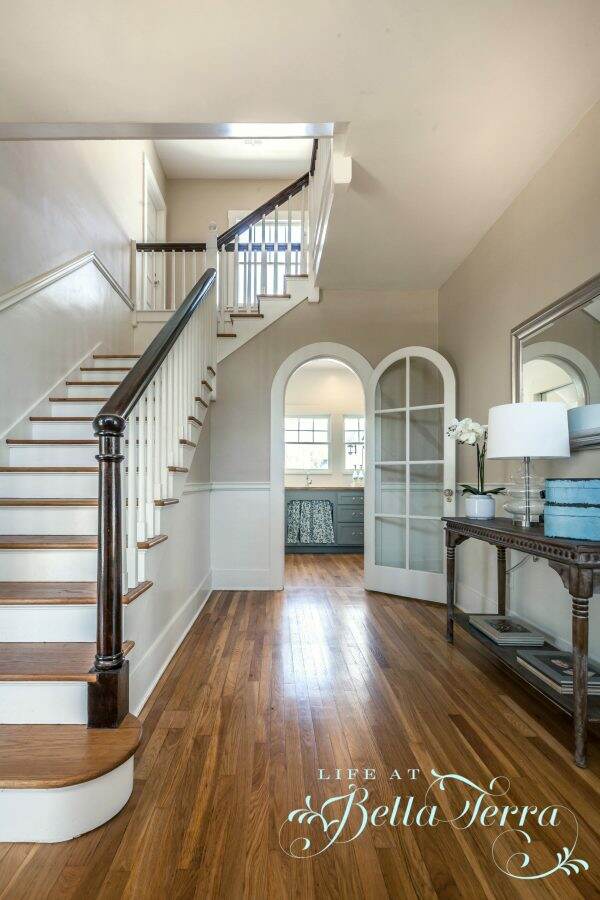
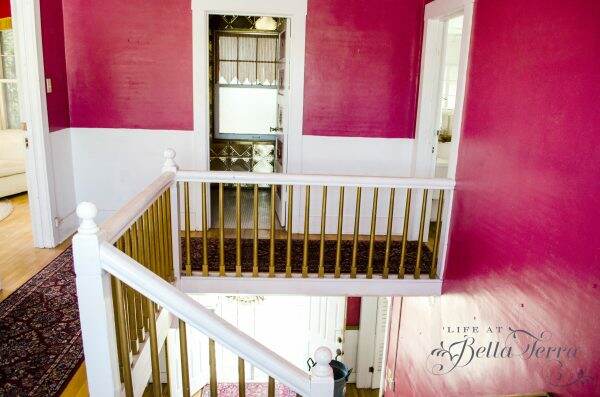
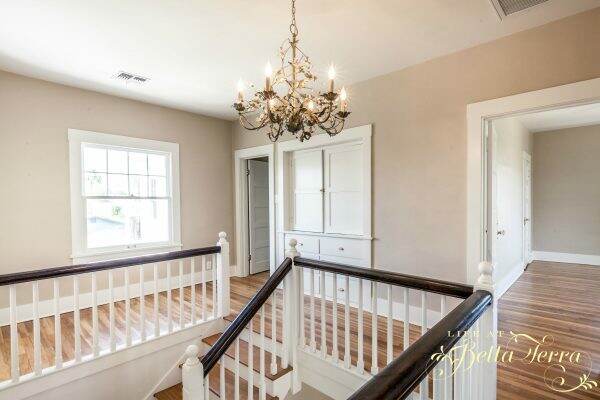
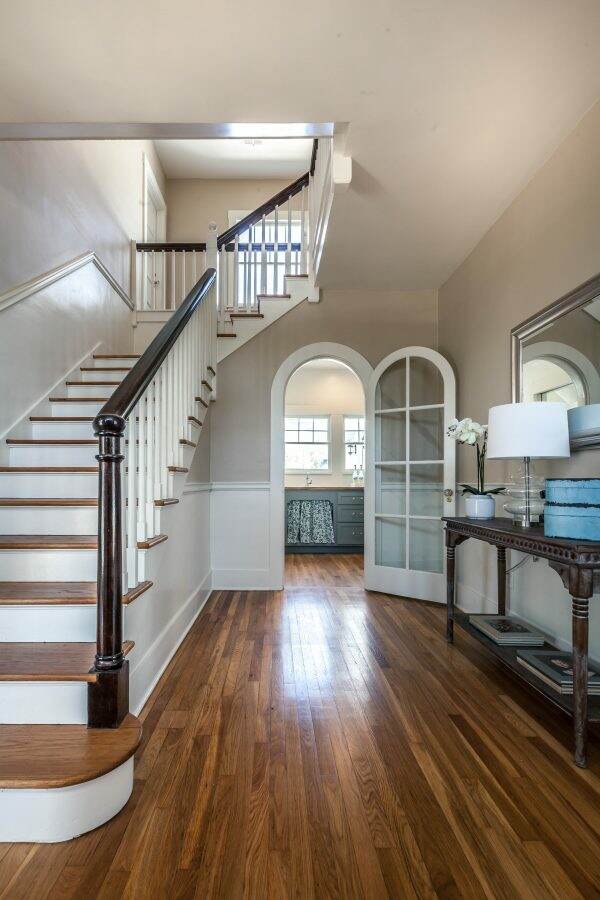
The Entry

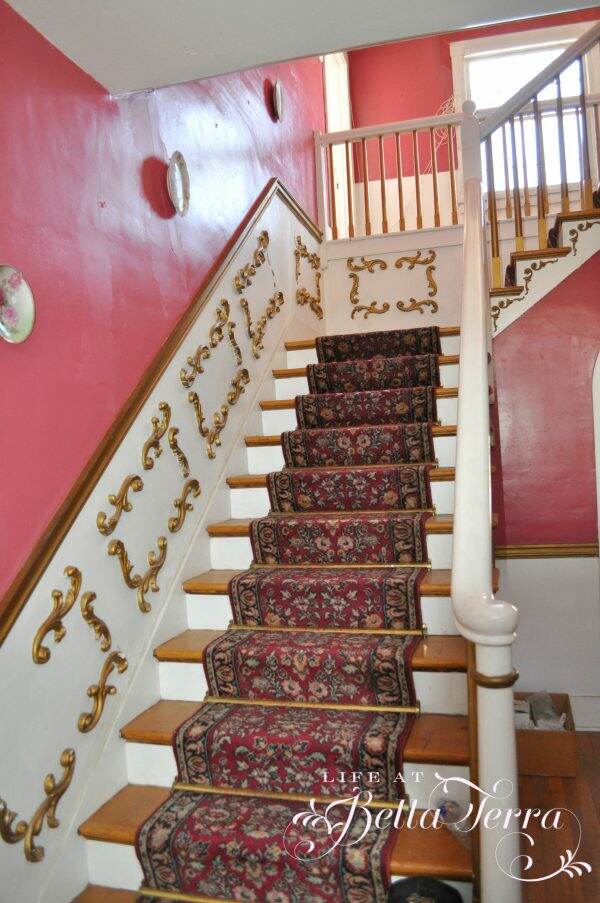
The entry was painted a hideous pink and the gold plaster curlicues were glued to EVERYTHING.  The entry light had plastic, fake crystals, the balustrades were painted gold (more gold!)  and the hardwood railing was painted white.

All the original floors are preserved and refinished~~they are gorgeous!
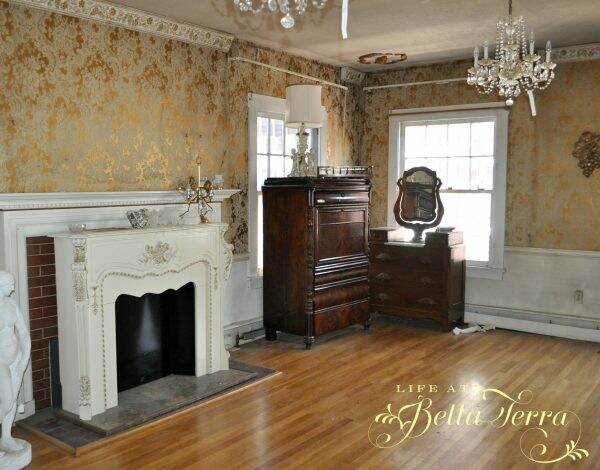
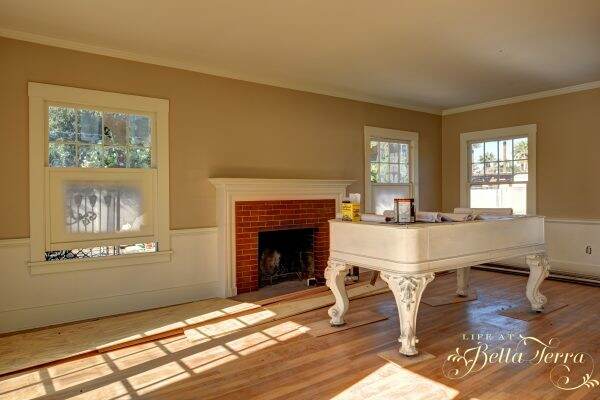
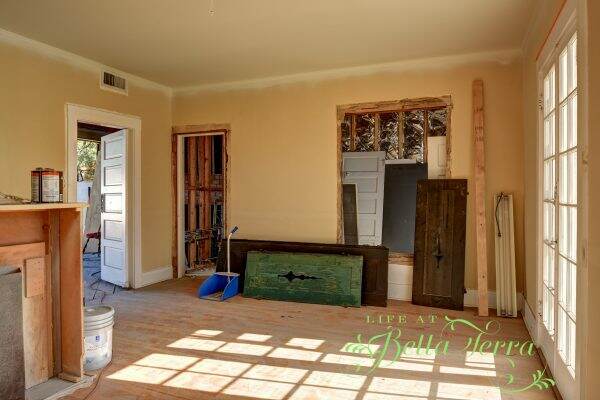
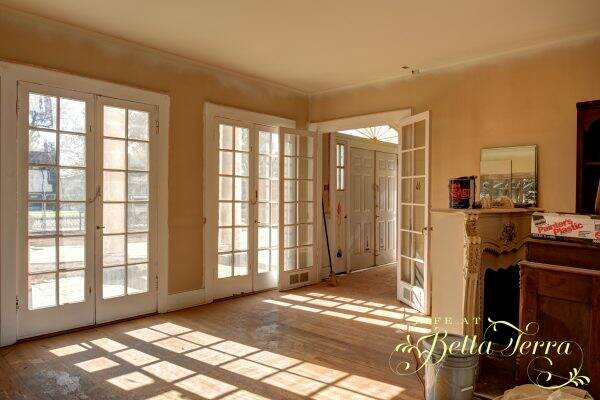
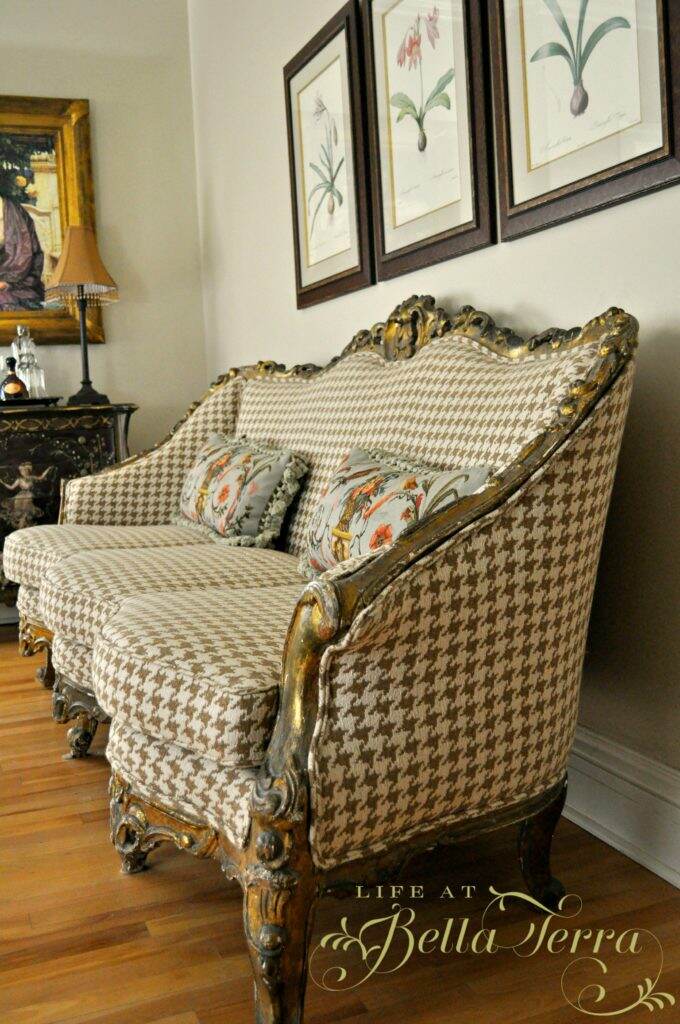
The Living Room

Upon entering the house, the living room is to the left.  With gold-flocked wallpaper and what appears to be 2 mantles (?), the original hardwood floors are in tact and the room is a very good size.  Thankfully the original chandeliers and plaster medallions are still there.

All the windows needed repair as did the many cracks in the plaster walls.  We removed the baseboard heating system, as well as the wallpaper. Though you cannot see it in this picture, the electrical conduit to the chandeliers was just tacked onto the walls.

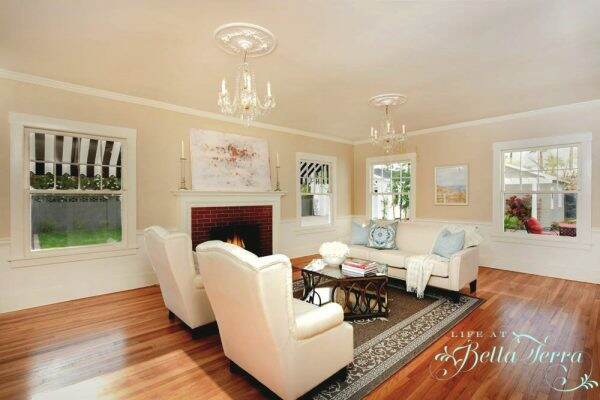
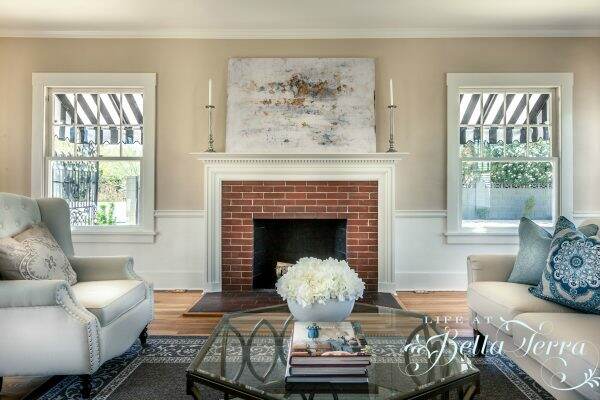
Now you can see the gorgeous bones of this room. The ceiling rosettes, crystal chandeliers, beautiful woodwork and original hardwood floors make this room an elegant space.
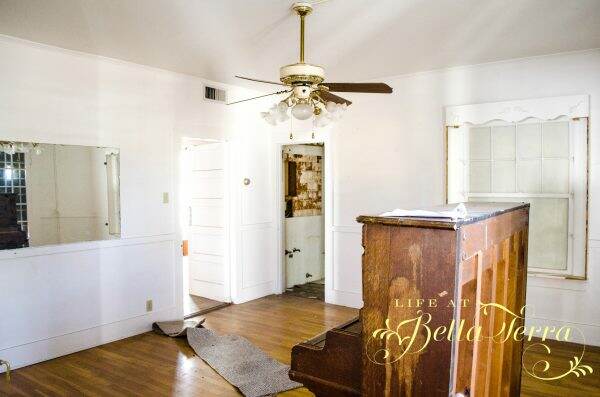
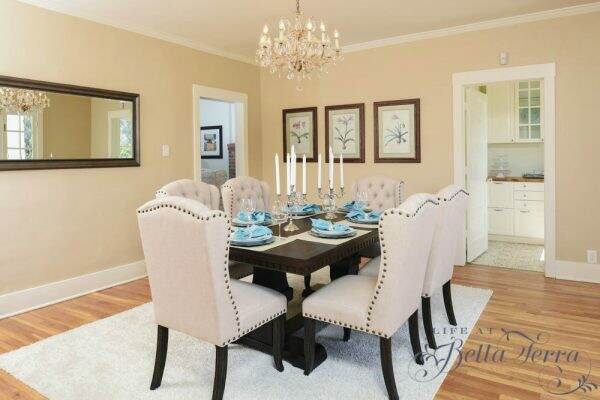
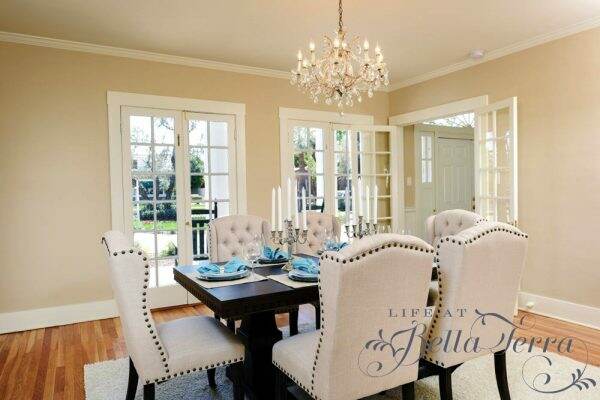
The Dining Room

To the right of the entry is the Dining Room.  The walls were wallpapered and then painted over, so we removed everything down to the plaster. Yes, behind the piano, that is an exterior window that was used as a bookshelf.  Go figure.

Both the dining room and living room have beautiful French doors that open up to the front terrace.

Here is the dining room after from 2 different angles. What was once a storage area, is now a closet for china, silver, linen and crystal.  Though you can’t see it well in this photo, the concrete floor is hand-painted.  See a previous post regarding that project!

Picture a meal here with all the French doors open to the outside. The original chandelier was missing but I am able to find another crystal one that fits the period of the house.
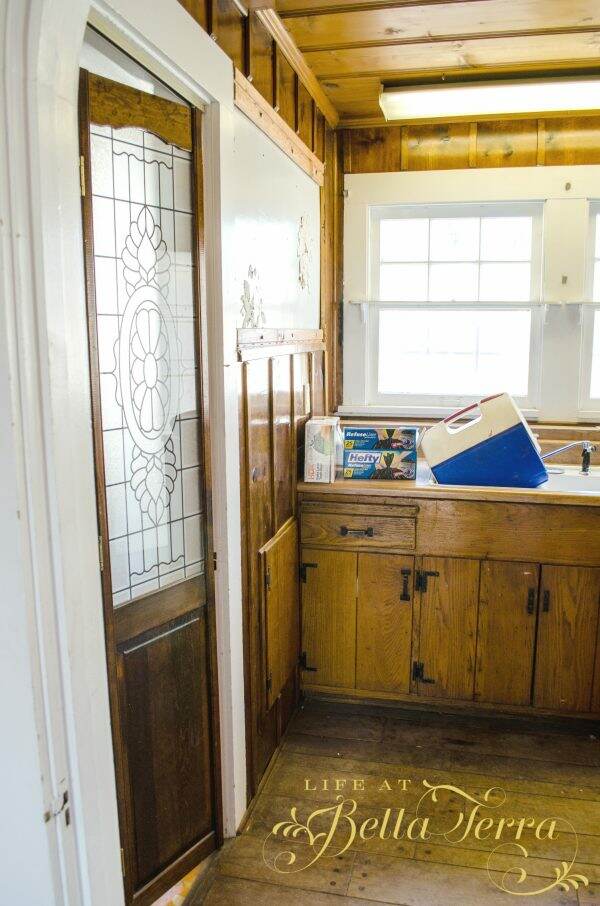
The Butler’s Pantry

From the entry there is now a Butler’s Pantry where parts of the original kitchen were located.  The plastic door to the left is the former laundry room.  This is now a completely new powder room with a pocket door added for privacy.

Here we have gutted the room back to the walls.  The door in the distance is the entrance to the basement.

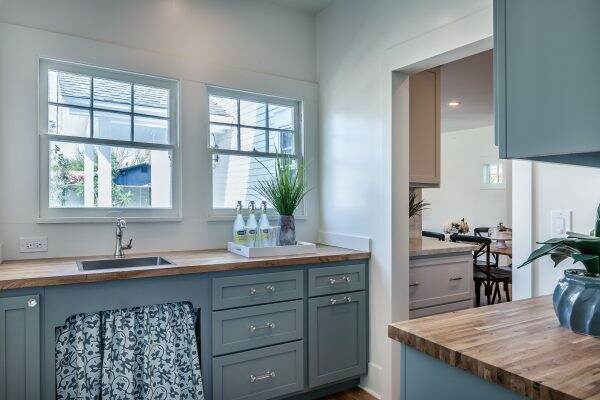
This sweet butler’s pantry has oak countertops, crystal pulls and knobs on the custom cabinetry and a skirted sink.
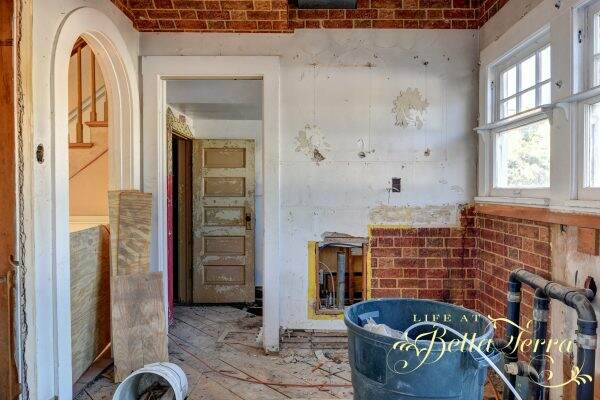
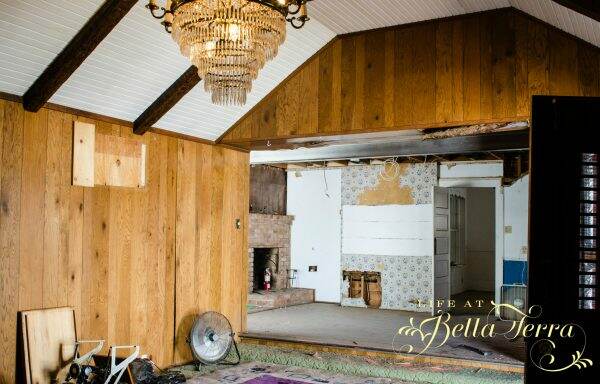
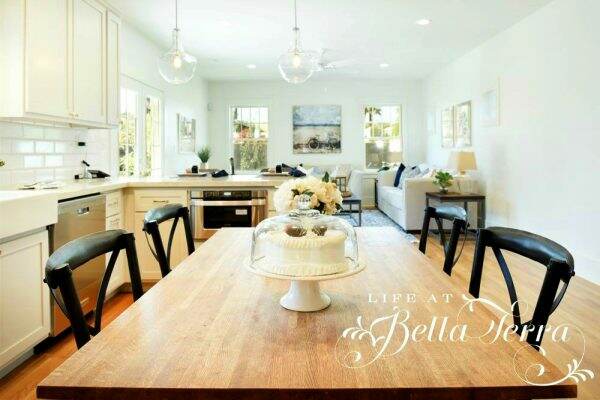
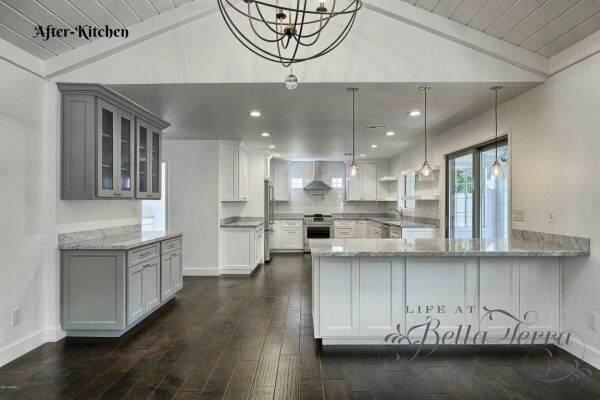
The Kitchen

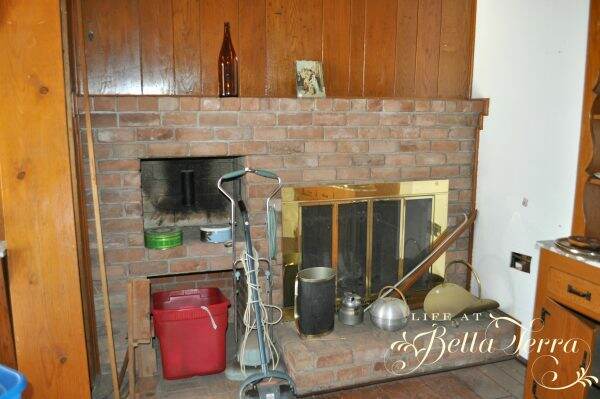
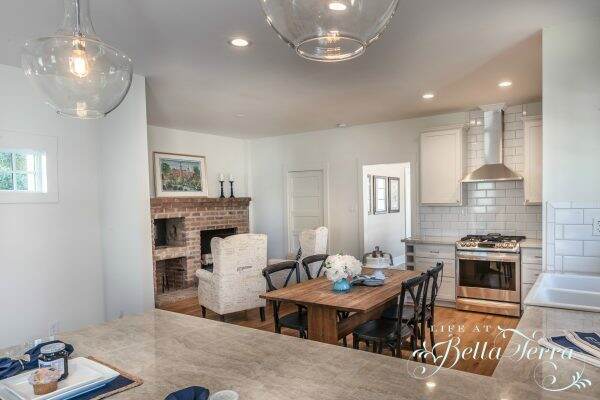
The kitchen was a massive undertaking.  It spanned two rooms with the sink, dishwasher and refrigerator in one room with the stove in another.  However, there is a lovely, large, brick fireplace which apparently was at one time, used for cooking.

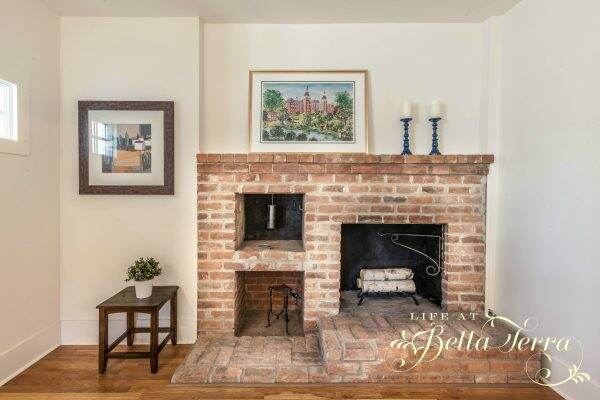
This is now what I am calling the “kitchen cozy”.  A perfect place to sit in a very comfortable chair to read the paper or have your coffee.

There was a tacky addition to the back of the house that needed to be removed.  After structurally supporting the exterior of the house with a beam, we rebuilt the addition and took this opportunity to add a second story which becomes the master suite.

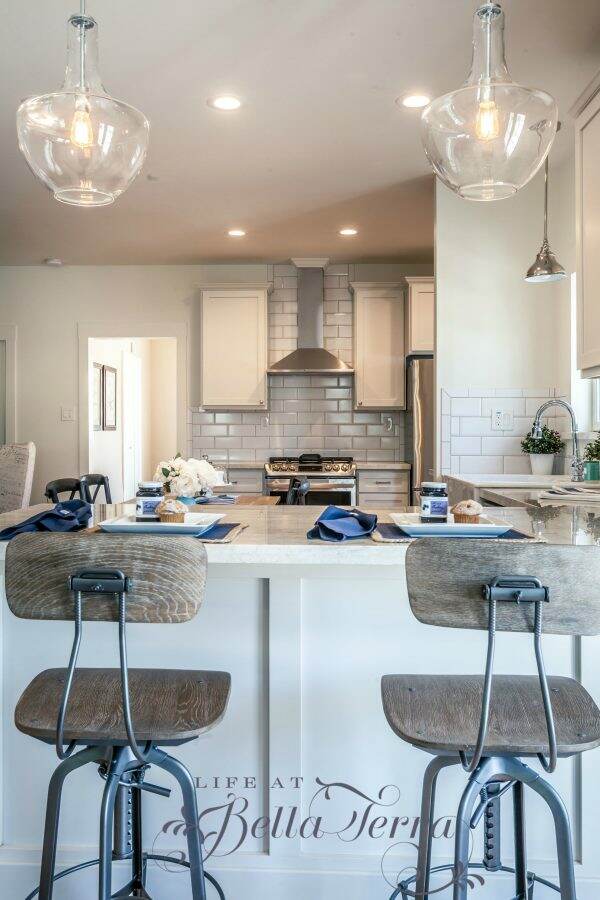
The new flooring is now level with the kitchen and all the air conditioning vents have been submerged in the subfloor. This addition, on the first floor is now the open kitchen/family room.

Great care is taken to put all the first floor air-conditioning ducting in the floors. Insulation helps with sound and keeping the house cool in the hot Phoenix summers.

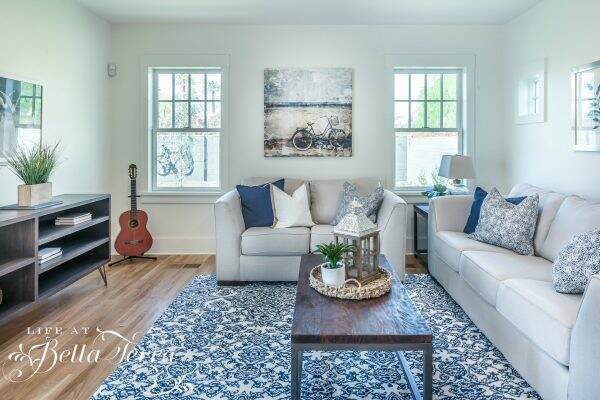
The family room after.

This is the view from one end of the kitchen to the family room.
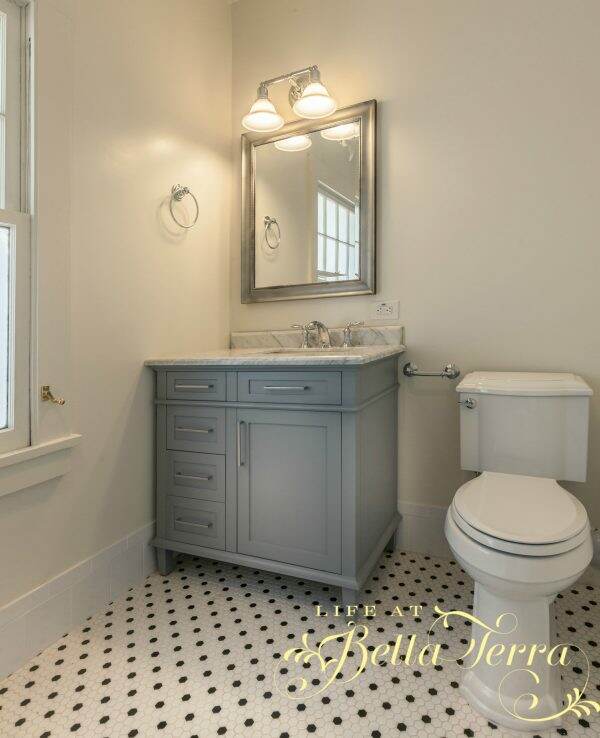
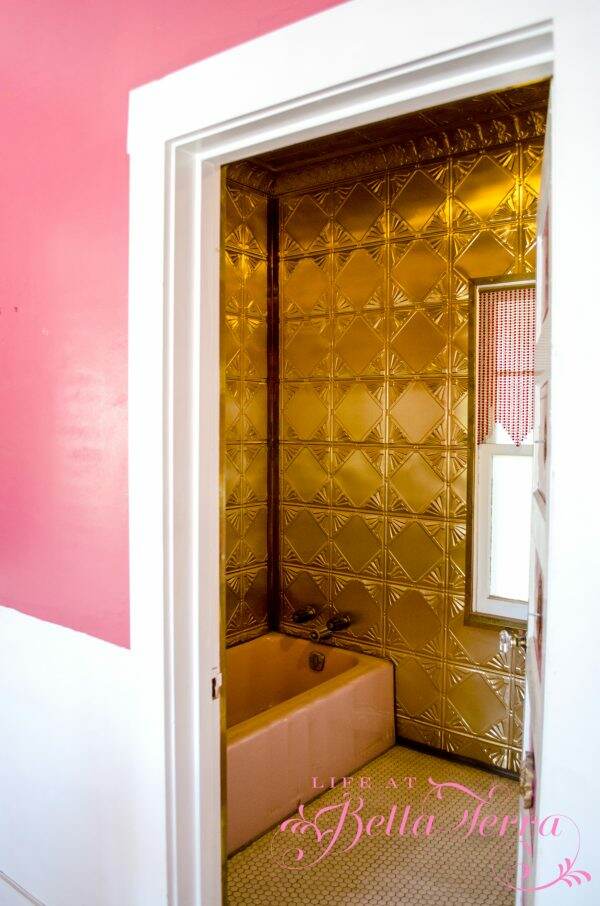
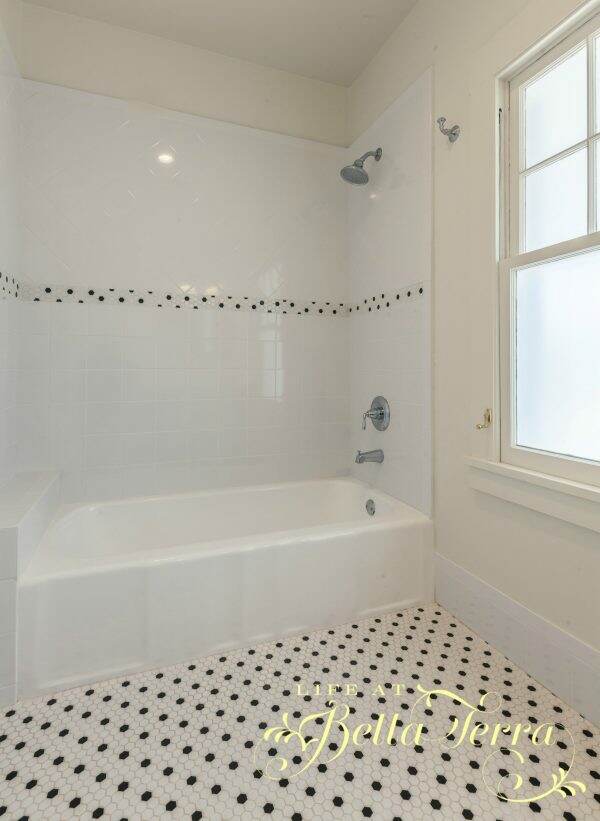
The Hall Bathroom

Upstairs, the hall bath was quite a site!  Again, lots of gold on the walls and the ceiling!

Notice the small brass cranks on the window trim. These cranks allow you to open and close the exterior shutters from the inside.

All the bedrooms are off this wonderful upstairs hall.  You can see the hall bath in the background with its original beaded curtain.

With a fresh coat of paint and refinished floors, it looks so clean and elegant.  The light fixture has silk shades and this is a Ballard Designs purchase.
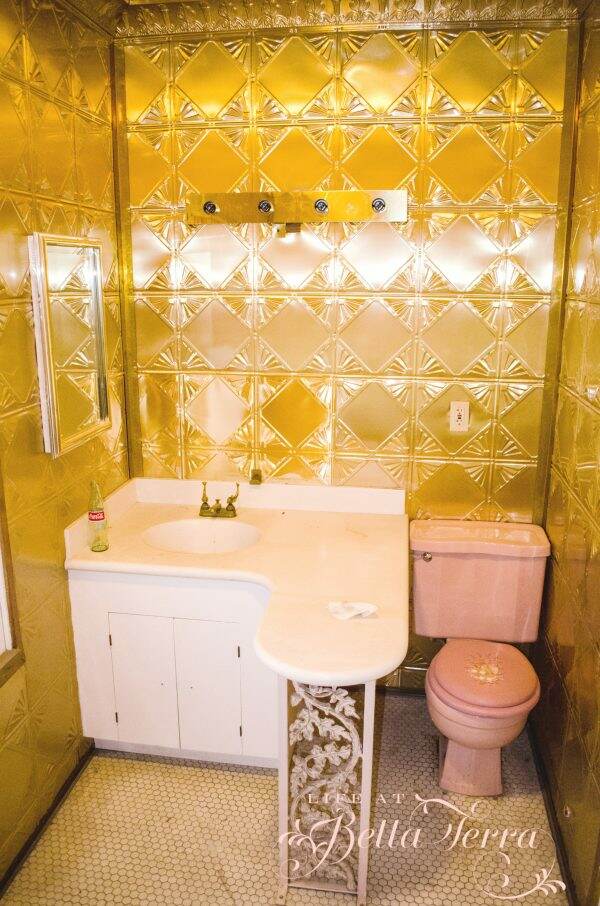
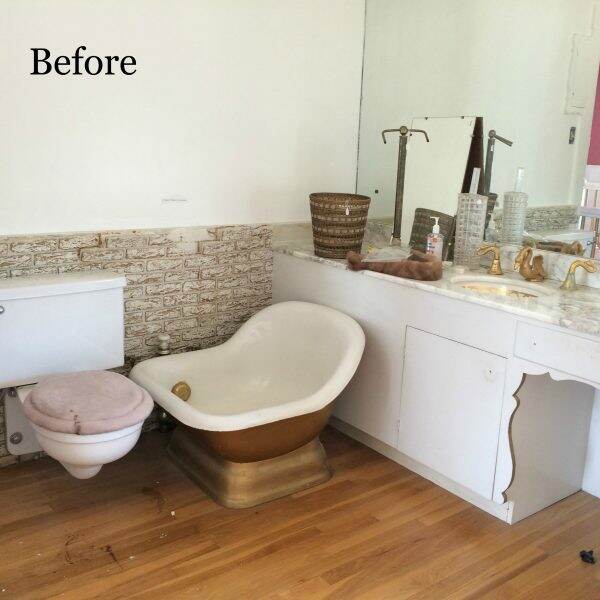
The Bedrooms

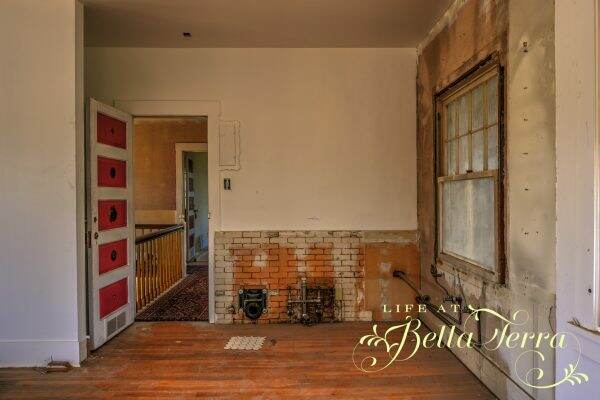
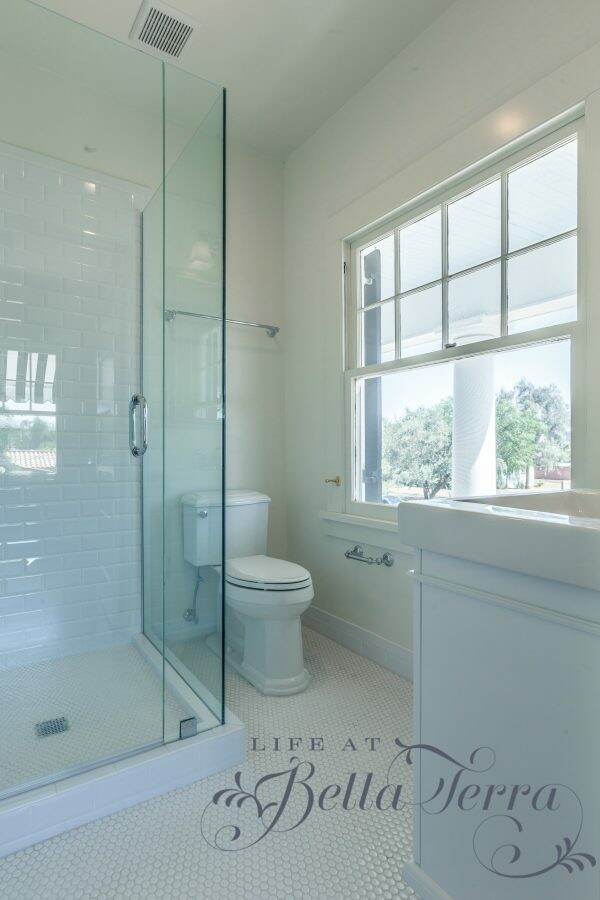
The southwest bedroom had the funky bathroom in one corner without any walls. Gotta love the very disgusting fuzzy, pink toilet seat cover!

When we took out the vanity and we discovered an original window in tact! Hard to believe the faux brick wallpaper was “in” once.

With the addition of walls, this space becomes an actual bathroom.
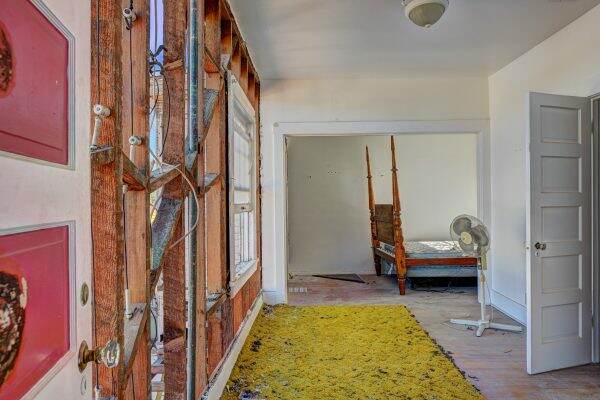
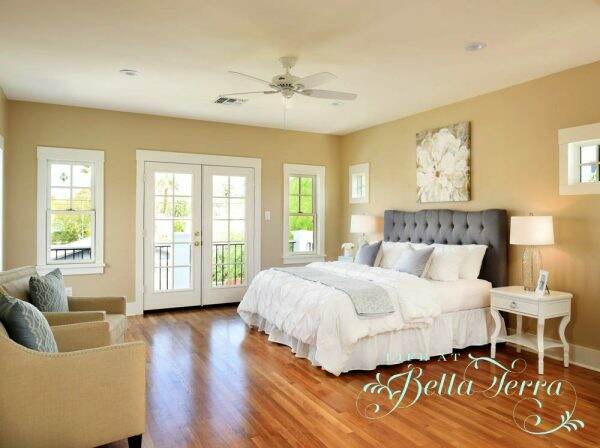
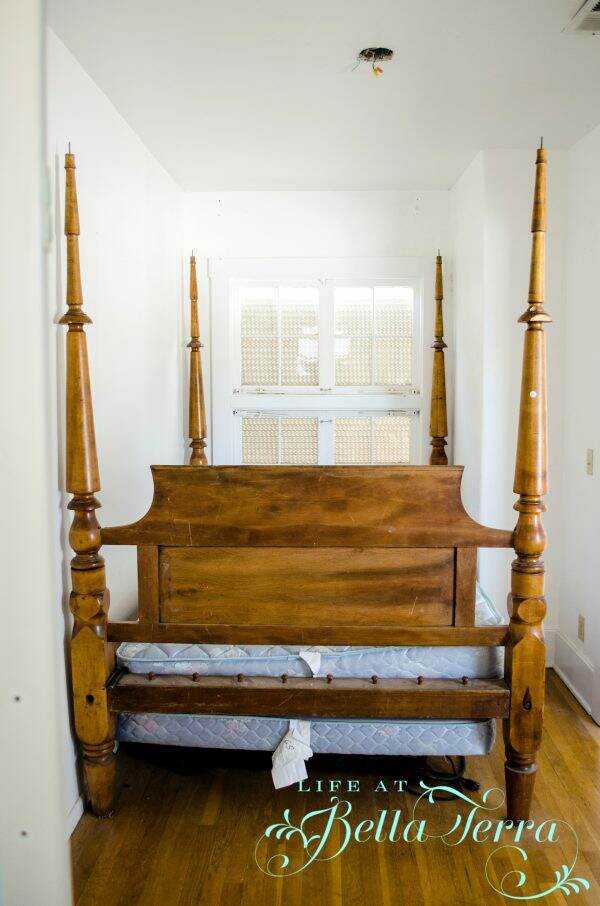
The Master Bedroom

The master bedroom was rather tiny so we created a new master space with the second story addition. Where you see the closet to your right, we walled off a larger section (over the yellow rug), and created a new master walk-in closet. The window, located in the left of the photo is where the opening becomes the new master bedroom addition. Where the bed is located in the background, becomes the master bath.

We build a small deck outside the bedroom~~where there are city lights to be viewed at night.

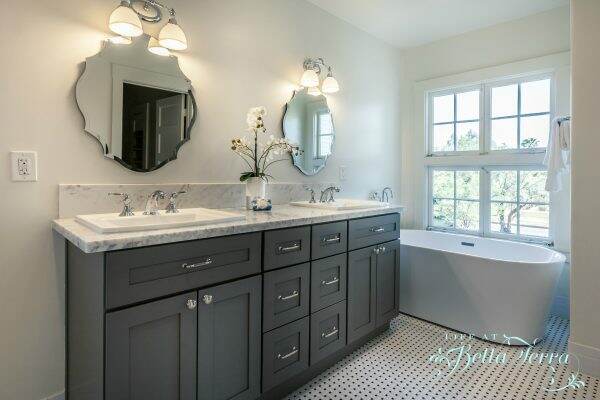
Notice the window behind the bed.  This is where the new bathtub is placed.

Demolition and Addition

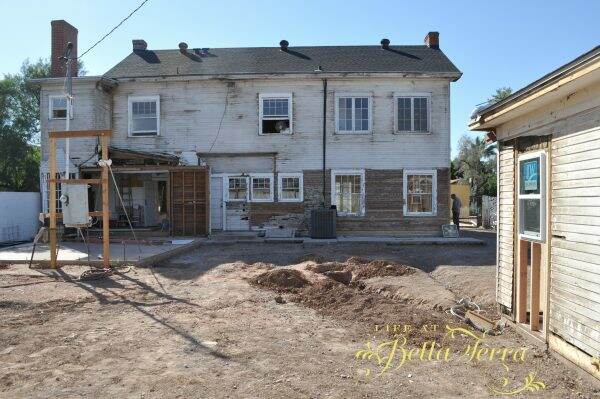
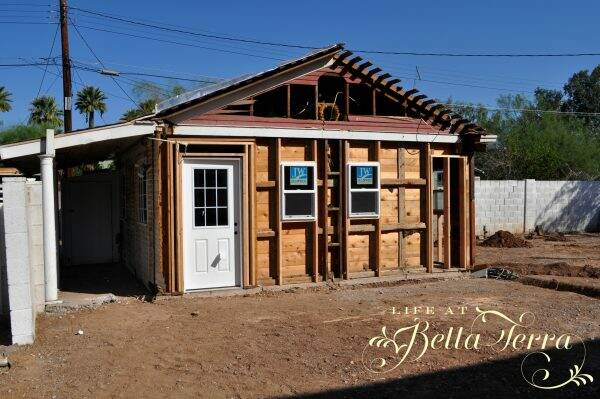
Some of the greatest building transformation took place outside.  The backyard was crammed with 3 buildings~~all rentals units that were uninhabitable.  We demolished 2 of them and opened up the back yard.  We left one cottage and discovered it had been the original garage.  

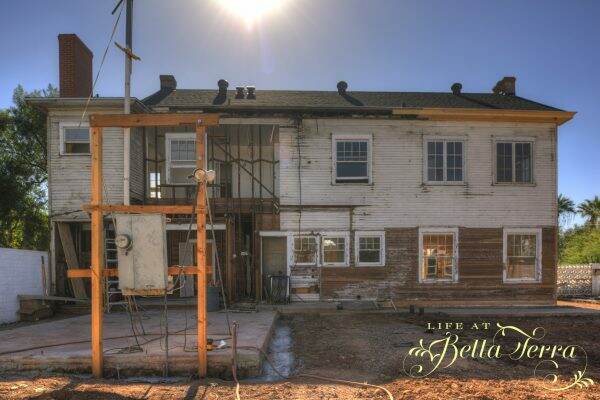
However, we couldn’t salvage the barn-style doors as they had been destroyed.  Included in the demolition permit was the removal of the addition off the kitchen which was not built to code.  I don’t have any good pictures of the backyard before, however, here is what the house looks like after everything is gone.

Here you can see the second story demolition of the house and the where the future master suite will be located.
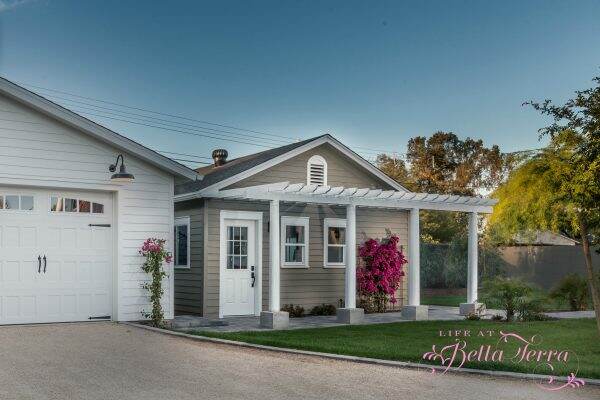
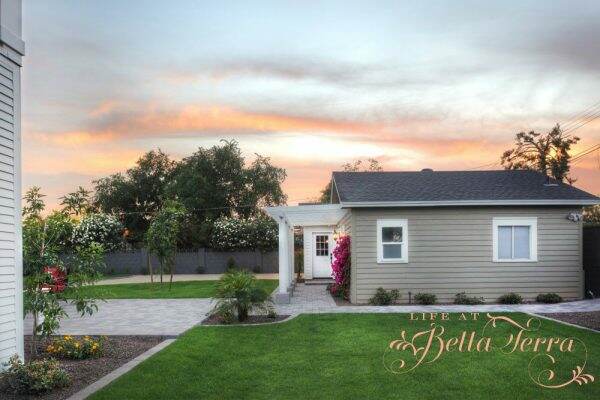
The Guest Cottage

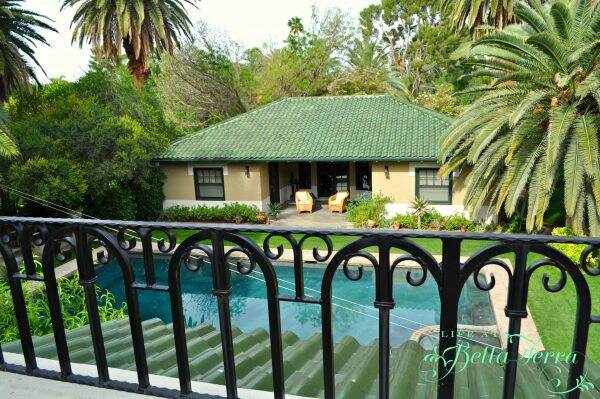
Here is the remaining guest cottage/original garage.

By adding new doors and windows, this original garage becomes a sweet place for guests.
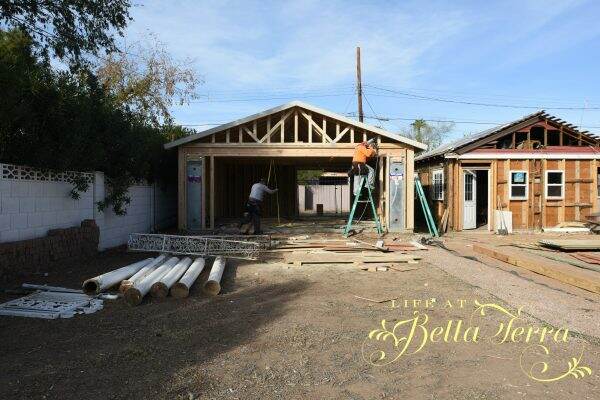
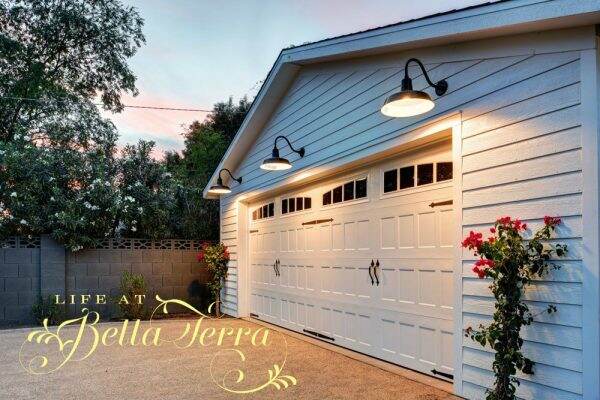
The Garage

There was no garage so we add 2 two car one next to the guest cottage. There is an 2 – car automatic garage door on one side and a single car garage door which opens out to the alley. This way you can pull you car in one side and drive out the other.

The Yard

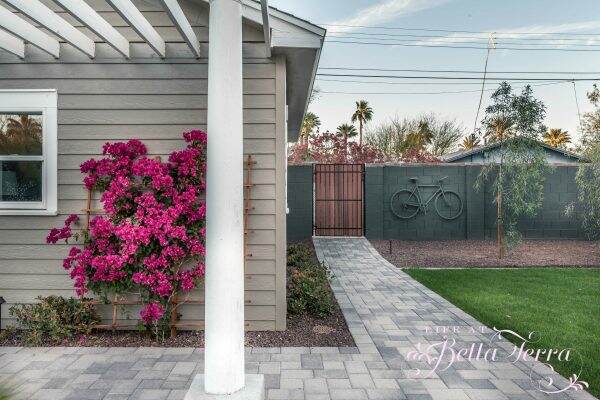
I’m not a big fan of block walls, however, they do provide privacy and safety. I always like to do something whimsical and unique at each house I renovate and this section of wall seems to be the perfect place.

I picked up this bike on Craig’s List for $20.00, cut the seat in half; removed one pedal and split the handle bars.  The block wall was white and we paint both the wall and the bike a great shade of green/gray from Sherwin Williams.

The “bike art” is now a focal point of the back yard.  Once the trees fill it, you may not see it but it’s a fun surprise.  I wonder what other objects I could use for future wall art projects??
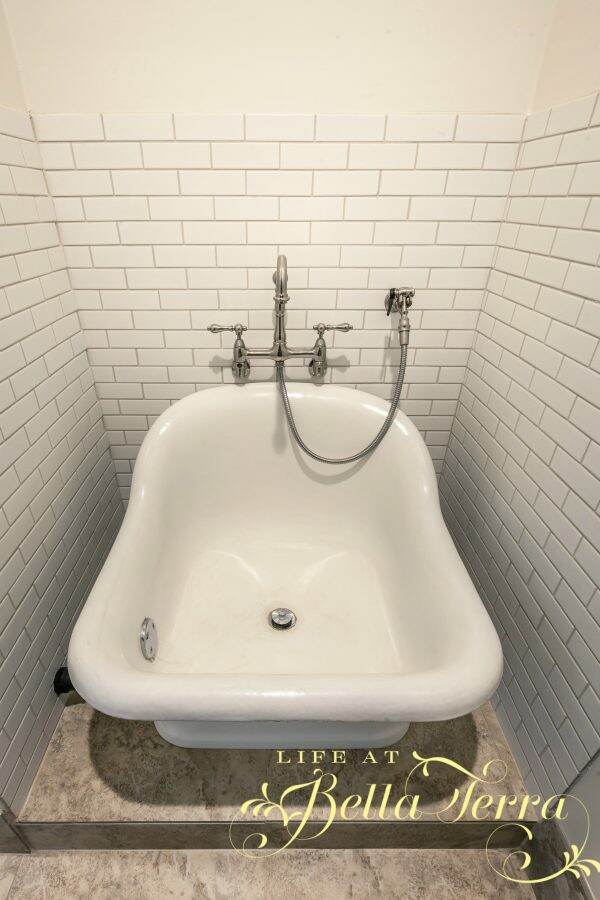
The Details

The French tub was a keeper and it is repurposed as a dog bath in the new laundry room. I had the exterior of the tub (which was gold, no surprise there) professionally coated.

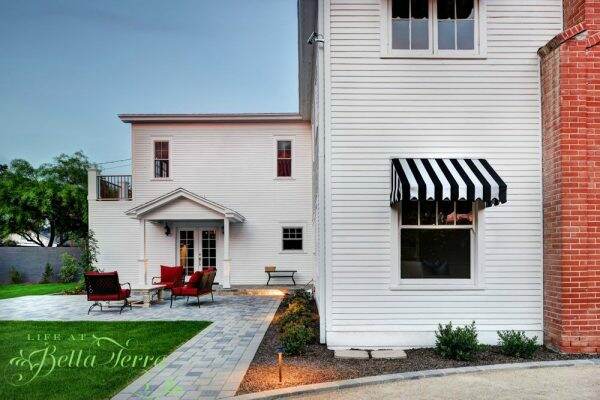
Here are some additional  photos of the exterior.

Since I retained the original windows on the existing house, I add Sunbrella awnings over the windows facing west to reduce the sun exposure.

Finishing this project

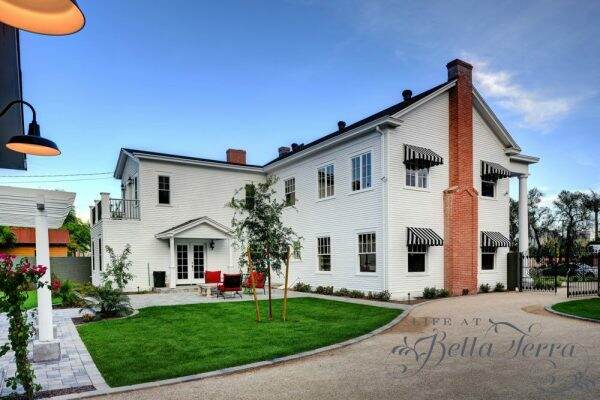
This is a great shot showing the original house and the newly added (and structurally correct) 2 story addition.  You may note that 3 windows in the upper story don’t match the rest of the house.  I assume this section may have been an old sleeping porch and then enclosed at some point later.  Nearly all the windows are double hung, but these three are casement windows.

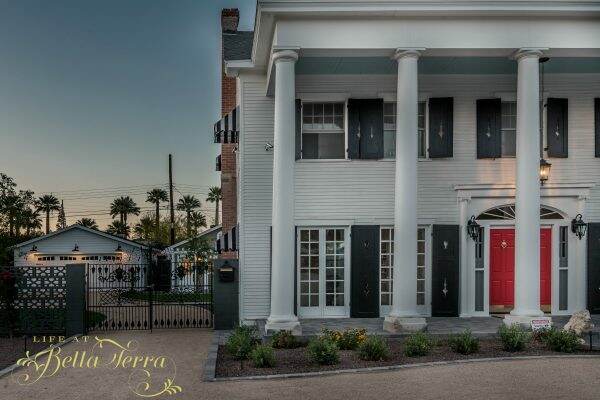
I find it interesting that the shutters are only on the front of the house~~which is historically correct.  The shutters actually serve a purpose since the front is south facing.  The upper shutters close via an interior brass handled crank and the lower, larger shutters actually work and cover the French doors.  Very innovative back in 1922 when air conditioning didn’t exist.

I hope you enjoy the restoration journey of this magnificent home.  My work is done and now it is up to my realtor, Madison Hallock to find the perfect person/family for this house.  You can see more photos and real estate details here.

This project could not have been done with the right people working on it. I am blessed with the absolute best crew, who manage to keep the laughter going even in times of despair. Everyone left a little bit of the heart and soul here and we are so proud to breathe new life into a historical home of this caliber.  

Many thanks to the following people for helping me: some before and after shots by photographer, Adam Peter; after photos by photographer, Jesse Fitton; Lola Castle with Castle Designs for her wonderful staging.  I’ve never used a staging company before and Lola was calm, cool and professional even as I was anxiously hovering over her.  I would definitely use her again!  And a big thank you for all the neighbors who tolerated our presence in their neighborhood.  Their words of support and encouragement are so appreciated and welcomed!

Will I do another?

Everyone keeps asking when I will do another one, but I can honestly say, I’m pooped.  I hope to take the summer to recuperate.  Unlike some profit-driven flippers, I do this out of love and respect for older homes and their architecture.  I take this responsibility seriously and feel that renovating and restoring is a way of care giving.  And if you have ever taken care of someone, you know how rewarding and draining it can be at the same time.  As with most things in life,  I always try to leave the campsite better than I found it.  I think we hit this one out of the park!

If you enjoy this post, please feel free to share it on Pinterest.

Save


Terrace Makeover

We have a lovely space outside of our master bedroom that has been sorely neglected.  It is located on the second story so it feels like it we are up in the tree tops. It is very private and surrounded by lush foliage. There’s a wonderful view over to the pool house and is ideal for watching sunsets.

The cast metal furniture has oxidized over time and little maintenance had been done to the deck such as cleaning and sweeping.

We added this fireplace during our original restoration/renovation but we hardly seem to use it as this space has never felt attractive or inviting.

I don’t know what prompted me to get busy with this part of our home, but after I purchased 5 cans of Rust-Oleum spray paint from Lowe’s in Metallic Oil-Rubbed Bronze I was up and running.  I’ve used spray paint cans before and have suffered from a stiff index finger in the process.  I am very happy to find this tool which is very inexpensive and so well worth it. The handle clips onto a spray paint can and all you have to do is squeeze the handle.  So easy!

The table top has a stone insert that was not removable so I covered it with paper and used Scotch’s blue painters tape to protect the stone from overspray.

Each piece of outdoor furniture is sprayed with new paint. After they are all dry, it is time to put the seating area back together.

And here is the AFTER.

The rug I ordered online through Rugs Direct.  I’ve had rather good luck with this company and have been very happy with their selection, their prices and the speed of their delivery.  This 8′ x 10′ Caspian (1005D) outdoor rug cost $199 (with free delivery) and it defines the space.

The throw, pillows, lanterns and acrylic glasses and tray are from Pier One Imports.  I haven’t been there in some time and I am always so impressed with their selection of products. The cushions are covered in Sunbrella fabric. The furniture was purchased several years ago and I believe the manufacturer is Pompeii.

Pier One has such a nice selection of outdoor trays and dinnerware.  Look at this tray-the details are so pottery-like but unbreakable!

I imagine this will now become a favorite spot for a cup of coffee or glass of wine.

Some things to learn about this project:

  1.  Wear gloves unless you want to scrub off your first layer of skin to get the paint off.
  2.  Wear shoes or socks.  I was barefoot and yes, I had to scrub and scrub to get the paint off my feet.
  3.  Make sure you put down an appropriate amount of protective sheets or drop cloths.  Mine were a bit small and yes, there was overspray.  Thankfully I was able to scrub that off the deck.  Lots of scrubbing after this project!
  4. Check the paint color before you start.  I didn’t dislike this paint enough to stop and purchase more, but I do wish it was a bit lighter.

If you enjoyed this post, please feel free to share it on Pinterest.

This post shared with Between Naps on the Porch Metamorphosis Mondays #604