1

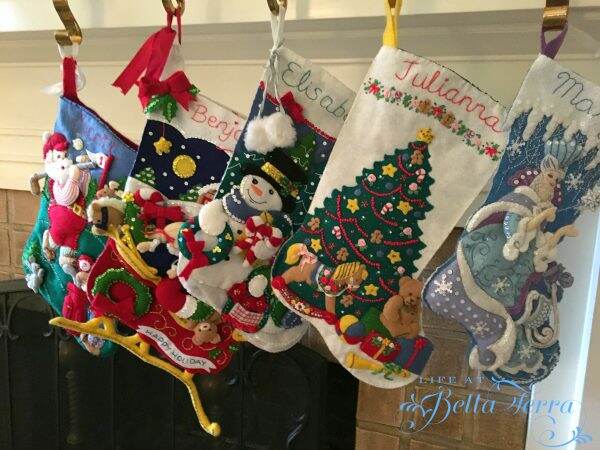
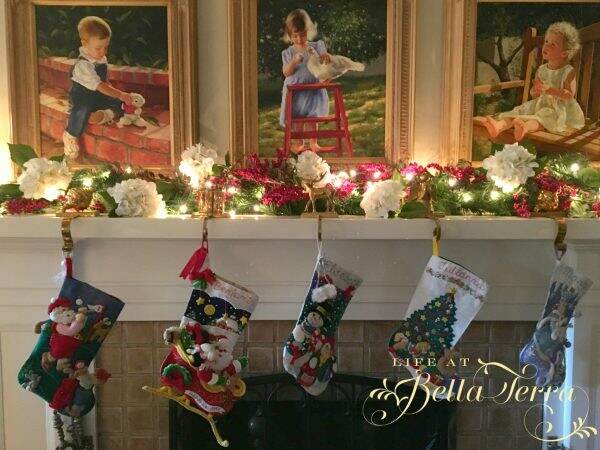
And the Stockings were hung….

I am not sure why we hang stockings by the chimney with care, but it appears to be a long standing custom.  Since 1823 when Clement Clarke Moore wrote “A Visit from St. Nicholas”, Christmas stockings have been an essential part of Christmas traditions.

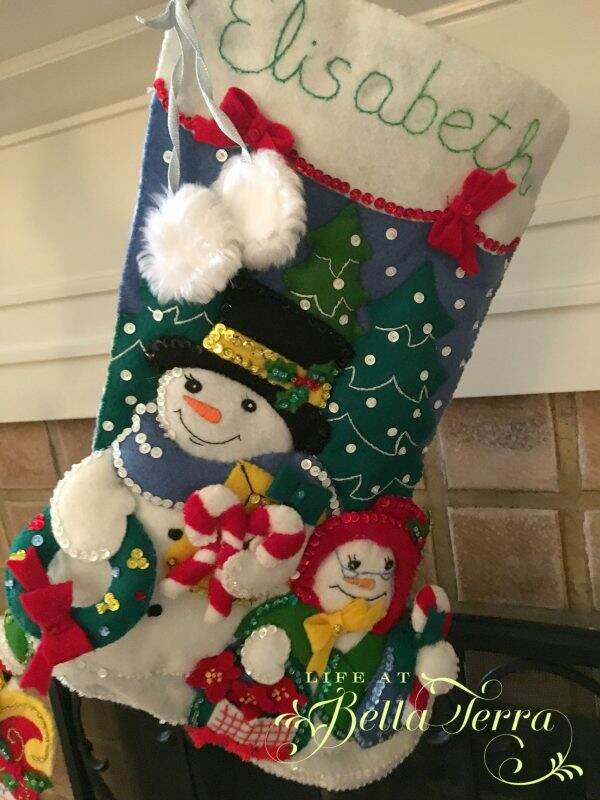
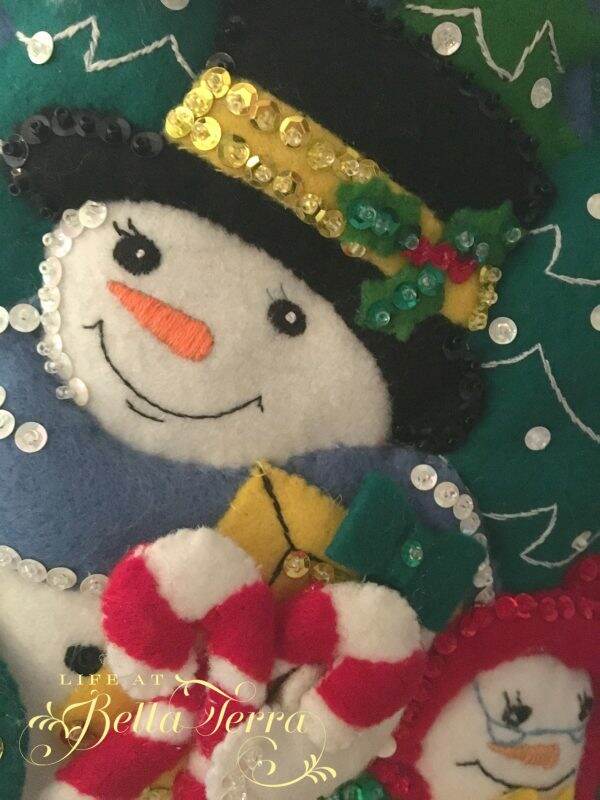
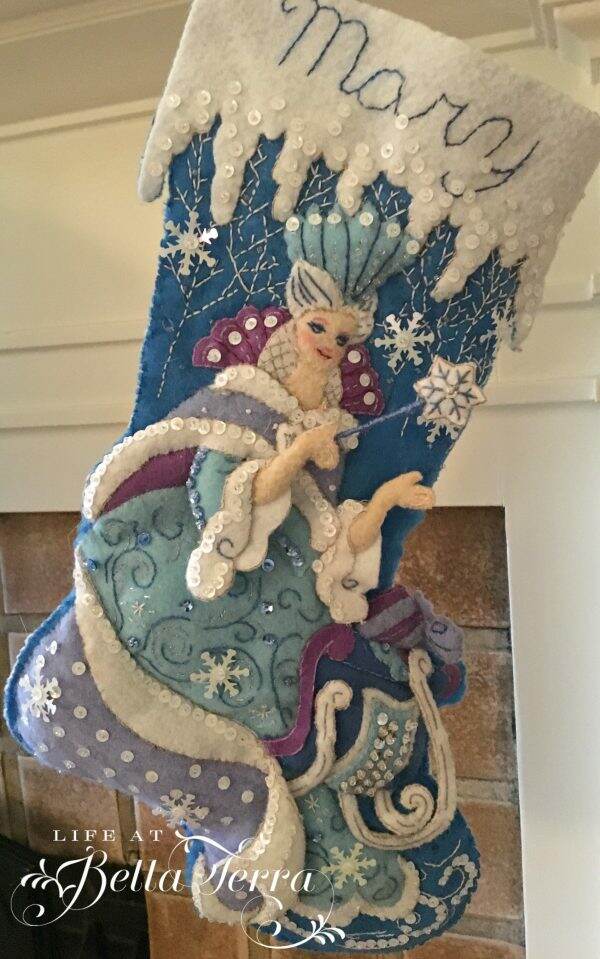
We have 5 handmade stockings for our family and multiple ones for each of the pets.  Our family stockings are made from a Bucilla felt stocking kit, which can be easily purchased online or at a craft store. Click here to see Bucilla stocking ideas on Pinterest.

The kit provides everything you need~~stamped felts, embroidery floss, ribbons, sequins, beads, needles and lengthy instructions.   I made the very first one 23 years ago when I was pregnant with our first child and subsequently made one for each child since. Be aware~~they are very time consuming.

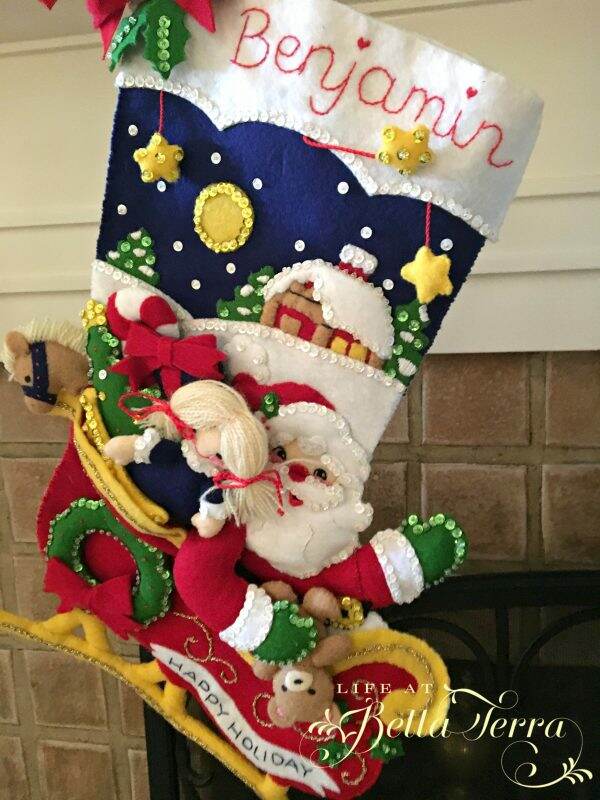
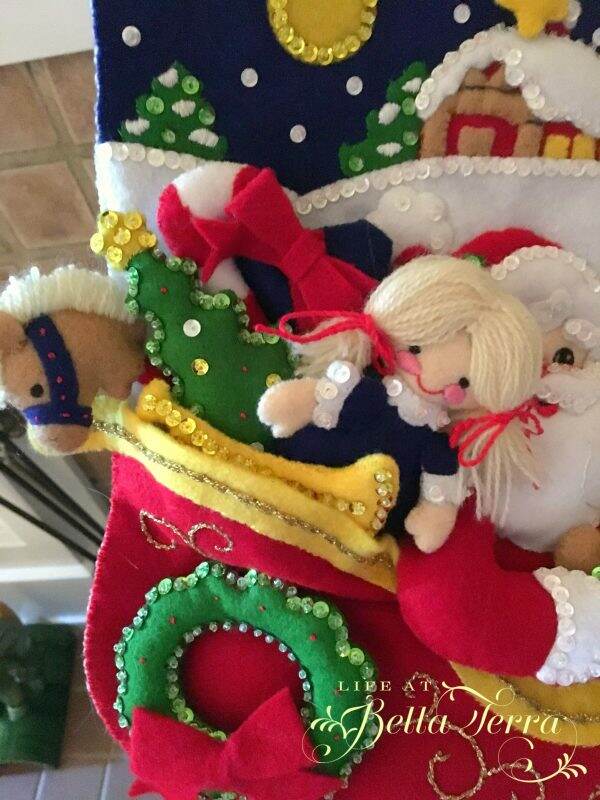
For Benjamin’s stocking, each toy in Santa’s bag was individually made and then stitched in place.

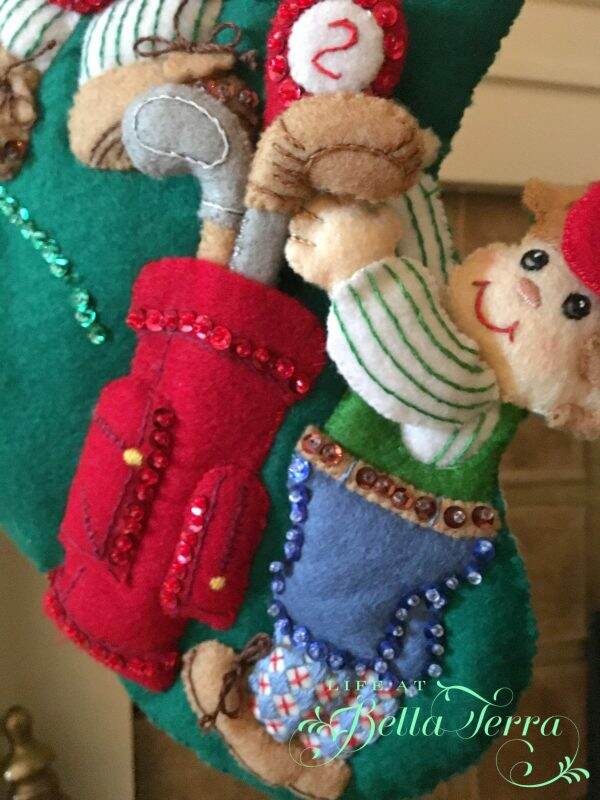
Since my husband loves to golf, it was very easy to select the theme for his stocking.

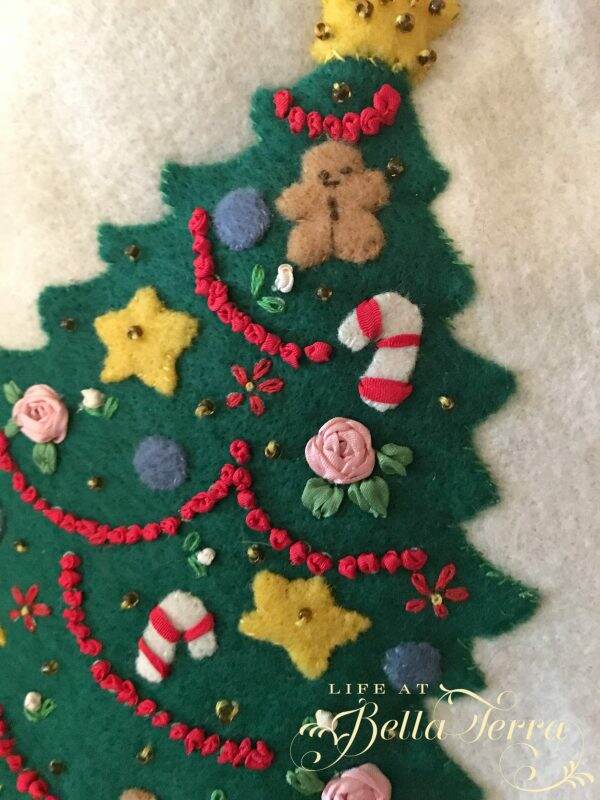
My daughter’s stocking is a little different but still required a great deal of time and skill to make.  French knots and delicate needle work was required.

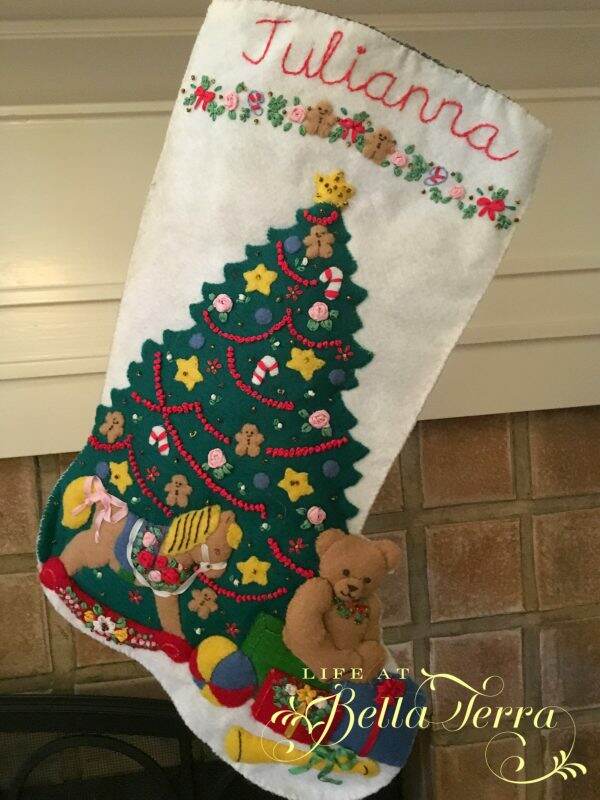
Each stocking is lined with a different fabric.  I recycled my daughter’s favorite blue velvet holiday dress as the lining of her stocking.  The dress had little white pom poms on the neckline and I used those too.

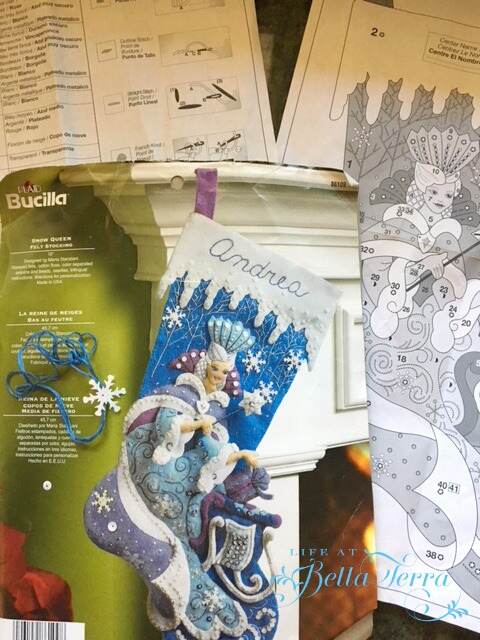
This year I FINALLY completed my stocking kit which my husband bought for me.

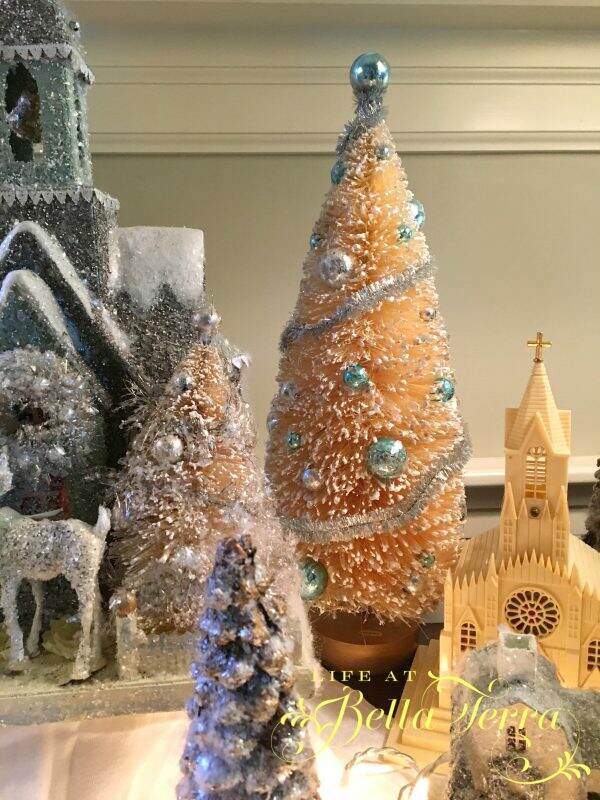
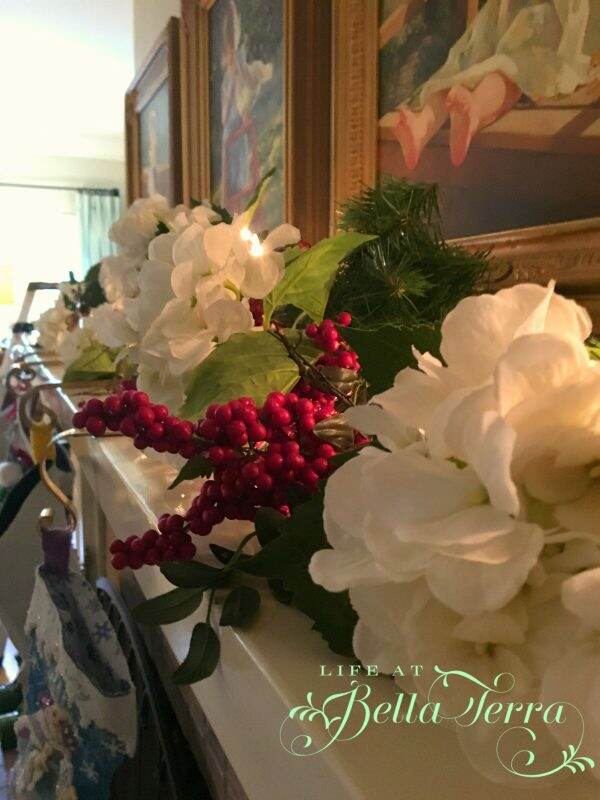
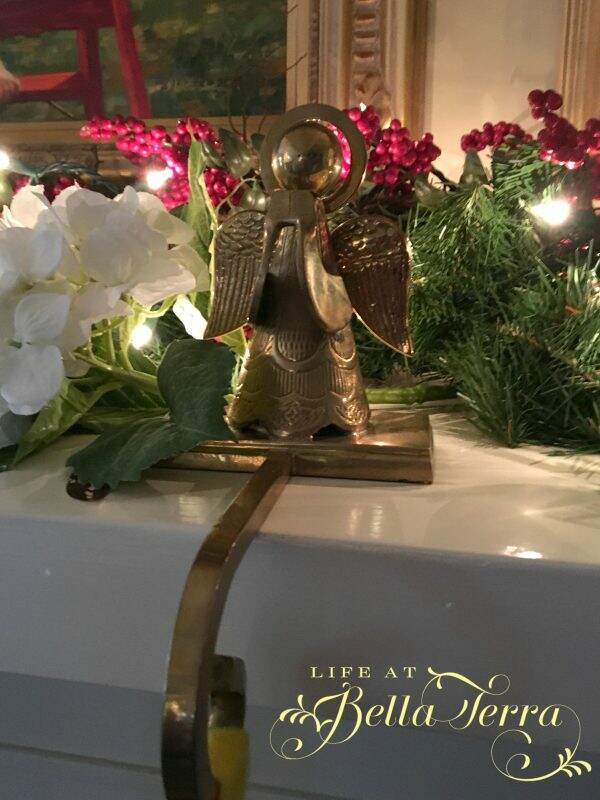
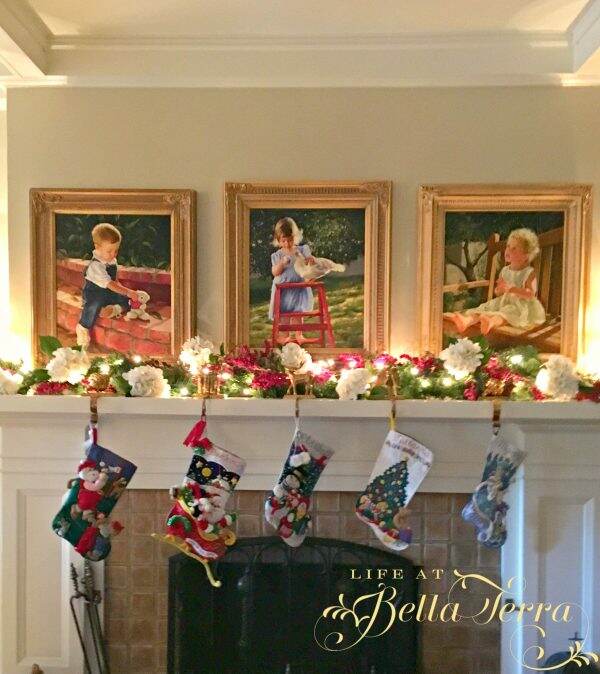
The living room mantle is nice and wide, allowing for an abundant garland of greens, berries and hydrangeas (from The Enchanted Home).

Brass hangers are tucked in the garland.  In retrospect, I would have been more careful in adding the tabs on the handmade stockings, because it affects how they hang.

Now for the fun part~~tucking a clementine in the toe and filling them with goodies for Christmas Day!  Do you have a favorite stocking?


Making it Sparkle

Once a year, I clean the crystal chandelier in the dining room.  It happens to coincide with my holiday decorating.  For some reason, the rest of the year I overlook the dust on the crystals, probably because it is evenly dusty!  But once the glitter village and snow globes go up, the dullness of the chandelier catches my eye.

Quite honestly, there is really no easy way to do this (at least I haven’t discovered it yet).  This chandelier came with us during our move to Bella Terra.  Once candle lit only, we had it electrified and it has hung in our last two dining rooms.   I love the 12 arms and the crystals are not overabundant (except when you have to clean each and every one).

The cups that sit under each candle collect the most dust.

I start by laying down old towels on top of the table.  With a spray bottle of white vinegar and water, I spray each and every crystal and cup. With a soft towel, I wipe each and every crystal and cup…..good for toning the arms!!! 🙂

The view from below doesn’t show all the crystals.  Each arm has approximately 3o individuals crystals of varying sizes.

It never fails that one crystal will fall off during this process.  The purpose of the towel is to break its fall, however, this one bounced off the table and landed on the stone fireplace hearth.

Therefore, I keep a box of extras, just in case.  You can also find crystal replacements online.

Though most people won’t realize the chandelier has been cleaned, I know this will bump up the sparkle effect in the dining room, especially at night.

Wishing you a week of shiny and bright!


Building a Snow Village

The theme in the dining room for the holidays is all snow and glitter.  Each year I build a snow village using several paper/cardboard glitter houses.  There are many ways to make your own on Pinterest, but I purchased these affordable, yet adorable houses over the years. They are readily available in many retail stores.

The buffet in the dining room is the perfect spot for this.  I leave the lace runner (a favorite handmade piece from our trip to Italy) in place and add a strand of white lights. I also leave the table lamps and add a small wreath to each.  A winter painting is placed in the small window above.

Next, I add items to create varying heights~~ a cake stand and different size boxes.

Using old white napkins and linens (they can be torn or stained, it won’t matter), I cover the boxes, and place the lights on top of the linens.

Next I add my village houses and churches. Like an old town, the church is at the highest point and in the center.

Then, I add trees.  Mine don’t match.  They are an odd compilation of evergreen, wood with glitter and funky, but it all seems to work.

Next I add another string of lights.  The purpose of this string is to insert the bulbs in the back of the houses.  Each of them have a hole in the back.

Taking the time to do this is rewarding as the little house looks so magical, as if the lights are on and somebody’s home.

The remainig lights are laid around the bases and in between the trees.

You can get packaged snow from any hobby store (mine is from Michael’s).  It is 100% polyester, flame retardant and comes in a roll.

I cannot take credit for this part.  My dear friend, Janie, taught me this trick years ago and I think it produces fabulous results.  It’s important to pull apart the fine layers of batting (vs. clumping) and drape the snow over the lights.  You can layer it or mound it up, but the key is to keep the “snow” or batting a light as possible.  The effect is so lovely, almost heavenly.

The snow hides all the wiring and lights and bases, producing a soft glow.

At night, with the lamps off, this snow village is so dreamy and enchanting! Now I am off to put out all the snow globes!!! Happy decorating!


Setting the Thanksgiving Table

Food seems to taste much better when served in a beautiful setting.  Even though I didn’t have an extravagant childhood, my mother always set a lovely table for the holidays, using her Franciscan Ware apple pattern.

This year, I took one of my English china plates, Windsor Ware by Johnson Bros. with me to select the plants from Whitfill Nursery and flowers from Safeway for the centerpiece.

Setting the Thanksgiving Table

I wanted to purchase items I could use again~~plants and herbs.  Of course, I needed a few flowers for additional color.

how to set a Thanksgiving Table

We are having 10 for Thanksgiving dinner so we extended the table.  I wonder why they are called leaves?

set your Thanksgiving Table

It was a worthwhile investment purchasing a table pad to protect the surface of the dining room table.  One side of the pad is felt and the other is a protective plastic.  This one was custom made by Guardian and it has 3 parts.

Next, I layered my table cloths, starting with a Battenburg lace one, and adding 3 smaller muslin sheets on top.  I purchased the vintage muslin sheets from one of my favorite bloggers, Miss Mustard Seed. The lighter ivory tone and texture of the muslin matches the background of the dinner plate.

For the centerpiece,  I lined a rectangular wooden tray with both plastic and foil, and then filled it with the plants, herbs, and pomegranates, pears and flowers.  The brass pumpkins were on sale at Safeway ~~and add a bit of sparkle.

Since, at the time of writing this post, I had not finalized my menu, I was experimenting with adding different plates/bowls in case we have a first course salad or soup. The wooden charger is from Pier 1 Imports, providing a great back drop for my china pattern.

The glass, gold trim salad plate is from Lesley Roy. I like that the design in the center of the plate is visible.

I love these pumpkin soup tureens from Williams-Sonoma, but I rarely use them.

The napkins were a recent purchase (on sale!) from Ballard Designs.  They are the perfect creamy color and the plaid trim complements the brown tones.

A fresh sprig of rosemary from the garden is tucked in the napkin ring.

Looking forward to spending the next few days baking and cooking. Funny how Thanksgiving dinner takes hours to prepare and such a short time to eat!


A Bit of Fall Decorating

I love the longevity of fall decorating~~you can start in September, adjust it a bit for Halloween and keep it until Thanksgiving.

With a few small touches, the house feels like autumn. It helps that we’ve been enjoying such gorgeous cool mornings and evenings. Don’t you just love the light lately? The yard looks so surreal.

We have a few leaves falling, but our true autumn occurs closer to Thanksgiving.  But I will take what I can, as I love this time of year….as does my constant companion, Sox.

I brought a bit of the outdoors into the dining room this year.  The handblown green glass jug was purchased during my summer visit to Camps and Cottages. Mollie English, the owner, gave me the idea to fill it with branches of fall leaves and she was spot on.

I like to change the art with the seasons.  This original oil painting on masonite by Lynn Winans (1897-1982) was  a wonderful find in an antique store in Pinetop, Arizona.  It’s 40″ x 20″ size is perfect on an art stand. Mr. Winans was a California artist and is known for his plein-air landscapes and seascapes. The colors are so appropriate for this time of year.

Another, rather simple, idea (I’m not even sure anyone in my family notices this), is that I change out the shades to the lamps that sit on the petticoat table in the entry. In the spring, I use a light blue color; for the fall, I add these gold silk ones.

I purchased them from Ballard Designs as they have a very large selection and are affordably priced.  A few pumpkins, gourds or apples are added to complete the decorations in the entry.

Behind the entry table, is a raised panel secured by a brass clasp. There is a rope and pulley operated section that slides down beneath the floor.  The door to the right of the table is the powder room. This secret panel provides access to the powder room’s plumbing. Rather clever thinking back in 1912, and it is great access to storage space under the stairs.

My kitchen….it really needs a painting update but the existing colors seems to work during this time of year.  Fall towels hang on the oven handle and candied corn fills my glass jar.

My favorite, newly purchased candle, Rosy Rings Spicy Apple (from Camps and Cottages) resides on the kitchen counter.

Hanging on the red front door is a basket full of mums, leaves and Chinese lanterns.

We recently discovered a GREAT pumpkin farm/patch in Snowflake, Arizona at Willis Family Farms.  It reminded me of pumpkin patches back east~~there was such a variety of pumpkins, gourds and corn.

During my last trip to Whitfill Nursery (you know how much I love Whitfill), I discovered these fabulous zinc pumpkin cut-outs on wooden stands.

So, with the inspiration of Patty Taylor, who selects all the unique items in the Garden Shop at Whitfill Nursery, I decided to do this combination on our front porch.

It doesn’t take a lot of money or creativity to add a touch of fall decorating to your home.  I would love to hear what you have done and how you are welcoming this wonderful season.


What is on your bedside table?

As you know, I have been on a cleaning, sorting and organizing whirlwind.  Starting at one end of the house, my goal is to go through every drawer, closet, dresser and attack it with the mindset as if I am moving in 2 weeks. Expired makeup, business suits with shoulder pads, miscellaneous paperwork – GONE!

The master closet and bathroom are behind me and I just finished the master bedroom. I haven’t cleaned out my nightstand in many years.

It’s such a luxury to have fresh cut flowers in any room, but having them by the bed, seems extra special….bringing a bit of the nature indoors.

But I am also fine with a good quality artificial flower, like these peonies from The Enchanted Home. To see a previous post about these artificial flowers, click here.

The decadent picture frame was a wedding gift from a friend~~it’s a collage of old pearls, jewelry, and a cupid and is truly one of a kind. Not sure my husband is very fond of it, but I think it’s fun.  Wouldn’t this be a great DIY project with an abundance of costume jewelry?

Within reach, I keep a candle, books I may be reading, a water bottle, and a small Limoges box that holds a set of rosary beads.  There’s a great story behind the Limoges box.  My husband and I won a trip (charity raffle) in 2001 to fly to London, England, take the Venice-Simplon-Orient Express train to Southhampton, England and then board Cunard’s Queen Elisabeth ship for a 10-day transAtlantic cruise.  Up to this point, I had never won anything…lucky, lucky me!!!  This beautiful keepsake box is from our exquisite train ride on the Orient Express.

The jeweled frog is just something fun.  It’s a small box and I don’t really use it for anything, but I’m rather fond of it.

In the top drawer closest to my side of the bed, you will find Kiehl’s hand cream, Essie apricot cuticle oil, Smith’s Rosebud salve, a nail file, my glasses, a few flashlights (as we are always losing power), and multiple power cords for my iPhone and Kindle, and my headphones. The ceramic prayer book holds a few more of my rosary collection. The pottery plate I received as a gift on a business trip with my husband to Chile, South America.

Smith’s Rosebud salve is so good for chapped lips, extra dry skin or to help minor burns.  It smells good and the tin looks so retro to me. My cuticles tend to get dry in the climate here and the apricot oil does the trick.

Lastly, I just discovered this amazing app called “Calm“.  If you have difficulty either falling asleep or staying asleep, you may want to try this. Each night before I go to sleep, I listen to a Sleep Story.  There is a large selection of stories that are read aloud for adults.  I cannot tell you how much fun it is to settle in and listen to a story.  I have not, to date, stayed awake long enough to hear the entire thing.  Their narrators have such smooth, reassuring voices that lull you to sleep.  They also have selections for meditations to reduce anxiety, sleep better and feel happier for all ages (even a College Collection).  I can’t say enough about this app.  It truly is something that I look forward to each day. It’s my new latest toy!!!

So, what is on your nightstand or bedside table?