1

Dividing Irises

Bearded Iris

In our USDA planting zone (9b), the best time to divide iris rhizomes is this time of year. Established plants need to be divided every third or fourth year or whenever the clumps become crowded and flowering decreases. This is best done in August after flower stalks have died back. I can honestly say that dividing iris in the summer heat is not a fun thing to do.

Bearded Iris

As you know, once you buy a property it is fun to go through the seasons to see what will bloom in your yard. Since our property was a major restoration construction site for 3 years, large portions of the landscaping have been re-designed. However, many plants/trees that were planted by previous owners over the last 100+ years still remain.

An Overgrow Bed of Irises

The front bed is dense with iris

A section of our landscaping bed nearest the street is chock-a-block full of a smaller white iris. I have no idea who or when these irises were planted. Since we have been living here for 20 years, this iris bed is in dire need of attention. It is a cluttered mess.

Since the original rhizome (the “mother”) will produce several offshoot rhizomes you can only imagine how entangled this planting bed is currently. Dividing them gives them space to grow and flower.

My bulb garden

If you are new to my blog, two years ago I did create a separate bulb garden on the south side of our parcel. The hope is to divide these irises and place some of them in the newer bulb garden. To see my bulb garden project, click here.

Tools You Will Need

Time for a better pitchfork like this one

It’s impossible to garden here without a hat, water bottle and since we’ve had so much rain, a mosquito repellent. I place a tarp down so I can sort and separate the rhizomes.

Using a pitchfork to gently lift the rhizomes and roots, I quickly realize that this will be a difficult project. As stated earlier, dividing irises should take place every 3-4 years. Since nothing has been done in the past 20 years, these rhizomes are firmly embedded, so much so, that I bend the tine of the pitchfork.

Parts of the Iris

You will quickly see the rhizome protruding from the bottom of the iris fan. The roots hang freely below. In the picture above you can see how long the rhizome has grown.

Digging up rhizomes

Condition of the Rhizome

After carefully releasing several iris, I am ready to prepare them for replanting. First I check the condition of the rhizome. If any parts are rotted or showing signs of extensive infestation, I will not replant. However, if just the end or tip has decay, you can cut off the bad areas.

Rotted parts of the rhizome

In order to determine the condition of the rhizome, I place them in a bucket of water to wash off the excess dirt. Here I can evaluate the condition, length and hardiness of the rhizome.

Washing rhizome

Many of the rhizomes are in big clumps and others are just long and linear. Separate these rhizomes from the mother with a sharp knife and discard of the mother, as it will no longer produce blooms. You can break apart the clumps and trim the rhizome to approximately 3-4 inches, using a sharp, clean knife or garden shears (found here).

Cut the rhizome to 3-4 inches in length

For the rhizomes you decide to keep, cut the leaf fans back so they’re about four to six inches long. This helps the plant focus on growing roots before winter.

Trim the fan to 4-6 inches

Replanting

To plant, dig a shallow hole and create a mound in the middle where the rhizome will sit. Place the rhizome on the mound with the roots in your hole. Cover the roots and then place a thin layer of soil over the rhizome. You want the rhizome itself to sit just below the surface, lightly covered in soil. Push any errant roots under the soil with your finger.  

It’s easy to make the mistake of planting irises too deeply. The rhizomes of these plants should be partially exposed to the elements, or thinly covered with soil in hot climates. If they’re buried too deeply, they won’t do well.

Newly planted iris

Since the long overdue extraction of the rhizomes is rather difficult, I still have half a bed to go. But several are now clean and freshly planted in the ground. While digging up the rhizomes, I also discover many miscellaneous bulbs. I am not sure if they are freesias or paperwhite narcissus so it will be fun to see what comes up in the Spring.

My bulb garden in 2021

Irises in Phoenix bloom around Easter time. I plan to fertilize all my bulbs and rhizomes in January, February and March. Hopefully I will have an abundant crop of spring blooms to share with you. Check your area to see when it is the ideal time for you to plant and divide irises.

Happy Gardening! Make sure you keep reading to see what my other gardening friends are up to this month. It is such fun to see their gardens in other parts of the country!

I would love for you to follow me on Pinterest. Please share this pin if you enjoy my post!

Now Off to the Gardening Blog Hop

Well, since my cutting garden is a bit of a failure, I am excited to read Kim from Shiplap and Shells post about 9 Common Cut Flower Garden Challenges and Solutions. See it here.

Shiplap and Shells

Chas from Chas Crazy Creations is sharing When to Harvest Your Garden Vegetables here.

Chas Crazy Creations

Stacy from Bricks and Blooms is enjoying her flower garden and let’s us peek into Gardening Zone 6a Summer Flowers here.

Bricks ‘n Blooms


National Cherry Day

red pitted cherries
Bowl of pitted cherries

Friday, July 16th is National Cherry Day. Who knew? But one not to miss celebrating any holiday, I am embracing these glorious, ruby red gem in a few different recipes today. There is still time to get your fresh, frozen or canned cherries to whip up one of these easy recipes for your own celebration.

Cherry Options

types of cherries
Cherries are fresh at the market

Right now the grocery stores in my area have fresh cherries from the Pacific Northwest. Safeway, our local grocery store is selling the best cherries ~both red and Rainier (yellowish ones). We prefer to snack on the Rainier cherries and bake with the regular red cherries, but it is of course up to personal taste what you prefer.

If you do not have access to fresh cherries, frozen and canned ones are available. If using canned, I prefer the sweet or tart cherries packed in water vs. the gooey cherry pie filling. In the recipes below, I am using fresh red cherries.

Preparing the Cherries

OXO Cherry Pitter
OXO Cherry Pitter

Before you can use fresh cherries, it is important to remove the pit. This OXO cherry pitter is a handy affordable tool that makes pit removal a breeze. And its plastic guard prevents the juice from spraying on your hands or clothing. There is a small platform where you place the cherry and then you just squeeze the handle. The metal rod pushes the pit out the bottom. Easy peasy. You can find it here. However, whenever pitting cherries, I always wear an apron just in case.

Cherry Berry Skillet Crisp

Fresh berries baked with an oatmeal topping in a skillet
A One skillet recipe

This recipe is from one of my favorite bloggers, Tieghen from Half Baked Harvest. She is an innovative foodie who not only creates delicious recipes, but her pictures are so well done. Since I do not like to share recipes I haven’t personally tried yet, as I am writing this I can smell this skillet crisp baking in the oven. If it tastes as good as it smells, we have a winner.

Buttery Cherry Berry Skillet Crisp by Half Baked Harvest

Chock a block full of cherries, strawberries, blueberries and raspberries, this recipe is prepared in one oven safe skillet. Here I am using a 10″ cast iron one (see similar one here).

Melt the butter, add the fruit, mix the topping and spread the crumble on top and bake. Wow. So simple! Click here for the recipe.

A Gluten Free Version

Coconut sugar on cherries

Andrea from Design Morsels shares this gluten free individual serving cherry crisp recipe.

Design Morsels gluten-free version

Using almond flour, raw almonds, shredded coconut, coconut sugar and coconut oil, this recipe can be made in 30 minutes or less.

See the recipe here.

Cherry Bourbon Ice Cream

Cherry Bourbon Ice Cream – Yummly

Is there anything better than homemade ice cream on a hot summer’s day? And I’m not sure you can go wrong with cherries and bourbon. Whether you like bourbon or not, this recipe calls for a hint of bourbon with only 1 teaspoon. I am wondering if any more than that would affect the freezing process?

Basil Hayden Kentucky Bourbon
A really good bourbon

I don’t know much about bourbon but I do know this Basil Hayden is a good one.

Homemade ice cream-soften version

With 1 1/2 cups of cherries this is a wonderful combination of vanilla ice cream, fruit and bourbon whiskey. My trusty Cuisinart frozen custard, ice cream and sherbet maker is able to chill this frozen dessert in 20 minutes. It’s a soft version but then you can finish it off in the freezer if you want a harder consistency. Cuisinart ice cream maker here.

Fruit Water

With all the leftover fruit, I am making a large pitcher of fruit water. Strawberries, cherries, cucumbers, and lemon are a few of the things you can add to water for color and flavor. Isn’t it interesting that all the cherries are sinking to the bottom?

Lately, I am not drinking nearly enough water. Ideally, we are supposed to be drinking half our body weight in ounces of water. Especially as we age, being hydrated is VERY important. Who is with me on drinking more water?

Fun Facts about Cherries

Homemade cherry pie for my husband

These facts are from National Today:

  1. The average cherry tree has 7,000 cherries. Cherry trees are so productive, they can yield up to 28 pies.
  2. There are two main types. Cherries are either sweet or tart.
  3. Michigan is the cherry capital. Around 94% of cherries consumed in the U.S. are grown in Michigan.
  4. Pits contain toxins. Don’t chew on cherry pits because they can release toxins.
  5. There are more than 1000 different cherry varieties, sweet and tart combined, but only 20% of them are used for commercial purposes.

Happy Wednesday and Happy National Cherry Day this week. Enjoy the delicious, fresh cherries while they are in season!

If you enjoy this post, please feel free to share on Pinterest.


Mountain Decor

Pinetop, Arizona

There is a plethora of blog posts and magazine articles about getting the “beach” look for the summer.  This time of year, the words summer and beach are synonymous.  However, I would imagine many people alternatively go to the mountains or lake instead of the beach. In Arizona, we are blessed with beautiful mountains within an easy driving distance and with the altitude comes cooler temperatures. So let’s head to the mountains and check out some mountain decor.

Rustic sign of welcome

Adding some decor touches

When I go on vacation having a completely different decor/scenery helps with the “winding down and being on vacation” mode. Getting out of the daily grind and going on vacation means a slower pace, lowering my shoulders, spending time with family, being subdued and taking in the gorgeous scenery.

Pillows in our dining room

Any home can be decorated to feel like it belongs in the mountains with only a few of the right accessories.

The bunk room at White Arrows Home

My friend, Kristin, from White Arrows Home lives in a gorgeous mountain cabin in Wisconsin year round. She is the expert at decorating her log cabin, fondly known as Camp Paradise in a rustic style. Check out her blog here. She just opened a new store, too, so if you are looking for unique items, she does ship!

Cooper loves the daybed

Utilize your space

What is a vacation getaway without a cozy place to read or nap?  I purchased this day bed years ago in a junk store.  At that time, the chippy paint style was not as popular and the frame is very white and very chippy.  I spray painted it a satin Moss Green from Rust-Oleum which is ideal for both indoor and outdoor use. Plus it blends in nicely with the colors of the forest.

The striped fabric seems fitting for a daybed in the screened-in porch. The bed actually slides out so the bottom cushions sit side by side~making a double size bed.  The pillows were my first attempt at sewing a welt on my own.  Don’t look too closely at my “rustic” mistakes!

Rustic Elements

In the same screened porch, we have a small table with 2 chairs and a vintage wicker lounge chair, perfect for a morning coffee.

Most of the furniture is cobbled together~leftover pieces from our home and garage sale finds.  But it all seems to work as cabin living here is casual and comfortable.

A Place to Gather

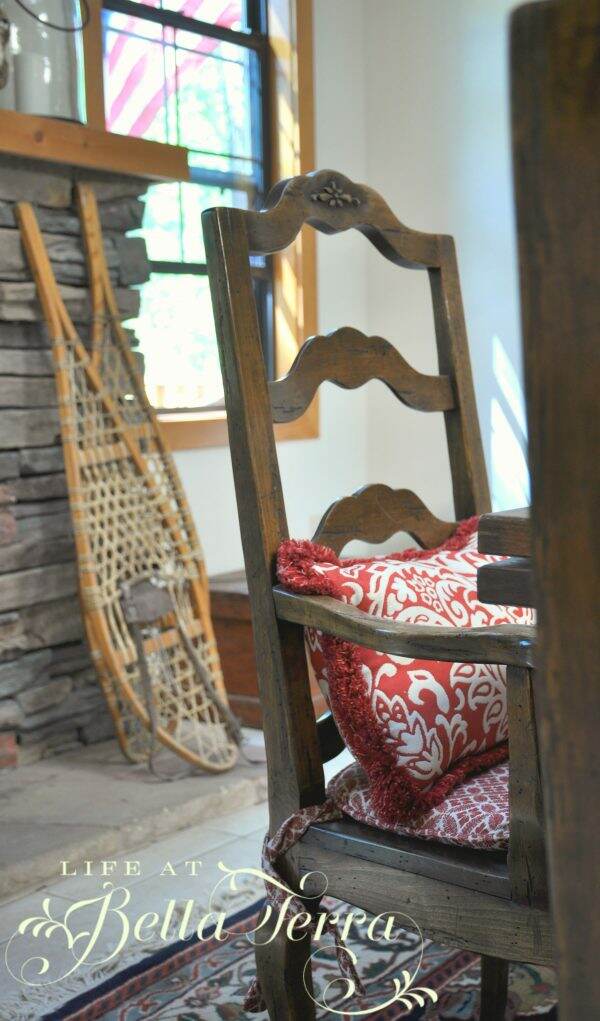
There is nothing better than family and friends gathering around a large table. This dining room set is a thrift store find and table leaves slide out to accommodate more seating.  The ladder-back chairs complement the mountains decor.

My friend, Linda Frederick, from Arcadia Design and Stitch made the seat cushions and pillows out of this sweet fabric.

Special Touches

Small accents like these old snowshoes are reminiscent of outdoor winter sports. Just a tip if you are looking for snowshoes~~they were much less expensive here in the Phoenix thrift stores than those in the mountains.

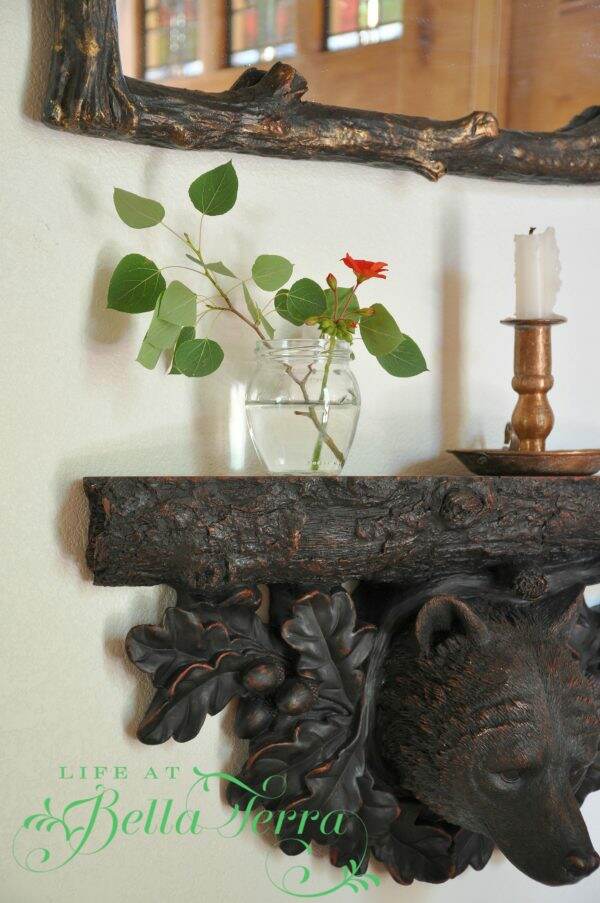
I love anything faux bois (French for false wood) which is the artistic imitation of wood or wood grains in various media. Since last year, I am consistently adding items with a Black forest motif to make the cabin feel more Scandinavian. To see my post about accomplishing that, click here.

This songbird arched mirror comes with a finish which lends to the rustic vibe of the cabin. You can find it here. Not only is it helpful to have a mirror in the front hall by the door, but it pairs nicely with the Black Forest bear and acorn shelf.

This simple, inexpensive bench was found at a junk store and I recovered it myself in cowhide. Situated right in front of the fireplace, it is the perfect place to warm up on a cold evening.

Find it in Nature

Being surrounded by beautiful Ponderosa pine trees, there is an abundance of natural material to use.  

We collect pine cones during our walks and they make the perfect centerpiece in an old dough bowl, or as a place card holder!

A simple place card holder

Accommodate the Weather

Vintage camp blanket from Camps and Cottages

The temperature in the mountains can vary significantly. During the summer it is warm and toasty during the day, but the afternoon storm clouds move in and it can get chilly. As a result we have blankets and quilts scattered throughout the house. This vintage camp blanket was purchased one summer from Camps and Cottages during a trip to Laguna Beach, CA. 

One of my favorite shops in Laguna Beach, the owner, Molly English, is a talented designer. We became fast friends and I have all the books that she has written on camps and cottage decor.   Her latest book, Contemporary Cottages is filled with wonderful inspirational ideas and decor.

Molly Hyde English’ book Contemporary Cottages

Show off your Collections

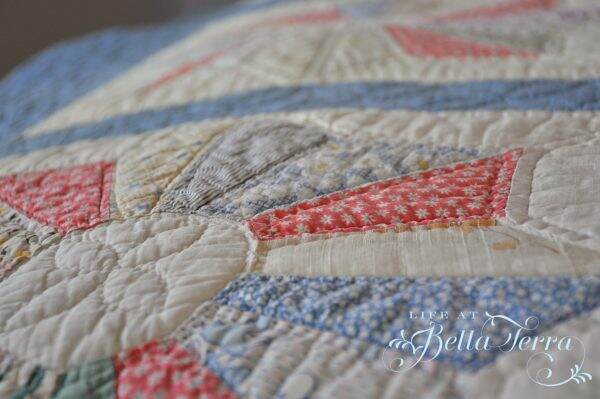
Collecting quilts over the years, provides each bed with a quilt. And each quilt has its own story.  

My daughter’s room

This sweet quilt in my daughter’s room was purchased many moons ago (before children) during a cross country trip. Hidden in a corner of an antique store, it was filthy and nearly black but I could tell that by the intricate stitching that it was a keeper.  Hauling it home, the quilt is placed in a bathtub filled with cold water and Ivory Snow. Miraculously, after a long soaking, the dirt floats away and the quilt came to life. You can imagine my delight when it was finally clean!

The maple four poster bed is mine from childhood.  I recall my mother stopping by the roadside and buying it for $2.50.  It was painted a bright red and she lovingly refinished it to its natural wood grain.

Rescued quilt

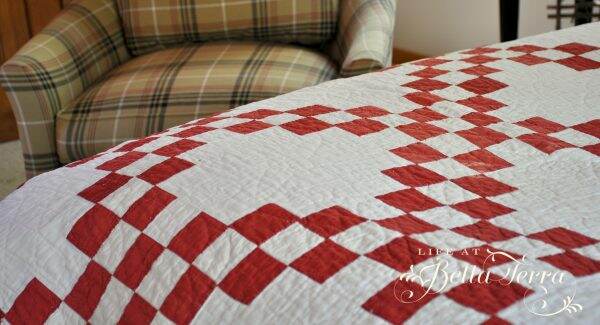
The quilt in my son’s room was made by his paternal grandmother.  It’s hard not to admire all the work that goes into these beauties. Does anyone know the name of this pattern?

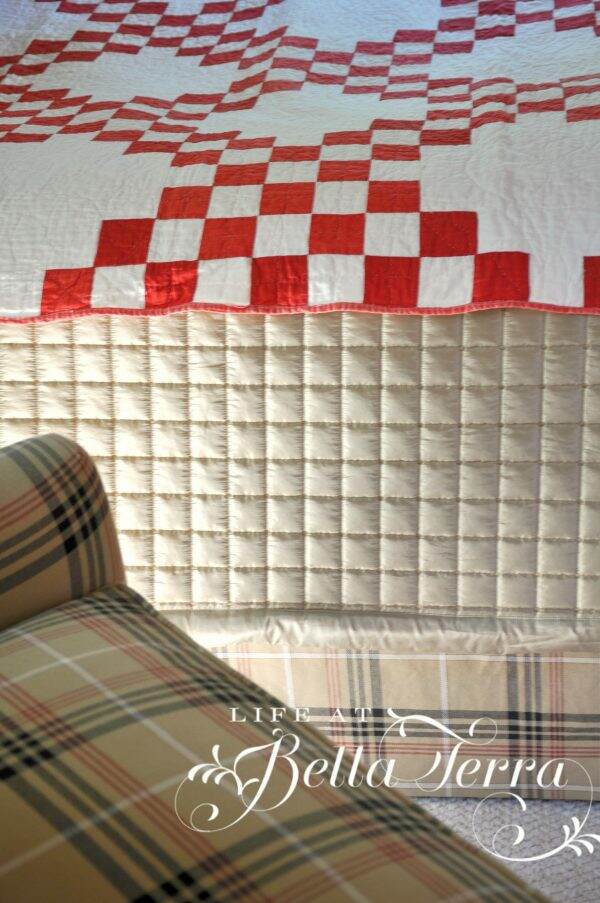
A simple red and white checkered coverlet is in my other daughter’s room.  It pairs nicely with the Burberry fabric on her side chair and bedskirt.

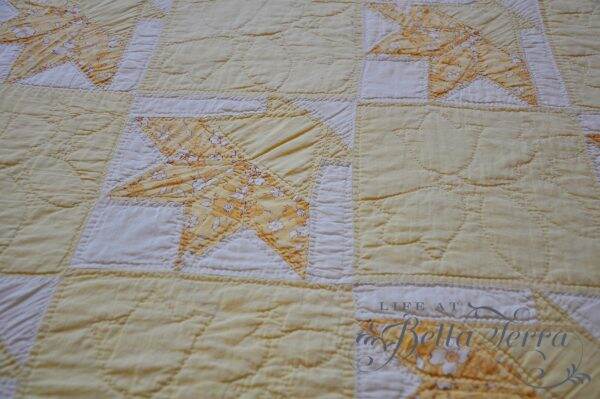
The guest room has two twin beds and it is very difficult to find matching quilts.  However, a side trip to Bisbee, AZ many years ago yielded these yellow darlings.  The vintage fabric has some wear and tear but they are so sweet with the darker bed frames.

Whether summer means the beach or mountains to you, it is a time to enjoy your surroundings. Or maybe just adding some summery touches around your home is enough to make you feel like you are on vacation. The best part is to just enjoy it all~the lazy, hazy, crazy days of summer, as they seem to fly by so quickly.

Wishing you a summer filled with rest and relaxation!


Gathering Seeds

Sunflower Seeds

It is time again for our monthly blog hop where my fellow gardening buddies share news from their gardens. Most gardens around the country are now abundant with fruits and vegetables. But in USDA Hardiness zone 9B (Phoenix, Arizona), my garden is past its prime. Since it is difficult to do a great deal of summer gardening in our triple digit temperatures, I just let the garden go. A few plants manage to make it through to fall, but not many. Actually, it is a time I start collecting and gathering seeds.

Procut Gold Sunflower Seeds from Floret Farm

In February I received seeds from Floret Farm. This is my first time ordering from them and my yield was less than expected. I place the blame on very hungry birds who were successful in pulling out the fragile shoots, which I should have covered. But the sunflowers that did make it, are just beautiful. Even though I did hope to cut armloads of them, the birds seem to be enjoying them even more.

Look how these sunflowers attract a flock of peach faced lovebirds! Seeing these stunning birds in the garden frequently is rewarding.

Dinner!
Peach faced lovebirds enjoying the sunflowers

Now the sunflowers are past their prime. The petals are dry and falling off and the stems are leaning over as if they are ready to go to sleep. Since this is my first time harvesting the sunflower seeds to use at a later date for planting, or sprinkling with salt for eating, I need to do some research.

Dying Sunflower head

Prior to harvesting the seeds, you need to look for a few clues that it is time to harvest. You can let the flower dry on or off the stem until the back of the head turns brown, the foliage turns yellow, the petals die down, the seeds look plump and somewhat loose.

From what I gather from the internet, there are two ways to harvest the seeds from a sunflower.

Cut off the Head

Heads removed from the plant

Since I did this just before leaving town, I put all the dried sunflower heads into a paper bag. When I get home, I will remove the seeds using a fork or just rubbing my hands over the head. These flower heads may have been left on the plant a bit too long, as they look incredibly dry to me.

Leave the Heads on

Experimenting with the second option, I leave the sunflower heads on the plants. By wrapping the heads in tulle and securing with ribbon, hopefully the seeds will dislodge and fall within the netting bag. Can you see the “face” in the above photo? A bit creepy, right?

ProCut Gold Sunflower
ProCut Red Sunflower

There is joy in growing sunflowers, as it is fun to watch the stages of growth. They are fast growing and are so pretty in the garden. Not to mention all the birds and bees they attract too. Hopefully I will get viable seeds and grow them again next season.

Getting out the sunflower seeds

Wish me luck!

Hollyhocks

Hollyhocks in full bloom

Our property has an abundance of hollyhocks as they grow like weeds in multiple beds. I love these plants because there are many different colors option and petal formations. When they are in full bloom, these flowers make a grand statement. Gathering hollyhock seeds is VERY easy.

Like most plants, as they are dying, hollyhocks are not very attractive. Their flowers fall off, and their tall stalks wither and tip over. But that is all for a purpose. As the stalks hit the ground, the seeds fall out and the propagation process begins all over again.

Hollyhock seed head

At the base of the flower, the seed head exists. Stacked up like little dominos, the flat black seeds are numerous.

Seeds easily fall out

Using small paper envelopes, I tap the seed head and let the seeds fall in.

Collecting seeds

With a marker, I label the hollyhocks based on color of flower, or number of clusters of blooms. The first time I planted hollyhocks, nothing happened the first year. I nearly forgot about them and then lo and behold, I now have hollyhocks everywhere. The birds must play a role in spreading them too.

It is tempting to cut down a plant when it is dying, but letting it go through the entire process helps provide the most nutrients back to the seeds. I am always tempted to pull tulips and daffodils after their prime, but the energy does go back into the bulb for the next season.

Whatever stage your garden is at currently, please consider saving seeds. They make excellent gifts and there is something satisfying about growing generation after generation of plants.

The Monthly Gardening Blog

Now let’s see what my fellow gardening bloggers are featuring this month.

Chas from Chas Crazy Creations shows us some easy DIY Garden Plant Care here.

Stacy from Bricks ‘n Blooms gives us an early summer garden tour here.

Kim from Shiplap and Shells has 9 ways to protect your garden from extreme heat (geez, I need to read this one!). You can see it here.

Gardening is so rewarding wherever you live. From lowering blood pressure to providing food, it’s a worthwhile endeavor.

If you enjoy this post, please feel free to share on Pinterest.


Refinishing Outdoor Furniture

Thanks for joining me today for our DIY Monthly Blog hop. This month our focus is something to do with seating. Over four years ago, I did a DIY project where I repainted our outdoor furniture. Fast forward to today, and the pieces look as new as ever! Here in the Arizona sun, our outdoor furniture takes a beating. It is rewarding to know that this technique is still producing gorgeous results. Let me share how easy it is to refinish outdoor furniture.

The Before

Lounge chair with oxidized frame

Here you can see the metal frame of the lounge chair in its oxidized condition. Instead of being a dark, rich brown, the finish almost looks purple.

Notice the variation of color

The pieces that need work are a lounge chair, a regular chair, a large ottoman and a round table. All these pieces are on our deck outside the master bedroom. The seating is rubber straps that do not require any work.

4 pieces that need refinishing

Supplies

I purchase 5 cans of Metallic Oil-Rubbed Bronze spray paint from Rust-oleum. There is something about the depth of this color that I love for outdoor furniture. You can find it here

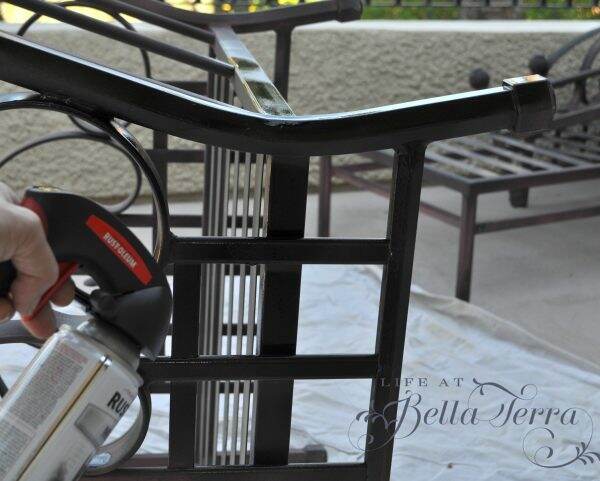
If you have ever done a lot of spray painting, you will know how challenging and tiring it is on your index finger. With this handy attachment, spraying is so much easier.

Best tool for spray painting

The Comfort Grip attaches to the top of the can and the handle helps to apply the paint evenly. It is so inexpensive and well worth it! You can find it here.

After wiping down the seating frames with a damp cloth, I am ready to paint. Using large drop cloths, I lay the furniture down and spray the bottom sections first. I tend to spray paint my feet (or socks) so be aware of where the paint is landing!

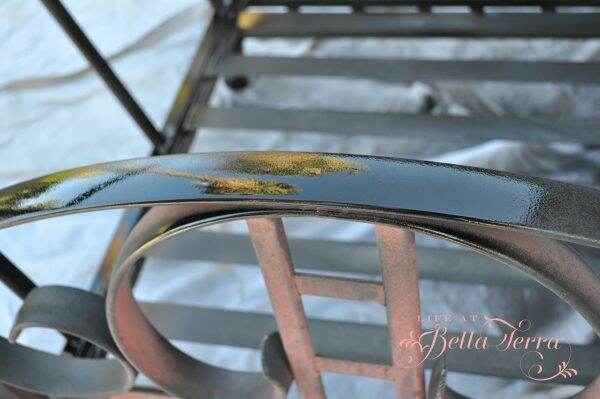
You can see in this photo the huge improvement from a new coat of paint.

Big difference!

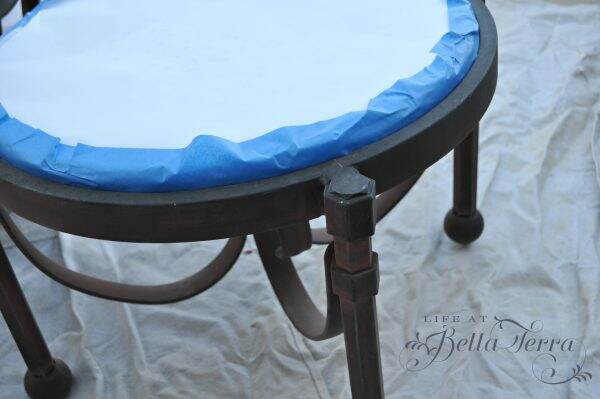
Since the stone top of the table is not removable, I carefully tape the edges with painter’s tape and make sure not to overspray the top.

Protecting the stone top

Allow to dry according to the manufacturer’s instructions. Also make sure you look around the furniture for missed painting spots.

The After

Here is the furniture 4 years ago. Doesn’t it look clean and new?

Furniture is finished!
Looks like new!

Now here is the same furniture today. We did move the pieces to a different location on the covered portion of the deck. But even after 4 years of being outdoors in the Arizona weather, all the seating pieces still look good!

Lounge chair today

The spray paint did hold up beautifully. Actually, the only thing that has changed is the pillows are a bit faded now from the sun.

Paint is still looking good!

Outdoor furniture can be pricey but with a bit of maintenance they can last you a long time.

Now onto the DIY Blog Hop

Thanks for joining me today. Now onto the other bloggers who will share their seating projects!

Andrea from Design Morsels shows how to cover your office chair here. I need to check this out as my office chair is looking a bit skanky.

Allison from Darling and Dapper Life creates a DIY Farmhouse Bench here.

Chas from Chas Crazy Creations gives us a great tutorial on How to Clean a Sofa.

Tarah from my Grandmas House DIY has two favorite rocking chairs that she has updated. You can see it here.

If you enjoy this post, please feel free to share on Pinterest.

This post shared with Between Naps on the Porch Metamorphosis Monday #649.


Saturday Meanderings

My patriotic charcuterie tray

As I am writing this I am in the mountains of Arizona and out of the insufferable Phoenix heat. The only downside to owning a second home is there is always some maintenance problem to tackle. But I’m not complaining, as it is cool, green and gorgeous here. So let’s get started on our chat about all good things this past week. Thank you for joining me for Saturday Meanderings on this July 4th holiday weekend.

Speaking of home maintenance..

Dead A/C and dead lawn

Upon our return from our 10 day trip to Nantucket, the air-conditioning unit servicing the kitchen, mud room, and library died. Fortunately, our HVAC person is able to quickly respond and get us a new one. OMG! When did the price of air conditioners skyrocket? But after a full day of installation, the kitchen is now nice and cool.

Painting the deck railing

Our cabin has decks made of wood. One of these days, I know we should go to the expense to replace them with a composite material, like Trex. But that too is expensive and anything to do with construction materials is difficult to get right now. Well, I just couldn’t stand the blistering surface of the top of the deck railing by the front door. So a couple of quick passes with a belt sander and a few coats of Behr’s Weatherproofing All-in-One stain and sealer, and it’s a temporary fix for now.

Isn’t Nature Interesting?

As you may recall, we bring our big pots of geraniums up to the mountains for the summer. They LOVE the cooler weather and occasional rains. One of the first things I do when I get to our cabin, is dead head the plants and water them.

However, yesterday, a bird did not appear happy that I was near the plant. It was chattering at me looking quite disturbed. Sure enough, look at the beautiful nest I found buried in all the foliage. But why 3 blue eggs and a speckled one?

Why is a cowbird egg in someone else’s nest?

Cowbirds are brood parasites, which means females lay their eggs in the nests of other birds and let the other mother bird do all of the rearing.

The cowbird will wait for a resident bird to leave her nest and then will usually damage or remove one or more eggs and replace that one or more eggs with her own.

The foster parents unknowingly raise the young cowbirds. Who knew? Thanks to my son, Benjamin for sending me this information.

Update on Furniture damage

Thanks to many of you who shared their remedies for repairing the damage to the dining room table. I did try mayonnaise, but to no avail.

Once we return home, I may try a few more times, but in the meantime, are also seeking knowledgeable furniture repair specialists.

Grilling

It’s that time of year for lots of barbecuing and I cannot recommend these grill mats enough. Not only do they minimize clean up, but the grill marks still occur and the food tastes the same. Recently, we did grilled peaches and they were perfect!

I like the fact that you don’t have a messy grill when you are finished cooking. The mats clean up easily and are reusable. You can find them here.

My Garden

Pedilanthus macrocarpus, Lady Slipper. Image Green Meadow Growers

The high summer heat does fry many of the plants in the garden. Surprisingly some plants are actually blooming, like the Lady Slipper, a succulent that looks a bit prehistoric to me. The thin, lime green, leafless stems, create wavy, straight or arched clustered growth.

Lady Slipper in bloom

Right now, they are flowering with delicate pink blossoms that look like a lady’s slipper. Sorry the photo is a bit blurry.

Pumpkins in July? I just picked two pumpkins from the garden. One of these years, I am going to get the timing right. Last time I grew Fairytale pumpkins they were done by mid-June. But aren’t the stems wonderful?

Beautiful Pillows

Pillow sham from My Stylish French Box

One of the beautiful items I received in the May box from My Stylish French Box, is this gorgeous pillow sham. The colors are perfect for our master bedroom (see the master bedroom here). Not only is the quality very good, but I am able to order another one through the website. The second pillow sham arrived and don’t they look fabulous on our bed? Here is the link to the pillow sham.

Saint-Tropez

Apparently the theme for the August box will be Un Weekend à Saint-Tropez. To learn more about this box, click here. These boxes make perfect gifts too.
Happy Independence Day!

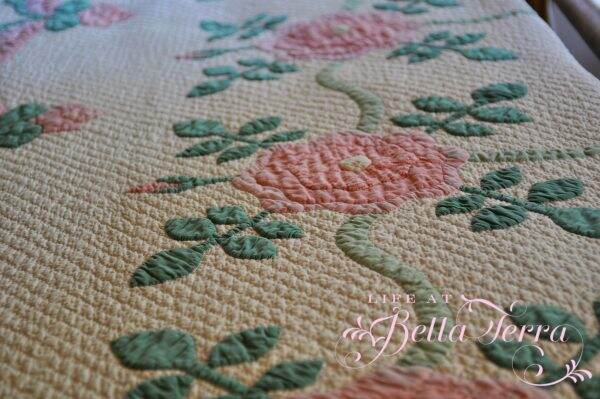
Patriotic table

Wishing you all an enjoyable, safe and happy holiday. Remember to celebrate the true meaning of July 4th~our freedom and the signing of the Declaration of Independence.
Thank you again for following me and sharing all your stories, inspirations, and recipes. I am so grateful to all of you!
If you missed any of my posts this week, you can find them below.

DIY Patriotic Wreath
A Trip to Nantucket