1

Saturday Meanderings

Happy Saturday! My hope is that Saturday Meanderings is to have a conversation with you about odds and ends about the previous week. So pull up a chair and grab a cup of coffee and let’s chat.

Boy did this week fly by and it is a stressful one that I am happy to have behind me. Do you ever have one of those weeks that everything you touch doesn’t go smoothly? The planets feel a bit misaligned for me lately.

My goal of heading back to Phoenix this week from our cabin is delayed due to car trouble. Finding a big puddle of pink fluid under the car didn’t bode well and this creates a delay in my trip home. As I am writing this post, I am awaiting to hear the status. If I didn’t have a million things to do in the Valley, I’d love to stay here. But I cannot complain to have another few days in our beautiful mountain weather.

I did start a new project with hopes of sharing it with you today, but that too, did not go according to plan. Last month, I wrote a blog post indicating my desire to add more Scandinavian touches to our mountain cabin. (see blog post here). Well, the re-painting of this chest of drawers is my first real attempt to do so. Here is a sneak peak.

Cabinet before

This cabinet has 8 drawers of varying sizes. I have 6 of the 8 painted as my dilemma seems to be the these two drawers that are different from all the others. The two center drawers looks like 8 smaller ones with 8 ring pulls. So long story short, I decided to wait for the new pulls to arrive before I determine what the painting design will be. And the pulls came in the wrong size and I was 2 pulls short.

So as of today, the project is stalled until the new hardware comes in….and for my next trip to the cabin.

Mindful Minute

Since this week held more stress than others, I am so grateful to have access to Mindful Minutes. If you aren’t familiar with this, I cannot recommend it enough. My friend, Chas (from Chas’ Crazy Creations) has daily exercises on Instagram to reduce stress and they are a minute long. But I can honestly say, the one minute of taking a break from the computer (or other chores) and doing her brief exercises and breathing techniques is a LIFE SAVER. Seriously, it is the best thing you can do for yourself every day.

In addition, Chas is such a kind soul. She is the type of friend all of us need. Please get to know her. You will be so delighted that you did. Here is her link to Instagram; and her link to her blog.

Someone or something stole my pears

Last year, lo and behold, I discovered we have a pear tree at our cabin. This tree NEVER produced fruit before and was shockingly, full of pears. This year, the pear tree is also producing a great deal of fruit. Until this week. It has two pears left. The rest of the pears are GONE.

It’s a mystery as the pears are not on the ground. They have just vanished. Does anyone have any idea why this would happen? Is there a local pear thief? An animal?
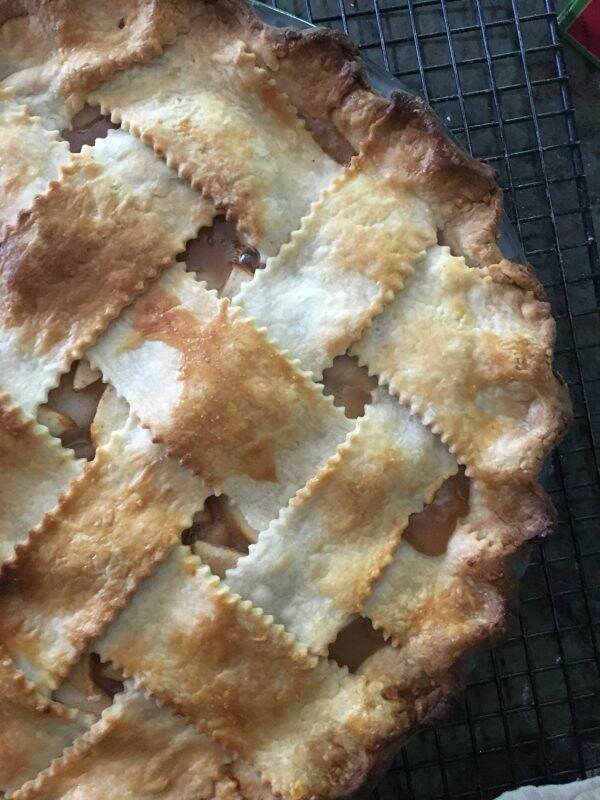
Naturally I am so disappointed because last year I made the best pear dessert, A Pear and Caramel Pie (see recipe here) and pear preserves. Looks like I will just need to purchase some pears from the Farmers Market.

Rosary Beads

I recently received a payment for some work I was subpoenaed to do for a law firm who is suing the City. Long story, but lots of nastiness involved. Since the check felt like dirty money to me, I spent it on a set of rosary beads. If you have been following me from the beginning, you know I collect rosary beads (see post here).

Seraphym Designs, based out of Santa Fe, New Mexico makes the most gorgeous original heirloom rosary beads. Each design is carefully handcrafted in the United States and contains replicated devotional metals that date between the 14th and 19th centuries. In 2015, Seraphym Designs was commissioned to make an original St. Serra rosary for Pope Francis during his visit to the US.

Not only does the founder, Arasely Rios creates rosaries but she also makes beautiful jewelry. If you are looking for a unique one of a kind gift (they have a wedding rosary), I suggest you visit their website. And now I feel like I took bad money and spent it on something good.

Drone Video on my last Restoration

Video done by Austin Ely

Recently I was contacted by the owner of my last restoration remodel asking if I would give permission for the before and after photos to be used for a virtual historical home tour. Looking back at previous projects is such fun, as I forget many of the details over time.

Here is a 2:33 minute drone video that was done after the completion of the Willetta Restoration. I truly think it is one of my best renovations. Video created by Austin Ely. To see more information on this 1922 Jeffersonian home, please click here.

Thank you for all the great advice

I hope you read the blog post this week on rejuvenating my fabric pumpkins. So many people offered solutions to the bug infestation (thank you, bay leaves) and alternative filling. Instead of rice or beans which tend to get bugs, readers suggested pebbles and cat litter. Such great ideas and I cannot wait to try them.

Always love getting feedback from you!If you missed this easy DIY post, click here.

Beginners Blogging Retreat

If you are looking for a small group where you can learn how to build a blog, this is the retreat for youo. Learn more about this blogging retreat for beginners in Arizona. Group size will be limited to 12. You will learn about setting up your blog, writing better content, search engine optimization and how to promote your blog.

As you know, I started blogging to keep a living record of life here around our historic property/farm. And for the first few years, I happily dabbled in it. Last year I attended my first blogging seminar and realized just how much I don’t know.

I set my sights this year to learn more, because if you are always learning you are always growing, right? Well, there is SO much to learn about blogging and who knew? I certainly didn’t. But what I have learned is that what works for one person who has been blogging for 10 years, doesn’t necessarily work in today’s social media saturated world.

So, a group of talented friends are putting together a Beginner’s Blogging Retreat and we are holding it here at Bella Terra. If you are interested or have friends who are interested, please click here.

The seminar is for the person who either wants to start a blog or is in the beginning stages. It will be a fun day here at Bella Terra with good food, new friends, great information with lots of personal attention. Plus there is a discount for those who sign up before October 15.

We know that in light of COVID the world can change on a dime, but we are limiting the class to 10-12. It will be held on our back terrace, which is outdoors and has plenty of room to social distance. And it will be on November 12th when the weather is glorious.

If this is your jam, we hope you will consider attending! Also, feel free to reach out to me if you have questions or concerns.

Last fall~trip to Connecticut

That’s All Folks!

Well, that about wraps it up for this Saturday. Hoping your week went well. Thank you all for joining me!The official first day of fall is just around the corner! As soon as I get to Phoenix, fall planting begins! Stay safe and healthy out there!

If you enjoy this post, please feel free to share on Pinterest.


Making Fabric Pumpkins

This is not a DIY project I was looking forward to but was forced to try. Years ago, I purchased several beautiful fabric pumpkins at a school fundraiser. Every year when I unpack them they look fabulous. Not this year. For some reason, weevils (?) infiltrated the fabric pumpkins and had a year to reproduce. It was so gross!

So I discarded the pumpkins that were badly damaged. In saving the pumpkin stems, I wasn’t sure if the weevils are taking up residence in there. Placing the stems in ziplock bags, I put them in the freezer just in case.

Since I have leftover fabric at the cabin, next on the shopping list is filler for the pumpkins. The infested ones had both dried kidney beans and rice. Unfortunately, Safeway is completely out of dried kidney beans (go figure). So I am forced to use rice. Next thing to buy is bay leaves.

Since most of the residual pumpkin stems are on the smaller side, I measure the fabric for a 10″ circle using a Pyrex bowl.

The only thread I could find up here is from the Dollar Store and doesn’t look like the best quality. So I use four strands on my larger needle. Using the basting stitch, I go around the entire circle of fabric.

By tightening up the thread, you create a pouch which is ready for the filling.

On this first pumpkin, I use only rice. In retrospect, I may have overfilled it as the pumpkin is a bit hard and not a pliable. In order to prevent future weevils, I add bay leaves too.

You will need strong thread (or 4 strands like mine) because in order to close the pumpkin, you must pull it together to minimize the opening.

Taking the needle, I sew back and forth, and side to side to securely close the top.

Using a glue gun, I affix the stems to the top of the pumpkin. (Thank you to my friend and neighbor, Kathy for letting borrow this!)

Holding the stem in place for several seconds, guarantees a secure fit. If you don’t have actual pumpkin stems, you can use a stick or cork and apply it the same way.

For the next pumpkin, I use a bigger bowl to measure for a medium size one (the bowl is 13-14″ in diameter). I repeat the same process but instead of using just rice, I put about 1/2 cup of rice in the bottom and use polyester fiber fill. The combination of the two makes a more pliable pumpkin.

This one is a little more difficult to stitch due to the thickness of the fabric.

Again, secure the stem to the pumpkin with the glue gun.

Here are the results of this DIY project. It is interesting that the fabric plays a role in how the pumpkin performs. The stiffer the fabric, the less squishy the pumpkin.

In addition to adding bay leaves to the filler, I am also placing several bay leaves inside the plastic storage box. Let’s hope these little critters are dead and gone.

To see how I use these fabric pumpkins for fall decorating in previous years, click here.

This post shared with Thursday Favorite Things


What Makes a House A Home

Gray Green Walls
Sarah Richardson Designs-photo from Decorpad

So last night, I was thinking about all the things that make a house a home. This started when I was admiring my lamps in the master bedroom at our cabin. I was relentless in hunting down these lamps, which literally took weeks. I first saw them in a photo (above) of a Sarah Richardson bedroom.

Sarah Profile Image
Sarah Richardson

Who remembers the television show, Sarah’s House back in 2014? Sarah Richardson is a Canadian designer and at that time, I was a big fan and loved her style. Rich in fabrics and textures, her bedrooms are dreamy and colorful. Both Sarah Richardson and Candice Olsen were all the rage before Joanna and Chip Gaines.

A Look Inside Sarah's House | Sarah's House | HGTV
Sarah Richardson Designs-photo from HGTV

When the lamps arrived in 2 BIG boxes, I was so excited. So every time I turn on the lights by our bed, I am reminded of how determined I was to purchase these lights. Our master bedroom cabin is on the large size and the scale of these lamps is P.E.R.F.E.C.T!

Luckily, Paulo Bracket Light TOB2201 designed by Thomas O’Brien can still be found through Circa Lighting and through online searches.

The brass arm is articulating and therefore you can pull the light closer to you if needed. The barley twist leg side table is one I found at a thrift store. Someone had waxed and chalk painted over the beautiful wood. It took quite a while to get it back to its original patina, but it is definitely another special piece.

The basket below the table (since there are no drawers) holds my reading material, hand cream and other night time necessities.

Back to Sarah Richardson….So I haven’t seen her work in a few years and I do not believe she has a current television show. Thanks to the internet, I looked her up and boy, has her style changed. She is now more minimalistic and modern. Surprisingly, in one of her videos she is using lots of IKEA pieces. Though her spaces are beautifully orchestrated, I find them lacking the warmth and interest from her previous style. But to each’s own, right?

Contemporary Chalet: Media Room
Sarah Richardson Designs now~Contemporary Chalet

So what elements make a house a home? For me, it is furnishing my home with pieces I love. That there is a story behind each one. The pieces do not belong to a set, but have unique features and qualities. They vary in age and style but they work together for me.

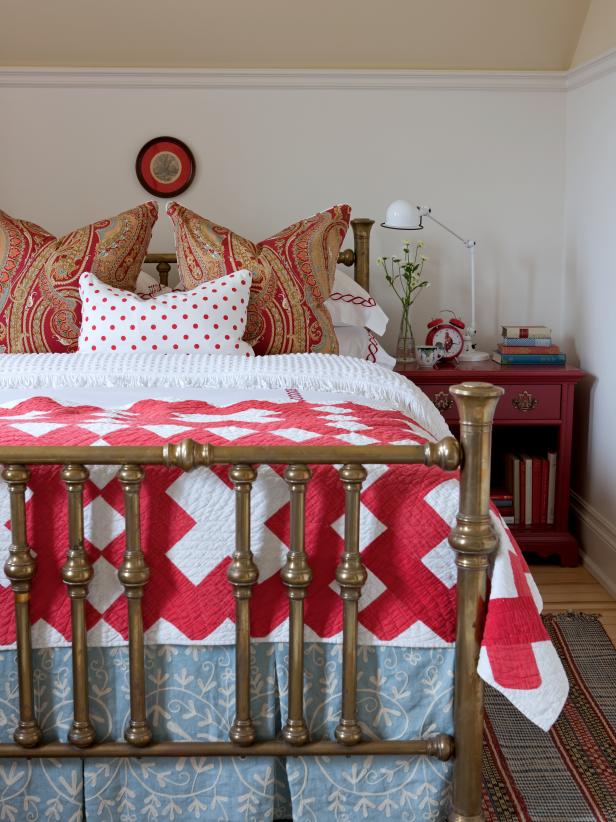
Like this picture. My mother found this four poster bed on the side of the road for sale for $4.00. It was painted red and she and I stripped it back to its original wood. This was my childhood bed and now it is in my daughter’s bedroom at the cabin.

Or the quilt~which I found during a cross country driving trip. It was in an old antique store black with dirt. I carefully hand washed it in a bathtub of Ivory Snow before I finally saw the beautiful complex stitching. Or the Ralph Lauren sheets that I paid for with my first big promotion. The Laura Ashley rug is from my very first house in Connecticut ~back when Laura Ashley was a thing!

The painting of the pink roses is mine~done in my first year of taking art classes. So many memories in one small room!

There has only been two times in my life where I used an interior designer. When I was a corporate executive, I was traveling a great deal and depended on others to pull my home together. I can honestly say I have no connections with the items they purchased. There is no story to be told except my memory of paying them for their services. Finally, after many years, I have removed several of those pieces and replaced them with meaningful ones.

Maybe my home and cabin aren’t magazine worthy, but they are filled with antiques, vintage, unique pieces and glorious memories. I can recount with nearly every item, where I got it, the life stage I was in and how it touched my heart.

When you look around your home, what do you see? Cherished items and wonderful memories? Or a perfectly staged home that is magazine worthy? Or both (lucky you!)?

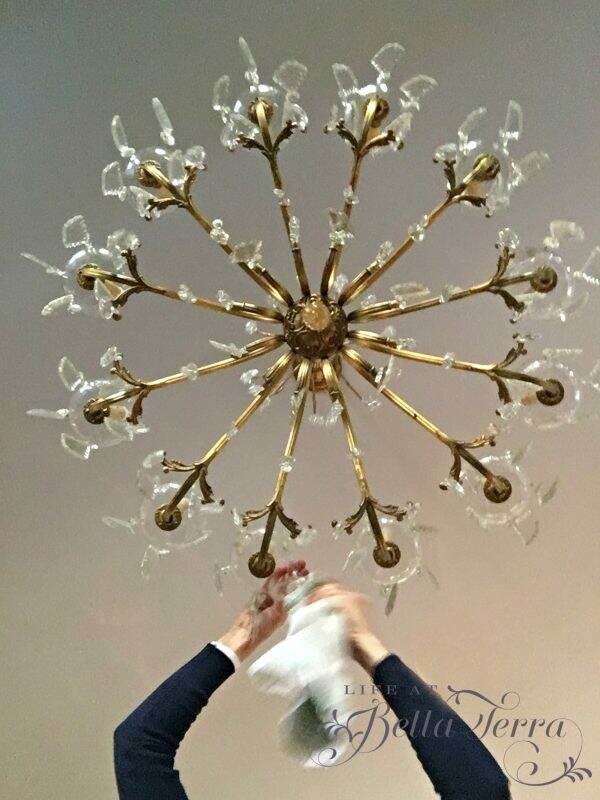
Cleaning a Chandelier

I know some people would say that you shouldn’t get so attached to “things”. But they are more than that to me. These items spark wonderful thoughts and memories of all the different phases of my life. When I see the houndstooth sofa in the above picture, I see my teenage daughter Elisabeth, giggling and plopping down on it.

Could I let go of all of them? Yes, because the feelings and memories remain in my heart. But these cherished items help tell the story of my life and my family. And that is worth clinging to.

If you enjoyed this post, please feel free to share on Pinterest. To see more pictures of our cabin, click here.

This post shared with Between Naps on the Porch Metamorphosis Monday #610


DIY Wreaths Using Natural Materials

I love incorporating natural materials into any DIY project for two reasons. 1) You cannot replicate nature and its beauty; 2) Natural products are free and do not cost anything. Good quality faux branches and flowers are expensive. And even though they are pretty, they are not genuine or unique as Nature provides. Have you ever made a wreath using natural materials?

Cattails

Materials You will Need

Currently, I am still at our cabin in the mountains and resources and supplies are very limited. There is a Walmart about a 25 minute drive from here and often, they are low on inventory. The only wreath frames available are 2 18″ grapevine wreaths for $4.74 each. In addition, I needed a wire cutter for $4.88 and floral wire for $1.47. Any kind of wreath frame will work.

Walmart’s faux floral section is so depleted and what is left, well, let’s just say it isn’t my taste. However, I was recently very inspired by a blog post written by Christine from Designs and Events. She made a wreath using roadside plants and greens. Since I’ve never made a wreath using natural materials, I thought I’d give it a try. Don’t you just love it when someone or something inspires you?

Foraging for Plant Material

The mornings here are crisp and cool now which is a great time to scavenge and hunt for just the right foliage. I do not know the names of these plants and they could be weeds for all I know. But I am looking for different textures, colors and sizes to make sure the wreath is interesting.

Wreath #1

Prep Your Work Space

Armed with my straw basket I set out looking for a variety of cuttings. The oak and aspen trees provide good material for the backdrop of the wreath. When I return home, I spread out a plastic tablecloth to assemble the wreath. Be prepared for a few bugs too.

Fill in the Background

I cut the oak leaves into manageable sizes and wire them to the grapevine wreath. Then I add the aspen greens, tucking them among the oak.

Here is what the wreath looks like at this stage.

Add Different Elements

Next I add this very fall looking flower (not sure the name), tucking the stems in with the greenery.

Using an odd number of sprig groupings, I sprinkle them around the wreath.

Next I add this soft, tubular shaped grass (?) with its sage green tones.

Since I don’t have a glue gun up here, I am tucking the stems in the wire used to secure the oak and aspen leaves. With the grapevine structure, it is easy to slip the stems into that as well.

These dark, rusty red branches already have dried leaves on them. Placing them on the bottom of the wreath, will lead your eye to the center. Another option would be to break them into smaller pieces and scatter them through the whole wreath.

Finding fresh thistle with its purple spikes was a painful delight. They are SO thorny and prickly. Wearing gloves is important while working with them.

So here is Wreath #1. Ribbon would be a great addition however, I failed to buy one.

Wreath #2

With the second wreath I decide to do something a bit loose and less complicated. Using the leftover grasses, I wrap them with the floral wire around the second grapevine form.

Isn’t this just pretty as is?

Using a few pumpkin and amaranthus picks from Walmart for $0.97 each, I only decorate one side. Here are some autumn picks from Amazon.

Faux pumpkin pick
Faux Amaranthus pick

Here is how Wreath #2 looks!

The fun part of this project is that you can create whatever you want. This is a very cost effective way to make your very own wreath with natural materials for under $10.

Neccesity is the Mother of invention here at the cabin. Not having lots of material available is forcing me to think out of the box. I put the second wreath up by our front door and it looks just perfect there!

Wishing you a fabulous weekend!

If you love wreaths and follow Pinterest, I have a Wreath Board you can find here. As always, if you enjoyed this post, please share with others.

This post shared with Tuesday Turnabout #66

Charming Homes and Gardens #24

To Grammas House We Go Link Party #209

Creative Crafts Linky Party #7


A Resourceful Fall Table Setting

Since the lifestyle at our mountain cabin is mostly part-time and casual, I do not have an extensive supply of table setting items. It is a bit of a challenge to come up with an elaborate table, with limited supplies. So it’s time to become resourceful!

I am excited to participate in a Welcome Fall Tablescape Blog Hop, hosted by Chloe from Celebrate and Decorate. You will find table inspiration from 20 bloggers at the bottom of this post.

Feeling a bit conflicted because I am here at our cabin without a lot of “things”, I am determined to create a lovely table for this blog hop. And since we aren’t here very often, I really don’t even recall what I have or don’t have. And the scavenger hunt begins!

Start with Linens

Love a bargain!

So I begin the search for linens, dishes, glasses and natural items for the centerpiece. Fortunately, in the kitchen armoire, I discover this unopened Hemstitched linen tablecloth from Willams Sonoma. An obvious bargain purchase, the gold colored tablecloth is the inspiration for this post. You can find similar tablecloths here on Amazon.

Select Your Dishes

Using our every day dishes from Pier 1 imports, the gold tablecloth picks up the yellow in the plate. This when things start to come together!

Centerpiece Ideas?

Fall to me means all the colors of nature~the earth tones of red, yellow, browns and greens. Luckily, I located some artificial autumn leaves in the garage. But after being stored they are wrinkled and curled. With an iron on VERY low heat, I press the leaves that are in the worst condition.

At this point, the gold table cloth seems a little boring to me. What to do? I find a bolt of fabric leftover from a previous project stored in a closet.

The warm tones of the cotton are perfect and I have enough to cut a runner. And the cotton is nice and soft to be made into napkins.

Being here in the mountains, I have access to natural elements like pinecones. I collect a big bowl of them, intent on using them somehow on the table.

Utilizing What You Have

And here is how the table looks! I am pleased that I am able to use what I found around the cabin and didn’t go to any additional expense to put it together. The centerpiece is two sheaths of wheat, the faux fall leaves, pinecones, brass pumpkins, brass candlesticks and numerous votives. If you are looking for brass candlesticks, Amazon has a great selection.

Adding brass elements give it a bit of brightness yet complements the theme. The pinecones become easy place card holders.

I don’t have chargers here, but the burgundy dinner plate anchors the place setting. The fabric runner provides a nice base for all the fall decor.

Night Time Table

At night, the candles create an autumn warmth which gives it a magical feel.

The only stemmed wine glasses we have are numbered, and it’s a good way for people to keep track of their own glass.

For me, the key lesson here is that you can create a pretty table setting with items you already have around the house or in the yard. That bolt of fabric? I hadn’t used it in over 10 years. Now it will become part of my linen collection!

I hope you enjoy this post and thank you so much for visiting today. If you are new to my blog, welcome! For those who have followed me for a long time, I am so grateful for your support. Please let others know if you enjoyed this and share on Pinterest.

Welcome to the Fall Tablescape Blog Hop!

Now onto other Fall Tablescapes! Please check out these other talented bloggers and as always, we love your comments!

Celebrate & Decorate |  Design Morsels | Mantel and Table |Corner of Plaid and Paisley | Home is Where the Boat Is | Belle Blue Interiors|Calypso in the Country | Our Crafty Mom | My Thrift Store Addiction | The Painted Apron|The Little Yellow Corner Store | Sweet Sensations | Living With Thanksgiving | Panoply|Life and Linda | Everyday Living | Bluesky at Home  |Life at Bella Terra | Red Cottage Chronicles | Cozinest 

This post shared with Tuesday Turn About #65

Charming Homes & Gardens #23

Centerpiece Wednesday Karin’s Kottage

To Gramma’s House We Go Link Party #208

Between Naps on the Porch Tablescape Thursday #625

Thursday Favorite Things #456~An Artful Mom


Styling for Fall

I can honestly say I felt a slight drop in temperature this weekend. Well, even though it remains hot here, it is a perfect time to think about styling for fall!

What a grueling summer we are having. For the next several weeks, fall weather will tease us. But every year, we get our Indian summer and the temperatures will go way up again. But a girl can dream about crisp, cooler mornings and wearing long sleeves again, right? It’s only a matter of time Fall will be here, so why not think about styling for fall now?

Despite the lingering summer heat, it doesn’t mean that we shouldn’t get into the mood. Today’s blog post is pulling out the best of fall decorating from previous years.

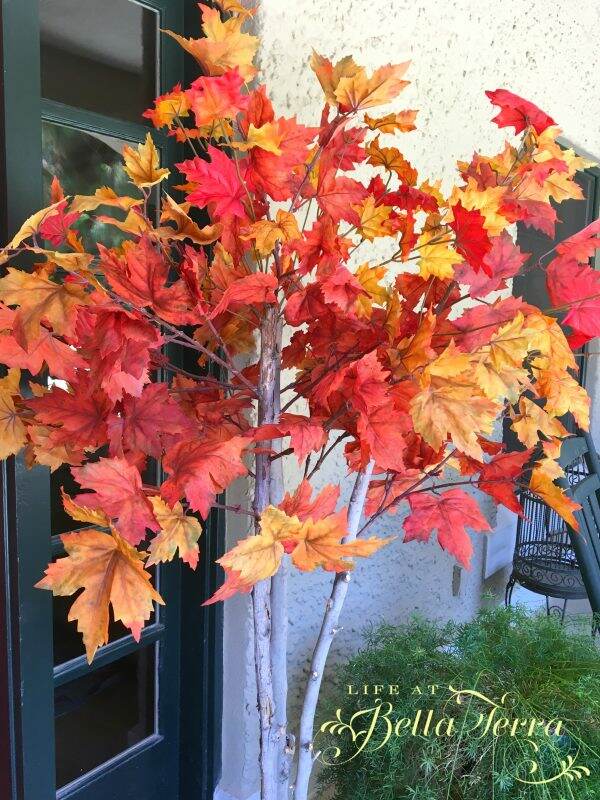
It’s hard to believe it was two years ago that I made these life size autumn trees. To see this DIY, click here.

This year I am thinking about making several smaller fall trees, ones I can put on mantels or use as centerpieces.

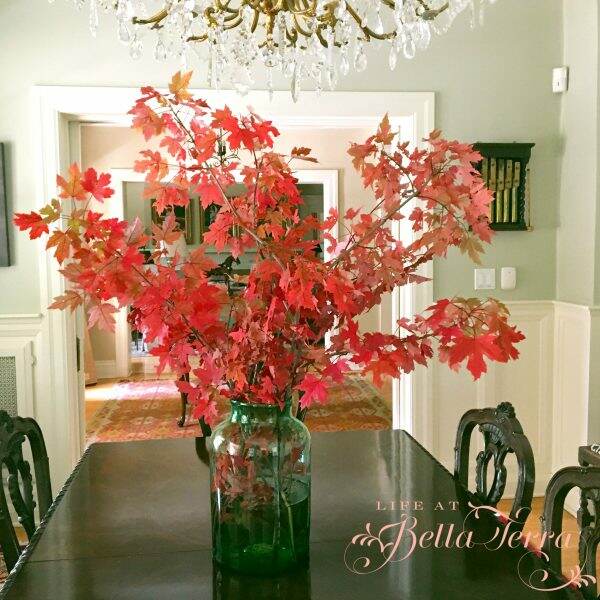
Or maybe large branches with fall leaves on them? Each year we go to the mountains and I will cut branches from real trees that have autumn leaves. I feel a bit guilty doing this so it might be time to create faux ones that I can use year after year.

Best Fall Candles

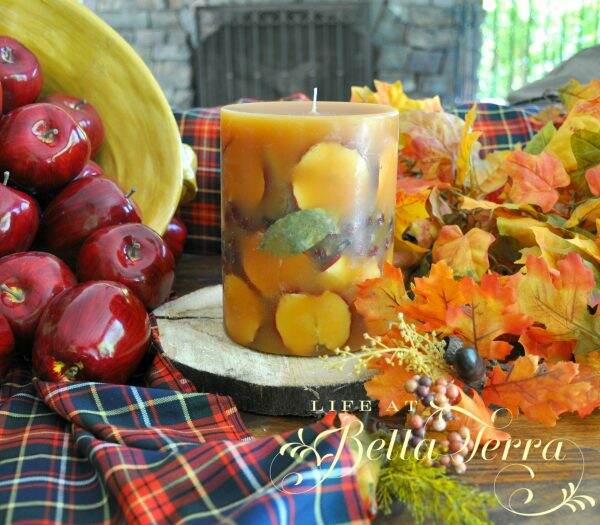
I am a big fan of Rosy Rings candles as each one looks like a work of art and smells heavenly. The candles are in investment, but they last from year to year. Plus they make terrific gifts. Click here for the link.

I cannot wait to pull this out again soon and fill the rooms with a seasonal fragrance. There’s a bit of a story around this Spicy Apple Candle. Click here for the post.

Each year I decorate one of my prized antiques, a Hepplewhite secretary, dating from 1790 to 1800. I bought this at a time when I had little disposable cash and every penny counted. But I am so glad I made the investment because it gives me such joy.

With 4 glass shelves, I get to do some creative fall magic with it. Too bad it is tucked into a corner of the living room, but I am always pleased to doll it up for this season. To see how I decorated it in the past, click here.

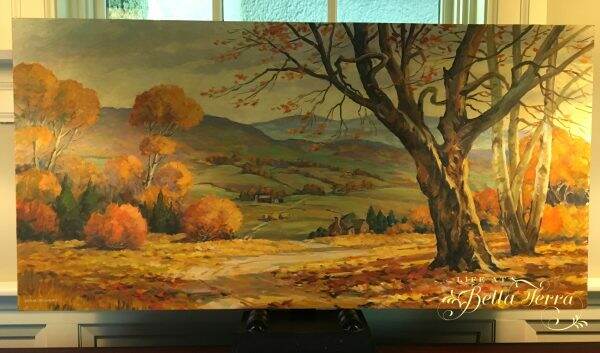
An easy, quick way to add seasonal decor is to switch up pieces of art. I don’t recall where I purchased the art above (I think an auction house), but it screams autumn. In addition, I have a few pieces I have personally painted, but now I am inspired to create a new one.

It doesn’t take much to add color and texture to your fall seasonal decor to your kitchen. A coffee cups, pumpkins, and hand towels are affordable ways to change things up a bit. Here are some cute towels on Amazon.

This spring I acquired a few great yard sale finds. This particular piece, especially with the artwork above, gives an autumn vibe in our family room. I cannot wait to play with the decor and see how I can change it up.

So are you ready for fall? Is it getting cooler where you live? If so, send some lower temperatures our way. Since we are without children, the fall decorating this year will be just for us. I have a new front door color that is more spring/summer-ish so that will be an interesting challenge to decorate. To see the new front door color, click here.

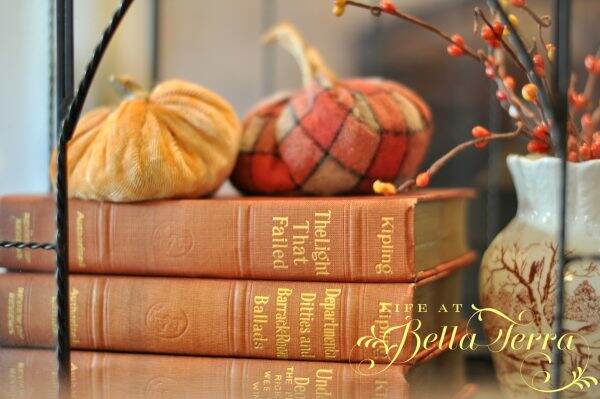
My fall focus is going to be on natural and already owned items. For the natural items I am dreaming about acorns, pinecones, branches, succulents and wood. My collection of baskets, scarves, throws, pottery and lots of velvet pumpkins will be incorporated.

Do you have any decorating plans for the fall? Please share your thoughts and ideas as you always inspire me! Have a terrific Tuesday. Happy September!

This post shared with Tuesday Turn About #64

Charming Homes and Gardens #64

If you enjoyed this blog, please share it on Pinterest later.

For your convenience, I try and provide links to items you may like. If you make a purchase as a result, I may receive a small stipend for this service, at no cost to you.