1

Saturday Meanderings

Our “fall” is now

What a week! Slowly the decorations are coming out and we will get our fresh tree this weekend. It’s a family tradition to get our main tree on or near my husband’s birthday. The goal is to have the tree up and decorated no later than next Tuesday. I know I am way behind other bloggers, but it doesn’t really matter because this is how we celebrate here at Bella Terra.

The Annual Christmas Painting

Our cat, Donovan

As you may recall, I started painting about five years ago (see post here). Each year I attempt a new holiday painting. Based on a wonderful photo, I painted our cat, Donovan. He is a stray Maine coon cat the girls found in the yard years ago and he is currently our only cat. After losing our very first cat, Tippy this year, I have an increased desire to capture our pets on canvas. If you follow me on Instagram (I hope you do!), you may have already seen this.

Two New Recipes

Chocolate Sourdough Babka Bread

Every Christmas, I replay the previous Christmases and holidays in my head. I feel blessed to have had many happy and joyous holidays from my childhood to now. Naturally there have been a few where loved ones are not there and occasionally my heart feels heavy from their loss. Lately, I have been thinking of my Mom and Dad, who both passed away rather unexpectedly 5 years ago, 5 months apart.

But they were very good parents and they made our holidays extra special every year. Being of Polish decent, I recall some of the traditions and foods surrounding the holidays. With fond memories of babka bread, I realize that I have never made one.

Babka is a dense cake, although it looks a little like a bread. It’s a sweet yeast dough filled with fudgy chocolate or cinnamon in layers and baked. It also sometimes has a streusel on top.

Rising in front of the fireplace

Since I am always looking for ways to use my sourdough starter discard, this recipe is a Chocolate Sourdough Babka with Streusel de Coco from Artisan Brian is perfect. You can see the recipe here.

A 2-day recipe, but well worth the effort. Also, I have never braided bread before but this is a fun learning recipe with excellent results!
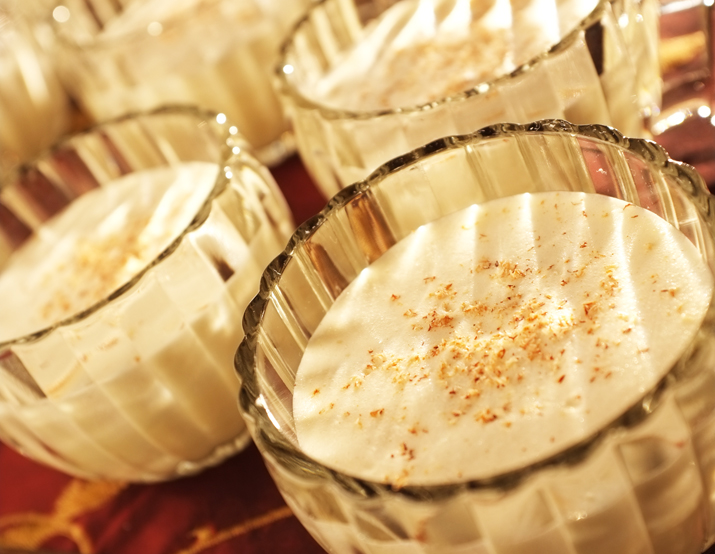
Aged Egg Nog

Aged eggnog in glass goblets topped with eggnog.

Have you ever heard of aged egg nog? I certainly haven’t, yet my son brought up the idea at Thanksgiving.

Although most Americans think of eggnog as something they get out of a milk carton during the two-week period leading up to December 25, eggnog actually descends from sack posset, a strong, thick English beverage built upon eggs, milk, and either a fortified wine (like Madeira) or ale. 

In this recipe, you must age it for a minimum of 2 weeks, but they say a month or two would be even better. We made this on November 24 and will drink it later this month. Made with eggs, sugar, fresh nutmeg, half-and-half, whole milk, heavy cream, Jamaican rum, cognac, bourbon and a bit of kosher salt, let’s not count the calories!

It looks like it has lost a bit of volume (where would it go?). We all tasted it before it went into the refrigerator and it is delicious. Should be interesting to see how it tastes 6 weeks later. Click here for the link to the recipe.

An Easy DIY Holiday Decorating Idea

As you know, plaids are all the rage this year. During a recent trip to Michaels, they had buy one and get one free rolls of wrapping paper. So I grabbed all the plaid ones and did this simple, easy and fast DIY.

Here is the chest in my family room, before.

And look how festive it looks now with minimal effort!

I simply wrapped the books with the plaid wrapping paper, changed out the wooden beads for silver ones (a necklace of mine) and added faux greens.

In setting up a small tree at the other end of the chest, I added small wrapped packages underneath too.

I hope to show you more of our holiday decorations (if I can get my act together) next week with a holiday home tour.

Thanks for the help

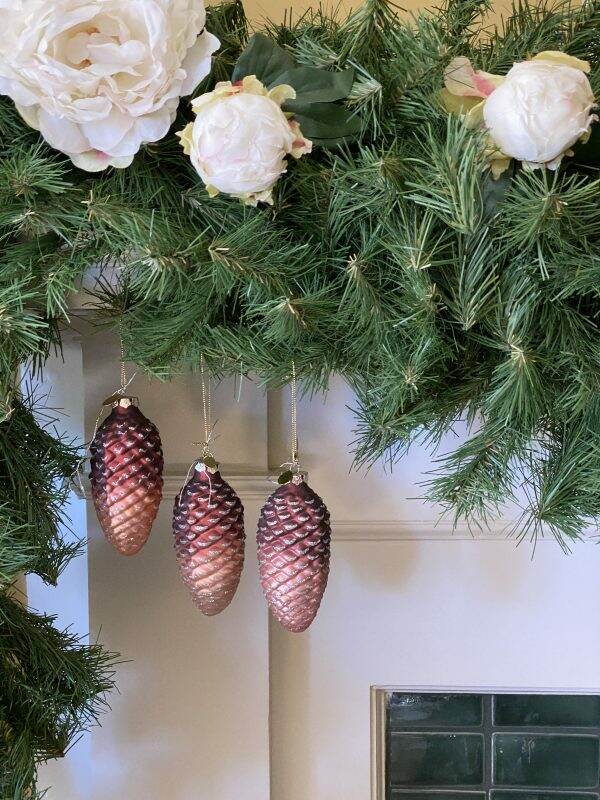
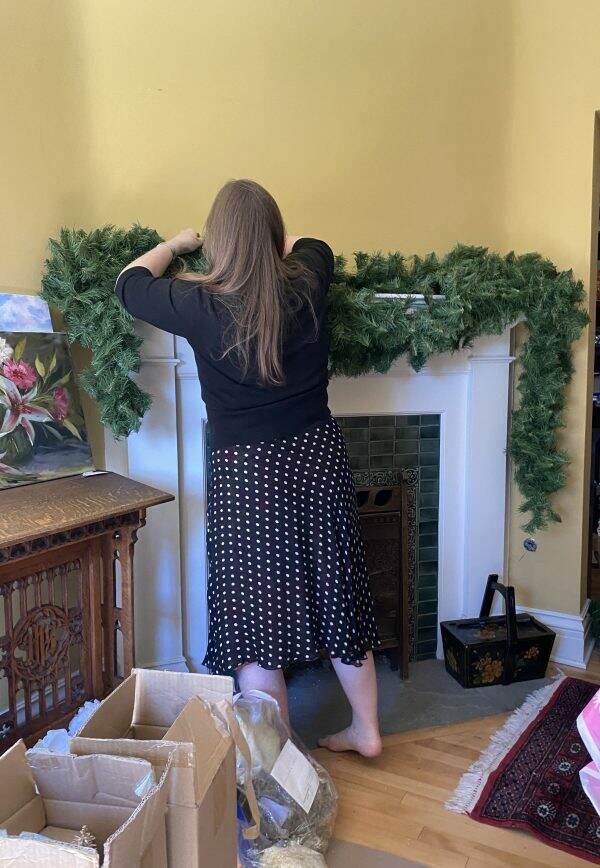
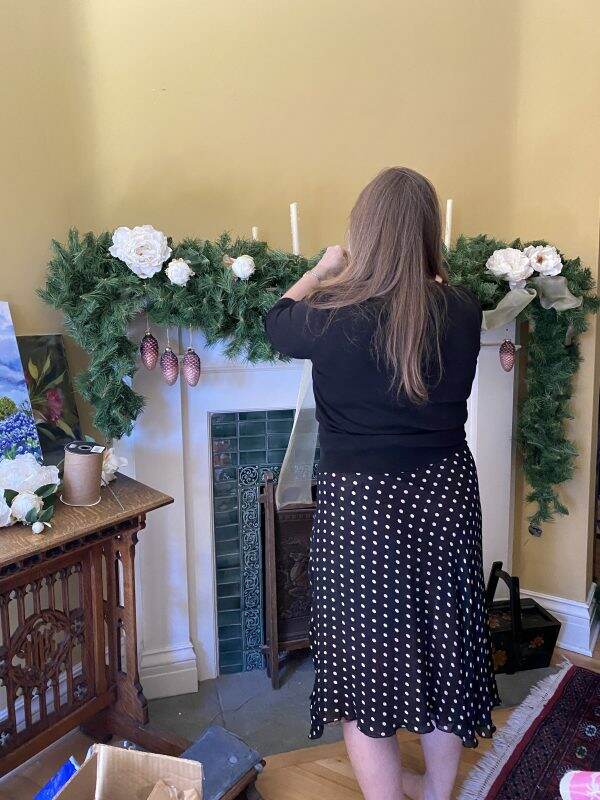
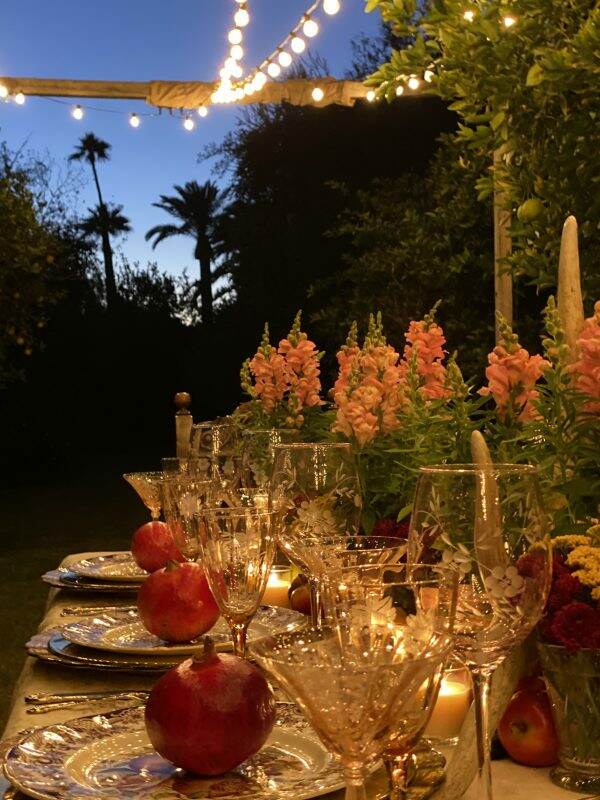
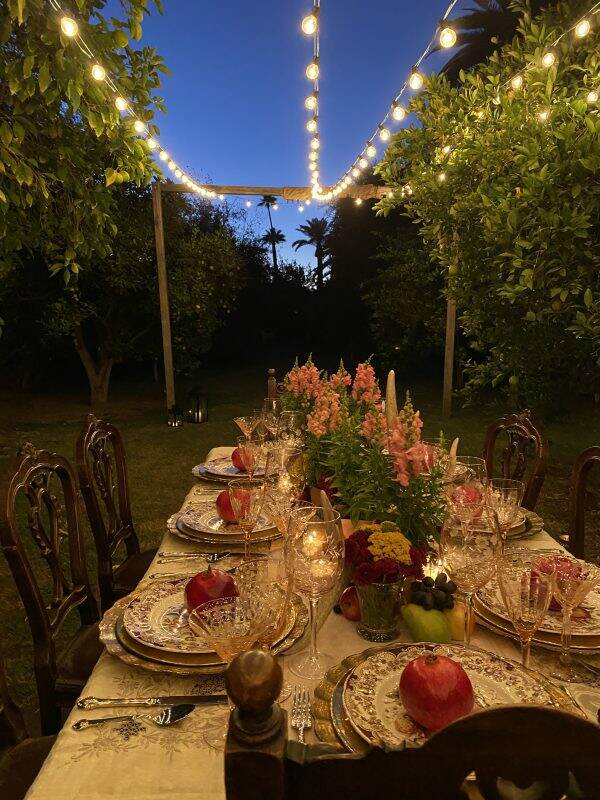
If you don’t follow me on Instagram stories (I hope you do), I want to thank you for all the fabulous feedback on how to improve upon my dining room mantel. My friend, Jeanne suggested adding fairy lights and that did the trick! Most voted against adding ribbon and I think that was the right choice.

So far, no fresh garland this year

Every year I order a 75 foot roll of fresh cedar garland. Unfortunately, this year none was available from my resource. So I am hoping when we pick up the live tree this weekend, there will be fresh garland to purchase. Important areas of the house are draped in garland and this may be a year that we go without.

Enjoy your Saturday and weekend. We had our first big rain here the other day and I am hoping and praying for more. If you missed any posts this week, see how I clean our crystal chandeliers and how to make bleached pinecones.

Thank you so much for joining me today!


How to Make Bleached Pinecones

I don’t recall where I saw this DIY, but it sounds like a project that I could tackle. We have lots of pinecones at our cabin and I brought some back with me during our last trip. But I can’t find them anywhere. Go figure. So I did a garage search and came up with enough pinecones to try this. Actually these are cinnamon-scented pinecones, but it doesn’t seem to matter. Here is how to make bleached pinecones.

The supplies you will need~pinecones (in good condition), bleach, water, a bucket, and bricks (or something to help submerge the pinecones), and rubber gloves. I also wore an apron because I tend to be a bit messy.

Take precautionary measures

Clorox Disinfecting Bleach - Regular - 121oz : Target

First of all, bleach is a caustic substance and not only will it ruin your clothes and eyes if you splash, but the fumes can be overwhelming and dangerous. Why do I know this? Because I tried doing this DIY in the kitchen, vs. outside in the fresh air. It took a matter of seconds but I could feel the negative effects of the bleach fumes. Not smart.

Also make sure your vessel does not leak. I unfortunately didn’t see the hairline crack in my container and had bleach leaking out….in my kitchen while I was nearly overcome with fumes.

Pinecones in a 5 gallon bucket

Put your bucket outside. Toss in any amount of pinecones you’d like (20-30). Cover the pinecones with bleach (1.5 gallons) and add water to cover.

Submerge the Pinecones

Don’t forget to wear gloves

Place the bricks on top of the pinecones (as they will float) and leave for 24 hours.

Submerge the pinecones with bricks

24 hours later…

Remove the pinecones and let dry. What I didn’t realize is that pinecones, when wet, will close up. But as they dry, they spread open again.

Lay bleached pinecones out to dry

When the pinecones first came out of the bleach solution, they did not look white. But over time, as they dried, the pinecones will get lighter.

Pinecones will slowly open

I did read that if you leave them in the bleach longer than 24 hours they start to break down. The first batch I did complete within the 24 hour time frame.

The second batch

Not wanting to toss the bleach solution yet, I am trying another batch. We will see if the chlorine is still strong enough to bleach them. The second batch was left in for two days. They are still drying out, but look fine. You can see how tightly closed the wet pinecones are compared to the dried ones.

Add to Your Holiday Decor

Now I am excited to use these pinecones around the house for the holidays. Yesterday, I created a holiday theme for the top of a cabinet in the family room, using a few bleached pine cones. If you have a beach house, wouldn’t these look great? Also, the pinecones do not smell like bleach either.

So remember, if you do this DIY, please take more precautions than I did. I am really happy with the results. Since I love regular pinecones and now bleached ones, it will be fun to decor with both this holiday season.

Have a fabulous Wednesday. The decorations are going very slowly, but I am certainly not complaining. Trying to take my time and enjoy every minute.


Another Beautiful Mantel

As promised, I want to show you another beautiful mantel done by my fabulous friends. Quite honestly, wouldn’t it be nice to have your creative and talented friends help decorate your home for every holiday? There must be a business idea in there somewhere! If you missed yesterday’s post about the romantic mantel in my art room, click here.

Chloe’s Joy to the World Tablescape!

Let me introduce you to Chloe from Celebrate and Decorate. Chloe lives in Celebration, Florida and she is one talented gal. Not only does she have boundless energy, but she is a skilled actor and an innovator. I have fondly nicknamed her, Take Charge Chloe! Check out the above photo of her holiday tablescape. Wow!

After raiding the Christmas room (read more about that here), Chloe began working on the living room mantel. This mantel is long and deep and each year I have struggled with decor that didn’t fulfill the needs of the mantel.

Assisting Chloe is Andrea from Design Morsels. Being the very witty and dry-humored one, Andrea always downplays her creativity, but she is marvelous as well. Check out these Star Wars ornaments she is hand making for her son!

chewbacca ornaments
Andrea’s handmade Star Wars ornaments

If you need a deep dive into anything (linens, vacuum cleaners, bookcase design), Andrea is the person to follow. Her blog, Design Morsels is the Cliff notes of design tricks and products.

Andrea setting up the lighting

Since the living room only gets good light in the morning, we set up professional lighting to help with the photos.

Starting with garland and using Command hooks, Chloe is able to drape an abundant amount of garland and have it stay on the mantel.

Chloe doing her magic!

Asymmetrical mantel designs are big this year and Chloe did not disappoint. I think this is the first year I have a mantel in style! She twists the garland to attach to the ends to each other too.

Next she adds artificial red berry garland. Some of the red has come off so I need to take a marker and do some touch up.

This old, inexpensive set of cow bells (can’t recall where I purchased them) are used at the far end, nestled in the garland and berries.

On the right side of the fireplace, balance is created with 3 small artificial trees. I did buy the trees at Scottsdale Marketplace last year but you can probably find them online too.

Above the trees I will hang the stockings (haven’t done that yet), again adding more weight on this side of the mantel.

Chloe cleverly stacks the battery operated candles on various items to create different heights. She uses what she can find~small books, boxes and even the bottom piece of my tuliperie (to see more about my tulipieres click here). She is just so creative!

At night, the candles provide a warm glow to the overall look of the mantel.

Stepping back, here is a picture of the entire mantel with the new holiday decor.

Now isn’t this just beautiful? No more wimpy looking holiday decor on this fabulous fireplace! Once I hang the stockings and get the rest of the room ready for the holidays, I will definitely share the final look!

I hope this has inspired you to try something different if you are decorating a mantel or a shelf. Chloe is a dynamo and threw this together in a relatively short period of time. I was speechless and so over the moon with the results!

Happy Wednesday, my dear friends! I hope you aren’t tired of mantel decor because I hope to share the last two mantels with you on Saturday. Stay safe and healthy and live brightly!

Resources:

Green garland here

Red berry garland here

Command Hooks here

Battery Operated Candles here

Bells (similar) here

3′ small trees here

If you enjoyed this post, I love it when you share it on Pinterest!


Decorating a Mantel for Christmas

Earlier this month, I had the pleasure of hosting 4 other bloggers here at Bella Terra. Being the recipient of their collective creativity, they tackled 3 fireplace mantels and decorated them for the holidays. What a fun experience watching these talented gals in action. Today I want to share the mantel over the fireplace in my art room. To see more about this fireplace and room, click here for a previous post.

Barbara from Mantel and Table is the innovative person behind this. If you love fine china, silver, teacups and flowers, her blog is one to follow. Barbara actually participates in table setting competitions (who even knew those existed!) and is an elegant, poised lovely individual.

She went right to work finding items to use~including artificial garland, faux silk peonies, candles, ribbon and ornaments.

Barbara adding ribbon

First of all, I wouldn’t have thought to use clusters of peonies. Nor would I add the ornaments. What is so wonderful is how much I am learning from these talented women!

Adding the gold sprig brings a bit of brightness to the theme. I love how Barbara weaves the ribbon throughout. This is such a soft and feminine look, perfect for my art studio!

Lastly the candles are added at different heights to create interest and ambiance.

I love the fullness of the garland. Typically I just run the garland straight across the mantel, however, this abundant look is more appealing. The asymmetrical use of the pinecone ornaments and garland works too!

Barbara states that her inspiration is a painting that I haven’t completed, but is sitting on the easel nearby. It is also a bit hard to stand back and take a picture as this is a very small room, filled with my art supplies. I love how romantic this mantel looks in my work space!

Unfinished painting

To read more about the fireplaces at our home (we have 7), click here. There are two more decorated fireplace mantels to show you and I will post about those tomorrow. To read more about these 4 fabulous women and their visit to Bella Terra, click here.

Have a wonderful Tuesday. I am just now starting all the other Christmas decorating slowly but surely!

Please share this post on Pinterest~thank you!

Source for similar items used in mantel:

Artificial Garland at Amazon here

Pinecone Ornaments here

Gold Berry Stems here

Ribbon 2″ wide here

Silk peonies here

Straight taper candles here

Candle holders from West Elm here


Creating an Antler Centerpiece

Having 4 talented bloggers come to Phoenix and stay at my home last week was such a treat. There is SO much to tell you, but one of the highlights is the Friday night dinner. They all brought favorite recipes and made dinner for 8. Since we are being COVID respectful, dinner in the orchard seems to be the perfect location for us to gather. I can honestly say it is very fun to have these extraordinary, creative women scouring the house for items to set the table. The set of antlers we recently got from a friend (see post here), was the perfect stimulus for the rest of the table design.

Andrea, Chas, me, Barbara and Chloe

But first let me tell you a little bit about each of my guests. In October 2019, I attended an Inspiration Workshop in Texas at KariAnne’s home (Thistlewood Farms). After the workshop, one of the attendees started a weekly conference call where 5 of us would remain connected and share our blogging knowledge (or inexperience in my case).

Inspiration Workshop October 2019

Over time, a few new bloggers joined the weekly call. When COVID hit, we had our network already up and running. Each week I found myself enjoying our virtual connection in a world promoting lockdowns and isolation.

Long story short, we decided to meet in person here at Bella Terra. I am excited and delighted to host this group. Unfortunately, two members could not attend due to family obligations. Kristin from White Arrows Home wrote a lovely post about why she needed to miss our gathering. You can read it here.

Setting the Table: The Linens

Since Barbara from Mantel and Table and Chloe from Celebrate and Decorate are Tablescape masters, they quickly select the tablecloth (a vintage find embroidered neutral) and a pink linen runner (from Williams Sonoma).

The Dishes

The charger is a ruffled, gold glass one from Leslie Roy, with an additional brass one on top. The plate is my favorite one for fall, Johnson Brothers Windsor Ware. Personally, I have never considered using double chargers, but the layering creates a fabulous and elegant look.

The Antlers

Andrea and Chloe

Take charge Chloe grabs the antlers off the front porch and off she goes to the orchard. Barbara states we need flowers and fruit and off we go to Whitfill Nursery and Safeway. Andrea from Design Morsels and Chas from Chas Crazy Creations help with all the rest~getting the glasses, silverware, chairs, etc. Activity is buzzing in the orchard!

The Stemware

Barbara and Chloe

After selecting the right colors, sizes and shapes of flowers and fruits, Barbara goes to work on adding the final elements to the table.

Flowers and Fruit

Cut flowers from Safeway; snapdragons from Whitfill

Pink stemware picks up the rose color on the plate. The pink glasses are vintage and part of my collection. Larger pink wine glasses are from Pier One Imports. Chrysanthemums, golden flowers and fruit bring the colors of the plate design to the table.

Pomegranates, pears, crab apples and grapes are tucked in among the flowers and antlers.

Using my Wallace Napoleon Bee pattern flatware, the gold accent goes well with the chargers. You can find this stemware on Amazon here.

As a side note, the antlers are sheds, meaning an animal was not killed for them. Elk grow antlers every year and shed their old ones. We will be using these antlers at our mountain cabin, once they are properly mounted.

Even the pink plastic containers holding the snapdragons blend in with the centerpiece. Squares of plastic are placed beneath the pots to prevent the tablecloth from getting soiled.

The Evening

As evening approaches, the lanterns which were a bargain purchase from Home Depot, are used to line the walkway to the table. You can see that blog post here.

What a magical evening! The dinner everyone prepares is so delicious and worthy of another blog post.

Here’s what I learned: When you live with all your belongings, it is difficult to step outside the box and create something new and different. I would never have thought to use the antlers, nor would I have paired it with pink. But look how lovely this table is~a mixture of rustic and elegance! Wish these friends lived closer as I would invite them over all the time to help me do things like this.

Happy Wednesday! For other centerpiece ideas using plants, flower and fruits, check out a previous post here.

If you enjoy this post, please do share it on Pinterest.

This post shared with Charming Homes & Gardens Week 34

Between Naps on the Porch Tablescapes Thursday #634


Property Maintenance

There is nothing better than having house guests to motivate you to spiff up your property. This has been a year of projects, mostly because of being confined to home more than usual. But this year it is necessary to get some of the bigger property maintenance projects done. Last week, I was blessed to have 4 friends come and stay. Since they haven’t been here before, I naturally wanted to make sure our property was in the best condition possible. A great time to finally schedule some overdue maintenance work.

The Well Tower

The well tower siding is redwood clapboard. Every five years it needs to be sanded and re-stained due to the exposure to our brutal summer sun. Peeling, blistering and fading make the structure look tired.

Being a size and shape that is difficult to navigate, I hire my favorite painter, John Cruz to help. John and I have been working together for years. He is my go-to painter for all my home remodels. The quality of his work is excellent and I believe his pricing to be fair. Plus he is fun to be around!

Well tower-After

With the well tower power washed and the sides sanded, it is now ready for stain. The dark green trim is also re-coated, making the final project crisp and ready for another 5 years. To see more information on the history of the well tower and its restoration, click here.

The Barn

Peeling and cracking paint on the barn-before

I haven’t shared much about the barn. Originally home to two horses (long before we owned Bella Terra), the barn is now where furniture is stored. Once the headquarters of 2 Connecticut Yankees, the barn was a fun vintage shop started by me and my friend, Susan. Filled with antiques and old treasures, Susan and I would have a barn sale 2-3 times per year. To see more about 2 Connecticut Yankees, click here.

Fresh paint-After

But life and family responsibilities became bigger priorities and the barn sales stopped. A few of our pieces and treasures are still inside. Some of those pieces can be found in my Store (there’s a tab on the top of my website).

Before
After

Using Ralph Lauren Barn Red, this structure definitely needed a new paint job. Though Ralph Lauren got out of the paint business in 2017, Sherwin Williams replicates this color. John scraped off the blistering paint, protected the hinges, primed where necessary and coated the entire barn with a fresh red layer.

The posts were primed in gray paint and then new white paint is applied.

Back side of the barn

All the hinges are re-painted with a fresh coat of black. Everything is now looking so much better.

The Hen House

Before
Hen house doors Before

Though the paint, for the most part, still looks good on the body of the hen house, the entry doors need significant help.

After

Using the same red paint as the barn, John, makes them pop again with his magical brushes.

Miscellaneous Touch Ups

In the interior, all the walls are plaster. Chipped corners happen every year with normal wear and tear. Typically, every October, I will go around the house and touch up the obvious dings in paint. It makes me feel like I am getting the house ready for the holidays. By putting both wall and trim color paint in mason jars, I am always ready to do a quick touch up here and there.

Sprucing up the Planters

Beautiful flowers are now available for planting so we are taking advantage of the abundant assortment to bring color to the yard. Some of our planters have been deteriorating and crumbling and are in need of replacement.

New geraniums and snapdragons are added to the front planter. Fresh containers of chrysanthemums enhance the fall entry. Whitfill Nursery has a great assortment of flowers and planters, if you are in the market.

Though it takes a bit of effort to get all this done, there is something very rewarding when your property looks clean and sharp. Plus after your houseguests leave, the work is done and you can sit back and enjoy the fruits of your labor!

Happy Tuesday! I cannot wait to share the visit with my four blogging friends tomorrow!

If you enjoyed this post, please feel free to share on Pinterest.

This post shared with Between Naps on the Porch Metamorphosis Monday #616