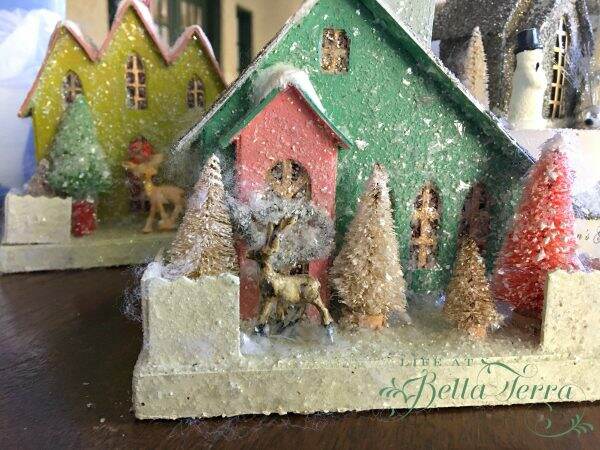
1

Making it Sparkle

Once a year, I clean the crystal chandelier in the dining room.  It happens to coincide with my holiday decorating.  For some reason, the rest of the year I overlook the dust on the crystals, probably because it is evenly dusty!  But once the glitter village and snow globes go up, the dullness of the chandelier catches my eye.

Quite honestly, there is really no easy way to do this (at least I haven’t discovered it yet).  This chandelier came with us during our move to Bella Terra.  Once candle lit only, we had it electrified and it has hung in our last two dining rooms.   I love the 12 arms and the crystals are not overabundant (except when you have to clean each and every one).

The cups that sit under each candle collect the most dust.

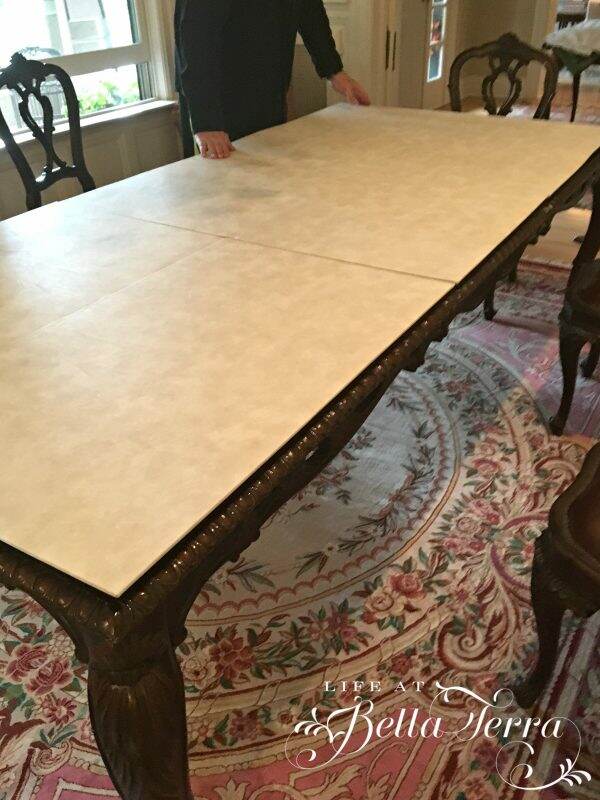
I start by laying down old towels on top of the table.  With a spray bottle of white vinegar and water, I spray each and every crystal and cup. With a soft towel, I wipe each and every crystal and cup…..good for toning the arms!!! 🙂

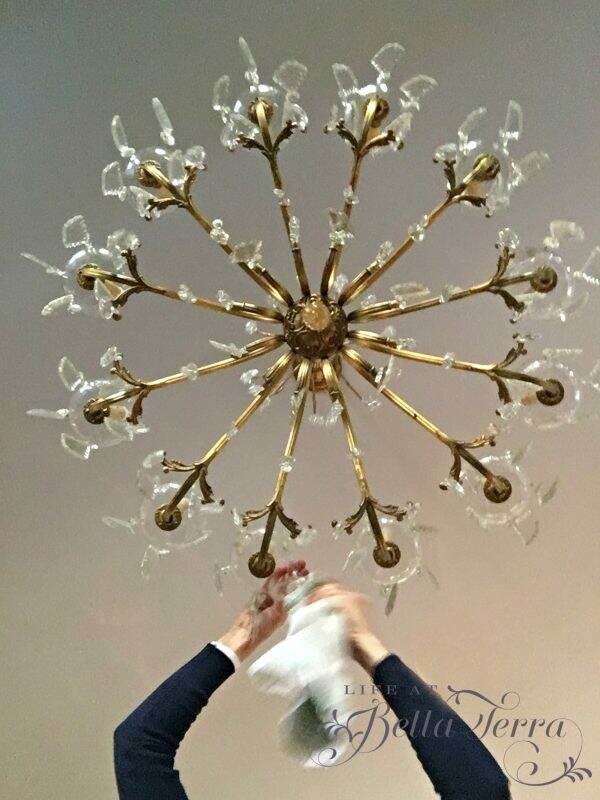
The view from below doesn’t show all the crystals.  Each arm has approximately 3o individuals crystals of varying sizes.

It never fails that one crystal will fall off during this process.  The purpose of the towel is to break its fall, however, this one bounced off the table and landed on the stone fireplace hearth.

Therefore, I keep a box of extras, just in case.  You can also find crystal replacements online.

Though most people won’t realize the chandelier has been cleaned, I know this will bump up the sparkle effect in the dining room, especially at night.

Wishing you a week of shiny and bright!


Entries-Making a First Impression

I have searched for an original picture of the entry of the property prior to restoration, but found nothing.  The driveway was dirt/stones with no gates.

Our home sits back from the street and our neighborhood has irrigation laterals, which provide water at an affordable cost to deep water our large, mature trees.

As you drive in, you cross what I call the “moat”.  It is the main irrigation ditch that runs along the road.  If you look to the left and right once you pull onto the “bridge”, you see this~~a river.

This water source feeds into our private irrigation ditch, which parallels the main moat and our property line.

Twice a month in the summer and once a month in the winter,water is released into our private ditch.  After opening hatches, the water is then funneled throughout the 2+ acres providing many gallons of water to the orchard and mature trees.

Large, original stone pillars act as sentries at the entrance of the driveway.

The wrought iron fencing and gate was designed to replicate the architectural arches throughout the house. Since we live on a busy street, the fence and gate keep the dogs safely inside the property.

We used tumbled pavers on the entrance bridge and allowed space for 2 cars to pull in. Once you go through the gates, the driveway is a combination of paver edges and bands with 1/4 minus granite in between.  This stone/gravel look felt more historical and appropriate for a 1912 home.

The original entry and sidelights had security bars and gates on them, hiding the beautiful 4 foot wide door. The red paint works well for this time of year, but a think a new door color is in my future.

First impressions are lasting and a welcoming entry is the first step. What is unique about your entry?


Building a Snow Village

The theme in the dining room for the holidays is all snow and glitter.  Each year I build a snow village using several paper/cardboard glitter houses.  There are many ways to make your own on Pinterest, but I purchased these affordable, yet adorable houses over the years. They are readily available in many retail stores.

The buffet in the dining room is the perfect spot for this.  I leave the lace runner (a favorite handmade piece from our trip to Italy) in place and add a strand of white lights. I also leave the table lamps and add a small wreath to each.  A winter painting is placed in the small window above.

Next, I add items to create varying heights~~ a cake stand and different size boxes.

Using old white napkins and linens (they can be torn or stained, it won’t matter), I cover the boxes, and place the lights on top of the linens.

Next I add my village houses and churches. Like an old town, the church is at the highest point and in the center.

Then, I add trees.  Mine don’t match.  They are an odd compilation of evergreen, wood with glitter and funky, but it all seems to work.

Next I add another string of lights.  The purpose of this string is to insert the bulbs in the back of the houses.  Each of them have a hole in the back.

Taking the time to do this is rewarding as the little house looks so magical, as if the lights are on and somebody’s home.

The remainig lights are laid around the bases and in between the trees.

You can get packaged snow from any hobby store (mine is from Michael’s).  It is 100% polyester, flame retardant and comes in a roll.

I cannot take credit for this part.  My dear friend, Janie, taught me this trick years ago and I think it produces fabulous results.  It’s important to pull apart the fine layers of batting (vs. clumping) and drape the snow over the lights.  You can layer it or mound it up, but the key is to keep the “snow” or batting a light as possible.  The effect is so lovely, almost heavenly.

The snow hides all the wiring and lights and bases, producing a soft glow.

At night, with the lamps off, this snow village is so dreamy and enchanting! Now I am off to put out all the snow globes!!! Happy decorating!


Displaying Holiday Cards

We love receiving holiday cards from family and friends. It’s the time of year to catch up on people’s lives and each and every card is opened with great anticipation.

Instead of putting all the cards into a bowl or basket, we like to hang them where they can be seen.

The butler’s pantry, which sits between the dining room and breakfast room has the perfect window which looks out to the northern part of our property.  In order to get to the kitchen from the front door, you need to walk through this sweet room and therefore, placing the cards here makes perfect sense.

Ballard Designs sells this button garland, called Marianna Button Garland in a set of 3 – 9 foot sections for $35.00.  The wafer-thin buttons are made of capriz shells and are softly iridescent.

One 9 foot section fit perfectly around this small window.

A small hole punch to the corner of the card, add string and it is ready to hang!

This location is also the perfect place for my Santa/reindeer folk art balance toy.

What do you do with your holiday cards?


Easing into Christmas Decorating

Having the extra time between Thanksgiving and December has been such a gift.  I have been easing into holiday decorating, pulling out the easy stuff that doesn’t require 2 or 3 sets of hands. First stop, the bedrooms.

My artistic daughter has such a beautiful bedroom.  There is an unusual combination of windows that face east~~2 Palladian-style windows and a port hole one over her bed.  She has always loved the color black and was delighted when I painted her room that color.  John, our expert painter, was skeptical, but with tall white baseboards and wide trim around the doors and windows, the black is just stunning.

Playing on the color theme, I used black and white checked ribbon to hang small wreaths in the windows.

Wired ribbon is so easy to curl any way you want and it hides the push pin.

A battery operated candle is placed in each of the windows on the front of the house.  I purchased these from Frontgate and the flickering flame is rather realistic.  They also have a timer option so each night at 6:00 p.m. all the candles light up. They don’t have this exact style online but they do have something similar and it is on sale~click here.

In order to give the candle more height, my husband cut blocks of wood, which are wrapped to look like presents.

Christmas pillows, and we have many, are an easy way to quickly make a room festive. These sweet ones go on all the beds.

This colorful selection perks up the family room sofa. Most were purchased from Pottery Barn.

As with most older, historical homes, this one gets drafty and chilly in the winter.  Flannel sheets go on all the beds in the children’s rooms and holiday quilts are added on top.

I find it rather fun to change out the artwork during the year and will be hanging all these today.

This weekend the bigger decorating projects will start and wreaths will go up.

It’s been an overcast, cooler week here in Phoenix.  Perfect for taking things slowly.  Have a wonderful weekend……I’m off to make some pumpkin bread!


Setting the Thanksgiving Table

Food seems to taste much better when served in a beautiful setting.  Even though I didn’t have an extravagant childhood, my mother always set a lovely table for the holidays, using her Franciscan Ware apple pattern.

This year, I took one of my English china plates, Windsor Ware by Johnson Bros. with me to select the plants from Whitfill Nursery and flowers from Safeway for the centerpiece.

Setting the Thanksgiving Table

I wanted to purchase items I could use again~~plants and herbs.  Of course, I needed a few flowers for additional color.

how to set a Thanksgiving Table

We are having 10 for Thanksgiving dinner so we extended the table.  I wonder why they are called leaves?

set your Thanksgiving Table

It was a worthwhile investment purchasing a table pad to protect the surface of the dining room table.  One side of the pad is felt and the other is a protective plastic.  This one was custom made by Guardian and it has 3 parts.

Next, I layered my table cloths, starting with a Battenburg lace one, and adding 3 smaller muslin sheets on top.  I purchased the vintage muslin sheets from one of my favorite bloggers, Miss Mustard Seed. The lighter ivory tone and texture of the muslin matches the background of the dinner plate.

For the centerpiece,  I lined a rectangular wooden tray with both plastic and foil, and then filled it with the plants, herbs, and pomegranates, pears and flowers.  The brass pumpkins were on sale at Safeway ~~and add a bit of sparkle.

Since, at the time of writing this post, I had not finalized my menu, I was experimenting with adding different plates/bowls in case we have a first course salad or soup. The wooden charger is from Pier 1 Imports, providing a great back drop for my china pattern.

The glass, gold trim salad plate is from Lesley Roy. I like that the design in the center of the plate is visible.

I love these pumpkin soup tureens from Williams-Sonoma, but I rarely use them.

The napkins were a recent purchase (on sale!) from Ballard Designs.  They are the perfect creamy color and the plaid trim complements the brown tones.

A fresh sprig of rosemary from the garden is tucked in the napkin ring.

Looking forward to spending the next few days baking and cooking. Funny how Thanksgiving dinner takes hours to prepare and such a short time to eat!