1

Open Floor Plan or Not?

Jodi Cooper Design

Do you like an open floor plan? According to Google, an Open plan is the generic term used in architectural and interior design for any floor plan which makes use of large, open spaces and minimizes the use of small, enclosed rooms. Are open floor plans going out of style?

Modern Kitchen Living Room Hone design with open concept
YinYang/Getty Images

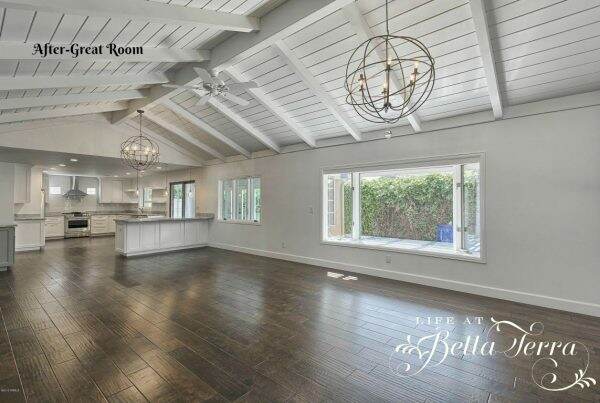
I’ve never lived in a home with an open floor plan. The closest thing is our cabin in the mountains, where there is a large window-size opening between the kitchen and the main living room. It’s good for shouting through but not for much else. Sorry for the low quality photo~~it is the only one I have!

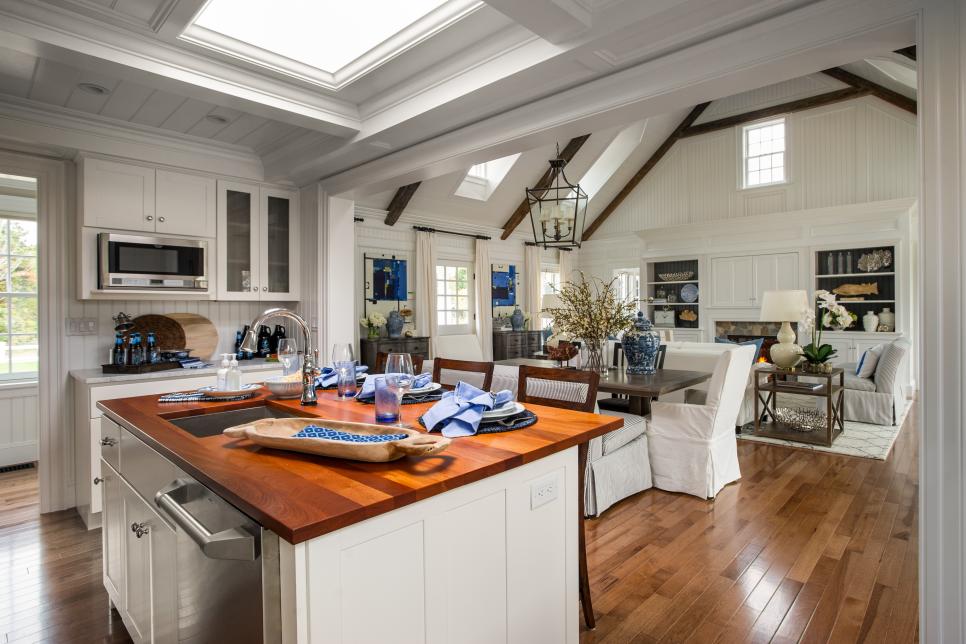
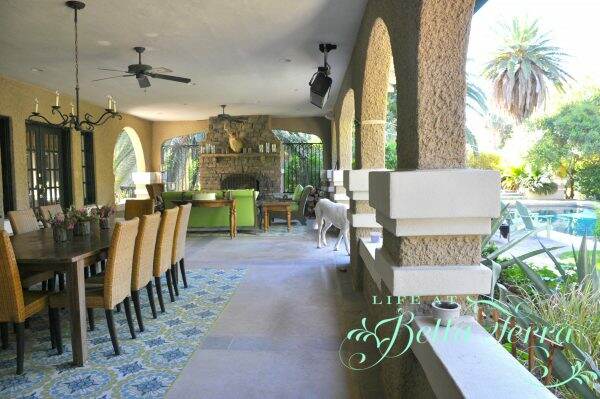
Since Bella Terra was built in 1910, it clearly has formal and private spaces. Our kitchen is definitely not an open one. The kitchen to me is my haven, my sanctuary. I prefer it to be separate from the living spaces. To see more kitchen details, click here for Part 1 and here for Part 2.

When I’m stressed, I tend to bake or cook, and want to do so by myself. There is a television in one of the cabinets, but I get to choose whether I want it on or not. The kitchen is open to the breakfast room, but it is not an active part of the house.

The kitchen island is rather large and that is where all our family and guests congregate anyway. I love my family but sometimes I just want to have my own space. Plus I am not a fan of the kitchen mess or smells infiltrating the living spaces. Rarely is my kitchen neat as a pin.

Even though I prefer a private kitchen, I know the open plan is popular. In one of my previous remodels for resale, I did open up the kitchen to the living room/dining room. To see more of the Glenn remodel, click here.

Removing the load bearing wall between the previous kitchen and living room

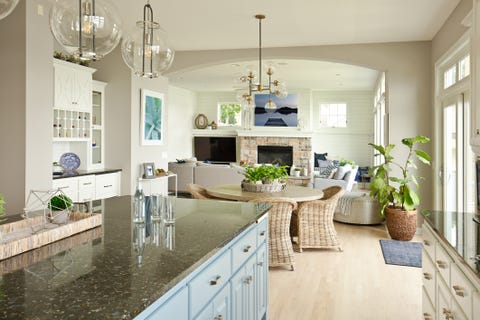
We recently visited friends who just moved. Their kitchen, dining room and living room are one big room. It was lovely but it got me thinking of whether I would enjoy the open concept or not.

When I was designing the addition to the Willetta remodel (see post here), the floor plan was original to 1922…..separate living room, dining room and kitchen. But the kitchen was oddly shaped and it made sense to expand this space.

Peninsula is the room divider

In addition to enlarging the kitchen, a family room was added on the first level and an updated master suite on the second story.

Clear pendant lamps define the end of the kitchen space
The New Addition: a small family room

A House Beautiful article by Hadley Keller, entitled Please Stop with the Open Floor Plans asks, “when did the walls become the enemy?” Somewhere in the early 1990s, builders began touting the attributes of “open plan”. Hadley suggests instead of open floor plans, to try and start using your rooms. Use the dining room more frequently, not just for Christmas dinner.

Carlton Architect + Design Build

There is a great deal of discussion of getting rid of the open floor plan, especially when it comes to kitchens. Some are suggesting that you add another “messy” kitchen that is hidden from the open floor plan kitchen. Oh my! The thought of keeping two kitchens clean??!!???

Kitchen is not part of the living room or dining room. Photo by Claire Paquin

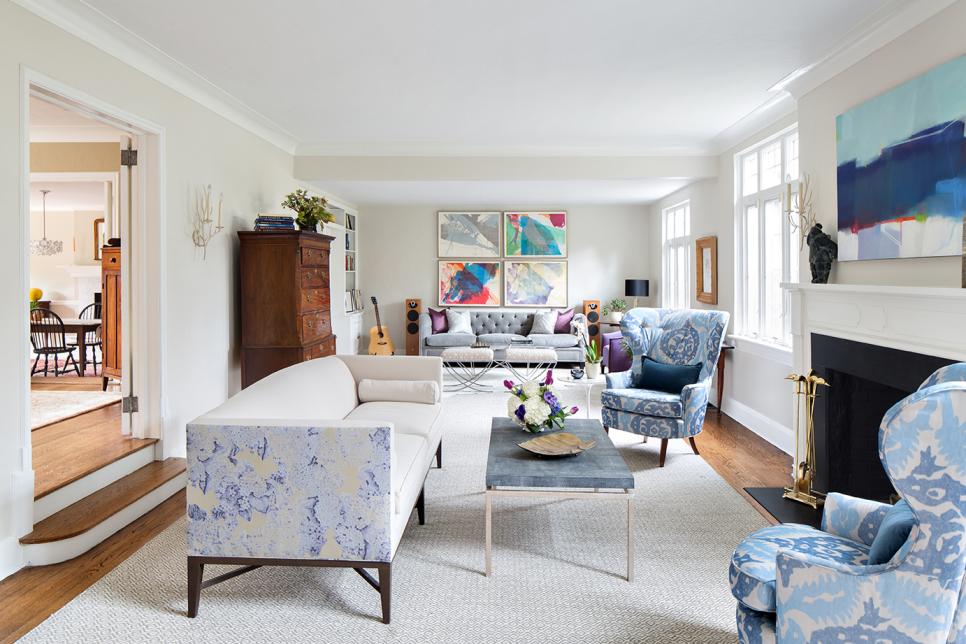
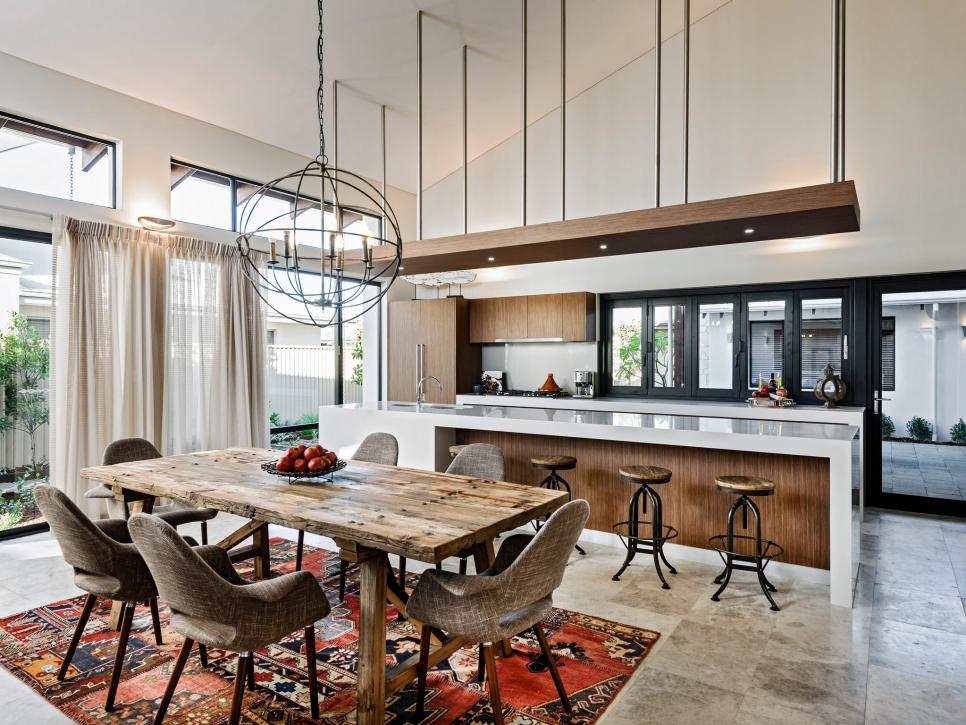
According to HGTV here are some pros of open plan living . 1) Makes a small space feel larger; 2) Being part of the family (not isolated); 3) Entertaining is more social and convenient; 4) Gorgeous open site lines; 5) Eliminating underused space.

Matthew Collins, Uptic Studios

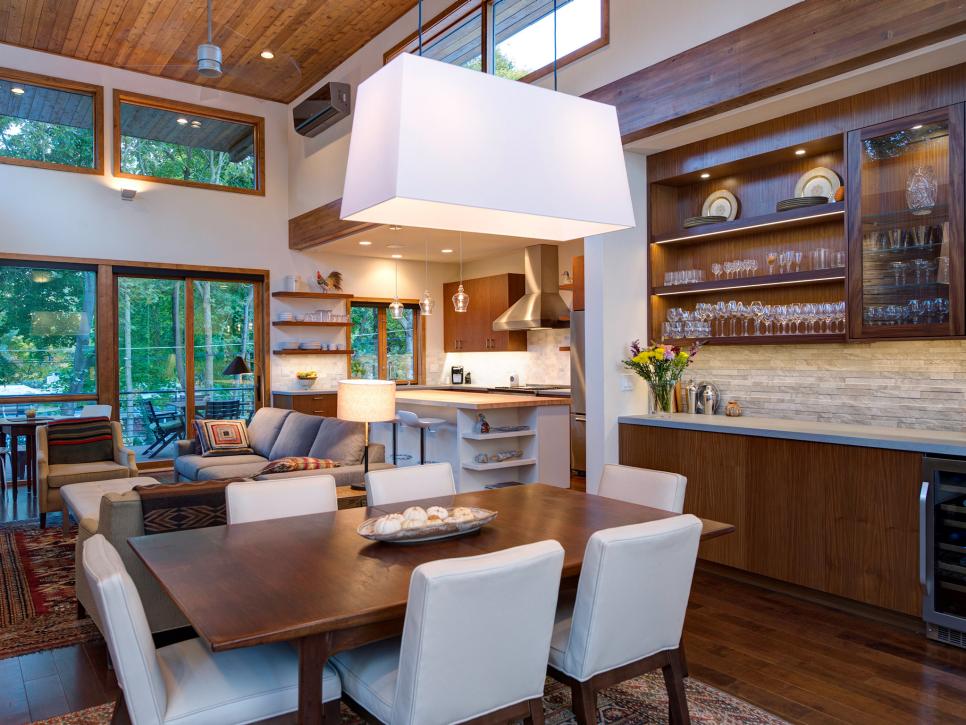
And the cons (by HGTV): 1) Makes a large space feel too big; 2) a messy kitchen is always on display; 3) No perfect way to contain the mess; 4) Load bearing walls; 5) Lack of privacy.

So what are your thoughts on this? Do you have an open plan kitchen/living and dining room? Or a separate and private kitchen? If so, please tell me what you love/dislike about it.

Happy Wednesday!


Butler’s Pantry Inspiration

We have a butler’s pantry. We do not have a butler. I would LOVE to have a butler like Mr. Carson from Downton Abbey, wouldn’t you? So, what is a butler’s pantry? According to Google, butler’s pantries are usually located in transitional spaces between kitchens and dining rooms, and used as staging areas for serving meals. They commonly contain countertops, and storage for candles, serving pieces, table linens, tableware, wine, and other dining room articles.

In Europe, the butler’s job was to keep the silver under lock and key. So he used to sleep in that room, and that’s why the room got the name butler’s pantry.

Our butler’s pantry, minus the butler, is located between the breakfast room and dining room. It contains most of our crystal, silver, some china (the rest is stored in the basement), candles, napkins, trivets, teapots, votives~~all the items I use for entertaining. To see a previous post on organizing the butler’s pantry, click here.

What is the difference between a butler’s pantry and a pantry? At our home, the butler’s pantry is a room you walk through to get to the dining room or kitchen. Our regular pantry is a walk-in closet. This is where I store our canned goods and non-perishable food items. I also keep my cookbook collection, beverages and back up non-food kitchen items (foil, Saran Wrap, Ziploc bags) in this space. To see the pantry organization project, click here.

In watching a recent episode of Restored on the DIY Network (which I highly recommend), Brett Waterman brings a 1913 California Mission Revival home back to life. Bella Terra is also Mission Revival architecture, so it was interesting to see the many similarities between the show’s home and ours. During this segment, Brett discusses the attributes of a butler’s pantry.

Since we live with ours every day, it is common to overlook some of its unique features. According to Brett, older butler pantries have wooden countertops. This was designed to prevent breaking the crystal glasses as you place them on the counter (vs. a harder surface like granite or stone).

Our pantry has a detail to the cabinets that isn’t present in contemporary cabinetry. The curvy edge bracket detail is not only decorative but serves as an actual support for the end cabinets.

The other detail that I just love is the curved transition in the wood from the countertop to the backsplash. This workmanship you rarely find today.

Since our home is over 100 years old, it is fun to find clues of a previous era. The cigarette burns on the wooden countertop near the sink prompt images of a former homeowner laying their cigarette down while washing a goblet or mixing a cocktail.

When I was restoring the Willetta house (click here to see that restoration project), I created a butler’s pantry, due to a challenging floor plan for the kitchen. The original kitchen spanned over 2 long and narrow rooms. This space was also visible as you walked into the front door. Therefore, it was important to create an elegant transition from foyer to kitchen. No one wants to see a messy kitchen when they enter a home.

Anytime I remodel a home, I create imaginary future owners and think of how they will utilize the house. Even though this butler’s pantry has the same custom cabinets as the kitchen, the cabinets are lacquered a different color.

The curtain softens the look below the new sink. The butcher block countertops are in keeping with a butler’s pantry feel. Hardware is a simple way to upgrade the look of the cabinets. I selected these elegant crystal knobs and pulls to finish the look. Hardware from House of Antique Hardware. Butcher block countertops from Floor and Decor.

In the Willetta house, I also took a useless storage space and converted it into a china, crystal, and silver closet, as it sat adjacent to the dining room. Who doesn’t need more space to store all those dinnerware items? To see more about this room and the stenciled floor, click here.

Cabinets from IKEA and butcher block counter from Floor and Decor

In this photo you can see the proximity of our butler’s pantry to the dining room. There are swing doors leading to the breakfast room and to the dining room. A small window to the left (unseen) provides light and ventilation to this transitional space.

Do you have a pantry? Do you have a space you would like to convert to a pantry?

I hope you enjoyed the tour of our butler’s pantry! Can you believe it is March already? Have a wonderful Tuesday.


Italian Fountain Project is Complete!

Our Italian stone fountain, which is located in our front yard, was beginning to show signs of deterioration. The iron spouts had completely rusted and the stone was covered with crusty lime that was leeching from the stone. You may recall, this project is on my New Year’s list of home maintenance needing attention (see post here).

The rusted spouts

It didn’t make sense as to why the lime was leeching out of the stone as the plumbing system inside the blocks was supposed to be self-contained and not leaking.

However in taking the fountain apart, we found a jury-rigged system using PVC pipes. The entire inside of the stone fountain was filled with water, hence causing the lime to leech out and form a white crusty mess on the outside of the stone.

Lime looks like white blisters on the stone surface

I contacted Relics where we had purchased the fountain nearly 20 years ago to find out where we could get new spouts. Unfortunately, the initial style they sent to me was too contemporary for this type of fountain. Thanks to the internet I began my search looking for replacement copper spouts.

As a result, I discovered Black Oak Foundry in California. They were extremely helpful and asked that I send pictures and dimensions to them.

In the meantime, I was unable to remove the rusted spouts to find out the size of the male NPT (National Pipe Thread~~see what you can learn here?) and needed the assistance of a plumber. It took two men with big wrenches to get them out.

Once we had the parts out, then we had to determine the proper size of the replacement. Since there are no local stores or vendors who supply this, we had no choice but to buy spouts online. Black Oak Foundry recommended 2 sizes, with wide pricing differences.

Using an old pizza box, I roughly designed the dimensions and then I cut out mock ups of the two different size spouts available to us.

This was a mathematical challenge because we had several factors to consider. Obviously the size of the spout was important from an aesthetic perspective. But the fountain serves a purpose. Not only is it decorative but the running water drowns out some of the road noise. We had to take into consideration the distance from the spout to the basin, the dimension of the spout hole, and the speed in which the water would flow. We didn’t want the water to splash up or out of the fountain.

Since we had a bit of rust staining, this spout needed a custom escutcheon to cover the rusted insertion hole. So once I placed the order, if it was wrong, I couldn’t return them for a refund.

Aesthetically, the smaller spout seemed to be a good choice and our plumber said he could make it fit to the new plumbing. We ordered two spouts with an oil rubbed bronze finish.

The spouts arrived and I was very happy with the quality. I ran out and held them up to the fountain, hoping and praying they would fit!

The plumber installed new copper plumbing guts so it will not leak anymore and attached the new spouts.

What I didn’t consider is that the tip of the spout is flanged so the water makes a bit of a helix as it falls to the basin.

It is a bit unsettling to order something sight unseen while spending lots of money at the same time. I am delighted these spouts look beautiful and create a lovely water sound. I still need to clean up a few rust spots, but it feels good to get another project done!

Are you crossing any projects off your list?

Welcome to our DIY Blog Hop with Chas' Crazy Creations & Grandma's House DIY

Now for some more DIY backyard projects! If you are visiting from one of these fabulous women, thank you for stopping by today.

Andrea of Design Morsels should be the Cliff notes to all things home related. She is the master at evaluating products, creating design solutions and just being resourceful. Check out her blog post on refinishing teak furniture. I need to put this on my list of things to do.

Chas from Chas’ Crazy Creations has yet again found a way to make another interesting DIY project. Her ingenuity is endless and today she shares not one, not two, but 3 ways to use solar lights outside.

Tarah from Grandma’s House DIY has story after story about her renovation of a 100-year old farmhouse. She has done an incredible job on her outside deck. Now she is making her own bar top deck railing with this amazing piece of oak.

My new friend, Kippi from Kippi at Home, is a chef but also does everything else from home decor, crafts, sewing and gardening. Her outdoor project is this obelisk that you can make yourself.

Thank you for joining all of us today at our monthly home DIY blog hop.


Random Saturday Morning Thoughts

This week began with my husband going out of town for 4 days. Do I tackle a big project or sit and watch chick flicks and relax? As his plane was departing I was already pulling things out of the “does a hoarder live here?” garage. Two out of the 3 bays are relatively organized, but this one was the dumping site for just about anything. It is embarrassing to show you this picture but here it is.

For 3 full days, I worked countless hours, sorting and organizing and I only put a dent in it. I’m not sure if it was standing on the concrete floor but I was so sore and fatigued after doing this. But I’ve made good progress and now there is some breathing room to work in. How one collects so much stuff, I do not know.

With any luck, I’m hoping the garage project will be finished before the brutal summer heat.

Do you remember I planted a bulb garden in September? In addition to dividing all my irises, I planted nearly 450 bulbs. See post here. I am excited to report that the hyacinths are already showing their purple flowers. The tulips and alliums are breaking ground too!

Since the frost is behind us, it’s time to start planting the Spring garden. The winter vegetables are past their prime. The broccoli and bok choy are starting to bloom.

I yanked all the cauliflower, broccoli, peppers and lettuces that have bolted, in preparation for tomatoes, artichokes, and spring herbs. The chickens love getting the discarded plants. The beds have been cleaned and fresh fertilized soil will be added.

It’s King Cake time! As you may recall, I was introduced to King Cake when I was part of a work crew that went down to Mississippi after Hurricane Katrina (see post here). I make this every year before Fat Tuesday (the day before Lent on Wednesday).

Getting ready to hide the baby in the dough

To learn more about King Cake, Mardi Gras and its tradition, click here.

We are having heavy rains this morning! With 299 sunny days per year, we love and appreciate the rain. This is the first time I’m adding a video link to a post, so hopefully you will be able to view it. We have a rain chain off the master bedroom terrace to slow down the rain run off from the roof. I think it’s mesmerizing to watch in the rain. Make sure to turn on the sound.

https://www.instagram.com/p/B5GI1MkJjJ8/

Have a wonderful Saturday! Just enjoying my coffee and a quiet morning so far! Do you have any special plans this weekend?


What Paint and (a lot) of Elbow Grease Will Do

The Foyer-Before

I know you love Before and After pictures. This blog post is about a neglected foyer that transforms to a gorgeous stately entry, using paint and a lot of elbow grease.

Let’s look at the grand exterior of this 1920s historical house I restored/remodeled. This beautiful home is now owned by a wonderful young family. In spite of its deterioration, the house has such a gorgeous front door and impressive entrance.

The Before

As you may recall, this Jeffersonian house was built in 1922 and prior to my purchasing it, was locked up and unused for 20 years. This house spoke to me and it was so sad that it was in this state of disrepair.

The foyer is grand, albeit very shiny, very FUSCIA and very gold.

Foyer-Before

The previous owner was a little heavy handed with the gold paint. The plaster curlicues are glued to the walls and the staircase. But look at this arched door?

Entry to the kitchen

The entire home is in need of updated electrical. But can you see the potential in this space?

The pink madness continues up the stairs to the second landing.

But the bones are there, aren’t they?

An exhaust vent is cut into the linen cupboard.

During the Restoration

Under the heavy layers of paint there is a mahogany bannister. Using a heat gun, I carefully peel back years and years of paint. We remove the gold plaster accoutrements and prime the room a neutral paint color.

This is a tedious process, but well worth it in the end. I am concerned about how blotchy the railing looked. Will it take the stain the same way?

Here is the view to the inside of the front doors. There was a lot of trippy paint in this house….maybe too many hallucinogens? Go figure.

The side panels open up to allow in fresh air, but keep the front door secure

In stripping off the paint on the posts, we realize they are pine and will not stain like the mahogany railing. We decide to leave those white and repaint them the same color as the balustrades.

The front foyer looks better all ready just by toning down the paint color.

The handrail is carefully sanded by hand to remove any residual paint. After some research to solve the blotchy problem, I prepare the surface with a pre-stain conditioner by Minwax. It prevents blotchiness and conditions the dry and thirsty wood.

Here is the railing with the new stain on it. Using Minwax PolyShades, I am able to apply stain and polyurethane in a one step. I am very happy with the results.

After painting the walls and balustrades, the stair treads and flooring are refinished.

The upstairs linen cupboard is given a new custom door. The missing chandelier is replaced with this one from Ballard Designs (Claire 6-arm chandelier in Etruscan Gold). It is the perfect size and shape for the space.

The existing downstairs chandelier is too big and hung too low….plus the beads and crystals are plastic. Obviously not original to the house. Here is the Before picture again….

The After

And here is the finished After photo!

In the entry, the new small pendant is elegant with a short drop so it works better with the ceiling height. I could have sworn I bought it from Pottery Barn, but I couldn’t find it online. If anyone needs the resource, let me know and I can search through my files.

Professional photography by Adam Peter, My Haus Photo
A completed restoration!

Structurally, this room was sound. It just needed some love. The floors are original and brightened up with light sanding and refinishing. The house is staged with furniture prior to going on the market.

The restored front foyer is now appropriate to the quality of this stately home. The darker handrail highlights the beauty of the staircase. Personally, I wanted to be the one to bring this bannister back to life. I would often imagine all the hands that have gone up and down this over the last 100 years.

Though this house was neglected and a huge eyesore, after a 9 months re-birth, it is now a neighborhood gem. It fills my heart to know that a young family have made it their home and are creating their own wonderful memories.

I did write a few blog posts during this renovation so if you would like to go back and read them, here are the links. The Willetta Remodel, click here. The Willetta Renovation is Finished, click here.

Have a wonderful Tuesday!

Resources:

Professional photos: Adam Peter, My Haus Photo

Painter: John Cruz, Ultimate Interiors

Electrician: Tony Boyer, Boyer Electric

Flooring: Wildwood Custom Floors

Staging: Castle Designs

Hardware refinishing: My husband


The Restoration Chronicles~~Chapter 2

Back Northwest corner of main house-Before

Welcome to Chapter 2 of the restoration journey of our 110 year old historic home. A few weeks ago, I shared Chapter 1 of The Restoration Chronicles which focuses on the front of the main house. Well, let me take you around to the back of the house, because the renovation/restoration work here is so much more extensive. To read Chapter 1, click here.

The original kitchen in the main house was not only small, but the electric stove was an inch away from the kitchen sink. Not sure how that ever passed inspection! I began dreaming of designing my ideal kitchen. It was evident that we had to expand onto the back of the house. Like dominos, that decision set in motion a series of renovation improvements.

View from the well tower to the main house-site of the future kitchen and basement.

There was no garage but a feeble lean-to that was more of a broken down carport. You can see remnants of it (gray roof) in the bottom of the above photo. Eventually that was removed and a circular driveway installed.

Though the house already had a very small, dirt basement, the kitchen addition provided an opportunity to create a bigger basement. You can see where the hole for it has been excavated. So above the basement “hole” is where my new kitchen will be located.

Back of house during construction

This photo shows the new foundation walls to the kitchen. The basement walls at this point have been secured and made water tight.

After

Now that the kitchen/basement has been added, we need to make sure the new addition flows with the rest of the house. I am so grateful for the help and creative genius of our architect, Cathy Hayes. She made all the puzzle pieces fit together!

We do so by creating a large, outdoor covered terrace. A two-story fireplace is built on the south end. This becomes the focal point for both the downstairs and 2nd story patios. To see a previous post about the back terrace, click here.

Back Terrace during construction
Back Terrace After

The new additions on the first level created yet again, MORE opportunities to expand the second story, but that will be in Chapter 3! Ka-ching, ka-ching!

2nd Story Master Terrace

The photo below shows the new kitchen addition, with the stucco and roof tiles being applied. The carport is no longer there.

The view of the kitchen this morning

I love the large exterior roof overhangs. Whoever designed this house, took into account the sun and its placement during the day. These large 3 foot overhangs are so effective in protecting us from the extreme heat in the summer, especially on this western side of the house.

During all this construction, yes, we were living in our double-wide Cavco trailer, or manufactured home. The construction site was a real live playground for our two toddlers, who were happy as clams with all the dirt piles, excavators, and trucks.

It was a very joyful time for them, as they had no clue about the stresses or challenges of such a major restoration. Any dangerous parts of the project were off limits to the children, but I allowed them to play freely and get as dirty as they wanted.

Since the entire property was an active construction site, parking our cars was only allowed at the very front of the house.

Parking only in the front of the house

Below is a red wagon that I used multiple times a day. I hauled groceries and children back and forth from the front of the house to the double-wide, which was parked at the very rear of the lot. It was rough terrain and approximately 300 feet from the car to the trailer. The wagon would only hold 2 children and one bag of groceries so I made that walk, back and forth, so many times. One day, the wagon had enough. Its wheels fell off and it sighed with exhaustion. I felt like I lost a trusted companion.

Our Christmas card photos were rather fun during the 3 year restoration project. We really worked hard at keeping our sense of humor!

Yes, I am pregnant in that photo. More to come about that!

I hope you have enjoyed Chapter 2 of The Restoration Chronicles. Did you have a nice Valentine’s Day? Personally, I was happy to stay home and just enjoy a quiet Friday night.

Thank you again for following my stories here on the blog and on Instagram and Facebook. I just learned how to do Instagram Stories. Woohoo! IG Stories only stays online for 24 hours. Please check them out and tell me what you think.

Have a terrific weekend!

If you enjoy this post, please share on Pinterest.

This post shared with Between Naps on the Porch Metamorphosis Monday #638