1

Happy Mother’s Day

I am giving myself permission to do nothing this weekend. The week has been filled with so many projects, I will need a vacation after this quarantine is over! I dream about staring at the ocean with an umbrella drink in my hand. But it is time to slow down a bit and enjoy this Mother’s Day weekend!

Early advocate for Mother's Day Anna Marie Jarvis - ABC News ...
Anna Jarvis

Who started Mother’s Day and why? Mother’s Day was first celebrated in 1908 when Anna Jarvis held a memorial service for her mother. Her campaign to make Mother’s Day a recognized holiday in the United States began in 1905, the year her mother, Ann Reeves Jarvis died.

Ann Jarvis had been a peace activist who cared for wounded soldiers on both sides of the American Civil War, and created Mother’s Day Work Clubs to address public health issues. Anna Jarvis wanted to honor her mother by continuing the work she started and to set aside a day to honor all mothers because she believed a mother is “the person who has done more for you than anyone in the world”. (from Wikipedia).

My mother, Julia Ukleja Brostek

In 1914, President Woodrow Wilson signed a proclamation designating Mother’s Day, held on the second Sunday in May as a national holiday to honor mothers. Owing to the efforts of Anna Jarvis, by 1911 all U.S. states observed the holiday.

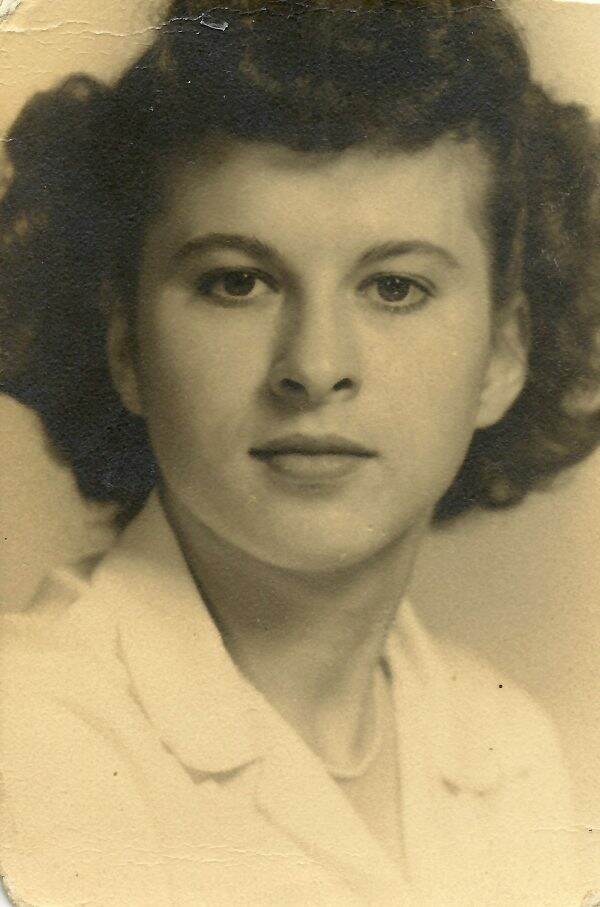
My mother passed away in 2014. She was 89 years old and was suffering from dementia. Dad insisted Mom stay at home and we had a wonderful caregiver who took excellent care of my mother.

It is hard for me to describe my mother, as she wasn’t a warm and cuddly type of person. Mom had a sense of duty and a great deal of pride. She was rather strict with the girls in the family as she didn’t want us to become “fast steppers”. It was important for her to instill lady-like tendencies~~no chewing gum, no drinking beer from a bottle, no swearing or dressing provocatively. Education and grades were important to her~~anything less than an A wasn’t acceptable. She had high expectations of all 5 of us.

My parents on their wedding day

I remember her lectures and often hear her in my head. She didn’t wear her heart on her sleeve and she wasn’t an easy person to get to know. But she made sure we were well-behaved, dressed appropriately and had everything we needed for a happy childhood.

My mother loved art~~ to paint and draw. I have fond memories of doing that with her. She could turn a sow’s ear into a silk purse. With little money, she could transform a piece of furniture she found on the side of the road to a priceless heirloom.

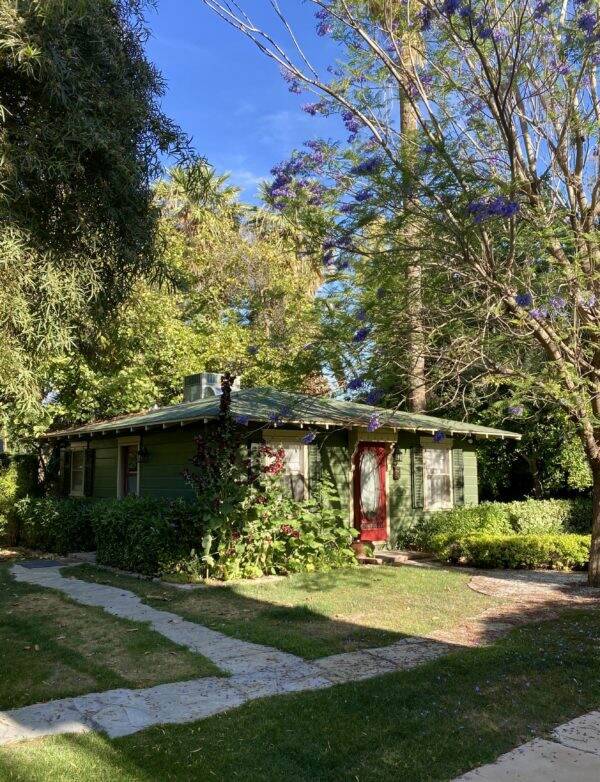
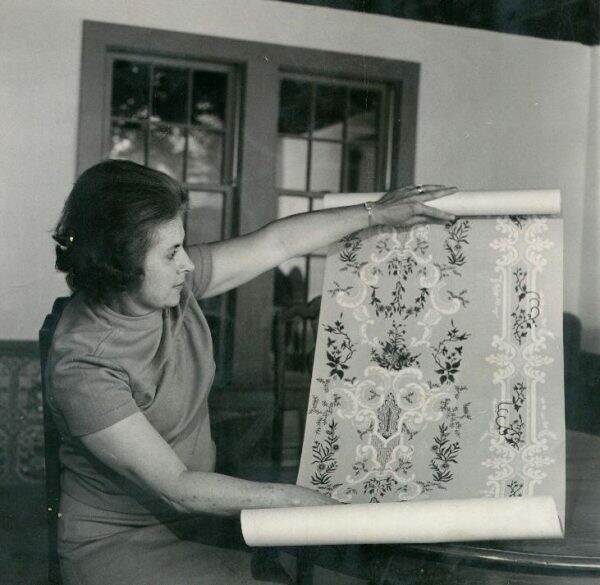
While I was in high school, Mom and Dad purchased and restored a 1774 historical home in Norwich, Connecticut. During the restoration, Mom carefully removed layers and layers of wallpaper, eventually getting to the first original one. She sent the piece she retrieved to Schumacher and they replicated the design, naming it “Norwich”. The restoration of this old home was their pride and joy. It was a wonderful place to bring our friends.

As the empty nesting years were approaching, Mom went back to school and then started a new career. She was practical. After 25 years, she retired from the State of Connecticut and enjoyed her pension until her death.

When I had my children, I took the lessons learned from my mother, but I adjusted them to fit my life. I would like to think I gleaned the best from her and then improved upon them for my three.

I have had a big corporate career, own my own business and nothing has fulfilled my life as much as being a mother. The blessings and love that my children provide cannot be put into words. Every day I am grateful for their presence in my life.

Wishing you a happy Mother’s Day~~whether you are a mother or have mothered others. Our weather is beautiful, albeit a bit warm, but I understand snow storms are happening in the east. Wherever you are, have a safe and lovely weekend.


Project Dilemma Solved!

I can’t tell you how much I APPRECIATE all the great comments regarding the vintage mailbox dilemma. If you missed yesterday’s post discussing the sad looking mailbox, click here. If you are visiting via HomeTalk, here is the post about the exterior light project that started the conversation about the mailbox re-do. As you can see below, freshly painted exterior light fixture makes existing mailbox stick out like a sore thumb.

I combined all of your wonderful thoughts and decided to do this to the mailbox. I spray painted the inside, sides and back the same color as the guest house light fixture~~an oil rubbed bronze, which is quite dark. Since there was some rust, the Rust-oleum paint will hopefully slow down any further deterioration.

In spraying the sides, I was careful not to get any of the overspray on the front or top.

After allowing these sections to dry, it was time for hand painting the front and top of the box. The metal isn’t smooth, but not hammered either. In this next photo, you can see the difference between the painted and unpainted surfaces.

Using spray paint on the front isn’t an option. Since the oil rubbed bronze spray paint is very dark in hue, I hand mixed the paint to use on the front. I combined Mars Black and Burnt Umber to create a warmer black. Sorry for the shadowy photos as I took these photos at night.

Hand painting the top of the mailbox allowed me to see how the new paint would look before I attempted the more visible face of the box.

Here is the top prior to painting the diamonds.

At this point, I really like the fresh paint and so I take a deep breath and continue onto the front! Using 3 different size brushes, I make my way around the diamonds and the curlicue.

I decide to sand the curlicue because I want to remove that drip of old pale green paint which I failed to notice beforehand. I wait for the black paint to dry first. Thankfully, I am able to get most of the paint drip off.

With so many leftover craft items, I have two tubes of gold and bronze Rub ‘n Buff metallic finish for the diamonds and curlicue. Though the instructions say to rub it on, I elect to use a small paintbrush.

Yes, Rub ‘n Buff can be used on metal. And it dries quickly! To see another project where I used this product, click here.

At this point, I’m not sure if the Antique Gold is too bright but I paint all the diamonds. I take the time to touch up with the black/umber paint where I get sloppy.

The Spanish Copper Rub ‘n Buff tube is a bit solidified and the contents will not easily come out. However, a bronzy liquid squirts out instead, and I use it anyway on top of the gold to tone it down.

I also paint this bronzy liquid on the curlicue to cover any scratches and dings. I paint the two rivets gold.

So here is the before…..

The mailbox after…..

Unfortunately the sun is shining directly on the front this morning, so the light in the after photos is not the same.

The light and mailbox before….

The light and mailbox after……

The mailbox still has its vintage charm, but the new paint makes such a positive difference.

Thank you to Karen, Barbara (from Mantel and Table) Janie, Linda, Marty, Karin, and Louise for your helpful comments. They truly gave me the inspiration to take the leap and paint this mailbox! I may have to spray it with a protective clear coat as I am not sure how my acrylic paints will hold up over time.

Marty, a subscriber, asked to see a bigger picture of the guest cottage. Again these were taken this morning with the eastern light exposure.

The hollyhocks have taken over the corner garden and the jacaranda tree is in full bloom.

It is such a beautiful morning here. The temperatures are in the low 70s and my morning walkabout was so joyful on this glorious Wednesday!

Enjoy your day! Please remember you can follow me on Instagram @lifeatbellaterra or Facebook. To see more pictures of the guest cottage, click here. Thank you for joining me today from HomeTalk and if you like what you see, I would love for you subscribe to Life at Bella Terra.

Products Used:

Rustoleum Oil Rubbed Bronze spray paint

Rub ‘n Buff Wax Metallic Finish-Spanish Copper and Antique Gold

Golden acrylic paints-Mars Black and Burnt Umber


Project Dilemma

The exterior lights to the guest cottage were looking tired and faded. What started as an easy DIY project now has me stumped about another. It seems like every time I start one project, it inevitably leads to ones I haven’t considered.

As you can see below, the exterior light fixtures to the guest house look like this. The original oil rubbed bronze finished has oxidized and faded over time.

Side entrance

I do like the classic shape of the lantern, which fits the quaint exterior of the guest cottage. Often I like the design of a light, but don’t like the finish. If you find a light you like, it is easy to change the appearance with paint.

After carefully removing the light (please make sure the power is OFF or have a licensed electrician do this), I cleaned it thoroughly. I did this by using water and a paper towel. Since the glass panels did not slide out, I carefully taped all the places that I wanted paint-free.

This is the most tedious part of the preparation, but it is better to prepare and prevent rather than repair and repent. I wasn’t quite sure of the color I wanted, so I painted them a Rust-oleum brown first and then lightly used an oil rubbed bronze spray over the brown.

After removing all the blue painters tape, the lights look brand new. I am please with the clean and fresh look.

Now the entrance looks a bit more perky.

I posted this project on HomeTalk and so far it has had nearly 10,000 views. To read the more detailed DIY on painting lighting fixtures, click here. However, one HomeTalk comment was “the lights look so good, is the mailbox next?”

Quite honestly, I never even noticed how sad the mailbox looks. It is a vintage box and I’ve haven’t seen another like it. But, the metal mailbox does look like the ugly sibling now. What should I do with it?

The gold-ish diamonds are also on the top of the box and a bit raised from the surface.

I like the design of the box because the front opens forward for you to reach your mail.

So what should I do to the mailbox? Leave it alone? Re-paint the black or another color? Paint the whole thing? Just give it a clear coat? If so, shiny or satin? I cannot remove the curlicue piece on the front as the rivets are welded in.

This mailbox does need a face lift! Please send me your thoughts as I’d love to wrap up this project this week. Since I received so many good ideas on my front door color request, I am hoping I can tap into your expertise on this one!

Have a wonderful Tuesday! To see more on this sweet guest cottage, click here.


Selecting a Front Door Color

It appears I’m in a bit of a painting frenzy. Not the artwork kind of painting, but the “what needs painting next” kind of painting. Paint is one of those home improvement items that is rather affordable, easy to use and makes a significant impact.

Since the front porch is looking a bit tired, I am pondering ways to make some affordable improvements. I do believe it is time to re-think the color of the front door. Red seems appropriate as it is the complement to the dark green house trim. But it is time for something different.

Selecting Colors with Web Technology

Sherwin Williams has a color technology section on their website which allows you to “paint” different colors into your own photo. I uploaded a picture of the front door and began experimenting with different colors. How cool is this! It is ColorSnap Visualizer for the web and you can do an interior room or the exterior of your home.

With an icon, you “paint” the area you are interested in. You can choose up to 8 colors from the color charts on their website and create “My Color Palette”.

At the bar on the bottom of the screen, you can see the colors I selected to try~~black, dark green (like the trim), cayenne, sage, and two shades of blue.

I have always loved a high gloss black door with beautiful brass hardware. You see many of these in London. However, when I tried it on this software, the front door almost looks like a big black hole. And would the black be too dark against the green?

What if I were to paint the door the same as the trim color?

Sage green almost always looks so beautiful on doors, but not so sure on mine. Sorry for the blurry photo as I was taking pictures of my computer screen with my phone.

Several years ago I did have a French Blue door. I loved it! I was into all things French back then. Not sure I want to repeat it?

Here is the ColorSnap Visualizer with a few different shades of blue.

What if I just need a different color red?

Since our home is historical, I am pre-disposed to doing a color that will be appropriate for the age. Or do I? Should I consider a stain?

My confidence level is fairly low on selecting colors, so I would appreciate ANY feedback on this. I know many of your have a great eye for these things.

Our local Sherwin Williams has curbside pick up during the quarantine so I may start painting a few color patches and see what happens.

Have a beautiful Tuesday!


The Restoration Chronicles~~Chapter 4

Building the Pool House

Welcome to Chapter 4 of The Restoration Chronicles! I love a good Before and After story and we have many of those here at Bella Terra. I hope you have read the previous chapters where construction of the kitchen/basement, back terrace, and master suite additions to our historic 1912 home have started.

Quite frankly, I have no recollection of making the decision that we needed a new building by the pool. But with two toddlers and a baby on the way, there is much during that time that I don’t remember.

However, there was an existing ramada hidden under all the foliage to the west of the pool. Initially we didn’t even know it was there. It was so rotted and overgrown that it had to be demolished.

Working with an experienced architect (Cathy Hayes of Hayes Studios), we designed the building with the same architectural elements as the main house~~green tile roof, window accents, and overhanging eaves. Again, we used Marvin Windows and Ludowici historical roof tile.

Since we already had a guest cottage, the City of Phoenix doesn’t allow you to have additional guest quarters. Therefore, the architect listed the rooms as Game Room, Exercise Room, and Hall with two covered patios. There is a total of 845 livable square feet and 345 square feet of covered patios.

Red lettering indicates current use

I don’t have any pictures of early construction, but here you can see the pool house prior to stucco and paint. Much of the new construction was occurring simultaneously and I am assuming I was off solving other problems vs. taking photos.

Family Life

In the middle of all of this, we welcomed our third child into the world, a baby girl, Elisabeth! Unfortunately, her clavicle broke during birth, but she’s healthy and has a sweet nature . We are all still living in the double wide trailer. Sigh.

For the most part the pool house has been for guest. But when the children were teens, we splurged and made it their space. It is heavily used when the children come home as it is still a gathering place with their friends.

Pool House Details

There is an outdoor shower, which I just love. There is something about showering outside in the privacy of all the foliage. Plus a great stop to rinse off after swimming in the pool.

Where the “Hall” is located, there is plumbing for a full kitchen if one is required in the future. I put primitive pine cabinets in place for storage and also to hide the plumbing. Hardwood flooring is throughout. The window over the sink overlooks the hen house and garden.

Here is a glimpse of the bedroom. There are two antique beds that can be pushed together for a king-size one if needed. We had the walls faux painted back in the day when that was in style. Not sure if I will re-paint, but I’ve held off doing a detailed post on the interior until I decide.

The bathroom is a good size and has access to the outdoor shower.

Here is the view out of the pool house’s front French doors.

The pool house is the perfect place for our out-of-town guests. It is completely private with a spacious living area to relax. During this quarantine, I may just spend a weekend out there to feel like I am getting away!

I hope you enjoyed the latest edition of our home restoration journey. If you haven’t read the previous chapters of The Restoration Chronicles, click here for Chapter 1; here for Chapter 2 and here for Chapter 3.

My goal this week is to finish some already started projects. I need to have sense of completion……on something!

What projects are you working on? I really miss painting and hope to get some art time in this week too. Have a wonderful Tuesday.


My Easter Table

I know many of us are having smaller Easter dinner celebrations this year. However, albeit cozy, it is important to make it special for several reasons. Easter is a time of rebirth, joy and celebration. Even though we may be apart from our friends and family, we are healthy and safe.

Typically we have our sit-down dinners in the dining room, but since I have a “new” (from a yard sale) table in the family room with 4 “new” (from a yard sale) chairs, this location felt right for 4 people.

I chose the Royal Worcester Yellow Urn/Roses/Greek Key china because of the cheerful colors. An old business friend bought me 4 dishes many years ago. Slowly, over time, I have added to my collection but it is a rather difficult to find other pieces to this pattern.

Check out my adorable DIY bird nests! I am still tickled over how they turned out. If you missed my last blog post, click here. They fit perfectly inside my creamed soup bowl and add the Spring touch the table needed.

Yellow linen napkins are from Sferra. The sweet lamb napkin holders are gifts from my friend, Gwen. I am putting the napkins off to the side in a non-traditional location but this seems to work best with the round table configuration.

It’s hard to have Easter without bunnies! Daffodils were from our local Safeway store. I have no idea where the bunnies came from…maybe I just started with two? Ha!

My latest glassware purchase include these drop dead gorgeous Rogaska Gallia crystal glasses. They stand 9 3/8″ tall and the crystal cuts are stunning. Thanks to my friend, Louise, I was introduced to them at her dinner party last fall. I fell in love with the weight of the glass and was fortunate to find these on eBay.

Though I haven’t finalized the menu, I am hoping we have all the ingredients here so no one has to make a trip to the grocery store. We are wearing our masks out in public. I am encouraged by the latest projections as it appears that sheltering in is helping.

Wallace Silversmiths Bee Flatware from Horchow

Today I am making the annual family Lamb Cake. I am hoping all my siblings and my son are doing the same so we can have our Lamb Cake competition. My mother would bake one every year and it is one of many fond memories I have of her. Here’s a glimpse of last year’s cake. To learn more about the tradition of this cake, click here.

Happy Saturday and wishing you a blessed Easter with your family. May you continue to have good physical, mental and spiritual health!

The post shared with Between Naps on the Porch Tablescape Thursday #653