1

A Powerful Stain Remover

My sweet friend, Chloe, from Celebrate and Decorate gave me a very attractive duvet cover and pillow shams for a king bed that she no longer needed. It is made of a high quality woven Belgian linen and from Restoration Hardware (which we all know is not inexpensive). However, the duvet has unknown various stains, possibly rust? I didn’t want to ruin the beautiful linen fabric, but an intervention is needed. The good news is that in the process, I found a powerful stain remover using simple items in your home.

One of several stains

My First Pass at removing the stain

Make a paste of OxiClean and water

I often use OxiClean for tough stain removal. Since it comes in a powder, I find it most effective when I make a paste using OxiClean and water. Using a toothbrush, I gently work the paste into the stain. Did you know that when you mix water and OxiClean, the paste changes temperature? It gets very warm.

Using an old toothbrush

After applying the paste, I let it sit on the fabric for a few minutes. You can actually see the stains starting to disappear.

Even though the laundering instructions on this linen set say to Dry Clean, I washed the pillow shams in cold water. Before drying, I did double check that all the stains washed out and only then, did I hang them on the line outside to dry.

Did you know that sunlight has natural bleaching abilities?

After washing in cold water, hung on line to dry

Second Pass at Cleaning Stains

Naturally I thought I was on a roll having great success with the OxiClean, however, stains STILL remain on the larger duvet cover. OxiClean didn’t touch them at all. And unfortunately, I discover this while attempting to hang the extremely large and heavy damp cover on the line.

stubborn stains

Stains set when dried and even though this was an old stain, I remove it from the clothes line. It is time to step up my approach to stain removal. After searching the internet for answers, I decide to try this.

Hydrogen peroxide, cream of tartar and baking soda

Using hydrogen peroxide, baking soda and cream of tartar (using equal amounts), I make another paste and apply it in a relatively thick layer to the stubborn stains. Here I let the concoction sit on the stains for at least 30 minutes. Notice how the paste bubbles up while it is working.

After a half an hour, I scrape off the extra paste and surprisingly the stains are GONE!

Scraping off the excess paste and stain is gone

Like before, I re-wash the duvet cover in cold water and hang it on the line to dry. Each and every stain is gone!

So pleased with the results

Here is what the linens look like now. We are so happy with Chloe’s generous donation of this duvet cover which is perfect in our bedroom for the fall season.

Wentworth Court Belgian linen set from Restoration Hardware

I did debate whether I should press or steam the duvet and shams, but it is linen after all and it will not stay pressed looking very long.

No stains left

I am so impressed with this household stain remover, I try it on a blouse that has had a stubborn stain for months. Fortunately, the stain is on the cuff so I can wear the blouse if I roll up the sleeves.

Here you can see the orange stain on the cuff. I have tried numerous over the counter products on this and nothing has taken this stain out.

So I make the same combination of hydrogen peroxide, cream of tartar and baking soda and apply it generously.

As I am writing this, I am waiting to launder the blouse, but all indications are that the stain is gone!

I am so excited to share this powerful stain remover with you as it’s nice when something outperforms your expectations.

Well, today is the first day of Fall so happy Autumn, everyone! I hope to spend a few hours today getting out some of the fall decor. I also bought a flat of pears from Costco yesterday so I see a Pear and Caramel pie in my future (if you missed that post, see it here).

Have a terrific Wednesday!

If you enjoy this post, please share on Pinterest.

This post shared with Between Naps on the Porch Metamorphosis Monday #661


Saturday Meanderings

Thank you all for such wonderful and insightful comments to my post this week on Kindness. If you missed that post, you can see it here. Welcome to Saturday Meanderings where we chat about all good things that happen this week. So pull up a chair, grab a beverage and let’s get started.

The Fall wreath is up!

Though it is still SO hot here (107.5 degrees as I write this), I put up our Fall wreath this week. Surprisingly I still had the Spring wreath up on the front door, as this summer flew by so quickly and never really felt like summer to me. The autumn colors of the wreath against the blue door works somehow and just makes me happy. “If I build it they will come” is my mantra for hoping if I do some decorating, the season will change.

Grapefruit Peel Vinegar Cleaner

Inspired by Lisa, from Fresh Eggs Daily, I am trying my hand at making a cleaner that I could use in the hen house. Since chickens have sensitive respiratory systems, using bleach or other harmful chemicals would not be a good idea.

Apparently, the Orange Peel Vinegar cleaner is very popular on Pinterest, but at the time I didn’t have any oranges, but lots of grapefruits. Combining grapefruit, white vinegar, cinnamon sticks and vanilla beans, the concoction is ready to use.

I am trying it for a few weeks to see if it’s worth sharing with a longer, more detailed post. But I can tell you, it smells divine! Now let’s hope it works. To see Lisa’s post on this, click here.

A Great Haircut

Hairdo by Roscoe at Pucci Salon

What is it about getting a haircut that just makes you feel fabulous? I was so long overdue and looking a bit shabby. But my favorite stylist and long-time friend, Roscoe, just does his magic and voila! I have a fantastic haircut. I swear, if I could bottle him up and sell him, I’d make a fortune…he’s that good! Also it’s hard to take a selfie of the back of your head..ha!

New Shows to Watch

This movie, Gunsmoke Milkshake, reminds me of Lemony Snicket due to its interesting editing. With a strong cast of female characters, it has humor, relationships and a bit of violence. I did think it is well done and for someone who doesn’t watch movies often, it is entertaining. It can be found on Netflix.

My preference is to watch a television series, where I am only sitting for an hour at a time. Professor T on PBS is about eccentric criminal psychology professor with a brilliant mind, but also several neurological disorders, which makes him very complex and unpredictable. Enjoyable, so far!

Professor T on PBS

My Next Home?

Unknown

I am always dreaming of a home with a view like this. There is something about the water that I crave, which is interesting as I live in land-locked Phoenix. When I saw this photo (place and photographer unknown to me), I said “this is it!”. Does anyone recognize this photo or where it was taken? A girl can dream, right?

New Products

Trader Joe’s Chocolate Coconut Almonds

I did find these Chocolate Coconut Almonds at Trader Joe’s and quite frankly, I am afraid to buy more. It is very easy to consume the entire container. If you love Almond Joys, then this is the treat for you. You probably didn’t know that I used to work for Cadbury U.S.A. and we owned Mounds and Almond Joy. The fastest 5 pounds I ever gained was my first month working there~consuming candy bars fresh off the production line. These delicious morsels, that taste just like the candy bar, are good frozen, too.

Pepper Jack Crisps-Costco

Never go to Costco starving, which is what I did this week. In search of a new television, as ours was fried at the cabin due to a lightning strike, I grab this bag for something to nibble on during the ride home.

They are delicious with 10 grams of protein per serving and naturally lactose free~10 crisps equals 150 calories (but the crisps are rather big).

Made by Sonoma Creamery, there are other flavors too! Highly recommend as they would be delicious on a charcuterie board.

Dreamy Vacation Rental

The living room

Check out this dreamy English cottage which is available to rent in Devon, England. If making travel plans wasn’t so sketchy right now, I would be booking this for next Spring/Summer.

Owned by Elizabeth Hay

It looks like something out of a fairy tale. This cottage is owned and decorated by Elizabeth Hay, an interior designer who trained at Colefax & Fowler.  Immaculately restored and bursting with quintessential English country charm, the historic Grade II thatched cottage is surrounded by two acres of private grounds boasting orchards, a babbling brook, and a secret garden.

Kitchen/Dining

The cottage sleeps five, and guests have optional access to a beautifully decorated annex, a former livestock barn now converted to further sleeping accommodations. The annex provides ancillary sleeping space and will house an additional four guests. You can read more about this little slice of heaven here and learn more about booking reservations. 

Well that’s a wrap! Have a wonderful and relaxing weekend, my friends!


September Garden Guide

tomato transplants

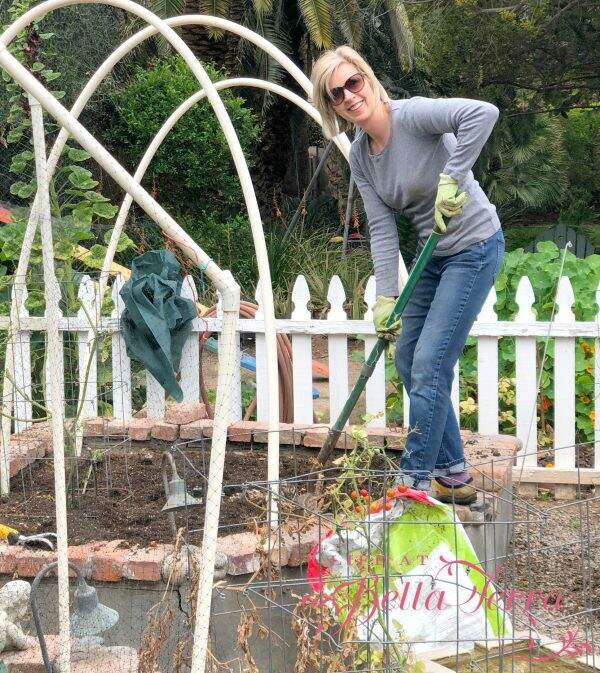
After wonderful monsoon weather and a nearly dead garden, I am so excited to get the beds ready for Fall planting. Here is my September Garden Guide for zone 9b. The only problem lately is the influx of mosquitos resulting from all the rain. And those nasty little fellas just love biting me. But I am determined to start gardening again! It is also time to see what my gardening buddies are up to this month too!

Good Soil Structure

Healthy soil has lots of worms

One of the foundations of a good garden is have equally good soil. It’s important to know your soil type. There are three soil types~ clay, loam, and sandy. Loam is the most desirable as it is a balanced mix of all three. How do you determine your soil type?

Our composted soil

The best way to tell what type of soil you have is by touching it and rolling it in your hands.

  1. Sandy soil has a gritty element – you can feel sand grains within it, and it falls through your fingers.
  2. Clay soil has a smearing quality, and is sticky when wet.
  3. Pure silt soils are rare, especially in gardens.
Soil test kit

Or you can purchase a soil analysis test (see one here) which will include the pH and mineral content. I just ordered mine as the last time a soil test was done on my garden was in 2012. The results take 6-8 days online so I will be sending my test kit in today!

Getting the Beds Ready

Emptying the composter

Most of the beds are laying fallow over the last month and require a new burst of good soil. Since we do compost nearly everything we can, I have a large quantity of this amazing nutritious dirt.

Preparing the beds

These compost tumblers make composting easy and I cannot recommend them enough. For a good selection of compost items, click here. Composting is feeding your soil for free! Plus it is a great way to get rid of 30% of your waste.

Getting beds ready for planting

The compost is placed on the top of the existing soil. I do not turn the soil much but I allow it to sit for a week or two before I start planting. To see my tutorial on composting, click here.

Check your Watering system

Flower garden soaker hose system

Last season, we had a drainage problem in one of the raised beds. What resulted was stagnant, stinky soil and poor vegetable growth and harvest. Now is a good time to make sure all systems are working properly. Too much or too little water can ruin a crop.

Our beds are equipped with an automatic watering system and the flower bed has a drip soaker hose with a timer. But sometimes these fail so it’s important to make sure they are in the best condition at the beginning of a planting season.

Shade Cloth?

In May, I did add shade cloth to protect the plants in the garden from the blistering summer sun. Since September is one of those months where it may still get really hot or we may see a shift to cooler temperatures, I will leave the shade cloth up for a while.

It is very easy to remove and during the winter months I replace the shade cloth with frost cloth on those few days we see below freezing temperatures.

Since the Valley of the Sun has different microclimates, it will be interesting to see how September pans out, weather-wise.

My planting guide for September

Time to plant these!

Starting early in the month, here is a list of items I hope to plant:

  • Beets
  • Broccoli
  • Brussel Sprouts
  • Cauliflower
  • Tomato transplants
Fresh from the garden

Closer to September 15th, I will add:

  • Kale
  • Lettuces
  • Carrots
  • Radishes
  • Garlic

Since our weather has been a bit out of the ordinary (heavy rains, cooler temps), I will adjust what I plant and when. When the night temperatures fall in the 70s, the bulk of the planting will take place.

Autumn flowers

Here is a list of annuals and perennials to sow. I actually have seeds (carnation, larkspur, sweet pea, and stock) that I ordered from Floret Farm back in the Spring, but the planting for these seed groups takes place in the fall here.

  • African Daisies
  • Alyssum
  • Aster
  • Bachelor Buttons
  • Bells of Ireland
  • Calendula
  • California Poppy
  • Carnation
  • Delphinium
  • Forget-Me-Not
  • Hollyhocks
  • Larkspur
  • Lupines
  • Nasturtium
  • Pansy
  • Petunia
  • Phlox
  • Shasta Daisy
  • Snapdragon
  • Stocks
  • Sweet Pea
  • Sweet William
  • Verbena
  • Viola
Picket fence needs tending

The white picket fence around the garden is looking a bit tired. It’s an ambitious project but I hope to paint it when it cools off a bit.

As many gardeners around the country are winding down their gardens, here in Phoenix we are just starting a big planting season. I cannot wait!

Thanks for joining me today. And now off to the Garden Blog hop.

Garden Blog Hop

Chas from Chas Crazy Creations tells us The Actual Truth and Reality of Growing My Seasonal Garden.

Chas from Chas Crazy Creations

If you have seen Kim’s garden, it’s hard to believe she makes any mistakes. However, today she is sharing 8 Mistakes Made in My Flower Garden and you can see it here.

Kim from Shiplap and Shells

Stacy from Bricks ‘n Blooms has a lovely garden in New Jersey. This month she shares How My Garden NJ Is Changing to Fall. See it here.

Stacy’s New Jersey Garden

Thanks for joining me today! I hope everyone had a relaxing the Labor Day weekend.

If you enjoy this post, please share on Pinterest.


Refinishing Outdoor Furniture

Thanks for joining me today for our DIY Monthly Blog hop. This month our focus is something to do with seating. Over four years ago, I did a DIY project where I repainted our outdoor furniture. Fast forward to today, and the pieces look as new as ever! Here in the Arizona sun, our outdoor furniture takes a beating. It is rewarding to know that this technique is still producing gorgeous results. Let me share how easy it is to refinish outdoor furniture.

The Before

Lounge chair with oxidized frame

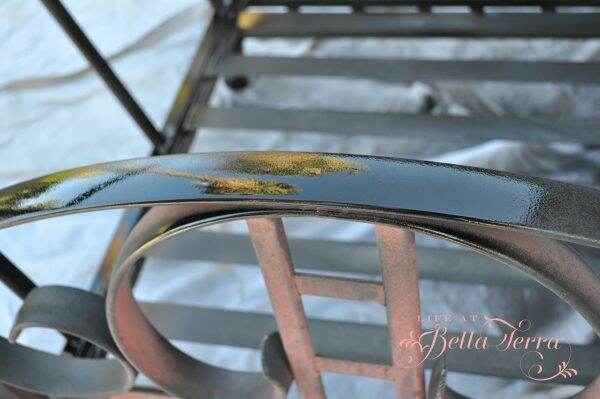
Here you can see the metal frame of the lounge chair in its oxidized condition. Instead of being a dark, rich brown, the finish almost looks purple.

Notice the variation of color

The pieces that need work are a lounge chair, a regular chair, a large ottoman and a round table. All these pieces are on our deck outside the master bedroom. The seating is rubber straps that do not require any work.

4 pieces that need refinishing

Supplies

I purchase 5 cans of Metallic Oil-Rubbed Bronze spray paint from Rust-oleum. There is something about the depth of this color that I love for outdoor furniture. You can find it here

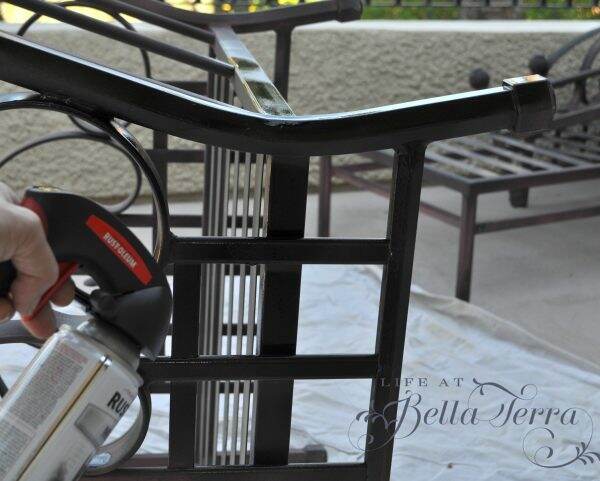
If you have ever done a lot of spray painting, you will know how challenging and tiring it is on your index finger. With this handy attachment, spraying is so much easier.

Best tool for spray painting

The Comfort Grip attaches to the top of the can and the handle helps to apply the paint evenly. It is so inexpensive and well worth it! You can find it here.

After wiping down the seating frames with a damp cloth, I am ready to paint. Using large drop cloths, I lay the furniture down and spray the bottom sections first. I tend to spray paint my feet (or socks) so be aware of where the paint is landing!

You can see in this photo the huge improvement from a new coat of paint.

Big difference!

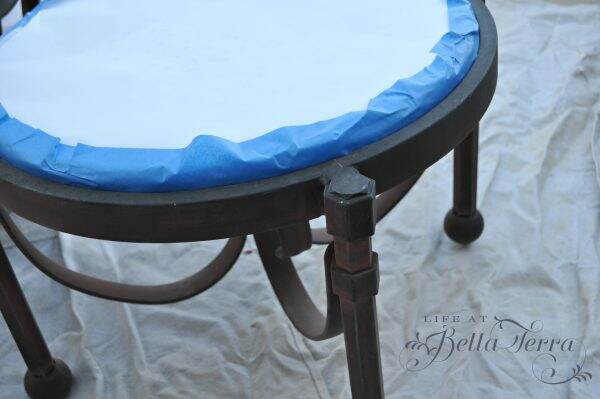
Since the stone top of the table is not removable, I carefully tape the edges with painter’s tape and make sure not to overspray the top.

Protecting the stone top

Allow to dry according to the manufacturer’s instructions. Also make sure you look around the furniture for missed painting spots.

The After

Here is the furniture 4 years ago. Doesn’t it look clean and new?

Furniture is finished!
Looks like new!

Now here is the same furniture today. We did move the pieces to a different location on the covered portion of the deck. But even after 4 years of being outdoors in the Arizona weather, all the seating pieces still look good!

Lounge chair today

The spray paint did hold up beautifully. Actually, the only thing that has changed is the pillows are a bit faded now from the sun.

Paint is still looking good!

Outdoor furniture can be pricey but with a bit of maintenance they can last you a long time.

Now onto the DIY Blog Hop

Thanks for joining me today. Now onto the other bloggers who will share their seating projects!

Andrea from Design Morsels shows how to cover your office chair here. I need to check this out as my office chair is looking a bit skanky.

Allison from Darling and Dapper Life creates a DIY Farmhouse Bench here.

Chas from Chas Crazy Creations gives us a great tutorial on How to Clean a Sofa.

Tarah from my Grandmas House DIY has two favorite rocking chairs that she has updated. You can see it here.

If you enjoy this post, please feel free to share on Pinterest.

This post shared with Between Naps on the Porch Metamorphosis Monday #649.


Saturday Meanderings

My patriotic charcuterie tray

As I am writing this I am in the mountains of Arizona and out of the insufferable Phoenix heat. The only downside to owning a second home is there is always some maintenance problem to tackle. But I’m not complaining, as it is cool, green and gorgeous here. So let’s get started on our chat about all good things this past week. Thank you for joining me for Saturday Meanderings on this July 4th holiday weekend.

Speaking of home maintenance..

Dead A/C and dead lawn

Upon our return from our 10 day trip to Nantucket, the air-conditioning unit servicing the kitchen, mud room, and library died. Fortunately, our HVAC person is able to quickly respond and get us a new one. OMG! When did the price of air conditioners skyrocket? But after a full day of installation, the kitchen is now nice and cool.

Painting the deck railing

Our cabin has decks made of wood. One of these days, I know we should go to the expense to replace them with a composite material, like Trex. But that too is expensive and anything to do with construction materials is difficult to get right now. Well, I just couldn’t stand the blistering surface of the top of the deck railing by the front door. So a couple of quick passes with a belt sander and a few coats of Behr’s Weatherproofing All-in-One stain and sealer, and it’s a temporary fix for now.

Isn’t Nature Interesting?

As you may recall, we bring our big pots of geraniums up to the mountains for the summer. They LOVE the cooler weather and occasional rains. One of the first things I do when I get to our cabin, is dead head the plants and water them.

However, yesterday, a bird did not appear happy that I was near the plant. It was chattering at me looking quite disturbed. Sure enough, look at the beautiful nest I found buried in all the foliage. But why 3 blue eggs and a speckled one?

Why is a cowbird egg in someone else’s nest?

Cowbirds are brood parasites, which means females lay their eggs in the nests of other birds and let the other mother bird do all of the rearing.

The cowbird will wait for a resident bird to leave her nest and then will usually damage or remove one or more eggs and replace that one or more eggs with her own.

The foster parents unknowingly raise the young cowbirds. Who knew? Thanks to my son, Benjamin for sending me this information.

Update on Furniture damage

Thanks to many of you who shared their remedies for repairing the damage to the dining room table. I did try mayonnaise, but to no avail.

Once we return home, I may try a few more times, but in the meantime, are also seeking knowledgeable furniture repair specialists.

Grilling

It’s that time of year for lots of barbecuing and I cannot recommend these grill mats enough. Not only do they minimize clean up, but the grill marks still occur and the food tastes the same. Recently, we did grilled peaches and they were perfect!

I like the fact that you don’t have a messy grill when you are finished cooking. The mats clean up easily and are reusable. You can find them here.

My Garden

Pedilanthus macrocarpus, Lady Slipper. Image Green Meadow Growers

The high summer heat does fry many of the plants in the garden. Surprisingly some plants are actually blooming, like the Lady Slipper, a succulent that looks a bit prehistoric to me. The thin, lime green, leafless stems, create wavy, straight or arched clustered growth.

Lady Slipper in bloom

Right now, they are flowering with delicate pink blossoms that look like a lady’s slipper. Sorry the photo is a bit blurry.

Pumpkins in July? I just picked two pumpkins from the garden. One of these years, I am going to get the timing right. Last time I grew Fairytale pumpkins they were done by mid-June. But aren’t the stems wonderful?

Beautiful Pillows

Pillow sham from My Stylish French Box

One of the beautiful items I received in the May box from My Stylish French Box, is this gorgeous pillow sham. The colors are perfect for our master bedroom (see the master bedroom here). Not only is the quality very good, but I am able to order another one through the website. The second pillow sham arrived and don’t they look fabulous on our bed? Here is the link to the pillow sham.

Saint-Tropez

Apparently the theme for the August box will be Un Weekend à Saint-Tropez. To learn more about this box, click here. These boxes make perfect gifts too.

Happy Independence Day!

Patriotic table

Wishing you all an enjoyable, safe and happy holiday. Remember to celebrate the true meaning of July 4th~our freedom and the signing of the Declaration of Independence.

Thank you again for following me and sharing all your stories, inspirations, and recipes. I am so grateful to all of you!

If you missed any of my posts this week, you can find them below.

DIY Patriotic Wreath
A Trip to Nantucket


Ways to Enhance Your Entry

Like every first impression, the entrance to your home says alot about you. Is it welcoming? Warm? Impressive? Easy to find? Often we take the entries of our homes for granted, because we are in and out of them frequently. So it’s time to step back and ask yourself the question, how can I create an impressive entrance?

Front Entry Update

Getting ready for our pre-renovation party 1999

Sometimes your entry needs a major facelift. This photo is our house prior to the extensive restoration. It is the only picture I found of the front door that shows the bare light bulb on the front porch. And back then, there were security bars on all the windows and doors.

Front Entrance today

With new house paint, removal of the security door and bars, new front door paint color, new light fixtures we transform the scary front of our home into something much more welcoming. Adding plants and a bench do add to the notion that we actually want you to enter the house and stay awhile.

Bella Terra

To read a detailed version of the restoration of the front of our home, click here.

Willetta Restoration before

I must be attracted to home with security doors as the same appears at the 1922 home I restored in downtown Phoenix. Even with missing light fixtures and significant deterioration, this is still an impressive entry. Plus the front door does have wonderful opening sidelights for ventilation.

Willetta restoration during

After all the white aluminum siding was removed, we found the original clapboard in good condition. The columns need significant work as does the under roof of the terrace.

Front Door Color

Willetta Restoration After

Sometimes a simple can of paint can really change up the look of your front door. Previously painted white, the double front doors look fabulous in this color red. For a more in-depth review of the historic Willetta restoration, click here.

Numbers

Here is the before and after of a remodel I did on a small ranch house. In addition to changing the front door, the house siding and removing the brick planter, note the old house numbers.

Here is the after with lots of changes. But the personal touch I love on this house is the custom made gold plated number 32. Made by an artisan in Connecticut, this is a unique look in Phoenix.

In lieu of a screen door, the shuttered door allows in light and ventilation to a rather dark entrance.

A Front Walkway

Before

This is one of my first “for sale” remodels. There is a lot wrong with the entrance to this house. It needs a new door as the hollow core closet one makes no sense. The mixture of brick and stone confuse me. But because the house is so flat and linear, it desperately needs a welcoming walkway.

After

With a winding path of tumbled pavers, your eye goes directly to the front door (sorry for the quality of this old photo). The solar lights enhance the path at night.

Front Entry Decor

Each season I change up the decor on my front porch. A new wreath, pillows, a throw, new plants~anything to freshen it up for that time of year. To see more about this front porch re-do, click here.

Adding Pretty Elements

Before

It doesn’t take much to freshen up your front entry. Recently, I painted the exterior fixtures and mailbox to our guest cottage. A simple project like this produces big results. To learn more about painting both these items, click here.

Know Your Home’s Architecture

In a small gated community here in town, I found this sweet patio home. However, the entrance does not fit with the style of the house. Between the dated French provincial front doors and the alpine-like peaked roof, I felt like yodeling every time I entered. The light fixture is 1980s. Structurally it looks wonky.

The wooden spindles and beams are removed. Columns are added and receive a coat of stucco. New fascia board gives the roof some beef.

During

With a new front door with sidelights, an appropriate scaled light fixtures and new paint the front door becomes the focal point in this entrance.

After

Here are some pretty entry pictures I did find on the internet. I just love all the window panes around this door.

Better Homes and Gardens

In each photo, your eye is drawn to the front door…which is exactly what you want to achieve.

Houzz

I hope this inspires you to spruce up the entrances of your home! Happy Wednesday!

If you enjoy this post, please share on Pinterest.

This post shared with Between Naps on the Porch Metamorphosis Monday #648