1

Candlesticks to Lamps

This month’s DIY blog hop is all about thrift store finds. I have really missed scouring thrift stores in 2020! Lucky me to find these gorgeous tarnished candlesticks years ago. They are the perfect size to make into buffet lamps for an entry table or dining room. Here is my DIY on turning thrift store candlesticks into lamps.

I don’t know about you, but often I cannot find just the right lamp so it’s easy to convert a thrift store find into that perfect lamp. What attracts me to these candlesticks is the ornate design in the metal. From a distance they look elegant and expensive. Due to their relatively light weight, I can’t really tell what kind of metal. My first inclination is that they are silver-plate, but there is a brass cast to the patina.

I don’t recall how much I paid for these candlesticks, but you can find many silver-plated or brass sets on eBay for a small amount~$25.00. Just make sure you find candlesticks that are hollow.

Now my husband, Scott will take over and provide the tutorial to convert these candlesticks into lamps.

Supplies You Will Need

  • Hollow Candlesticks
  • Threaded rod (available in various lengths)
  • Lamp socket
  • Make a Lamp Kit or see individual items below
  • Candle sheaths
  • Lamp shades
  • Light bulbs

Preparing the Candlestick

The first step is to drill a hole through the top of the candlestick, just big enough for a 1/2 inch diameter all thread steel pipe.  It’s hollow so the wire can run up the middle. 

Here’s a shot of the pipe and a base plate for the candlestick holder.  You’ll see three thin brass nuts.  One holds the plate on, one sets the top of the rod against the top hole we just drilled and the third sets the height of the socket.

Here’s a picture of the hole drilled in the bottom of my candlestick (you may not need to do that.  The brass plate holds the rod with the nut but also centers the rod in the indentation.

A trip to our local legendary electrical supply store French Electric & Lighting Supply, Inc., in Phoenix, Arizona is necessary. Here’s where we get the candelabra sockets, plug wires, rocker cord switches, adaptors for full size bulbs, plastic candle sheaths and warm LED bulbs (40 watt 2700K).

Assembly

Assembly is pretty quick.  I slide the nut and baseplate over the plug wire, thread the wire through the threaded steel rod (cut to the appropriate length) and push the rod up through the candlestick holder.

I put the plate in place and screw the nut onto lower end of the threaded rod and hand tighten it.  Next, I put two nuts on the top part of the rod(one to tighten the top of the rod to the candlestick and one to set the height of the socket.  Now I attach the wires to the socket which will screw onto the rod.  Since I don’t do this often, I find the guide above useful.

I only have two wires here so I ignore the last line.

The last thing I do is put in an inline rocker switch.  It’s pretty straightforward.  Here’s a picture of the inside of the switch. 

The cord passes through the switch.  I split the wire with a knife, cut the hot wire, take about 1/2 inch of insulation on both cut ends and attach them to the poles.  Tighten them down and reassemble the switch.  
The sockets come with a cardboard sleeve which is the perfect diameter for the plastic candle sleeve.  Tighten up the various nuts, slide the candle sleeve over the socket and you now have a lamp ( in need of a bulb and shade). 

Finishing Touches

Thank you, Scott! I love them. Now it’s time for me to dress them up.

Metal polish
Light polishing

Since I do like the vintage look, I do not want to completely polish them to a high sheen. I first start with silver polish, but it only reveals that these candlesticks are not silver. With a little brass polish, I can lightly clean the metal.

I do have different color shades that I change each season~blue for Spring, gold for Autumn and white/cream for the New Year. Ballard Design is a great resource for shades of different sizes and colors. According to Architectural Digest, your shade should be 1/3 of the total height of your lamp. These candlestick lamps are 24″ tall and my shade is 8″.

Aren’t they beautiful? They add a touch of elegance to my entry hall table, as well as light for evening ambiance.

If you enjoy this post, please share on Pinterest.

Thank you for joining me today for the DIY Monthly Blog Hop. Now let’s check out what my friends are doing.

Chas from Chas’ Crazy Creations teaches us how to Paint with Chalk Paint

Niky from The House on Silverado has a wonderful thrift store Farmhouse sign makeover.

Andrea from Design Morsels mixes vintage and modern here.

Kippi from Kippi at Home shows how to take a Goodwill shirt and turn it into a gardening apron.

Allison from Darling and Dapper Life makes a Farmhouse Bread Basket from a thrift store find.

Amy from Health, Home and Heart does a thrift store bench makeover.

Kim from Shiplap and Shells, who has a gorgeous garden uses a thrift store find to show off your garden flowers.

Tarah from Grandma’s House DIY takes a Thrift Store Basket and creates a gift for Mother’s Day.

I hope you enjoy seeing all the thrift store finds. Makes me want to go shopping!


How to Make a Tulip Wreath

If you recall, last year I added a new paint color to the front door. It is the perfect color for Spring and Summer. Surprisingly this shade of blue also works well for Autumn and Winter. Since tulips are currently blooming in the bulb garden, it seems appropriate to hang a tulip wreath on the front door. Join me today to make a tulip wreath. To see the front door color post for details, click here.

Michael’s is having a great sale on faux flowers and I scored 4 bunches of pink tulips for less than $20.00. See here. Initially the goal is to make an all pale pink wreath.

The challenge with our front door is that it is 48″ wide. Standard-sized wreaths tend to look a little dinky. So when I do create a wreath, abundance is the key. Naturally I did this DIY project out of order. It would make the most sense to start with your wreath frame and then determine the quantity of flowers you need. However, I didn’t want to buy another wreath frame and did some digging in the garage to find this 26″ grapevine one…..after I purchased the pale pink tulips.

My old glue gun

Supplies you need are simple: a wreath frame, flowers, glue gun and something to cut the flowers. For a nice selection of grapevine wreaths, click here.

Realizing that I may not have enough pink tulips to fill the wreath frame, I find some darker pink tulips that I had on hand from another project. With 4 bunches of light pink (14 stems each) and 2 bunches of dark pink (also 14 stems each), I have a total of 84 tulips. Before I start a project I want to make sure I do not run out of materials. Been there. Done that.

Using wire cutters makes this easier

Having wire cutters makes this job a lot easier to get through the plastic covering and the wire underneath. These are super affordable and you can order them through Amazon here.

Use glue when necessary

I start working on 1/4 of the wreath, knowing I can use 21 stems in that portion. This gives me a sense of what density of flowers will work. Most stems tuck easily and securely in between the grapevines.

Tucking in the flower stems

Don’t discard the leaves as they can be added to the wreath for fullness or just another pop of color. I hot glue the leaves randomly. Personally, I really don’t like using a glue gun because I tend to burn myself far too much. On this wreath, I use minimal gluing.

Adding leaves

As I am styling it, darker tulips are added for contrast. If you follow me on Instagram, I try to post a story daily and show these types of DIY projects in action.

As posted on IG

Continuing to add tulips around the entire wreath, I leave a space for a ribbon. Using the leftover bow from Valentine’s Day, I find that I don’t like it. The pink in the ribbon looks a little flat to me.

Bow or no bow?

Instead, I remove the bow and continue adding more tulips to fill in the gap. Much better!

So here is the finished tulip wreath! I think it looks so cheerful on the front door.

Since the wreath looks so nice, the rest of the porch looks a bit tired. Join me tomorrow to see how I spruced up the front porch to go with my new wreath!

Happy Tuesday! Spring has sprung and hopefully, everyone’s weather is improving. We are, of course, in the midst of our beautiful season so every day seems better than the one before.

If you enjoy this post, please share on Pinterest.


Saturday Meanderings

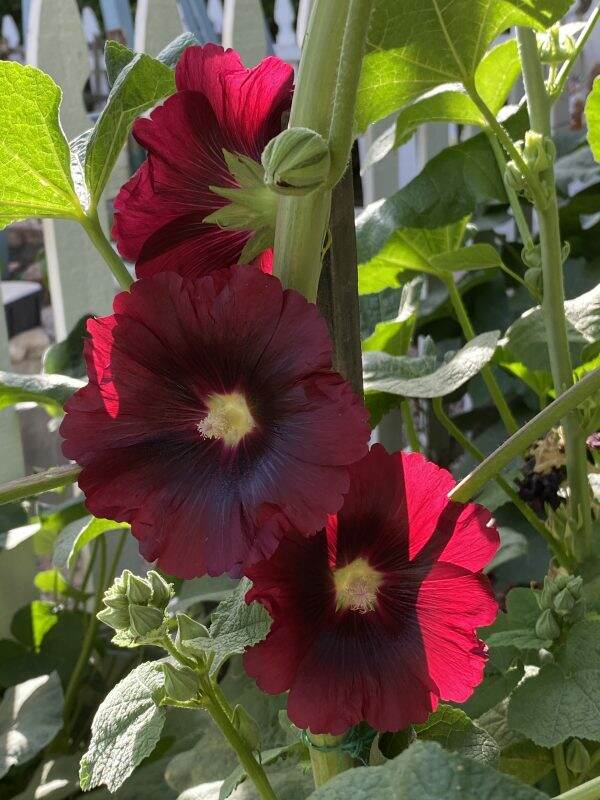
Burgundy Hollyhocks

I so look forward to this Saturday Meanderings post because I have SO much to share with you! Houseguests have left and I was anticipating more for Thanksgiving. However, an unexpected physical injury occurred and unfortunately they are not coming. Thankfully my family loves turkey because I have ordered a BIG one. Here is what else has been happening this week.

Gardening Update

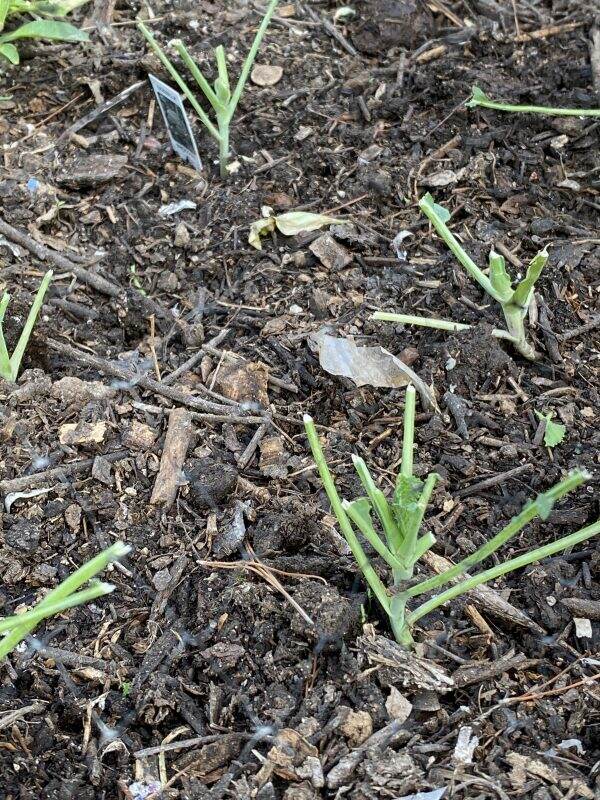
What used to be kale

Typically we do not have critters that infest the garden. However, this year my kale and some of the other greens have been eaten down to the ground. On four separate occasions, I have planted new kale starters only to find them munched on ~ over and over again. Using those heart traps, we caught 2 rats (ewww). Who knew they like kale?

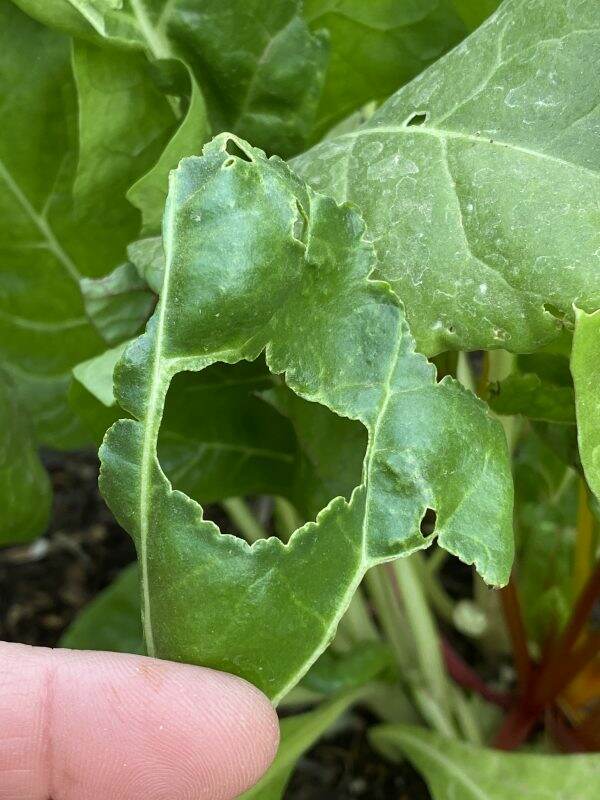
Swiss chard~bug damage

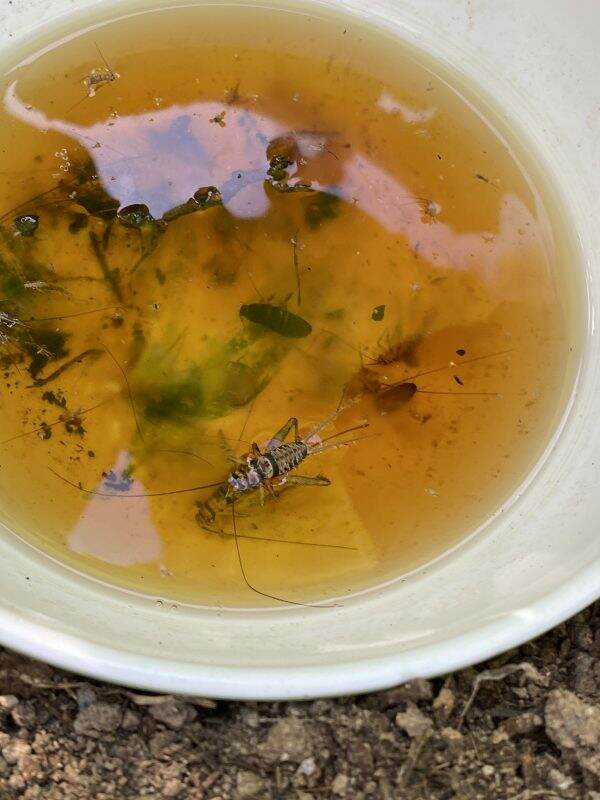
And now something is eating holes in my Swiss chard. So I put out two bowls of beer at ground level. Both bowls have successfully lured caterpillars, crickets and slugs. It seems like a humane way to get rid of them~drowning in a good IPA.

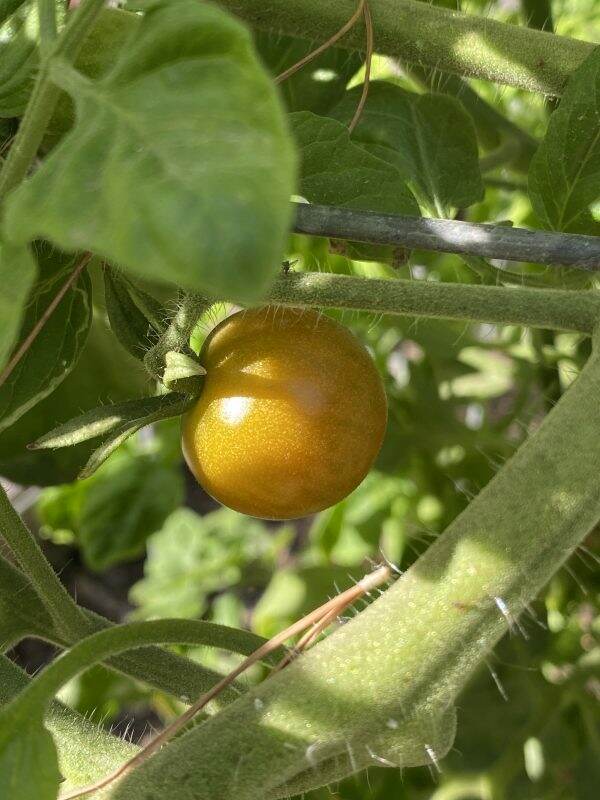
Curled tomato leaves

The weather went from summer to winter with temperatures in the high 30s to low 60s. But we are back up to the mid-to-high 80s. The plants are so confused. Tomato leaves are curled from the chilly temperatures with ripening fruit on them. So strange.

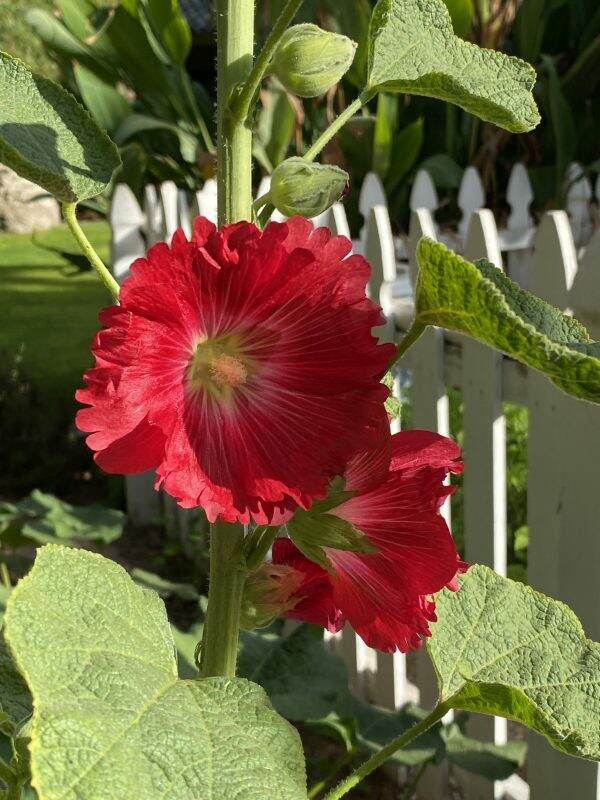
And the hollyhocks, which typically bloom well after the holidays, are starting to show their ruffled blossoms.

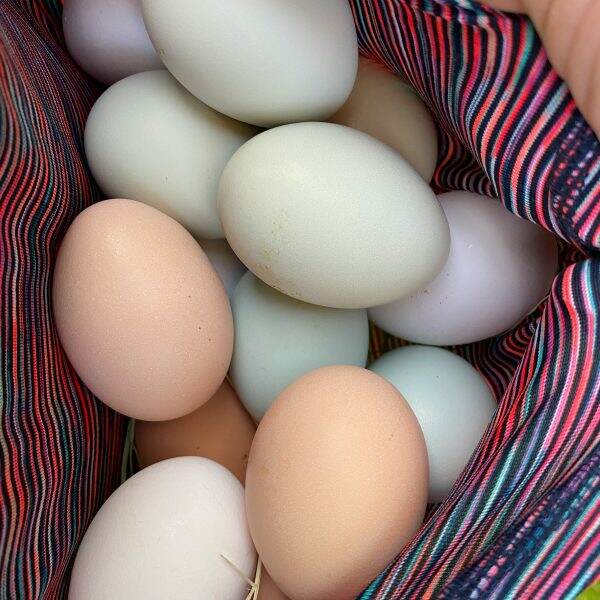
With this warmer weather, the chickens are laying up a storm. Yesterday I gathered 14 eggs from the hen house. So if you are nearby and want fresh eggs, please let me know. Once the weather cools down and the days are shorter, the egg laying will slow down. And don’t you just love all the natural colors of the shells?

Fun New Recipes

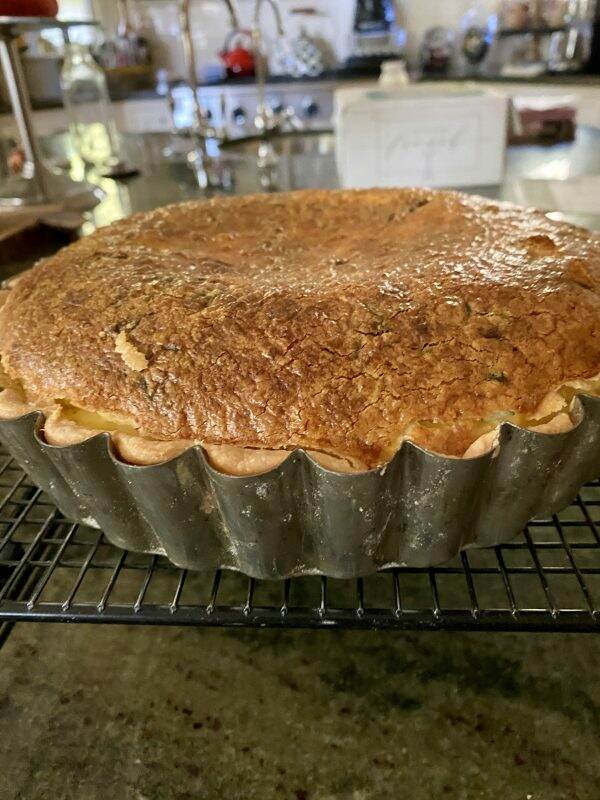
Spinach and goat cheese quiche

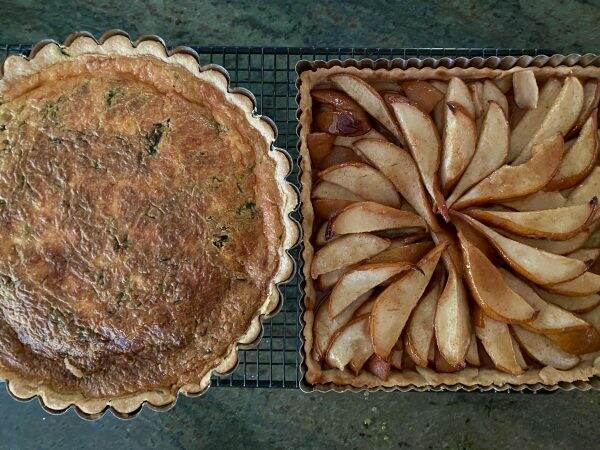
There is something very therapeutic about baking. With so many eggs, I made two quiches with spinach, shallots, ham and goat cheese. Not really following any recipe, I just use eggs, heavy cream (sometimes with low fat milk too), sautéed spinach/shallots (and squeeze out excess water) and goat cheese.

I did try a new pie crust recipe that was super easy from Confetti and Bliss. The author wrote perfect instructions and this pie crust takes 30 minutes from start to finish, including refrigeration. Here is the link to the recipe.

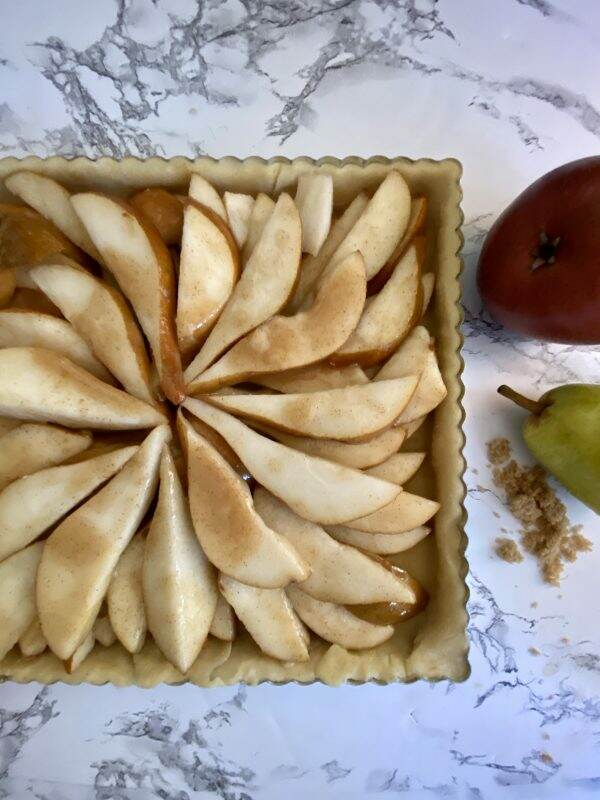
Pear tart before baking

With the leftover pie crust dough, I decided to try making a tart with pears. I love pears and this tart is another simple, delicious recipe. Even though I have possessed this square tart pan for years, I have never used it. Just perfect for this particular recipe, but I am sure you can adjust it to accommodate apples, too. The recipe is from Food Network~click here.

After baking

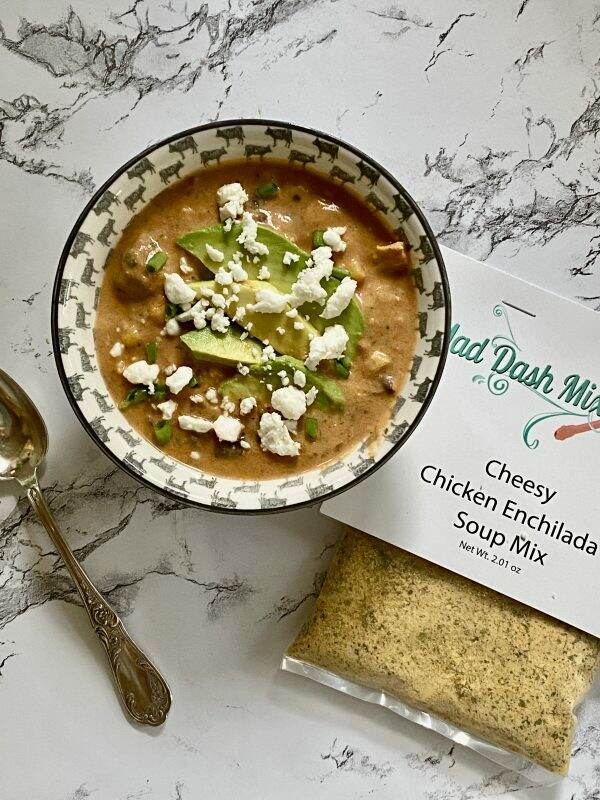
In my Holiday Gift Guide (see post here), Mad Dash Mixes is offering my readers a 10% off on their Host Bundle. They sent me some samples to try and this week, I made their Cheesy Chicken Enchilada Soup. Typically I make all our food from scratch, but these mixes are PERFECT on those nights or weekends when you just don’t feel like cooking. Here is their home page (click here) and if you use BELLATERRA10, you will get an additional 10% off your order.

Mad Dash Mixes soup

All that is required is a can of tomato sauce, milk, water, chicken (can use canned or rotisserie) and shredded cheese. I did add a can of black beans for extra protein. Topped with avocado and cilantro, this is just yummy. Great gift for the holidays!

New Bakery in Town

Europa Pastry

This particular bakery was a favorite and they closed their doors years ago. I am so excited that they have finally re-opened and are located right next door to where I take Pilates. Exercise an hour at Pilates and then go to the bakery. Perfect, right?

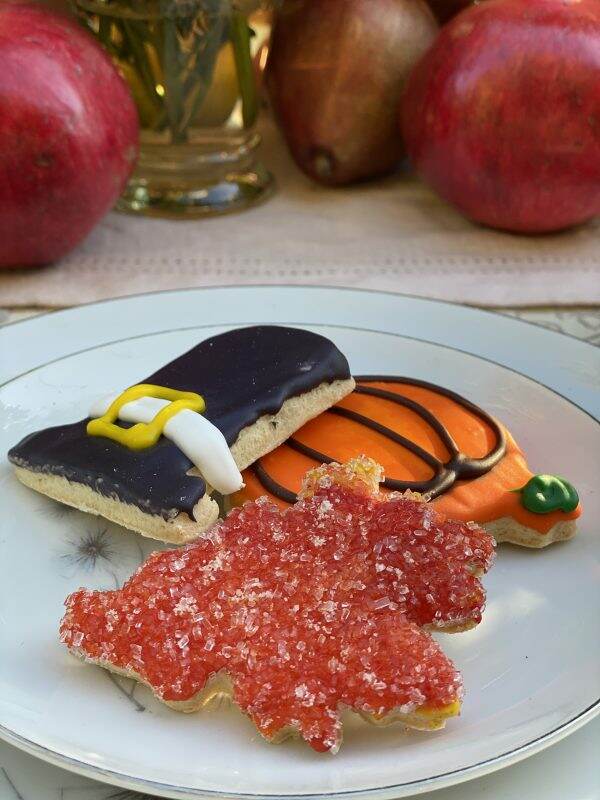
Thanksgiving cookies

This European bakery, called Europa Pastry has a fine assortment of typical treats from across the pond. Plus they have the pastries my grandmother (from Poland) used to make! Check them out: Europa Pastry at 6522 N. 16th Street, Phoenix. And they serve coffee drinks too. Always want to help our local businesses.

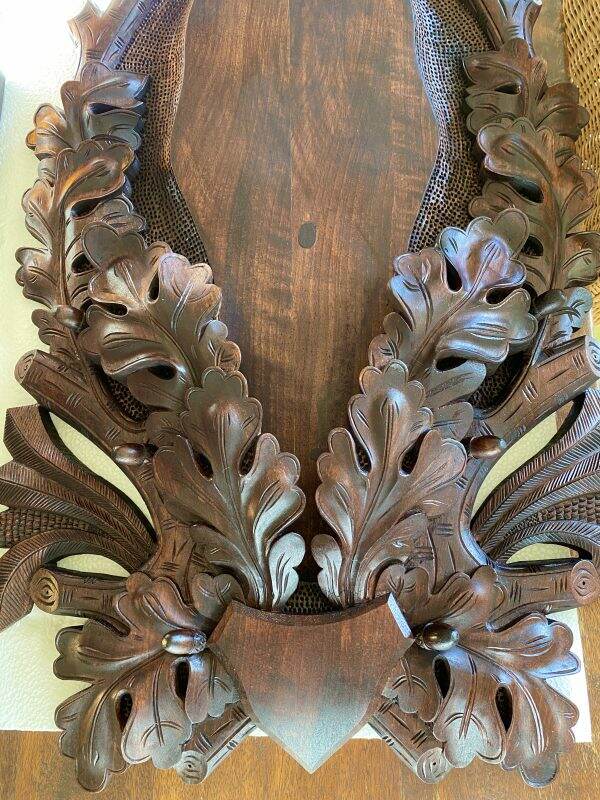
Hand Carved Mounting

My goal for our mountain cabin decor is to add more of a European/Black Forest look. We just received the mounting mechanism for the huge elk antler sheds (see post here).

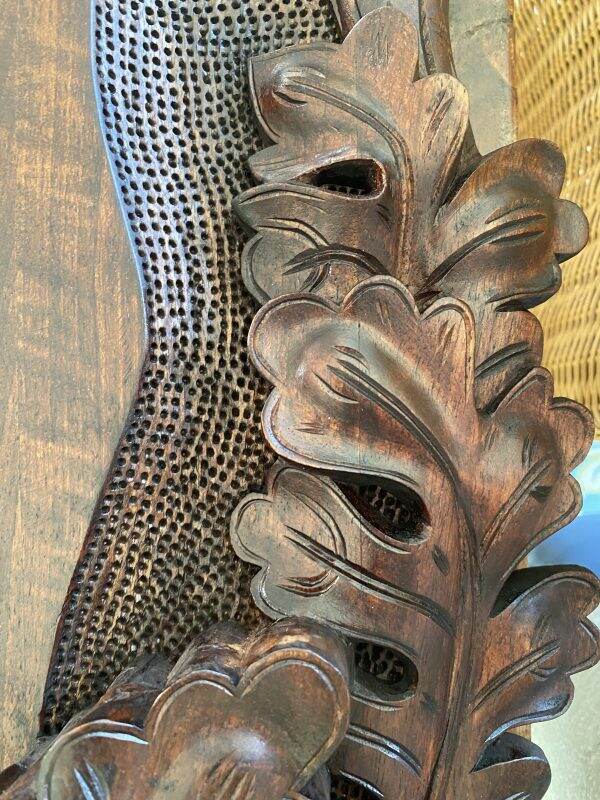
This beautiful, totally hand carved, chestnut panel, with carved oak leaves and acorns, is ideal for mounting all types of antlers. Apparently the owner of this company has relatives that makes these in Europe and he imports them to the US. Here is the resource.

Right now the elk antlers are being used as holiday decorations, so it will be a while before we can take them up to the cabin and properly mount them. To see the centerpiece using the antlers that I posted this week, click here. Will share the holiday mantels with you next week.

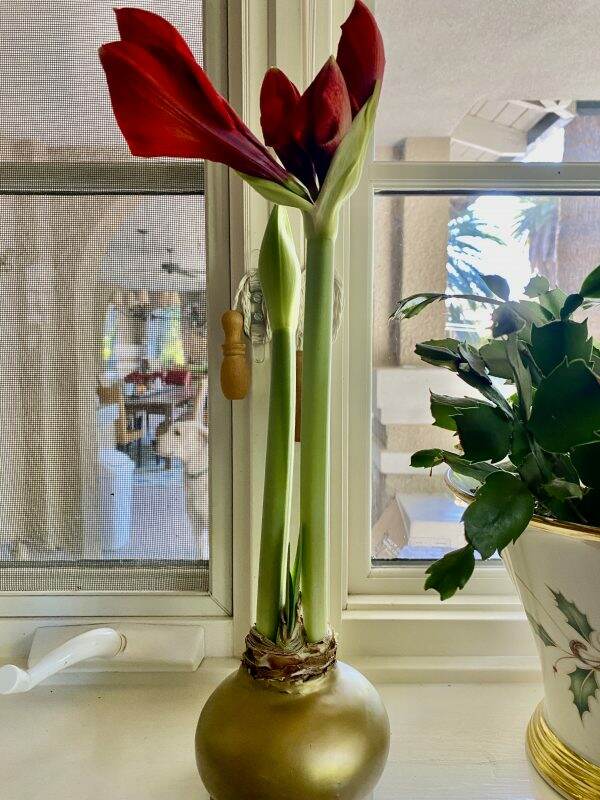
A Great Costco Find

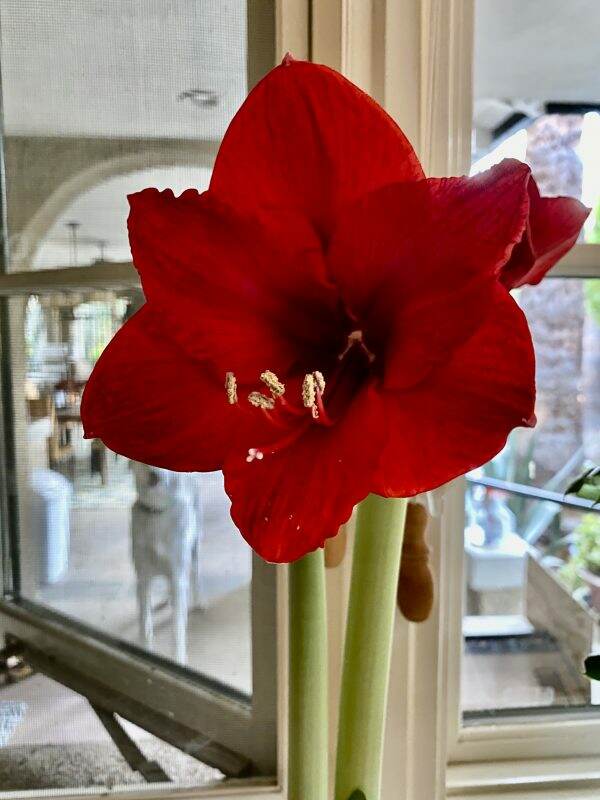
These amaryllis come in a 3 pack. The base is a wax ball that apparently contains everything the amaryllis needs. There is no water or soil at all. This one has been sitting on the kitchen window sill and is now almost in full bloom.

You cannot buy them online, however, I believe they are available in Costco stores. Here’s the link to the description online. My husband seems to think he paid about $20 for the three.

Well, that’s a wrap! I hope everyone has a fabulous weekend. Stay healthy and safe out there. Next week is Thanksgiving and I am hanging onto the last days of autumn. Sending big virtual hugs to all.


Holiday Gift Guide

For those of you who know me, I do not do anything Christmas/holiday related until the day after Thanksgiving. No decorations, no gift buying, no holiday cards. However, 2020 is a completely different year, forcing completely different behavior. Ever since the pandemic started, our supply chain has been stressed. And even though there is toilet paper back on the shelves, many other items continue to be out of stock. Inventories are low. A recent trip to Walmart had 30% of the shelves completely empty.

So what can we do differently this year in our holiday gift planning? I am teaming up with my blogging buddies as we are trying to find viable solutions to gift giving. And I do believe we must all think about it sooner rather than later. Here’s just a peek into some ideas and hopefully I will generate a few more gift guides in the next few weeks. And please check out the links to other holiday gift ideas at the end of this post.

For the cook/foodie

My son, Benjamin is our family’s foodie and he loves to cook. Here are his recommendations in the kitchen:

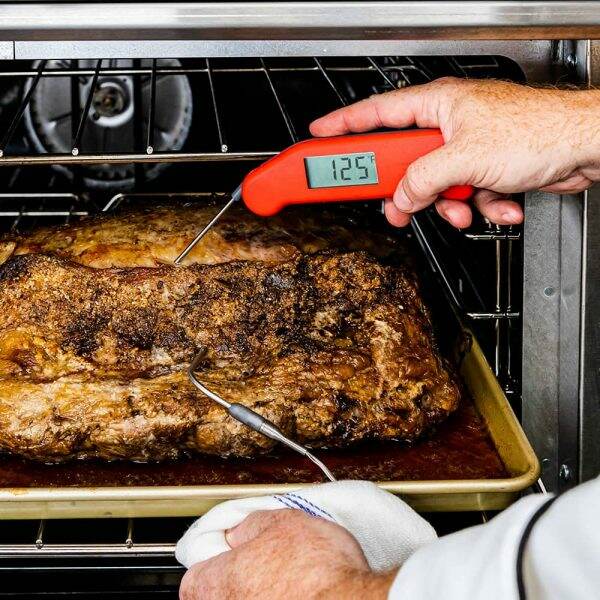
  • Instant Read Thermometer. Link is here
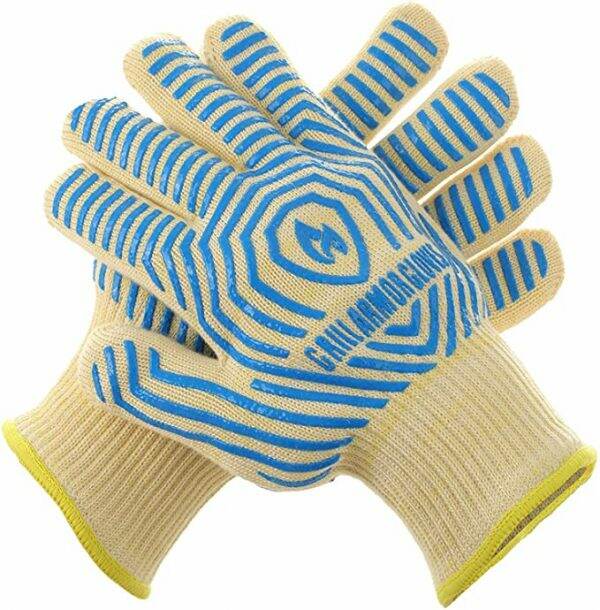
  • Good Oven Gloves. Link is here
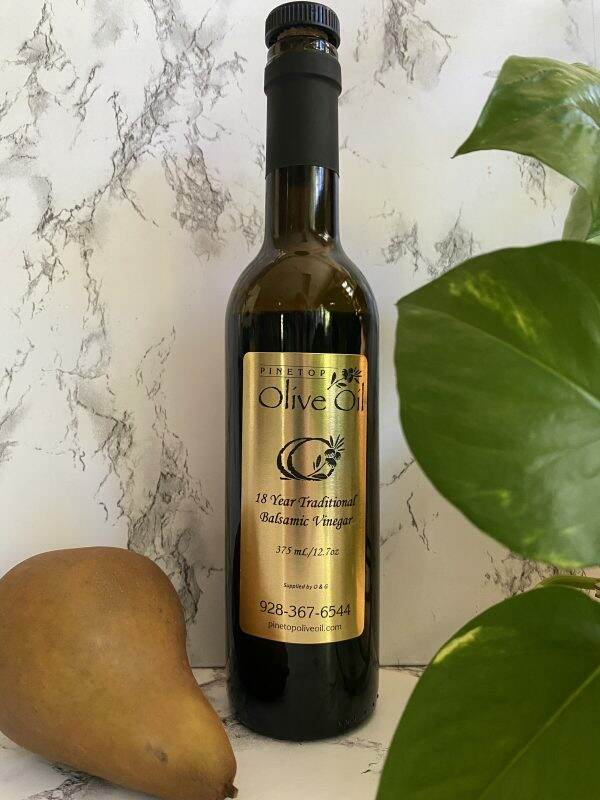
  • Nice Balsamic Vinegar~Hands down, our FAVORITE balsamic is from a very small shop in Pinetop, Arizona. This thick, delicious balsamic comes from Modena and is called the “mamma” of all balsamic. Link is here. Their shop has limited hours of Wednesday-Saturday, but you can order online or give them a call. $18.00/bottle

For the Gardener

As a gardener, I go through many things~gloves, shears, and tools.

Gardening Shears~Depending on your budget, here is a selection of shears/pruners.

Gardening Gloves: I literally can trash a pair of gardening gloves in one day in the garden. So having a few is always recommended. This 6 pack from Amazon is a great deal. Click here.

Gardening shoes: I’ve written about my Sloggers before. These were a Christmas present from my friend, Janie and I LOVE them. I wear a typical 7.5 women’s shoe and these Sloggers are a WO S 7 and they fit perfectly…..and oh so comfortable. Here is the link.

For the Wine Connoisseur

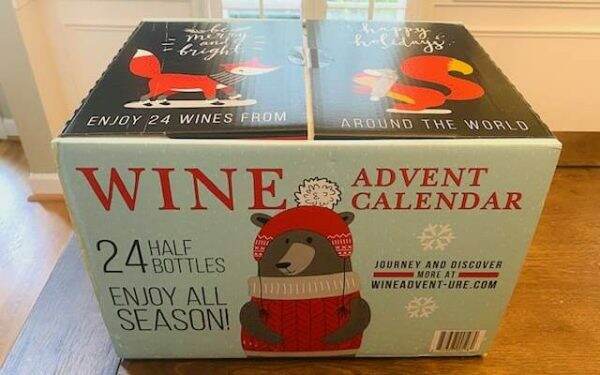
Costco is again featuring their wine Advent calendar this year. With 24 1/2 size bottles of wine from around the world. At $99.00, it works out to be about $4.00 per bottle. Wine advent calendar from Costco. Link is here.

As we all know, 2020 has been an interesting year. There are SO many wine glasses out there with fun quotes for the person who loves wine and has a sense of humor. See the extensive collection here.

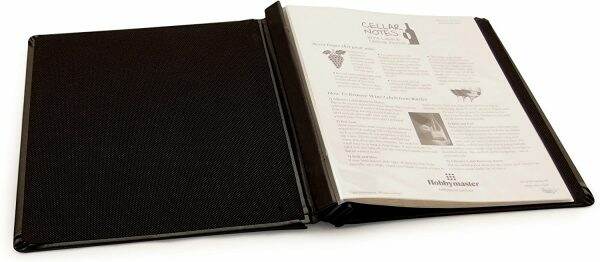
For those wine enthusiasts who like to keep track of the wines they are enjoying, this leather bound wine journal is a lovely gift. Link is here.

For the Hostess

My favorite candle is Capri Blue Volcano candle. Generally for the holidays, they change up their jar design but you cannot go wrong with this candle. If you prefer, there is also a reed diffuser.

Click the link here.

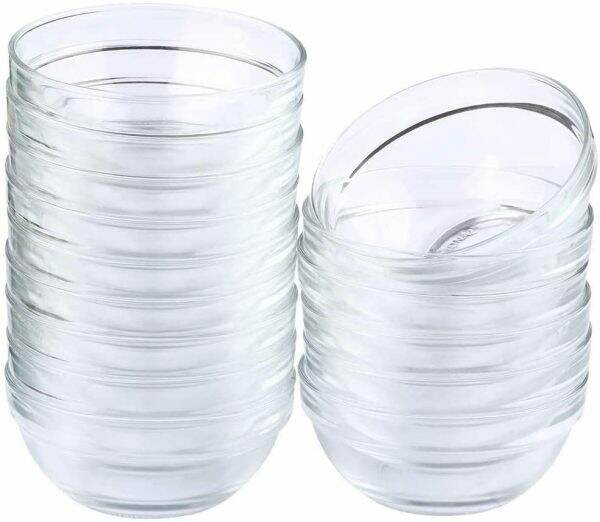
Small Prep Bowls: A gift from my friend, Connie, I use these 4″ bowls all the time when cooking, entertaining or just using them for food storage. Here is an affordable set of 16 for nearly $20.00.

I met the owner, Sherri of Mad Dash Mixes during a trip to Waco in June. So far the mixes I have tried are very good (and easy to use!). These mixes are just fabulous to have on hand if you need to whip up a dip, or a soup or dessert. Just for this blog post, Mad Dash Mixes has created a coupon for you for an additional 10% off! Any orders that you place using BELLATERRA10, will get you this discount.

Here is the link to their main page so you can peruse the numerous products they have. If you want to order the Host Bundle (Link here) it includes Warm Spinach Artichoke Dip, Cranberry Pasta Salad, Cheesy Chicken Enchilada, and Pumpkin Spice No-Bake Cheesecake. $21.00 (and don’t forget the discount code!)

Just some wonderful gift ideas:

23 and Me~for the person who is interested in real science, real data and genetic insights that can help make it easier for you to take action on your health. Especially this year, knowing more about your ancestry, genetics and health profile is a valuable gift. Link here.

My personal splurge is subscribing to the quarterly subscription to My Stylish French Box. It is such a treat to get this beautifully wrapped box filled with hand picked French items four times a year. You can also do a one-time purchase or give it to someone as a gift. I highly recommend this for yourself or someone who is extra special. My Stylish French box. Link here.

Help your local businesses as suggested by my friend Tevia on her Instagram.

As soon as I finish typing this I am going to start my holiday gift planning. I hope you enjoy today’s post and please send me any other ideas you have for holiday gifts.

And now for some other gift suggestions from my blogging friends:

Family Gift Exchange Ideas from Chas Crazy Creations|DIY Custom Gift Boxes for Christmas from Design Morsels|Holiday Gifts under $30 by Celebrate and Decorate|

Am still traveling and cannot wait to share some of my photos of this trip with you! Happy Tuesday.

If you enjoy this post, please share on Pinterest.

As an Amazon Associate I do earn a small commission on qualifying purchases. If you purchase something linked through my website, it will not affect your cost, but does provide me with a small stipend for making the recommendation.


Saturday Meanderings

Happy Saturday! Often after a very busy week, I just want to catch up with you on Saturday morning. In the past I have entitled these posts, Saturday Meanderings. I hope you enjoy these as much as I do, but I need your feedback. Please let me know if: 1) you enjoy Saturday Meanderings; 2) If so, should we name it something else; 3) or these posts are okay some of the time but not every Saturday. Thank you.

So many eggs

Our chickens are laying up a storm. We are getting about a dozen eggs a day! When I came back from the cabin there were 10 dozen eggs in the fridge. What better way to use up a lot of eggs than making quiche. So I made 6 spinach goat cheese quiches this week. Fortunately we have neighbors who like my cooking and we are so happy to share. Now I need to find a dessert recipe that requires lots of eggs!

Shopping

Michaels

I am not a shopper. I tolerate online shopping but going to a store, shopping for hours? Not my thing. This week, however, I feel like I did find some unexpected treasures in my necessary travel stops. For a future DIY project, I went to Michaels and happened upon these fun versions of pumpkins. I scooped up the last 3 because I love their textures.

Pumpkin pillow from Target

For another organization project I stopped by Target for plastic storage containers and found this cute pumpkin pillow. With the blue stitching. it goes well with my front porch fall decor. A happy purchase for $20.00.

During different times of the year, I typically buy the girls something to mark the season. I found these great smelling candles, Sugared Birch from Magnolia’s Hearth & Hand line at Target.

In order to make them extra special, I photocopied oak leaves, and then made a template for a gift tag. Using decorative paper, I cut out the leaf shape.

Using a sealing wax and a letter stamp, I affix the Happy Fall leaf to the tops of the candles.

Yard Sale

A realtor recently contacted me about an old historic home that may be going on the market soon. The pictures she sent are SO intriguing. In the interim, the owner is having a yard sale that may last for weeks.

Curious about this home, I did stop by and found some treasures. Check out these glasses I bought~8 for $10. They are perfect for a glass of wine!

I also scored these very cool candle holders which can be affixed to a wall or tree. A large French gathering basket is another bargain, as well as a long handled pizza peel and ornate iron brackets.

Traveling Tea Cup

This week the traveling tea cup arrived! I cannot wait to tell you all about this and will be sharing my story with you on Tuesday. My friend, Barbara from Mantel and Table started this wonderful idea in March. More to come.

Healthy Find at Costco

With the flu season soon upon us, I try to take extra precautions in building my immune system. To see my 10 Tips to Staying Healthy, click here. Costco now has these Suja Organic Immunity Defense Shots with turmeric and probiotics. They are filled with ginger and pack quite the punch, so be aware that they are not for wimps. However, I am game to try whatever helps to keep you strong and healthy. You can also buy them online through Amazon here.

That’s a wrap for this Saturday! As you are reading this, I am on a nature adventure near the Grand Canyon. Have a fabulous weekend and cannot wait to share my trip with you soon.


DIY Wreaths Using Natural Materials

I love incorporating natural materials into any DIY project for two reasons. 1) You cannot replicate nature and its beauty; 2) Natural products are free and do not cost anything. Good quality faux branches and flowers are expensive. And even though they are pretty, they are not genuine or unique as Nature provides. Have you ever made a wreath using natural materials?

Cattails

Materials You will Need

Currently, I am still at our cabin in the mountains and resources and supplies are very limited. There is a Walmart about a 25 minute drive from here and often, they are low on inventory. The only wreath frames available are 2 18″ grapevine wreaths for $4.74 each. In addition, I needed a wire cutter for $4.88 and floral wire for $1.47. Any kind of wreath frame will work.

Walmart’s faux floral section is so depleted and what is left, well, let’s just say it isn’t my taste. However, I was recently very inspired by a blog post written by Christine from Designs and Events. She made a wreath using roadside plants and greens. Since I’ve never made a wreath using natural materials, I thought I’d give it a try. Don’t you just love it when someone or something inspires you?

Foraging for Plant Material

The mornings here are crisp and cool now which is a great time to scavenge and hunt for just the right foliage. I do not know the names of these plants and they could be weeds for all I know. But I am looking for different textures, colors and sizes to make sure the wreath is interesting.

Wreath #1

Prep Your Work Space

Armed with my straw basket I set out looking for a variety of cuttings. The oak and aspen trees provide good material for the backdrop of the wreath. When I return home, I spread out a plastic tablecloth to assemble the wreath. Be prepared for a few bugs too.

Fill in the Background

I cut the oak leaves into manageable sizes and wire them to the grapevine wreath. Then I add the aspen greens, tucking them among the oak.

Here is what the wreath looks like at this stage.

Add Different Elements

Next I add this very fall looking flower (not sure the name), tucking the stems in with the greenery.

Using an odd number of sprig groupings, I sprinkle them around the wreath.

Next I add this soft, tubular shaped grass (?) with its sage green tones.

Since I don’t have a glue gun up here, I am tucking the stems in the wire used to secure the oak and aspen leaves. With the grapevine structure, it is easy to slip the stems into that as well.

These dark, rusty red branches already have dried leaves on them. Placing them on the bottom of the wreath, will lead your eye to the center. Another option would be to break them into smaller pieces and scatter them through the whole wreath.

Finding fresh thistle with its purple spikes was a painful delight. They are SO thorny and prickly. Wearing gloves is important while working with them.

So here is Wreath #1. Ribbon would be a great addition however, I failed to buy one.

Wreath #2

With the second wreath I decide to do something a bit loose and less complicated. Using the leftover grasses, I wrap them with the floral wire around the second grapevine form.

Isn’t this just pretty as is?

Using a few pumpkin and amaranthus picks from Walmart for $0.97 each, I only decorate one side. Here are some autumn picks from Amazon.

Faux pumpkin pick
Faux Amaranthus pick

Here is how Wreath #2 looks!

The fun part of this project is that you can create whatever you want. This is a very cost effective way to make your very own wreath with natural materials for under $10.

Neccesity is the Mother of invention here at the cabin. Not having lots of material available is forcing me to think out of the box. I put the second wreath up by our front door and it looks just perfect there!

Wishing you a fabulous weekend!

If you love wreaths and follow Pinterest, I have a Wreath Board you can find here. As always, if you enjoyed this post, please share with others.

This post shared with Tuesday Turnabout #66

Charming Homes and Gardens #24

To Grammas House We Go Link Party #209

Creative Crafts Linky Party #7