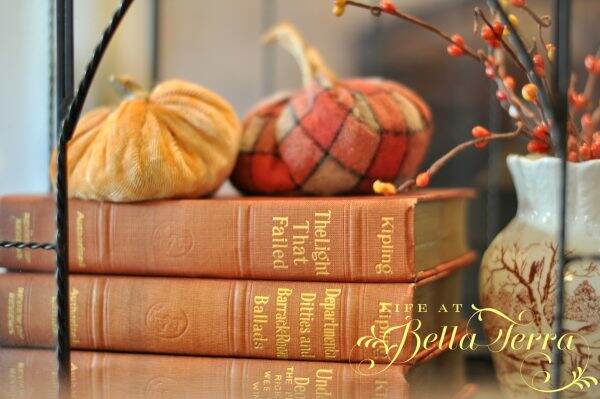
This is not a DIY project I was looking forward to but was forced to try. Years ago, I purchased several beautiful fabric pumpkins at a school fundraiser. Every year when I unpack them they look fabulous. Not this year. For some reason, weevils (?) infiltrated the fabric pumpkins and had a year to reproduce. It was so gross!
So I discarded the pumpkins that were badly damaged. In saving the pumpkin stems, I wasn’t sure if the weevils are taking up residence in there. Placing the stems in ziplock bags, I put them in the freezer just in case.
Since I have leftover fabric at the cabin, next on the shopping list is filler for the pumpkins. The infested ones had both dried kidney beans and rice. Unfortunately, Safeway is completely out of dried kidney beans (go figure). So I am forced to use rice. Next thing to buy is bay leaves.
Since most of the residual pumpkin stems are on the smaller side, I measure the fabric for a 10″ circle using a Pyrex bowl.
The only thread I could find up here is from the Dollar Store and doesn’t look like the best quality. So I use four strands on my larger needle. Using the basting stitch, I go around the entire circle of fabric.
By tightening up the thread, you create a pouch which is ready for the filling.
On this first pumpkin, I use only rice. In retrospect, I may have overfilled it as the pumpkin is a bit hard and not a pliable. In order to prevent future weevils, I add bay leaves too.
You will need strong thread (or 4 strands like mine) because in order to close the pumpkin, you must pull it together to minimize the opening.
Taking the needle, I sew back and forth, and side to side to securely close the top.
Using a glue gun, I affix the stems to the top of the pumpkin. (Thank you to my friend and neighbor, Kathy for letting borrow this!)
Holding the stem in place for several seconds, guarantees a secure fit. If you don’t have actual pumpkin stems, you can use a stick or cork and apply it the same way.
For the next pumpkin, I use a bigger bowl to measure for a medium size one (the bowl is 13-14″ in diameter). I repeat the same process but instead of using just rice, I put about 1/2 cup of rice in the bottom and use polyester fiber fill. The combination of the two makes a more pliable pumpkin.
This one is a little more difficult to stitch due to the thickness of the fabric.
Again, secure the stem to the pumpkin with the glue gun.
Here are the results of this DIY project. It is interesting that the fabric plays a role in how the pumpkin performs. The stiffer the fabric, the less squishy the pumpkin.
In addition to adding bay leaves to the filler, I am also placing several bay leaves inside the plastic storage box. Let’s hope these little critters are dead and gone.
To see how I use these fabric pumpkins for fall decorating in previous years, click here.
I love incorporating natural materials into any DIY project for two reasons. 1) You cannot replicate nature and its beauty; 2) Natural products are free and do not cost anything. Good quality faux branches and flowers are expensive. And even though they are pretty, they are not genuine or unique as Nature provides. Have you ever made a wreath using natural materials?
Cattails
Materials You will Need
Currently, I am still at our cabin in the mountains and resources and supplies are very limited. There is a Walmart about a 25 minute drive from here and often, they are low on inventory. The only wreath frames available are 2 18″ grapevine wreaths for $4.74 each. In addition, I needed a wire cutter for $4.88 andfloral wire for $1.47. Any kind of wreath frame will work.
Walmart’s faux floral section is so depleted and what is left, well, let’s just say it isn’t my taste. However, I was recently very inspired by a blog post written by Christine from Designs and Events. She made a wreath using roadside plants and greens. Since I’ve never made a wreath using natural materials, I thought I’d give it a try. Don’t you just love it when someone or something inspires you?
Foraging for Plant Material
The mornings here are crisp and cool now which is a great time to scavenge and hunt for just the right foliage. I do not know the names of these plants and they could be weeds for all I know. But I am looking for different textures, colors and sizes to make sure the wreath is interesting.
Wreath #1
Prep Your Work Space
Armed with my straw basket I set out looking for a variety of cuttings. The oak and aspen trees provide good material for the backdrop of the wreath. When I return home, I spread out a plastic tablecloth to assemble the wreath. Be prepared for a few bugs too.
Fill in the Background
I cut the oak leaves into manageable sizes and wire them to the grapevine wreath. Then I add the aspen greens, tucking them among the oak.
Here is what the wreath looks like at this stage.
Add Different Elements
Next I add this very fall looking flower (not sure the name), tucking the stems in with the greenery.
Using an odd number of sprig groupings, I sprinkle them around the wreath.
Next I add this soft, tubular shaped grass (?) with its sage green tones.
Since I don’t have a glue gun up here, I am tucking the stems in the wire used to secure the oak and aspen leaves. With the grapevine structure, it is easy to slip the stems into that as well.
These dark, rusty red branches already have dried leaves on them. Placing them on the bottom of the wreath, will lead your eye to the center. Another option would be to break them into smaller pieces and scatter them through the whole wreath.
Finding fresh thistle with its purple spikes was a painful delight. They are SO thorny and prickly. Wearing gloves is important while working with them.
So here is Wreath #1. Ribbon would be a great addition however, I failed to buy one.
Wreath #2
With the second wreath I decide to do something a bit loose and less complicated. Using the leftover grasses, I wrap them with the floral wire around the second grapevine form.
Isn’t this just pretty as is?
Using a few pumpkin and amaranthus picks from Walmart for $0.97 each, I only decorate one side. Here are some autumn picks from Amazon.
Faux pumpkin pick
Faux Amaranthus pick
Here is how Wreath #2 looks!
The fun part of this project is that you can create whatever you want. This is a very cost effective way to make your very own wreath with natural materials for under $10.
Neccesity is the Mother of invention here at the cabin. Not having lots of material available is forcing me to think out of the box. I put the second wreath up by our front door and it looks just perfect there!
Wishing you a fabulous weekend!
If you love wreaths and follow Pinterest, I have a Wreath Board you can find here. As always, if you enjoyed this post, please share with others.
Since the lifestyle at our mountain cabin is mostly part-time and casual, I do not have an extensive supply of table setting items. It is a bit of a challenge to come up with an elaborate table, with limited supplies. So it’s time to become resourceful!
I am excited to participate in a Welcome Fall Tablescape Blog Hop, hosted by Chloe from Celebrate and Decorate. You will find table inspiration from 20 bloggers at the bottom of this post.
Feeling a bit conflicted because I am here at our cabin without a lot of “things”, I am determined to create a lovely table for this blog hop. And since we aren’t here very often, I really don’t even recall what I have or don’t have. And the scavenger hunt begins!
Start with Linens
Love a bargain!
So I begin the search for linens, dishes, glasses and natural items for the centerpiece. Fortunately, in the kitchen armoire, I discover this unopened Hemstitched linen tablecloth from Willams Sonoma. An obvious bargain purchase, the gold colored tablecloth is the inspiration for this post. You can find similar tableclothshere on Amazon.
Select Your Dishes
Using our every day dishes from Pier 1 imports, the gold tablecloth picks up the yellow in the plate. This when things start to come together!
Centerpiece Ideas?
Fall to me means all the colors of nature~the earth tones of red, yellow, browns and greens. Luckily, I located some artificial autumn leaves in the garage. But after being stored they are wrinkled and curled. With an iron on VERY low heat, I press the leaves that are in the worst condition.
At this point, the gold table cloth seems a little boring to me. What to do? I find a bolt of fabric leftover from a previous project stored in a closet.
The warm tones of the cotton are perfect and I have enough to cut a runner. And the cotton is nice and soft to be made into napkins.
Being here in the mountains, I have access to natural elements like pinecones. I collect a big bowl of them, intent on using them somehow on the table.
Utilizing What You Have
And here is how the table looks! I am pleased that I am able to use what I found around the cabin and didn’t go to any additional expense to put it together. The centerpiece is two sheaths of wheat, the faux fall leaves, pinecones, brass pumpkins, brass candlesticks and numerous votives. If you are looking for brass candlesticks, Amazon has a great selection.
Adding brass elements give it a bit of brightness yet complements the theme. The pinecones become easy place card holders.
I don’t have chargers here, but the burgundy dinner plate anchors the place setting. The fabric runner provides a nice base for all the fall decor.
Night Time Table
At night, the candles create an autumn warmth which gives it a magical feel.
The only stemmed wine glasses we have are numbered, and it’s a good way for people to keep track of their own glass.
For me, the key lesson here is that you can create a pretty table setting with items you already have around the house or in the yard. That bolt of fabric? I hadn’t used it in over 10 years. Now it will become part of my linen collection!
I hope you enjoy this post and thank you so much for visiting today. If you are new to my blog, welcome! For those who have followed me for a long time, I am so grateful for your support. Please let others know if you enjoyed this and share on Pinterest.
Welcome to the Fall Tablescape Blog Hop!
Now onto other Fall Tablescapes! Please check out these other talented bloggers and as always, we love your comments!
I can honestly say I felt a slight drop in temperature this weekend. Well, even though it remains hot here, it is a perfect time to think about styling for fall!
What a grueling summer we are having. For the next several weeks, fall weather will tease us. But every year, we get our Indian summer and the temperatures will go way up again. But a girl can dream about crisp, cooler mornings and wearing long sleeves again, right? It’s only a matter of time Fall will be here, so why not think about styling for fall now?
Despite the lingering summer heat, it doesn’t mean that we shouldn’t get into the mood. Today’s blog post is pulling out the best of fall decorating from previous years.
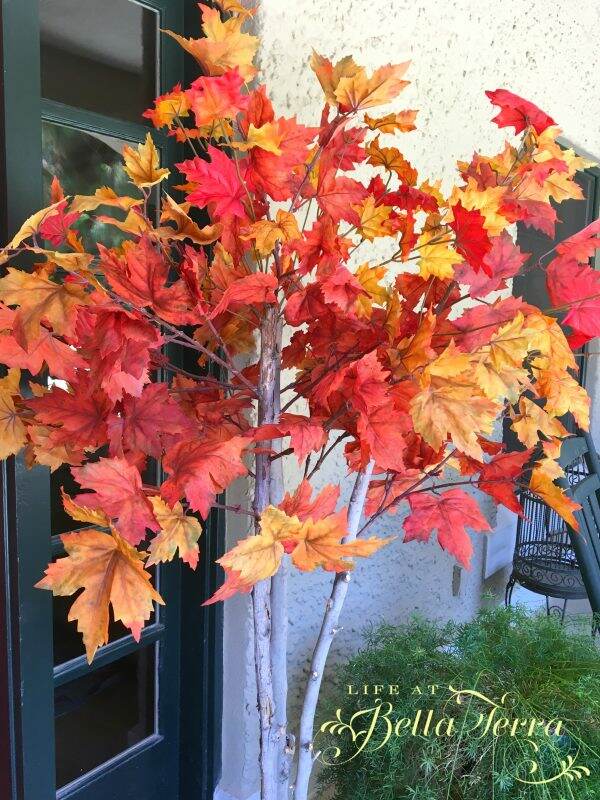
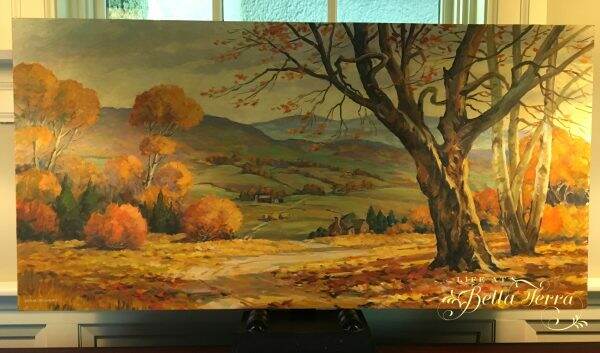
It’s hard to believe it was two years ago that I made these life size autumn trees. To see this DIY, click here.
This year I am thinking about making several smaller fall trees, ones I can put on mantels or use as centerpieces.
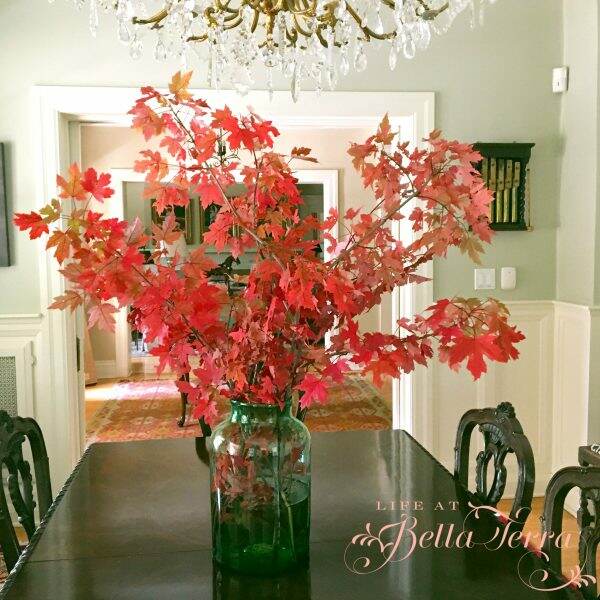
Or maybe large branches with fall leaves on them? Each year we go to the mountains and I will cut branches from real trees that have autumn leaves. I feel a bit guilty doing this so it might be time to create faux ones that I can use year after year.
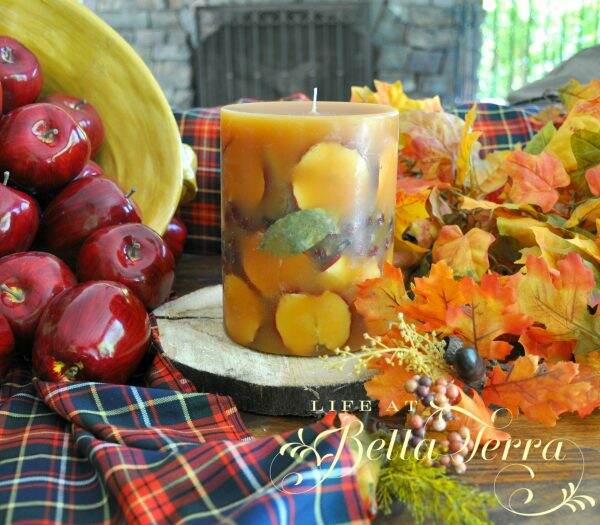
I am a big fan of Rosy Rings candles as each one looks like a work of art and smells heavenly. The candles are in investment, but they last from year to year. Plus they make terrific gifts. Click here for the link.
I cannot wait to pull this out again soon and fill the rooms with a seasonal fragrance. There’s a bit of a story around this Spicy Apple Candle. Clickhere for the post.
Each year I decorate one of my prized antiques, a Hepplewhite secretary, dating from 1790 to 1800. I bought this at a time when I had little disposable cash and every penny counted. But I am so glad I made the investment because it gives me such joy.
With 4 glass shelves, I get to do some creative fall magic with it. Too bad it is tucked into a corner of the living room, but I am always pleased to doll it up for this season. To see how I decorated it in the past, click here.
An easy, quick way to add seasonal decor is to switch up pieces of art. I don’t recall where I purchased the art above (I think an auction house), but it screams autumn. In addition, I have a few pieces I have personally painted, but now I am inspired to create a new one.
It doesn’t take much to add color and texture to your fall seasonal decor to your kitchen. A coffee cups, pumpkins, and hand towels are affordable ways to change things up a bit. Here are some cute towels on Amazon.
This spring I acquired a few great yard sale finds. This particular piece, especially with the artwork above, gives an autumn vibe in our family room. I cannot wait to play with the decor and see how I can change it up.
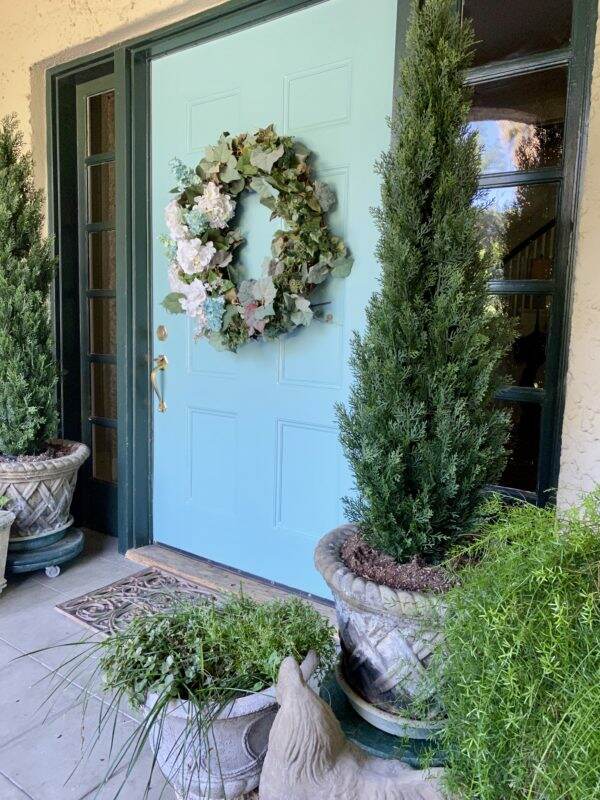
So are you ready for fall? Is it getting cooler where you live? If so, send some lower temperatures our way. Since we are without children, the fall decorating this year will be just for us. I have a new front door color that is more spring/summer-ish so that will be an interesting challenge to decorate. To see the new front door color, click here.
My fall focus is going to be on natural and already owned items. For the natural items I am dreaming about acorns, pinecones, branches, succulents and wood. My collection of baskets, scarves, throws, pottery and lots of velvet pumpkins will be incorporated.
Do you have any decorating plans for the fall? Please share your thoughts and ideas as you always inspire me! Have a terrific Tuesday. Happy September!
If you enjoyed this blog, please share it on Pinterest later.
For your convenience, I try and provide links to items you may like. If you make a purchase as a result, I may receive a small stipend for this service, at no cost to you.
Life at Bella Terra’s Greatest Hits
|
Garden entrance
Thank you for visiting my blog on Tuesday, Wednesday and Saturday! I am so grateful to my faithful readers and all the new people who are joining us every week. Your comments and questions make my day. Since many of you are new, I thought it might be fun to share some oldies but goodies. Let’s call it Life at Bella Terra’s greatest hits!
Here at our home, we have the good fortunate of space where we enjoy everything from gardening to outdoor entertaining. Here are a few areas of interest.
Gardening and Chickens
My blog post Gardening 101 stemmed from the question, “does gardening take a great deal of time”? After the initial garden plan, the actual work to plant, harvest and maintain a garden is minimal and seasonal. And the benefits are enormous! To see this detailed post, click here.
Composting 101
Another popular post is about Composting 101, which is an ideal project to start during COVID. Being home and creating more waste, composting is the answer to having great soil for your garden. If you could recycle 30% of your trash to make rich fertilizer, why not? See that post, here.
Before and Afters
Our home BEFORE
Don’t you love to look at other people’s homes? I certainly do! And it is a bonus if there are good Before and After pictures. I actually have a file where I keep renovation photos of other projects as inspiration.
After
Our historic home is always going through a constant renovation. However, the initial restoration was the most significant. In an attempt to capture that journey, I am writing The Restoration Chronicles. So far there are 5 chapters and if you haven’t read our story, click here for Chapter 1.
Entertaining
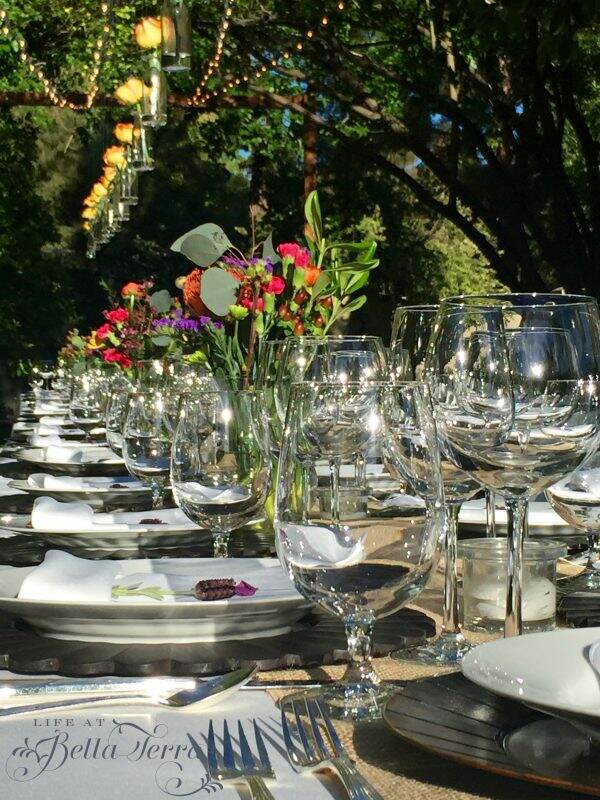
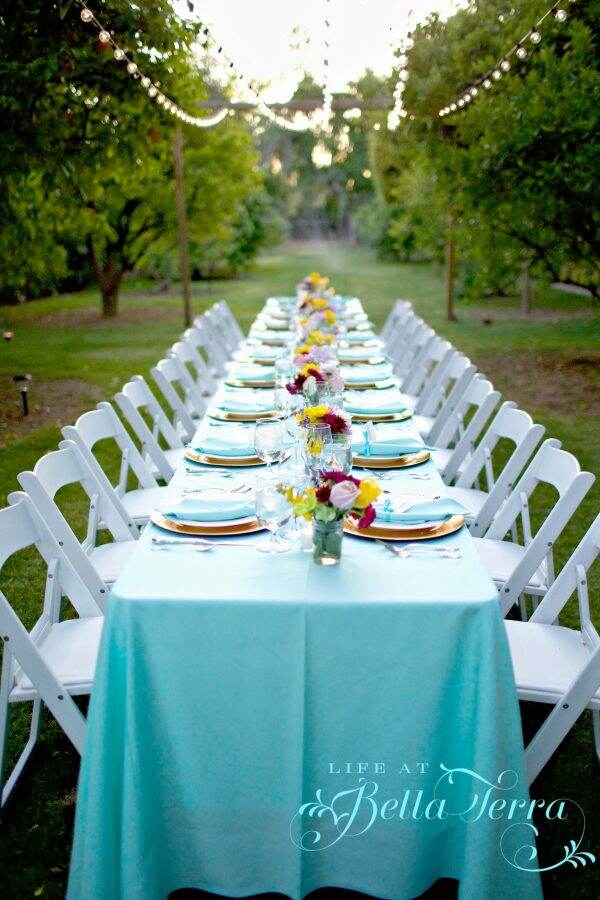
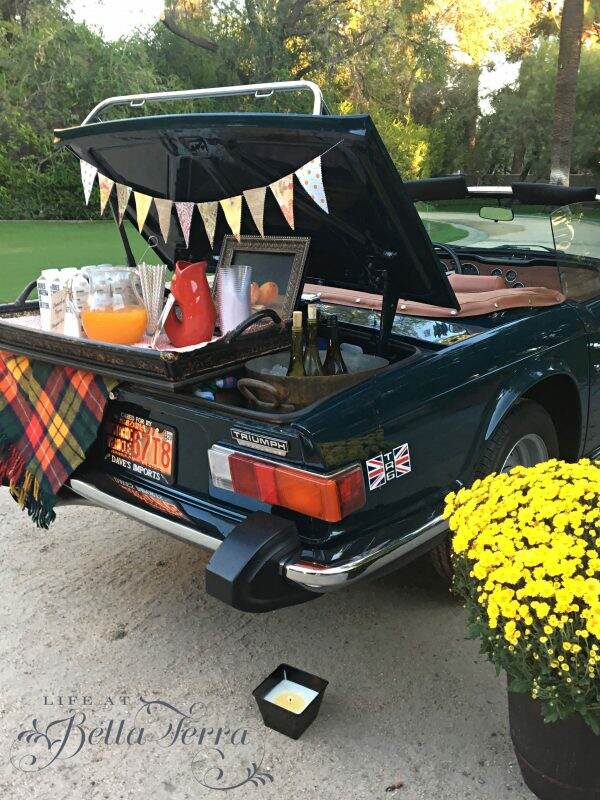
COVID has definitely put a monkey wrench into our socializing and entertaining. We feel blessed to be the stewards of this unique historical property and share it often to host everything from charitable events to proms. The orchard is one of the areas of the property we use for large sit-down meals. For more details about one of our dinners in the orchard, click here.
I long for the day when we can open up our home and our arms and welcome guests again. If you are dreaming of when we can all reconnect, here is an autumn entertaining post.
Cooking, Baking and Making
The summers do put a cramp in my cooking, as it is almost painful to turn on the oven in the triple-digit heat. However, the minute there is a touch of autumn in the air, I am back to baking. This past year, I learned how to bake sourdough bread from scratch, using starter that I carried home on a plane from Washington, D.C.
My sourdough starters~Hope and Bubbles
If you need a new project while we are all stuck at home, baking bread using a natural yeast, is so rewarding. I just recently shared more sourdough starter with someone who reached out to me and now I have a new friend. Bake bread. Make friends. Check out my post, Sourdough Starter Basics here.
Of course, there are all sorts of recipes in the files of Bella Terra. But here are a few favorites. Key Lime Pie post
Farfalle pasta with Lemon Chicken and Herb Salad
Together we made Preserved Lemons (see recipe here) and then we used them in some fabulous recipes, like the one above. This delicious chicken pasta salad is ideal for the summer~as it can be eaten warm or cold. Check out the recipe here.
DIY and Home Improvement
I am not much of a crafter, but I do like to tackle projects myself, sometimes moaning along the way.
The most recent is a hand stenciled tile bathroom floor in our pool house. If you missed that post you can see it here.
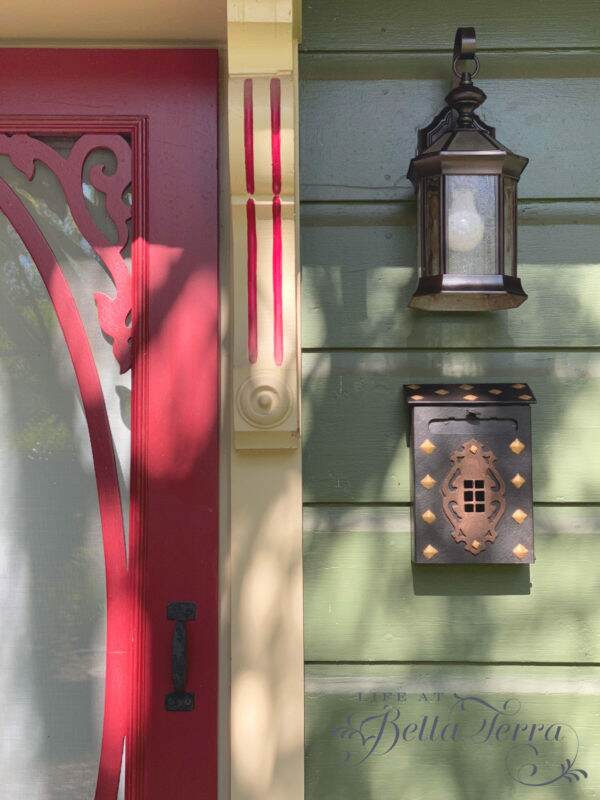
To see the post on the Mailbox/Exterior Light on Guest Cottage, click here
We have accomplished quite a few projects this year, and several with your helpful comments. From the great advice on the vintage mailbox above, to helping select a front door color, your feedback is gold! See that post, here.
Organizing
Staying organized is such a challenge, but I am inspired to be better at it when I see others accomplishing these tasks. This year, getting the master closet organized was a big win. To see the embarrassing before pictures and the fabulous after shots, click here.
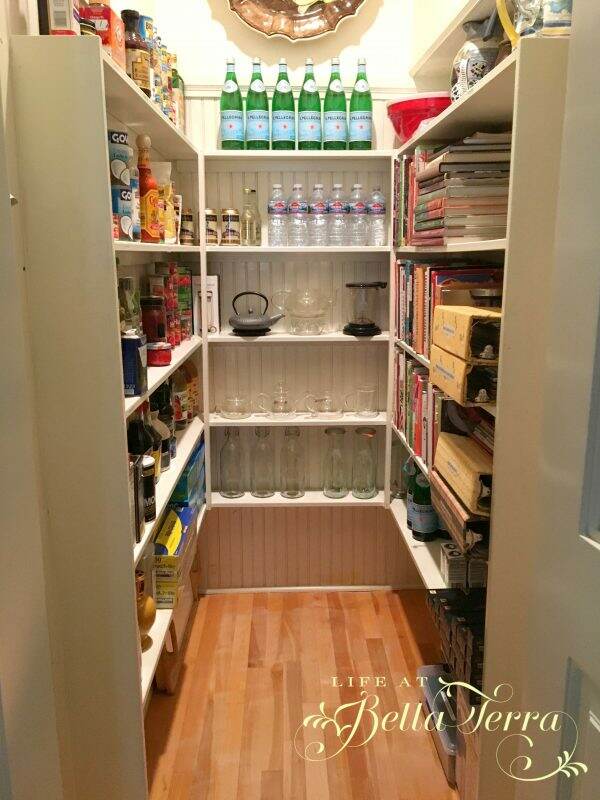
Keeping heavily used spaces like the pantry is always a challenge. But it looks so nice when it is neat and tidy. See the improvements here.
Pets
Cooper~loves to sit
For those of you who have pets, you know how important they are to family life. Our two dogs, two cats and numerous chickens are all part of our daily existence here. The Best Kind of Friend is a blog post about the bond we have with our pets, how they shadow us daily and love us unconditionally. Read it here.
Tippy and Donovan
Sox
Thank you for all your kind words during Sox’s recent back injury and Tippy’s current failing health. We share in the joy of their presence and the grief of their loss.
Just Getting Through Life
You have provided loving ears to some of my life’s challenges as we enter new phases of maturity. It was only a year ago, when I was struggling with empty nesting (see post here). But with the pandemic, nearly everyone is home again! Now, next week I will do a repeat performance as we move our daughter out of the house to start her sophomore year in college. Ah, the ups and downs!
We have talked about Kindness (see post here) and how important it is to Smile (see post here) and how to age well (see post here). Even though we cannot get together physically, we have such a supportive community right here on this blog. The goal with each and every blog post is to provide you with something interesting and important. And I’ve learned so much from all of you along the way.
Sharing my painting journey
Again, I cannot express how delighted I am that you have been with me from the beginning and I extend a warm welcome to new readers. In a world that seems to be filled with division and anger, it is my hope that Life at Bella Terra will be a bright spot in your day.
Happy Tuesday, my friends! If you ever want to see more content on any topic~gardening, recipes, home improvement, decorating, seasonal, whatever it is, please let me know! Thank you.
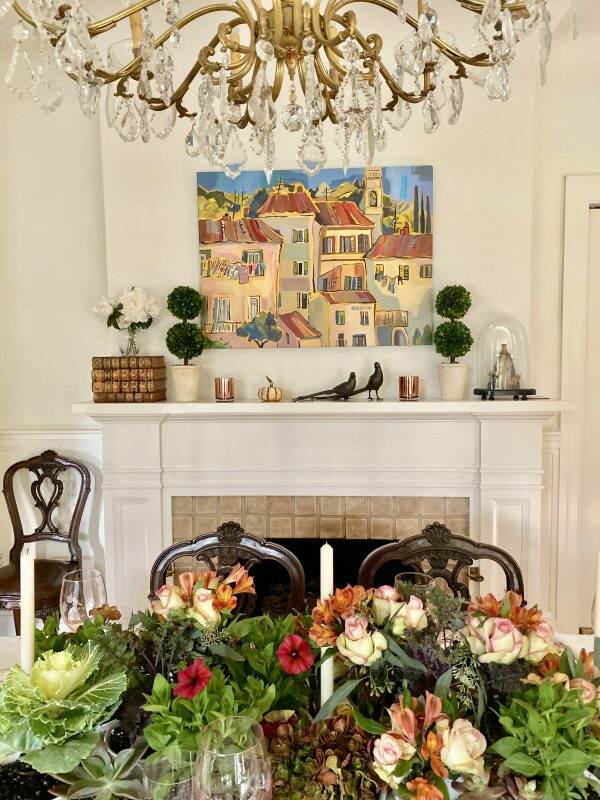
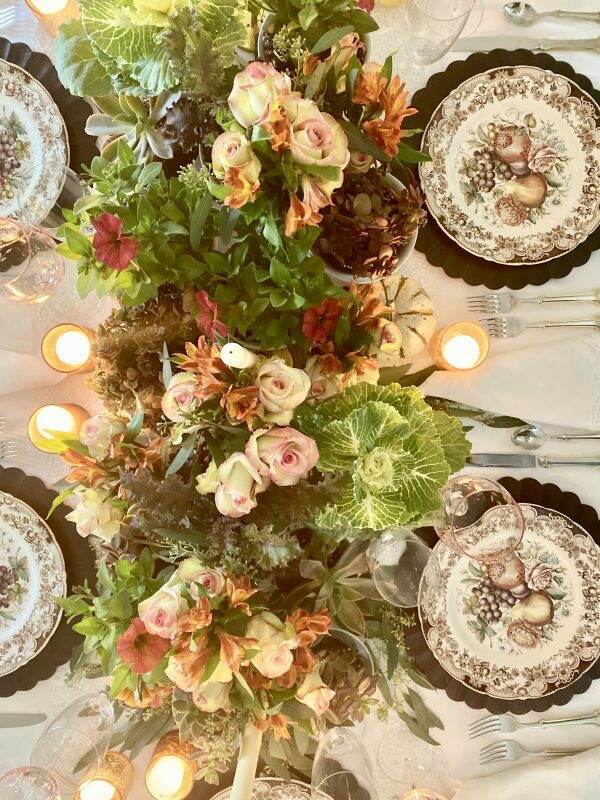
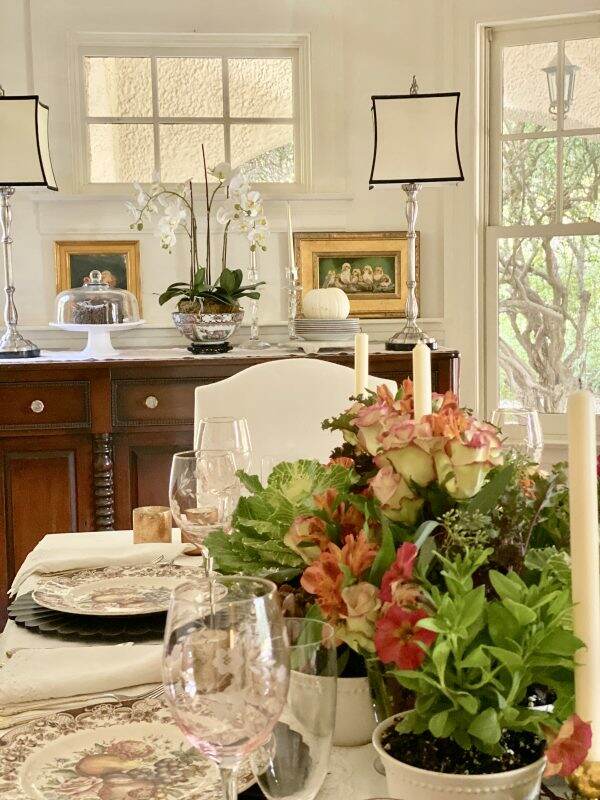
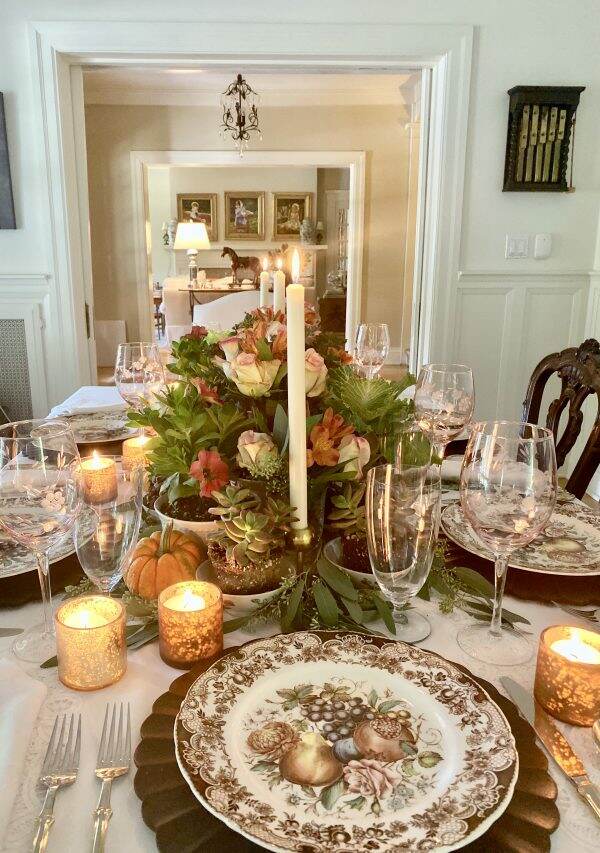
I didn’t intend for the Thanksgiving centerpiece to match the artwork in the dining room but it happily does! Every few months I’ve been hanging different art, trying to find just the right piece.
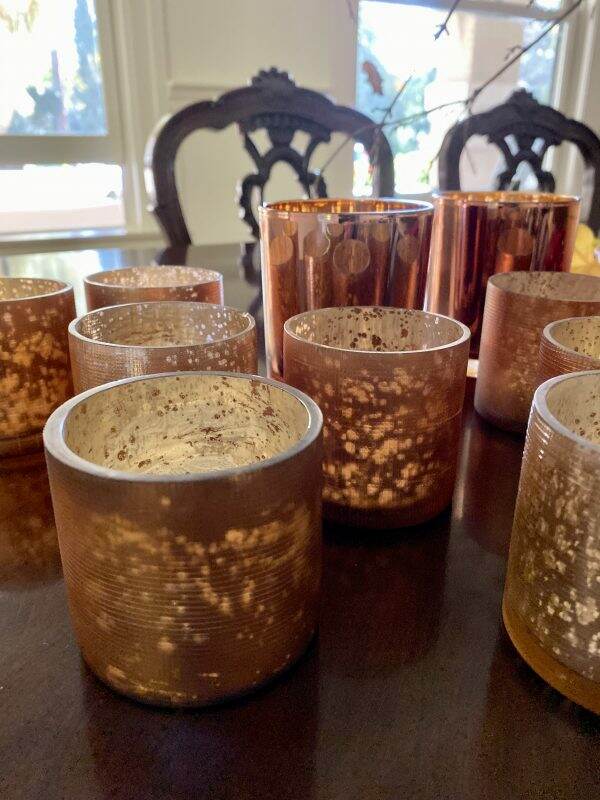
It’s easy to decorate the same way year after year and there’s comfort in that. But how do I use what I have and put a different spin on it? The crosshatched mercury candleholders in a coppery tone from West Elm was the first step of the inspiration. They were on sale for $5.00 each.
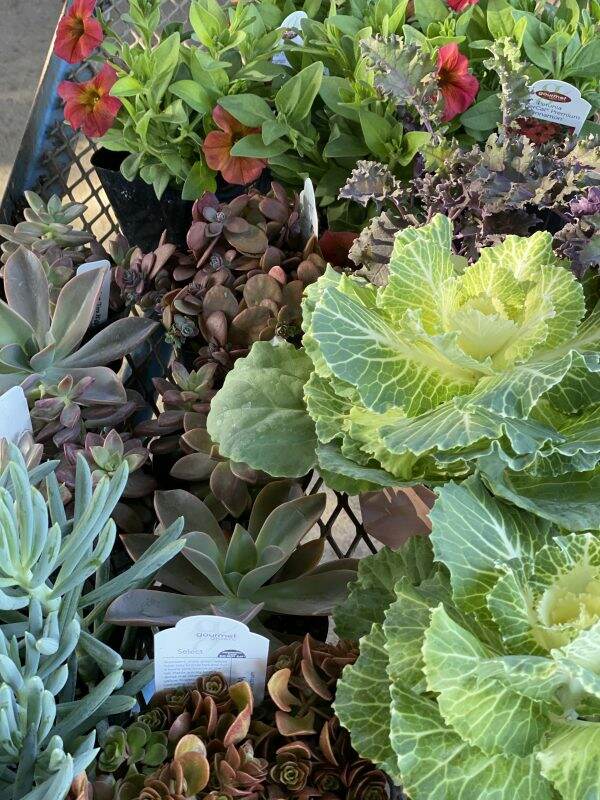
A few years ago, I started using plants as the majority staple in my centerpieces, adding a small amount of cut flowers. Planting them in the yard later is a way of re-purposing and seemed more economical. We are so fortunate to have a fabulous nursery (Whitfill Nursery) right around the corner from our home.
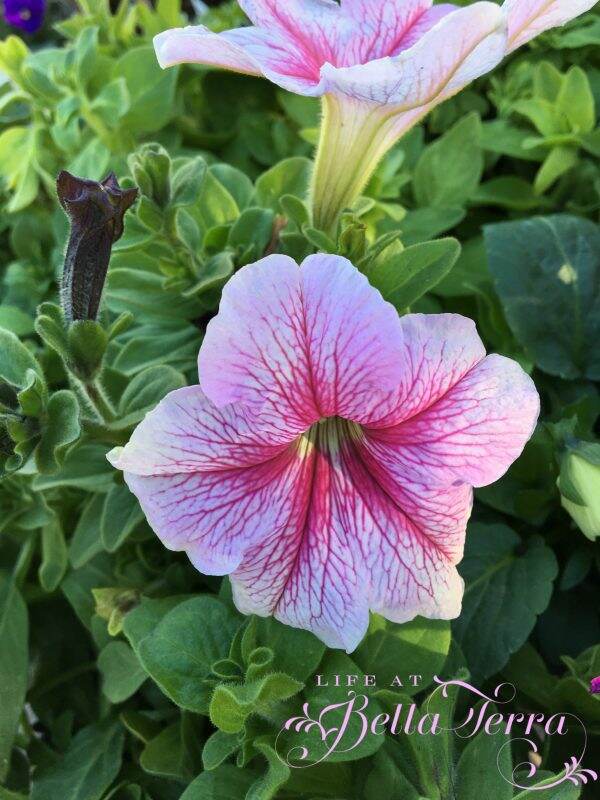
Whitfill has the most beautiful Cinnamon Petunias with lovely rusty, coral flowers. Succulents are a mystery to me, but the green and bronze hues are so perfect with my candle holders. The plant list includes: White Ornamental cabbage, Red Bor Kale; the succulents are Graptoeria Fredives and Vera Higgins Graptosedum.
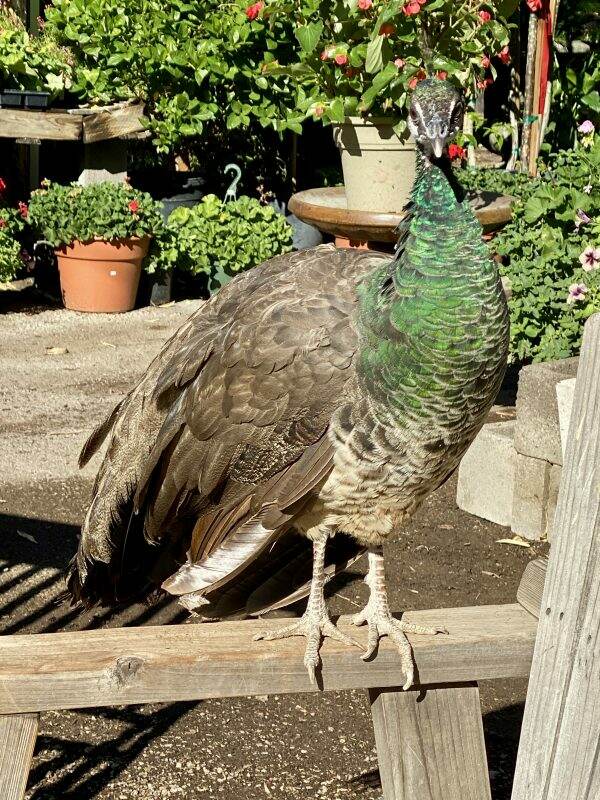
I am a bit of a garden geek and Whitfill Nursery is one of my happy places. Where else can you go look at a huge variety of plants, see peacocks and goats, interact with a welcoming and helpful staff on a gorgeous sunny day?
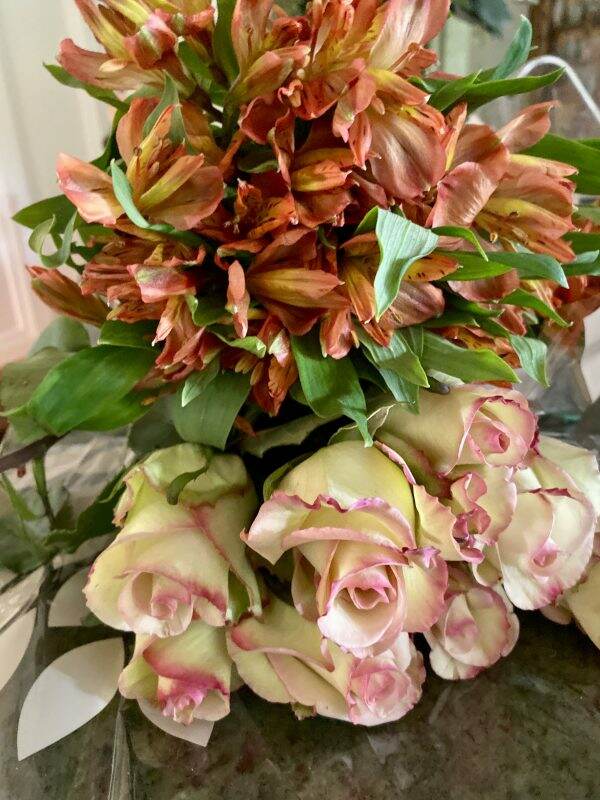
The cut flowers are alstroemeria and roses from Safeway.
I transplanted all the plants out of their plastic containers into plain white bowls (Emma pattern from Pottery Barn). Flowers are placed at various heights in small glass vases and tucked into the plants.
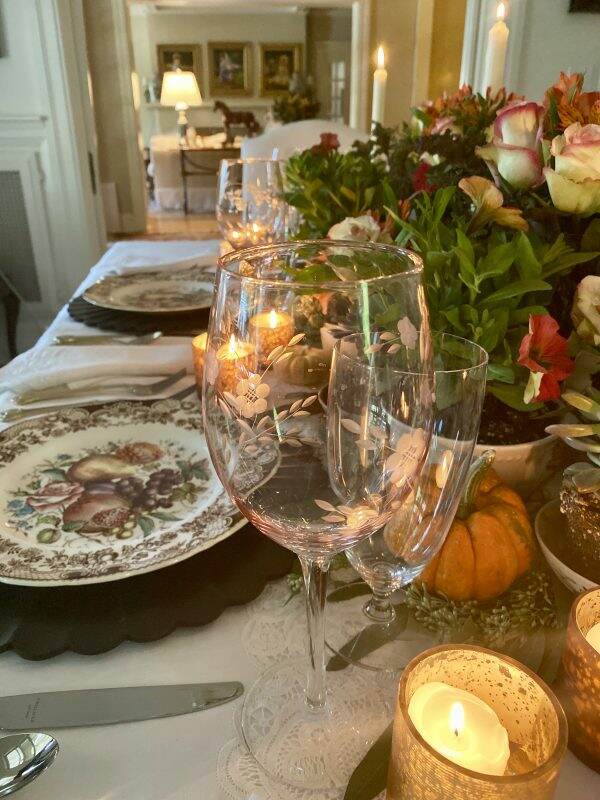
Again, my Windsor Ware plates are just perfect for this time of year. I chose to use a darker wood charger, softened with pale pink wine glasses. White and orange pumpkins were added to play down the white bowls.
I had some leftover seeded eucalyptus which I randomly stuffed into the edges.
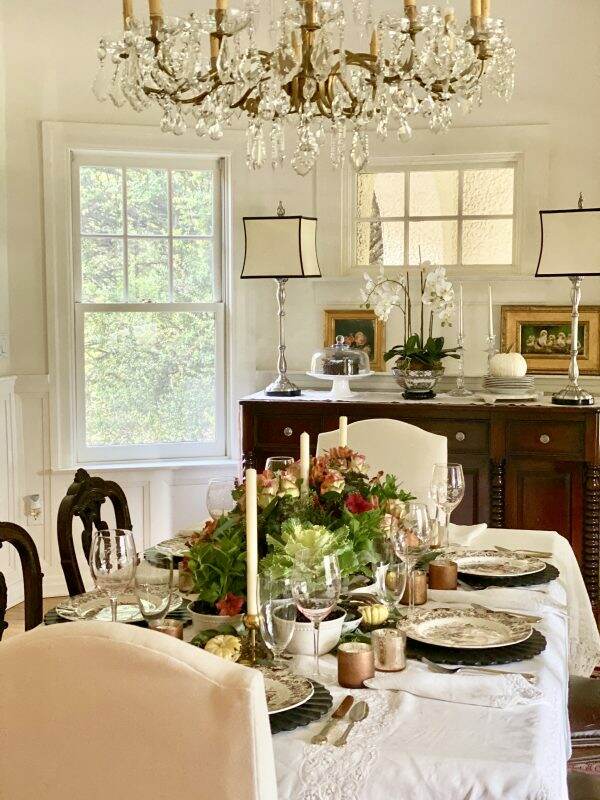
It’s nice to have the table set and ready to go. Today we will do all the food shopping and pick up the turkey. I expect the stores to be a bit of a madhouse in the midst of the holiday rush. The next few days will include many hours in the kitchen~~a joyful time indeed!
Is your table set? Have you done all your shopping? Or better yet, are you going elsewhere for Thanksgiving dinner?