Both the dining room and living room have ideal mantels in which to decorate for the holidays and seasons. Typically in October, the dining room mantel is filled with Halloween themed items. But this year is so different than all others. Between the pandemic and the fact that we no longer have small children that get excited over Halloween, my heart just isn’t in to pulling out all the spooky items. It is just a strange year overall. So instead, I am adding a bit of Autumn to the dining room mantel.
Here is the Before of the mantel. To see more of my dining room, click here.
Start with a Blank Slate
I remove all the items and leave the painting, as I hope it will work.
Add Layers
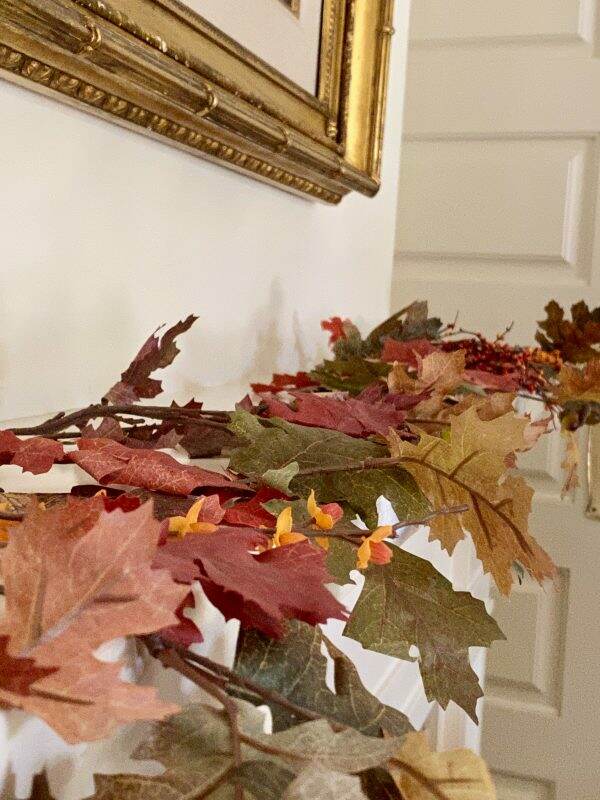
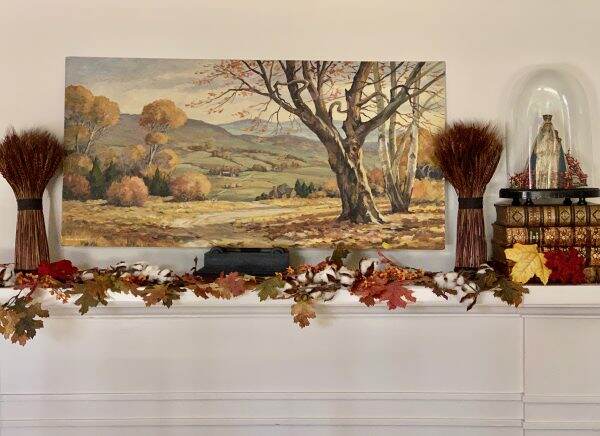
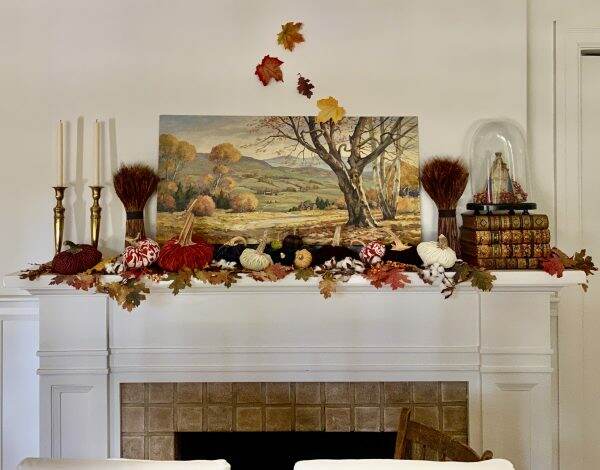
On the mantel, faux fall leaves and cotton branches create a base of fall color and texture. Amazon has a great selection of fall leaves here.
And Height
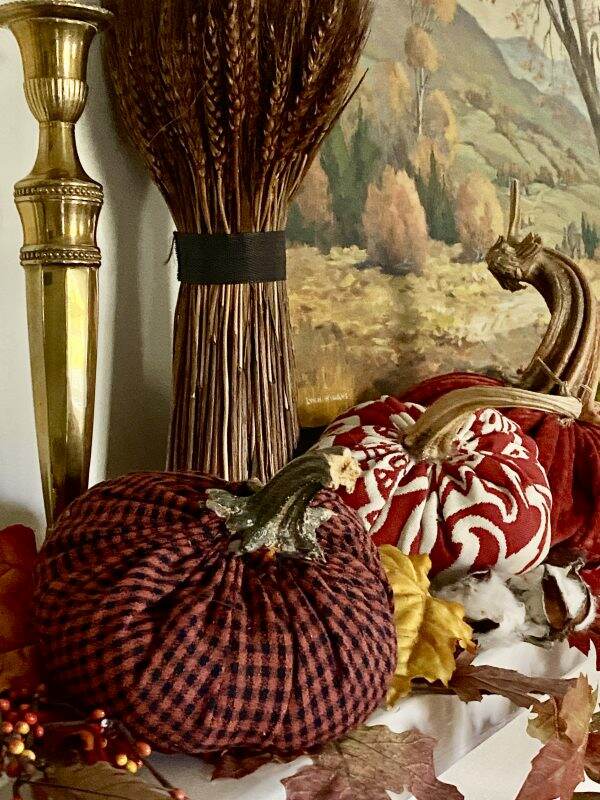
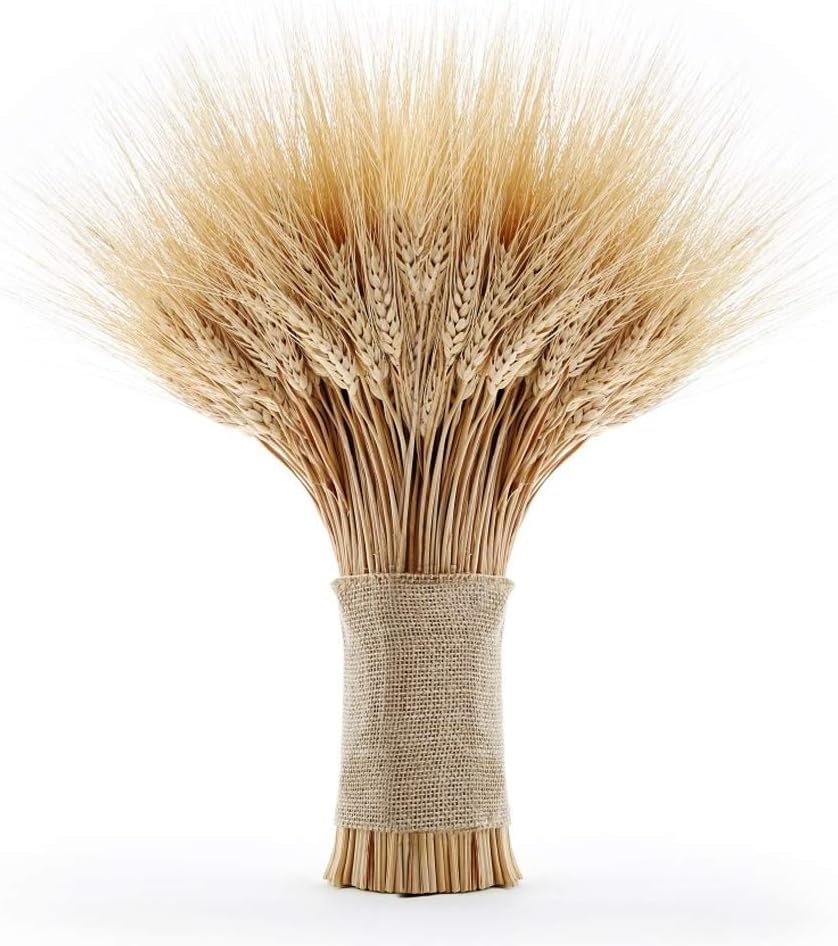
To add some height, I add two wheat sheaths. I found these lighter colored sheaths of wheat on Amazon and I actually think I like them better. Click here to see them.
Books are always a good tool to use to provide some anchoring or to use as a pedestal for another item. This “set” of books is really a French faux book form cordial set. However, you can use something like this, faux books or real tomes.
Unique Pieces
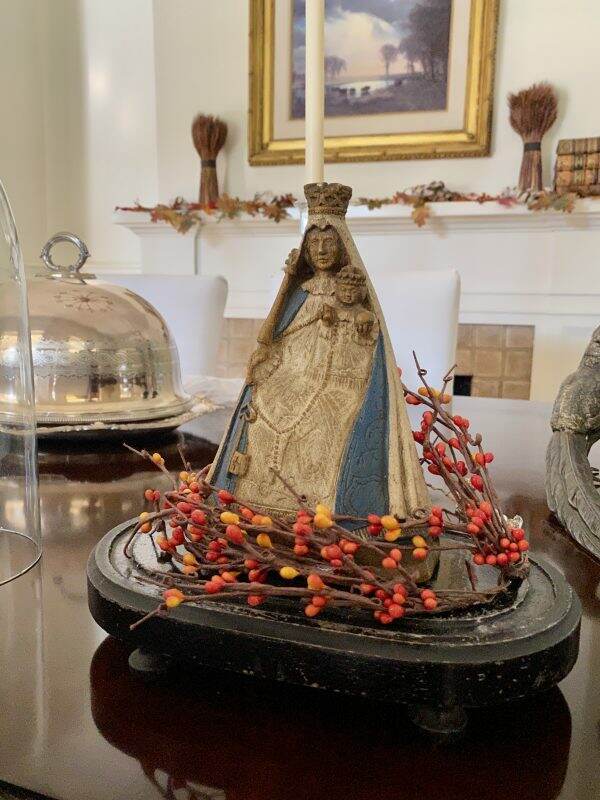
One of my cherished pieces is this antique carved Virgin Mary and Jesus on an oval pedestal with a glass dome. Adding some faux orange berries really enhances her blue and white gown. This statue is placed on top of the old books.
Seasonal Artwork
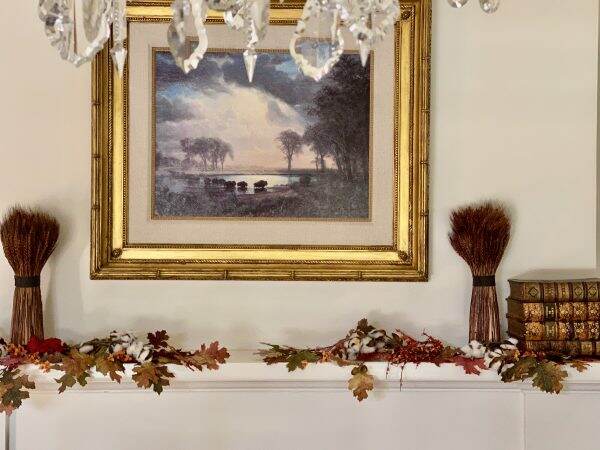
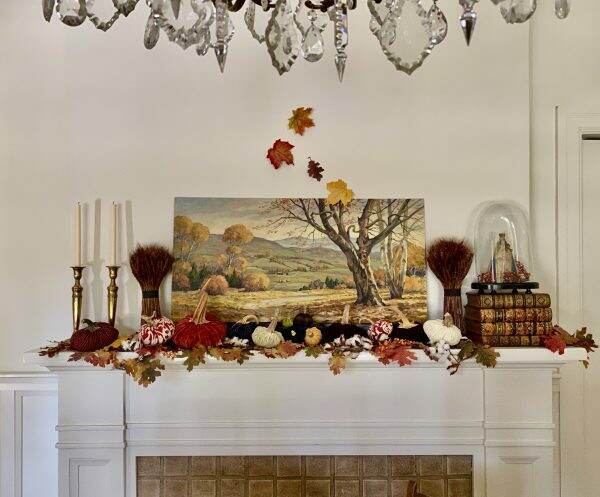
I remove the existing painting and bring out an original by California plein air artist, Lynn Winans (1897-1982). With the colors of autumn and known for his landscapes, this painting reminds me of the rolling hills in California. What it needs is a proper frame, but in the interim, I set it on a pedestal.
And then fill in
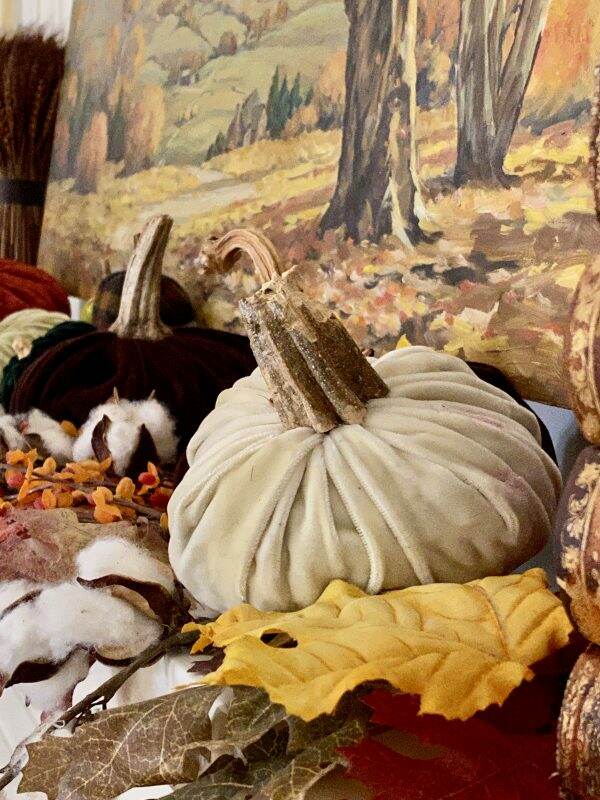
Using some of my fabric pumpkins, I fill in the empty spaces with their plump shapes and colors. To see how to make these, click here.
A set of brass candlesticks on the left side adds a bit of brightness and height.
The nail that holds the larger previous painting is noticeable. I try to disguise the nail with faux leaves. Do you think the “falling leaves” are goofy looking? Not sure how I will mask that~maybe just some touch up paint and it will disappear. Maybe a mirror layered behind it? Please share your suggestions!
Slowly, ever so slowly, I am decorating the house. It is cool enough here in the mornings to turn off the air-conditioning and open the windows. I am baking more too, but it still feels like summer during the day. Strange weather, strange year.
Enjoy your Wednesday and let me know what you are doing to add fall to your home.
If you enjoy this post, please share with others on Pinterest
As an Amazon Associate I do earn a small commission on qualifying purchases. If you purchase something linked through my website, it will not affect your cost, but does provide me with a small stipend for making the recommendation.
Inspired by a blog post by KariAnne at Thistlewood Farms, I made this fun wool wreath this week. Probably the hardest part of this craft is finding 100% wool items here in Phoenix.
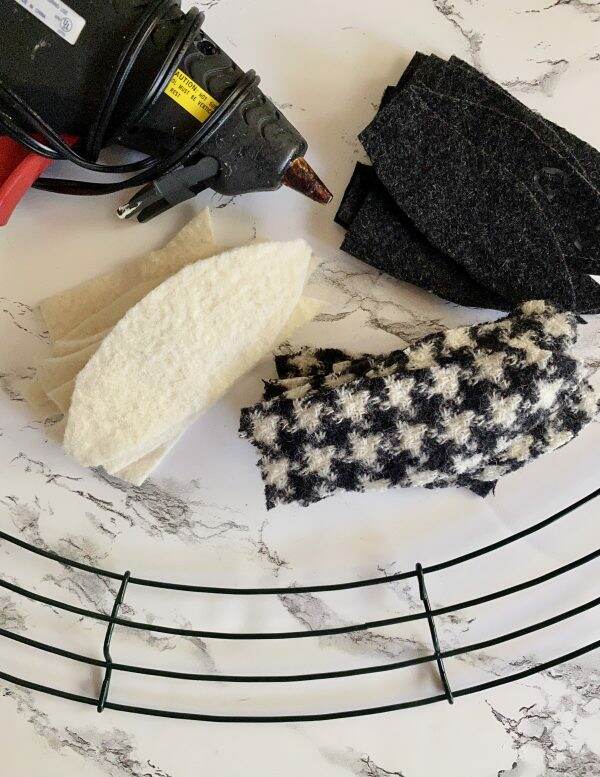
This project requires just a few supplies. Wool, wreath frame, scissors and glue gun. I don’t typically wear wool because it itches my skin, so I don’t have any sweaters or wool clothing in my closet. And due to our warm climate, trying to find these things locally is a bit challenging.
However, during my recent trip to the mountains, I luck out at a Goodwill store in Show Low. For a few dollars, I purchase a black and white houndstooth skirt ($6.00), a winter white jacket ($4.50) and a dark gray blazer ($4.50). And since checks and houndstooth are so trendy right now, I hope these three fabrics will do the trick.
Goodwill finds
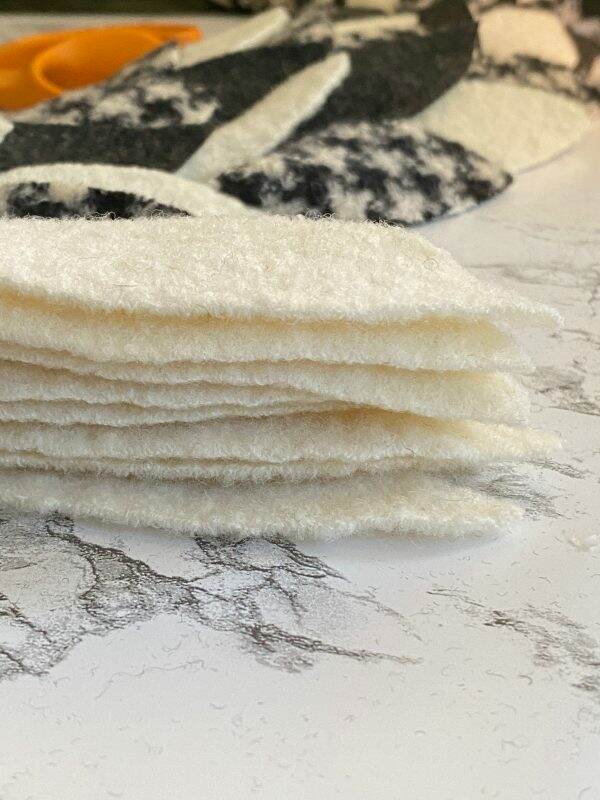
Fortunately the clothing is too big for me so I don’t feel the need to add them to my wardrobe. First thing to making this wreath is preparing the fabric. In order to make wool into felt, you must do the things your mother told you not to do~wash the wool items in very hot water and then put them in the dryer.
Leaf templates made with scratch paper
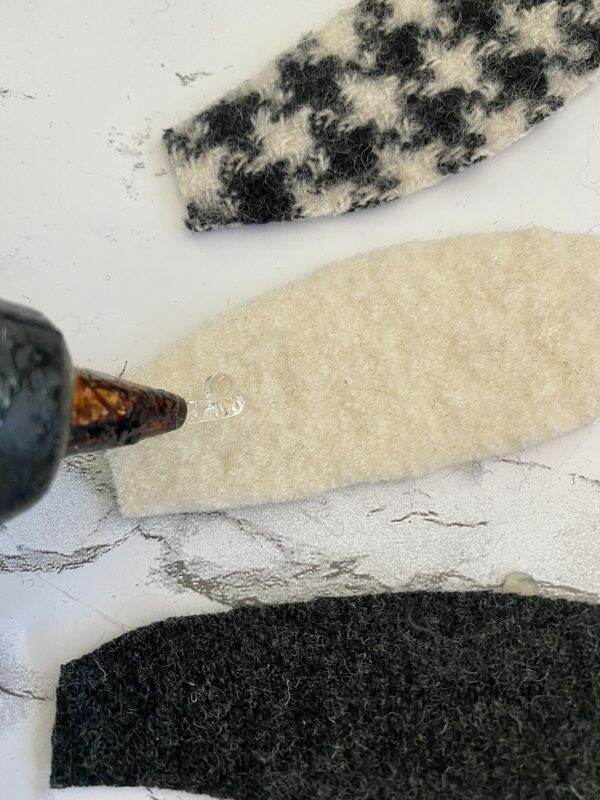
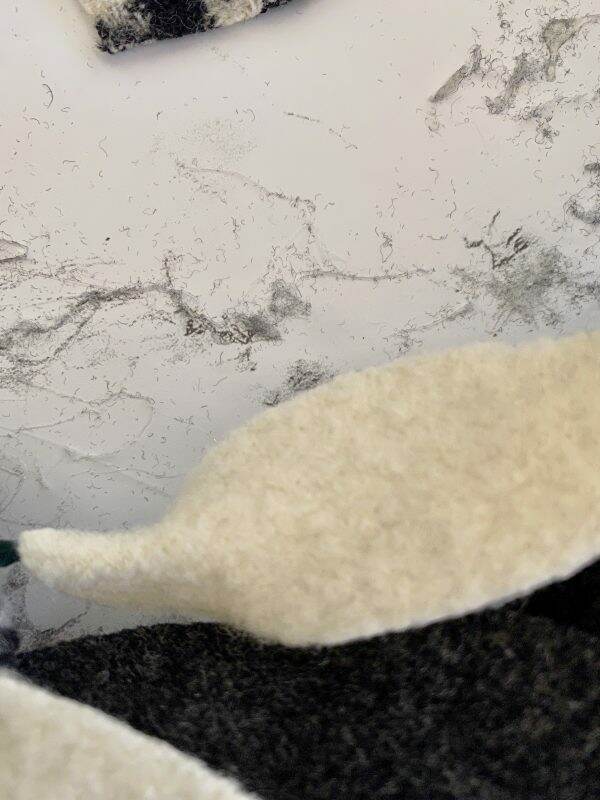
As expected, the wool shrinks down to a thicker, more tightly woven material. Next I make a template of a leaf out of scratch paper, measuring about 4″ long and 1.25″ to 1.5″ at the widest point. Using the template, I cut the first few leaves from the material. After repeating this multiple times, I ditch the template and improvise.
In KariAnne’s tutorial, she uses an 18″ wreath wire frame. However, at Michaels the inventory is so depleted that I end up with a 24″ frame (with 4 wires). Depending on where you will use this wreath should determine the size you choose. Amazon has a very good selection of these wreath frames here. Also, selecting a smaller wreath size will be easier and faster.
Please make sure you have really good scissors, as this project requires quite a bit of cutting. It truly makes the job much easier. KariAnne’s 18″ wreath uses 70 felt leaves; and mine has approximately 190 leaves.
Applying the leaves is easy with a glue gun. Be very careful not to burn your fingers (as I did over and over again) with the liquid glue. Take the leaf and place the glue at the bottom. Pinch the leaf to the wire wreath frame, alternating fabric as you go.
Make sure you lay the leaves in the same direction. I found it easier to work ahead of the leaves vs. trying to tuck them behind each other.
I can honestly say I really did enjoy making this wreath. Think of all the possibilities for future wreaths~red, white and pink for Valentine’s Day; shades of green for St. Patty’s Day.
And this could also be a family project (exercising glue gun caution).
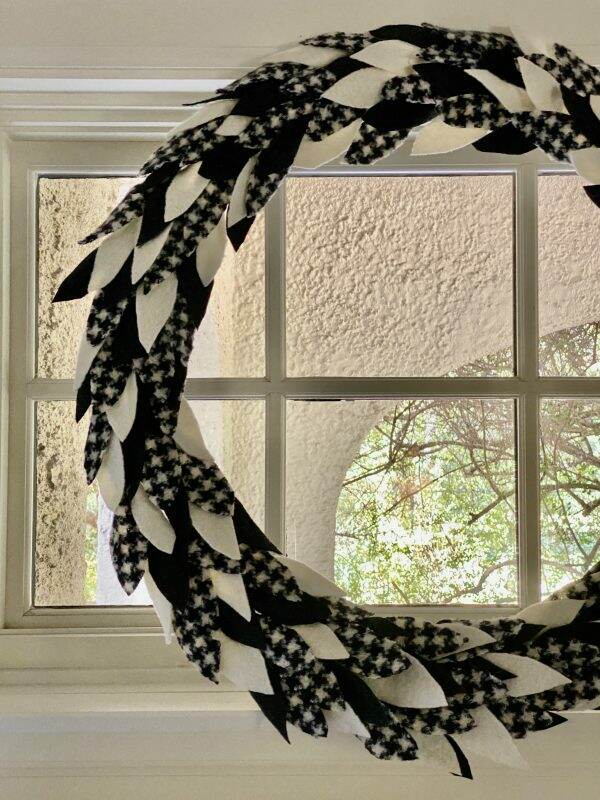
If you recall, my daughter, Julianna’s room is painted with a bold black and white theme. Here is the wreath hanging on her wall. To see more about her room with these sophisticated colors, clickhere.
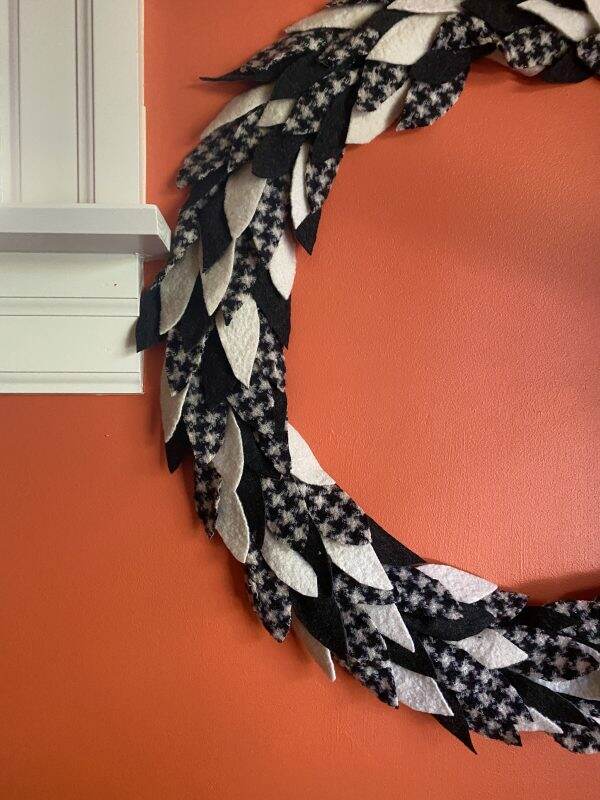
And look how fun it looks in Elisabeth’s rooms with the orange walls! Just perfect for Halloween. To see more of this fun orange and white bedroom, click here.
If you are concerned with the felt leaves flopping over, you can secure them with a bit of glue. The larger the wreath, the greater the chance of that happening.
Using a smaller wreath frame will allow you to put in on a mantel or inside a bookcase. With the 24″ wreath frame, the larger size is perfect for hanging on a wall or door.
Some things to remember:
Try to get items that are 100% wool and with a tight weave. This prevents the edges from fraying after felting and cutting.
Use really good scissors
It doesn’t really matter if the leaf shapes are not exactly the same size. As you apply them to the wreath frame, they can be adjusted.
Again, be very careful with the glue gun. Squeezing the fabric around the wire wreath frame can cause the glue to ooze out and burn your fingertips.
Think of all the possibilities as far as color and design for this DIY!
Smaller wreath frame will take less material.
Have a wonderful Saturday! I hope to get out and enjoy some of this beautiful weather!
If you enjoy this post, please share it on Pinterest.
Hoping for Chilly Weather and Chili
|
It is the first of October and we are still experiencing warm daytime temperatures. I am hoping for the chilly fall weather to appear any day now! Just arriving home from a long road trip (and a bit behind), I am dusting off this older post. So for those of you who have been with me from the beginning, some of this will look familiar. For those who are new, this is a fabulous fall and winter recipe.
This recipe even won an award at a chili competition. So if you like a hearty meal with healthy ingredients, this is the one for you. And if you have a fabulous soup tureen, like the one above, put it to good use. Soup tureen is available in my store.
My favorite go-to chili recipe is Turkey Chili with White Beans. It’s not hot and spicy, though you could certainly add heat to it. This recipe is richly textured with flavors and is simple to make. I don’t recall where I found the original recipe but I’ve been making it for years. When my son rowed crew in high school, I would warm up several batches of this on a camp stove and serve it to the athletes during the freezing cold regattas.
The Ingredients
Unsweetened cocoa and cinnamon, add to the depth of flavors. For the beans, I look for cannellini beans. An excellent source of iron, magnesium and folate, a single serving of cannellini beans provides more than 20 percent of the recommended daily values of these nutrients. They are also a good source of protein, providing more than 15 grams per serving. Other nutritional benefits include their low fat content and calorie count. Each serving contains only 225 calories and less than one gram of fat.
The preparation
All you need is a large pot and the ingredients below. Sauté the onions, add the spices.
Break up the turkey as it cooks with the back of your spoon.
Mix in the stock and tomato sauce and simmer for 45 minutes.
Serve it up in something pretty
Since this recipe makes 8 servings, it easily fills up the soup tureen. Served with a salad and a nice glass of wine, this makes a filling meal.
I garnish the chili with fresh cilantro, chopped red onions and a dab of light sour cream, but shredded cheese and avocado would be delicious too.
Individual pumpkin bowls are a fun size. I believe I may have purchased them from Williams Sonoma, but Amazon has a good selection here.
This recipe is terrific the day you make it. But it can be easily frozen into individual servings and reheated later. I promise you will LOVE this!
If you enjoy this post, please share with others on Pinterest.
Save
Save
Turkey Chili with White Beans
This healthy, hearty chili is perfect for chilly fall days.
1 TBSP vegetable oil
2 medium onions (chopped)
1.5 tsp dried oregano
1.5 tsp ground cumin
1.5 lbs lean ground turkey
1/4 cup chili powder
2 bay leaves
1 TBSP unsweetened cocoa powder
1.5 tsp salt
1/4 tsp ground cinnamon
1 28 oz. can whole tomatoes
3 cups beef stock or canned beef broth
1 8 oz. can tomato sauce
3 15 oz. cans small white beans (rinsed and drained)
Garnishes
chopped red onion
chopped fresh cilantro
Plain low-fat yogurt or light sour cream
Heat oil in heavy large pot over medium heat. Add onions, sauté until ight brown and tender, about 10 minutes. Add oregano and cumin; stir 1 minute. Increase heat to medium-high. Add turkey, stir until no longer pink, breaking up with back of spoon.
Stir in chili powder, bay leaves, cocoa powder, salt and cinnamon. Add tomatoes with their juices, breaking up with back of spoon. Mix in stock and tomato sauce. Bring to boil. Reduce heat; simmer 45 minutes, stirring occasionally.
Add beans to chili and simmer until flavors blend, about 10 minutes longer. Discard bay leaves. (Can be prepared 1 day ahead. Cover and refrigerate. Rewarm over medium-low heat before continuing.)
Ladle chili into bowls. Pass red onion, cilantro and yogurt separately.
After being away at the cabin for 2+ weeks, I am feeling a bit behind in getting my garden ready for fall planting here in Phoenix. In looking over blog posts from previous years, my tardiness is self-imposed. I’m actually a bit early this year. Now it makes sense that the vegetable selection at the nursery was a bit on the light side. Well, by jumping ahead the good news is that Phase 1 of fall planting in the garden is complete. Better early than late, right?
Prepping the Garden
obelisks built by my husband
A few weeks ago, I pulled all the tired and scorched plants from the garden. Fresh, rich compost from our compost tumblers go into each of the beds while the garden awaits new plants. This is the garden rest period. A couple of basil plants and mint still remain, but most of the beds are quiet.
Here is my 2 cents on composting. We give Nature scraps and she gives us nutritious fertilizer. Garbage in, compost out. Such a great deal! To see my post on Composting 101, click here. Please, please, please try composting if you aren’t doing it already. Even the earthworms love this soil.
Best Nursery in town
Succulents at Whitfill
All my garden/plant shopping happens at Whitfill Nursery. Truly, it is a joyful experience! If you haven’t been to the location on Glendale Avenue, I encourage you to do so. In addition to a vast selection of plants, they have a sweet gift shop in an old historic bungalow that is always filled with unique items. Shopping local is important and this family owned and operated business has been a Phoenix icon for over 6 decades.
Plant Selection
So this week during my trip to my favorite nursery, I buy the following plants:
11 tomato plants~Roma, San Marzano, Better Boy, Beefsteak~all certified Organic
12 Snowball Cauliflower
6 Green Broccoli and 6 Burgundy Baby Broccoli
2 Red Swiss chard~these are actually for the chickens
French Sorrel
6 Dinosaur (Nero di Toscana) Kale
Fennel and Italian Parsley
blooming shishito pepper
There is something exciting about bringing all these new plants home to the garden. I pack them in a wheel barrow and head to the back yard.
With gardening, unexpected surprises occur. Last spring is the first time I planted Shishito Peppers. I didn’t realize they are a perennial and both plants are in bloom again!
Placing the tomato plants
Prior to digging, I place all the pots in the beds. Typically, I will rotation plants in order to prevent soil depletion. Tomatoes tend to stay in the same bed to receive the most sun.
Having plenty of tomato cages is handy. As you may recall, I purchased more of my favorite brandof cages in the Spring. If you need tomato supports, these are a good quality and last a long time. My tomatoes this summer grew SO big and I was appreciative to have the cage structures to hold them up. Plus they break down to lay flat when storing. To see more about my Spring garden, click here.
Giving my fall garden a few weeks head start should produce some interesting results. Plus with the weather still being a bit warm, my tomatoes might actually do better.
Some garden maintenance
In the past we have used PVC pipes for frames to hold up shade/frost cloth or bird netting. This is easily accomplished by bending the pipe and shoving the ends deep into the soil. Such an affordable way to create overhead frames for the beds.
Now we are building a larger, more permanent structure that spans over multiple beds. Using larger PVC pipes and connectors, the frame will span over 2 beds. Here I can drape big pieces of shade/frost cloth over entire sections. This will allow me the ability to walk underneath to work in the beds.
PVC structure being built
Every year, especially after the grueling summers, basic maintenance needs to be done The perimeter picket fence is looking tired and requires a new coat of white paint.
Time to Clean Up
Having a garden doesn’t really take a great deal of time. Planting new starters is relatively quick, especially when the soil is soft, warm and ready to use. Water and then it is time to clean up.
Good garden tools need care and I certainly have ruined my fair share of them. Cleaning off the dirt and getting them stored for the next time, lengthens the life of the tools. Having a dedicated sink in the well tower for gardening is certainly a plus. To see my potting area in the well tower, click here.
There is something very fulfilling when the plants are tucked in for the night. I am dirty and sweaty and my fingernails look pathetic. But as my sign says on the picket garden gate, “Life begins in the garden.”
Do you have a fall garden? I know in many places, the crops are being harvested now and gardens will lay dormant for the winter. But a garden doesn’t have to be large. Containers and pots work really well for herbs and greens. Gardening is very fulfilling and takes many forms. Would love to hear your gardening goals and stories.
If you enjoy this post, please share on Pinterest!
Happy First Day of Fall 2020
|
Today fall begins in the United States and everywhere else in the northern hemisphere. The autumn equinox — also known as the autumnal equinox, the fall equinox or the September equinox — occurs when the sun moves directly over the Earth’s Equator, bringing virtually the same amount of daylight and darkness on that particular day. Happy first day of Fall 2020!
Pumpkins, apple cider donuts and sweaters are the things I think of during this season. However, it is still triple digits here in Phoenix and will be for the next week. It’s ghastly. But this seems to happen every year so no one is really surprised. We just like to complain about it.
Since our temps are so high, several of the nurseries haven’t gotten their fall flowers or pumpkins yet. We probably will not see those until October. But in celebration of the end of one season and the beginning of another, I dusted off the autumn wreath and it is officially on the front door.
Spring and Summer Front Door
As you recall, this Spring I stepped out of my comfort zone and painted a new front door color. I am a bit concerned about how other wreaths from different seasons will look up against the blue.
But, boy, do I have to tell you I am L.O.V.I.N.G these fall tones against the new color. I bought this 28″ wreath on Etsy as my challenge is finding a wreath large enough for the 4 foot wide front door. Most wreaths are 18-24″ wide, which is too small for the scale of the door.
Since this is what I would consider an expensive wreath, I take care and store them properly in between seasons. There are two different ways I store my wreaths, clickhere and here.
Lucky me, orange is the complementary color to blue! So the door color works with the Fall seasonal ones. Yay!
Now that the highlights of the front porch are the door and wreath, I really didn’t want to add any thing that would compete with this focal point. During my trip to Whitfill Nursery (you know, my happy place), I am able to score some wonderful plants that have a fall vibe.
Henna Coleus is rich with gold and burgundy tones and pick up on the shades in the wreath. Coupled with sweet potato vine the planters now whisper Fall.
At the beginning of the summer, you may recall that I purchased two artificial evergreens to survive on the front porch over the summer. I love that these require NO maintenance and they provide a lovely backdrop for smaller planters. The cedar faux plants have held up beautifully over the summer and I look forward to decorating them at the holidays.
I am a big fan of ornamental grasses, especially the way they look blowing in the wind. Though the 2 containers I purchased from Whitfill did not have a name tag, I am guessing this is Fountain Grass, with delicate mauve feathers.
The natural fall look on the front porch is the opposite of what I typically do, however, I like the calmness of it all.
One of the biggest lessons in 2020 is getting out of our comfort zone. It’s easy to replicate the same look over and over again, but when forced to do something different, the results can be surprising.
The bench by the front door is the perfect place for an orange pillow and throw.
More orange pillows are put on the rocking chairs. Also, Amazon has the greatest selection of orange and fall pillows here.
To see the re-painting of these rockers and the entire porch re-do from May, click here.
What is a front porch with some boots or Sloggers? I really love these gardening shoes/boots, especially with the chicken design. Not only are they comfortable but waterproof too. Trust me on this, you will enjoy these as much as I do. Plus what a great gift for any gardener (thank you, Janie!) Here is the link.
Front Porch 2020 is a bit less understated than in previous years. That doesn’t mean I may not keep adding fall flowers and pumpkins. But I am enjoying its natural elements and its peaceful serenity.
What are you doing on this first day of Fall 2020? Is it cooling off where you live? Have you started your fall decorating? Tomorrow I hope to make apple cider donuts. Maybe if I do fall things, fall will come.
Happy Tuesday!
If you enjoy this post, please feel free to share on Pinterest.
Saturday Meanderings
|
Happy Saturday! My hope is that Saturday Meanderings is to have a conversation with you about odds and ends about the previous week. So pull up a chair and grab a cup of coffee and let’s chat.
Boy did this week fly by and it is a stressful one that I am happy to have behind me. Do you ever have one of those weeks that everything you touch doesn’t go smoothly? The planets feel a bit misaligned for me lately.
My goal of heading back to Phoenix this week from our cabin is delayed due to car trouble. Finding a big puddle of pink fluid under the car didn’t bode well and this creates a delay in my trip home. As I am writing this post, I am awaiting to hear the status. If I didn’t have a million things to do in the Valley, I’d love to stay here. But I cannot complain to have another few days in our beautiful mountain weather.
I did start a new project with hopes of sharing it with you today, but that too, did not go according to plan. Last month, I wrote a blog post indicating my desire to add more Scandinavian touches to our mountain cabin. (see blog post here). Well, the re-painting of this chest of drawers is my first real attempt to do so. Here is a sneak peak.
Cabinet before
This cabinet has 8 drawers of varying sizes. I have 6 of the 8 painted as my dilemma seems to be the these two drawers that are different from all the others. The two center drawers looks like 8 smaller ones with 8 ring pulls. So long story short, I decided to wait for the new pulls to arrive before I determine what the painting design will be. And the pulls came in the wrong size and I was 2 pulls short.
So as of today, the project is stalled until the new hardware comes in….and for my next trip to the cabin.
Mindful Minute
https://www.instagram.com/p/CFPk7LInrt8/
Since this week held more stress than others, I am so grateful to have access to Mindful Minutes. If you aren’t familiar with this, I cannot recommend it enough. My friend, Chas (from Chas’ Crazy Creations) has daily exercises on Instagram to reduce stress and they are a minute long. But I can honestly say, the one minute of taking a break from the computer (or other chores) and doing her brief exercises and breathing techniques is a LIFE SAVER. Seriously, it is the best thing you can do for yourself every day.
In addition, Chas is such a kind soul. She is the type of friend all of us need. Please get to know her. You will be so delighted that you did. Here is her link to Instagram; and her link to her blog.
Someone or something stole my pears
Last year, lo and behold, I discovered we have a pear tree at our cabin. This tree NEVER produced fruit before and was shockingly, full of pears. This year, the pear tree is also producing a great deal of fruit. Until this week. It has two pears left. The rest of the pears are GONE.
It’s a mystery as the pears are not on the ground. They have just vanished. Does anyone have any idea why this would happen? Is there a local pear thief? An animal?
Naturally I am so disappointed because last year I made the best pear dessert, A Pear and Caramel Pie (see recipe here) and pear preserves. Looks like I will just need to purchase some pears from the Farmers Market.
Rosary Beads
I recently received a payment for some work I was subpoenaed to do for a law firm who is suing the City. Long story, but lots of nastiness involved. Since the check felt like dirty money to me, I spent it on a set of rosary beads. If you have been following me from the beginning, you know I collect rosary beads (see post here).
Seraphym Designs, based out of Santa Fe, New Mexico makes the most gorgeous original heirloom rosary beads. Each design is carefully handcrafted in the United States and contains replicated devotional metals that date between the 14th and 19th centuries. In 2015, Seraphym Designs was commissioned to make an original St. Serra rosary for Pope Francis during his visit to the US.
Not only does the founder, Arasely Rios creates rosaries but she also makes beautiful jewelry. If you are looking for a unique one of a kind gift (they have a wedding rosary), I suggest you visit their website. And now I feel like I took bad money and spent it on something good.
Drone Video on my last Restoration
Video done by Austin Ely
Recently I was contacted by the owner of my last restoration remodel asking if I would give permission for the before and after photos to be used for a virtual historical home tour. Looking back at previous projects is such fun, as I forget many of the details over time.
Here is a 2:33 minute drone video that was done after the completion of the Willetta Restoration. I truly think it is one of my best renovations. Video created by Austin Ely. To see more information on this 1922 Jeffersonian home, please click here.
Thank you for all the great advice
I hope you read the blog post this week on rejuvenating my fabric pumpkins. So many people offered solutions to the bug infestation (thank you, bay leaves) and alternative filling. Instead of rice or beans which tend to get bugs, readers suggested pebbles and cat litter. Such great ideas and I cannot wait to try them.
Always love getting feedback from you!If you missed this easy DIY post, click here.
Beginners Blogging Retreat
As you know, I started blogging to keep a living record of life here around our historic property/farm. And for the first few years, I happily dabbled in it. Last year I attended my first blogging seminar and realized just how much I don’t know.
I set my sights this year to learn more, because if you are always learning you are always growing, right? Well, there is SO much to learn about blogging and who knew? I certainly didn’t. But what I have learned is that what works for one person who has been blogging for 10 years, doesn’t necessarily work in today’s social media saturated world.
So, a group of talented friends are putting together a Beginner’s Blogging Retreat and we are holding it here at Bella Terra. If you are interested or have friends who are interested, please click here.
The seminar is for the person who either wants to start a blog or is in the beginning stages. It will be a fun day here at Bella Terra with good food, new friends, great information with lots of personal attention. Plus there is a discount for those who sign up before October 15.
We know that in light of COVID the world can change on a dime, but we are limiting the class to 10-12. It will be held on our back terrace, which is outdoors and has plenty of room to social distance. And it will be on November 12th when the weather is glorious.
If this is your jam, we hope you will consider attending! Also, feel free to reach out to me if you have questions or concerns.
Last fall~trip to Connecticut
That’s All Folks!
Well, that about wraps it up for this Saturday. Hoping your week went well. Thank you all for joining me!The official first day of fall is just around the corner! As soon as I get to Phoenix, fall planting begins! Stay safe and healthy out there!
If you enjoy this post, please feel free to share on Pinterest.