A year ago today, I sent my first blog post of Life at Bella Terra. It was an intimidating moment, because I thought “who would ever want to read this?” I don’t consider myself a very good writer and I’m really trying to improve upon that. But your words of encouragement have brought me back to the computer to post again and again. If it wasn’t for your kindness and support, it would have been easy to just quit. Thank you for your loyalty and feedback and comments. Truly. From the bottom of my heart.
Each time I send out an email letting you know I’ve created a new post, I am praying you find it interesting, enlightening or even motivating. I try to share a small piece of loveliness in hopes that I can brighten your day. As I look out into the world, I believe we each need to find sources of joy and create our own beauty. Whether it be feeling the warmth from a freshly picked tomato, or the scent of a homegrown flower, these moments of perfection can only help feed the soul.
Blogging for me, is a chance to stop and capture a sliver of time, an exquisite photo or a recipe that bursts with flavor. Plus it is forcing me to attack those cluttered corners of the house or undone projects while showing you my progress. But I can honestly say, I am still a long way from feeling confident about creatively illustrating that to you. But I will keep trying.
So here is a look back at the year and some of my favorite photos and posts.
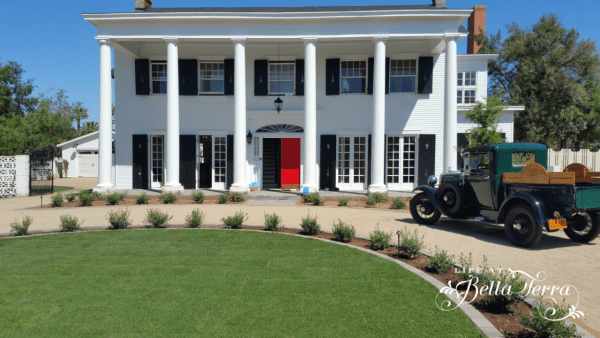
My very first blog post was about the New York Times Bestselling author, Rhys Bowen and the fundraising English tea we had here at Bella Terra.
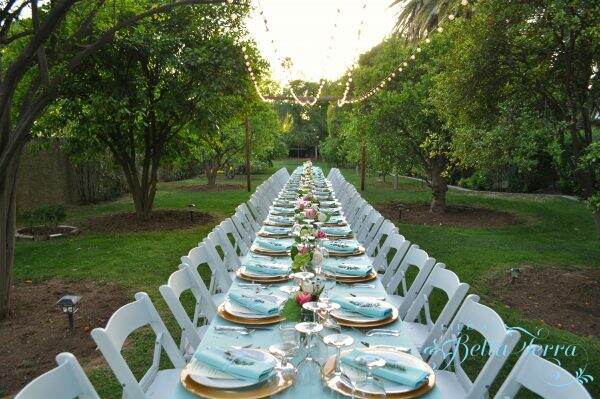
And other events we happily hosted here…..
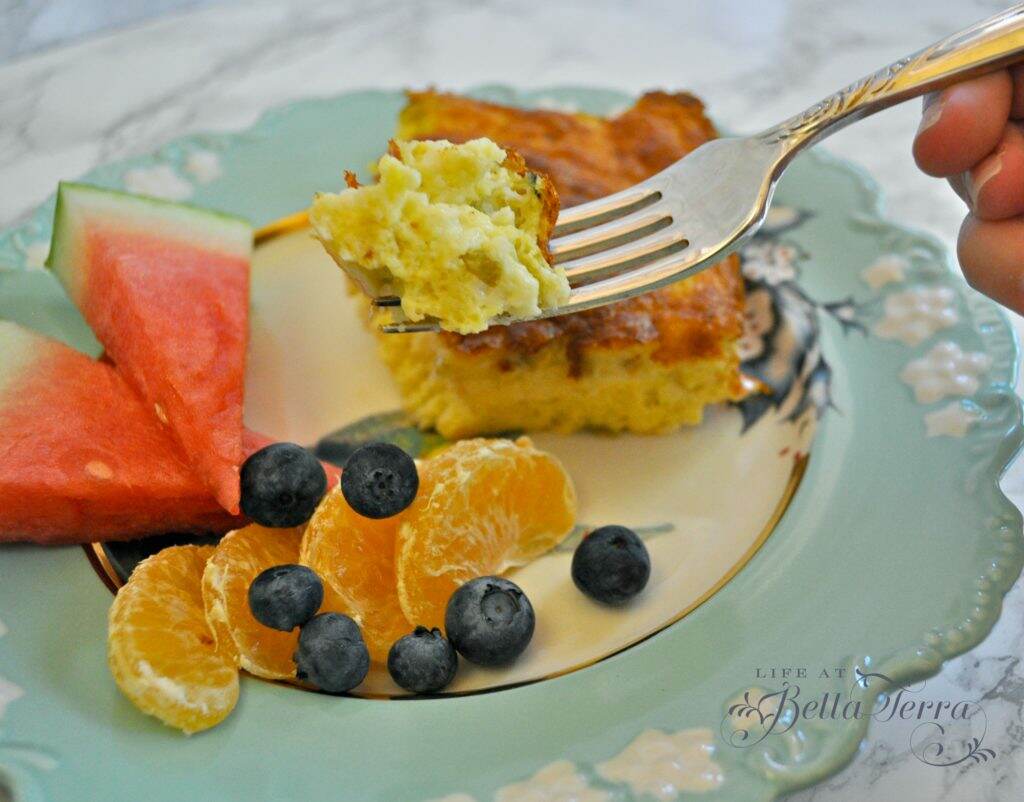
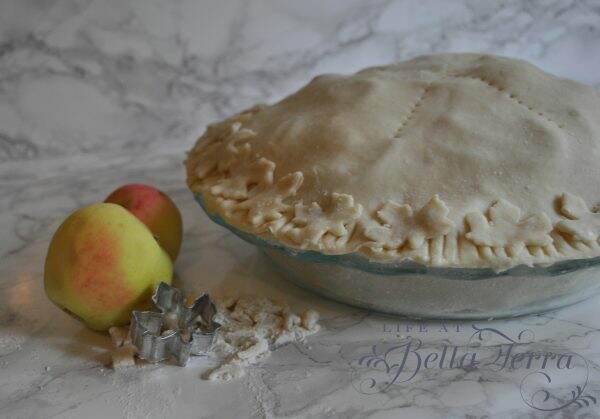
Recipes shared…..
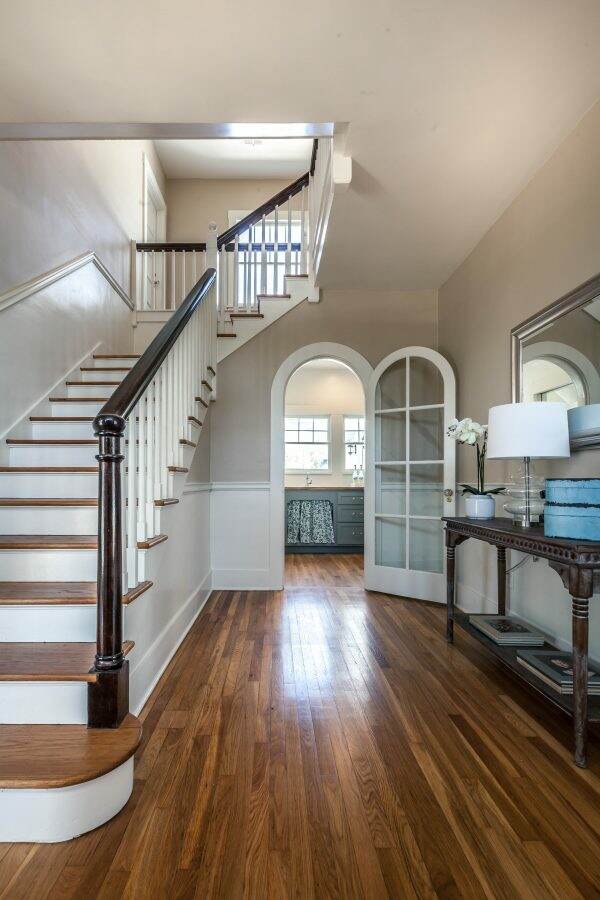
My Renovations and Restorations….
Travel and leisure…..
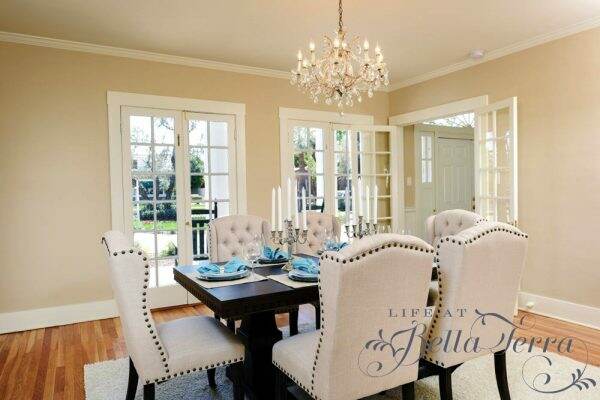
Decorating and Design…
The holidays….
Cleaning, Organizing, and Updating…
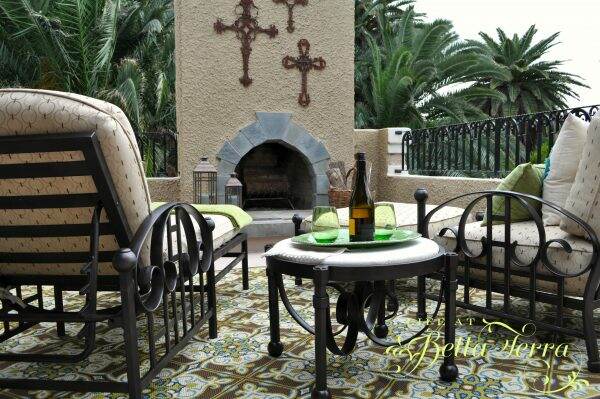
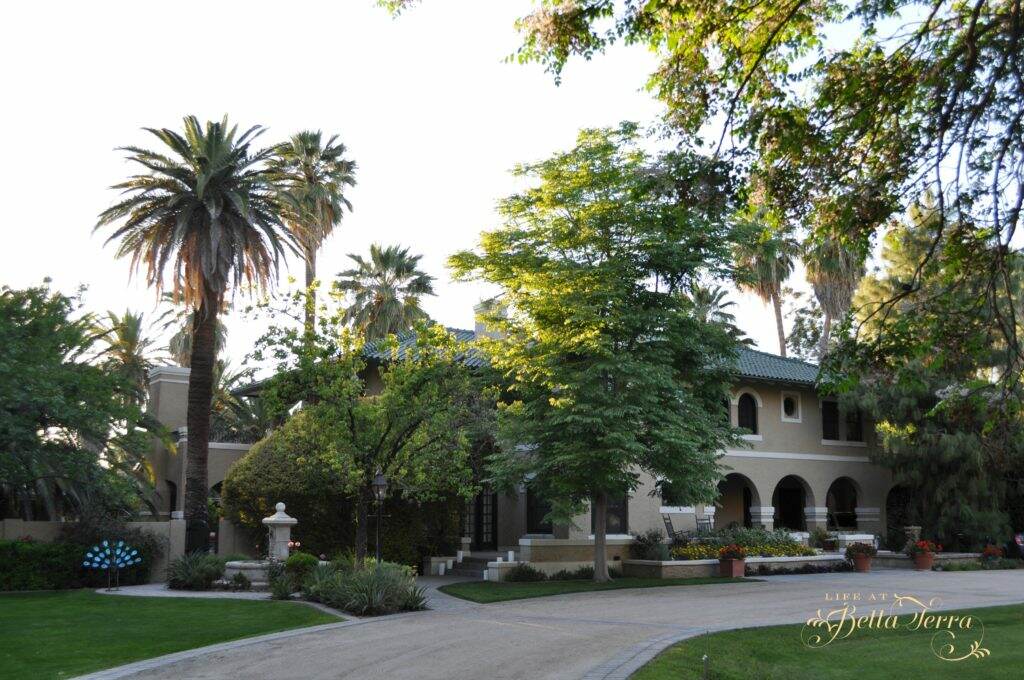
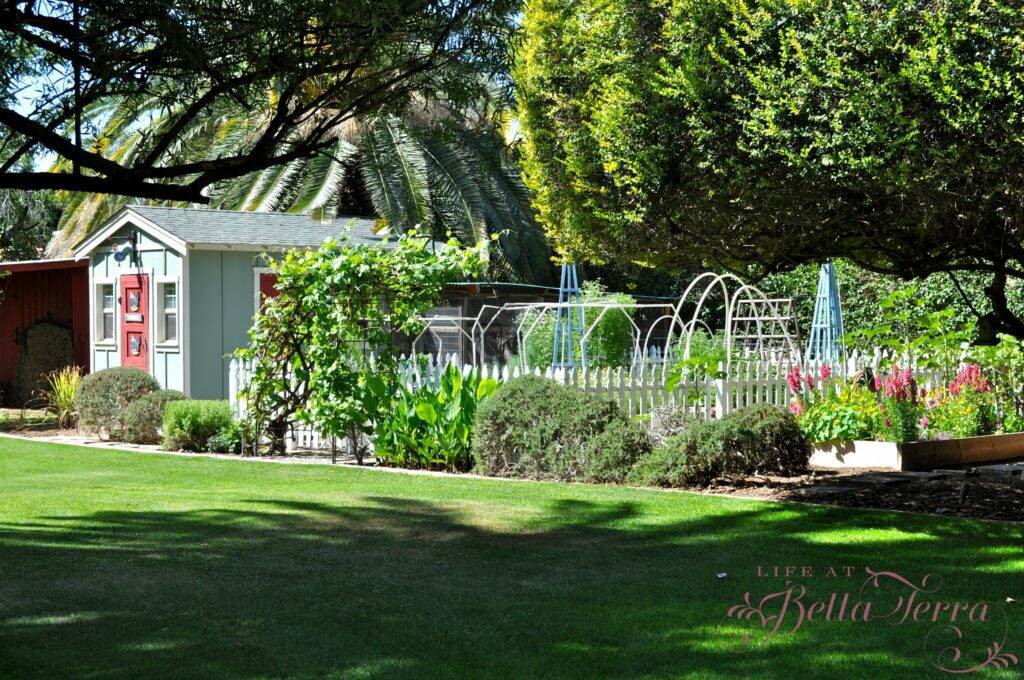
Sharing our home and yard….
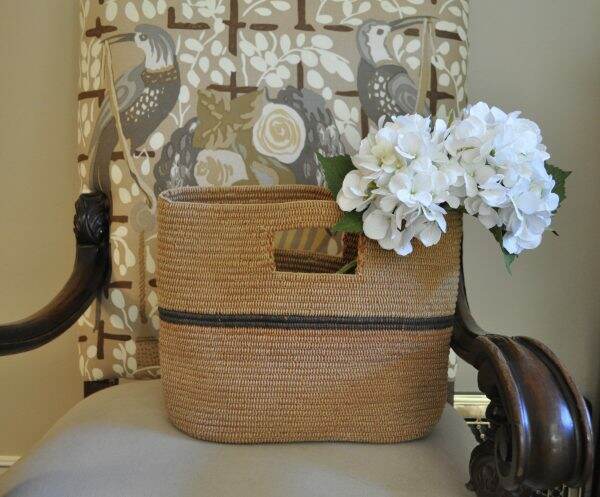
My attempt at art….
Flower arranging..
Our pets…
And a few DIYs….
My online store….
There is still so much to learn, especially better photography, writing and getting my watermarks the same size on every photo. So thank you again for following me and sharing my blog with others.
PLEASE send in your comments~~What area of interest would you like for me to expand? What are your favorite topics? How often should I post (trying to do a maximum of twice per week)? What can I do to be better for you? My goals for the next year are to do a contest or giveaway and conduct a real survey into your likes and interests.
Here’s to one year and onto the next!! I couldn’t have done it without you.
Save
Save
Save
Save
Save
Save
Save
Save
Save
Save
Save
Painting on Vacation
|
Each year we visit the Pacific Ocean for our family vacation. This trip is especially exciting for me as I love being by the water.
Marriott’s Newport Coast Villas offers a Canvas Art Event, a class where you paint step-by-step with an artist. Since we live in the desert, I enjoy this event because we get the opportunity to paint a local seascape. Last year I attend this class by myself with a certain amount of trepidation. There is no experience necessary and all ages are welcomed. After the 2 hour class, I so enjoyed taking home a keepsake from our vacation. Here’s is what I painted last summer, called Heisler Park, a setting in Laguna Beach, CA.
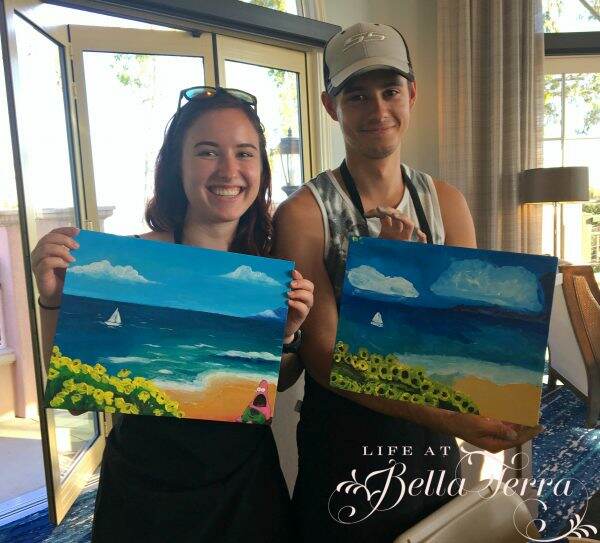
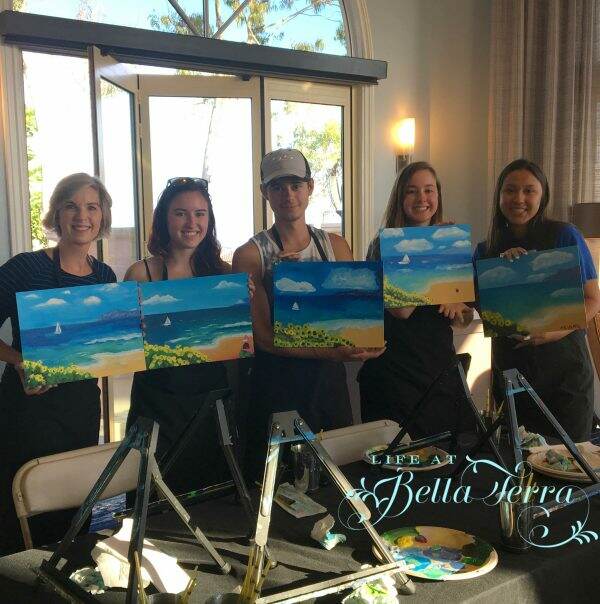
This year, I convinced my 2 daughters and their friends to take the class with me. There was a bit of hemming and hawing, but you can’t learn to paint if you don’t try, right? The class was held in a light-filled room overlooking the Pacific Ocean, which, in and of itself, was inspirational.
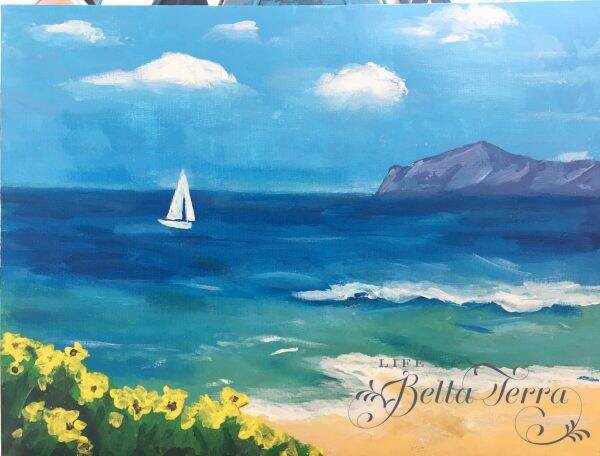
The painting, entitled “Sailing to Catalina” was our topic. Here is the teacher’s version for us to emulate.
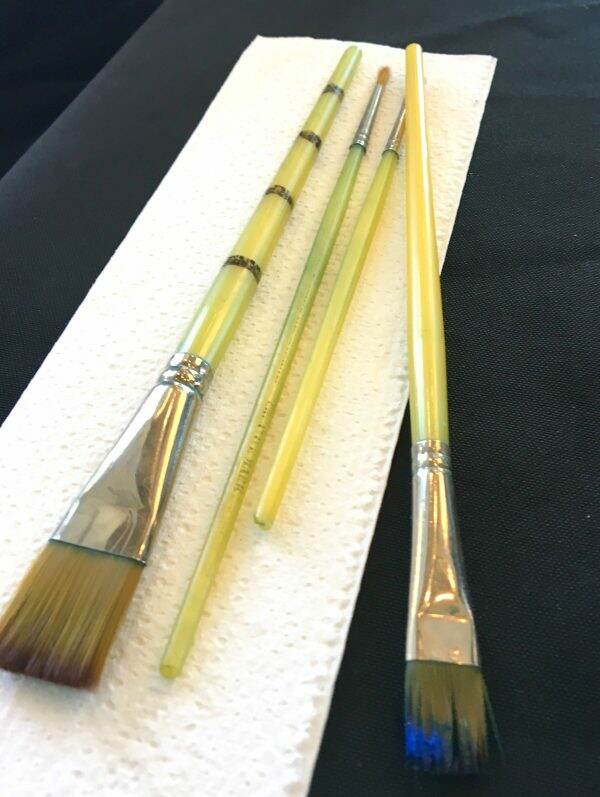
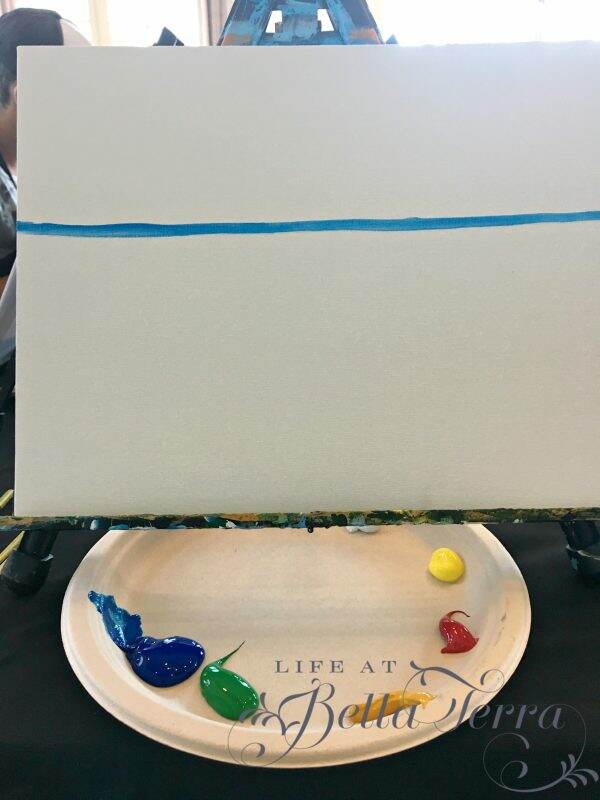
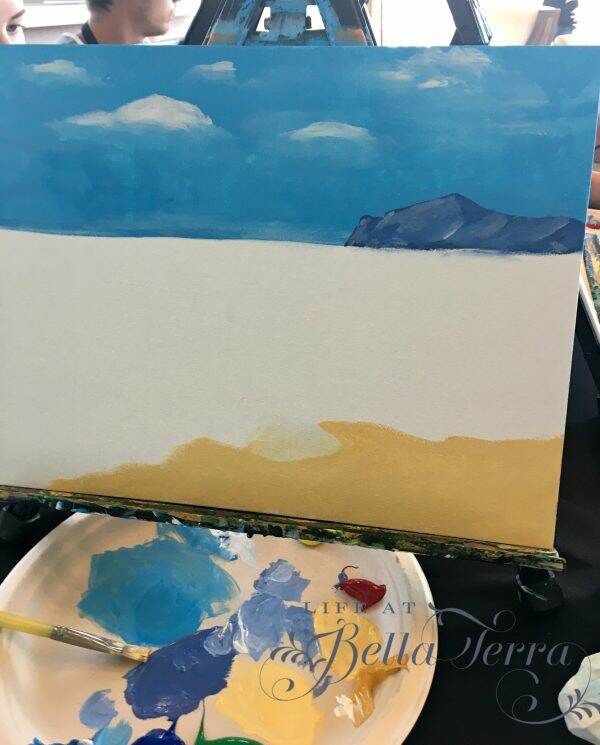
The class was $35.00 per person and included a prepared 11″x14″ canvas, the brushes, acrylic paints, supplies and instruction. The largest brush has inch markers on the handle which we used to determine our horizon line.
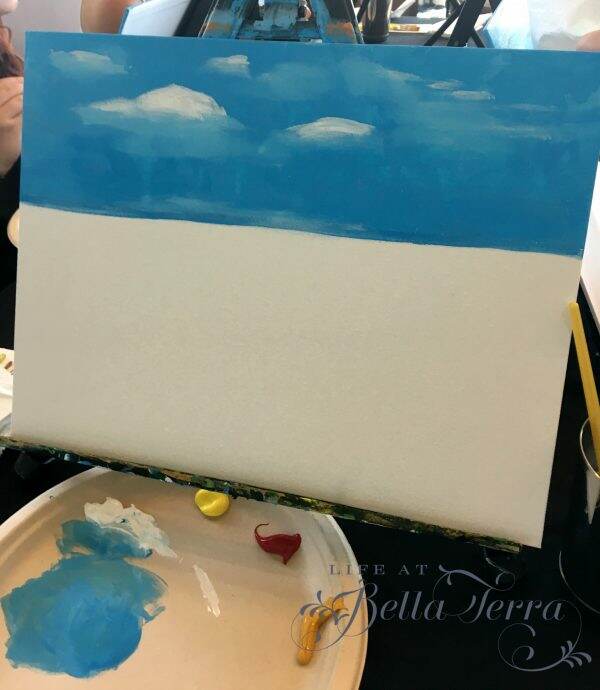
The instructor told us which paints and quantities to use. The sky, for example, was 2 parts white to one part blue.
We then used the white paint to create the clouds.
Next we added Catalina Island in the distance and added various quantities of white paint to the darker purple to add dimension to the rock.
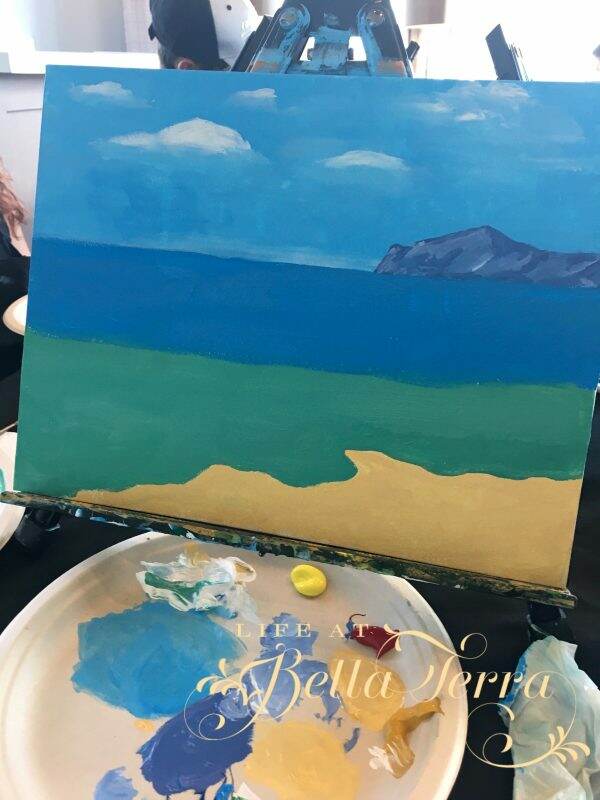
The painting of the beach came next.
We used different shades of blue and green for the ocean.
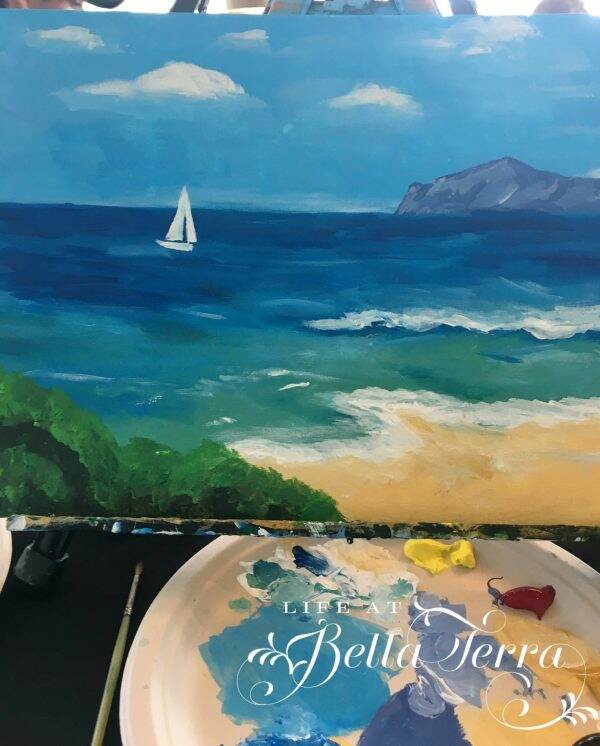
Added waves, and then the greenery in the foreground, as well as the sailboat.
Added the finishing touches of the flowers in the foreground~~ a quick 2 hours! Our instructor, Jessica Byrne, traveled the room, lending her artistic feedback and helping each of us with our paintings.
My daughter, Julianna, decided to add a character (Patrick Star) to her painting!
Everyone was happy they attended and we each had our own artistic style!
This was a fun family experience! If you haven’t painted before, taking a group class and doing it alongside an artist is a great place to start. This particular company, Painterly Events, also provides private, corporate events and plein air (outdoors on location) classes. What a fun way to gather a group of friends/family and share in an artistic experience.
Now I am off to enjoy the ocean! Happy Saturday!
Painting/Stenciling a Concrete Floor
|
Silver, crystal, linen and china closet
At the Willetta restoration, we created a large closet off of the dining room by enclosing a portion of an old adjacent storage area. The purpose of this room is to become the silver, crystal, linen and china closet. I’ve always wanted a separate space to store my “stuff”- large trays, candlesticks, tablecloths, dishes, silverware and entertaining items. This 6′ x 7′ closet will be PERFECT for the new homeowners to do just that.
Dining Room Before
The challenge is that the floor in the new closet is concrete and is flush with the dining room floor which is hardwood. Adding new flooring on top of the concrete doesn’t make much sense as it would have create an awkward transition.
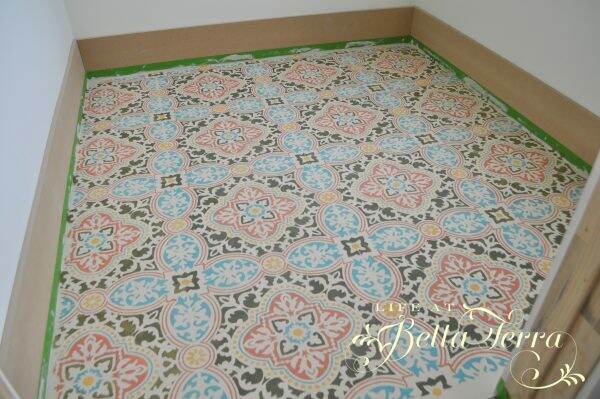
What could I do to make the floor feel more formal, like the dining room, without adding tile or more wood? After pondering this for a few days, I asked myself, “How hard could it be to stencil/paint the concrete floor?” So I googled “how to paint a concrete floor” and watched the YouTube video by Annie Sloan, entitled How to stencil a concrete floor in 10 easy steps.
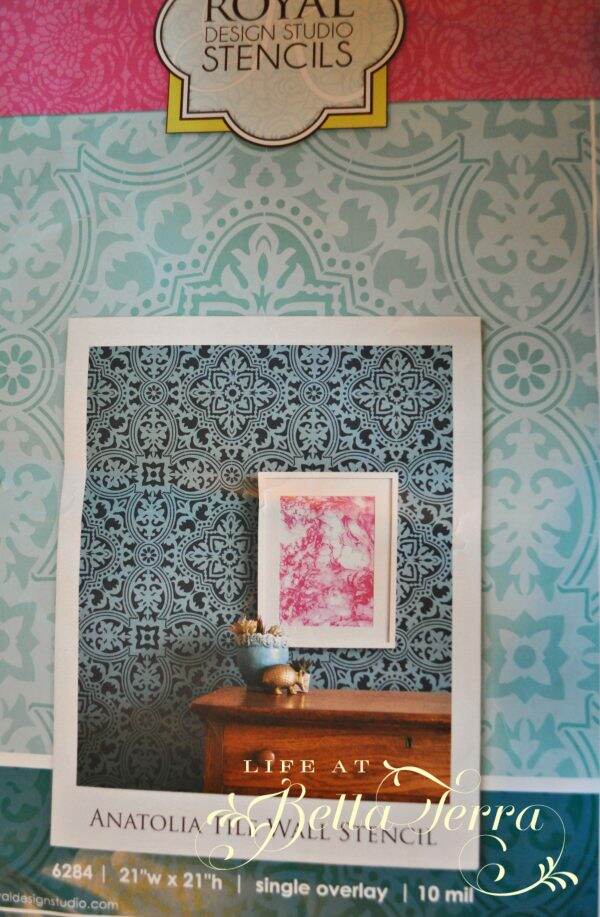
The video is set to catchy music and yes, in 10 easy steps, Annie Sloan creates a beautiful floor. So easy peasy, right? To make it even more convenient, you can buy the entire stenciling kit from Royal Design Studio Stencils.
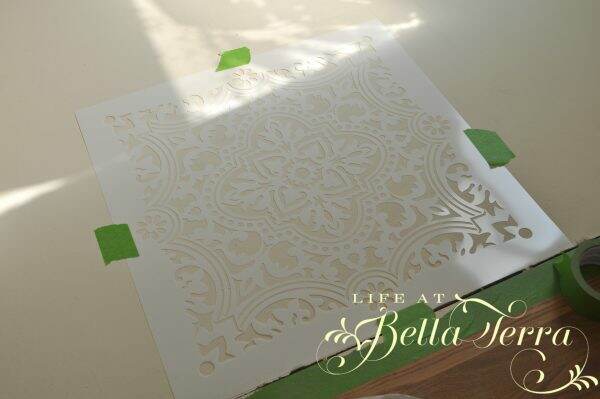
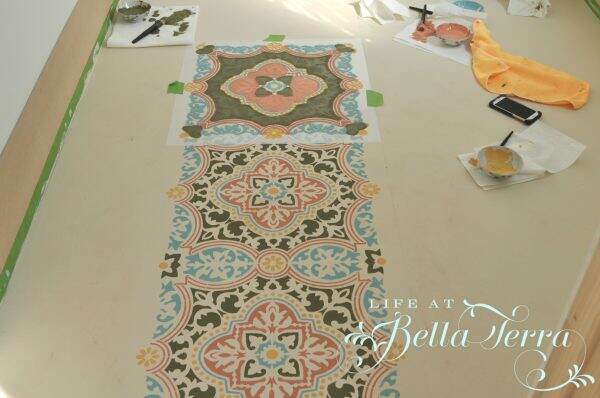
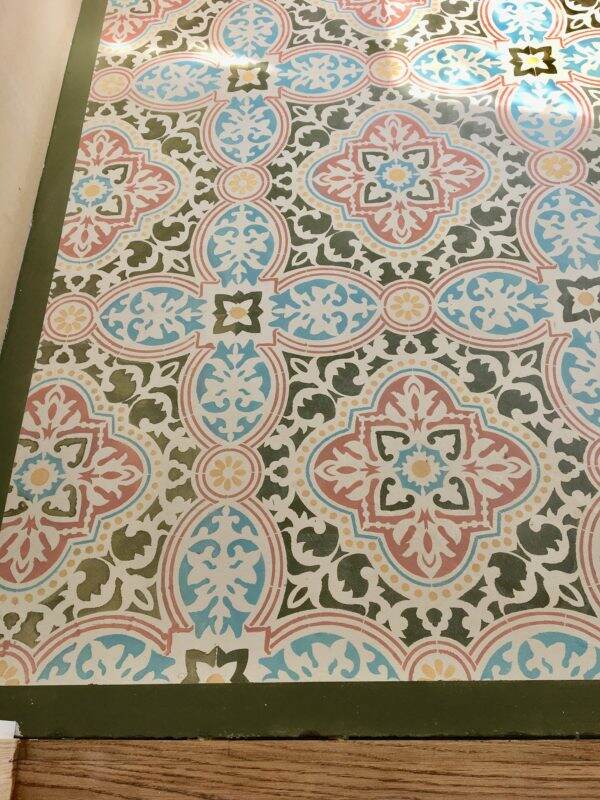
The stencil that is used in the video is the Anatolia Wall Stencil. However, the packaging below shows the stencil using 2 colors only (which in retrospect would have been MUCH easier!). In the video, there are five different colors. The stencil dimensions are rather large at 21″ x 21″.
Within minutes, I purchase the stencil kit online and figured nothing ventured, nothing gained. Right?
The kit is complete with the stencil, the paint, the brushes and the top clear coat.
I’ve never stenciled anything elaborate before so I didn’t realize you needed special brushes, but thank goodness they came in the kit. However, there wasn’t any information on what brush to use with what color. I had 4 colors and 5 brushes. No problem, as I thought I could wing it.
Starting the Stenciling Process
When the kit arrived a few days later, I didn’t see any instructions in the box. So I called Royal Design Studios and asked where I could get a copy of the instructions of the floor that was created in the video. They told me that there weren’t any written instructions. Yikes. So, my smart painter, John, suggested I do screen shots of the video and print them out.
So armed with 20+ pages of instructions and my stencil kit, I began painting the floor over the weekend.
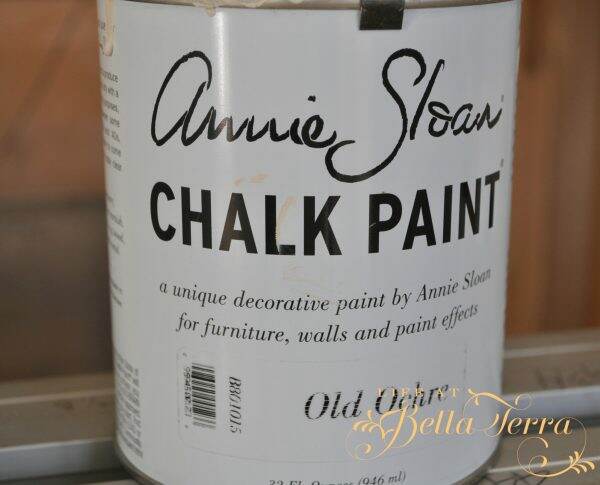
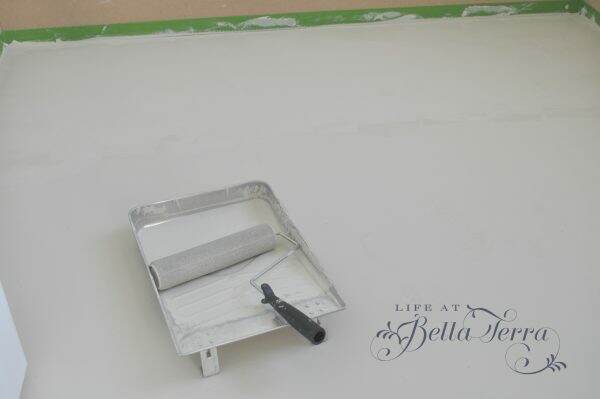
First, I taped off the baseboard (which hasn’t been painted) with painter’s tape and painted the floor Old Ochre Chalk Paint. The paint is a very warm white and rolled on rather well–velvety in a way. I used a foam roller as recommended in the video. The paint dried very quickly, however, I waited until the next morning to do a second coat.
After finding and marking the center line of the room, I placed the first stencil at the doorway and put the right edge of the stencil on the center line. You can see here that the concrete floor is flush with the dining room hardwood floor. I used green Frog painter’s tapeto secure the stencil and protect any paint from spilling onto the hardwood floor.
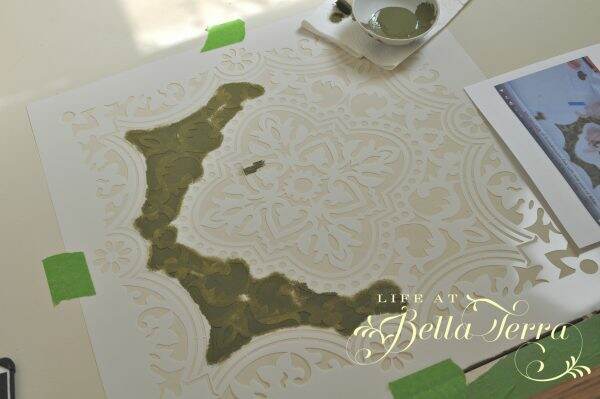
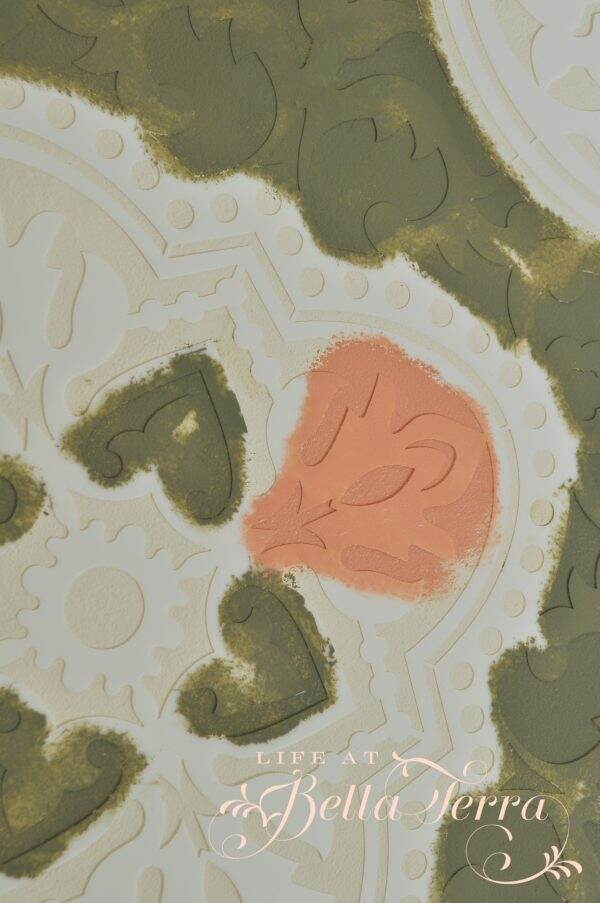
Since the paint brush sizes weren’t designated to a specific color, I would use the largest brush on the bigger parts of the stencil and then work my way down. The first color was Olive~~I’m so glad I printed out the steps as it’s a bit confusing trying to determine what color goes where on the clean stencil.
Next came a color that required blending of a pink and yellow paint–I will refer to it as salmon. The stencil brushes have a blunt cut, so I gently dabbed paint onto the stencil.
At this point, I have completed the olive and salmon paint colors. Notice the paint and the paper towel in the photo below. It is important to dab off any excess paint on the paper towel before applying to the stencil.
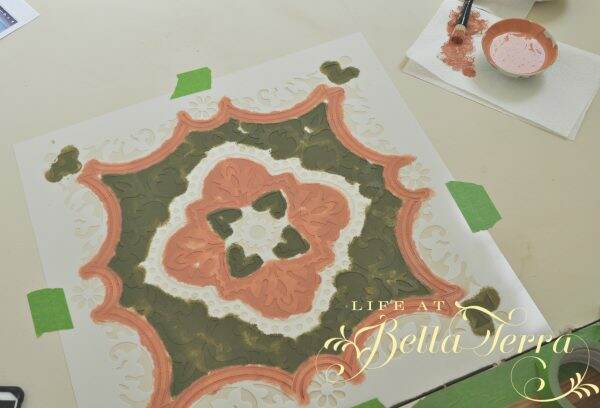
Yellow paint next, then followed by the blue.
The chalk paint dried very quickly so I didn’t need to wait to proceed with the next stencil. It was relatively easy to line up markers on the edge, re-tape the stencil to the floor, and repeat.
The first few stencils seemed to take an eternity, because I was proceeding cautiously. With the colors now on the stencil, I didn’t need to refer to the notes anymore so the process went a bit faster. By the end, I was able to complete a tile in 30 minutes. Mid-way through, I washed the stencil off with soap and water, as the dried paint began accumulating.
The center portions of the floor could accommodate the entire stencil, however, when I got close to the baseboards, only a partial stencil would fit. It was a little tricky because it was hard to keep the stencil in place, even when secured with the tape. This step requires patience.
All in all, I painted this stencil 16 times to cover the 6′ x 7′ space.
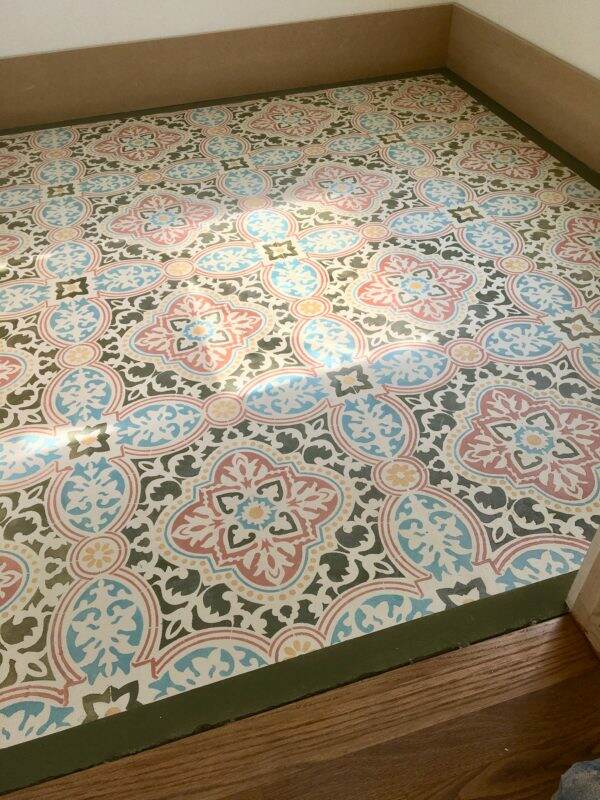
With the stencils completed and the paint dry, I now paint the edges with a 2″ border of the olive paint to complete the look.
Finishing the Floor
In order to protect the floor I finished it with 2 coats of the clear floor lacquer provided in the kit.
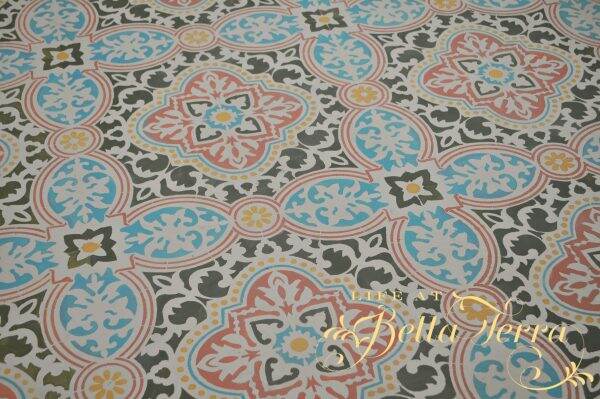
I am so happy with the results! In retrospect, this was labor intensive and I was so sore from sitting or kneeling on the hard concrete floor for hours on end. From start to finish, I would say I invested 10-12 hours of labor, not counting the drying time. However, this project was well worth it.
I always love to do something unique and personal to each of the homes I restore/remodel. This historic Willetta home now has an original piece of art by me. To see more about the Willetta restoration, click here.
Here you can see the proximity of this storage area to the formal dining room. The floor is so pretty you can leave the door open!
I hope you have enjoyed watching the transformation of this special room. If you love Before and Afters or restorations of historical homes, I invite you to browse my website. If you like what you see, please sign up to get my weekly blog posts! You can also find me on Instagram @lifeatbellaterra.
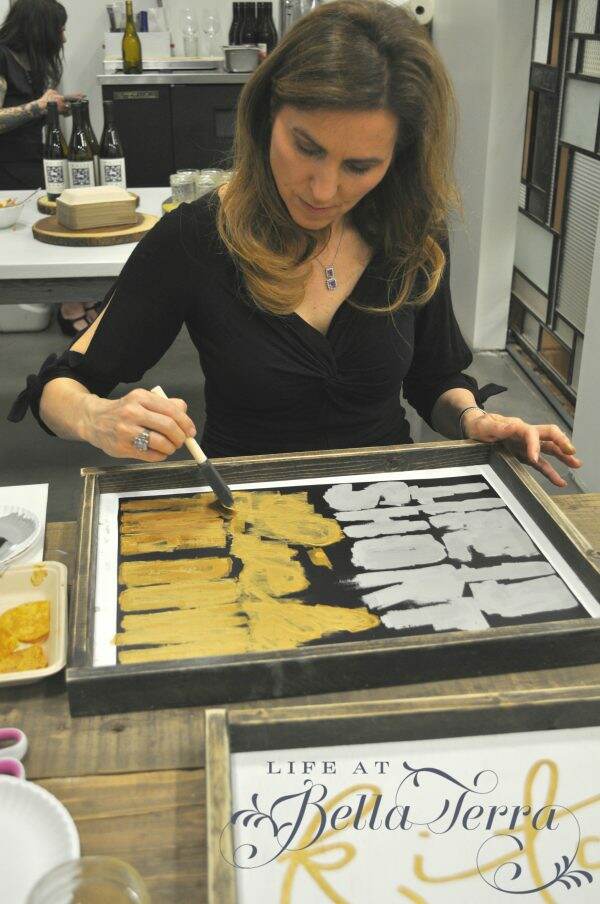
DIY Girls’ Night Out
|
My friend and neighbor, Dawn, invited me to a spontaneous DIY Girls’ Night Out at Porter Barn Wood in Phoenix. I have to chuckle because I don’t believe I’ve ever gone on a Girls’ Night Out. I am so swamped that when I do have a moment, I tend to spend it here at Bella Terra. But, Dawn is such a spectacular person with a large heart and the event, which included making a sign, sounded quite fun.
Here is the adorable young family behind Porter Barn Wood. Thomas is a woodworker, metalworker, and plays in a Bluegrass band. They provide reclaimed wood, slab lumber, antiques, and many other things as well as provide woodworking, milling, blacksmithing and just about anything you need. Plus they have classes that include creating a barn wood wall to dinner and bluegrass concerts ( events calendar).
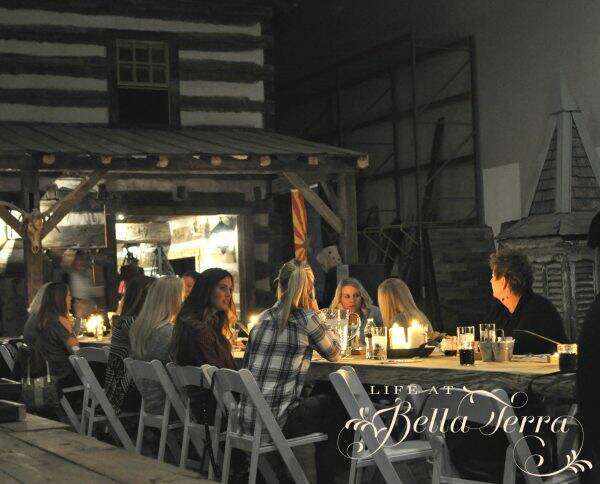
With the popularity of barn wood doors and the farm house style, this is the place to go. They own this facility in downtown Phoenix and the event was held here last Friday night.
When we arrive,The Coronado, a restaurant located on N. 7th Street, was serving wine and appetizers while we made our signs. This restaurant specializes in vegetarian and vegan dishes but with a Cordon Bleu spin.
In typical “barn” like fashion, the wine was served in mason jars….love that! The roasted veggies, hummus and homemade tortilla chips were delicious (and healthy)!
Porter Barn Wood made the frames and the background wood was painted white. We sat at picnic tables awaiting instruction.
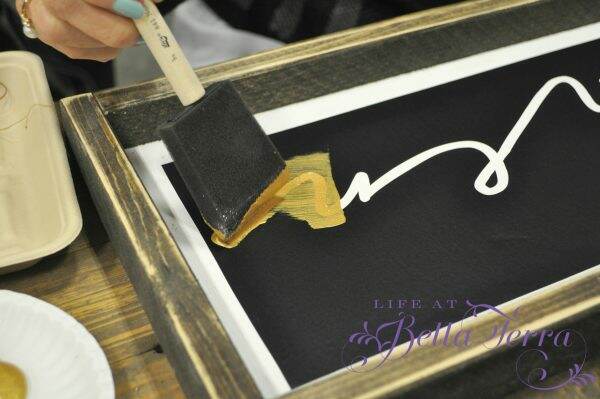
After peeling off the back side of the stencil, we carefully centered it on our frames.
We then peeled off the front clear material, exposing the stencil to be painted. We were able to choose the colors we wanted and applied the acrylic paint with foam brushes.
Dawn chose a gray paint for part of her stencil and then gold for the rest.
While our signs dried, dinner was served. Instead of renting long tables with white table cloths, Thomas decided that morning (!) to plane down large reclaimed trees and created 3 16 foot lengths of wood to make the tables. The smell of fresh cut wood and the beauty of the tree-tables made dinner extra special (and I believe these tables are for sale!).
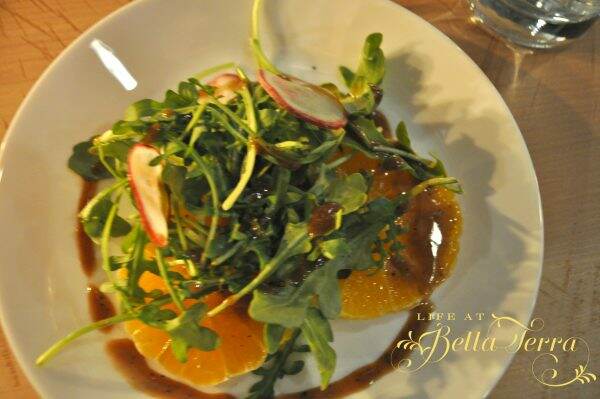
Dinner was amazing. Liam Murtagh, one of the owners of The Coronado, introduced each course and gave the history behind all the ingredients. The first course was a beautifully presented Farm Salad utilizing ingredients from local farms (arugula from Blue Sky Organic Farms; radishes from Agave Farms, tangelos from FarmYard) with a black pepper agave vinaigrette.
The main course was Mashed Garlic Potatoes under a Tepary (heirloom) Bean Croquette with Rosemary Roasted Tomatoes and a Vegan Demi Glas.
Of course we had a different wine with each course while listening to a fabulous solo artist Hannah Risley, a talented 18-year old singer and guitarist.
I am still dreaming about dessert. Who knew that vegan/vegetarian food could be so delicious? We had a Mesquite Flour Snickerdoodle with dark chocolate with Aqua Faba meringue (this was so delicious I wanted to lick my plate) with Candied Hibiscus.
During dinner we had the chance to sit near and chat with two wonderful young women~~~all in all, it was a spectacular way to spend a Friday night with a sweet friend. Also, I was so impressed with Thomas and Liam, as young business owners who are so passionate about what they are doing. They are such a great addition to our growing downtown area.
Plus I got to take home my very own sign! Maybe this Girls’ Night Out thing is worth pursuing!!!!