Back Staircase Renovation

This back staircase renovation is finally finished. What a bear. Truly, this project took so many twists and turns and over a year to complete. Thanks for visiting today to see the good, the bad and the ugly of the back staircase renovation. To see the original post back in August 2019, click here.
Deteriorated Rug

This all started when the quality of the sisal rug runner was deteriorating. With an active family, the life span of sisal on steps is about 8 years. This is the second installation of the same runner and quite frankly, even though I love the look, I am tired of replacing it every 8 years.
For some reason, Cooper loves laying on the top landing. With determination, he used his paws to release the rug from its glue and then folds it up underneath him. Go figure.

As you can see, it is quite the mess.

Rug Removal
The first task is removal of this rug only to reveal 2 layers of gross glue and hundreds of carpet staples underneath. Between the dust and fibers, it is a dirty job. However, the rug did hide several problems and imperfections, that are revealed for the first time.

Unforeseen Problems
Cracked stair treads, jury-rigged risers, some odd looking leveling material~all extremely unsightly. The walls adjacent to the stairs are plaster and the area where the wall meets the step is full of holes.

The original stairs have layers of old paint and stain. We did consider sanding them down to bare wood to stain them, but it appears some of the treads may be different woods. They would never take the stain evenly.


What Can be Done?
Since I believe in fixing problems, not hiding them, we realize we need a contractor to repair all of this. It took weeks to find someone (anyone) who wants to work on this. We finally get one bid and it is over $5,000. Sigh.
So the project sat for a few months while we debate what to do. I really do not want to glue down another rug. And the thought of seeing another carpet staple was unimaginable. Finally, determination is born out of frustration.
I will learn to plaster. How hard can it be? Like frosting a cake, so I think. The recommendation from the hardware store is to use Fixall. This spackling compound is a dry powder mixed with water. It works fine, however, I didn’t realize that when it dries, it really DRIES, hard and immovable. Very difficult to sand down but for the most part, my initial application is somewhat smooth. I only find out later that the better material would have been MH Ready Patch (and easier to sand down).

We remove the creepy glue with a heat gun; sand down the stairs; reinforce the broken treads with a hardwood overlay; replace the broken risers and sand down the weird leveling compound.


New Solutions?
Initially, our plan is to paint the stairs and then add a carpet runner. However, when I posted about that in July, a trusted friend questioned my choice in stair runner. This gave me pause. The last thing I want to do is add another runner that will need replacing in a few years.

Bad Lighting
We change plans again and the decision is made to just paint the treads and see where that leads us. While working for months in this space, I realize the lighting is just horrible. There is only one can light in the ceiling that is 16 feet high.

I call our electrician and ask if I can easily put a pendant light in place of a can light. He gives me the thumbs up and I purchase this one from Wayfair. We are scheduled to have the light put in by a professional and he cancels due to a last minute conflict.
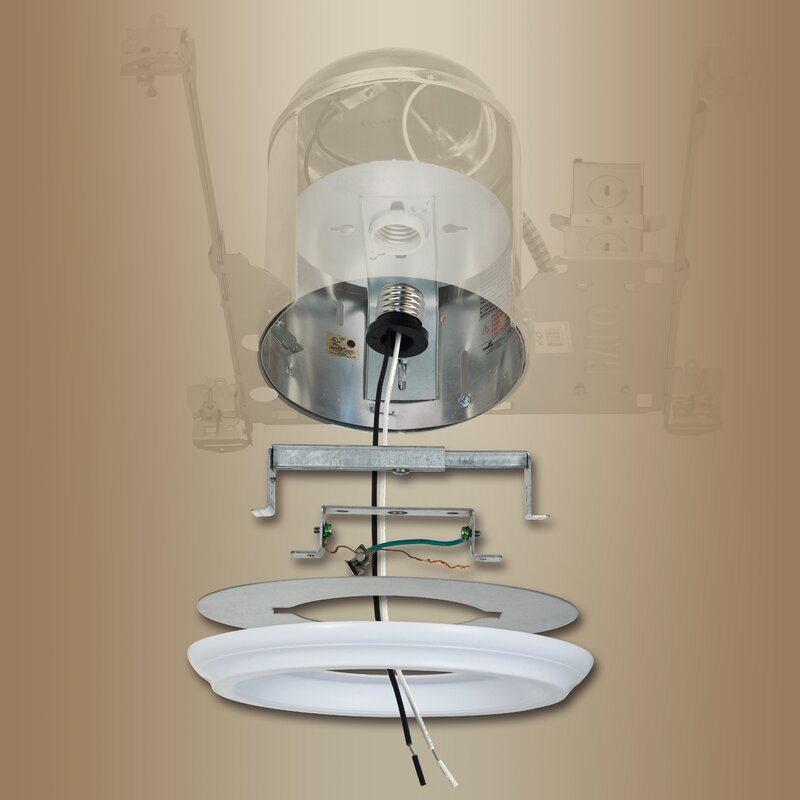
So I google how to switch out a can light to a pendant and we do it ourselves. In retrospect it is very challenging because of the height of the ceiling and not having a flat plane to put a ladder. My husband gets extra points for this difficult installation. Hanging on a 6′ long chain, the light is now lower and illuminates the space so much better.

We hire our favorite painter, John Cruz to paint the walls a high reflective white Sherwin Williams SuperPaint~what a difference this makes!
Now it Echoes?
In the past, the staircase displayed a gallery of the children’s artwork. But they are no longer children and as sad as it is, the artwork is taken down to paint the walls. Interestingly, once the sisal runner is gone and all the children’s artwork is removed, this space sounds hollow and echoes. I realize now the role the rug and art played in absorbing noise.

After the steps are properly sanded and cleaned and walls taped off, I paint the treads a dark navy blue and the risers a bright white (same as the wall color). The navy paint is a premium exterior latex enamel in semi-gloss.
Taping a Runner
The space looks so crisp and clean, but the navy edges against the plaster walls do not look are sharp as I would like. We live with this for a few weeks, but I am still longing for the look of a runner.

So I make the decision to turn the navy paint into the “runner”. By painting the outer edges of the steps and risers in white, I am also hoping that solves the step to wall transition. What a complete pain this is! The steps are varying widths and different angles. Making sure the runner is in the middle involved a lot more math than I am used to doing. Quite a nightmare.
More Problems
Of course it takes 2 coats of white paint to cover the navy and I hold my breath while I am doing it (as my husband isn’t quite enthralled yet). Naturally, nothing goes smoothly and while I am painting the white, our cat, Donovan decides it is time to run up the stairs!


I suppose this is a good excuse to do another coat of navy paint on the steps as I need to paint the risers navy as part of the visual runner.
When I finish the painting, I am happily walking down the steps with my supplies. And then the paint lid drops and navy paint sprays onto the freshly painted white edge. Arggg! Thankfully it wipes up easily. This project has really tested my mettle!

Finally….it is done.
So what do you think? I love how fresh and cheerful it looks. I MAY do a center stripe or add side stripes to the runner down the road. But right now, I feel like I need to leave it alone.


Once a dull and poorly lit space, the back staircase is bright and cheerful. To make the change even more impactful, I decide to use this space to hang my artwork. So I pull out some of my favorite ones and hang them.

As I continue to hang more art, the canvases will absorb the sound and reduce the echoes.
For right now, I decide to leave a few of the cat’s paw prints, just because it makes for a good story!

Here is a longer shot with my iPhone to give you an idea on how the back staircase renovation looks overall.


Before and After:


What a project! I am so grateful it is finished (for now). This staircase feels like my own personal art gallery with the white walls and better lighting. Since it took so long, it’s hard to imagine what it did look like before.

With many unexpected twists and turns, decisions and indecisions and multiple delays, this staircase renovation project was a challenging one. Fortunately it is located in a place in our house that is not highly visible. This project took about 1 year longer than I would have like take. Quite honestly, I am glad it is over.
Happy Tuesday!

If you enjoy this post, please share on Pinterest.

This post shared with Between Naps on the Porch Metamorphosis Monday #625.